Introduction
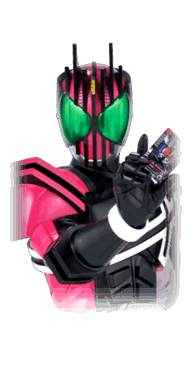
 Kamen Rider Decade
Kamen Rider Decade is just passing through. He is just polite enough to remind you.
Decade has the power of all prior main Kamen Riders at his disposal, which makes him lore-wise one of the strongest Kamen Riders. This translates to his playstyle as a jack of all trades, capable of fighting well from any range.
When choosing Form Change Style, Decade uses a unique menu. This selects two critical parts of Decade's moveset from a wide range of options.
First, Decade selects which other Rider he becomes when he uses his Form Change. He has access to each of the 9 other main Kamen Riders of the Heisei period, those being Kuuga, Agito, Ryuki, Faiz, Blade, Hibiki, Kabuto, Den-O and Kiva.
Decade then selects his Final Form Ride, which he uses in-match as a special move that costs Rider Gauge. Final Form Rides allow Decade to specialize further for any given matchup, and his further 9 options are detailed below.
Thanks to these options, Decade is able to really and truly flex two movesets at will, at the cost of being especially vulnerable to Guard Crush. This variation is recommended for players who like having a wide range of tools and testing their own defensive skills.
Playstyle
 Kamen Rider Decade (Form Change) uses the power of other Kamen Riders to bolster his own. Kamen Rider Decade (Form Change) uses the power of other Kamen Riders to bolster his own. |
| Pros |
Cons |
- Versatility: Decade's Base Form is no slouch, but with Form Change, he's also able to become a number of other notably strong characters at will.
- Invulnerable Form Change: Decade has full invulnerability while switching between himself and his chosen alternative Rider, allowing him to dodge and punish attacks.
- Defensive Powerhouse: Decade has a huge range of other options with defensive utility. Most notably, his jS works as a strong defensive poke, he's able to beat many projectiles with his own, and many of his Final Form Rides grant him another defensive option.
|
- Low Damage in Base Form: Decade is able to exert a lot of control in his Base Form, but dealing damage isn't his forte. This weakness is usually covered up by his Form Change, but is important to consider.
- Vulnerable to Guard Crush: While Decade has a lot of great defensive options, he doesn't have any way to bail himself out of being Guard Crushed.
|
In this variation, Decade can transform into his Complete Form.
Decade Complete functions like an exaggeration of Decade's strengths in Base Form. His strings are broadly improved, and he gains a number of high privileges. Among them are a strong air projectile, a fully invulnerable divekick, and a grounded projectile normal that he can RC and follow behind.
Players who want to experience Decade's own unique strengths should try this version.
Playstyle
 Kamen Rider Decade (Power Up) maximizes Decade's own strengths. Kamen Rider Decade (Power Up) maximizes Decade's own strengths. |
| Pros |
Cons |
- Jack of All Trades: On top of Decade's normal strengths, Complete Form gains its own wide range of immensely powerful tools.
- Many Vectors of Attack: Complete Form's range of tools is wide enough that he has something critically useful for most matchups.
- Power Up Style: Power Up Style characters are universally capable of refreshing their Guard Gauge and damage scaling by transforming.
|
- Low Damage in Base Form: Decade is able to exert a lot of control in his Base Form, but dealing damage isn't his forte.
- Base Form's Meter Gain: While Complete Form is an incredibly strong character, Decade's Base Form represents a moment of weakness when playing with Power Up Style.
|
Form Select
Move List
Normal Moves
5LL
5LL
|
| Version
|
Damage
|
Guard
|
Startup
|
Active
|
Recovery
|
Block Adv.
|
Hit Adv.
|
| 5L
|
-
|
Y
|
-
|
-
|
-
|
-
|
-
|
|
|
| 5LL
|
-
|
Y
|
-
|
-
|
-
|
-
|
-
|
A lunging punch that knocks the opponent away on hit. Covers a lot of distance, so it can be useful to RC.
|
|
5LH
5LH
|
| Version
|
Damage
|
Guard
|
Startup
|
Active
|
Recovery
|
Block Adv.
|
Hit Adv.
|
| 5L
|
-
|
Y
|
-
|
-
|
-
|
-
|
-
|
|
|
| 5LH
|
-
|
Y
|
-
|
-
|
-
|
-
|
-
|
A spinning kick that knocks the opponent away on hit. Deals more damage than 5LL, but has shorter range.
|
|
4/6LLL
4/6LLL
|
| Version
|
Damage
|
Guard
|
Startup
|
Active
|
Recovery
|
Block Adv.
|
Hit Adv.
|
| 4/6L
|
-
|
Y
|
-
|
-
|
-
|
-
|
-
|
A stepping low kick. A good advancing normal for Decade.
|
| 4/6LL
|
-
|
Y
|
-
|
-
|
-
|
-
|
-
|
A flurry of punches. Hits 4 times, making it very useful when RC'd.
|
| 4/6LLL
|
-
|
Y
|
-
|
-
|
-
|
-
|
-
|
A spinning backhand that knocks the opponent away diagonally on hit.
|
|
4/6LH
4/6LH
|
| Version
|
Damage
|
Guard
|
Startup
|
Active
|
Recovery
|
Block Adv.
|
Hit Adv.
|
| 4/6L
|
-
|
Y
|
-
|
-
|
-
|
-
|
-
|
A stepping low kick. A good advancing normal for Decade.
|
| 4/6LH
|
-
|
Y
|
-
|
-
|
-
|
-
|
-
|
A hopping kick. Can be a really useful pressure string, as it's about even on block.
This normal goes airborne, so if RC'd during its startup, Decade can use air moves.
|
|
2/8LLL
2/8LLL
|
| Version
|
Damage
|
Guard
|
Startup
|
Active
|
Recovery
|
Block Adv.
|
Hit Adv.
|
| 2/8L
|
-
|
Y
|
-
|
-
|
-
|
-
|
-
|
A stepping high kick. As a starter, this is Decade's slowest and shortest ranged light normal, but it offers good string options.
|
| 2/8LL
|
-
|
Y
|
-
|
-
|
-
|
-
|
-
|
|
|
| 2/8LL
|
-
|
Y
|
-
|
-
|
-
|
-
|
-
|
A spinning kick that knocks the opponent away diagonally on hit.
|
|
2/8LH
2/8LH
|
| Version
|
Damage
|
Guard
|
Startup
|
Active
|
Recovery
|
Block Adv.
|
Hit Adv.
|
| 2/8L
|
-
|
Y
|
-
|
-
|
-
|
-
|
-
|
A stepping high kick. As a starter, this is Decade's slowest and shortest ranged light normal, but it offers good string options.
|
| 2/8LH
|
-
|
Y
|
-
|
-
|
-
|
-
|
-
|
A flurry of punches. Hits 4 times and crumples the opponent on hit. This is a key piece of Decade's Base Form combos.
|
|
5HH
5HH
|
| Version
|
Damage
|
Guard
|
Startup
|
Active
|
Recovery
|
Block Adv.
|
Hit Adv.
|
| 5H
|
-
|
Y
|
-
|
-
|
-
|
-
|
-
|
A lunging punch that Decade puts his whole body into. Decade's longest-reaching grounded starter.
|
| 5HH
|
-
|
Y
|
-
|
-
|
-
|
-
|
-
|
An uppercut that launches the opponent on hit. Notably, this is an untechable launch, all but guaranteeing that Decade is able to taunt safely afterwards. This also makes it somewhat useful for combos.
|
|
6H
6H
|
| Version
|
Damage
|
Guard
|
Startup
|
Active
|
Recovery
|
Block Adv.
|
Hit Adv.
|
| 6H
|
-
|
Y
|
-
|
-
|
-
|
-
|
-
|
|
|
| Version
|
Damage
|
Guard
|
Startup
|
Active
|
Recovery
|
Block Adv.
|
Hit Adv.
|
| 6HH
|
-
|
Y
|
-
|
-
|
-
|
-
|
-
|
A hopping kick. Can be a really useful pressure string, as it's about even on block.
This normal goes airborne, so if RC'd during its startup, Decade can use air moves.
|
|
2/8HHH
2/8HHH
|
| Version
|
Damage
|
Guard
|
Startup
|
Active
|
Recovery
|
Block Adv.
|
Hit Adv.
|
| 2/8H
|
-
|
Y
|
-
|
-
|
-
|
-
|
-
|
An uppercut. Launches the opponent on hit.
|
| 2/8HH
|
-
|
Y
|
-
|
-
|
-
|
-
|
-
|
A lunging punch. Has enough frame advantage on a grounded hit to link 5S or another string of your choice, other than 2/8H.
|
| 2/8HHH
|
-
|
Y
|
-
|
-
|
-
|
-
|
-
|
Decade fires a shot downwards. This string isn't guaranteed on air hit, as the opponent can ground tech out of it, though Decade will be safe in that case.
On ground hit, this is about even on hit, so it's not very rewarding, and it's also extremely punishable if blocked. Use with caution.
|
|
jL
jL
|
| Damage
|
Guard
|
Startup
|
Active
|
Recovery
|
Block Adv.
|
Hit Adv.
|
| -
|
Y
|
-
|
-
|
-
|
-
|
-
|
Decade does a jumping punch. A standard but good jumping normal that stays active until landing.
jH is identical to this attack, but deals more damage.
|
|
Taunt
Taunt
Wait after any string
|
| Damage
|
Guard
|
Startup
|
Active
|
Recovery
|
Block Adv.
|
Hit Adv.
|
| -
|
Y
|
-
|
-
|
-
|
-
|
-
|
After completing any string, Decade will automatically taunt, dusting his hands off. Upon completion of the taunt, Decade instantly gains .5 stocks of Rider Gauge.
This taunt can be interrupted by taking any action, including moving or attacking, so it doesn't hinder Decade in any way.
Most strings won't guarantee a successful taunt, with the exception of 5HH.
|
|
Special Moves
5S
Ride Booker Sword
5S~S
|
| Version
|
Damage
|
Guard
|
Startup
|
Active
|
Recovery
|
Block Adv.
|
Hit Adv.
|
| 5S
|
-
|
Y
|
-
|
-
|
-
|
-
|
-
|
| 5S~S
|
-
|
Y
|
-
|
-
|
-
|
-
|
-
|
A Rekka-type move. When pressing 5S once, Decade will execute a stepping low slash. Pressing 5S a second time executes a followup slash that knocks the opponent away on hit, after which Decade will wipe his blade.
The first hit is unsafe on block, but the second hit can be used as a frametrap if the opponent tries to punish. Be careful, however, as the second hit is extremely punishable.
The first hit can also be a useful special ender in combos. However, in juggles, the second hit will usually not connect before the opponent touches the ground. If the second attack is used anyway and the opponent ground techs, Decade will be stuck wiping the blade and extremely punishable.
|
|
4/6S
Ride Booker Gun
4/6S
|
| Damage
|
Guard
|
Startup
|
Active
|
Recovery
|
Block Adv.
|
Hit Adv.
|
| -
|
Y
|
-
|
-
|
-
|
-
|
-
|
Decade fires a head-level shot from the Ride Booker. This projectile has really good durability and can negate a lot of other projectiles.
In juggles where Decade must use a grounded special, this is usually the preferred ender thanks to its reliability.
When using Power Up Style, or when you have less than 1 stock of Rider Gauge in Form Change Style, this move can also be input as 2/8S.
|
|
2/8S
Final Form Ride
Form Change Style Only
2/8S
|
| Damage
|
Guard
|
Startup
|
Active
|
Recovery
|
Block Adv.
|
Hit Adv.
|
| -
|
?
|
-
|
-
|
-
|
-
|
-
|
Decade uses his Final Form Ride as chosen at character select. He has access to one Final Form Ride for each of the 9 main Riders of the Heisei era. Final Form Ride costs 1 stock of the Rider Gauge.
These Final Form Rides are detailed below, and usually offer Decade a defensive option.
If Decade attempts to use Final Form Ride without 1 stock of Rider Gauge, he will instead use Ride Booker Gun (4/6S).
It is also possible to cheat Final Form Ride's meter requirement by using it simultaneously with an RC. This will still cost 2 stocks of Rider Gauge if you had more than 2 stocks, but will allow you to use Final Form Ride with amounts between 1 and 2 stocks.
|
|
JS
Diving Slash
jS
|
| Damage
|
Guard
|
Startup
|
Active
|
Recovery
|
Block Adv.
|
Hit Adv.
|
| -
|
Y
|
-
|
-
|
-
|
-
|
-
|
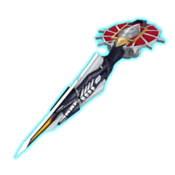
Decade holds the Ride Booker Sword out and dives at a steep angle. This is a really difficult tool to attack into, as well as a useful offensive tool.
This move has no recovery frames, staying active until Decade fully recovers. This makes it very difficult to whiff punish, so using it as a defensive poke is very strong.
Launches the opponent on hit. Because this is an untechable launch and the move recovers very quickly, you can link 5S or Rider Finale from this against the wall.
Offensively, this also sees a lot of use because it's always advantageous on block. If blocked while Decade is very high in the air, it will be closer to even on block, but if spaced to hit the opponent's feet, it can become extremely advantageous.
|
|
Universal Mechanics
Throw
Throw
4H
|
| Damage
|
Guard
|
Startup
|
Active
|
Recovery
|
Block Adv.
|
Hit Adv.
|
| -
|
N
|
-
|
-
|
-
|
-
|
-
|
Decade's throw. This throw has an untechable knockdown, but does not offer a combo followup.
|
|
Dash Action
Dash Action Guard Dash Guard Dash
|
| Damage
|
Guard
|
Startup
|
Active
|
Recovery
|
Block Adv.
|
Hit Adv.
|
| -
|
N/A
|
-
|
-
|
-
|
-
|
-
|
Decade runs forward with a shield that guards against projectile attacks. This slowly depletes the Guard Gauge as it is used.
|
|
Rider Art
Rider Art High Speed Dash High Speed Dash
|
| Damage
|
Guard
|
Startup
|
Active
|
Recovery
|
Block Adv.
|
Hit Adv.
|
| -
|
Y
|
-
|
-
|
-
|
-
|
-
|
Costs .5 stocks of the Rider Gauge. Has access to a follow-up by pressing Rider Art or Special Attack at no additional cost.
This Rider Art follow-up is an uppercut that triggers a cinematic on hit. It is useful as a whiff punish or combo ender thanks to its high damage, but a little slower than most moves of this type.
|
|
Style Action
Style Action
Form Change Style Only Form Change Form Change
|
| Damage
|
Guard
|
Startup
|
Active
|
Recovery
|
Block Adv.
|
Hit Adv.
|
| -
|
N/A
|
-
|
-
|
-
|
-
|
-
|
Decade transforms into his chosen alternative Rider at no cost. This has invulnerable frames, allowing Decade to dodge attacks and create opportunities.
Decade chooses his alternative Rider at character select out of Kuuga, Agito, Ryuki, Faiz, Blade, Hibiki, Kabuto, Den-O, and Kiva.
It's generally agreed that the best options for Decade's Form Change are Faiz, Blade, Hibiki, and Kabuto. These characters are each top tier largely on the back of their Base Form's strength, so they're each good candidates.
- Faiz offers surprise unblockable mixups, but doesn't offer much that uniquely supplements Decade over picking Faiz.
- Blade has an incredible Rider Art for punishing, as well as deals high damage, which both synergize well with Decade's invulnerable frames.
- Hibiki also has a Rider Art for punishing, as well as potent specials for harassing the opponent.
- Kabuto's Rider Art is the most useful for combos, and Kabuto's defensive tools mitigate Form Change Decade's Guard Bar weaknesses. Decade also gains a couple of improved normals over Kabuto, since he uses the Ride Booker Sword rather than Kabuto's shorter weapon.
|
|
Style Action
Style Action
Power Up Style Only Power Up Power Up
|
| Damage
|
Guard
|
Startup
|
Active
|
Recovery
|
Block Adv.
|
Hit Adv.
|
| -
|
N/A
|
-
|
-
|
-
|
-
|
-
|
Decade transforms into his Complete Form at the cost of three stocks of the Rider Gauge. As with all Power Up style transformations, this can be used to cancel grounded normal attacks and blockstun. Doing so also refreshes damage scaling and the Guard Gauge.
|
|
Final Form Ride
In Form Change Style, Decade chooses a Final Form Ride at character selection. This gives him access to 9 distinct special moves, input with 2/8S, and which each cost 1 stock of Rider Gauge.
Recommended Final Form Rides
- Kuuga Gouram/Agito Tornador
- Gouram and Tornador have invulnerable frames starting from fairly early in the attack, making them a viable reversal option that forces the opponent to properly time a meaty.
- Dragreder is one of the most useful Final Form Rides offensively, and can be used to lock the opponent down with a homing fireball.
- Ongekiko gives Decade a fast counter against strikes, and is a great choice in matchups where Decade needs defensive help.
Kuuga Gouram
Kuuga Gouram
2/8S
|
| Damage
|
Guard
|
Startup
|
Active
|
Recovery
|
Block Adv.
|
Hit Adv.
|
| -
|
Y
|
-
|
-
|
-
|
-
|
-
|
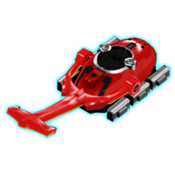
Decade hops on Gouram and flies forward, attempting to tackle the opponent.
This Final Form Ride has invulnerable frames as soon as Decade jumps onto Gouram, and Decade's dismount can throw off attempts to punish.
If there's any difference between Kuuga Gouram and Agito Tornador, we currently don't know about it.
|
|
Agito Tornador
Agito Tornador
2/8S
|
| Damage
|
Guard
|
Startup
|
Active
|
Recovery
|
Block Adv.
|
Hit Adv.
|
| -
|
Y
|
-
|
-
|
-
|
-
|
-
|
Decade hops on the Tornador and flies forward, attempting to tackle the opponent.
This Final Form Ride has invulnerable frames as soon as Decade jumps onto Gouram, and Decade's dismount can throw off attempts to punish.
If there's any difference between Kuuga Gouram and Agito Tornador, we currently don't know about it.
|
|
Ryuki Dragreder
Ryuki Dragreder
2/8S
|
| Damage
|
Guard
|
Startup
|
Active
|
Recovery
|
Block Adv.
|
Hit Adv.
|
| -
|
Y
|
-
|
-
|
-
|
-
|
-
|
Decade summons Dragreder to fire a slow-moving homing fireball.
Its long startup makes this somewhat gimmicky in neutral, but once it's out, it's a very real threat. Decade is able to set this up by using 2/8LH's crumple to buy time, at the cost of some damage.
|
|
Faiz Blaster
Faiz Blaster
2/8S
|
| Damage
|
Guard
|
Startup
|
Active
|
Recovery
|
Block Adv.
|
Hit Adv.
|
| -
|
Y
|
-
|
-
|
-
|
-
|
-
|
Decade fires a leading projectile that locks the opponent down from the Faiz Blaster, then follows up with a beam.
This Final Form Ride deals a lot of damage, but unfortunately, it's a little slow and it doesn't combo on an airborne opponent. It can combo reliably from many normals with an RC.
|
|
Blade Blade
Blade Blade
2/8S
|
| Damage
|
Guard
|
Startup
|
Active
|
Recovery
|
Block Adv.
|
Hit Adv.
|
| -
|
Y
|
-
|
-
|
-
|
-
|
-
|
Decade spins the Blade Blade for two hits.
This Final Form Ride isn't juggle-friendly, and the opponent will usually be able to ground tech and avoid the second hit.
Because it offers few up-sides, and because of its limitations, this Final Form Ride is not an especially useful option.
|
|
Hibiki Ongekiko
Hibiki Ongekiko
2/8S
|
| Damage
|
Guard
|
Startup
|
Active
|
Recovery
|
Block Adv.
|
Hit Adv.
|
| -
|
Y
|
-
|
-
|
-
|
-
|
-
|
Decade holds up the Hibiki Ongekiko. A quick counter special with long active time that triggers against strikes, locking the opponent in on a successful counter.
Having an extra defensive option is pretty nice in some matchups, but be forewarned that if you're hit out of the startup, this still costs 1 stock of Rider Gauge.
|
|
Zecter Kabuto
Zecter Kabuto
2/8S
|
| Damage
|
Guard
|
Startup
|
Active
|
Recovery
|
Block Adv.
|
Hit Adv.
|
| -
|
Y
|
-
|
-
|
-
|
-
|
-
|
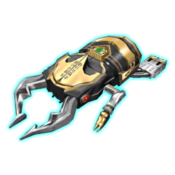
Zecter Kabuto appears in front of Decade, and he takes a stance. A counter special that triggers against strikes.
This counter compares unfavorably to Hibiki Ongekiko because it starts up much slower and is much more visibly obvious.
|
|
Momotaros
Momotaros
2/8S
|
| Damage
|
Guard
|
Startup
|
Active
|
Recovery
|
Block Adv.
|
Hit Adv.
|
| -
|
Y
|
-
|
-
|
-
|
-
|
-
|
Momotaros runs in from behind Decade and attacks. If the opponent isn't in a comboable state or goes off-axis, Momotaros will just keep running and leave the screen.
A strange pseudo-striker that has some use in combos. Using RC from a string with a lot of hitstun, you can call Momotaros while also allowing enough time for Decade to link another attack.
|
|
Kiva Arrow
Kiva Arrow
2/8S
|
| Damage
|
Guard
|
Startup
|
Active
|
Recovery
|
Block Adv.
|
Hit Adv.
|
| -
|
Y
|
-
|
-
|
-
|
-
|
-
|
Decade fires a Kiva Arrow. A projectile with a ton of durability that leaves the opponent standing on a grounded hit.
Can be useful as an anti-zoning tool, but Decade's Ride Booker Gun (4/6S) is already really good for that and doesn't cost anything extra.
|
|
Combos
- 2/8LH > jS
- (Corner) 2/8LH > walk back > jS > 5S/Rider Finale
- 2/8LH > Rider Art Followup
- 2/8LH > Rider Finale
- Decade's crumple string allows him to follow up with anything he chooses.
- This crumple also allows you to Form Change and then follow up as your chosen alternative Rider, so experiment!
Power Up Style
- 5HH > Style Action (Complete Form) > dS/jS
- Decade's 5HH has unique utility when used to cancel into Power Up activation.
Move List
Normal Moves
Complete 5LLLL
5LLLL
|
| Version
|
Damage
|
Guard
|
Startup
|
Active
|
Recovery
|
Block Adv.
|
Hit Adv.
|
| 5L
|
-
|
Y
|
-
|
-
|
-
|
-
|
-
|
A quick advancing jab. A very useful starter.
|
| 5LL
|
-
|
Y
|
-
|
-
|
-
|
-
|
-
|
|
|
| 5LLL
|
-
|
Y
|
-
|
-
|
-
|
-
|
-
|
|
|
| 5LLLL
|
-
|
Y
|
-
|
-
|
-
|
-
|
-
|
A two-hit axe kick that groundbounces the opponent. Juggles meterlessly into 5S or Rider Finale.
|
|
Complete 5LHHH
5LHHH
|
| Version
|
Damage
|
Guard
|
Startup
|
Active
|
Recovery
|
Block Adv.
|
Hit Adv.
|
| 5L
|
-
|
Y
|
-
|
-
|
-
|
-
|
-
|
A quick advancing jab. A very useful starter.
|
| 5LH
|
-
|
Y
|
-
|
-
|
-
|
-
|
-
|
Complete Form's launcher string. Can be followed up with a Combo Jump into its aircombo followup string, jLHS.
This launch is completely untechable, so you can loop it up to 3 times before going for the aircombo string, as well as link into Rider Finale.
|
| 5LHH
|
-
|
Y
|
-
|
-
|
-
|
-
|
-
|
An alternate ender for Complete's launcher string. This doesn't see very much use because the launcher string enables stronger combos.
|
| 5LHHH
|
-
|
Y
|
-
|
-
|
-
|
-
|
-
|
Knocks the opponent away on hit.
|
|
Complete 4/6LLLL
4/6LLLL
|
| Version
|
Damage
|
Guard
|
Startup
|
Active
|
Recovery
|
Block Adv.
|
Hit Adv.
|
| 4/6L
|
-
|
Y
|
-
|
-
|
-
|
-
|
-
|
A sweep kick. Can evade some high attacks.
|
| 4/6LL
|
-
|
Y
|
-
|
-
|
-
|
-
|
-
|
A hopping knee that launches the opponent on hit.
|
| 4/6LLL
|
-
|
Y
|
-
|
-
|
-
|
-
|
-
|
A gut punch that launches the opponent on hit. Has extremely fast recovery and is advantageous on block, but because it's a launcher, no link followup is guaranteed on hit.
|
| 4/6LLLL
|
-
|
Y
|
-
|
-
|
-
|
-
|
-
|
A hook punch that knocks the opponent away on hit.
|
|
Complete 4/6LHH
4/6LHH
|
| Version
|
Damage
|
Guard
|
Startup
|
Active
|
Recovery
|
Block Adv.
|
Hit Adv.
|
| 4/6L
|
-
|
Y
|
-
|
-
|
-
|
-
|
-
|
A sweep kick. Can evade some high attacks.
|
| 4/6LH
|
-
|
Y
|
-
|
-
|
-
|
-
|
-
|
|
|
| 4/6LHH
|
-
|
Y
|
-
|
-
|
-
|
-
|
-
|
A sword slash that knocks the opponent away diagonally on hit.
|
|
Complete 2/8LLLLL
2/8LLLLL
|
| Version
|
Damage
|
Guard
|
Startup
|
Active
|
Recovery
|
Block Adv.
|
Hit Adv.
|
| 2/8L
|
-
|
Y
|
-
|
-
|
-
|
-
|
-
|
A gut punch. Has short range, but makes up for it with the range on its followups.
|
| Version
|
Damage
|
Guard
|
Startup
|
Active
|
Recovery
|
Block Adv.
|
Hit Adv.
|
| 2/8LL
|
-
|
Y
|
-
|
-
|
-
|
-
|
-
|
Decade does a spinning kick. Has great forward movement.
|
| Version
|
Damage
|
Guard
|
Startup
|
Active
|
Recovery
|
Block Adv.
|
Hit Adv.
|
| 2/8LLL
|
-
|
Y
|
-
|
-
|
-
|
-
|
-
|
Decade does a stepping kick. Has great forward movement.
|
| Version
|
Damage
|
Guard
|
Startup
|
Active
|
Recovery
|
Block Adv.
|
Hit Adv.
|
| 2/8LLLL
|
-
|
Y
|
-
|
-
|
-
|
-
|
-
|
Decade does another spinning kick. As with the previous two hits, this has great forward movement. Causes a mashable stagger on hit, so don't delay your followup.
|
| Version
|
Damage
|
Guard
|
Startup
|
Active
|
Recovery
|
Block Adv.
|
Hit Adv.
|
| 2/8LLLLL
|
-
|
Y
|
-
|
-
|
-
|
-
|
-
|
A dashing punch that knocks down on hit. Using this string to completion allows Decade to cover the length of most stages in grounded movement, making it pretty good for chasing opponents down.
|
|
Complete 2/8LH
2/8LH
|
| Version
|
Damage
|
Guard
|
Startup
|
Active
|
Recovery
|
Block Adv.
|
Hit Adv.
|
| 2/8L
|
-
|
Y
|
-
|
-
|
-
|
-
|
-
|
A gut punch. Has short range, but makes up for it with the range on its followups.
|
| Version
|
Damage
|
Guard
|
Startup
|
Active
|
Recovery
|
Block Adv.
|
Hit Adv.
|
| 2/8LH
|
-
|
Y
|
-
|
-
|
-
|
-
|
-
|
Decade fires a shot forward, which knocks the opponent away on hit.
|
|
Complete 5HHHHH
5HHHHH
|
| Version
|
Damage
|
Guard
|
Startup
|
Active
|
Recovery
|
Block Adv.
|
Hit Adv.
|
| 5H
|
-
|
Y
|
-
|
-
|
-
|
-
|
-
|
Decade swings the Ride Booker sword. Although it's not especially useful for neutral, this string is very useful as combo filler and for pressure thanks to its high damage.
|
| 5HH
|
-
|
Y
|
-
|
-
|
-
|
-
|
-
|
|
|
| Version
|
Damage
|
Guard
|
Startup
|
Active
|
Recovery
|
Block Adv.
|
Hit Adv.
|
| 5HHH
|
-
|
Y
|
-
|
-
|
-
|
-
|
-
|
|
|
| Version
|
Damage
|
Guard
|
Startup
|
Active
|
Recovery
|
Block Adv.
|
Hit Adv.
|
| 5HHHH
|
-
|
Y
|
-
|
-
|
-
|
-
|
-
|
A fourth sword swing that causes a mashable stagger.
It's easy to guarantee a followup from this stagger using RC, but be aware that Decade's 5S will launch and become ground techable when used on a staggered opponent.
|
| Version
|
Damage
|
Guard
|
Startup
|
Active
|
Recovery
|
Block Adv.
|
Hit Adv.
|
| 5HHHHH
|
-
|
Y
|
-
|
-
|
-
|
-
|
-
|
A final sword swing that knocks the opponent away on hit.
|
|
Complete 6HHHHH
6HHHHH
|
| Version
|
Damage
|
Guard
|
Startup
|
Active
|
Recovery
|
Block Adv.
|
Hit Adv.
|
| 6H
|
-
|
Y
|
-
|
-
|
-
|
-
|
-
|
Decade steps forward and swings the Ride Booker Sword. A much more useful heavy string for covering distance.
|
| Version
|
Damage
|
Guard
|
Startup
|
Active
|
Recovery
|
Block Adv.
|
Hit Adv.
|
| 6HH
|
-
|
Y
|
-
|
-
|
-
|
-
|
-
|
A quick followup swipe. This can actually whiff if 6H hits at its max range, but 6H has enough hitstun that 6HHH will connect as a combo anyway.
|
| Version
|
Damage
|
Guard
|
Startup
|
Active
|
Recovery
|
Block Adv.
|
Hit Adv.
|
| 6HHH
|
-
|
Y
|
-
|
-
|
-
|
-
|
-
|
|
|
| Version
|
Damage
|
Guard
|
Startup
|
Active
|
Recovery
|
Block Adv.
|
Hit Adv.
|
| 6HHHH
|
-
|
Y
|
-
|
-
|
-
|
-
|
-
|
A stepping sword chop. Useful as RC string filler because it doesn't cause a mashable stagger like 5HHHH does.
|
| Version
|
Damage
|
Guard
|
Startup
|
Active
|
Recovery
|
Block Adv.
|
Hit Adv.
|
| 6HHHHH
|
-
|
Y
|
-
|
-
|
-
|
-
|
-
|
A final sword swipe that knocks the opponent away on hit. Has notably long recovery as Decade wipes the blade, and is even punishable on hit if not cancelled.
|
|
Complete 2/8H
2/8H
|
| Damage
|
Guard
|
Startup
|
Active
|
Recovery
|
Block Adv.
|
Hit Adv.
|
| -
|
Y
|
-
|
-
|
-
|
-
|
-
|
Decade fires a shot forward. Leaves the opponent standing on hit.
Looks and functions very similarly to Base Form's 4/6S Ride Booker Gun, but because it's a normal, it can be Rider Cancelled and followed up even at range using Decade's Rider Art.
|
|
Complete JL
jL
|
| Damage
|
Guard
|
Startup
|
Active
|
Recovery
|
Block Adv.
|
Hit Adv.
|
| -
|
Y
|
-
|
-
|
-
|
-
|
-
|
Decade fires a shot at an angle. Like his grounded shots, this deals 5 hits. Extremely useful both to cover an offensive jump and to run away with.
Technically, each hit staggers the opponent, which causes it to launch on hit most of the time. However, if you can hit the very edge of only one shot on the opponent's feet, they will instead be put into a mashable stagger from which you can connect a full combo.
|
|
Special Moves
5S
Ride Booker Sword (Complete)
5S~S
|
| Version
|
Damage
|
Guard
|
Startup
|
Active
|
Recovery
|
Block Adv.
|
Hit Adv.
|
| 5S
|
-
|
Y
|
-
|
-
|
-
|
-
|
-
|
| 5S~S
|
-
|
Y
|
-
|
-
|
-
|
-
|
-
|
A Rekka-type move. When pressing 5S once, Decade will execute a stepping low slash. Pressing 5S a second time executes a chopping slash that is safe on block. Pressing 5S a third time executes a followup slash that knocks the opponent away on hit, after which Decade will wipe his blade.
The first hit is unsafe on block, but the followups can be used as a frametrap if the opponent tries to punish or take their turn. Be aware that the third hit is extremely unsafe.
The first hit can also be a useful special ender in combos. However, in juggles, the second hit will usually not connect before the opponent touches the ground. Complete Form is best suited to using the second hit anyway as its recovery is much faster, but the third hit should never be used in juggles.
|
|
4/6S
Ride Booker Gun (Complete)
4/6S
|
| Damage
|
Guard
|
Startup
|
Active
|
Recovery
|
Block Adv.
|
Hit Adv.
|
| -
|
Y
|
-
|
-
|
-
|
-
|
-
|
Decade fires a beam from the Ride Booker that hits many times. Launches the opponent on hit.
This is generally worse for neutral zoning purposes than the regular shot version of this move due mostly to a quirk with the projectile durability of beams: dense projectiles, like Decade's own projectile, will negate the entire beam and still hit.
The beam is still useful for combos and deals about half of the opponent's Guard Gauge even when it's blocked, and Decade retains the regular shot version of this move as a normal (2/8H) in Complete Form, so it's still really nice to have this.
This can be used as Complete Form's preferred special ender when you can't connect a grounded hit of 5S for any reason, but keep in mind that it can be very negative if the opponent air techs.
|
|
Complete JS
Dimension Kick
jS
|
| Damage
|
Guard
|
Startup
|
Active
|
Recovery
|
Block Adv.
|
Hit Adv.
|
| -
|
Y
|
-
|
-
|
-
|
-
|
-
|
Decade does a divekick at a very steep angle. Punishable on block.
This may appear at first glance to be a standard divekick, but it's fully invulnerable until its recovery frames on landing. This makes it an excellent neutral tool to snipe an opponent with, in spite of the risks involved.
Dimension Kick also has relatively low recovery despite still being punishable. Between the quick recovery and its steep angle, Decade is able to move around the screen using this move with relative safety.
|
|
Universal Mechanics
Complete Throw
Throw
4H
|
| Damage
|
Guard
|
Startup
|
Active
|
Recovery
|
Block Adv.
|
Hit Adv.
|
| -
|
N
|
-
|
-
|
-
|
-
|
-
|
Complete Form's throw. Unlike Base Form's throw, does not cause a hard knockdown, but deals extra damage and leaves the opponent farther away to compensate.
|
|
Complete Dash Action
Dash Action Air Dash Air Dash
|
| Damage
|
Guard
|
Startup
|
Active
|
Recovery
|
Block Adv.
|
Hit Adv.
|
| -
|
N/A
|
-
|
-
|
-
|
-
|
-
|
Decade airdashes. A generic mobility tool that is especially useful in combination with Decade's air attacks. Costs .5 stocks of the Rider Gauge.
|
|
Complete Rider Art
Rider Art High Speed Dash High Speed Dash
|
| Damage
|
Guard
|
Startup
|
Active
|
Recovery
|
Block Adv.
|
Hit Adv.
|
| -
|
Y
|
-
|
-
|
-
|
-
|
-
|
Costs .5 stocks of the Rider Gauge. Has access to a follow-up by pressing Rider Art or Special Attack at no additional cost, a dash punch that begins a cinematic.
This Rider Art deals a lot of damage, so it's a staple in RC combos and a useful punisher. It's also fairly safe on block, so you can be aggressive with it.
|
|
Complete Style Action
Style Action Power Up Power Up
|
| Damage
|
Guard
|
Startup
|
Active
|
Recovery
|
Block Adv.
|
Hit Adv.
|
| -
|
N/A
|
-
|
-
|
-
|
-
|
-
|
While already in Complete Form, Style Action transforms back into Decade's Base Form at no cost. Doing so also refreshes damage scaling and the Guard Gauge.
|
|
Combos
- 5LH > 5LH > 5LH > Combo Jump > jLHS
- 5LH > 5LH > 5LH > Rider Finale
- Complete's launcher loop is very meter efficient even while using a Combo Jump.
- Be aware that a Combo Jump is a consistent opportunity to burst safely. This combo is a much better option while the opponent is Guard Crushed.
- 5LLLL > 5S
- 5LLLL > Rider Finale
- This string's groundbounce enables some meterless links.
- 5HHHH > RC > 6HHHH > RC > 5SSS
- 5HHHH > RC > Rider Art Followup
- Complete Form can get good mileage out of comboing multiple heavy strings with RC.
- 5HHHH's stagger will cause 5S to launch, but comboing Rider Art Followup is reliable even on stagger.
Navigation
| General
|
|
|
Showa
|
| Kamen Rider
|
|
| Kamen Rider V3
|
|
| Kamen Rider Amazon
|
|
| Kamen Rider BLACK (RX)
|
|
|
Heisei Phase 1
|
| Kamen Rider Kuuga
|
|
| Kamen Rider Agito
|
|
| Kamen Rider Ryuki
|
|
| Kamen Rider 555
|
|
| Kamen Rider Blade
|
|
| Kamen Rider Hibiki
|
|
| Kamen Rider Kabuto
|
|
| Kamen Rider Den-O
|
|
| Kamen Rider Kiva
|
|
| Kamen Rider Decade
|
|
|
Heisei Phase 2
|
| Kamen Rider W
|
|
| Kamen Rider OOO
|
|
| Kamen Rider Fourze
|
|
| Kamen Rider Wizard
|
|
