Latest revision as of 07:23, 22 June 2024
Introduction
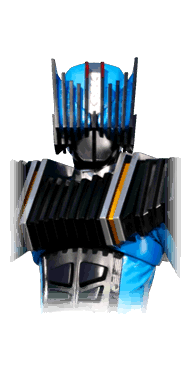 Kamen Rider Diend
Kamen Rider Diend is an interdimensional thief crossing through worlds looking for treasure. This is a good thing, because if he was one of those "fights for justice" types, I'd be losing hope in justice.
Diend is a zoner with a lot of one-of-a-kind options that only he has access to. He even uses a one-of-a-kind Support Attack: he summons Kamen Riders, controlled by the game's AI, to fight for him, on the same stage at the same time.
Although he's a really unique character, that uniqueness doesn't bring strength with it. Diend is somewhat infamous for being potentially the least durable character in the game, with the worst defensive stats and absolutely no built-in defensive mechanic. As if that wasn't enough, his damage is pitiful, so any risk he takes grants trivial reward.
Picking Diend isn't really competitively advisable, but he is really swaggy and his striker occasionally makes some really funny game states happen, so you can definitely still have a good time playing him.
Playstyle
 Kamen Rider Diend summons ancillary Riders to fight alongside him. Kamen Rider Diend summons ancillary Riders to fight alongside him. |
| Pros |
Cons |
- Has an Infinite: Diend isn't capable of doing much solo, but he does have an infinite.
- Style: Diend uses a lot of unique tools and animations, and his advanced combos are quite stylish.
|
- Low Damage: Diend's damage is so low that any good character can make two dozen mistakes before ending Diend in one of his own.
- Unusual Striker: Diend's striker is really unique, but it's also extremely expensive and inconsistent. The AI can choose to do nothing helpful for its entire duration, and it can only be used at 4 stocks of Rider Gauge.
- Waiting For The End: Diend is unlikely to ever win besides by time up due to his low damage, and unlikely to survive his opponent's offense due to his low health and the lack of defensive cushions in his kit.
|
Form Select
Move List
Normal Moves
5LLL
5LLL
|
| Version
|
Damage
|
Guard
|
Startup
|
Active
|
Recovery
|
Block Adv.
|
Hit Adv.
|
| 5L
|
-
|
Y
|
-
|
-
|
-
|
-
|
-
|
|
|
| 5LL
|
-
|
Y
|
-
|
-
|
-
|
-
|
-
|
A side kick. Recovers notably fast.
|
| 5LLL
|
-
|
Y
|
-
|
-
|
-
|
-
|
-
|
A high kick that knocks the opponent down on hit.
|
|
4/6LL
4/6LL
|
| Version
|
Damage
|
Guard
|
Startup
|
Active
|
Recovery
|
Block Adv.
|
Hit Adv.
|
| 4/6L
|
-
|
Y
|
-
|
-
|
-
|
-
|
-
|
A high kick. Diend's fastest light starter.
|
| 4/6LL
|
-
|
Y
|
-
|
-
|
-
|
-
|
-
|
A slow kick that causes a mashable stagger on hit.
|
|
4/6LHH
4/6LHH
|
| Version
|
Damage
|
Guard
|
Startup
|
Active
|
Recovery
|
Block Adv.
|
Hit Adv.
|
| 4/6L
|
-
|
Y
|
-
|
-
|
-
|
-
|
-
|
A high kick. Diend's fastest light starter.
|
| 4/6LH
|
-
|
Y
|
-
|
-
|
-
|
-
|
-
|
Diend does a spinning high kick. Launches the opponent on hit. Can be followed up with a Combo Jump into its aircombo followup string, jLHS.
A mainstay of Diend's combos, this aircombo string is excellent in every way but damage. He's able to loop it against the wall, and at midscreen it creates a lot of distance on hit to allow him to keep out and regain some Rider Gauge.
|
| 4/6LHH
|
-
|
Y
|
-
|
-
|
-
|
-
|
-
|
An alternate ender for the launcher string. Diend shoots and then kicks, knocking the opponent away on hit.
|
|
2/8LL
2/8LL
|
| Version
|
Damage
|
Guard
|
Startup
|
Active
|
Recovery
|
Block Adv.
|
Hit Adv.
|
| 2/8L
|
-
|
Y
|
-
|
-
|
-
|
-
|
-
|
An advancing low kick. Diend's longest range light starter.
|
| 2/8LL
|
-
|
Y
|
-
|
-
|
-
|
-
|
-
|
A high kick that knocks the opponent away on hit.
|
|
5HH
5HH
|
| Version
|
Damage
|
Guard
|
Startup
|
Active
|
Recovery
|
Block Adv.
|
Hit Adv.
|
| 5H
|
-
|
Y
|
-
|
-
|
-
|
-
|
-
|
Diend leans back and fires a shot at mid level.
|
| 5HH
|
-
|
Y
|
-
|
-
|
-
|
-
|
-
|
Diend follows up with a volley of 3 shots.
|
|
6HHH
6HHHH
|
| Version
|
Damage
|
Guard
|
Startup
|
Active
|
Recovery
|
Block Adv.
|
Hit Adv.
|
| 6H
|
-
|
Y
|
-
|
-
|
-
|
-
|
-
|
|
|
| 6HH
|
-
|
Y
|
-
|
-
|
-
|
-
|
-
|
Diend does a spinning high kick. Launches the opponent on hit. Can be followed up with a Combo Jump into its aircombo followup string, jLHS.
A mainstay of Diend's combos, this aircombo string is excellent in every way but damage. He's able to loop it against the wall, and at midscreen it creates a lot of distance on hit to allow him to keep out and regain some Rider Gauge.
|
| 6HHH
|
-
|
Y
|
-
|
-
|
-
|
-
|
-
|
An alternate ender for the launcher string. Diend fires a shot that knocks the opponent away.
|
|
2/8HH
5LLL
|
| Version
|
Damage
|
Guard
|
Startup
|
Active
|
Recovery
|
Block Adv.
|
Hit Adv.
|
| 2/8H
|
-
|
Y
|
-
|
-
|
-
|
-
|
-
|
Diend fires a shot at mid-level.
|
| 2/8HH
|
-
|
Y
|
-
|
-
|
-
|
-
|
-
|
Diend steps in with an elbow. Crumples the opponent on hit, which is nice.
|
|
jL
jL
|
| Damage
|
Guard
|
Startup
|
Active
|
Recovery
|
Block Adv.
|
Hit Adv.
|
| -
|
Y
|
-
|
-
|
-
|
-
|
-
|
Diend fires a shot at a very steep angle. Useful for coverage.
This attack has landing recovery that is cancellable into everything but jump. In order to jump right after using it anyway, hold a direction on landing so that you'll cancel the recovery into walking, and then jump again.
|
|
jH
jH
|
| Damage
|
Guard
|
Startup
|
Active
|
Recovery
|
Block Adv.
|
Hit Adv.
|
| -
|
Y
|
-
|
-
|
-
|
-
|
-
|
Diend fires a shot at a 45 degree angle.
This attack has landing recovery that is cancellable into everything but jump. In order to jump right after using it anyway, hold a direction on landing so that you'll cancel the recovery into walking, and then jump again.
Using this technique, Diend is actually able to combo this into itself for an infinite. This is pretty tricky to keep up forever, though, and doesn't deal a lot of damage anyway.
|
|
Special Moves
5S
Diendriver
5S
|
| Damage
|
Guard
|
Startup
|
Active
|
Recovery
|
Block Adv.
|
Hit Adv.
|
| -
|
Y
|
-
|
-
|
-
|
-
|
-
|
Diend fires a quick projectile straight ahead. Knocks the opponent away on hit.
This is Diend's most consistently useful special, but it doesn't combo in a few key places.
|
|
dS
Homing Barrage
any direction + S
|
| Damage
|
Guard
|
Startup
|
Active
|
Recovery
|
Block Adv.
|
Hit Adv.
|
| -
|
Y
|
-
|
-
|
-
|
-
|
-
|
Diend holds his gun to the sky and fires a volley of 15 homing shots. Launches and drains the opponent's Rider Gauge on hit.
The homing on these shots leaves something to be desired. They have multiple sour spots where they just won't home in no matter what you do, most importantly full distance from the opponent and point blank. Even when they do connect, it's often only a few, and usually for piddling damage.
This special is mostly a deathtrap, since it's very likely to miss, tends to be dodged pretty effortlessly, and even on hit, it's just not worth the reward. It is somewhat more useful as a combo ender in the corner.
|
|
jS
Jump Shot
jS
|
| Damage
|
Guard
|
Startup
|
Active
|
Recovery
|
Block Adv.
|
Hit Adv.
|
| -
|
Y
|
-
|
-
|
-
|
-
|
-
|
Diend fires a projectile at a steep angle. Knocks the opponent down on hit.
This is probably the overall best part of Diend's kit, as it deals relatively nice damage, knocks down, doesn't affect Diend's movement, and is relatively risk-free.
|
|
Universal Mechanics
Throw
Throw
4H
|
| Damage
|
Guard
|
Startup
|
Active
|
Recovery
|
Block Adv.
|
Hit Adv.
|
| -
|
N
|
-
|
-
|
-
|
-
|
-
|
Diend's throw. Causes a hard knockdown, and Diend can combo a 2/8L after this against the wall, but not much else.
|
|
Dash Action
Dash Action
Dash Shot
|
| Damage
|
Guard
|
Startup
|
Active
|
Recovery
|
Block Adv.
|
Hit Adv.
|
| -
|
Y
|
-
|
-
|
-
|
-
|
-
|
A generic Dash Shot-type Dash Action. Costs .5 stocks of the Rider Gauge and can chain into itself up to 3 shots. Dash Shot tracks the opponent's position when firing, including vertically, so although these shots aren't homing, they can be used to snipe the opponent out of the air.
Dash Shot recovers instantly when its user returns to neutral.
|
|
Rider Art
Rider Art
|
| Damage
|
Guard
|
Startup
|
Active
|
Recovery
|
Block Adv.
|
Hit Adv.
|
| 0
|
N
|
-
|
-
|
-
|
-
|
-
|
A unique spin on the Dodge Shot type Rider Art, this sees Diend fire an unblockable shot aimed towards the ground, then slip away into the wall between worlds, popping back out at full-stage distance. If this unblockable hits, this is a cinematic that holds the opponent in place for a more effective escape, but Diend backs up regardless. This costs 1 stock of the Rider Gauge.
This doesn't do any damage, making it really limited in its usage. It's also really expensive, which is extra tough for Diend because his low damage means he also builds very little Rider Gauge. This combination of factors makes it often feel like a bad idea to use this, but it *is* able to get you out of a tight spot.
|
|
Style Action
Support Attack
|
| Damage
|
Guard
|
Startup
|
Active
|
Recovery
|
Block Adv.
|
Hit Adv.
|
| -
|
N/A
|
-
|
-
|
-
|
-
|
-
|
When selecting Diend, players also choose a Rider to accompany him and serve as his Striker. Diend can choose from the following Riders: Ouja, Raia, Scissors, Gai, PunchHopper, and Femme.
By pressing Style Action, Diend calls another Rider to the field, who is controlled by the AI. This costs 4 stocks of the Rider Gauge regardless of when it is used.
This is Diend's main gimmick, but it usually doesn't help him very much for how expensive it is. The AI tends to do full strings and not much else.
|
|
Combos
- 2HH > walk back > dS
- 2HH > walk back > jS
- 2HH > Rider Art
- 2HH > Rider Finale
- Diend is able to link a few things from 2HH's crumple.
- Diend has the powerful Dash Shot dash action, and can combo from it if he's on point.
- (corner) 6LH > jc > jL~H~S > 6HH > jc > jLHS > 2HH
- (corner) 2HH > 6HH > jc > jL~H~S > 6HH > RC > dS
- Diend's advanced corner loops.
- Delaying the aircombo string allows Diend to land earlier and enables the juggle height necessary for the loop to work.
- The [RC > dS] combo part is intended to hit the opponent point-blank with every projectile from dS, and drains just shy of 1 stock of their Rider Gauge.
- (corner) jH > repeat xN > 5S
- Diend's infinite. Deals precious little damage, which at least means an experienced opponent might choose to not burst and just hope you drop it.
- Doing this infinitely requires occasionally adjusting your positioning some, i.e. manually timing the forward jump very slightly later.
Navigation
| General
|
|
|
Showa
|
| Kamen Rider
|
|
| Kamen Rider V3
|
|
| Kamen Rider Amazon
|
|
| Kamen Rider BLACK (RX)
|
|
|
Heisei Phase 1
|
| Kamen Rider Kuuga
|
|
| Kamen Rider Agito
|
|
| Kamen Rider Ryuki
|
|
| Kamen Rider 555
|
|
| Kamen Rider Blade
|
|
| Kamen Rider Hibiki
|
|
| Kamen Rider Kabuto
|
|
| Kamen Rider Den-O
|
|
| Kamen Rider Kiva
|
|
| Kamen Rider Decade
|
|
|
Heisei Phase 2
|
| Kamen Rider W
|
|
| Kamen Rider OOO
|
|
| Kamen Rider Fourze
|
|
| Kamen Rider Wizard
|
|

