Introduction
 Kamen Rider Ryuga
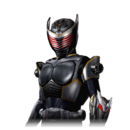
Kamen Rider Ryuga is the evil version of Kamen Rider Ryuki. In classic fighting game fashion, this means he's the stronger one at the cost of lower health.
Being a Ryuki Rider, Ryuga uses the Support Attack style, and does not have access to normal grounded special moves. Instead, he equips weapons at the cost of Rider Gauge; in particular, Ryuga has access to Sword Vent (which improves his Heavy normals), Strike Vent (which opens up strings using projectiles), and Guard Vent (which grants him temporary Super Armor).
Ryuga's strength comes from his powerful metered options. While his meterless play leaves something to be desired, his striker, Dragblacker, is very good at controlling the pace of the match and extremely easy to fit into combos. He really shines when he has enough Rider Gauge to equip Sword Vent comfortably without losing access to Dragblacker. While some Ryuki Riders fight with finesse, Ryuga uses his sword like a blunt object to smash the opponent into pieces.
Playstyle
 Kamen Rider Ryuga crushes the opponent with brute force, backed by a powerful striker. Kamen Rider Ryuga crushes the opponent with brute force, backed by a powerful striker. |
| Pros |
Cons |
- High Damage: Ryuga's damage is very high, especially when he has Sword Vent equipped.
- Flexibility: Ryuga has access to two distinct Vent movesets with Sword Vent and Strike Vent, allowing him a wider range of attacks that suit different situations.
- Powerful Striker: Dragblacker deals a lot of damage in a single hit and covers space for a long period of time, so it can be difficult to completely avoid.
|
- All In: Ryuga's offense is powerful, but the price he pays is being weak in most ways besides actively hitting his opponent, including his defense modifiers.
- Difficulty Removing Red Life: Because Ryuki Riders lack standard special moves, it's very difficult for them to cut off the opponent's red life without spending a resource.
- Meter Requirements: Ryuga's strength is all loaded into metered options. This can pose a problem if he's being smothered without Rider Gauge.
|
Form Select
Move List
Normal Moves
5LLL
5LHH
|
| Version
|
Damage
|
Guard
|
Startup
|
Active
|
Recovery
|
Block Adv.
|
Hit Adv.
|
| 5L
|
-
|
Y
|
-
|
-
|
-
|
-
|
-
|
An advancing left jab. A quick attack with a lot of range.
|
| 5LL
|
-
|
Y
|
-
|
-
|
-
|
-
|
-
|
|
|
| 5LLL
|
-
|
Y
|
-
|
-
|
-
|
-
|
-
|
A kick that knocks the opponent away on hit.
|
|
4/6LLL
4/6LLL
|
| Version
|
Damage
|
Guard
|
Startup
|
Active
|
Recovery
|
Block Adv.
|
Hit Adv.
|
| 4/6L
|
-
|
Y
|
-
|
-
|
-
|
-
|
-
|
Ryuga throws a hook punch. His slowest light starter, this is mostly only used for combos.
|
| 4/6LL
|
-
|
Y
|
-
|
-
|
-
|
-
|
-
|
|
|
| 4/6LLL
|
-
|
Y
|
-
|
-
|
-
|
-
|
-
|
A kick that knocks the opponent away on hit.
|
|
2/8LL
2/8LL
|
| Version
|
Damage
|
Guard
|
Startup
|
Active
|
Recovery
|
Block Adv.
|
Hit Adv.
|
| 2/8L
|
-
|
Y
|
-
|
-
|
-
|
-
|
-
|
A high kick. Ryuga's fastest light starter.
|
| 2/8LL
|
-
|
Y
|
-
|
-
|
-
|
-
|
-
|
A kick that knocks the opponent away on hit.
|
|
5HHH
5HHH
|
| Version
|
Damage
|
Guard
|
Startup
|
Active
|
Recovery
|
Block Adv.
|
Hit Adv.
|
| 5H
|
-
|
Y
|
-
|
-
|
-
|
-
|
-
|
Ryuga headbutts the opponent. An advancing normal that still feels pretty stubby, but hits pretty hard.
|
| 5HH
|
-
|
Y
|
-
|
-
|
-
|
-
|
-
|
|
|
| 5HHH
|
-
|
Y
|
-
|
-
|
-
|
-
|
-
|
A kick that knocks the opponent away on hit.
|
|
6HHH
6HHH
|
| Version
|
Damage
|
Guard
|
Startup
|
Active
|
Recovery
|
Block Adv.
|
Hit Adv.
|
| 6H
|
-
|
Y
|
-
|
-
|
-
|
-
|
-
|
A stepping high kick. Exactly as fast as 5L, but with less range.
|
| 6HH
|
-
|
Y
|
-
|
-
|
-
|
-
|
-
|
|
|
| 6HHH
|
-
|
Y
|
-
|
-
|
-
|
-
|
-
|
A final kick that knocks the opponent away on hit.
|
|
2/8HH
2/8HH
|
| Version
|
Damage
|
Guard
|
Startup
|
Active
|
Recovery
|
Block Adv.
|
Hit Adv.
|
| 2/8H
|
-
|
Y
|
-
|
-
|
-
|
-
|
-
|
|
|
| 2/8HH
|
-
|
Y
|
-
|
-
|
-
|
-
|
-
|
A kick that knocks the opponent away on hit.
|
|
jL
jL
|
| Damage
|
Guard
|
Startup
|
Active
|
Recovery
|
Block Adv.
|
Hit Adv.
|
| -
|
Y
|
-
|
-
|
-
|
-
|
-
|
Ryuga holds his fist out. A jump-in that has active frames until landing.
|
|
JH
jH
|
| Damage
|
Guard
|
Startup
|
Active
|
Recovery
|
Block Adv.
|
Hit Adv.
|
| -
|
Y
|
-
|
-
|
-
|
-
|
-
|
A very standard divekick.
|
|
During Sword Vent
Sword Vent 5LHH
5LHH (Sword Vent)
|
| Version
|
Damage
|
Guard
|
Startup
|
Active
|
Recovery
|
Block Adv.
|
Hit Adv.
|
| 5L
|
-
|
Y
|
-
|
-
|
-
|
-
|
-
|
An advancing left jab. A quick attack with a lot of range.
|
| 5LH
|
-
|
Y
|
-
|
-
|
-
|
-
|
-
|
|
|
| 5LHH
|
-
|
Y
|
-
|
-
|
-
|
-
|
-
|
A sword slice that knocks the opponent away on hit.
|
|
Sword Vent 4/6LHHH
4/6LHHH (Sword Vent)
|
| Version
|
Damage
|
Guard
|
Startup
|
Active
|
Recovery
|
Block Adv.
|
Hit Adv.
|
| 4/6L
|
-
|
Y
|
-
|
-
|
-
|
-
|
-
|
|
|
| 4/6LH
|
-
|
Y
|
-
|
-
|
-
|
-
|
-
|
Ryuga chops downward with the sword. Has enough frame advantage on hit to link 5L or Rider Finale afterwards.
|
| 4/6LHH
|
-
|
Y
|
-
|
-
|
-
|
-
|
-
|
A second identical chop downward with the sword. Like 4/6LH, this also has enough frame advantage on hit to link 5L or Rider Finale afterwards.
|
| 4/6LHHH
|
-
|
Y
|
-
|
-
|
-
|
-
|
-
|
A final sword chop that knocks the opponent down on hit.
|
|
Sword Vent 2/8LH
2/8LH (Sword Vent)
|
| Version
|
Damage
|
Guard
|
Startup
|
Active
|
Recovery
|
Block Adv.
|
Hit Adv.
|
| 2/8L
|
-
|
Y
|
-
|
-
|
-
|
-
|
-
|
A high kick. Ryuga's fastest light starter.
|
| 2/8LH
|
-
|
Y
|
-
|
-
|
-
|
-
|
-
|
A stepping slash that knocks the opponent away on hit.
|
|
Sword Vent 5HHH
5HHH (Sword Vent)
|
| Version
|
Damage
|
Guard
|
Startup
|
Active
|
Recovery
|
Block Adv.
|
Hit Adv.
|
| 5H
|
-
|
Y
|
-
|
-
|
-
|
-
|
-
|
Ryuga slices downwards with the sword.
|
| 5HH
|
-
|
Y
|
-
|
-
|
-
|
-
|
-
|
An outward follow-up slash.
|
| 5HHH
|
-
|
Y
|
-
|
-
|
-
|
-
|
-
|
A final downward slice that causes a mashable stagger on hit.
This string is very useful due to its high damage, and using an RC enables guaranteed followups to the mashable stagger.
|
|
Sword Vent 6HHH
6HHH (Sword Vent)
|
| Version
|
Damage
|
Guard
|
Startup
|
Active
|
Recovery
|
Block Adv.
|
Hit Adv.
|
| 6H
|
-
|
Y
|
-
|
-
|
-
|
-
|
-
|
Ryuga chops downward with the sword. Has enough frame advantage on hit to link 5L afterwards.
|
| 6HH
|
-
|
Y
|
-
|
-
|
-
|
-
|
-
|
|
|
| 6HHH
|
-
|
Y
|
-
|
-
|
-
|
-
|
-
|
A final chop that knocks the opponent down on hit.
|
|
Sword Vent 2/8HH
2/8HH (Sword Vent)
|
| Version
|
Damage
|
Guard
|
Startup
|
Active
|
Recovery
|
Block Adv.
|
Hit Adv.
|
| 2/8H
|
-
|
Y
|
-
|
-
|
-
|
-
|
-
|
Ryuga crouches and spins towards the opponent, then slashes upwards. Might technically be able to evade some high attacks, but doesn't do so with any consistency.
|
| 2/8HH
|
-
|
Y
|
-
|
-
|
-
|
-
|
-
|
A follow-up slash that causes a mashable stagger on hit.
|
|
During Strike Vent
Strike Vent 5LH
5LH (Strike Vent)
|
| Version
|
Damage
|
Guard
|
Startup
|
Active
|
Recovery
|
Block Adv.
|
Hit Adv.
|
| 5L
|
-
|
Y
|
-
|
-
|
-
|
-
|
-
|
An advancing left jab. A quick attack with a lot of range.
|
| 5LH
|
-
|
Y
|
-
|
-
|
-
|
-
|
-
|
Ryuga shoots a fireball ahead of himself. Knocks the opponent away on hit.
|
|
Strike Vent 4/6LHH
4/6LHH (Strike Vent)
|
| Version
|
Damage
|
Guard
|
Startup
|
Active
|
Recovery
|
Block Adv.
|
Hit Adv.
|
| 4/6L
|
-
|
Y
|
-
|
-
|
-
|
-
|
-
|
|
|
| 4/6LH
|
-
|
Y
|
-
|
-
|
-
|
-
|
-
|
A second hook punch that causes a mashable stagger on hit.
|
| 4/6LHH
|
-
|
Y
|
-
|
-
|
-
|
-
|
-
|
Ryuga shoots a fireball ahead of himself. Knocks the opponent away on hit.
|
|
Strike Vent 2/8LHH
2/8LH (Strike Vent)
|
| Version
|
Damage
|
Guard
|
Startup
|
Active
|
Recovery
|
Block Adv.
|
Hit Adv.
|
| 2/8L
|
-
|
Y
|
-
|
-
|
-
|
-
|
-
|
A high kick. Ryuga's fastest light starter.
|
| 2/8LH
|
-
|
Y
|
-
|
-
|
-
|
-
|
-
|
A headbutt similar to Ryuga's normal 5H.
|
| 2/8LHH
|
-
|
Y
|
-
|
-
|
-
|
-
|
-
|
Ryuga shoots a fireball ahead of himself. Knocks the opponent away on hit.
|
|
Strike Vent 5HH
5HH (Strike Vent)
|
| Version
|
Damage
|
Guard
|
Startup
|
Active
|
Recovery
|
Block Adv.
|
Hit Adv.
|
| 5H
|
-
|
Y
|
-
|
-
|
-
|
-
|
-
|
Ryuga shoots a fireball ahead of himself. Has enough frame advantage on hit to link 5L, 2/8L, or Rider Finale.
|
| 5HH
|
-
|
Y
|
-
|
-
|
-
|
-
|
-
|
Ryuga shoots a second fireball ahead of himself that knocks the opponent away on hit.
|
|
Strike Vent 6HHH
6HHH (Sword Vent)
|
| Version
|
Damage
|
Guard
|
Startup
|
Active
|
Recovery
|
Block Adv.
|
Hit Adv.
|
| 6H
|
-
|
Y
|
-
|
-
|
-
|
-
|
-
|
A dash punch that advances very far and recovers extremely quickly. Ryuga can even link off of this at point blank, and it's definitely the superstar of Strike Vent's moveset.
|
| 6HH
|
-
|
Y
|
-
|
-
|
-
|
-
|
-
|
A follow-up hook punch that causes a mashable stagger on hit.
|
| 6HHH
|
-
|
Y
|
-
|
-
|
-
|
-
|
-
|
Ryuga shoots a fireball ahead of himself that knocks the opponent away on hit.
|
|
Strike Vent 2/8HHH
2/8HHH (Strike Vent)
|
| Version
|
Damage
|
Guard
|
Startup
|
Active
|
Recovery
|
Block Adv.
|
Hit Adv.
|
| 2/8H
|
-
|
Y
|
-
|
-
|
-
|
-
|
-
|
Ryuga uppercuts, launching the opponent on hit.
|
| 2/8HH
|
-
|
Y
|
-
|
-
|
-
|
-
|
-
|
A follow-up headbutt.
This also launches the opponent on grounded hit, but launches too short as a standalone attack for its followup string to connect before the opponent can ground tech, so be careful.
|
| 2/8HHH
|
-
|
Y
|
-
|
-
|
-
|
-
|
-
|
A sobat that knocks the opponent away diagonally on hit.
|
|
Special Moves
5S
Sword Vent
5S
|
| Damage
|
Guard
|
Startup
|
Active
|
Recovery
|
Block Adv.
|
Hit Adv.
|
| -
|
N/A
|
-
|
-
|
-
|
-
|
-
|
Ryuga equips a sword in exchange for 1 stock of the Rider Gauge. Sword Vent lasts for about 15 seconds.
Vent activations can be Rider Canceled once they take effect and their corresponding card in the UI flashes.
Using either Strike Vent (4/6S) or Guard Vent (2/8S) while under the effects of Sword Vent will cancel Sword Vent and switch to that Vent.
Ryuga only loses his sword when he next returns to neutral after Sword Vent's timer runs out. This means that you can continue to RC and start new Sword Vent strings after the timer has expired.
Having Sword Vent active completely changes Ryuga's Heavy normals and strings. Ryuga in particular would prefer to have Sword Vent on most of the time, as it gives him access to much higher damage. Keep in mind that you will lose access to barehanded Heavy attacks for the duration of Sword Vent.
|
|
4/6S
Strike Vent
4/6S
|
| Damage
|
Guard
|
Startup
|
Active
|
Recovery
|
Block Adv.
|
Hit Adv.
|
| -
|
N/A
|
-
|
-
|
-
|
-
|
-
|
Ryuga equips a dragon knuckle in exchange for 1 stock of the Rider Gauge. Strike Vent lasts for about 15 seconds.
Vent activations can be Rider Canceled once they take effect and their corresponding card in the UI flashes.
Using Sword Vent (5S) or Guard Vent (2/8S) while under the effects of Strike Vent will cancel Strike Vent and switch to that Vent.
Ryuga generally prefers to have Sword Vent on for its straightforward power, but Strike Vent is still a compelling option. Ryuga gains an excellent dash punch 6H in Strike Vent, as well as other useful strings, and he is still able to use his striker to add damage to combos. Strike Vent's fireball attacks also remove the opponent's red health on hit, so Strike Vent is especially appealing if the opponent has a lot of red health.
|
|
2/8S
Guard Vent
2/8S
|
| Damage
|
Guard
|
Startup
|
Active
|
Recovery
|
Block Adv.
|
Hit Adv.
|
| -
|
N/A
|
-
|
-
|
-
|
-
|
-
|
Ryuga equips a shield in exchange for 3 stocks of the Rider Gauge. This grants Ryuga about 15 seconds of temporary Super Armor. Guard Vent does not change Ryuga's attack properties in any other way.
Vent activations can be Rider Canceled once they take effect and their corresponding card in the UI flashes.
Using Sword Vent (5S) or Strike Vent (4/6S) while under the effects of Guard Vent will cancel Guard Vent and switch to that Vent.
Using 3 stocks of Rider Gauge on this is a bit of a hard sell, especially since you can't also have Sword Vent active at the same time. That said, its effect is very strong, especially when the opponent doesn't have enough health left to take big risks in playing against your Super Armor.
|
|
JS
Diving Kick
jS
|
| Damage
|
Guard
|
Startup
|
Active
|
Recovery
|
Block Adv.
|
Hit Adv.
|
| -
|
Y
|
-
|
-
|
-
|
-
|
-
|
A very standard divekick shared with other Ryuki Riders. Identical to jH in every way.
|
|
Universal Mechanics
Throw
Throw
4H
|
| Damage
|
Guard
|
Startup
|
Active
|
Recovery
|
Block Adv.
|
Hit Adv.
|
| -
|
N
|
-
|
-
|
-
|
-
|
-
|
Ryuga's throw. Ryuga does a 3-hit punch combo that knocks the opponent away and causes a non-comboable hard knockdown.
While under the effects of Sword Vent, Ryuga instead does a 2-hit punch combo and then hits the opponent with his sword. Unlike his standard throw, this causes a comboable hard knockdown.
While under the effects of Strike Vent, Ryuga instead does a 2-hit punch combo and then blasts the opponent with a fireball. Unlike his standard throw, this causes a comboable hard knockdown. It also deals much higher damage compared to his other two throws.
|
|
Dash Action
Dash Action Air Dash Air Dash
|
| Damage
|
Guard
|
Startup
|
Active
|
Recovery
|
Block Adv.
|
Hit Adv.
|
| -
|
N/A
|
-
|
-
|
-
|
-
|
-
|
Ryuga airdashes. A generic mobility tool. Costs .5 stocks of the Rider Gauge.
|
|
Rider Art
Rider Art High Speed Dash High Speed Dash
|
| Damage
|
Guard
|
Startup
|
Active
|
Recovery
|
Block Adv.
|
Hit Adv.
|
| -
|
N/A
|
-
|
-
|
-
|
-
|
-
|
Standard High Speed Dash-type Rider Art. Costs .5 stocks of the Rider Gauge.
|
|
Style Action
Style Action Support Attack Support Attack
|
| Damage
|
Guard
|
Startup
|
Active
|
Recovery
|
Block Adv.
|
Hit Adv.
|
| -
|
Y
|
-
|
-
|
-
|
-
|
-
|
By pressing Style Action, Ryuga can call his striker to launch an attack. This costs 2 stocks of the Rider Gauge, or 4 stocks when executed from hitstun.
Ryuga calls upon his Contract Monster, Dragblacker, who flies through the stage from behind Ryuga, then turns around to leave after a set distance. Once he's on the screen, he occupies that space for some time with an active hitbox.
This striker is very straightforwardly powerful, and it's very easy to fit into combos as well as useful in neutral to check an opponent's advances. Ryuga can expect to use this striker often.
It's possible for the opponent to move to the side and avoid this striker, but it's difficult for them to attack into the space it occupies even if they do.
|
|
Combos
- 5LLL > Style Action
- 5HHH > Style Action
- Ryuga's combos are fairly limited without a Vent equipped, but it's easy to hitconfirm a string into Dragblacker.
- Dragblacker has some startup time and should be called in the middle of these strings, not after.
- Sword Vent gains meterless link combos that greatly expand Ryuga's combo game.
- (Strike Vent, far) 5H > 6H > 2LH > RC > 5H > 2LHH
- Strike Vent also gains link combos, including links from his 5H fireball that get even better with a little distance.
- (Sword Vent) [5HHH > RC] > repeat xN > 6LHH > 5LHH
- (Sword Vent) [5HHH > RC] > repeat xN > 6LHH > 5LH > Style Action > Climax Time > Rider Finale
- Ryuga's fastest damage comes from looping Sword Vent's 5HHH string. This allows him to do practical touch of death combos well under the Guard Gauge recovery timer.
- (Strike Vent) 6H > 2LH > RC > 5H > 2LH > RC > 5H > 2LH > Style Action > Climax Time > Rider Finale
- While slightly less broadly practical, Strike Vent also has access to a touch of death combo.
- Strike Vent's meter gain is significantly less than Sword Vent's overall, so any touch of death using it requires more Rider Gauge to start.
- (Corner, Sword Vent) Throw > 6H ~ Style Action ~ HH
- (Corner, Sword Vent) Throw > 6H > RC + Rider Finale
- (Corner, Strike Vent) Throw + Style Action > 2HH > RC > 2HH
- With either of his offensive Vents on, Ryuga is able to combo from throw to great effect.
Navigation
| General
|
|
|
Showa
|
| Kamen Rider
|
|
| Kamen Rider V3
|
|
| Kamen Rider Amazon
|
|
| Kamen Rider BLACK (RX)
|
|
|
Heisei Phase 1
|
| Kamen Rider Kuuga
|
|
| Kamen Rider Agito
|
|
| Kamen Rider Ryuki
|
|
| Kamen Rider 555
|
|
| Kamen Rider Blade
|
|
| Kamen Rider Hibiki
|
|
| Kamen Rider Kabuto
|
|
| Kamen Rider Den-O
|
|
| Kamen Rider Kiva
|
|
| Kamen Rider Decade
|
|
|
Heisei Phase 2
|
| Kamen Rider W
|
|
| Kamen Rider OOO
|
|
| Kamen Rider Fourze
|
|
| Kamen Rider Wizard
|
|

