Chaos Code/NSC/Celia: Difference between revisions
m (→Colors: Fixed headers) |
Crimefighter (talk | contribs) (fixed headers and moved onto the new template) |
||
| Line 1: | Line 1: | ||
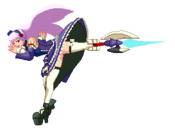
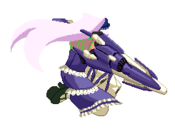
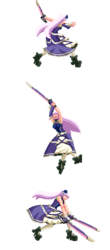
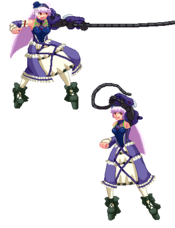
[[image:profile-celia.png|180px|right]] | [[image:profile-celia.png|180px|right]] | ||
{{TOClimit|2}} | |||
=Story= | ==Story== | ||
Celia is a robot built to protect the Chaos Code, but she decided that was lame and so instead she's just really into gothic lolita fashion. Respecting Celia's independence, the professor who created her made a different robot to guard the Chaos Code instead. But then things go wrong and Celia must put her average ordinary gothic lolita school girl life on pause to rescue the Chaos Code and ensure it's limitless power isn't used for evil. | Celia is a robot built to protect the Chaos Code, but she decided that was lame and so instead she's just really into gothic lolita fashion. Respecting Celia's independence, the professor who created her made a different robot to guard the Chaos Code instead. But then things go wrong and Celia must put her average ordinary gothic lolita school girl life on pause to rescue the Chaos Code and ensure it's limitless power isn't used for evil. | ||
=Playstyle= | ==Playstyle== | ||
Health: 28000 Stun: 95 | '''Health:''' 28000 '''Stun:''' 95 | ||
Celia is a fairly well rounded character with solid zoning, setplay, anti-airs, etc. She has notably good meterless damage and her special run can lead to strong mix-up opportunities. Many of her tools have a significant delay before becoming active, which lets them act as an insurance policy of sorts. Opponents who aren't careful will end up hitting Celia, only to fall into a missile or a bomb. At the same time these moves are limited via a missile gauge that can lock Celia out of most of her options. | Celia is a fairly well rounded character with solid zoning, setplay, anti-airs, etc. She has notably good meterless damage and her special run can lead to strong mix-up opportunities. Many of her tools have a significant delay before becoming active, which lets them act as an insurance policy of sorts. Opponents who aren't careful will end up hitting Celia, only to fall into a missile or a bomb. At the same time these moves are limited via a missile gauge that can lock Celia out of most of her options. | ||
=Run vs Step= | ===Mobility (Run vs Step)=== | ||
'''Run''' | '''Run:''' Celia has a special hover dash instead of a normal run. This puts her airborne quickly allowing her to come down with fast jump attacks for a stronger high/low mix-up game. | ||
Celia | '''Step:''' Because of the special run, Celia's step functions less like a typical chaos code step, and more like most character's runs. She can cancel her step early with any button (or crouching), cannot step cancel, and can super jump out of her step by pressing up. | ||
==Extra Move Selection== | |||
Prankish Whip gives Celia really good meterless combos, Welcome Boost gives Celia a really obnoxious neutral tool that she can make even more obnoxious via her various missiles, Angelic Wing gives Celia good Exceed routes, and Vanishing Gift gives Celia some good 2 bar combos. | |||
===Recommended Sets=== | |||
Prankish Whip is incredibly good and you should probably take it. Outside of that take whichever super you want to use primarily, or take welcome boost if you want to spend your meter on dangerous company/bashing rain. | |||
'''Prankish Whip & Angelic Wing''' | |||
This is probably the easiest set to use, it gives Celia good, consistent meterless combos via prankish whip and it gives her a good, consistent, exceed route to spend all that meter she saves on. | |||
'''Prankish Whip & Welcome Boost''' | |||
Use this set if you like Dangerous Company. | |||
== Move List== | |||
''Click on a header to expand that section of the movelist'' | |||
<div class="mw-collapsible mw-collapsed"> | |||
<div class="mw-collapsible-toggle" style="float: none;"><center><font size="4"><b>Normal Moves</b></font></center></div> | |||
<div class="mw-collapsible-content"> | |||
=== <font style="visibility:hidden" size="0">Normal Moves</font> === | |||
====== <font style="visibility:hidden" size="0">5A</font> ====== | |||
{{MoveData |image=CC_C1_5A.png |name=5A |data= {{AttackData-CC | |||
|damage= |guard=High/Low |cancelable=Yes |chprop=- | |||
|startup= |active=- |recovery=- |frameadv=- | |||
|description = Description. | |||
}} }} | |||
====== <font style="visibility:hidden" size="0">2A</font> ====== | |||
{{MoveData |image=CC_C1_2A.png |name=2A |data= {{AttackData-CC | |||
|damage= |guard=High/Low |cancelable=Yes |chprop=- | |||
|startup= |active=- |recovery=- |frameadv=- | |||
|description = Description. | |||
}} }} | |||
====== <font style="visibility:hidden" size="0">cl.B</font> ====== | |||
{{MoveData |image=CC_C1_clB.png |name=cl.B |data= {{AttackData-CC | |||
|damage= |guard=Low |cancelable=Yes |chprop=- | |||
|startup= |active=- |recovery=- |frameadv=- | |||
|description = Description. | |||
}} }} | |||
====== <font style="visibility:hidden" size="0">5B</font> ====== | |||
{{MoveData |image=CC_C1_5B.png |name=5B |data= {{AttackData-CC | |||
|damage= |guard=High/Low |cancelable=Yes |chprop=- | |||
|startup= |active=- |recovery=- |frameadv=- | |||
|description = Description. | |||
}} }} | |||
====== <font style="visibility:hidden" size="0">2B</font> ====== | |||
{{MoveData |image=CC_C1_2B.png |name=2B |data= {{AttackData-CC | |||
|damage= |guard=Low |cancelable=Yes |chprop=- | |||
|startup= |active=- |recovery=- |frameadv=- | |||
|description = Description. | |||
}} }} | |||
====== <font style="visibility:hidden" size="0">cl.C</font> ====== | |||
{{MoveData |image=CC_C1_clC.png |name=cl.C |data= {{AttackData-CC | |||
|damage= |guard=High/Low |cancelable=Yes |chprop=- | |||
|startup= |active=- |recovery=- |frameadv=- | |||
|description = Description. | |||
}} }} | |||
====== <font style="visibility:hidden" size="0">5C</font> ====== | |||
{{MoveData |image=CC_C1_5C.png |name=5C |data= {{AttackData-CC | |||
|damage= |guard=High/Low |cancelable=No |chprop=- | |||
|startup= |active=- |recovery=- |frameadv=- | |||
|description = Description. | |||
}} }} | |||
====== <font style="visibility:hidden" size="0">2C</font> ====== | |||
{{MoveData |image=CC_C1_2C.png |name=2C |data= {{AttackData-CC | |||
|damage= |guard=High/Low |cancelable=Yes |chprop=- | |||
|startup= |active=- |recovery=- |frameadv=- | |||
|description = Description. | |||
}} }} | |||
====== <font style="visibility:hidden" size="0">cl.D</font> ====== | |||
{{MoveData |image=CC_C1_clD.png |name=cl.D |data= {{AttackData-CC | |||
|damage= |guard=High/Low |cancelable=Yes |chprop=- | |||
|startup= |active=- |recovery=- |frameadv=- | |||
|description = Description. | |||
}} }} | |||
====== <font style="visibility:hidden" size="0">5D</font> ====== | |||
{{MoveData |image=CC_C1_5D.png |name=5D |data= {{AttackData-CC | |||
|damage= |guard=High/Low |cancelable=No |chprop=- | |||
|startup= |active=- |recovery=- |frameadv=- | |||
|description = Description. | |||
}} }} | |||
====== <font style="visibility:hidden" size="0">2D</font> ====== | |||
{{MoveData |image=CC_C1_2D.png |name=2D |data= {{AttackData-CC | |||
|damage= |guard=Low |cancelable=No |chprop=- | |||
|startup= |active=- |recovery=- |frameadv=- | |||
|description = Description. | |||
}} }} | |||
====== <font style="visibility:hidden" size="0">j.A</font> ====== | |||
{{MoveData |image=CC_C1_jA.png |name=j.A |data= {{AttackData-CC | |||
|damage= |guard=High |cancelable=Yes |chprop=- | |||
|startup= |active=- |recovery=- |frameadv=- | |||
|description = Description. | |||
}} }} | |||
====== <font style="visibility:hidden" size="0">j.B</font> ====== | |||
{{MoveData |image=CC_C1_jB.png |name=j.B |data= {{AttackData-CC | |||
|damage= |guard=High |cancelable=Yes |chprop=- | |||
|startup= |active=- |recovery=- |frameadv=- | |||
|description = Description. | |||
}} }} | |||
====== <font style="visibility:hidden" size="0">j.C</font> ====== | |||
{{MoveData |image=CC_C1_jC.png |name=j.C |data= {{AttackData-CC | |||
|damage= |guard=High |cancelable=Yes |chprop=- | |||
|startup= |active=- |recovery=- |frameadv=- | |||
|description = Description. | |||
}} }} | |||
====== <font style="visibility:hidden" size="0">j.D</font> ====== | |||
{{MoveData |image=CC_C1_jD.png |name=j.D |data= {{AttackData-CC | |||
|damage= |guard=High |cancelable=Yes |chprop=- | |||
|startup= |active=- |recovery=- |frameadv=- | |||
|description = Description. | |||
}} }} | |||
</div></div> | |||
<div class="mw-collapsible mw-collapsed"> | |||
<div class="mw-collapsible-toggle" style="float: none;"><center><font size="4"><b>Command Moves</b></font></center></div> | |||
<div class="mw-collapsible-content"> | |||
=== <font style="visibility:hidden" size="0">Command Moves</font> === | |||
====== <font style="visibility:hidden" size="0">cl.C > 6C</font> ====== | |||
{{MoveData |image=CC_C1_clC6C.png |name=Vaulting-stakes|data= {{AttackData-CC | |||
|damage= |guard=High/Low |cancelable=Yes |chprop=- | |||
|startup= |active=- |recovery=- |frameadv=- | |||
|description = Description. | |||
}} }} | |||
====== <font style="visibility:hidden" size="0">Throw</font> ====== | |||
{{MoveData|image=CC_C1_Throw.png|name=Throw|input= 5/6AC|data= {{AttackData-CC | |||
|damage= |guard=Throw |cancelable=No |chprop= | |||
|startup=5f |active=- |recovery=- |frameadv=- | |||
|description= Normal Throw, wall sticks near the corner for combos. | |||
}} }} | |||
====== <font style="visibility:hidden" size="0">Guard Break</font> ====== | |||
{{MoveData|image=CC_C1_6CD.png|name=Guard Break|input= 6CD|data= {{AttackData-CC | |||
|damage= |guard=Guard Break |cancelable=No |chprop= | |||
|startup=- |active=- |recovery=- |frameadv=- | |||
|description= Guard Break. | |||
}} }} | |||
====== <font style="visibility:hidden" size="0">C+D</font> ====== | |||
{{MoveData|image=CC_C1_CD.png|name=Tactical Guard|input= CD|data= {{AttackData-CC | |||
|damage= |guard=High/Low |cancelable=No |chprop= | |||
|startup=- |active=- |recovery=- |frameadv=- | |||
|description= Parry | |||
}} }} | |||
= | ====== <font style="visibility:hidden" size="0">A+B</font> ====== | ||
{{MoveData|image=CC_C1_AB.png|name=Roll|input= CD|data= {{AttackData-CC | |||
|damage= |guard=High/Low |cancelable=No |chprop= | |||
|startup=- |active=- |recovery=- |frameadv=- | |||
|description= Roll | |||
}} }} | |||
</div></div> | |||
== | <div class="mw-collapsible mw-collapsed"> | ||
<div class="mw-collapsible-toggle" style="float: none;"><center><font size="4"><b>Special Moves</b></font></center></div> | |||
<div class="mw-collapsible-content"> | |||
=== <font style="visibility:hidden" size="0">Special Moves</font> === | |||
'''Celia has a special ammo gauge she has to manage in addition to super meter. There are 6 stocks in total. Stocks slowly refill over time, if Celia runs out of stocks she enters cooldown. Special moves that consume stocks of the ammo gauge cannot be used during cooldown. Cooldown lasts approximately 10 seconds. The EX versions of ammo consuming special moves do not consume ammo and can be used during cooldown.''' | |||
====== <font style="visibility:hidden" size="0">236K</font> ====== | |||
{{MoveData|image=CC_C1_236K.png|name=Mischievous Missile|input= 236K|data= {{AttackData-CC | |||
|damage= |guard=High/Low |cancelable=No |chprop= wall bounce (vs air hit) | |||
|startup=- |active=- |recovery=- |frameadv=- | |||
|description= Projectile, it starts off really low and rises up, so it's possible for it to move in under other projectiles which can be good or bad depending on the situation. It does really good damage for a fireball. D version wall sticks if it hits an airborne opponent and wall bounces if it counterhits an airborne opponent, EX version shoots 2 missiles and will give you a jump back in the air, letting you do triple jump combos. Consumes a stock. | |||
}} }} | |||
====== <font style="visibility:hidden" size="0">623P</font> ====== | |||
{{MoveData|image=CC_C1_623P.png|name=Special Move Name|input= 623P|data= {{AttackData-CC | |||
|damage= |guard=High/Low |cancelable=No |chprop=OTGable knockdown | |||
|startup=- |active=- |recovery=- |frameadv=- | |||
|description= DP, pretty okay anti-air but a bit slow and the angle isn't hard to avoid. Can be a good combo ender or air exceed starter since the heavy version builds a lot of meter. EX version recovers in the air in a sort of float state, you can't block while falling but you can steer yourself and come down with buttons which makes it a little weird to punish, but not safe. | |||
}} }} | |||
====== <font style="visibility:hidden" size="0">214P</font> ====== | |||
{{MoveData|image=CC_C1_214P.png|name=Blade Stroll|input= 214P|data= {{AttackData-CC | |||
|damage= |guard=High/Low |cancelable=No |chprop=Stagger | |||
|startup=- |active=- |recovery=- |frameadv=- | |||
|description=Rekka, do it 3 times for all hits. Has good range, meterless it's mostly a ground combo ender, the ex version can work as a midscreen combo starter. C version has better range but is slower, both meterless versions lead to an OTGable knockdown, EX version launches for an air combo on both the second and third hits. Staple combo piece if you don't take prankish whip | |||
}} }} | |||
====== <font style="visibility:hidden" size="0">j.214K</font> ====== | |||
{{MoveData|image=CC_C1_j214K.png|name=Charming Splash|input= j.214K|data= {{AttackData-CC | |||
|damage= |guard=High/Low |cancelable=No |chprop=- | |||
|startup=- |active=- |recovery=- |frameadv=- | |||
|description=Air combo ender. OTGable hard knockdown. D version has slower startup but a better hitbox. EX version gets you a better knockdown and does more damage. | |||
}} }} | |||
====== <font style="visibility:hidden" size="0">22K</font> ====== | |||
{{MoveData|image=CC_C1_22K.png|name=Prankish Bomb|input= 22K|data= {{AttackData-CC | |||
|damage= |guard=High/Low |cancelable=No |chprop=Stagger | |||
|startup=- |active=- |recovery=- |frameadv=- | |||
|description=Celia Places a bomb that blows up after a few seconds or when the opponent touches it. Good for oki and also in neutral. They don't go away even if Celia gets hit so they can combo break. B version is right at your feet, D version is a bit in front, and EX version is a robot that slowly walks to the opponent (and will correct itself). Consumes a stock. | |||
}} }} | |||
====== <font style="visibility:hidden" size="0">214K</font> ====== | |||
{{MoveData|image=CC_C1_214K.png|name=Prankish Missile|input= 214K|data= {{AttackData-CC | |||
|damage= |guard=High/Low |cancelable=No |chprop=Stagger | |||
|startup=- |active=- |recovery=- |frameadv=- | |||
|description=Hidden missiles. 3 missiles shoot up and then fall after a delay. B version falls closer, D version falls further away. Ex version tracks the opponent and all 3 missiles hit the same spot. Can be useful in combos but mostly a neutral/oki tool. | |||
}} }} | |||
</div></div> | |||
<div class="mw-collapsible mw-collapsed"> | |||
<div class="mw-collapsible-toggle" style="float: none;"><center><font size="4"><b>Extra Special Moves</b></font></center></div> | |||
<div class="mw-collapsible-content"> | |||
=== <font style="visibility:hidden" size="0">Extra Special Moves</font> === | |||
====== <font style="visibility:hidden" size="0">623K</font> ====== | |||
{{MoveData|image=CC_C1_623K.png|name=Welcome Boost|input= 623K|data= {{AttackData-CC | |||
|damage= |guard=High/Low |cancelable=No |chprop= | |||
|startup=- |active=- |recovery=- |frameadv=- | |||
|description= Celia sprouts a pair of butterfly shaped energy wings from her back and rushes forward. B version hits once and leaves the opponent standing. D version hits 3 times for a techable knockdown | |||
}} }} | |||
====== <font style="visibility:hidden" size="0">236P</font> ====== | |||
{{MoveData|image=CC_C1_236P.png|name=Prankish Whip|input= 236P|data= {{AttackData-CC | |||
|damage= |guard=High/Low |cancelable=No |chprop= | |||
|startup=- |active=- |recovery=- |frameadv=- | |||
|description= Whip that can either be pulled back with 4P or lead to a bunch more whips with 6P. Too slow to be good in neutral, but a great combo move. Use the 4P followup midscreen to get into an air combo, use the 6P followup in the corner for extra stun. | |||
}} }} | |||
</div></div> | |||
<div class="mw-collapsible mw-collapsed"> | |||
<div class="mw-collapsible-toggle" style="float: none;"><center><font size="4"><b>Ultimate Chaos Moves</b></font></center></div> | |||
<div class="mw-collapsible-content"> | |||
=== <font style="visibility:hidden" size="0">Ultimate Chaos Moves</font> === | |||
====== <font style="visibility:hidden" size="0">214214K</font> ====== | |||
{{MoveData|image=CC_C1_214214K.png|name=Dangerous Company|input= 214214K <br> (B+D to launch projectiles)|data= {{AttackData-CC | |||
|damage= |guard=High/Low |cancelable=No |chprop= | |||
|startup=- |active=- |recovery=- |frameadv=- | |||
|description=B version summons 6 chibi-celias at a fixed point, D version summons them around Celia. Too slow to be used in most combos, but activating it after a knockdown makes your following pressure and combos stronger. Chibis can be launched with either 5B+D to go straight or 2B+D to drop to the ground and go low. Active for about 10 seconds. | |||
}} }} | |||
====== <font style="visibility:hidden" size="0">236236K</font> ====== | |||
{{MoveData|image=CC_C1_236236K.png|name=Super Move Name|input= 236236K|data= {{AttackData-CC | |||
|damage= |guard=High/Low |cancelable=No |chprop= | |||
|startup=- |active=- |recovery=- |frameadv=- | |||
|description= Celia fires a whole bunch of missiles. Does good damage and can be Chaos Shifted on block/whiff. Be careful about your spacing when using this as a combo ender, there are some spacings where the opponent might get carried too high and tech out before Celia finishes. Because it covers such a huge area this super is really good if your opponent is on their last few pixels of health, or if you have a ton of meter and want to spend 2 bars to go in you can pop this and then Chaos Shift once your opponent blocks. | |||
}} }} | |||
</div></div> | |||
<div class="mw-collapsible mw-collapsed"> | |||
<div class="mw-collapsible-toggle" style="float: none;"><center><font size="4"><b>Extra Ultimate Chaos Moves</b></font></center></div> | |||
<div class="mw-collapsible-content"> | |||
=== <font style="visibility:hidden" size="0">Extra Ultimate Chaos Moves</font> === | |||
====== <font style="visibility:hidden" size="0">236236P</font> ====== | |||
{{MoveData|image=CC_C1_236236P.png|name=Vanishing Gift|input= 236236P|data= {{AttackData-CC | |||
|damage= |guard=High/Low |cancelable=No |chprop= | |||
|startup=- |active=- |recovery=- |frameadv=- | |||
|description= Celia shoves an exploading pie in the opponents face. Does alright stun and damage. C version is way slower but lets you combo after. | |||
}} }} | |||
====== <font style="visibility:hidden" size="0">2141236K</font> ====== | |||
{{MoveData|image=CC_C1_2141236K.png|name=Angelic Wing|input= 2141236K|data= {{AttackData-CC | |||
|damage= |guard=High/Low |cancelable=No |chprop= | |||
|startup=- |active=- |recovery=- |frameadv=- | |||
|description= Invincible and does decent damage, can be done in the air as well. Good for exceed combos. | |||
}} }} | |||
</div></div> | |||
<div class="mw-collapsible mw-collapsed"> | |||
<div class="mw-collapsible-toggle" style="float: none;"><center><font size="4"><b>Destruction Chaos</b></font></center></div> | |||
<div class="mw-collapsible-content"> | |||
=== <font style="visibility:hidden" size="0">Destruction Chaos</font> === | |||
====== <font style="visibility:hidden" size="0">2363214PP</font> ====== | |||
{{MoveData|image=CC_C1_2363214PP.png|name=Surprise Formation|input= 2363214P|data= {{AttackData-CC | |||
|damage= |guard=High/Low |cancelable=No |chprop= | |||
|startup=- |active=- |recovery=- |frameadv=- | |||
|description= Celia rushes forward. On hit she turns her arms into blades and spins on her head. When the opponent is knocked forward, she teleports and knocks them in the air with a giant scythe. She then proceeds to juggle her target in the air with a different array of weapons. The final blow is a beam which is shot from her dress. 13 hits. | |||
}} }} | |||
</div></div> | |||
==Combos== | |||
[https://www.youtube.com/watch?v=mo2e3pF6mCc video reference] | |||
'''2A > 2B > 2C > 214C > 214C > 214C''' | |||
Confirm into rekka, works anywhere | |||
'''2A > 2B > 2C > 214A+C > 214C > 5B > sjc > j.A > j.C > j.D > j.623C''' | |||
Confirm into ex rekka, works anywhere on screen | |||
'''2A > 2B > 2C > 214A+C > 214C > 5B > sjc > j.A > j.C > j.D > land > j.B > j.C > j.D > double jump > j.A > j.C > j.D > j.214D''' | |||
Confirm into ex rekka into rejump, requires you to be close to the corner | |||
'''2A > 2B > 2C > 236A > 4A > (5B) > cl.C > sjc > j.A > j.C > j.D > land > j.B > j.C > j.D > double jump > j.A > j.C > j.D > j.214D''' | |||
Confirm into prankish whip and rejump. You need to delay the first air series a bit to get it to work. the 5B before the cl.C is optional, it helps if the opponent is further but it makes the rejump portion a bit tighter. | |||
'''2A > 2B > cl.C > 236A > 6A > 5B > cl.C > sjc > j.A > j.C > j.D > land > j.B > j.C > j.D > double jump > j.A > j.C > j.D > j.214D''' | |||
Prankish whip corner combo. | |||
'''2A > 2B > cl.C > 6C > 236B > 2D > [9] > j.B > j.C > j.D > double jump > j.A > j.C > j.D > j.236B+D > j.B > Tripple jump > j.A > j.C > j.D > j.214D''' | |||
Corner combo utilizing cl.C > 6C and ex missiles for an extra jump. Requires you to be pretty close to the opponent. | |||
'''Throw > 2C > sjc > j.A > j.C > j.D > land > jump > j.B > j.C > j.D > j.214D''' | |||
Throw combo, corner only. | |||
'''2A > 2B > cl.C > 6C > 236B > 2D > [9] > j.B > j.C > j.D > double jump > j.A > j.C > j.D > B+D > 623C > 236236D > A+B > 623C > 236236D > A+B > 623C > 236236D''' | |||
Corner exceed using no extra moves, you can start it out using prankish whip as well. | |||
'''2A > 2B > cl.C > 6C > 236B > 2D > [9] > j.B > j.C > j.D > double jump > j.A > j.C > j.D > B+D > j.C > 214D > 2141236D(9) > A+B > 214D > 2141236D(9) > 214D > 2141236D''' | |||
Corner exceed using angelic wing. Can be started off of prankish whip as well. | |||
'''2A > 2B > 2C > 236A > 4A > (5B) > cl.C > sjc > j.A > j.C > j.D > B+C > 9 > j.C > j.D > 214D > 2141236D(9) > A+B > 214D > 2141236D(9) > A+B > 214D > 2141236D''' | |||
''' | |||
A | |||
Midscreen exceed using prankish whip. you can do this with a rejump as well, but it becomes much less stable. | |||
== Colors == | == Colors == | ||
Revision as of 00:26, 22 November 2020
Story
Celia is a robot built to protect the Chaos Code, but she decided that was lame and so instead she's just really into gothic lolita fashion. Respecting Celia's independence, the professor who created her made a different robot to guard the Chaos Code instead. But then things go wrong and Celia must put her average ordinary gothic lolita school girl life on pause to rescue the Chaos Code and ensure it's limitless power isn't used for evil.
Playstyle
Health: 28000 Stun: 95
Celia is a fairly well rounded character with solid zoning, setplay, anti-airs, etc. She has notably good meterless damage and her special run can lead to strong mix-up opportunities. Many of her tools have a significant delay before becoming active, which lets them act as an insurance policy of sorts. Opponents who aren't careful will end up hitting Celia, only to fall into a missile or a bomb. At the same time these moves are limited via a missile gauge that can lock Celia out of most of her options.
Mobility (Run vs Step)
Run: Celia has a special hover dash instead of a normal run. This puts her airborne quickly allowing her to come down with fast jump attacks for a stronger high/low mix-up game.
Step: Because of the special run, Celia's step functions less like a typical chaos code step, and more like most character's runs. She can cancel her step early with any button (or crouching), cannot step cancel, and can super jump out of her step by pressing up.
Extra Move Selection
Prankish Whip gives Celia really good meterless combos, Welcome Boost gives Celia a really obnoxious neutral tool that she can make even more obnoxious via her various missiles, Angelic Wing gives Celia good Exceed routes, and Vanishing Gift gives Celia some good 2 bar combos.
Recommended Sets
Prankish Whip is incredibly good and you should probably take it. Outside of that take whichever super you want to use primarily, or take welcome boost if you want to spend your meter on dangerous company/bashing rain.
Prankish Whip & Angelic Wing
This is probably the easiest set to use, it gives Celia good, consistent meterless combos via prankish whip and it gives her a good, consistent, exceed route to spend all that meter she saves on.
Prankish Whip & Welcome Boost
Use this set if you like Dangerous Company.
Move List
Click on a header to expand that section of the movelist
Normal Moves
5A
5A
|
|---|
2A
2A
|
|---|
cl.B
cl.B
|
|---|
5B
5B
|
|---|
2B
2B
|
|---|
cl.C
cl.C
|
|---|
5C
5C
|
|---|
2C
2C
|
|---|
cl.D
cl.D
|
|---|
5D
5D
|
|---|
2D
2D
|
|---|
j.A
j.A
|
|---|
j.B
j.B
|
|---|
j.C
j.C
|
|---|
j.D
j.D
|
|---|
Command Moves
cl.C > 6C
Vaulting-stakes
|
|---|
Throw
Throw
5/6AC |
|---|
Guard Break
Guard Break
6CD |
|---|
C+D
Tactical Guard
CD |
|---|
A+B
Roll
CD |
|---|
Special Moves
Celia has a special ammo gauge she has to manage in addition to super meter. There are 6 stocks in total. Stocks slowly refill over time, if Celia runs out of stocks she enters cooldown. Special moves that consume stocks of the ammo gauge cannot be used during cooldown. Cooldown lasts approximately 10 seconds. The EX versions of ammo consuming special moves do not consume ammo and can be used during cooldown.
236K
Mischievous Missile
236K |
|---|
623P
Special Move Name
623P |
|---|
214P
Blade Stroll
214P |
|---|
j.214K
Charming Splash
j.214K |
|---|
22K
Prankish Bomb
22K |
|---|
214K
Prankish Missile
214K |
|---|
Extra Ultimate Chaos Moves
236236P
Vanishing Gift
236236P |
|---|
2141236K
Angelic Wing
2141236K |
|---|
Combos
2A > 2B > 2C > 214C > 214C > 214C
Confirm into rekka, works anywhere
2A > 2B > 2C > 214A+C > 214C > 5B > sjc > j.A > j.C > j.D > j.623C
Confirm into ex rekka, works anywhere on screen
2A > 2B > 2C > 214A+C > 214C > 5B > sjc > j.A > j.C > j.D > land > j.B > j.C > j.D > double jump > j.A > j.C > j.D > j.214D
Confirm into ex rekka into rejump, requires you to be close to the corner
2A > 2B > 2C > 236A > 4A > (5B) > cl.C > sjc > j.A > j.C > j.D > land > j.B > j.C > j.D > double jump > j.A > j.C > j.D > j.214D
Confirm into prankish whip and rejump. You need to delay the first air series a bit to get it to work. the 5B before the cl.C is optional, it helps if the opponent is further but it makes the rejump portion a bit tighter.
2A > 2B > cl.C > 236A > 6A > 5B > cl.C > sjc > j.A > j.C > j.D > land > j.B > j.C > j.D > double jump > j.A > j.C > j.D > j.214D
Prankish whip corner combo.
2A > 2B > cl.C > 6C > 236B > 2D > [9] > j.B > j.C > j.D > double jump > j.A > j.C > j.D > j.236B+D > j.B > Tripple jump > j.A > j.C > j.D > j.214D
Corner combo utilizing cl.C > 6C and ex missiles for an extra jump. Requires you to be pretty close to the opponent.
Throw > 2C > sjc > j.A > j.C > j.D > land > jump > j.B > j.C > j.D > j.214D
Throw combo, corner only.
2A > 2B > cl.C > 6C > 236B > 2D > [9] > j.B > j.C > j.D > double jump > j.A > j.C > j.D > B+D > 623C > 236236D > A+B > 623C > 236236D > A+B > 623C > 236236D
Corner exceed using no extra moves, you can start it out using prankish whip as well.
2A > 2B > cl.C > 6C > 236B > 2D > [9] > j.B > j.C > j.D > double jump > j.A > j.C > j.D > B+D > j.C > 214D > 2141236D(9) > A+B > 214D > 2141236D(9) > 214D > 2141236D
Corner exceed using angelic wing. Can be started off of prankish whip as well.
2A > 2B > 2C > 236A > 4A > (5B) > cl.C > sjc > j.A > j.C > j.D > B+C > 9 > j.C > j.D > 214D > 2141236D(9) > A+B > 214D > 2141236D(9) > A+B > 214D > 2141236D
Midscreen exceed using prankish whip. you can do this with a rejump as well, but it becomes much less stable.
Colors
- Console Versions: You can hold R1 button while selecting a character to get an alternative color.
- Arcade Version: You can hold START button while selecting a character to get an alternative color.


