|
|
| Line 1,093: |
Line 1,093: |
| }} | | }} |
|
| |
|
|
| |
| <!-----------------------------------------------------------------------------Section Divider----------------------------------------------------------------------------->
| |
|
| |
| ==<big>'''Strategy & Matchups'''</big>==
| |
| (click to expand)
| |
| <!--NOTE: "Important Punishes" refers to situations like punishing your opponent's -4 move with a 4f reversal, ranged punishes on moves with lots of pushback, or punishing a low-recovery airborne move (Thorsten 28K) with a juggle combo. Moves that are super unsafe with obvious punishes (like Drunk Jackie's super) don't need to be listed. Punishes are listed for the OPPONENT'S attacks; punishes for THIS character's moves should be listed on the other character pages-->
| |
|
| |
| <div style="float: none;"><center><font size="4"><b>General Strategy</b></font></center></div>
| |
|
| |
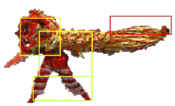
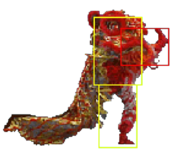
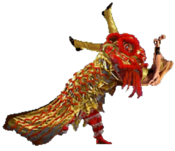
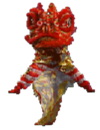
| M. Lion generally runs a hit-and-run gameplan, switching between zoning with 236P (Lion Bomb), harassing with 2HK slide as a poke, and dash into light normals mixed with throws. Any bomb hit can generally be converted into 646P (Lion Crusher) for good damage and an excellent post-juggle mixup. Lion frequently leaves the opponent in a back-turned state with his throw and side switch Lion Crusher, which prevents backdashing out of his resets.
| |
|
| |
| A cornerstone of Lion's gameplan is light normals cancelled into 236LP bomb. This is technically risky as the opponent can dash up throw as a read, but Lion gets great chip damage and continued pressure afterward on block, or a full combo on hit. Mix between bomb cancels, chains into 6HK, and dashing into more light normals/throws to keep the opponent guessing.
| |
|
| |
| 646LP (Lion Crusher) is your main combo ender, and should always be mashed to get a juggle afterward. 646HP is great at randomly hitting the opponent from half screen, and hard for many characters to punish on block due to its enormous pushback. To use this move effectively, try to keep the opponent midscreen; if they back themselves into the corner, this move becomes nearly useless as it is very punishable without the pushback. Both strengths of Lion Crusher are excellent punish tools, and can punish moves that are normally considered safe due to pushback. The LP version should be used for punishes unless it is too far away to get the followup hits.
| |
|
| |
| M. Lion's teleports move him to a fixed position relative to the opponent depending on which button is pressed, rather than maintaining a specific distance apart. This makes them worse than Thorsten's teleports for running away, but they still have very little recovery after the invincibility wears off. It might be worth using to escape the corner even if you get hit, depending on the opponent's strength.
| |
|
| |
| <div style="float: none;"><center><font size="4"><b>Anti-Airs</b></font></center></div>
| |
| M. Lion is one of the most awkward characters to anti-air with. He doesn't have a single button that is always his preferred option. Close 5HP hits above and slightly behind him, making it okay against crossups, but the hitbox is mediocre. Far 5HP has a great hitbox, but it doesn't extend very far forward for a far normal and it's quite slow. Far 5HK has a great hitbox against far range jumpins, but will lose clean to any deep jump. 6HP has a disjointed hitbox that works well for far range jumps.
| |
|
| |
| 2HP is probably your best bet most of the time. The hitbox priority isn't great, but even on trade Lion can dash up for a juggle afterward. 2LP also has an unusually low hurtbox that can work if the opponent hits an early air normal, but it's not reliable enough to use consistently.
| |
|
| |
| <!--------------------------------Mini-Divider----------------------------------------->
| |
|
| |
| <div class="mw-collapsible mw-collapsed">
| |
| <div class="mw-collapsible-toggle" style="float: none;"><center><font size="4"><b>Lau Matchup</b></font></center></div>
| |
| <div class="mw-collapsible-content">
| |
|
| |
| {| class="wikitable"
| |
| |-
| |
| | <center>'''Lau'''</center>[[File:JCFoF Lau icon.png|link=Jackie Chan in Fists of Fire/Lau]] ||
| |
| <big>'''Important punishes'''</big><br>
| |
| '''2HK:''' 2HK slide (only from max range, or you will be punishable)<br>
| |
| -646HP can punish, but may be unsafe depending on screen position<br>
| |
| -Dash up 5LP xx 646LP (mash) if poorly spaced (not very likely)
| |
|
| |
| '''236LK (LK Dragon Kick):''' Throw (if done at close range)<br>
| |
| -Lion's throw range is above average, so can punish from farther<br>
| |
| -Crouch throw can do more damage, but the backturn situation from normal throw is better if you are near a corner<br>
| |
| -Note: it can be difficult to punish properly, and Lau can use DP or Super to beat a failed punish. May be safer to backdash after blocking.<br>
| |
|
| |
| '''236HK (HK Dragon Kick):''' Full combo punish<br>
| |
| -If you can survive the chip, stand block to make the spacing easier (otherwise he can fly over your head)<br>
| |
|
| |
| '''623P (Rising Dragon):''' Full combo punish<br>
| |
| -Be aware that 623LP can whiff quickly and be hard to punish from farther ranges<br>
| |
|
| |
| '''Super (close range):''' block, then dash up into BnB combo<br>
| |
| -Note: if Super is done raw, Lion can HK Teleport behind Lau to avoid chip damage<br>
| |
|
| |
| '''Super (short-mid range):''' 2HK or 646HP can punish from surprisingly far<br>
| |
| -646HP usually won't knock down; don't use if it will corner yourself<br>
| |
|
| |
| '''Super (~Lau 2HK range):''' jump forward HK combo (can j.HK > j.HP at a specific range, but hard to judge this spacing)<br>
| |
| -From slightly beyond 2HK range, use j.HP into immediate 646LP instead<br>
| |
| -Be careful of range, as Lion has a lot of prejump frames and will get hit if too close to Lau<br>
| |
| -Note: at far range 2HK xx Super, Lion can HK Teleport behind Lau during the gap to avoid chip damage<br>
| |
|
| |
| <br>
| |
| <big>'''Juggle Enders'''</big> -- Note that some juggle options can be more limited if started from far away<br>
| |
| '''Mash 646LP:''' dash 2LK > cl 5HK (consistent); dash 2LK > cl 5HP > cl 5HK (only works if 2LK hits at earliest or latest possible timing)<br>
| |
| '''Mash 646HP (corner):''' microdash 5LK > cl 5HP > cl 5HK<br>
| |
| '''Stand/Crouch Throw (corner):''' 2LK > 2LP > cl 5HK<br>
| |
| '''Crouch Throw (midscreen):''' dash 2HK<br>
| |
|
| |
| <br>
| |
| <big>'''TOD Combos'''</big><br>
| |
| 1) 2LK > 2LP x2 > 5LP xx mash 646HP, dash 5LK > cl 5HP > cl 5HK (stun)<br>-Corner Only<br>
| |
| 2) 236LP Bomb (5 hits), dash 2LK > 5LP xx mash 646LP, dash 2LK > 5LP > cl 5HK<br>
| |
| 3) 236LP Bomb (5 hits), mash 646HP, dash 5LK > cl 5HK (stun)<br>-Corner Only<br>
| |
| 4) 6HK, 2LK > 5LP xx mash 646HP, dash 5LK > cl 5HP > cl 5HK (stun)<br>-Corner + crouching only, overhead must hit close enough to connect 2 lights afterward<br>
| |
| '''Easy Post-Stun Combo:''' j.HK > j.HP, land, mash 646LP (juggle 2HK if necessary)<br>
| |
|
| |
| <br>
| |
| <big>'''Wakeup Attacks'''</big><br>
| |
| Both wakeup attacks can be baited with a backdash, then whiff punished.<br>
| |
|
| |
| vs. '''Wakeup LK:''' the first hit must be stand blocked<br>
| |
| -There is a 4f gap between the 2 hits that can be interrupted with mashed 646P or Throw.<br>
| |
| -It is -7 on block, so reversal 646P is a consistent punish against it.<br>
| |
|
| |
| vs. '''Wakeup HK:''' despite the sweep animation, this does not hit low. The 2 hits are a true blockstring, and are safe at -2 on block.<br>
| |
| -Recovers crouching, which doesn't have a major effect on Lion's most common combo routes; 646P may take slightly longer to reach than usual.<br>
| |
|
| |
| <br>
| |
| <big>'''Strategy'''</big><br>
| |
| Lau counters some of Lion's biggest strengths. For one, Lion's excellent punish game with 646P (Lion Crusher) doesn't affect Lau very much, as 236HP pushes back too far. Lion is also vulnerable to Lau's 236HK if he throws out Lion Bomb in neutral or in blockstrings, as the forward movement will keep Lau out of the blast radius. Lion has to use the bombs from a farther range, which lets Lau sit back and build meter safely. To fight Lau effectively, Lion has to play a bit more offensively, using his great throw range to threaten Lau.
| |
|
| |
| |}
| |
|
| |
| </div>
| |
| </div>
| |
| <!--------------------------------Mini-Divider----------------------------------------->
| |
|
| |
| <div class="mw-collapsible mw-collapsed">
| |
| <div class="mw-collapsible-toggle" style="float: none;"><center><font size="4"><b>Yeung Matchup</b></font></center></div>
| |
| <div class="mw-collapsible-content">
| |
|
| |
| {| class="wikitable"
| |
| |-
| |
| | <center>'''Yeung'''</center>[[File:JCFoF Yeung icon.png|link=Jackie Chan in Fists of Fire/Yeung]] ||
| |
| <big>'''Important punishes'''</big><br>
| |
| '''2HK:''' 2HK can punish at any range, but on a close range punish, Lion will be unsafe himself<br>
| |
| -From close ranges, 5LP xx 646LP can punish; reversal 646LP is generally unreliable<br>
| |
|
| |
| '''6HK:''' Stand or Crouch Throw can punish on hit or block<br>
| |
| -On block, reversal 646LP (mashed) is an easier punish to time<br>
| |
| -Note that the corner OTG infinite appears to be harder on backturned knockdowns (like Stand Throw), so take this into consideration<br>
| |
|
| |
| '''63214P (Crane Wings):''' If cancelled into from 2LP, the LP version can be punished with 2HK on block<br>
| |
| -LP version is totally safe from longer range<br>
| |
| -HP version can be punished on hit or block by 646HP, except at the tip of its range<br>
| |
| -Microdash into 646HP can often punish in this scenario, but is hard to judge the spacing<br>
| |
|
| |
| '''41236K (Swallow Kick):''' Dash up and punish with a full knockdown combo<br>
| |
|
| |
| '''Super:''' Duck under the first hit, then stuff the approach with 5LK xx 646LP to start the infinite<br>
| |
| -From longer distances, 6HP, far 5HK, or even 236LP can stuff the followup attack<br>
| |
| -If the dash-in portion is blocked, Yeung is safe<br>
| |
|
| |
| <br>
| |
| <big>'''Juggle Enders'''</big> -- Note that some juggle options can be more limited if started from far away<br>
| |
| '''Mash 646LP:''' dash 2LK > cl 5HP > cl 5HK<br>
| |
| '''Mash 646HP (corner):''' dash out of corner, 2LK > cl 5HP > cl 5HK<br>
| |
| '''Stand/Crouch Throw (corner):''' 5LK > cl 5HP > cl 5HK<br>
| |
| '''Stand/Crouch Throw (midscreen):''' dash 2HK<br>
| |
| NOTE: It may be preferable to let Yeung get knocked down, then go for an OTG relaunch or infinite.<br>
| |
|
| |
| <br>
| |
| <big>'''TOD Combos'''</big><br>
| |
| 1) 2LK > 2LP x2 > 5LP xx mash 646HP, dash out of corner, 2LK > cl 5HP > cl 5HK (stun)<br>-Corner Only<br>
| |
| 2) 236LP Bomb (5 hits), dash 2LK > 5LP xx mash 646LP, dash 2LK > cl 5HK > far 5HP (stun)<br>
| |
| 3) 236LP Bomb (5 hits), mash 646HP, dash out of corner, 2LK > cl 5HK (stun)<br>-Corner Only<br>
| |
| 4) 6HK, 2LK > 5LP xx mash 646HP, 2LK > cl 5HP > cl 5HK (stun)<br>-Corner + crouching only, overhead must hit close enough to connect 2 lights afterward<br>
| |
| '''Easy Post-Stun Combo:''' j.HK > j.HP, land, mash 646LP (juggle 2HK if necessary)<br>
| |
|
| |
| <br>
| |
| <big>'''Yeung OTG Infinite'''</big><br>
| |
| 5LK, link 646LP (mash), dash out of corner and repeat<br>
| |
| -Possible to start this midscreen, but much easier in the corner<br>
| |
| -Somewhat difficult to execute; don't cancel the LK into 646LP<br>
| |
| -In general, the point is to run the clock out because this won't do enough damage to kill<br><br>
| |
| '''Alternative OTGs''' (non-infinite):<br>
| |
| 1) 5LK, dash 5LK > cl 5HP > cl 5HK (strong damage + reset)<br>
| |
| 2) 2HK, 2LK xx 236HP (sends Yeung fullscreen into blocked bomb)<br>
| |
|
| |
| <br>
| |
| <big>'''Wakeup Attacks'''</big><br>
| |
| Both wakeup attacks can be baited with a backdash, then whiff punished. Wakeup LK has much faster recovery but also moves forward for an easier punish.<br>
| |
|
| |
| vs. '''Wakeup LK:''' must be stand blocked<br>
| |
| -From very close range, Wakeup LK will whiff over a crouching opponent; crouch blocking can potentially work against both wakeup options<br>
| |
| -0 on block at worst, and potentially advantageous from farther ranges<br>
| |
| -Mashing 2LP on Yeung's wakeup will stuff Wakeup LK, but loses to Wakeup HK<br>
| |
| -Yeung can pick up juggles from this anywhere, so it is best to assume she will use Wakeup LK instead of HK<br>
| |
|
| |
| vs. '''Wakeup HK:''' must be blocked low<br>
| |
| -Punishable at -7 on block; 2HK will always reach for a punish, but 646P will whiff from longer ranges<br>
| |
| -Yeung recovers crouching, but this only matters if you try to dash up for a cl 5HK whiff punish starter.<br>
| |
|
| |
| <br>
| |
| <big>'''Strategy'''</big><br>
| |
| _
| |
|
| |
| |}
| |
|
| |
| </div>
| |
| </div>
| |
| <!--------------------------------Mini-Divider----------------------------------------->
| |
|
| |
| <div class="mw-collapsible mw-collapsed">
| |
| <div class="mw-collapsible-toggle" style="float: none;"><center><font size="4"><b>Thorsten Matchup</b></font></center></div>
| |
| <div class="mw-collapsible-content">
| |
|
| |
| {| class="wikitable"
| |
| |-
| |
| | <center>'''Thorsten'''</center>[[File:JCFoF Thorsten icon.png|link=Jackie Chan in Fists of Fire/Thorsten]] ||
| |
| <big>'''Important punishes'''</big><br>
| |
| '''46LK (LK Jackknife Storm):''' Throw is generally the best punish if near the corner, as it leads to backturned corner resets<br>
| |
| -Reversal 646LP is an easy punish that gives more corner carry if starting midscreen<br>
| |
| -For a damage increase, you can also plink 2LK~2LP to make the punish window 2f, then chain into 5LP xx 646LP<br>
| |
|
| |
| '''46HK (HK Jackknife Storm):''' Punish with a full combo<br>
| |
| -cl 5HK > 2HP xx 646LP will connect for a very strong punish (recommend stand blocking to ensure Thorsten stays in range)<br>
| |
| -Crouch blocking can make 46HK fly over your head at some ranges, making punishes difficult or impossible<br>
| |
|
| |
| '''28K (Gatling Kick):''' Punish with a 5LK or Throw combo<br>
| |
| -Only has 3f of landing recovery, making the punish much harder; 2LK will hit Thorsten out of the air, but 5LK will only connect grounded<br>
| |
| -Because of this landing recovery, punishing with a cl 5HK starter is also not recommended<br>
| |
|
| |
| '''16P (Slash Sword):''' Dash up into 2LK combo<br>
| |
| -On a ranged meaty connect (where the explosion hits, but his hand doesn't hit you on the way down), it becomes difficult or impossible to punish<br>
| |
|
| |
| '''Teleport:''' Dash into 2HK is the most reliable punish; usually hits meaty, making it much safer than usual<br>
| |
| -646HP can work, but can potentially be unsafe even on hit depending on the ranges involved<br>
| |
|
| |
| '''Super:''' Dash up into a full combo<br>
| |
| -cl 5HK > 2HP starter is possible, but can be difficult to time; easier if you stand block first, which leaves Thorsten closer<br>
| |
| -HP Teleport (63214HP) can avoid chip damage, and possibly allow a punish afterward depending on screen position<br>
| |
|
| |
| <br>
| |
| <big>'''Juggle Enders'''</big> -- Note that some juggle options can be more limited if started from far away<br>
| |
| '''Mash 646LP:''' dash 2LK > cl 5HP > cl 5HK -- Timing can be strict against Thorsten<br>
| |
| '''Mash 646HP (corner):''' 2LK > cl 5HP > cl 5HK<br>
| |
| '''Stand/Crouch Throw (corner):''' 2LK > 2LP > cl 5HK<br>
| |
|
| |
| <br>
| |
| <big>'''TOD Combos'''</big><br>
| |
| 1) 236LP Bomb (5 hits), dash cl 5HK > 2HP (1 hit) xx mash 646LP, dash 2LK > cl 5HK > far 5HP<br>-Extremely difficult, requires very tight spacing and 1f timing on cl 5HK<br>
| |
| 2) 236LP Bomb (5 hits), dash 5LP xx mash 646HP, microdash 2LK > cl 5HK (stun)<br>-Corner Only<br>
| |
| 3) 6HK, 2LK > 2LP > 5LP xx mash 646HP, 1f microdash 5LK > cl 5HP > cl 5HK (stun)<br>-Corner + crouching only, overhead must hit close enough to connect 3 lights afterward<br>
| |
| '''Easy Post-Stun Combo:''' j.HK > j.HP, land, mash 646LP (juggle 2HK if necessary)<br>
| |
|
| |
| <br>
| |
| <big>'''Wakeup Attacks'''</big><br>
| |
| _<br>
| |
|
| |
| <big>'''Strategy'''</big><br>
| |
| _
| |
|
| |
| |}
| |
|
| |
| </div>
| |
| </div>
| |
| <!--------------------------------Mini-Divider----------------------------------------->
| |
|
| |
| <div class="mw-collapsible mw-collapsed">
| |
| <div class="mw-collapsible-toggle" style="float: none;"><center><font size="4"><b>Drunk Jackie Matchup</b></font></center></div>
| |
| <div class="mw-collapsible-content">
| |
|
| |
| {| class="wikitable"
| |
| |-
| |
| | <center>'''Drunk Jackie'''</center>[[File:JCFoF Drunk icon.png|link=Jackie Chan in Fists of Fire/Drunken Fist Jackie]] ||
| |
| <big>'''Important punishes'''</big><br>
| |
| '''Far 5HK:''' Throw or 646LP to punish, unless it was well spaced<br>
| |
| -2LK and far 5HK are good at stuffing an approaching far 5HK (careful with 5HK, as it has a lot of recovery)<br>
| |
| -646HP can also be good if you aren't sure that the far 5HK was unsafe, as long as there is a lot of room behind Drunk Jackie (since he has trouble chasing down for a punish)<br>
| |
|
| |
| '''Light Normal > 6HK Chain:''' No counter to this on hit or block<br>
| |
| -Super or Teleport can go through it with invincibility, but both are easily punished afterward<br>
| |
|
| |
| '''236P (Jug Throw):''' Lion can dash through the jug fairly well, allowing a throw or 2LK combo<br>
| |
| -2HK slide can hit while avoiding the jug if close enough; Drunk Jackie's punishes on this are usually weak, so it's worth considering<br>
| |
| -Staying out of range and clashing with your Lion Bombs can eliminate the threat, but generally leads to a stalemate until someone picks a different option<br>
| |
| -Do not attempt to 646P through the jug, as this almost never works<br>
| |
|
| |
| '''Blockstring into 236P Jug Throw:''' 646HP can punish and avoid the jug, but don't use if Jackie's back is near the corner<br>
| |
| -2HK also avoids the jug, and won't generally be punished very hard unless done from very close range <br>
| |
|
| |
| '''63214P (Drunk Dragon):''' 646LP (mash) is a consistent punish on hit or block<br>
| |
| -Dash up into a combo is possible, but doesn't add that much damage and is harder to time<br>
| |
|
| |
| '''236K (Tricky Kick):''' Full combo punish<br>
| |
| -cl 5HK > 2HP works unless it was a very close range HK Tricky Kick (can still work with a quick dash beforehand)<br>
| |
|
| |
| '''28P (JackieCopter):''' Full combo punish<br>
| |
| -Be sure to wait until he fully lands<br>
| |
|
| |
| '''Super:''' Full combo punish<br>
| |
| -It is possible to time a 236LP Bomb right as he lands, allowing for a stun combo; use when Drunk begins to fall to the ground to hit his landing recovery<br>
| |
| -Only has 10 landing recovery frames, so be ready with the proper timing<br>
| |
| -Note: The proximity guard of Super can prevent you from walking to position yourself for a punish; dash away from Jackie, then walk/dash forward as he descends<br>
| |
|
| |
| <br>
| |
| <big>'''Juggle Enders'''</big> -- Note that some juggle options can be more limited if started from far away<br>
| |
| '''Mash 646LP:''' dash 2LK > cl 5HK<br>
| |
| '''Mash 646HP (corner):''' dash 5LK > cl 5HK<br>
| |
| '''Stand/Crouch Throw (corner):''' 2LP > cl 5HK (time the 2LP early -- 2LK also works, but must be timed very late as Drunk bounces)<br>
| |
| '''Stand Throw (midscreen):''' dash 2HK<br>
| |
|
| |
| <br>
| |
| <big>'''TOD Combos'''</big><br>
| |
| 1) 236LP Bomb (5 hits), dash 2LK > 5LP xx mash 646LP, dash 2LK > 5LP > cl 5HK<br>
| |
| 2) 236LP Bomb (5 hits), dash 5LP xx mash 646HP, dash 5LK > far 5HP (stun)<br>-Corner Only<br>
| |
| '''Easy Post-Stun Combo:''' j.HK > j.HP, land, mash 646LP (juggle 2HK if necessary)<br>
| |
|
| |
| <br>
| |
| <big>'''Wakeup Attacks'''</big><br>
| |
| _<br>
| |
|
| |
| <br>
| |
| <big>'''Strategy'''</big><br>
| |
| M. Lion does surprisingly well against Drunk Jackie, who is normally known for his advantage versus the rest of the top tiers. Bomb pressure, if spaced well, is stronger than usual because Drunk's forward dash has shorter total distance than most dashes (despite being the fastest dash overall). This means he will either have to force a closer range to get past bombs, or stay at a longer range to avoid them completely. As M. Lion, you want to force a range where his far 5HK either whiffs or connects too close, making it punishable by throw or LP Lion Crusher.
| |
|
| |
| Drunk Jackie has a harder time than most characters punishing HP Lion Crusher, so throw this out randomly unless he is backdashing at fullscreen or near his own corner. If he is staying at this long range, HP Bomb can threaten him while he is too far for his own ranged options.
| |
|
| |
| Drunk Jackie is generally weak at punishing lows, so slide can be more useful (plus it might go past a jug). He can technically punish this with far 5HP > 5HK, but this is a knowledge check that many players will fail and it can be hard to know what Drunk Jackie's frame advantage will be after the 5HK connects. If he tries starting the punish with something else like a far 5LK, the 5HP will no longer work because Lion's hurtbox is no longer extended upward.
| |
|
| |
| Corner throw loops are incredibly powerful against Drunk, as he has no fast invincible or airborne moves to counter it. As long as you time and space the dash + throw so that his reversal throw won't work, it is virtually inescapable without Super. And if his Super is available, a meaty 2LK after the air reset will beat it clean and lead to a 646HP stun combo.
| |
|
| |
| |}
| |
|
| |
| </div>
| |
| </div>
| |
| <!--------------------------------Mini-Divider----------------------------------------->
| |
|
| |
| <div class="mw-collapsible mw-collapsed">
| |
| <div class="mw-collapsible-toggle" style="float: none;"><center><font size="4"><b>Dragonball Jackie Matchup</b></font></center></div>
| |
| <div class="mw-collapsible-content">
| |
|
| |
| {| class="wikitable"
| |
| |-
| |
| | <center>'''Dragonball Jackie'''</center>[[File:JCFoF Spiritual icon.png|link=Jackie Chan in Fists of Fire/Spiritual Kung-Fu Jackie]] ||
| |
| <big>'''Important punishes'''</big><br>
| |
| '''6HP:''' 2HK can punish, even if blocking the 2nd hit<br>
| |
| -If ducking under the 2nd hit, 2LP xx 646LP can often whiff punish<br>
| |
|
| |
| '''236HK (HK Crush Kick):''' 646LP (mash) will punish unless spaced perfectly<br>
| |
|
| |
| '''41236P (Tiger Fist):''' 646LP (mash) will easily punish<br>
| |
|
| |
| '''Super:''' Same as Tiger Fist<br>
| |
| -If used from a distance, Lion can stuff the approaching super with most normals (5LP, 5LK, 2LP, 2LK, far 5HK, 2HK, 6HP)<br>
| |
| -From close range, doing this with 5HK/2HK will trade, generally in Lion's favor<br>
| |
|
| |
| <br>
| |
| <big>'''Juggle Enders'''</big> -- Note that some juggle options can be more limited if started from far away<br>
| |
| '''Mash 646LP:''' dash 2LK > cl 5HP > cl 5HK<br>
| |
| '''Mash 646HP (corner):''' 2LK > cl 5HP > cl 5HK<br>
| |
| '''Stand/Crouch Throw (corner):''' 2LK > cl 5HP > cl 5HK<br>
| |
| '''Stand Throw (midscreen):''' dash 2HK<br>
| |
|
| |
| <br>
| |
| <big>'''TOD Combos'''</big><br>
| |
| 1) 2LK > 2LP x2 > 5LP xx mash 646HP, 2LK > cl 5HP > cl 5HK (stun)<br>-Corner Only<br>
| |
| 2) 236LP Bomb (5 hits), dash 2LK > 5LP xx mash 646LP, dash 2LK > cl 5HK > far 5HP (stun)<br>
| |
| 3) 236LP Bomb (5 hits), mash 646HP, 2LK > cl 5HK (stun)<br>-Corner Only<br>
| |
| 4) 6HK, 2LK > 5LP xx mash 646HP, 2LK > cl 5HP > cl 5HK (stun)<br>-Corner + crouching only, overhead must hit close enough to connect 2 lights afterward<br>
| |
| '''Easy Post-Stun Combo:''' j.HK > j.HP, land, mash 646LP (juggle 2HK if necessary)<br>
| |
|
| |
| <br>
| |
| <big>'''Wakeup Attacks'''</big><br>
| |
| _<br>
| |
|
| |
| <br>
| |
| <big>'''Strategy'''</big><br>
| |
| _
| |
|
| |
| |}
| |
|
| |
| </div>
| |
| </div>
| |
| <!--------------------------------Mini-Divider----------------------------------------->
| |
|
| |
| <div class="mw-collapsible mw-collapsed">
| |
| <div class="mw-collapsible-toggle" style="float: none;"><center><font size="4"><b>Admiral Jackie Matchup</b></font></center></div>
| |
| <div class="mw-collapsible-content">
| |
|
| |
| {| class="wikitable"
| |
| |-
| |
| | <center>'''Admiral Jackie'''</center>[[File:JCFoF Admiral icon.png|link=Jackie Chan in Fists of Fire/Admiral Jackie]] ||
| |
| <big>'''Important punishes'''</big><br>
| |
| '''2HK:''' 2HK slide can punish at any range<br>
| |
| -646LP can punish from closer ranges (will only get 1 hit near max range); useful because 2HK can be unsafe on hit from close<br>
| |
|
| |
| '''41236P (Dragon Palm):''' Dash into a full combo<br>
| |
| -Reversal 646LP will work, but miss most of its hits; try to at least do dash 5LP xx 646LP for an easy, higher damage punish<br>
| |
|
| |
| '''623K (Double Dutch):''' Full combo punish<br>
| |
| -cl 5HK > 2HP is possible if Admiral recovers point blank<br>
| |
|
| |
| '''Super:''' Microdash 646LP (mashed); input as 6, 4, 66, then hit LP after dashing a few frames<br>
| |
| -With no microdash, reversal LP Lion Crusher won't get the knockdown and can be unsafe<br>
| |
| -Can also dash 5-7f into 5LP, which combos into 646LP knockdown<br>
| |
| -2HK, 6HP, or 646HP can punish more easily, but are significantly less effective and can be unsafe even on hit<br>
| |
|
| |
| <br>
| |
| <big>'''Juggle Enders'''</big> -- Note that some juggle options can be more limited if started from far away<br>
| |
| '''Mash 646LP:''' dash 2LK > cl 5HP > cl 5HK<br>
| |
| '''Mash 646HP (corner):''' dash 5LK > cl 5HP > cl 5HK<br>
| |
| '''Stand/Crouch Throw (corner):''' 5LK > cl 5HK > far 5HP -- may need to dash slightly out of corner due to turnaround bug<br>
| |
| '''Stand/Crouch Throw (midscreen):''' dash 2HK<br>
| |
|
| |
| <br>
| |
| <big>'''TOD Combos'''</big><br>
| |
| 1) 2LK > 2LP x2 > 5LP xx mash 646HP, dash 5LK > cl 5HP > cl 5HK (stun)<br>-Corner Only<br>
| |
| 2) 236LP Bomb (5 hits), dash 2LK > 5LP xx mash 646LP, dash 2LK > cl 5HK > far 5HP (stun)<br>
| |
| 3) 236LP Bomb (5 hits), mash 646HP, dash 5LK > cl 5HK (stun)<br>-Corner Only<br>
| |
| 4) 6HK, 2LK > 5LP xx mash 646HP, 2LK > cl 5HP > cl 5HK (stun)<br>-Corner + crouching only, overhead must hit close enough to connect 2 lights afterward<br>
| |
| '''Easy Post-Stun Combo:''' j.HK > j.HP, land, mash 646LP (juggle 2HK if necessary)<br>
| |
|
| |
| <br>
| |
| <big>'''Wakeup Attacks'''</big><br>
| |
| _<br>
| |
|
| |
| <br>
| |
| <big>'''Strategy'''</big><br>
| |
| _
| |
|
| |
| |}
| |
|
| |
| </div>
| |
| </div>
| |
| <!--------------------------------Mini-Divider----------------------------------------->
| |
|
| |
| <div class="mw-collapsible mw-collapsed">
| |
| <div class="mw-collapsible-toggle" style="float: none;"><center><font size="4"><b>Sam Matchup</b></font></center></div>
| |
| <div class="mw-collapsible-content">
| |
|
| |
| {| class="wikitable"
| |
| |-
| |
| | <center>'''Sam'''</center>[[File:JCFoF Sam icon.png|link=Jackie Chan in Fists of Fire/Sam]] ||
| |
| <big>'''Important punishes'''</big><br>
| |
| '''236P (Thousand Spears) (Blocked):''' Hold up forward and punish with j.HK > j.HP, dash 5LK > 5LP xx 646LP (mash) into an ending juggle<br>
| |
| -Can omit the 5LK > 5LP upon landing to make it easier, but the timing is fairly lenient<br>
| |
| -It is also possible to punish with a 236LP starter, but the spacing for a TOD combo doesn't generally work, making it weaker than the jump combo<br>
| |
|
| |
| '''236P (Thousand Spears) (Whiffed):''' 236LP Bomb can reliably punish due to the long animation; be careful not to move forward into Sam's active frames<br>
| |
| -The followup combo can be difficult; dash 5LP xx 646LP is the most consistent, or just 646HP if it's at a safe screen position<br>
| |
| -A spaced 2HK after seeing the animation end can work, but if too close, Sam can punish this with 236HK<br>
| |
| -646P does not generally work since the early hits won't connect at this range<br>
| |
|
| |
| '''214K (Divekick):''' 646LP (mash) works reliably; try to time the LP right as Sam lands, or it will hit him airborne for little damage<br>
| |
| -2HK also works reliably, and will hit meaty enough to be safe<br>
| |
| -From close-mid range, can backdash on reaction and punish the whiff with a full combo<br>
| |
|
| |
| '''Super:''' Punish with a full combo when he lands<br>
| |
| -Note: The 5th and 6th hits are overheads, so block these high<br>
| |
| -If chip damage or time are a concern, interrupt the 1st or 3rd hit with a 2LK combo starter (these hits whiff on crouchers)<br>
| |
|
| |
| <br>
| |
| <big>'''Juggle Enders'''</big> -- Note that some juggle options can be more limited if started from far away<br>
| |
| '''Mash 646LP:''' dash 2LK > cl 5HP > cl 5HK<br>
| |
| '''Mash 646HP (corner):''' 2LK > cl 5HP > cl 5HK<br>
| |
| '''Stand/Crouch Throw (corner):''' 2LK > 2LP > cl 5HK<br>
| |
|
| |
| <br>
| |
| <big>'''TOD Combos'''</big><br>
| |
| 1) 2LK > 2LP x2 > 5LP xx mash 646HP, 2LK > cl 5HP > cl 5HK (stun)<br>-Corner Only<br>
| |
| 2) 236LP Bomb (5 hits), dash 2LK > 5LP xx mash 646LP, dash 2LK > cl 5HK > far 5HP (stun)<br>
| |
| 3) 236LP Bomb (5 hits), mash 646HP, 2LK > cl 5HK (stun)<br>-Corner Only<br>
| |
| 4) 6HK, 2LK > 5LP xx mash 646HP, 2LK > cl 5HP > cl 5HK (stun)<br>-Corner + crouching only, overhead must hit close enough to connect 2 lights afterward<br>
| |
| '''Easy Post-Stun Combo:''' j.HK > j.HP, land, mash 646LP (juggle 2HK if necessary)<br>
| |
|
| |
| <br>
| |
| <big>'''Wakeup Attacks'''</big><br>
| |
| _<br>
| |
|
| |
| <br>
| |
| <big>'''Strategy'''</big><br>
| |
| _
| |
|
| |
| |}
| |
|
| |
| </div>
| |
| </div>
| |
| <!--------------------------------Mini-Divider----------------------------------------->
| |
|
| |
| <div class="mw-collapsible mw-collapsed">
| |
| <div class="mw-collapsible-toggle" style="float: none;"><center><font size="4"><b>Kim-Maree Matchup</b></font></center></div>
| |
| <div class="mw-collapsible-content">
| |
|
| |
| {| class="wikitable"
| |
| |-
| |
| | <center>'''Kim-Maree'''</center>[[File:JCFoF KimMaree icon.png|link=Jackie Chan in Fists of Fire/KimMaree]] ||
| |
| <big>'''Important punishes'''</big><br>
| |
| '''2HK:''' Lion's 2HK can punish Kim's at any range; if too close, dash up into a short combo instead, or you might get throw punished<br>
| |
|
| |
| '''6HK:''' Throw (stand or crouch) can punish on hit or block<br>
| |
| -646LP (mash) can punish reliably on block; low risk due to the easy reversal timing<br>
| |
| -Mashing Crouch Throw can interrupt the gap in her 2LK > 6HK string<br>
| |
|
| |
| '''236P (Running Lariat):''' Crouch until Kim reaches you, then punish with 2LK > 5LP xx 646LP (mash)<br>
| |
| -Alternatively, Crouch Throw is risk-free since you don't need to stand to attempt it (but is generally a weaker option)<br>
| |
|
| |
| '''28P (I Want You!):''' Dash up into a 2LK combo<br>
| |
|
| |
| <br>
| |
| <big>'''Juggle Enders'''</big> -- Note that some juggle options can be more limited if started from far away<br>
| |
| '''Mash 646LP:''' dash 2LK > cl 5HP > cl 5HK<br>
| |
| '''Mash 646HP (corner):''' microdash 2LK > cl 5HP > cl 5HK<br>
| |
| '''Stand/Crouch Throw (corner):''' 2LK > 2LP > cl 5HK<br>
| |
| '''Crouch Throw (midscreen):''' dash 2HK<br>
| |
|
| |
| <br>
| |
| <big>'''TOD Combos'''</big><br>
| |
| 1) 2LK > 2LP x2 > 5LP xx mash 646HP, microdash 2LK > cl 5HP > cl 5HK (stun)<br>-Corner Only<br>
| |
| 2) 236LP Bomb (5 hits), dash 2LK > 5LP xx mash 646LP, dash 2LK > cl 5HK > far 5HP (stun)<br>
| |
| 3) 236LP Bomb (5 hits), mash 646HP, microdash 2LK > cl 5HK (stun)<br>-Corner Only<br>
| |
| 4) 6HK, 2LK > 5LP xx mash 646HP, 2LK > cl 5HP > cl 5HK (stun)<br>-Corner + crouching only, overhead must hit close enough to connect 2 lights afterward<br>
| |
| '''Easy Post-Stun Combo:''' j.HK > j.HP, land, mash 646LP (juggle 2HK if necessary)<br>
| |
|
| |
| <br>
| |
| <big>'''Wakeup Attacks'''</big><br>
| |
| _<br>
| |
|
| |
| <br>
| |
| <big>'''Strategy'''</big><br>
| |
| _
| |
|
| |
| |}
| |
|
| |
| </div>
| |
| </div>
| |
| <!--------------------------------Mini-Divider----------------------------------------->
| |
|
| |
| <div class="mw-collapsible mw-collapsed">
| |
| <div class="mw-collapsible-toggle" style="float: none;"><center><font size="4"><b>Mysterious Lion Matchup (Mirror)</b></font></center></div>
| |
| <div class="mw-collapsible-content">
| |
|
| |
| {| class="wikitable"
| |
| |-
| |
| | <center>'''M. Lion'''<br>(Mirror)</center>[[File:JCFoF MLion icon.png|link=Jackie Chan in Fists of Fire/Mysterious Lion]] ||
| |
| <big>'''Important punishes'''</big><br>
| |
| '''6HP:''' Duck under it and whiff punish with 2HK (unless you are too close for 2HK to be safe)<br>
| |
| -It is possible to whiff punish with 646LP after ducking, but hard to time<br>
| |
|
| |
| '''2HK:''' 646LP unless spaced very well<br>
| |
| -2HK can also punish itself on hit or block, creating an endless loop until one player stops doing it<br>
| |
|
| |
| '''646LP (LP Lion Crusher):''' Punish with a 2LK combo (or standing Throw near the corner if attempting throw loops)<br>
| |
|
| |
| '''646HP (HP Lion Crusher):''' In almost any situation, Lion can punish HP Lion Crusher with his own HP Lion Crusher<br>
| |
| -This punish will usually lead to a knockdown, either because it hits late or because the opponent corners himself<br>
| |
| -If the 646HP was used from fullscreen, just punish with a 2LK combo into 646LP instead<br>
| |
|
| |
| '''Normal xx 236LP (Lion Bomb):''' Dash forward completely past the bomb, then use 2LK or Throwcombo starter<br>
| |
| -If you attempt to punish too early during the dash, your hurtbox may extend backwards into the blast<br>
| |
| -Mashed 646HP can work, but will usually lead to you getting punished unless it kills<br>
| |
|
| |
| '''Teleport:''' Dash into 2HK is the most reliable punish; usually hits meaty, making it much safer than usual<br>
| |
|
| |
| '''Super:''' If close, can use mashed 646LP to knock him out of the transformation (inconsistent)<br>
| |
| -Once transformed, harassing Chibi-Lion with 236LP and spaced 2HK can keep him locked down<br>
| |
| -He can use self destruct to destroy incoming bombs, but he can be punished with mashed 646HP for trying this (usually into a knockdown)<br>
| |
|
| |
| <br>
| |
| <big>'''Juggle Enders'''</big> -- Note that some juggle options can be more limited if started from far away<br>
| |
| '''Mash 646LP:''' dash 2LK > cl 5HP > cl 5HK -- Timing can be strict against M. Lion<br>
| |
| '''Mash 646HP (corner):''' 2LK > cl 5HP > cl 5HK<br>
| |
| '''Stand/Crouch Throw (corner):''' 2LK > 2LP > cl 5HK<br>
| |
| '''Crouch Throw (midscreen):''' dash 2HK<br>
| |
|
| |
| <br>
| |
| <big>'''TOD Combos'''</big><br>
| |
| 1) 236LP Bomb (5 hits), dash 5LP xx mash 646HP, 2LK > cl 5HP > cl 5HK (stun)<br>-Corner Only<br>
| |
| '''Easy Post-Stun Combo:''' j.HK > j.HP, land, mash 646LP (juggle 2HK if necessary)<br>
| |
|
| |
| <br>
| |
| <big>'''Wakeup Attacks'''</big><br>
| |
| _<br>
| |
| -Note: M. Lion's Wakeup LK has a very similar animation to his wakeup forward roll. Pay attention on his wakeup so you don't react to the wrong move.<br>
| |
|
| |
| <br>
| |
| <big>'''Strategy'''</big><br>
| |
| _
| |
|
| |
| |}
| |
|
| |
| </div>
| |
| </div>
| |
|
| |
|
| <!-----------------------------------------------------------------------------Section Divider-----------------------------------------------------------------------------> | | <!-----------------------------------------------------------------------------Section Divider-----------------------------------------------------------------------------> |
