Idol Showdown/Ayame Nakiri: Difference between revisions
Akuadynasty (talk | contribs) m (Added special move frame data and descriptions) |
|||
| Line 101: | Line 101: | ||
|advHit=-3 | |advHit=-3 | ||
|advBlock=-8 | |advBlock=-8 | ||
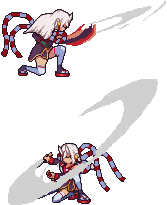
|description=A long range low slash. This normal is one of Ayame's most important pokes. It's one of her farthest ranged buttons that confirms easily into 236M even at max range. | |description=A long range low slash. This normal is one of Ayame's most important pokes. It's one of her farthest ranged buttons that confirms easily into 236M even at max range. | ||
*Very useful for pressure and poking | |||
*This attack is air unblockable, so it is useful for tech traps. | |||
}} | }} | ||
}} | }} | ||
| Line 277: | Line 279: | ||
|advBlock=-11 | |advBlock=-11 | ||
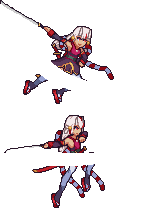
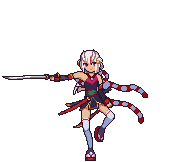
|description= Ayame's Rekka series. 236L on it's own is a safe way to end your pressure, but threatening with the rest of the hits is a good way to push stagger pressure. However, most of the hits are unsafe on block. In air juggle, 236LL is good for maintaining oki and 236LLL is good for damage conversions. Can be super chat cancelled into 22L for a full combo. | |description= Ayame's Rekka series. 236L on it's own is a safe way to end your pressure, but threatening with the rest of the hits is a good way to push stagger pressure. However, most of the hits are unsafe on block. In air juggle, 236LL is good for maintaining oki and 236LLL is good for damage conversions. Can be super chat cancelled into 22L for a full combo. | ||
Be careful using this at long range as the second hit can whiff. | *Be careful using this at long range as the second hit can whiff. | ||
}} | }} | ||
{{AttackData-IS | {{AttackData-IS | ||
| Line 378: | Line 380: | ||
|advHit=KND | |advHit=KND | ||
|advBlock=-10 | |advBlock=-10 | ||
|description= Ayame's H version of the rekka is the most versatile. Same as the other version, but more damage and more stagger opportunities. You can hit 8H for the final hit to get an overhead | |description= Ayame's H version of the rekka is the most versatile. Same as the other version, but more damage and more stagger opportunities. | ||
*You can hit 8H for the final hit to get an overhead | |||
*2H for the final hit to get a low | |||
}} | }} | ||
}} | }} | ||
| Line 394: | Line 398: | ||
|damage=75~ | |damage=75~ | ||
|guard= | |guard= | ||
|startup= | |startup=9f | ||
|active= | |active= | ||
|recovery= | |recovery= | ||
|advHit= | |advHit=KND | ||
|advBlock= | |advBlock=-21 | ||
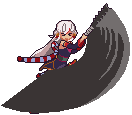
|description= Ayame swings her katana upwards. | |description= Ayame swings her katana upwards. One of her most useful combo tools for launching the opponent into a full juggle. This can also be used as a servicable anti-air. | ||
}} | }} | ||
{{AttackData-IS | {{AttackData-IS | ||
| Line 406: | Line 410: | ||
|damage=143~ | |damage=143~ | ||
|guard= | |guard= | ||
|startup= | |startup=9f | ||
|active= | |active= | ||
|recovery= | |recovery= | ||
|advHit= | |advHit=KND | ||
|advBlock= | |advBlock=-37 | ||
|description= | |description= Similar to the L version, but this move acts as one of her more consistent combo enders for decent oki. | ||
*Air Unblockable | *Air Unblockable, which is useful for tech traps. | ||
}} | }} | ||
{{AttackData-IS | {{AttackData-IS | ||
| Line 419: | Line 423: | ||
|damage=184~ | |damage=184~ | ||
|guard= | |guard= | ||
|startup= | |startup=9 | ||
|active= | |active= | ||
|recovery= | |recovery=-39 | ||
|advHit= | |advHit= | ||
|advBlock= | |advBlock= | ||
|description= | |description= This version of the attack is her invincible reversal. Launches the opponent on hit for high damage combo opportunities. It hits all around her head and can beat bursts. | ||
*Uses one bar of Star Power | *Uses one bar of Star Power | ||
*Invincible reversal | |||
*Burst bait tool | |||
}} | }} | ||
}} | }} | ||
| Line 441: | Line 447: | ||
|damage=75~ | |damage=75~ | ||
|guard= | |guard= | ||
|startup= | |startup=17f | ||
|active= | |active= | ||
|recovery= | |recovery= | ||
|advHit= | |advHit= | ||
|advBlock= | |advBlock=-5~ | ||
|description= Ayame does a short quick flip-kick. | |description= Ayame does a short quick flip-kick, useful as a combo ender for good oki. 214x flips can also go over some fireballs, but it is very inconsistent and spacing dependent. Advantage on block is also dependent on spacing. | ||
}} | }} | ||
{{AttackData-IS | {{AttackData-IS | ||
| Line 457: | Line 463: | ||
|recovery= | |recovery= | ||
|advHit= | |advHit= | ||
|advBlock= | |advBlock=-5~ | ||
|description= | |description= Same as the L version, but she goes much farther. This version can be used in for combos in the corner as well as tech traps. | ||
}} | }} | ||
{{AttackData-IS | {{AttackData-IS | ||
| Line 469: | Line 475: | ||
|recovery= | |recovery= | ||
|advHit= | |advHit= | ||
|advBlock= | |advBlock=-5~ | ||
|description= Same as the M version but fullscreen | |description= Same as the M version but fullscreen. | ||
*Uses one bar of Star Power | *Uses one bar of Star Power | ||
*Useful for surprise attacks | *Useful for surprise attacks to beat fireball startup from full screen. | ||
}} | }} | ||
}} | }} | ||
| Line 492: | Line 498: | ||
|advHit= | |advHit= | ||
|advBlock= | |advBlock= | ||
|description= Ayame does a quick flip attack on air going downward. Mostly used | |description= Ayame does a quick flip attack on air going downward. Mostly used to as a combo ender and a way to leverage 22S mixups. All versions are unsafe on block. | ||
}} | }} | ||
}} | }} | ||
| Line 507: | Line 513: | ||
|damage=75~ | |damage=75~ | ||
|guard= | |guard= | ||
|startup= | |startup=11f | ||
|active= | |active= | ||
|recovery= | |recovery= | ||
|advHit= | |advHit= | ||
|advBlock= | |advBlock=-3 | ||
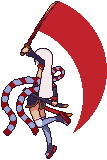
|description= Ayame summons | |description= Ayame summons a wisp projectile that plants a bomb on the opponent that will detonate after a short amount of time. The wisp projectile is unblockable, and can be setup in combos or blockstring. The detonation itself occurs shortly after the projectile hits. The detonation is blockable, but ayame can leverage it for mixups. | ||
*Uses one bar of Star Power | *Uses one bar of Star Power | ||
*Can be used | *Can be used to make attacks safe | ||
*Useful for pressure and mixups | |||
}} | }} | ||
}} | }} | ||
| Line 527: | Line 534: | ||
|data= | |data= | ||
{{AttackData-IS | {{AttackData-IS | ||
|damage= | |damage=269 | ||
|guard= | |guard= | ||
|startup= | |startup=5f | ||
|active= | |active= | ||
|recovery= | |recovery= | ||
|advHit= | |advHit=KND | ||
|advBlock= | |advBlock=-28 | ||
|description= | |description=High damaging super for 2 star gauge. Has high scaled damage, so a very useful way to spend meter for damage at the end of combos. This is also invincible on startup, but 22H is a better reversal in general. | ||
*Uses two bars of Star Power | |||
}} | }} | ||
}} | }} | ||
Revision as of 18:52, 8 May 2023
Playful Giggling Ojou - Nonstop Oni Offense
Introduction
|
|
|
| Pros | Cons |
|
|
Normal Moves
Standing Normals
5L
5L Ittoryu Ittoryu
|
|---|
5M
5M Nitoryu Nitoryu
|
|---|
5H
5H
|
|---|
Crouching Normals
2L
2L
|
|---|
2M
2M
|
|---|
2H
2H
|
|---|
3H
3H Haiya Haiya
|
|---|
Jumping Normals
j.L
j.L
|
|---|
j.M
j.M
|
|---|
j.H
j.H
|
|---|
Universal Mechanics
Throw
Throw
L+M |
|---|
Overhead
Overhead
M+H |
|---|
Special Attacks
236X
Asura's Fury
236 L/M/H |
|---|
22X
Demon Cutter
22 L/M/H |
|---|
214X
Oni Flip
214 L/M/H |
|---|
j.214X
Heavenly Oni Flip
j.214 L/M/H |
|---|
22S
Karma and Shiranui
22 S |
|---|
Super Star Attack
I'm the Real One!
236S |
|---|
Combos
General
Mid-screen
| Combo | Damage | Cost | Meter Gain | Location |
|---|---|---|---|---|
| 5L > 2M > 5M > 5H > 2H > 22L, 22L, 5H > 2H > 22M | 250 | 0 Meter bar | ? Opp: ?% |
Anywhere |
| ||||
| 5L > 2M > 5M > 5H > 2H > 236MMM > 22L, 22L, 5H > 2H > (236MMM) > 22M | 270 (279) | 0 Meter bar
1-2 Superchat bar |
? Opp: ?% |
Anywhere |
| ||||
Corner
| Combo | Damage | Cost | Meter Gain | Location |
|---|---|---|---|---|
| 5L > 2M > 5M > 5H > 214M > 5L > 2M > 5M > 214M > 5L > 2M > 5M > 2H > 22L > 22L > 5L > 5M > 2H > 22M | 258 | 0 Meter bar | ? Opp: ?% |
Anywhere |
| ||||
Combo Theory
Mid-screen
The goal of a combo midscreen is to secure oki, as well as get as much corner carry as possible. Ending combos with 22M gives a good amount of carry and consistent oki. By spending superchat meter, 236MMM can be used to extend combos and carry the enemy further.
Corner
The corner allows access to 214M in combos. After lifting the enemy with a move such as 5H, 214M can be used to loop into another string. Keep the juggle limit in mind, 2 flips before an ender is best.
Enders
Meterless combos should be ended with 22B, which gives enough time to dash up for oki. For 1 meter, 22H easily works in the same places. Be careful when routing into 236S, if they are bounced too high (e.g. with a high hitting 236MMM), they may recover before landing in the super. 2H > 236S seems to keep them low enough.
Matchups
- Vs. Aki
- Matchup advice goes here.
- Vs. Ayame
- Matchup advice goes here.
- Vs. Botan
- Matchup advice goes here.
- Vs. Coco
- Matchup advice goes here.
- Vs. Fubuki
- Matchup advice goes here.
- Vs. Korone
- Matchup advice goes here.
- Vs. Sora
- Matchup advice goes here.
- Vs. Suisei
- Matchup advice goes here.


