Idol Showdown/Coco Kiryu: Difference between revisions
| Line 786: | Line 786: | ||
* Can be used as a blockstring and confirmed from any hit. '''''2H > 5H > 22S''''' makes it safe on block. | * Can be used as a blockstring and confirmed from any hit. '''''2H > 5H > 22S''''' makes it safe on block. | ||
* Damage values are for the '''''2H''''' version. '''''3H''''' deals more damage but cannot be made safe, meaning it must be hit-confirmed earlier. | * Damage values are for the '''''2H''''' version. '''''3H''''' deals more damage but cannot be made safe, meaning it must be hit-confirmed earlier. | ||
| video = | | video = Meter Dump.mp4 | ||
}} | }} | ||
{{ComboData-IS | {{ComboData-IS | ||
| Line 801: | Line 801: | ||
* '''''2H > 5H''''' whiffs in the corner, and does not work on Ayame anywhere. Skip '''''5H''''' in those situations. | * '''''2H > 5H''''' whiffs in the corner, and does not work on Ayame anywhere. Skip '''''5H''''' in those situations. | ||
* '''''5L > 2M''''' makes the combo more difficult. It sacrifices a tiny amount of damage to build 18% more meter. | * '''''5L > 2M''''' makes the combo more difficult. It sacrifices a tiny amount of damage to build 18% more meter. | ||
| video = | | video = 1 Loop 214L SCC.mp4 | ||
}} | }} | ||
{{ComboData-IS | {{ComboData-IS | ||
| Line 814: | Line 814: | ||
| notes = * SCC into untechable knockdown. The micro-dash into '''''3H''''' is quite strict but still practical. | | notes = * SCC into untechable knockdown. The micro-dash into '''''3H''''' is quite strict but still practical. | ||
* '''''2H > 5H''''' whiffs in the corner, and does not work on Ayame anywhere. Skip '''''5H''''' in those situations. | * '''''2H > 5H''''' whiffs in the corner, and does not work on Ayame anywhere. Skip '''''5H''''' in those situations. | ||
| video = | | video = 66 3H Ender.mp4 | ||
}} | }} | ||
{{ComboData-IS | {{ComboData-IS | ||
| Line 829: | Line 829: | ||
* Though not strictly necessary, adding a delay between '''''5M > 2H''''' gets closer to the corner for the post-combo mixup. | * Though not strictly necessary, adding a delay between '''''5M > 2H''''' gets closer to the corner for the post-combo mixup. | ||
* The 3rd '''''214L''''' triggers a non-techable infinite prevention state, re-standing the opponent for very strong mixup options. | * The 3rd '''''214L''''' triggers a non-techable infinite prevention state, re-standing the opponent for very strong mixup options. | ||
| video = | | video = Corner Triple 214L.mp4 | ||
}} | }} | ||
}} | }} | ||
Revision as of 18:07, 20 May 2023
4th Chairman of the Kiryu Clan - Dragon-Style Grappling
Introduction
| Coco is a hard-hitting yakuza dragon who demolishes her opponents with powerful command grabs. Once Coco manages to close the distance, she shows opponents what it truly means to be the Legendary Dragon of Hololive. | |
| Pros | Cons |
|
|
Please note that as the game is still in its early lifespan, certain information may become outdated.
Also note that this page is full of memes. Don't protest, this is what Kaichou herself would have wanted.
Recommended Collabs
 Amelia - Amelia's 214S ground pound grants Coco amazing damage, and allows her to convert off of more moves than she normally would be able to.
 Kiara - So about those zoners... Kiara's reflector can help a lot with fighting them. Take it and don't look back.
 Kanata - Kanata's 214S grab can be converted into a combo from almost anywhere, and a side switching grab makes Soran Bushi pull the opponent towards Coco instead of pushing them away.
 Mio - An alternative to Amelia. Her 214S punch can be used for combos, but the debuffs aren't too recommended. Save your meter for those juicy, succulent cancels.
 Roboco - Roboco's 214S beam can help you get in, it destroys other projectiles and goes full screen. Just be sure to capitalize on the opportunity it gives you.
Normal Moves
Standing Normals
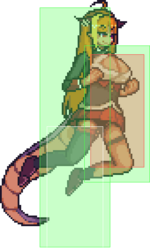
5L
5L
|
|
|---|---|
Toggle Hitboxes Toggle Hitboxes
|
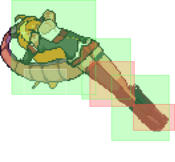
5M
5M Doko Mitendayo?! Doko Mitendayo?!
|
|
|---|---|
Toggle Hitboxes Toggle Hitboxes
|
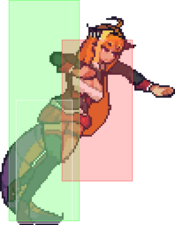
5H
5H Rolling eyes fall... Rolling eyes fall...
|
|
|---|---|
Toggle Hitboxes Toggle Hitboxes
|
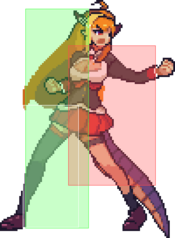
Crouching Normals
2L
2L Check your toes! Check your toes!
|
|
|---|---|
Toggle Hitboxes Toggle Hitboxes
|
2M
2M The ground-based footsies Idol Showdown is known for! The ground-based footsies Idol Showdown is known for!
|
|
|---|---|
Toggle Hitboxes Toggle Hitboxes
|
2H
2H Bringing a whole new meaning to "ahead of her time". Bringing a whole new meaning to "ahead of her time".
|
|
|---|---|
Toggle Hitboxes Toggle Hitboxes
|
3H
3H This is your new best friend. Treat it well. This is your new best friend. Treat it well.
|
|
|---|---|
Toggle Hitboxes Toggle Hitboxes
|
Jumping Normals
j.L
j.L Goooood Morning, Motherf*ckers! Goooood Morning, Motherf*ckers!
|
|
|---|---|
Toggle Hitboxes Toggle Hitboxes
|
j.M
j.M If only she used this for more than just an aerial... If only she used this for more than just an aerial...
|
|
|---|---|
Toggle Hitboxes Toggle Hitboxes
|
j.H
j.H There's nothing like a Ground Pound! There's nothing like a Ground Pound!
|
|
|---|---|
Toggle Hitboxes Toggle Hitboxes
|
Universal Mechanics
Throw
Throw
G / L+M |
|
|---|---|
Toggle Hitboxes Toggle Hitboxes
|
Overhead
Overhead M+H One of the overheads of all time. One of the overheads of all time.
|
|
|---|---|
Toggle Hitboxes Toggle Hitboxes
|
Special Attacks
214L/M/H
Verbal Roasting 214L/M/H She's certainly spitting fire. She's certainly spitting fire.
|
|
|---|---|
Toggle Hitboxes Toggle Hitboxes
|
214G
Sh*tpost Review 214G/H Next meme! Next meme!
|
|
|---|---|
Toggle Hitboxes Toggle Hitboxes
|
236G
Essence of Dragon Drop 236G / 236L+M Coco Buster Coco Buster
|
|
|---|---|
Toggle Hitboxes Toggle Hitboxes
|
236L/M
Acrobatic Assault 236L/M/H L/H versions L/H versions Arc-haic Assault Arc-haic Assault
|
|
|---|---|
Toggle Hitboxes Toggle Hitboxes
|
22G
Plug-In Type AsaCoco
22G / 22L+M |
|
|---|---|
Toggle Hitboxes Toggle Hitboxes
|
22L/M/H
Tail-Grab 22L/M/H High High Long Long Essence of Insertion: Tail-Slam Essence of Insertion: Tail-Slam
|
|
|---|---|
Toggle Hitboxes Toggle Hitboxes
|
22S
Wide Coco 22S Assume THE STANCE Assume THE STANCE
|
|
|---|---|
Toggle Hitboxes Toggle Hitboxes
|
j.S
Dragon Glide
j.S |
|
|---|---|
Toggle Hitboxes Toggle Hitboxes
|
Super Star Attack
Essence of True Form: Just Like a Dragon 236S FEEL THE HEAT! FEEL THE HEAT!
|
|
|---|---|
Toggle Hitboxes Toggle Hitboxes
|
Combos
| Combo Notation Help | |
|---|---|
| Disclaimer: Combos are written by different authors, so the notation used can vary from the standard one. For additional information on terminology for Idol Showdown or fighting games in general, please consult the Idol Showdown Glossary or the Fighting Game Glossary. | |
| #X | Input writted with numpad notation for the direction/motion input followed by the action. |
| X > Y | X input is cancelled into Y. |
| X, Y | X input is linked to Y, meaning Y is done after X's recovery frames. |
| X~Y | This notation has two meanings: 1. Use attack X with followup Y. 2. Input X, and then within a few frames, input Y. Sometimes referred to as "kara cancelling". |
| [X] | Input X is held down. |
| {X} | Input is partially charged (as in, not tapped but not held to full charge either). |
| (X) | Input X is optional. Typically, the combo will be easier without this input. |
| X/Y | Choose between input X or input Y. |
| #jc | Jump cancel. The number (7, 8, or 9) indicates which direction the jump cancel should be input if it is important to the combo. |
| j.X | Jumping input X. X should be input while airborne. |
| dl.X | Delayed input X. There will be some delay before inputting X. |
| CH X | Counterhit with input X. This is used for combo starters that require counterhit confirm. |
| OTG X | Input X while the opponent is knocked down but still able to be hit. |
| X(n) | Number of hits of a multihit attack. If an attack is multihit and this is not specified, it is assumed to let the maximum number of hits complete before proceeding. |
| scc | Superchat Cancel. Idol Showdown unique mechanic that allows you to cancel the recovery of one special into another special. |
Beginner Combos
| Combo | Difficulty | Damage | Cost | Meter Gain | Location |
|---|---|---|---|---|---|
| 236G | Beginner | 280 | 0 bar | Anywhere | |
| |||||
| 5M > 2H > 22M, (22H) | Beginner | 258 / 327 | 0-1 bar | Anywhere | |
| |||||
| 5M > 2M > 5H > 3H > (22H) | Beginner | 244 / 297 | 0-1 bar | Anywhere | |
| |||||
Combo Theory
2H anchors the opponent to a specific spot on hit. This means combos after 2H are consistent, and starters that lead into 2H can be freely mixed and matched with combos that lead out of 2H.
Coco can combo into a command grab if it connects on the first frame after hitstun. Unfortunately this usually requires a delayed cancel with a strict 2 frame window (exceptions will be noted).
Fortunately, even if done too late it turns into a command grab mixup. Just don't cancel too early or the grab will whiff right in their face.
- 5M > dl 236G
- Devastating if it combos, and even more devastating when it doesn't and the opponent hit anyway.
- 5M > dl 214H
- 1 bar conversion into good damage.
- 5H > dl 236H / 236L
- 236H deals an obscene amount of damage when comboed into, but the super freeze makes it easy to punish on reaction when the combo doesn't connect.
- The timing of the grab input changes depending on distance. 5H deals 3 frames more hitstop on a close hit, so the grab timing is slightly later.
- 236L off a far hitting 5H requires a frame perfect delay. 236H is always a 2 frame window.
- 22G > dl 236S
- OTG into death. Particularly difficult as the delayed cancel must be frame perfect on the last cancellable frame of 22G.
- 5M dl 5H(CH) > 22S, dl 236G
- Counterhit 5H > 22S is +5 on hit. Not enough for a regular combo, but it's possible to combo into a grab if close enough.
- Corner 5M dl 5H(CH) > 22S, 214G/H
- When in the corner, it's possible for 214G/H to reach, and unlike 236G no delay is required, making this easier to execute by using the buffer window.
Combo Starters
This section lists blockstrings, grabs, and anything else Coco has that leads directly into a combo.
| Combo | Difficulty | Damage | Cost | Meter Gain | Location |
|---|---|---|---|---|---|
| 2L/5L > 2M > 5M > 2H > 5H > (22S / 3H) | Easy | 0 bar | Anywhere | ||
| |||||
| 2L/5L > 2M > 5M > 5H > (22S / 3H / 2H) | Medium | 0 bar | Anywhere | ||
| |||||
| 2M > 214L | Medium | 114 | 0 bar | Anywhere | |
| |||||
| 236M, 5L > 5M > 2H > (22M) | Medium | 256 | 0 bar | Anywhere | |
| |||||
| 214H, (2M) > 5M > 2H > (22M) | Medium | 274 | 1 bar | Anywhere | |
| |||||
| M+H, 236S | Medium | 285 | 2 bar | Anywhere | |
| |||||
| 9~S, 236S, j.M, 66 > (5H / 3H) > 214L | Lunatic | 507 | 2 bar | Anywhere | |
| |||||
Combo BnB
This section lists combos using the basic starter of (2L/5L) > 2M > 5M > 2H.
Anything listed in the combo starter section that includes 2H will also work with these combos. Simply replace everything up to 2H with the different starter.
| Combo | Difficulty | Damage | Cost | Meter Gain | Location |
|---|---|---|---|---|---|
| (2L/5L > 2M) > 5M > (2H / 3H) > 22M (scc 22L) (scc 22M) (scc 22L) | Easy | 258 / 329 / 383 / 421 | 0-3 SC | 33% + 1/6 SC | Anywhere |
|
|||||
| (2L/5L > 2M) > 5M > 2H > (5H) > 214L scc 22S, 66 > (5L > 2M) > 5M > 2H > (Loop or 22M) | Medium | 322 | 1 SC | 84% + 3/6 SC | Anywhere |
|
|||||
| (2L/5L > 2M) > 5M > 2H > (5H) > 214M scc 214L, 66 > 3H | Hard | 324 | 1 SC | 67% + 2/6 SC | Anywhere |
|
|||||
| (2L/5L > 2M) > 5M > 2H > 214L scc 22S, 214L, 5L > (2M) > 5M > 2H 214L | Medium | 282 | 1 SC | 95% + 4/6 SC | Corner |
|
|||||
OTG Combo Enders
This section lists alternate ways to end a combo after almost any knockdown.
- 22L/M or 214G or 236L all leave the opponent in range for 22G or 22H.
- 3H leaves the opponent in range for 22H.
- 214L leaves the opponent in range for 22H as long as it doesn't hit from too far away. It works with most combos.
- G / 4G, throwing the opponent into the corner also leaves them in range for 22H, but the timing and positioning can be a bit finicky.
- 236S leaves the opponent in range for 22H. On the Main Stage/Japan stage it's also possible but difficult to connect with 66 > 22G
There is a limit of 3 OTG hits per combo. 22H counts as 2 OTG hits against an opponent on the ground and 1 OTG hit against an opponent in the air.
The third OTG hit in a combo triggers the Infinite Prevention System (IPS), which re-stands the opponent and freezes them for a moment in an unhittable state. This prevents the opponent from taking advantage of wake-up throw invulnerability, and leads to significantly more frame advantage after 22G. This is so much better than a regular OTG that it's worth holding off on using OTG moves until you have enough resources.
| Combo | Difficulty | Damage | Cost | Meter Gain | Location |
|---|---|---|---|---|---|
| OTG 22H scc 22G | Easy | 1 bar + 1 SC | Midscreen | ||
|
|||||
| OTG 22H, 22G | Medium | 1 bar | Corner | ||
|
|||||
| Anti-Air 22H, 22H | Easy | 2 bar | Anywhere | ||
|
|||||
| OTG 22G > dl 236S | Lunatic | 2 bar | Anywhere | ||
|
|||||
Collab Combos
This section lists combos only possible when using a collab.
| Combo | Difficulty | Damage | Cost | Meter Gain | Location |
|---|---|---|---|---|---|
| Amelia: 236G > dl 214S, 66 > 5M > 2H > 22M, (22H) | Hard | 475 / 504 | 2-3 bar | Anywhere | |
|
|||||
| Amelia: 3H > 214S, 66 > 5M > 2H > 22M, (22H) | Hard | 469 / 522 | 2-3 bar | Anywhere | |
|
|||||
| Amelia: 3H > 214S, 66 > 5L > (dl 2M > 5M) > 5H > dl (236L / 236H) | Hard | 437 / 541 | 2-3 bar | Anywhere | |
| |||||
| Kanata: 214S, 66 > 214L, (5L) > 5M > 2H > (22M) | Hard | 422 | 2 bar | Anywhere | |
|
|||||
| Kanata: (214G / 214H / 236L / 236M) > L+H | Easy | 2 SC | Anywhere | ||
|
|||||
Matchups
- Vs. Aki
- Pray to Yagoo
- Vs. Ayame
- Matchup advice goes here.
- Vs. Botan
- Pray to Yagoo and assume the stance.
- Vs. Coco
- Pray to Yagoo that your opponent is more of a clown than you
- Vs. Fubuki
- Fubuki's 22X reversal is completely destroyed by meaty 2L as it will 22L/M and it low profiles under 22H
- Vs. Korone
- Matchup advice goes here.
- Vs. Sora
- Most Sodas will try to keep you out with 5M 6M 214X/236L/M which leaves you without much option to punish if blocked; so get ready to trade most of her pressure with either 3H or 214L/M while they input 214X/236L/M. Once you get the hit, dash in as fast as you can. If you have meter, simply 236H in to go through said projectiles.
- Vs. Suisei
- If they're a clown then you can pluck em straight out of the air with 5M or your tail grabs. If they're competent, try your best not to get blended. 236S is a VERY funny tool if they don't see it coming, but not optimal.
External Resources
Colors
Amane Kanata (Hololive)
Akai Haato (Hololive)
Kazuma Kiryu (Yakuza)
Coco Kaine
Melody (VShojo)
Potemkin (Guilty Gear)


