Kamen Rider: Super Climax Heroes/Saga: Difference between revisions
(create kamen rider saga page) |
No edit summary |
||
| Line 1: | Line 1: | ||
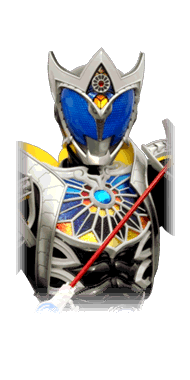
[[image:KRSCH_Saga_portrait.png|<center><font size="3"><b>Kamen Rider Saga</b></font></center>|frame|right]] | [[image:KRSCH_Saga_portrait.png|<center><font size="3"><b>Kamen Rider Saga</b></font></center>|frame|right]] | ||
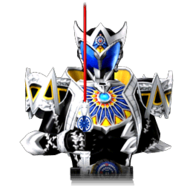
[[image: | [[image:KRSCH Saga Illustration.png|border|right|190px]] | ||
{{TOClimit|2}} | {{TOClimit|2}} | ||
== Introduction == | == Introduction == | ||
'''Kamen Rider Saga''' is the leader of Checkmate | '''Kamen Rider Saga''' is the leader of the Checkmate Four, a group of enforcers who punish Fangires that get too buddy-buddy with humans. You're on the list. | ||
Saga is without question one of the most fearsome characters in Super Climax Heroes, with terrifying space control tools that lead into some of the most devastating combos in the game. With the dominant j.H, a terrifying j.S, a whole slew of long-ranged normals and even a ranged unblockable hitgrab, Saga has the tools to keep his opponents at bay and keep them scared into submission. However, his tools are somewhat on the slow side to compensate for their range, meaning he can have a somewhat harder time on defence compared to some other characters, and his Striker, while powerful, is incredibly linear with a large blind spot, rendering its primary use in combos and not much else. | Saga is without question one of the most fearsome characters in Super Climax Heroes, with terrifying space control tools that lead into some of the most devastating combos in the game. With the dominant j.H, a terrifying j.S, a whole slew of long-ranged normals and even a ranged unblockable hitgrab, Saga has the tools to keep his opponents at bay and keep them scared into submission. However, his tools are somewhat on the slow side to compensate for their range, meaning he can have a somewhat harder time on defence compared to some other characters, and his Striker, while powerful, is incredibly linear with a large blind spot, rendering its primary use in combos and not much else. | ||
| Line 14: | Line 14: | ||
|cons = | |cons = | ||
* '''Poor Defence:''' Saga has to do what all long-range monsters do - trade away range for speed. While some of his tools are fast enough to poke with reasonable consistency, his lack of fast close-range tools leaves his defence somewhat lacking. | * '''Poor Defence:''' Saga has to do what all long-range monsters do - trade away range for speed. While some of his tools are fast enough to poke with reasonable consistency, his lack of fast close-range tools leaves his defence somewhat lacking. | ||
* '''Limited Striker:''' While the Sagarc can be used to extend Saga's combo pickups into devastating damage, the limited space it covers means that it sees decidedly less use in pressure and on defence. | * '''Limited Striker:''' While the Mother Sagarc can be used to extend Saga's combo pickups into devastating damage, the limited space it covers means that it sees decidedly less use in pressure and on defence. | ||
| tablewidth = 80 | | tablewidth = 80 | ||
}} | }} | ||
| Line 530: | Line 530: | ||
|caption= | |caption= | ||
|name=Dash Action | |name=Dash Action | ||
|subtitle= | |subtitle=Guard Dash | ||
|data= | |data= | ||
{{AttackData-KRSCH | {{AttackData-KRSCH | ||
| Line 569: | Line 569: | ||
{{MoveData | {{MoveData | ||
|image= | |image=KRSCH_Saga_Support_Attack_Illustration.png | ||
|caption= | |caption= | ||
|image2=KRSCH_Saga_Support_Attack.png | |||
|caption2= | |||
|name=Support Attack | |name=Support Attack | ||
|subtitle= | |subtitle= | ||
| Line 583: | Line 585: | ||
|hitadv= | |hitadv= | ||
|description= | |description= | ||
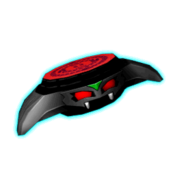
Saga summons | Saga summons the Mother Sagarc directly above his head, causing it to fire a multi-hit laser beam at a downwards angle towards the opponent. Can be used to excellent effect in most combos, but the limited space it covers means using it in pressure requires specific spacing, and it's basically completely useless in close-range defensive situations. | ||
}} | }} | ||
}} | }} | ||
Revision as of 09:30, 1 December 2023
Introduction
Kamen Rider Saga is the leader of the Checkmate Four, a group of enforcers who punish Fangires that get too buddy-buddy with humans. You're on the list.
Saga is without question one of the most fearsome characters in Super Climax Heroes, with terrifying space control tools that lead into some of the most devastating combos in the game. With the dominant j.H, a terrifying j.S, a whole slew of long-ranged normals and even a ranged unblockable hitgrab, Saga has the tools to keep his opponents at bay and keep them scared into submission. However, his tools are somewhat on the slow side to compensate for their range, meaning he can have a somewhat harder time on defence compared to some other characters, and his Striker, while powerful, is incredibly linear with a large blind spot, rendering its primary use in combos and not much else.
Normal Moves
5LLL
5LLL
|
|---|
5LHH
5LHH
|
|---|
4/6LLL
4/6LLL
|
|---|
4/6LHH
4/6LHHHH
|
|---|
2/8LLL
2/8LLLL
|
|---|
2/8LHH
2/8LHH
|
|---|
5HH
5HH
|
|---|
6HHH
6HHHH
|
|---|
2/8HH
5LLL
|
|---|
jL
jL
|
|---|
jH
jH
|
|---|
Throw
Throw
4H |
|---|
Rider Art and Dash Action
Dash Action
Dash Action
Guard Dash |
|---|
Rider Art
Rider Art Super Jump Super Jump
|
|---|
Style Action
By pressing Style Action, Saga can call his striker to launch an attack. This costs 2 stocks of the Rider Gauge, or 4 stocks when executed from hitstun.
Support Attack
|
|---|
Combos
- 6HH > RC > 5S > 2HH
- Saga's bread and butter combo that you can build from and to most everything. Very easy to convert into from most other pokes that don't knock down, and even combos from j.H at closer ranges. Can extend into SA call from the third hit of 2HH.
- DS > 2HH > SA > DS/[j.S]x2
- Basic pickup from DS that also showcases SA extensions. Use DS when midscreen, [j.S]x2 when close to the corner.


