In this variation, Blade gains access to his final form: King Form. In this form, Blade boasts improved strings, a notably powerful projectile, and an oppressive advancing attack.
Playstyle
|
|
|
| Pros | Cons |
|
|
(Created Blade's page under the old style of page, mostly just getting this one out it's been cooking for months for no reason) |
No edit summary |
||
| Line 1: | Line 1: | ||
__NOTOC__ | |||
== Introduction == | |||
[[image:KRSCH_Blade_portrait.png|<center><font size="3"><b>Kamen Rider Blade</b></font></center>|frame|right]] | [[image:KRSCH_Blade_portrait.png|<center><font size="3"><b>Kamen Rider Blade</b></font></center>|frame|right]] | ||
'''Kamen Rider Blade''' yells WEH and throws himself at you full force. | |||
'''Kamen Rider Blade | |||
It's mostly obvious how Blade works at first glance. His attacks are very strong on their face, he does a ton of damage, and he's working with a damaging and flexible Rider Art Followup in both of his forms. | It's mostly obvious how Blade works at first glance. His attacks are very strong on their face, he does a ton of damage, and he's working with a damaging and flexible Rider Art Followup in both of his forms. | ||
Blade's kit is highly unusual in a number of ways. This is usually in his favor, supplementing his obvious strengths with some really deranged properties on his moves. This includes moves that drain Rider Gauge arbitrarily, a projectile that deletes other projectiles, and utterly bizarre tracking. | |||
Blade's most notable weakness is that he's one of the very few characters in the game without a normal jumping attack. All of his air buttons are divekicks, so he must choose carefully when jumping. He also has a very small and relatively inflexible movelist relative to a lot of characters. | Blade's most notable weakness is that he's one of the very few characters in the game without a normal jumping attack. All of his air buttons are divekicks, so he must choose carefully when jumping. He also has a very small and relatively inflexible movelist relative to a lot of characters. | ||
<tabber> | |||
|-|Power Up Style (King Form)= | |||
In this variation, Blade gains access to his final form: King Form. In this form, Blade boasts improved strings, a notably powerful projectile, and an oppressive advancing attack. | |||
{{StrengthsAndWeaknesses | {{StrengthsAndWeaknesses | ||
| Line 22: | Line 21: | ||
|cons = | |cons = | ||
* '''Limited Air Options:''' Blade is a rare character who doesn't have any air normals besides divekicks. | * '''Limited Air Options:''' Blade is a rare character who doesn't have any air normals besides divekicks. | ||
* '''Awkward Base Form Matchups:''' Some of Blade's Base Form tools match up poorly against certain characters. For example, an advancing tackle | * '''Awkward Base Form Matchups:''' Some of Blade's Base Form tools match up poorly against certain characters. For example, an advancing tackle isn't a great idea against characters who put a lot of projectiles in his path. These concerns mostly go away once he reaches King Form, but reaching it is half the battle. | ||
| tablewidth = 80 | | tablewidth = 80 | ||
}} | }} | ||
|-|Power Up Style (Jack Form)= | |||
In this variation, Blade gains access to his Jack Form, which solves one of Blade's core problems at a steep price. | |||
The main benefit of choosing Jack Form is that Blade gains access to his only non-divekick jumping attacks. However, Jack Form is probably Blade's weakest form overall. | |||
Players who prefer Blade's Base Form over King Form may prefer the feel of this alternative. | |||
{{ | {{StrengthsAndWeaknesses | ||
Base Form= | | intro = [[file:KRSCH_Blade_icon.png|64px]] '''Kamen Rider Blade (Jack Form)''' boasts air superiority over King Form. | ||
[[image: | | pros = | ||
== Normal Moves == | * '''A Normal Jumping Attack:''' Going to the air is much less of a bad idea for Jack Form. | ||
* '''He's Still Blade:''' King Form is powerful, but Blade's Base Form is a large part of his strength. Losing King Form doesn't make Blade bad by any means. | |||
* '''Power Up Style:''' Power Up Style characters universally are able to refresh their Guard Gauge and damage scaling by transforming. | |||
|cons = | |||
* '''Is Just Okay:''' Blade's Jack Form is a rare example of a Power Up character who becomes arguably worse than his default form. | |||
* '''Awkward Base Form Matchups:''' Some of Blade's Base Form tools match up poorly against certain characters. For example, an advancing tackle isn't a great idea against characters who put a lot of projectiles in his path. | |||
| tablewidth = 80 | |||
}} | |||
</tabber> | |||
== Form Select == | |||
<div style="top: 0; display: flex; justify-content: center; background-color: #cacace;" class="movelist-toggles"> | |||
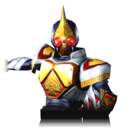
<div id="movelist-toggle-1" class="movelist-toggle-button">[[image:KRSCH_Blade_Ace_Form_Illustration.png|130px|link=]]<br><center>'''Base Form'''</center></div> | |||
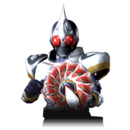
<div id="movelist-toggle-2" class="movelist-toggle-button">[[image:KRSCH_Blade_King_Form_Illustration.png|130px|link=]]<br><center>'''King Form'''</center></div> | |||
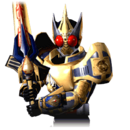
<div id="movelist-toggle-3" class="movelist-toggle-button">[[image:KRSCH_Blade_Jack_Form_Illustration.png|130px|link=]]<br><center>'''Jack Form'''</center></div> | |||
</div> | |||
<div id="movelist-1" class="movelist"><!-- Base Blade Move List --> | |||
== Move List == | |||
=== Normal Moves === | |||
====== <font style="visibility:hidden" size="0">5LL</font> ====== | ====== <font style="visibility:hidden" size="0">5LL</font> ====== | ||
{{MoveData | {{MoveData | ||
| Line 407: | Line 430: | ||
|hitadv= | |hitadv= | ||
|description= | |description= | ||
Blade divekicks, dealing the lowest damage of his three divekicks. In return, this normal is really unusual for divekicks in Super Climax Heroes, and has absurd tracking. Where other divekicks would whiff directly over the opponent's head, this divekick will get stuck directly above the opponent and land on top of them for a successful hit. | Blade divekicks, dealing the lowest damage of his three divekicks. In return, this normal is really unusual for divekicks in ''Super Climax Heroes'', and has absurd tracking. Where other divekicks would whiff directly over the opponent's head, this divekick will get stuck directly above the opponent and land on top of them for a successful hit. | ||
The downside is that it's still unsafe on block, as you'd expect for a divekick in this game. This move might be a footnote for other characters, but Blade often wants to use this if he has to go airborne, considering he doesn't have access to normal jumping attacks. | The downside is that it's still unsafe on block, as you'd expect for a divekick in this game. This move might be a footnote for other characters, but Blade often wants to use this if he has to go airborne, considering he doesn't have access to normal jumping attacks. | ||
| Line 432: | Line 455: | ||
}} | }} | ||
====== <font style="visibility:hidden" size="0"> | === Special Moves === | ||
====== <font style="visibility:hidden" size="0">5S</font> ====== | |||
{{MoveData | {{MoveData | ||
|image= | |image=KRSCH_Blade_5S.png | ||
|caption= | |caption= | ||
|name=Boar Tackle | |||
|input=5S | |||
|name=Boar Tackle | |||
|input=5S | |||
|data= | |data= | ||
{{AttackData-KRSCH | {{AttackData-KRSCH | ||
| Line 514: | Line 516: | ||
}} | }} | ||
== | == Universal Mechanics == | ||
====== <font style="visibility:hidden" size="0"> | ====== <font style="visibility:hidden" size="0">Throw</font> ====== | ||
{{MoveData | {{MoveData | ||
|image=KRSCH_Blade_DA.png | |image=KRSCH_Blade_Throw.png | ||
|caption=Air Dash | |caption= | ||
|name=Dash Action | |input=4H | ||
|name=Throw | |||
|subtitle= | |||
|data= | |||
{{AttackData-KRSCH | |||
|damage= | |||
|guard=N | |||
|startup= | |||
|active= | |||
|recovery= | |||
|blockadv= | |||
|hitadv= | |||
|description= | |||
Blade's throw. Has plenty of advantage, but not enough to safely power up with dS near the corner. | |||
}} | |||
}} | |||
====== <font style="visibility:hidden" size="0">Dash Action</font> ====== | |||
{{MoveData | |||
|image=KRSCH_Blade_DA.png | |||
|caption=Air Dash | |||
|name=Dash Action | |||
|subtitle= | |subtitle= | ||
|data= | |data= | ||
| Line 538: | Line 561: | ||
{{MoveData | {{MoveData | ||
|image=KRSCH_Blade_RA.png | |image=KRSCH_Blade_RA.png | ||
|caption=High Speed Dash | |||
|name=Rider Art | |name=Rider Art | ||
|subtitle= | |subtitle= | ||
| Line 550: | Line 574: | ||
|hitadv= | |hitadv= | ||
|description= | |description= | ||
Costs .5 stocks of the Rider Gauge. Has access to a followup by pressing <u>Rider Art</u> or <u>Special Attack</u> at no additional cost. | |||
This Rider Art Followup has ridiculously fast startup, and if it hits this initial hitbox, Blade enters a cinematic that deals substantial damage, making it useful as a punish or a combo ender. | This Rider Art Followup has ridiculously fast startup, and if it hits this initial hitbox, Blade enters a cinematic that deals substantial damage, making it useful as a punish or a combo ender. | ||
| Line 557: | Line 581: | ||
}} | }} | ||
}} | }} | ||
====== <font style="visibility:hidden" size="0"> Style Action </font> ====== | |||
====== <font style="visibility:hidden" size="0"> | |||
{{MoveData | {{MoveData | ||
|image= | |image=KRSCH_Blade_SA.png | ||
| | |caption=Power Up | ||
|name= | |name=Style Action | ||
|subtitle= | |subtitle= | ||
|data= | |data= | ||
{{AttackData-KRSCH | {{AttackData-KRSCH | ||
|damage= | |damage= | ||
|guard= | |guard=N/A | ||
|startup= | |startup= | ||
|active= | |active= | ||
| Line 578: | Line 598: | ||
|hitadv= | |hitadv= | ||
|description= | |description= | ||
Blade transforms into his chosen alternate form (King Form or Jack Form) at the cost of three stocks of the Rider Gauge. As with all Power Up style transformations, this can be used to cancel grounded normal attacks and blockstun. Doing so also refreshes damage scaling and the Guard Gauge. | |||
}} | }} | ||
{{AttackData-KRSCH | }} | ||
</div> | |||
<div id="movelist-2" class="movelist"><!-- King Form Move List --> | |||
== Move List == | |||
=== Normal Moves === | |||
====== <font style="visibility:hidden" size="0">King 5LL</font> ====== | |||
{{MoveData | |||
|image=KRSCH_Blade_King_5L.png | |||
|image2=KRSCH_Blade_King_5LL.png | |||
|name=5LL | |||
|subtitle= | |||
|data= | |||
{{AttackData-KRSCH | |||
|version=5L | |||
|damage= | |||
|guard=Y | |||
|startup= | |||
|active= | |||
|recovery= | |||
|blockadv= | |||
|hitadv= | |||
|description= | |||
}} | |||
{{AttackData-KRSCH | |||
|version=5LL | |version=5LL | ||
|damage= | |damage= | ||
| Line 844: | Line 888: | ||
|description= | |description= | ||
A quick and powerful slash that leads into a deadly string. King Form's powered up version of 5H retains all of its strengths, as well as advancing on startup. | A quick and powerful slash that leads into a deadly string. King Form's powered up version of 5H retains all of its strengths, as well as advancing on startup. | ||
}} | }} | ||
{{AttackData-KRSCH | {{AttackData-KRSCH | ||
|version=5HH | |version=5HH | ||
| Line 976: | Line 1,020: | ||
}} | }} | ||
====== <font style="visibility:hidden" size="0">King | ====== <font style="visibility:hidden" size="0">King JL</font> ====== | ||
{{MoveData | {{MoveData | ||
|image=KRSCH_Blade_King_jL.png | |image=KRSCH_Blade_King_jL.png | ||
| Line 996: | Line 1,040: | ||
}} | }} | ||
====== <font style="visibility:hidden" size="0">King | === Special Moves === | ||
====== <font style="visibility:hidden" size="0">King 5S</font> ====== | |||
{{MoveData | {{MoveData | ||
|image= | |image=KRSCH_Blade_King_5S.png | ||
|caption= | |caption= | ||
|name=Royal Straight Flush (Wave) | |||
|name= | |subtitle=5S | ||
|subtitle= | |||
|data= | |data= | ||
{{AttackData-KRSCH | {{AttackData-KRSCH | ||
|damage= | |damage= | ||
|guard=Y | |||
|guard=Y | |||
|startup= | |startup= | ||
|active= | |active= | ||
| Line 1,082: | Line 1,105: | ||
}} | }} | ||
== | == Universal Mechanics == | ||
====== <font style="visibility:hidden" size="0">King | ====== <font style="visibility:hidden" size="0">King Throw</font> ====== | ||
{{MoveData | {{MoveData | ||
|image=KRSCH_Blade_King_DA.png | |image=KRSCH_Blade_King_Throw.png | ||
|caption=Air Dash | |caption= | ||
|name=Dash Action | |input=4H | ||
|name=Throw | |||
|subtitle= | |||
|data= | |||
{{AttackData-KRSCH | |||
|damage= | |||
|guard=N | |||
|startup= | |||
|active= | |||
|recovery= | |||
|blockadv= | |||
|hitadv= | |||
|description= | |||
King Form's throw. Fairly standard in most ways. If Blade does his dS immediately after a throw against the wall, it can hit meaty as a crossup. | |||
}} | |||
}} | |||
====== <font style="visibility:hidden" size="0">King Dash Action</font> ====== | |||
{{MoveData | |||
|image=KRSCH_Blade_King_DA.png | |||
|caption=Air Dash | |||
|name=Dash Action | |||
|subtitle= | |subtitle= | ||
|data= | |data= | ||
| Line 1,124: | Line 1,168: | ||
}} | }} | ||
}} | }} | ||
== | ====== <font style="visibility:hidden" size="0"> King Style Action </font> ====== | ||
{{MoveData | |||
|image=KRSCH_Blade_King_SA.png | |||
|caption=Power Up | |||
While already in King Form, <u>Style Action</u> transforms back into Blade's Base Form at no cost. Doing so also refreshes damage scaling and the Guard Gauge. | |name=Style Action | ||
|subtitle= | |||
|data= | |||
{{AttackData-KRSCH | |||
|damage= | |||
|guard=N/A | |||
|startup= | |||
|active= | |||
|recovery= | |||
|blockadv= | |||
|hitadv= | |||
|description= | |||
While already in King Form, <u>Style Action</u> transforms back into Blade's Base Form at no cost. Doing so also refreshes damage scaling and the Guard Gauge. | |||
}} | |||
}} | |||
== Combos == | |||
=== Base Form === | === Base Form === | ||
*5L > Rider Art Followup | *5L > Rider Art Followup | ||
*5L > Rider Finale | *5L > Rider Finale | ||
| Line 1,150: | Line 1,206: | ||
=== King Form === | === King Form === | ||
*5LL > 5S | *5LL > 5S | ||
*5LL > optional side walk > dS | *5LL > optional side walk > dS | ||
| Line 1,162: | Line 1,217: | ||
:King Form's standard RC combos. These examples balance meter spent for damage. | :King Form's standard RC combos. These examples balance meter spent for damage. | ||
:Using 5HHH or 6LHH guarantees that 5S will hit as a double hit of 5S, unless hitting the opponent into the wall. This ender both deals absurd damage and builds 2 full stocks of Rider Gauge, making it preferred when possible. | :Using 5HHH or 6LHH guarantees that 5S will hit as a double hit of 5S, unless hitting the opponent into the wall. This ender both deals absurd damage and builds 2 full stocks of Rider Gauge, making it preferred when possible. | ||
</div> | |||
<div id="movelist-3" class="movelist"><!-- Jack Form Move List --> | |||
== Move List == | |||
=== Normal Moves === | |||
====== <font style="visibility:hidden" size="0">Jack 5LL</font> ====== | |||
{{MoveData | |||
|image=KRSCH_Blade_Jack_5L.png | |||
|image2=KRSCH_Blade_Jack_5LL.png | |||
|name=5LL | |||
|subtitle= | |||
|data= | |||
{{AttackData-KRSCH | |||
|version=5L | |||
== Normal Moves == | |||
====== <font style="visibility:hidden" size="0">5LL</font> ====== | |||
{{MoveData | |||
|image= | |||
|image2= | |||
|name=5LL | |||
|subtitle= | |||
|data= | |||
{{AttackData-KRSCH | |||
|version=5L | |||
|damage= | |damage= | ||
|guard=Y | |guard=Y | ||
| Line 1,210: | Line 1,238: | ||
|hitadv= | |hitadv= | ||
|description= | |description= | ||
Compared to Base Form's 5L, this one is slightly worse on hit, so you can't link Rider Finale from it. | |||
}} | }} | ||
{{AttackData-KRSCH | {{AttackData-KRSCH | ||
|version=5LL | |version=5LL | ||
|damage= | |damage= | ||
|guard=Y | |guard=Y | ||
| Line 1,223: | Line 1,250: | ||
|hitadv= | |hitadv= | ||
|description= | |description= | ||
Identical to Blade's Base Form 5LL. | |||
}} | }} | ||
}} | }} | ||
====== <font style="visibility:hidden" size="0">5LHH</font> ====== | ====== <font style="visibility:hidden" size="0">Jack 5LHH</font> ====== | ||
{{MoveData | {{MoveData | ||
|image= | |image=KRSCH_Blade_Jack_5L.png | ||
|image2= | |image2=KRSCH_Blade_Jack_5LH.png | ||
|image3= | |image3=KRSCH_Blade_Jack_5LHH.png | ||
|name= | |name=5LHH | ||
|subtitle= | |subtitle= | ||
|data= | |data= | ||
| Line 1,249: | Line 1,276: | ||
{{AttackData-KRSCH | {{AttackData-KRSCH | ||
|version=5LH | |version=5LH | ||
|damage= | |damage= | ||
|guard=Y | |guard=Y | ||
| Line 1,258: | Line 1,284: | ||
|hitadv= | |hitadv= | ||
|description= | |description= | ||
}} | }} | ||
{{AttackData-KRSCH | {{AttackData-KRSCH | ||
|version=5LHH | |version=5LHH | ||
|damage= | |damage= | ||
|guard=Y | |guard=Y | ||
| Line 1,275: | Line 1,300: | ||
}} | }} | ||
====== <font style="visibility:hidden" size="0">4/6LL</font> ====== | ====== <font style="visibility:hidden" size="0">Jack 4/6LL</font> ====== | ||
{{MoveData | {{MoveData | ||
|image= | |image=KRSCH_Blade_Jack_46L.png | ||
|image2= | |image2=KRSCH_Blade_Jack_46LL.png | ||
|name=4/6LL | |name=4/6LL | ||
|subtitle= | |subtitle= | ||
| Line 1,296: | Line 1,321: | ||
{{AttackData-KRSCH | {{AttackData-KRSCH | ||
|version=4/6LL | |version=4/6LL | ||
|damage= | |damage= | ||
|guard=Y | |guard=Y | ||
| Line 1,309: | Line 1,333: | ||
}} | }} | ||
====== <font style="visibility:hidden" size="0">4/6LH</font> ====== | ====== <font style="visibility:hidden" size="0">Jack 4/6LH</font> ====== | ||
{{MoveData | {{MoveData | ||
|image= | |image=KRSCH_Blade_Jack_46L.png | ||
|image2= | |image2=KRSCH_Blade_Jack_46LH.png | ||
|name=4/6LH | |name=4/6LH | ||
|subtitle= | |subtitle= | ||
| Line 1,330: | Line 1,354: | ||
{{AttackData-KRSCH | {{AttackData-KRSCH | ||
|version=4/6LH | |version=4/6LH | ||
|damage= | |damage= | ||
|guard=Y | |guard=Y | ||
| Line 1,339: | Line 1,362: | ||
|hitadv= | |hitadv= | ||
|description= | |description= | ||
Knocks the opponent down on hit. Fast enough to reliably hitconfirm from 4/6L. | |||
}} | }} | ||
}} | }} | ||
====== <font style="visibility:hidden" size="0">2/8LL</font> ====== | ====== <font style="visibility:hidden" size="0">Jack 2/8LL</font> ====== | ||
{{MoveData | {{MoveData | ||
|image= | |image=KRSCH_Blade_Jack_28L.png | ||
|image2= | |image2=KRSCH_Blade_Jack_28LL.png | ||
|name=2/8LL | |name=2/8LL | ||
|subtitle= | |subtitle= | ||
| Line 1,364: | Line 1,387: | ||
{{AttackData-KRSCH | {{AttackData-KRSCH | ||
|version=2/8LL | |version=2/8LL | ||
|damage= | |damage= | ||
|guard=Y | |guard=Y | ||
| Line 1,373: | Line 1,395: | ||
|hitadv= | |hitadv= | ||
|description= | |description= | ||
Knocks the opponent away on hit | Knocks the opponent away on hit. | ||
}} | }} | ||
}} | }} | ||
====== <font style="visibility:hidden" size="0"> | ====== <font style="visibility:hidden" size="0">Jack 28LHH</font> ====== | ||
{{MoveData | {{MoveData | ||
|image= | |image=KRSCH_Blade_Jack_28L.png | ||
|image2= | |image2=KRSCH_Blade_Jack_28LH.png | ||
|name=2/ | |image3=KRSCH_Blade_Jack_28LHH.png | ||
|name=2/8LHH | |||
|subtitle= | |subtitle= | ||
|data= | |data= | ||
| Line 1,398: | Line 1,421: | ||
{{AttackData-KRSCH | {{AttackData-KRSCH | ||
|version=2/8LH | |version=2/8LH | ||
|damage= | |damage= | ||
|guard=Y | |guard=Y | ||
| Line 1,407: | Line 1,429: | ||
|hitadv= | |hitadv= | ||
|description= | |description= | ||
Launches the opponent on hit. Can be followed up with a Combo Jump into its aircombo followup string, jLHS. | |||
You can alternatively follow up meterlessly by linking to 5S. | |||
}} | }} | ||
{{AttackData-KRSCH | {{AttackData-KRSCH | ||
|version= | |version=2/8LHH | ||
|damage= | |damage= | ||
|guard=Y | |guard=Y | ||
| Line 1,430: | Line 1,443: | ||
|hitadv= | |hitadv= | ||
|description= | |description= | ||
Knocks the opponent away on hit. | |||
}} | }} | ||
}} | |||
====== <font style="visibility:hidden" size="0">Jack 5HHHHH</font> ====== | |||
{{MoveData | |||
|image=KRSCH_Blade_Jack_5H.png | |||
|image2=KRSCH_Blade_Jack_5HH.png | |||
|image3=KRSCH_Blade_Jack_5HHH.png | |||
|image4=KRSCH_Blade_Jack_5HHHH.png | |||
|image5=KRSCH_Blade_Jack_5HHHHH.png | |||
|name=5HHHHH | |||
|subtitle= | |||
|data= | |||
{{AttackData-KRSCH | {{AttackData-KRSCH | ||
|version= | |version=5H | ||
|damage= | |damage= | ||
|guard=Y | |guard=Y | ||
| Line 1,443: | Line 1,467: | ||
|hitadv= | |hitadv= | ||
|description= | |description= | ||
A quick slash that leads into a powerful string. A key normal for Jack Form, same as Base Form. | |||
}} | |||
{{AttackData-KRSCH | {{AttackData-KRSCH | ||
|version= | |version=5HH | ||
|damage= | |damage= | ||
|guard=Y | |guard=Y | ||
| Line 1,456: | Line 1,479: | ||
|hitadv= | |hitadv= | ||
|description= | |description= | ||
Fast enough to hitconfirm from 5H. Has a mashable stagger, so it's best not to delay your 5HHH too much. | |||
}} | }} | ||
{{AttackData-KRSCH | |||
|version= | |version=5HHH | ||
|damage= | |damage= | ||
|guard=Y | |guard=Y | ||
| Line 1,469: | Line 1,491: | ||
|hitadv= | |hitadv= | ||
|description= | |description= | ||
}} | }} | ||
{{AttackData-KRSCH | {{AttackData-KRSCH | ||
|version= | |version=5HHHH | ||
|damage= | |damage= | ||
|guard=Y | |guard=Y | ||
| Line 1,491: | Line 1,503: | ||
|hitadv= | |hitadv= | ||
|description= | |description= | ||
Launches the opponent on hit. | |||
}} | }} | ||
{{AttackData-KRSCH | {{AttackData-KRSCH | ||
|version= | |version=5HHHHH | ||
|damage= | |damage= | ||
|guard=Y | |guard=Y | ||
| Line 1,504: | Line 1,515: | ||
|hitadv= | |hitadv= | ||
|description= | |description= | ||
Knocks the opponent away on hit. | |||
}} | |||
}} | |||
====== <font style="visibility:hidden" size="0">Jack 6HHH</font> ====== | |||
{{MoveData | |||
|image=KRSCH_Blade_King_6H.png | |||
|image2=KRSCH_Blade_King_6HH.png | |||
|image3=KRSCH_Blade_King_6HHH.png | |||
|name=6HHH | |||
|subtitle= | |||
|data= | |||
{{AttackData-KRSCH | {{AttackData-KRSCH | ||
|version= | |version=6H | ||
|damage= | |damage= | ||
|guard=Y | |guard=Y | ||
| Line 1,517: | Line 1,537: | ||
|hitadv= | |hitadv= | ||
|description= | |description= | ||
A stepping slash. Useful as an advancing normal to confirm from. | |||
}} | }} | ||
{{AttackData-KRSCH | {{AttackData-KRSCH | ||
|version= | |version=6HH | ||
|damage= | |damage= | ||
|guard=Y | |guard=Y | ||
| Line 1,538: | Line 1,549: | ||
|hitadv= | |hitadv= | ||
|description= | |description= | ||
Hit-confirmable string filler. | |||
}} | }} | ||
{{AttackData-KRSCH | {{AttackData-KRSCH | ||
|version= | |version=6HHH | ||
|damage= | |damage= | ||
|guard=Y | |guard=Y | ||
| Line 1,551: | Line 1,561: | ||
|hitadv= | |hitadv= | ||
|description= | |description= | ||
Knocks the opponent | Knocks the opponent away on hit. | ||
}} | }} | ||
}} | }} | ||
====== <font style="visibility:hidden" size="0"> | ====== <font style="visibility:hidden" size="0">Jack 2/8HH</font> ====== | ||
{{MoveData | {{MoveData | ||
|image= | |image=KRSCH_Blade_Jack_28H.png | ||
|name= | |image2=KRSCH_Blade_Jack_28HH.png | ||
|name=2/8HH | |||
|subtitle= | |subtitle= | ||
|data= | |data= | ||
{{AttackData-KRSCH | {{AttackData-KRSCH | ||
|version=2/8H | |||
|damage= | |damage= | ||
|guard=Y | |guard=Y | ||
| Line 1,570: | Line 1,582: | ||
|hitadv= | |hitadv= | ||
|description= | |description= | ||
Identical to Base Form's 2/8H, making it an incredible advancing normal. Launches the opponent on hit. | |||
}} | }} | ||
{{AttackData-KRSCH | {{AttackData-KRSCH | ||
|version=2/8HH | |||
|damage= | |damage= | ||
|guard=Y | |guard=Y | ||
| Line 1,591: | Line 1,594: | ||
|hitadv= | |hitadv= | ||
|description= | |description= | ||
Knocks the opponent down. | |||
}} | }} | ||
}} | }} | ||
====== <font style="visibility:hidden" size="0"> | ====== <font style="visibility:hidden" size="0">Jack JL</font> ====== | ||
{{MoveData | {{MoveData | ||
|image= | |image=KRSCH_Blade_Jack_jL.png | ||
|caption= | |caption= | ||
|name=jL | |||
|name= | |||
|subtitle= | |subtitle= | ||
|data= | |data= | ||
{{AttackData-KRSCH | {{AttackData-KRSCH | ||
|damage= | |damage= | ||
|guard= | |guard=Y | ||
|startup= | |startup= | ||
|active= | |active= | ||
| Line 1,612: | Line 1,614: | ||
|hitadv= | |hitadv= | ||
|description= | |description= | ||
An airborne twirling slash. More or less the entire reason to pick Jack Form is that you wanted this normal more than you wanted everything King Form offers. | |||
Despite that, its hitbox really leaves something to be desired, and it must be used incredibly low to the ground to even hit a grounded opponent. | |||
}} | }} | ||
}} | }} | ||
====== <font style="visibility:hidden" size="0">Jack JH</font> ====== | |||
====== <font style="visibility:hidden" size="0"> | |||
{{MoveData | {{MoveData | ||
|image= | |image=KRSCH_Blade_Jack_jH.png | ||
|caption= | |caption= | ||
|name= | |name=jH | ||
| | |subtitle= | ||
|data= | |data= | ||
{{AttackData-KRSCH | {{AttackData-KRSCH | ||
| Line 1,633: | Line 1,636: | ||
|hitadv= | |hitadv= | ||
|description= | |description= | ||
An awkward diving slash. | |||
Jack Form's other unique air tool, though this one also leaves a lot to be desired. Very unsafe on block or whiff like most diving attacks in Super Climax Heroes. That's not helped by its hitbox and damage being far worse than Blade's divekick alternatives, meaning it often whiffs completely where a divekick would hit and it's worse even when it does hit. | |||
}} | }} | ||
}} | }} | ||
====== <font style="visibility:hidden" size="0"> | === Special Moves === | ||
====== <font style="visibility:hidden" size="0">Jack 5S</font> ====== | |||
{{MoveData | {{MoveData | ||
|image= | |image=KRSCH_Blade_Jack_5S.png | ||
|caption= | |caption= | ||
|name=Lightning | |name=Lightning Sonic | ||
| | |subtitle=5S | ||
|data= | |data= | ||
{{AttackData-KRSCH | {{AttackData-KRSCH | ||
|damage= | |damage= | ||
|guard= | |guard=Y | ||
|startup= | |startup= | ||
|active= | |active= | ||
| Line 1,653: | Line 1,659: | ||
|hitadv= | |hitadv= | ||
|description= | |description= | ||
Blade | Blade yells and books it towards the opponent. A bizarre attack that begins a cinematic on hit, dealing a small chunk of damage. | ||
}} | }} | ||
}} | }} | ||
====== <font style="visibility:hidden" size="0"> | ====== <font style="visibility:hidden" size="0">Jack DS</font> ====== | ||
{{MoveData | {{MoveData | ||
|image= | |image=KRSCH_Blade_Jack_dS.png | ||
|caption= | |caption= | ||
|name=Lightning | |name=Lightning Slash | ||
| | |subtitle=Any direction + S | ||
|data= | |data= | ||
{{AttackData-KRSCH | {{AttackData-KRSCH | ||
|damage= | |damage= | ||
|guard= | |guard= | ||
|startup= | |startup= | ||
|active= | |active= | ||
| Line 1,673: | Line 1,679: | ||
|hitadv= | |hitadv= | ||
|description= | |description= | ||
Blade | Blade plants his sword in the ground and allows lightning to flow through him, increasing his damage for a set period. The damage increase is substantial, so it's worth fitting this in. | ||
}} | }} | ||
}} | }} | ||
====== <font style="visibility:hidden" size="0">Jack JS</font> ====== | |||
====== <font style="visibility:hidden" size="0"> | |||
{{MoveData | {{MoveData | ||
|image= | |image=KRSCH_Blade_Jack_jS.png | ||
|caption= | |caption= | ||
|name= | |name=Lightning Blast | ||
|subtitle= | |subtitle=jS | ||
|data= | |data= | ||
{{AttackData-KRSCH | {{AttackData-KRSCH | ||
|damage= | |damage= | ||
|guard= | |guard= | ||
|startup= | |startup= | ||
|active= | |active= | ||
| Line 1,694: | Line 1,699: | ||
|hitadv= | |hitadv= | ||
|description= | |description= | ||
Blade | Maybe the most notable factor in Jack Form's air superiority, this is Blade's jS if it had the bizarre tracking of jL. | ||
}} | }} | ||
}} | }} | ||
====== <font style="visibility:hidden" size="0"> | == Universal Mechanics == | ||
====== <font style="visibility:hidden" size="0">Jack Throw</font> ====== | |||
{{MoveData | {{MoveData | ||
|image= | |image=KRSCH_Blade_Jack_Throw.png | ||
|name= | |caption= | ||
|input=4H | |||
|name=Throw | |||
|subtitle= | |subtitle= | ||
|data= | |data= | ||
{{AttackData-KRSCH | {{AttackData-KRSCH | ||
|damage= | |damage= | ||
|guard= | |guard=N | ||
|startup= | |startup= | ||
|active= | |active= | ||
| Line 1,713: | Line 1,721: | ||
|hitadv= | |hitadv= | ||
|description= | |description= | ||
Jack Form's throw. | |||
}} | }} | ||
}} | }} | ||
====== <font style="visibility:hidden" size="0">Jack Dash Action</font> ====== | |||
====== <font style="visibility:hidden" size="0">Jack | |||
{{MoveData | {{MoveData | ||
|image= | |image=KRSCH_Blade_Jack_DA.png | ||
| | |caption=Air Dash | ||
|name= | |name=Dash Action | ||
|subtitle= | |subtitle= | ||
|data= | |data= | ||
{{AttackData-KRSCH | {{AttackData-KRSCH | ||
|damage= | |damage= | ||
|guard= | |guard=N/A | ||
|startup= | |startup= | ||
|active= | |active= | ||
| Line 1,741: | Line 1,741: | ||
|hitadv= | |hitadv= | ||
|description= | |description= | ||
Blade airdashes. A generic mobility tool. Costs .5 stocks of Rider Gauge. Thanks to Jack Form's better air capabilities, this is much more useful. | |||
}} | }} | ||
}} | |||
====== <font style="visibility:hidden" size="0">Jack Rider Art</font> ====== | |||
{{MoveData | |||
|image=KRSCH_Blade_Jack_RA.png | |||
|caption= | |||
|name=Rider Art | |||
|subtitle=Flight Mode | |||
|data= | |||
{{AttackData-KRSCH | {{AttackData-KRSCH | ||
|damage= | |damage= | ||
|guard=Y | |guard=Y | ||
| Line 1,753: | Line 1,761: | ||
|hitadv= | |hitadv= | ||
|description= | |description= | ||
Upon pressing <u>Rider Art</u>, Blade enters Flight Mode until the button is released. While hovering, the Rider Gauge slowly drains, and Blade has access to moves exclusive to Flight Mode. Requires (but does not consume) 1 stock of Rider Gauge to initiate. | |||
}} | }} | ||
}} | }} | ||
====== <font style="visibility:hidden" size="0">Jack | ====== <font style="visibility:hidden" size="0">Jack Rider Art L</font> ====== | ||
{{MoveData | {{MoveData | ||
|image= | |image=KRSCH_Blade_Jack_RA_L.png | ||
| | |caption= | ||
|name=L during Flight Mode | |||
|name= | |||
|subtitle= | |subtitle= | ||
|data= | |data= | ||
{{AttackData-KRSCH | {{AttackData-KRSCH | ||
|damage= | |damage= | ||
|guard=Y | |guard=Y | ||
| Line 1,775: | Line 1,781: | ||
|hitadv= | |hitadv= | ||
|description= | |description= | ||
A poke with a deadzone underneath Blade. | |||
}} | }} | ||
}} | |||
====== <font style="visibility:hidden" size="0">Jack Rider Art H</font> ====== | |||
{{MoveData | |||
|image=KRSCH_Blade_Jack_RA_H.png | |||
|caption= | |||
|name=H during Flight Mode | |||
|subtitle= | |||
|data= | |||
{{AttackData-KRSCH | {{AttackData-KRSCH | ||
|damage= | |damage= | ||
|guard=Y | |guard=Y | ||
| Line 1,787: | Line 1,801: | ||
|hitadv= | |hitadv= | ||
|description= | |description= | ||
A downward swipe that doesn't always reach to the ground. | |||
}} | }} | ||
}} | |||
====== <font style="visibility:hidden" size="0">Jack Rider Art S</font> ====== | |||
{{MoveData | |||
|image=KRSCH_Blade_Jack_RA_S.png | |||
|caption= | |||
|name=S during Flight Mode | |||
|subtitle= | |||
|data= | |||
{{AttackData-KRSCH | {{AttackData-KRSCH | ||
|damage= | |damage= | ||
|guard=Y | |guard=Y | ||
| Line 1,799: | Line 1,821: | ||
|hitadv= | |hitadv= | ||
|description= | |description= | ||
Blade dives, starting a cinematic if this hit connects. Unlike most moves of this type, this is blockable, so it's not particularly scary. | |||
}} | }} | ||
}} | }} | ||
====== <font style="visibility:hidden" size="0">Jack | ====== <font style="visibility:hidden" size="0"> Jack Style Action </font> ====== | ||
{{MoveData | {{MoveData | ||
|image= | |image=KRSCH_Blade_Jack_SA.png | ||
| | |caption=Power Up | ||
|name= | |name=Style Action | ||
|subtitle= | |subtitle= | ||
|data= | |data= | ||
{{AttackData-KRSCH | {{AttackData-KRSCH | ||
|damage= | |damage= | ||
|guard= | |guard=N/A | ||
|startup= | |startup= | ||
|active= | |active= | ||
| Line 1,820: | Line 1,841: | ||
|hitadv= | |hitadv= | ||
|description= | |description= | ||
While already in Jack Form, <u>Style Action</u> transforms back into Blade's Base Form at no cost. Doing so also refreshes damage scaling and the Guard Gauge. | |||
}} | }} | ||
}} | }} | ||
== Combos == | == Combos == | ||
=== Base Form === | === Base Form === | ||
*5L > Rider Art Followup | *5L > Rider Art Followup | ||
*5L > Rider Finale | *5L > Rider Finale | ||
| Line 2,349: | Line 1,856: | ||
=== Jack Form === | === Jack Form === | ||
*5HHH > RC > 2LH > 5S | *5HHH > RC > 2LH > 5S | ||
*5HHH > RC > 2LH > Combo Jump > jLHS | *5HHH > RC > 2LH > Combo Jump > jLHS | ||
| Line 2,356: | Line 1,862: | ||
*5HHH > RC > 5HHH > RC > 5HHH > RC > 5HHH > Style Action (Base Form) > 5HHH > RC > 5HHH > RC > 5HHH > RC > 5L > Climax Time > Rider Finale | *5HHH > RC > 5HHH > RC > 5HHH > RC > 5HHH > Style Action (Base Form) > 5HHH > RC > 5HHH > RC > 5HHH > RC > 5L > Climax Time > Rider Finale | ||
:A touch of death combo starting from 3 stocks of Rider Gauge. Can be useful to close out rounds when your opponent is guard crushed. | :A touch of death combo starting from 3 stocks of Rider Gauge. Can be useful to close out rounds when your opponent is guard crushed. | ||
</div> | |||
== Navigation == | == Navigation == | ||
{{Navbox-KRSCH}} | {{Navbox-KRSCH}} | ||
[[Category:Kamen Rider Blade]] | |||
[[Category:Kamen Rider: Super Climax Heroes]] | |||

Kamen Rider Blade yells WEH and throws himself at you full force.
It's mostly obvious how Blade works at first glance. His attacks are very strong on their face, he does a ton of damage, and he's working with a damaging and flexible Rider Art Followup in both of his forms.
Blade's kit is highly unusual in a number of ways. This is usually in his favor, supplementing his obvious strengths with some really deranged properties on his moves. This includes moves that drain Rider Gauge arbitrarily, a projectile that deletes other projectiles, and utterly bizarre tracking.
Blade's most notable weakness is that he's one of the very few characters in the game without a normal jumping attack. All of his air buttons are divekicks, so he must choose carefully when jumping. He also has a very small and relatively inflexible movelist relative to a lot of characters.
In this variation, Blade gains access to his final form: King Form. In this form, Blade boasts improved strings, a notably powerful projectile, and an oppressive advancing attack.
|
|
|
| Pros | Cons |
|
|
In this variation, Blade gains access to his Jack Form, which solves one of Blade's core problems at a steep price.
The main benefit of choosing Jack Form is that Blade gains access to his only non-divekick jumping attacks. However, Jack Form is probably Blade's weakest form overall.
Players who prefer Blade's Base Form over King Form may prefer the feel of this alternative.
|
|
|
| Pros | Cons |
|
|
5LL
|
| ||||||||||||||||||||||||||||||||||||||||||||
|---|---|---|---|---|---|---|---|---|---|---|---|---|---|---|---|---|---|---|---|---|---|---|---|---|---|---|---|---|---|---|---|---|---|---|---|---|---|---|---|---|---|---|---|---|---|
5LH
|
| ||||||||||||||||||||||||||||||||||||||||||
|---|---|---|---|---|---|---|---|---|---|---|---|---|---|---|---|---|---|---|---|---|---|---|---|---|---|---|---|---|---|---|---|---|---|---|---|---|---|---|---|---|---|---|---|
4/6LL
|
| ||||||||||||||||||||||||||||||||||||||||||||
|---|---|---|---|---|---|---|---|---|---|---|---|---|---|---|---|---|---|---|---|---|---|---|---|---|---|---|---|---|---|---|---|---|---|---|---|---|---|---|---|---|---|---|---|---|---|
4/6LH
|
| ||||||||||||||||||||||||||||||||||
|---|---|---|---|---|---|---|---|---|---|---|---|---|---|---|---|---|---|---|---|---|---|---|---|---|---|---|---|---|---|---|---|---|---|---|---|
2/8LL
|
| ||||||||||||||||||||||||||||||||||
|---|---|---|---|---|---|---|---|---|---|---|---|---|---|---|---|---|---|---|---|---|---|---|---|---|---|---|---|---|---|---|---|---|---|---|---|
2/8LH
|
|
|---|
5HHHH
|
| ||||||||||||||||||||||||||||||||||||||||||||||||||||||||||||||||||||||
|---|---|---|---|---|---|---|---|---|---|---|---|---|---|---|---|---|---|---|---|---|---|---|---|---|---|---|---|---|---|---|---|---|---|---|---|---|---|---|---|---|---|---|---|---|---|---|---|---|---|---|---|---|---|---|---|---|---|---|---|---|---|---|---|---|---|---|---|---|---|---|---|
6HHH
|
| ||||||||||||||||||||||||||||||||||||||||||
|---|---|---|---|---|---|---|---|---|---|---|---|---|---|---|---|---|---|---|---|---|---|---|---|---|---|---|---|---|---|---|---|---|---|---|---|---|---|---|---|---|---|---|---|
2/8HH
|
| ||||||||||||||||||||||||||||||||||||||||||||
|---|---|---|---|---|---|---|---|---|---|---|---|---|---|---|---|---|---|---|---|---|---|---|---|---|---|---|---|---|---|---|---|---|---|---|---|---|---|---|---|---|---|---|---|---|---|
jL
|
| |||||||||||||||||||||||
|---|---|---|---|---|---|---|---|---|---|---|---|---|---|---|---|---|---|---|---|---|---|---|---|---|
jH
|
| |||||||||||||||||||||||
|---|---|---|---|---|---|---|---|---|---|---|---|---|---|---|---|---|---|---|---|---|---|---|---|---|
Boar Tackle
5S |
| |||||||||||||||||||||||
|---|---|---|---|---|---|---|---|---|---|---|---|---|---|---|---|---|---|---|---|---|---|---|---|---|
Lightning Slash
Any direction + S |
| |||||||||||||||||||||||
|---|---|---|---|---|---|---|---|---|---|---|---|---|---|---|---|---|---|---|---|---|---|---|---|---|
Lightning Blast
jS |
| |||||||||||||||||||||||
|---|---|---|---|---|---|---|---|---|---|---|---|---|---|---|---|---|---|---|---|---|---|---|---|---|
Throw
4H |
| |||||||||||||||||||||||
|---|---|---|---|---|---|---|---|---|---|---|---|---|---|---|---|---|---|---|---|---|---|---|---|---|
Dash Action Air Dash Air Dash
|
| |||||||||||||||||||||||
|---|---|---|---|---|---|---|---|---|---|---|---|---|---|---|---|---|---|---|---|---|---|---|---|---|
Rider Art High Speed Dash High Speed Dash
|
| |||||||||||||||||||||||
|---|---|---|---|---|---|---|---|---|---|---|---|---|---|---|---|---|---|---|---|---|---|---|---|---|
Style Action Power Up Power Up
|
| |||||||||||||||||||||||
|---|---|---|---|---|---|---|---|---|---|---|---|---|---|---|---|---|---|---|---|---|---|---|---|---|
5LL
|
| ||||||||||||||||||||||||||||||||||||||||||
|---|---|---|---|---|---|---|---|---|---|---|---|---|---|---|---|---|---|---|---|---|---|---|---|---|---|---|---|---|---|---|---|---|---|---|---|---|---|---|---|---|---|---|---|
5LHH
|
| ||||||||||||||||||||||||||||||||||||||||||||||||||||||||||
|---|---|---|---|---|---|---|---|---|---|---|---|---|---|---|---|---|---|---|---|---|---|---|---|---|---|---|---|---|---|---|---|---|---|---|---|---|---|---|---|---|---|---|---|---|---|---|---|---|---|---|---|---|---|---|---|---|---|---|---|
4/6LLL
|
| ||||||||||||||||||||||||||||||||||||||||||||||||||||||||||||||||||||
|---|---|---|---|---|---|---|---|---|---|---|---|---|---|---|---|---|---|---|---|---|---|---|---|---|---|---|---|---|---|---|---|---|---|---|---|---|---|---|---|---|---|---|---|---|---|---|---|---|---|---|---|---|---|---|---|---|---|---|---|---|---|---|---|---|---|---|---|---|---|
4/6LHHH
|
| ||||||||||||||||||||||||||||||||||||||||||||||||||||||||||||||||||||||||||||||||||||||||||||||
|---|---|---|---|---|---|---|---|---|---|---|---|---|---|---|---|---|---|---|---|---|---|---|---|---|---|---|---|---|---|---|---|---|---|---|---|---|---|---|---|---|---|---|---|---|---|---|---|---|---|---|---|---|---|---|---|---|---|---|---|---|---|---|---|---|---|---|---|---|---|---|---|---|---|---|---|---|---|---|---|---|---|---|---|---|---|---|---|---|---|---|---|---|---|---|---|
2/8LL
|
| ||||||||||||||||||||||||||||||||||||||||||||||||||||
|---|---|---|---|---|---|---|---|---|---|---|---|---|---|---|---|---|---|---|---|---|---|---|---|---|---|---|---|---|---|---|---|---|---|---|---|---|---|---|---|---|---|---|---|---|---|---|---|---|---|---|---|---|---|
2/8LHH
|
| ||||||||||||||||||||||||||||||||||||||||||||||||||||||||||||||||||||||||||||||
|---|---|---|---|---|---|---|---|---|---|---|---|---|---|---|---|---|---|---|---|---|---|---|---|---|---|---|---|---|---|---|---|---|---|---|---|---|---|---|---|---|---|---|---|---|---|---|---|---|---|---|---|---|---|---|---|---|---|---|---|---|---|---|---|---|---|---|---|---|---|---|---|---|---|---|---|---|---|---|---|
5HHHH
|
| ||||||||||||||||||||||||||||||||||||||||||||||||||||||||||||||||||||||||||||||||||||||||||||||
|---|---|---|---|---|---|---|---|---|---|---|---|---|---|---|---|---|---|---|---|---|---|---|---|---|---|---|---|---|---|---|---|---|---|---|---|---|---|---|---|---|---|---|---|---|---|---|---|---|---|---|---|---|---|---|---|---|---|---|---|---|---|---|---|---|---|---|---|---|---|---|---|---|---|---|---|---|---|---|---|---|---|---|---|---|---|---|---|---|---|---|---|---|---|---|---|
6HHHH
|
| ||||||||||||||||||||||||||||||||||||||||||||||||||||||||||||||||||||||||||||||||||||||||||||||||||||||||
|---|---|---|---|---|---|---|---|---|---|---|---|---|---|---|---|---|---|---|---|---|---|---|---|---|---|---|---|---|---|---|---|---|---|---|---|---|---|---|---|---|---|---|---|---|---|---|---|---|---|---|---|---|---|---|---|---|---|---|---|---|---|---|---|---|---|---|---|---|---|---|---|---|---|---|---|---|---|---|---|---|---|---|---|---|---|---|---|---|---|---|---|---|---|---|---|---|---|---|---|---|---|---|---|---|---|
2/8HHH
|
| ||||||||||||||||||||||||||||||||||||||||||||||||||||
|---|---|---|---|---|---|---|---|---|---|---|---|---|---|---|---|---|---|---|---|---|---|---|---|---|---|---|---|---|---|---|---|---|---|---|---|---|---|---|---|---|---|---|---|---|---|---|---|---|---|---|---|---|---|
jL
|
| |||||||||||||||||||||||
|---|---|---|---|---|---|---|---|---|---|---|---|---|---|---|---|---|---|---|---|---|---|---|---|---|
Royal Straight Flush (Wave)
5S |
| |||||||||||||||||||||||
|---|---|---|---|---|---|---|---|---|---|---|---|---|---|---|---|---|---|---|---|---|---|---|---|---|
Royal Straight Flush
Any direction + S |
| |||||||||||||||||||||||
|---|---|---|---|---|---|---|---|---|---|---|---|---|---|---|---|---|---|---|---|---|---|---|---|---|
Diving Kick
jS |
| |||||||||||||||||||||||
|---|---|---|---|---|---|---|---|---|---|---|---|---|---|---|---|---|---|---|---|---|---|---|---|---|
Throw
4H |
| |||||||||||||||||||||||
|---|---|---|---|---|---|---|---|---|---|---|---|---|---|---|---|---|---|---|---|---|---|---|---|---|
Dash Action Air Dash Air Dash
|
| |||||||||||||||||||||||
|---|---|---|---|---|---|---|---|---|---|---|---|---|---|---|---|---|---|---|---|---|---|---|---|---|
Rider Art
|
| |||||||||||||||||||||||
|---|---|---|---|---|---|---|---|---|---|---|---|---|---|---|---|---|---|---|---|---|---|---|---|---|
Style Action Power Up Power Up
|
| |||||||||||||||||||||||
|---|---|---|---|---|---|---|---|---|---|---|---|---|---|---|---|---|---|---|---|---|---|---|---|---|
5LL
|
| ||||||||||||||||||||||||||||||||||||||||||||||||||||
|---|---|---|---|---|---|---|---|---|---|---|---|---|---|---|---|---|---|---|---|---|---|---|---|---|---|---|---|---|---|---|---|---|---|---|---|---|---|---|---|---|---|---|---|---|---|---|---|---|---|---|---|---|---|
5LHH
|
| ||||||||||||||||||||||||||||||||||||||||||||||||||||||||||
|---|---|---|---|---|---|---|---|---|---|---|---|---|---|---|---|---|---|---|---|---|---|---|---|---|---|---|---|---|---|---|---|---|---|---|---|---|---|---|---|---|---|---|---|---|---|---|---|---|---|---|---|---|---|---|---|---|---|---|---|
4/6LL
|
| ||||||||||||||||||||||||||||||||||||||||||||||||||||
|---|---|---|---|---|---|---|---|---|---|---|---|---|---|---|---|---|---|---|---|---|---|---|---|---|---|---|---|---|---|---|---|---|---|---|---|---|---|---|---|---|---|---|---|---|---|---|---|---|---|---|---|---|---|
4/6LH
|
| ||||||||||||||||||||||||||||||||||||||||||
|---|---|---|---|---|---|---|---|---|---|---|---|---|---|---|---|---|---|---|---|---|---|---|---|---|---|---|---|---|---|---|---|---|---|---|---|---|---|---|---|---|---|---|---|
2/8LL
|
| ||||||||||||||||||||||||||||||||||||||||||
|---|---|---|---|---|---|---|---|---|---|---|---|---|---|---|---|---|---|---|---|---|---|---|---|---|---|---|---|---|---|---|---|---|---|---|---|---|---|---|---|---|---|---|---|
2/8LHH
|
| ||||||||||||||||||||||||||||||||||||||||||||||||||||||||||||||||||||
|---|---|---|---|---|---|---|---|---|---|---|---|---|---|---|---|---|---|---|---|---|---|---|---|---|---|---|---|---|---|---|---|---|---|---|---|---|---|---|---|---|---|---|---|---|---|---|---|---|---|---|---|---|---|---|---|---|---|---|---|---|---|---|---|---|---|---|---|---|---|
5HHHHH
|
| ||||||||||||||||||||||||||||||||||||||||||||||||||||||||||||||||||||||||||||||||||||||||||||||||||||||||||||||||||||||||
|---|---|---|---|---|---|---|---|---|---|---|---|---|---|---|---|---|---|---|---|---|---|---|---|---|---|---|---|---|---|---|---|---|---|---|---|---|---|---|---|---|---|---|---|---|---|---|---|---|---|---|---|---|---|---|---|---|---|---|---|---|---|---|---|---|---|---|---|---|---|---|---|---|---|---|---|---|---|---|---|---|---|---|---|---|---|---|---|---|---|---|---|---|---|---|---|---|---|---|---|---|---|---|---|---|---|---|---|---|---|---|---|---|---|---|---|---|---|---|---|---|---|
6HHH
|
| ||||||||||||||||||||||||||||||||||||||||||||||||||||||||||||||||||||||||||||||
|---|---|---|---|---|---|---|---|---|---|---|---|---|---|---|---|---|---|---|---|---|---|---|---|---|---|---|---|---|---|---|---|---|---|---|---|---|---|---|---|---|---|---|---|---|---|---|---|---|---|---|---|---|---|---|---|---|---|---|---|---|---|---|---|---|---|---|---|---|---|---|---|---|---|---|---|---|---|---|---|
2/8HH
|
| ||||||||||||||||||||||||||||||||||||||||||||||||||||
|---|---|---|---|---|---|---|---|---|---|---|---|---|---|---|---|---|---|---|---|---|---|---|---|---|---|---|---|---|---|---|---|---|---|---|---|---|---|---|---|---|---|---|---|---|---|---|---|---|---|---|---|---|---|
jL
|
| |||||||||||||||||||||||
|---|---|---|---|---|---|---|---|---|---|---|---|---|---|---|---|---|---|---|---|---|---|---|---|---|
jH
|
| |||||||||||||||||||||||
|---|---|---|---|---|---|---|---|---|---|---|---|---|---|---|---|---|---|---|---|---|---|---|---|---|
Lightning Sonic
5S |
| |||||||||||||||||||||||
|---|---|---|---|---|---|---|---|---|---|---|---|---|---|---|---|---|---|---|---|---|---|---|---|---|
Lightning Slash
Any direction + S |
| |||||||||||||||||||||||
|---|---|---|---|---|---|---|---|---|---|---|---|---|---|---|---|---|---|---|---|---|---|---|---|---|
Lightning Blast
jS |
| |||||||||||||||||||||||
|---|---|---|---|---|---|---|---|---|---|---|---|---|---|---|---|---|---|---|---|---|---|---|---|---|
Throw
4H |
| |||||||||||||||||||||||
|---|---|---|---|---|---|---|---|---|---|---|---|---|---|---|---|---|---|---|---|---|---|---|---|---|
Dash Action Air Dash Air Dash
|
| |||||||||||||||||||||||
|---|---|---|---|---|---|---|---|---|---|---|---|---|---|---|---|---|---|---|---|---|---|---|---|---|
Rider Art
Flight Mode |
| |||||||||||||||||||||||
|---|---|---|---|---|---|---|---|---|---|---|---|---|---|---|---|---|---|---|---|---|---|---|---|---|
L during Flight Mode
|
| |||||||||||||||||||||||
|---|---|---|---|---|---|---|---|---|---|---|---|---|---|---|---|---|---|---|---|---|---|---|---|---|
H during Flight Mode
|
| |||||||||||||||||||||||
|---|---|---|---|---|---|---|---|---|---|---|---|---|---|---|---|---|---|---|---|---|---|---|---|---|
S during Flight Mode
|
| |||||||||||||||||||||||
|---|---|---|---|---|---|---|---|---|---|---|---|---|---|---|---|---|---|---|---|---|---|---|---|---|
Style Action Power Up Power Up
|
| |||||||||||||||||||||||
|---|---|---|---|---|---|---|---|---|---|---|---|---|---|---|---|---|---|---|---|---|---|---|---|---|
| Kamen Rider: Super Climax Heroes | |
| General | |
|
| |
| Kamen Rider | |
| Kamen Rider V3 | |
| Kamen Rider Amazon | |
| Kamen Rider BLACK (RX) | |
|
| |
| Kamen Rider Kuuga | |
| Kamen Rider Agito | |
| Kamen Rider Ryuki | |
| Kamen Rider 555 | |
| Kamen Rider Blade | |
| Kamen Rider Hibiki | |
| Kamen Rider Kabuto | |
| Kamen Rider Den-O | |
| Kamen Rider Kiva | |
| Kamen Rider Decade | |
|
| |
| Kamen Rider W | |
| Kamen Rider OOO | |
| Kamen Rider Fourze | |
| Kamen Rider Wizard | |