|
|
| (36 intermediate revisions by the same user not shown) |
| Line 1: |
Line 1: |
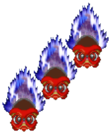
| <div style="float:right; overflow:hidden; width:318px; border:1px solid; margin-left:8px"><span style="margin-left:1px">[[File:JCFoF_MLion_ArcadePortrait.png|x450px]]</span>
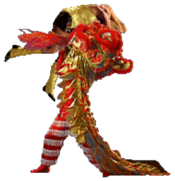
| | {{JCFoF Character Intro|char=Mysterious Lion|short=MLion|imgfile=JCFoF_MLion_Taunt.png|imgwidth=340|content= |
| | | <br> |
| {{QuotationBox | margin = center | fontsize=1.7 | | | {{QuotationBox | margin = center | fontsize=1.5 | |
| -''Dances to the distant drum beat''-
| | ''YUUUUUUU''<br><center>*dies*</center> |
| }}</div>
| | }} |
| | |
| {{TOClimit|3}}
| |
| <!--------------------------------Mini-Divider-----------------------------------------> | | <!--------------------------------Mini-Divider-----------------------------------------> |
| | ==<big>'''Intro'''</big>== |
|
| |
|
| ==<big>'''Intro'''</big>==
| | JP Name: '''ミステリアス・ライオン''' |
|
| |
|
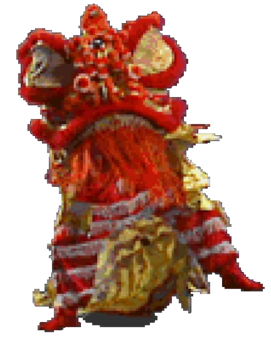
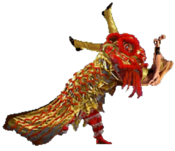
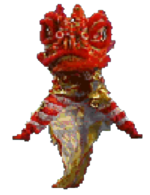
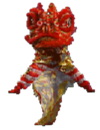
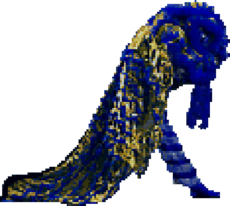
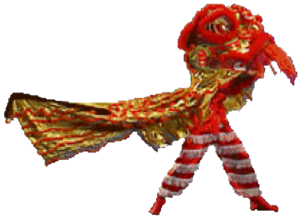
| Mysterious Lion (or M. Lion for short) is an original character to Kung Fu Master and Fists of Fire. Played by Sam Wong in disguise, Lion fights with magic by summoning bombs, teleporting, flying across the screen, and using a shrinking transformation. He doesn't speak, opting instead to communicate through dance and strange squeaking noises. | | Mysterious Lion (or M. Lion for short) is an original character to Kung Fu Master and Fists of Fire. Played by Sam Wong in disguise, Lion fights with magic by summoning bombs, teleporting, flying across the screen, and using a shrinking transformation. He doesn't speak, opting instead to communicate through dance and strange squeaking noises. |
| Line 20: |
Line 19: |
| *Best punish in the game with 3 frame Lion Crusher | | *Best punish in the game with 3 frame Lion Crusher |
| *Excellent throw range, second only to Kim-Maree | | *Excellent throw range, second only to Kim-Maree |
| *Normals like 5LP, 2HK, and far 5HK are very strong in neutral | | *Normals like 5LP, 2HK, and far.5HK are very strong in neutral |
| *Lion Bombs are great for chip, and often lead to strong conversion on hit | | *Lion Bombs are great for chip, and usually lead to a stun combo on hit |
| *Ultra Heavy weight makes many juggles impossible against him | | *Ultra Heavy weight makes many juggles impossible against him |
| *In the corner, his throws and HP Lion Crusher become extremely powerful | | *In the corner, his throws and HP Lion Crusher become extremely powerful |
| | *Super can be used to timer scam some characters that have no way to hit Chibi-Lion |
| | *Recovers from dizzy more quickly than most characters |
|
| |
|
|
| |
| |cons= | | |cons= |
| *Awkward execution to avoid accidental Lion Bomb inputs | | *Awkward execution (frequently leading to accidental Lion Bombs) |
| *The game's slowdown during Lion Bomb makes it hard to properly input followups | | *The game slows down during Lion Bomb, making it hard to properly input followups |
| *Applying pressure with lights cancelled into Lion Bomb is risky, as the opponent can dash through it | | *Applying pressure with lights cancelled into Lion Bomb is risky, as the opponent can dash through it |
| *Overhead is slow, weak, and difficult to combo off of at many ranges | | *Overhead is slow, weak, and difficult to combo off of at many ranges |
| *Juggles can be difficult to convert, and the timing is character/range specific | | *Juggles can be difficult to convert, and the timing is character/range specific |
| *Awful super | | *Super is risky to activate, and has no combo utility |
| }} | | }} |
| | |
| <!--------------------------------Mini-Divider-----------------------------------------> | | <!--------------------------------Mini-Divider-----------------------------------------> |
|
| |
|
| ==<big>'''Character Stats'''</big>== | | ==<big>'''Character Stats'''</big>== |
| | <br> |
|
| |
|
| <!--NOTE: M. Lion's meter build is 52 per frame, max 16384. Equals 0.317% per frame or 19.0% per second. Percent per second or Time to Full Charge is probably best way to present it.-->
| | {{CharacterData-JCFoF |
| | | basedef = '''232''' (High) |
| | | stundef = '''12800''' (Very High) |
| | | throwrange = '''73''' (A+) |
| | | weight = '''Very Heavy''' |
| | | prejump = '''7f''' |
| | | jump = '''52f''' (Fast) |
| | | bdashduration = '''19f''' (Average) |
| | | bdashdistance = '''114''' (Short) |
| | | bwalkspeed = '''Very Slow''' |
| | | fdashspeed = '''4.2''' (B) |
| | | fwalkspeed = '''Very Slow''' |
| | | chargerate = '''19% /sec''' |
| | | chargerecovery = '''7f''' |
| | | tauntdrain = '''40%''' |
| | | tauntduration = '''109f''' |
| | | nrise = '''32f''' |
| | | frise = '''59f''' |
| | | brise = '''53f''' |
| | }} |
|
| |
|
| <div style="visibility:hidden; height:0px; width:0px">
| | }} |
| <section begin=Defense />232 (High) // Very High<section end=Defense/>
| |
| <section begin=Jump Weight />7f+52f (Fast) // Ultra Heavy<section end=Jump Weight/>
| |
| <section begin=Throw />73 (A+)<section end=Throw/>
| |
| <!---------------------------------->
| |
| <section begin=Meter />19% / second // 7f<section end=Meter/>
| |
| <section begin=Taunt />40% // 109f<section end=Taunt/>
| |
| <section begin=Walk />Very Slow // Very Slow<section end=Walk/>
| |
| <!---------------------------------->
| |
| <section begin=Forward Dash />4.2 (B)<section end=Forward Dash/>
| |
| <section begin=Back Dash />19f // 114 (Short)<section end=Back Dash/>
| |
| <section begin=Wakeup />N: 32f // F: 59f // B: 53f<section end=Wakeup/>
| |
| </div>
| |
| {{StatsInfobox-JCFoF}}
| |
| <br>
| |
| | |
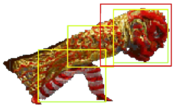
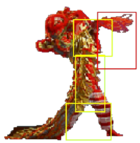
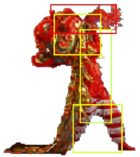
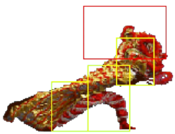
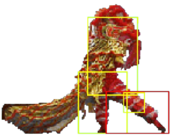
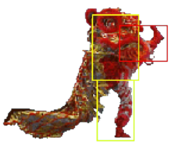
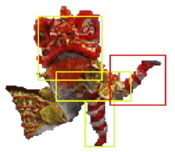
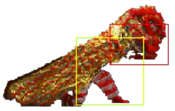
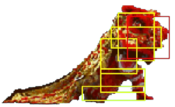
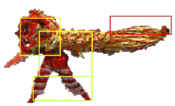
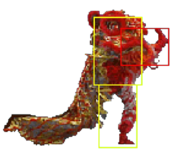
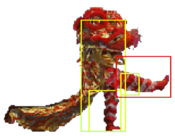
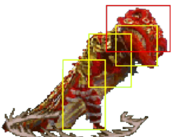
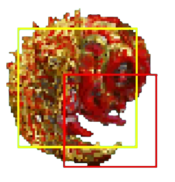
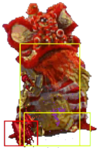
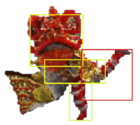
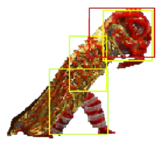
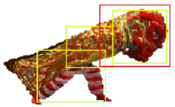
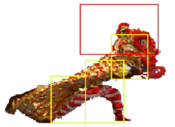
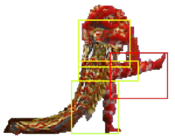
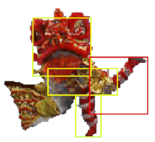
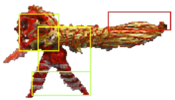
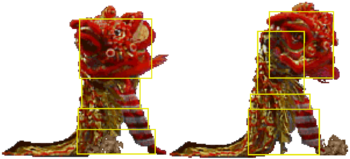
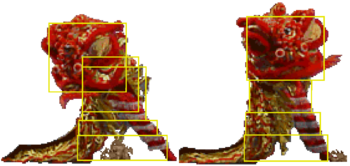
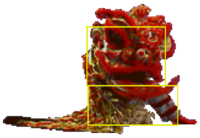
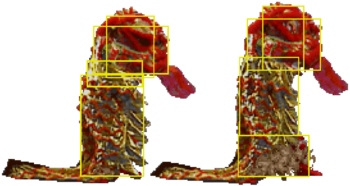
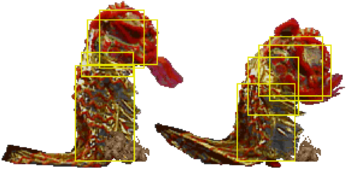
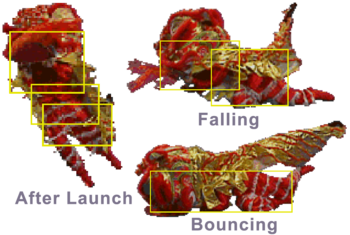
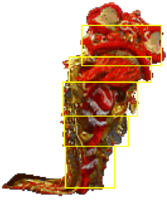
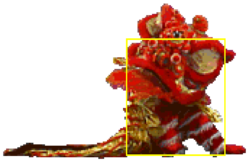
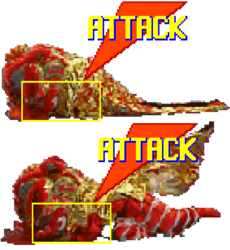
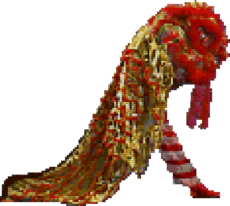
| <big>'''Hitstun, Blockstun, & Juggle Hurtboxes'''</big>
| |
| {| class="wikitable"
| |
| |-
| |
| ! 26 -- Light/High Standing !! 27 -- Heavy/High Standing !! 32 -- Crouching
| |
| |-
| |
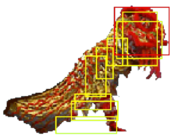
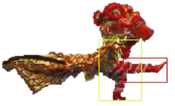
| | [[File:JCFoF_MLion_Hitstun_26.png|350x350px|center]] || [[File:JCFoF_MLion_Hitstun_27.png|350x350px|center]] || [[File:JCFoF_MLion_Hitstun_32.png|200x200px|center]]
| |
| |-
| |
| ! 29 -- Light/Mid Standing !! 30 -- Heavy/Mid Standing !! Juggle State
| |
| |-
| |
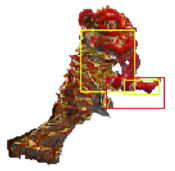
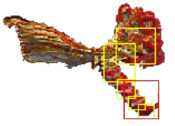
| | [[File:JCFoF_MLion_Hitstun_29.png|350x350px|center]] || [[File:JCFoF_MLion_Hitstun_30.png|350x350px|center]] || [[File:JCFoF_MLion_Hitstun_Juggle.png|350x350px|center]]
| |
| |-
| |
| ! Standing Blockstun !! Crouching Blockstun !! OTG State
| |
| |-
| |
| | [[File:JCFoF_MLion_Blockstun_Stand.png|200x200px|center]] || [[File:JCFoF_MLion_Blockstun_Crouch.png|250x250px|center]] || [[File:JCFoF_MLion_OTG.png|250x250px|center]]
| |
| |}
| |
|
| |
|
| <br> | | <br> |
| {{AttackData-JCFoF/Infobox}} | | {{AttackData-JCFoF/Infobox}} |
|
| |
|
| <!--------------------------------Mini-Divider-----------------------------------------> | | <!-----------------------------------------------------------------------------Section Divider-----------------------------------------------------------------------------> |
|
| |
|
| ==<big>'''Normals'''</big>== | | ==<big>'''Normals'''</big>== |
| <br> | | <br> |
| ===<big>'''Standing Normals'''</big>=== | | ===<big>'''Standing Normals'''</big>=== |
| <big>'''Stand LP'''</big> -- (Standing Hitstun Reeling: High/26)
| | |
| <font style="visibility:hidden" size="0">5LP</font>
| |
| {{MoveData | | {{MoveData |
| |image=JCFoF MLion 5LP.png | | |image=JCFoF MLion 5LP.png |
| Line 88: |
Line 78: |
| |input=5LP | | |input=5LP |
| |data= | | |data= |
| {{AttackDataN-JCFoF | | {{AttackData-JCFoF |
| |damage=8 | | |damage=8 |
| | |stun=512 |
| | |kdtime=128 |
| | |hitstun=High |
| |guard=Mid | | |guard=Mid |
| |startup=6 | | |startup=6 |
| Line 101: |
Line 94: |
| }} | | }} |
| }} | | }} |
| <br>
| |
|
| |
| <big>'''Close Stand HP'''</big> -- (Standing Hitstun Reeling: High/27)
| |
| <font style="visibility:hidden" size="0">Close 5HP</font>
| |
| {{MoveData | | {{MoveData |
| |image=JCFoF MLion Close 5HP 1.png | | |image=JCFoF MLion Close 5HP 1.png |
| Line 112: |
Line 101: |
| |caption= | | |caption= |
| |name= | | |name= |
| |input=Cl 5HP | | |input=cl.5HP |
| |data= | | |data= |
| {{AttackDataN-JCFoF | | {{AttackData-JCFoF |
| |damage=28 (24) | | |damage=28 (24) |
| | |stun=1792 (1536) |
| | |kdtime=448 (384) |
| | |hitstun=High |
| |guard=High | | |guard=High |
| |startup=7 | | |startup=7 |
| Line 129: |
Line 121: |
| }} | | }} |
| }} | | }} |
| <br>
| |
|
| |
| <big>'''Far Stand HP'''</big> -- (Standing Hitstun Reeling: High/27)
| |
| <font style="visibility:hidden" size="0">Far 5HP</font>
| |
| {{MoveData | | {{MoveData |
| |image=JCFoF MLion Far 5HP.png | | |image=JCFoF MLion Far 5HP.png |
| |caption= | | |caption= |
| |name= | | |name= |
| |input=Far 5HP | | |input=far.5HP |
| |data= | | |data= |
| {{AttackDataN-JCFoF | | {{AttackData-JCFoF |
| |damage=28 | | |damage=28 |
| | |stun=1024 |
| | |kdtime=448 |
| | |hitstun=High |
| |guard=High | | |guard=High |
| |startup=11 | | |startup=11 |
| Line 153: |
Line 144: |
| }} | | }} |
| }} | | }} |
| <br>
| |
|
| |
| <big>'''Stand LK'''</big> -- (Standing Hitstun Reeling: Mid/29)
| |
| <font style="visibility:hidden" size="0">5LK</font>
| |
| {{MoveData | | {{MoveData |
| |image=JCFoF MLion 5LK.png | | |image=JCFoF MLion 5LK.png |
| Line 163: |
Line 150: |
| |input=5LK | | |input=5LK |
| |data= | | |data= |
| {{AttackDataN-JCFoF | | {{AttackData-JCFoF |
| |damage=9 | | |damage=9 |
| | |stun=768 |
| | |kdtime=144 |
| | |hitstun=Mid |
| |guard=Low | | |guard=Low |
| |startup=6 | | |startup=6 |
| Line 177: |
Line 167: |
| }} | | }} |
| }} | | }} |
| <br>
| |
|
| |
| <big>'''Close Stand HK'''</big> -- (Standing Hitstun Reeling: High/27)
| |
| <font style="visibility:hidden" size="0">Close 5HK</font>
| |
| {{MoveData | | {{MoveData |
| |image=JCFoF MLion Close 5HK.png | | |image=JCFoF MLion Close 5HK.png |
| |caption= | | |caption= |
| |name= | | |name= |
| |input=Cl 5HK | | |input=cl.5HK |
| |data= | | |data= |
| {{AttackDataN-JCFoF | | {{AttackData-JCFoF |
| |damage=32 | | |damage=32 |
| | |stun=2048 |
| | |kdtime=512 |
| | |hitstun=High |
| |guard=High | | |guard=High |
| |startup=6 | | |startup=6 |
| Line 200: |
Line 189: |
| }} | | }} |
| }} | | }} |
| <br>
| |
|
| |
| <big>'''Far Stand HK'''</big> -- (Standing Hitstun Reeling: Mid/30)
| |
| <font style="visibility:hidden" size="0">Far 5HK</font>
| |
| {{MoveData | | {{MoveData |
| |image=JCFoF MLion Far 5HK.png | | |image=JCFoF MLion Far 5HK.png |
| |caption= | | |caption= |
| |name= | | |name= |
| |input=Far 5HK | | |input=far.5HK |
| |data= | | |data= |
| {{AttackDataN-JCFoF | | {{AttackData-JCFoF |
| |damage=30 | | |damage=30 |
| | |stun=1280 |
| | |kdtime=480 |
| | |hitstun=Mid |
| |guard=Mid | | |guard=Mid |
| |startup=7 | | |startup=7 |
| Line 221: |
Line 209: |
| |attribute= | | |attribute= |
| |description=*Useful as an anti-air against some characters, but a little awkward to time | | |description=*Useful as an anti-air against some characters, but a little awkward to time |
| *Good neutral button, similar to Drunk Jackie Far 5LK but riskier to whiff | | *Good neutral button, similar to Drunk Jackie far.5LK but riskier to whiff |
| *Proximity range: ≥ 88 | | *Proximity range: ≥ 88 |
| }} | | }} |
| Line 229: |
Line 217: |
|
| |
|
| ===<big>'''Crouching Normals'''</big>=== | | ===<big>'''Crouching Normals'''</big>=== |
| <big>'''Crouch LP'''</big> -- (Standing Hitstun Reeling: Mid/29)
| | |
| <font style="visibility:hidden" size="0">2LP</font>
| |
| {{MoveData | | {{MoveData |
| |image=JCFoF MLion 2LP.png | | |image=JCFoF MLion 2LP.png |
| Line 237: |
Line 224: |
| |input=2LP | | |input=2LP |
| |data= | | |data= |
| {{AttackDataN-JCFoF | | {{AttackData-JCFoF |
| |damage=8 | | |damage=8 |
| | |stun=512 |
| | |kdtime=128 |
| | |hitstun=Mid |
| |guard=Mid | | |guard=Mid |
| |startup=4 | | |startup=4 |
| Line 246: |
Line 236: |
| |advBlock=+5 | | |advBlock=+5 |
| |specialcancel=Y | | |specialcancel=Y |
| |attribute=Rapid Fire* | | |attribute=Self-chain (slow) |
| |description=*Rapid Fire cancels more slowly than most light normals | | |description=*Useful in hitconfirms, but should switch to 5LP before attempting 646P cancel due to input leniency issues causing 236P to come out instead |
| *Useful in hitconfirms, but should switch to 5LP before attempting 646P cancel due to input leniency issues causing 236P to come out instead | |
| }} | | }} |
| }} | | }} |
| <br>
| |
|
| |
| <big>'''Crouch HP'''</big> -- (Standing Hitstun Reeling: Mid+High/30+27)
| |
| <font style="visibility:hidden" size="0">2HP</font>
| |
| {{MoveData | | {{MoveData |
| |image=JCFoF MLion 2HP 1.png | | |image=JCFoF MLion 2HP 1.png |
| Line 264: |
Line 249: |
| |input=2HP | | |input=2HP |
| |data= | | |data= |
| {{AttackDataN-JCFoF | | {{AttackData-JCFoF |
| |damage=12*16 | | |damage=12*16 |
| |guard=Mid | | |stun=768*1024 |
| | |kdtime=192*256 |
| | |hitstun=Mid / High |
| | |guard=Mid / High |
| |startup=9 (11) | | |startup=9 (11) |
| |active=2*9 | | |active=2*9 |
| Line 279: |
Line 267: |
| }} | | }} |
| }} | | }} |
| <br>
| |
|
| |
| <big>'''Crouch LK'''</big> -- (Standing Hitstun Reeling: Mid/29)
| |
| <font style="visibility:hidden" size="0">2LK</font>
| |
| {{MoveData | | {{MoveData |
| |image=JCFoF MLion 2LK.png | | |image=JCFoF MLion 2LK.png |
| Line 289: |
Line 273: |
| |input=2LK | | |input=2LK |
| |data= | | |data= |
| {{AttackDataN-JCFoF | | {{AttackData-JCFoF |
| |damage=9 | | |damage=9 |
| | |stun=768 |
| | |kdtime=144 |
| | |hitstun=Mid |
| |guard=Low | | |guard=Low |
| |startup=4 | | |startup=4 |
| Line 298: |
Line 285: |
| |advBlock=+4 | | |advBlock=+4 |
| |specialcancel=Y | | |specialcancel=Y |
| |attribute=Rapid Fire* | | |attribute=Self-chain (slow) |
| |description=*Rapid Fire cancels more slowly than most light normals | | |description=*Main combo/blockstring starter |
| *OTG vs M. Lion | | *OTG vs M. Lion |
| }} | | }} |
| }} | | }} |
| <br>
| |
|
| |
| <big>'''Crouch HK'''</big> -- (Standing Hitstun Reeling: Mid/30)
| |
| <font style="visibility:hidden" size="0">2HK</font>
| |
| {{MoveData | | {{MoveData |
| |image=JCFoF MLion 2HK.png | | |image=JCFoF MLion 2HK.png |
| Line 313: |
Line 296: |
| |input=2HK | | |input=2HK |
| |data= | | |data= |
| {{AttackDataN-JCFoF | | {{AttackData-JCFoF |
| |damage=28 | | |damage=28 |
| | |stun=1024 |
| | |kdtime=448 |
| | |hitstun=Mid |
| |guard=Low | | |guard=Low |
| |startup=6 | | |startup=6 |
| Line 322: |
Line 308: |
| |advBlock=-11 to +1 | | |advBlock=-11 to +1 |
| |specialcancel=N | | |specialcancel=N |
| |attribute=OTG, No-Cancel | | |attribute=OTG, No-Chain |
| |description=*Great poke that is safe when well-spaced | | |description=*Great poke that is safe when well-spaced |
| }} | | }} |
| Line 330: |
Line 316: |
|
| |
|
| ===<big>'''Air Normals'''</big>=== | | ===<big>'''Air Normals'''</big>=== |
| <big>'''Jump LP'''</big> -- (Standing Hitstun Reeling: Mid/29)
| | |
| <font style="visibility:hidden" size="0">8LP</font>
| |
| {{MoveData | | {{MoveData |
| |image=JCFoF MLion 8LP.png | | |image=JCFoF MLion 8LP.png |
| |caption= | | |caption=Neutral/Diagonal |
| |name= | | |name= |
| |input=8LP | | |input=j.LP |
| |data= | | |data= |
| {{AttackData-JCFoF | | {{AttackData-JCFoF |
| |damage=10 | | |damage=10 |
| | |stun=512 |
| | |kdtime=160 |
| | |hitstun=Mid |
| |guard=Overhead | | |guard=Overhead |
| |startup=6 | | |startup=6 |
| |active=6 | | |active=6 |
| |recovery=-- | | |recovery=- |
| |advHit=-- | | |advHit=- |
| |advBlock=-- | | |advBlock=- |
| |attribute=Crossup | | |attribute=Crossup |
| |description=*Instant overhead if used within the first 2 airborne frames | | |description=*Instant overhead if used within the first 2 airborne frames |
| }} | | }} |
| }} | | }} |
| <br>
| |
|
| |
| <big>'''Jump HP'''</big> -- (Standing Hitstun Reeling: Mid/29)
| |
| <font style="visibility:hidden" size="0">8HP</font>
| |
| {{MoveData | | {{MoveData |
| |image=JCFoF MLion 8HP.png | | |image=JCFoF MLion 8HP.png |
| |caption= | | |caption=Neutral/Diagonal |
| |name= | | |name= |
| |input=8HP | | |input=j.HP |
| |data= | | |data= |
| {{AttackData-JCFoF | | {{AttackData-JCFoF |
| |damage=20 | | |damage=20 |
| | |stun=1280 |
| | |kdtime=320 |
| | |hitstun=Mid |
| |guard=Overhead | | |guard=Overhead |
| |startup=6 | | |startup=6 |
| |active=11 | | |active=11 |
| |recovery=-- | | |recovery=- |
| |advHit=-- | | |advHit=- |
| |advBlock=-- | | |advBlock=- |
| |attribute=Spike, Squish | | |attribute=Spike, Squish |
| |description=*Instant overhead if used within the first 3 airborne frames | | |description=*Instant overhead if used within the first 3 airborne frames |
| Line 374: |
Line 361: |
| }} | | }} |
| }} | | }} |
| <br>
| |
|
| |
| <big>'''Jump LK'''</big> -- (Standing Hitstun Reeling: High/26)
| |
| <font style="visibility:hidden" size="0">8LK</font>
| |
| {{MoveData | | {{MoveData |
| |image=JCFoF MLion 8LK.png | | |image=JCFoF MLion 8LK.png |
| |caption= | | |caption=Neutral/Diagonal |
| |name= | | |name= |
| |input=8LK | | |input=j.LK |
| |data= | | |data= |
| {{AttackData-JCFoF | | {{AttackData-JCFoF |
| |damage=12 | | |damage=12 |
| | |stun=512 |
| | |kdtime=192 |
| | |hitstun=High |
| |guard=Overhead | | |guard=Overhead |
| |startup=6 | | |startup=6 |
| |active=6 | | |active=6 |
| |recovery=-- | | |recovery=- |
| |advHit=-- | | |advHit=- |
| |advBlock=-- | | |advBlock=- |
| |attribute=Crossup (small hitbox) | | |attribute=Crossup (small hitbox) |
| |description=*Not much use outside of air-to-air juggles | | |description=*Not much use outside of air-to-air juggles |
| }} | | }} |
| }} | | }} |
| <br>
| |
|
| |
| <big>'''Jump HK'''</big> -- (Standing Hitstun Reeling: Mid/29)
| |
| <font style="visibility:hidden" size="0">8HK</font>
| |
| {{MoveData | | {{MoveData |
| |image=JCFoF MLion 8HK.png | | |image=JCFoF MLion 8HK.png |
| |caption= | | |caption=Neutral/Diagonal |
| |name= | | |name= |
| |input=8HK | | |input=j.HK |
| |data= | | |data= |
| {{AttackData-JCFoF | | {{AttackData-JCFoF |
| |damage=24 | | |damage=24 |
| | |stun=1024 |
| | |kdtime=384 |
| | |hitstun=Mid |
| |guard=Overhead | | |guard=Overhead |
| |startup=6 | | |startup=6 |
| |active=9 | | |active=9 |
| |recovery=-- | | |recovery=- |
| |advHit=-- | | |advHit=- |
| |advBlock=-- | | |advBlock=- |
| |attribute=Crossup, OTG, Spike, Squish | | |attribute=Crossup, OTG, Spike, Squish |
| |description=*Instant overhead if used within the first 7 airborne frames | | |description=*Instant overhead if used within the first 7 airborne frames |
| Line 422: |
Line 407: |
|
| |
|
| ===<big>'''Command Normals'''</big>=== | | ===<big>'''Command Normals'''</big>=== |
| <big>'''Mighty Cape'''</big> -- (Standing Hitstun Reeling: High/27)
| | |
| <font style="visibility:hidden" size="0">6HP</font>
| |
| {{MoveData | | {{MoveData |
| |image=JCFoF MLion 6HP.png | | |image=JCFoF MLion 6HP.png |
| |caption= | | |caption=Mighty Cape |
| |name= | | |name= |
| |input=6HP | | |input=6HP |
| Line 432: |
Line 416: |
| {{AttackData-JCFoF | | {{AttackData-JCFoF |
| |damage=28 | | |damage=28 |
| | |stun=1024 |
| | |kdtime=448 |
| | |hitstun=High |
| |guard=High | | |guard=High |
| |startup=11 | | |startup=11 |
| Line 440: |
Line 427: |
| |attribute= | | |attribute= |
| |description=*Decent poke from long range to stop dashes, but frame disadvantage allows opponent to gain ground afterward | | |description=*Decent poke from long range to stop dashes, but frame disadvantage allows opponent to gain ground afterward |
| *A bug prevents Lion from chaining into 6HP if he is within cl 5HP activation range | | *A bug prevents Lion from chaining into 6HP if he is within cl.5HP activation range |
| }} | | }} |
| }} | | }} |
| <br>
| |
|
| |
| <big>'''Universal Overhead'''</big> -- (Standing Hitstun Reeling: High+Mid/27+30)
| |
| <font style="visibility:hidden" size="0">6HK</font>
| |
| {{MoveData | | {{MoveData |
| |image=JCFoF MLion 6HK 1.png | | |image=JCFoF MLion 6HK 1.png |
| Line 452: |
Line 435: |
| |image2=JCFoF MLion 6HK 2.png | | |image2=JCFoF MLion 6HK 2.png |
| |imageSize2=175x250px | | |imageSize2=175x250px |
| |caption= | | |caption2=Universal Overhead |
| |name= | | |name= |
| |input=6HK | | |input=6HK |
| Line 458: |
Line 441: |
| {{AttackData-JCFoF | | {{AttackData-JCFoF |
| |damage=4*4 | | |damage=4*4 |
| | |stun=512*1024 |
| | |kdtime=64x2 |
| | |hitstun=High / Mid |
| |guard=High / Overhead | | |guard=High / Overhead |
| |startup=15 (24) | | |startup=15 (24) |
| Line 473: |
Line 459: |
|
| |
|
| ==<big>'''Throws'''</big>== | | ==<big>'''Throws'''</big>== |
| <br>
| | |
| <big>'''HP Throw'''</big>
| |
| <font style="visibility:hidden" size="0">HP Throw</font>
| |
| {{MoveData | | {{MoveData |
| |image=JCFoF MLion HP Throw 1.png | | |image=JCFoF MLion HP Throw 1.png |
| Line 483: |
Line 467: |
| |caption= | | |caption= |
| |name= | | |name= |
| |input=close 6HP/4HP | | |input=HP Throw |
| |data= | | |data= |
| {{AttackData-JCFoF | | {{AttackData-JCFoF |
| |damage=32 | | |damage=32 |
| | |stun=0 |
| | |kdtime=512 |
| | |hitstun= |
| |guard=Throw | | |guard=Throw |
| |startup=1 | | |startup=1 |
| |active=-- | | |active=- |
| |recovery=-- | | |recovery=- |
| |advHit=KD | | |advHit=KD |
| |advBlock=-- | | |advBlock=- |
| |attribute=Backturn | | |attribute=Backturn |
| |description=*Corner resets after this throw cannot be backdashed due to the turnaround animation, making it very powerful | | |description=*Corner resets after this throw cannot be backdashed due to the turnaround animation, making it very powerful |
| Line 498: |
Line 485: |
| }} | | }} |
| }} | | }} |
| <br>
| |
|
| |
| <big>'''HP Crouch Throw'''</big>
| |
| <font style="visibility:hidden" size="0">HP Crouch Throw</font>
| |
| {{MoveData | | {{MoveData |
| |image=JCFoF MLion Crouch Throw 1.png | | |image=JCFoF MLion Crouch Throw 1.png |
| Line 509: |
Line 492: |
| |caption= | | |caption= |
| |name= | | |name= |
| |input=close 3HP/1HP | | |input=HP Crouch Throw |
| |data= | | |data= |
| {{AttackData-JCFoF | | {{AttackData-JCFoF |
| |damage=26* | | |damage=26* |
| | |stun=0 |
| | |kdtime=64 * 32 each |
| | |hitstun= |
| |guard=Throw | | |guard=Throw |
| |startup=1 | | |startup=1 |
| |active=-- | | |active=- |
| |recovery=-- | | |recovery=- |
| |advHit=KD | | |advHit=KD |
| |advBlock=-- | | |advBlock=- |
| |attribute=Mashable | | |attribute=Mashable |
| |description=*Damage varies significantly depending on Lion's and opponent's mashing speed | | |description=*Damage varies significantly depending on Lion's and opponent's mashing speed |
| Line 529: |
Line 515: |
| ==<big>'''Special Moves'''</big>== | | ==<big>'''Special Moves'''</big>== |
| <br> | | <br> |
| <big>'''Lion Bomb (Baby Bomb)'''</big><br>
| | <big>'''Lion Crusher (Psycho Crusher)'''</big> |
| '''Priority:''' above 63214P/K, below 646P; '''Input Buffer:''' 15f window to press P after 236 input
| |
| <font style="visibility:hidden" size="0">236P</font>
| |
| {{MoveData
| |
| |image=JCFoF MLion 236LP 1.png
| |
| |imageSize=175x250px
| |
| |image2=JCFoF MLion 236LP 2.png
| |
| |imageSize2=175x250px
| |
| |caption=
| |
| |name=
| |
| |input=236P
| |
| |data=
| |
| {{AttackData-JCFoF
| |
| |version=LP
| |
| |damage=7x5
| |
| |guard=Mid
| |
| |startup=34
| |
| |active=9*
| |
| |recovery=6
| |
| |advHit=+35
| |
| |advBlock=+20
| |
| |attribute=OTG
| |
| |description=*48f total animation, travels a short distance
| |
| *Active frame distribution: 1<small>(1)</small>1<small>(1)</small>1<small>(1)</small>1<small>(1)</small>1 -- 9f start to finish, 5 actual active frames
| |
| *Not all hits will connect at all ranges; damage listed assumes all 5 hits connect
| |
| *Frame data assumes first active frame and all 5 hits connects, can vary
| |
| *Destroys projectiles when colliding with them
| |
| }}
| |
| {{AttackData-JCFoF
| |
| |version=HP
| |
| |damage=7x5
| |
| |guard=Mid
| |
| |startup=66
| |
| |active=9*
| |
| |recovery=0*
| |
| |advHit=~+81
| |
| |advBlock=~+80
| |
| |attribute=OTG
| |
| |description=*55f total animation, travels full screen
| |
| *Active frame distribution: 1<small>(1)</small>1<small>(1)</small>1<small>(1)</small>1<small>(1)</small>1 -- 9f start to finish, 5 actual active frames
| |
| *M. Lion recovers before the bomb detonates, so startup/active/recovery is all measured independently
| |
| *Not all hits will connect at all ranges; damage listed assumes all 5 hits connect
| |
| *Frame data assumes first active frame and all 5 hits connects, can vary
| |
| *Destroys projectiles when colliding with them
| |
| }}
| |
| }}
| |
| <br>
| |
| | |
| <big>'''Lion Crusher (Psycho Crusher)'''</big><br> | |
| '''Priority:''' above 236P and 63214P/K ; '''Input Buffer:''' 18f window to press P after 646 input
| |
| <font style="visibility:hidden" size="0">646P</font> | | <font style="visibility:hidden" size="0">646P</font> |
| {{MoveData | | {{MoveData |
| Line 585: |
Line 522: |
| |image2=JCFoF MLion 646P 2.png | | |image2=JCFoF MLion 646P 2.png |
| |imageSize2=175x250px | | |imageSize2=175x250px |
| |caption= | | |caption2='''Input Priority:'''<br>above 236P and 63214P/K |
| |name= | | |name= |
| |input=646P | | |input=646P |
| Line 592: |
Line 529: |
| |version=LP Unmashed | | |version=LP Unmashed |
| |damage=16*8*8 | | |damage=16*8*8 |
| | |stun=1024*512x2 |
| | |kdtime=256*128x2 |
| | |hitstun= |
| |guard=Mid | | |guard=Mid |
| |startup=3 | | |startup=3 |
| Line 606: |
Line 546: |
| {{AttackData-JCFoF | | {{AttackData-JCFoF |
| |version=LP Mashed | | |version=LP Mashed |
| |damage=16*8*(2)*8*(2) | | |damage=16*<br>[8*2]x2 |
| | |stun=1024*<br>512x4 |
| | |kdtime=256*<br>[128*32]x2 |
| | |hitstun= |
| |guard=Mid | | |guard=Mid |
| |startup=3 | | |startup=3 |
| Line 613: |
Line 556: |
| |advHit=KD | | |advHit=KD |
| |advBlock=-8 | | |advBlock=-8 |
| |attribute=Mashable, Airborne 8-27f | | |attribute=Mashable<br>Airborne 8-27f |
| |description=*Active frame distribution: 3<small>(4)</small>2*[3]*4*[3] -- 19f start to finish, 15 actual active frames | | |description=*Active frame distribution: 3<small>(4)</small>2*[3]*4*[3] -- 19f start to finish, 15 actual active frames |
| *The mashed version of LP Lion Crusher is M. Lion's primary combo ender as it leads to juggles afterward | | *The mashed version of LP Lion Crusher is M. Lion's primary combo ender as it leads to juggles afterward |
| Line 621: |
Line 564: |
| |version=HP Unmashed | | |version=HP Unmashed |
| |damage=14 * 10x5 | | |damage=14 * 10x5 |
| | |stun=512x6 |
| | |kdtime=224*160x5 |
| | |hitstun= |
| |guard=Mid | | |guard=Mid |
| |startup=3 | | |startup=3 |
| Line 635: |
Line 581: |
| {{AttackData-JCFoF | | {{AttackData-JCFoF |
| |version=HP Mashed | | |version=HP Mashed |
| |damage=14 * [10(2)]x5 | | |damage=14*<br>[10*2]x5 |
| | |stun=512x10 |
| | |kdtime=224*<br>[160*32]x4*160 |
| | |hitstun= |
| |guard=Mid | | |guard=Mid |
| |startup=3 | | |startup=3 |
| Line 642: |
Line 591: |
| |advHit=-40 (KD from range) | | |advHit=-40 (KD from range) |
| |advBlock=-39 | | |advBlock=-39 |
| |attribute=Mashable, Airborne 10-55f | | |attribute=Mashable<br>Airborne 10-55f |
| |description=*The (2) damage represents the extra hits when mashed; not all hits of the move can connect | | |description=*The (2) damage represents the extra hits when mashed; not all hits of the move can connect |
| *Active frame distribution [=extra hits]: 3<small>(4)</small> 2*[3]*4*[3]<small>(4)</small> 2*[3]<small>(4)</small> 3*[2]<small>(4)</small> 3*[2] -- 46 frames start to finish, 30 actual active frames, final [2] active frames replace recovery frames | | *Active frame distribution [=extra hits]: 3<small>(4)</small> 2*[3]*4*[3]<small>(4)</small> 2*[3]<small>(4)</small> 3*[2]<small>(4)</small> 3*[2] -- 46 frames start to finish, 30 actual active frames, final [2] active frames replace recovery frames |
| Line 651: |
Line 600: |
| <br> | | <br> |
|
| |
|
| <big>'''Teleport'''</big><br> | | <big>'''Lion Bomb (Baby Bomb)'''</big> |
| '''Priority:''' below 646P; '''Input Buffer:''' 18f window to press P/K after 63214 input | | <font style="visibility:hidden" size="0">236P</font> |
| | {{MoveData |
| | |image=JCFoF MLion 236LP 1.png |
| | |imageSize=175x250px |
| | |image2=JCFoF MLion 236LP 2.png |
| | |imageSize2=175x250px |
| | |caption2='''Input Priority:'''<br>above 63214P/K, below 646P |
| | |name= |
| | |input=236P |
| | |data= |
| | {{AttackData-JCFoF |
| | |version=LP |
| | |damage=7x5 |
| | |stun=768x5 |
| | |kdtime=112x5 |
| | |hitstun= |
| | |guard=Mid |
| | |startup=8+26 |
| | |active=9* |
| | |recovery=6 |
| | |advHit=+35 |
| | |advBlock=+20 |
| | |attribute=OTG |
| | |description=*48f total animation, travels a short distance |
| | *Bomb will not spawn if Lion is hit before frame 8 |
| | *Active frame distribution: 1<small>(1)</small>1<small>(1)</small>1<small>(1)</small>1<small>(1)</small>1 -- 9f start to finish, 5 actual active frames |
| | *Not all hits will connect at all ranges; damage listed assumes all 5 hits connect |
| | *Frame data assumes first active frame and all 5 hits connects, can vary |
| | *Destroys projectiles when colliding with them |
| | }} |
| | {{AttackData-JCFoF |
| | |version=HP |
| | |damage=7x5 |
| | |stun=768x5 |
| | |kdtime=112x5 |
| | |hitstun= |
| | |guard=Mid |
| | |startup=15+51 |
| | |active=9* |
| | |recovery=0* |
| | |advHit=~+81 |
| | |advBlock=~+80 |
| | |attribute=OTG |
| | |description=*55f total animation, travels full screen |
| | *Bomb will not spawn if Lion is hit before frame 15 |
| | *Active frame distribution: 1<small>(1)</small>1<small>(1)</small>1<small>(1)</small>1<small>(1)</small>1 -- 9f start to finish, 5 actual active frames |
| | *M. Lion recovers before the bomb detonates, so startup/active/recovery is all measured independently |
| | *Not all hits will connect at all ranges; damage listed assumes all 5 hits connect |
| | *Frame data assumes first active frame and all 5 hits connects, can vary |
| | *Destroys projectiles when colliding with them |
| | }} |
| | }} |
| | <br> |
| | |
| | <big>'''Teleport'''</big> |
| <font style="visibility:hidden" size="0">63214P or 63214K</font> | | <font style="visibility:hidden" size="0">63214P or 63214K</font> |
| {{MoveData | | {{MoveData |
| Line 661: |
Line 664: |
| |image3=JCFoF MLion Teleport 3.png | | |image3=JCFoF MLion Teleport 3.png |
| |imageSize3=175x250px | | |imageSize3=175x250px |
| |caption= | | |caption3='''Input Priority:'''<br>below 646P and 236P |
| |name= | | |name= |
| |input=63214P or 63214K | | |input=63214P or 63214K |
| Line 667: |
Line 670: |
| {{AttackData-JCFoF | | {{AttackData-JCFoF |
| |version=LP | | |version=LP |
| |damage=-- | | |damage=- |
| |guard=-- | | |stun= |
| | |kdtime= |
| | |hitstun= |
| | |guard=- |
| |startup=57 | | |startup=57 |
| |active=-- | | |active=- |
| |recovery=7 | | |recovery=7 |
| |advHit=-- | | |advHit=- |
| |advBlock=-- | | |advBlock=- |
| |attribute=Invincible 1-57f | | |attribute=Invincible 1-57f |
| |description=*Teleports to same side, near opponent | | |description=*Teleports to same side, near opponent |
| Line 680: |
Line 686: |
| {{AttackData-JCFoF | | {{AttackData-JCFoF |
| |version=HP | | |version=HP |
| |damage=-- | | |damage=- |
| |guard=-- | | |stun= |
| | |kdtime= |
| | |hitstun= |
| | |guard=- |
| |startup=57 | | |startup=57 |
| |active=-- | | |active=- |
| |recovery=7 | | |recovery=7 |
| |advHit=-- | | |advHit=- |
| |advBlock=-- | | |advBlock=- |
| |attribute=Invincible 1-57f | | |attribute=Invincible 1-57f |
| |description=*Teleports to same side, around 1/2 screen from opponent (unless corner forces you closer) | | |description=*Teleports to same side, around 1/2 screen from opponent (unless corner forces you closer) |
| Line 693: |
Line 702: |
| {{AttackData-JCFoF | | {{AttackData-JCFoF |
| |version=LK | | |version=LK |
| |damage=-- | | |damage=- |
| |guard=-- | | |stun= |
| | |kdtime= |
| | |hitstun= |
| | |guard=- |
| |startup=57 | | |startup=57 |
| |active=-- | | |active=- |
| |recovery=7 | | |recovery=7 |
| |advHit=-- | | |advHit=- |
| |advBlock=-- | | |advBlock=- |
| |attribute=Invincible 1-57f | | |attribute=Invincible 1-57f |
| |description=*Teleports to opposite side, near opponent | | |description=*Teleports to opposite side, near opponent |
| Line 706: |
Line 718: |
| {{AttackData-JCFoF | | {{AttackData-JCFoF |
| |version=HK | | |version=HK |
| |damage=-- | | |damage=- |
| |guard=-- | | |stun= |
| | |kdtime= |
| | |hitstun= |
| | |guard=- |
| |startup=57 | | |startup=57 |
| |active=-- | | |active=- |
| |recovery=7 | | |recovery=7 |
| |advHit=-- | | |advHit=- |
| |advBlock=-- | | |advBlock=- |
| |attribute=Invincible 1-57f | | |attribute=Invincible 1-57f |
| |description=*Teleports to opposite side, around 1/2 screen from opponent (unless corner forces you closer) | | |description=*Teleports to opposite side, around 1/2 screen from opponent (unless corner forces you closer) |
| Line 721: |
Line 736: |
| ==<big>'''Super'''</big>== | | ==<big>'''Super'''</big>== |
| <br> | | <br> |
| <big>'''Mini-Lion Transformation'''</big><br> | | <big>'''Mini-Lion Transformation'''</big> |
| '''Input Buffer:''' 18f window to press LP+HP after 646 input
| |
| <font style="visibility:hidden" size="0">646LP+HP</font> | | <font style="visibility:hidden" size="0">646LP+HP</font> |
| {{MoveData | | {{MoveData |
| Line 730: |
Line 744: |
| |imageSize2=100x250px | | |imageSize2=100x250px |
| |image3=JCFoF MLion Super Mini.png | | |image3=JCFoF MLion Super Mini.png |
| |imageSize3=100x250px | | |imageSize3=80x250px |
| |caption= | | |caption= |
| |name= | | |name= |
| |input=646LP+HP | | |input=646LP+HP<br>(Transform) |
| |data= | | |data= |
| {{AttackData-JCFoF | | {{AttackData-JCFoF |
| |damage=-- | | |damage=- |
| |guard=-- | | |stun= |
| | |kdtime= |
| | |hitstun= |
| | |guard=- |
| |startup=14+37 | | |startup=14+37 |
| |active=533 | | |active=533 |
| |recovery=0 | | |recovery=0 |
| |advHit=-- | | |advHit=- |
| |advBlock=-- | | |advBlock=- |
| |attribute=Invincible 1-37f | | |attribute=Invincible 1-37f |
| |description=*14f startup pre-flash, then falls as Mini-Lion for 37f (Super flash lasts 20f, not included in invincibility) | | |description=*14f startup pre-flash, then falls as Mini-Lion for 37f (Super flash lasts 20f, not included in invincibility) |
| Line 754: |
Line 771: |
| }} | | }} |
| }} | | }} |
| <br>
| |
|
| |
| <big>'''Self-Destruct'''</big>
| |
| <font style="visibility:hidden" size="0">+P (during Super)</font>
| |
| {{MoveData | | {{MoveData |
| |image=JCFoF MLion Super P 1.png | | |image=JCFoF MLion Super P 1.png |
| |imageSize=175x250px | | |imageSize=110x250px |
| |image2=JCFoF MLion Super P 2.png | | |image2=JCFoF MLion Super P 2.png |
| |imageSize2=175x250px | | |imageSize2=110x250px |
| |caption= | | |caption= |
| |name= | | |name= |
| |input=+P (during Super) | | |input=+P<br>(Self-Destruct) |
| |data= | | |data= |
| {{AttackData-JCFoF | | {{AttackData-JCFoF |
| |damage=8x5 | | |damage=8x5 |
| | |stun=1024x5 |
| | |kdtime=128x5 |
| | |hitstun= |
| |guard=Mid | | |guard=Mid |
| |startup=9 | | |startup=9 |
| |active=10 | | |active=10 |
| |recovery=43 (ground) to 54 (max height) | | |recovery=43 to 54 |
| |advHit=-12 (-23) | | |advHit=-12 (-23) |
| |advBlock=-11 (-22) | | |advBlock=-11 (-22) |
| |attribute=OTG, Air OK | | |attribute=OTG, Air OK |
| |description=*Explosion knocks Mini-Lion upward; has more recovery the higher it is activated, but no landing recovery | | |description=*Explosion knocks Mini-Lion upward |
| | **The higher he is, the more recovery there is |
| *Explosion cannot be stopped even if Mini-Lion is hit during the first startup frame | | *Explosion cannot be stopped even if Mini-Lion is hit during the first startup frame |
| | *Cannot be activated while in proximity guard |
| }} | | }} |
| }} | | }} |
| <br>
| |
|
| |
| <big>'''Lion Force (Drone Call)'''</big>
| |
| <font style="visibility:hidden" size="0">+K or +6K (during Super)</font>
| |
| {{MoveData | | {{MoveData |
| |image=JCFoF MLion Super K 1.png | | |image=JCFoF MLion Super K 1.png |
| |imageSize=175x250px | | |imageSize=110x250px |
| |image2=JCFoF MLion Super K 2.png | | |image2=JCFoF MLion Super K 2.png |
| |imageSize2=175x250px | | |imageSize2=110x250px |
| |caption= | | |caption2=Hidden Missiles! |
| |name= | | |name= |
| |input=+K or +6K (during Super) | | |input=+K or +6K<br>(Lion Force) |
| |data= | | |data= |
| {{AttackData-JCFoF | | {{AttackData-JCFoF |
| |damage=16x3 | | |damage=16x3 |
| | |stun=2048 each |
| | |kdtime=256 each |
| | |hitstun= |
| |guard=Overhead | | |guard=Overhead |
| |startup=61 ground, 24-42 air | | |startup=61 ground, 24-42 air |
| |active=until ground | | |active=until ground |
| |recovery=-- | | |recovery=- |
| |advHit=-- | | |advHit=- |
| |advBlock=-- | | |advBlock=- |
| |attribute=OTG, Air OK | | |attribute=OTG, Air OK |
| |description=*3 Lion Drones appear from the air, their position depending on which button was pressed | | |description=*3 Lion Drones appear from the air, their position depending on which button was pressed |
| Line 808: |
Line 825: |
| *If airborne, he will call drones and then drop, which takes 24f (min height) to 42f (max height) | | *If airborne, he will call drones and then drop, which takes 24f (min height) to 42f (max height) |
| *A low jump drone call into immediate self-destruct is very difficult to punish, as the drones will cover the recovery, allowing you to repeat the cycle | | *A low jump drone call into immediate self-destruct is very difficult to punish, as the drones will cover the recovery, allowing you to repeat the cycle |
| | **Well-placed drones + self destruct can instantly stun everyone besides Thorsten/M. Lion, if all hits connect |
| | *Cannot be activated while in proximity guard |
| }} | | }} |
| }} | | }} |
| Line 813: |
Line 832: |
| ==<big>'''Wakeup/Knockdown'''</big>== | | ==<big>'''Wakeup/Knockdown'''</big>== |
| <div class="mw-collapsible mw-collapsed"> | | <div class="mw-collapsible mw-collapsed"> |
| <div class="mw-collapsible-toggle" style="float: none;"><center><font size="3"><b>Wakeup Attack Detailed Info</b> <small>(click to expand)</small></font></center></div> | | <div class="mw-collapsible-toggle" style="float: none;"><center><font size="3"><b>Getup Attack Detailed Info</b> <small>(click to expand)</small></font></center></div> |
| <div class="mw-collapsible-content"> | | <div class="mw-collapsible-content"> |
| *Wakeup LK or HK must be input within a specific 16 frame window during the wakeup animation. | | *Getup LK or HK must be input within a specific 16 frame window during the wakeup animation. |
| *The exact timing of this window varies by character and by whether it was a neutral wakeup or forward/back roll. | | *The exact timing of this window varies by character and by whether it was a neutral wakeup or forward/back roll. |
| *During these 16 frames, the '''final''' LK or HK input will decide which version comes out. If LK and HK are input simultaneously, Wakeup LK takes priority. | | *During these 16 frames, the '''final''' LK or HK input will decide which version comes out. If LK and HK are input simultaneously, Getup LK takes priority. |
| *The Wakeup Attack will always come out on the first frame after the 16 frame input window, regardless of when it was input. | | *The Getup Attack will always come out on the first frame after the 16 frame input window, regardless of when it was input. |
| *For some characters, there is very little time between the end of the 16 frame Wakeup Attack window and the end of recovery, making it difficult to input a reversal move with LK or HK, so be mindful of this if you get accidental Wakeup Attacks. | | *For some characters, there is very little time between the end of the 16 frame Getup Attack window and the end of recovery, making it difficult to input a reversal move with LK or HK, so be mindful of this if you get accidental Getup Attacks. |
| *After inputting a Wakeup Attack, any special move input that occurs afterward will automatically be buffered until the attack animation has ended. This means that it's important to stop mashing directions on wakeup once the Wakeup Attack window is active, as you may get an unexpected special move way after it was input. | | *After inputting a Getup Attack, any special move input that occurs afterward will automatically be buffered until the attack animation has ended. This means that it's important to stop mashing directions on wakeup once the Getup Attack window is active, as you may get an unexpected special move way after it was input. |
| </div> | | </div> |
| </div> | | </div> |
| <br> | | <br> |
| <big>'''Wakeup LK'''</big>
| |
| <font style="visibility:hidden" size="0">Wakeup LK</font>
| |
| {{MoveData | | {{MoveData |
| |image=JCFoF MLion WakeupLK.png | | |image=JCFoF MLion GetupLK.png |
| |caption= | | |caption= |
| |name= | | |name= |
| |input= | | |input=Getup LK |
| |data= | | |data= |
| {{AttackData-JCFoF | | {{AttackData-JCFoF |
| |damage=24 | | |damage=24 |
| | |stun=1028 |
| | |kdtime=384 |
| | |hitstun= |
| |guard=Overhead | | |guard=Overhead |
| |startup=8 | | |startup=8 |
| Line 845: |
Line 865: |
| }} | | }} |
| }} | | }} |
| <br>
| |
|
| |
| <big>'''Wakeup HK'''</big>
| |
| <font style="visibility:hidden" size="0">Wakeup HK</font>
| |
| {{MoveData | | {{MoveData |
| |image=JCFoF MLion WakeupHK.png | | |image=JCFoF MLion GetupHK.png |
| |caption= | | |caption= |
| |name= | | |name= |
| |input= | | |input=Getup HK |
| |data= | | |data= |
| {{AttackData-JCFoF | | {{AttackData-JCFoF |
| |damage=24 | | |damage=24 |
| | |stun=1024 |
| | |kdtime=384 |
| | |hitstun= |
| |guard=Low | | |guard=Low |
| |startup=14 | | |startup=14 |
| Line 864: |
Line 883: |
| |advBlock=-3 | | |advBlock=-3 |
| |attribute=Invincible 1-10f, OTG | | |attribute=Invincible 1-10f, OTG |
| |description=*A rare wakeup attack with invincibility that doesn't extend throughout the entire startup | | |description=*A rare getup attack with invincibility that doesn't extend throughout the entire startup |
| *KD Timer is very short, but if you land a quick OTG afterward it resets the KD timer to allow for more OTGs | | *KD Timer is very short, but if you land a quick OTG afterward it resets the KD timer to allow for more OTGs |
| *Recovers in a crouching state, so it must be whiff punished with moves that work against crouchers | | *Recovers in a crouching state, so it must be whiff punished with moves that work against crouchers |
| }} | | }} |
| }} | | }} |
| <br>
| |
|
| |
| <big>'''Pursuit Attack'''</big>
| |
| <font style="visibility:hidden" size="0">Pursuit Attack</font>
| |
| {{MoveData | | {{MoveData |
| |image=JCFoF MLion PursuitA 1.png | | |image=JCFoF MLion PursuitA 1.png |
| Line 880: |
Line 895: |
| |caption= | | |caption= |
| |name= | | |name= |
| |input=8LP or 8HP | | |input=Pursuit Attack<br>8LP or 8HP |
| |data= | | |data= |
| {{AttackData-JCFoF | | {{AttackData-JCFoF |
| |damage=16 * (4 each) | | |damage=16 * (4 each) |
| | |stun=768 |
| | |kdtime= |
| | |hitstun= |
| |guard=Overhead | | |guard=Overhead |
| |startup=54 | | |startup=54 |
| Line 898: |
Line 916: |
| }} | | }} |
| }} | | }} |
| <br>
| |
|
| |
| <big>'''Pursuit Counter'''</big>
| |
| <font style="visibility:hidden" size="0">Pursuit Counter</font>
| |
| {{MoveData | | {{MoveData |
| |image=JCFoF MLion PursuitC 1.png | | |image=JCFoF MLion PursuitC 1.png |
| Line 909: |
Line 923: |
| |caption= | | |caption= |
| |name= | | |name= |
| |input=Any 2 Buttons | | |input=Pursuit Counter<br>Any 2 Buttons |
| |data= | | |data= |
| {{AttackData-JCFoF | | {{AttackData-JCFoF |
| |damage=20 | | |damage=20 |
| |guard=-- | | |stun=0 |
| |startup=-- | | |kdtime=320 |
| |active=-- | | |hitstun= |
| |recovery=-- | | |guard=- |
| | |startup=- |
| | |active=- |
| | |recovery=- |
| |advHit=KD | | |advHit=KD |
| |advBlock=-- | | |advBlock=- |
| |attribute= | | |attribute= |
| |description=*2f window to counter an opponent's pursuit attack; can counter against any hit of the pursuit attack | | |description=*2f window to counter an opponent's pursuit attack; can counter against any hit of the pursuit attack |
| Line 933: |
Line 950: |
| {{MoveData | | {{MoveData |
| |image=JCFoF MLion AutoN 2.png | | |image=JCFoF MLion AutoN 2.png |
| |imageSize=100x250px | | |imageSize=140x250px |
| |image2=JCFoF MLion AutoN 3.png
| |
| |imageSize2=125x250px
| |
| |image3=JCFoF MLion AutoN 4.png
| |
| |imageSize3=150x250px
| |
| |image4=JCFoF MLion AutoN 5.png
| |
| |imageSize4=140x250px
| |
| |image5=JCFoF MLion AutoN 6.png
| |
| |imageSize5=160x250px
| |
| |caption= | | |caption= |
| |name= | | |name= |
| Line 947: |
Line 956: |
| |data= | | |data= |
| {{AttackData-JCFoF | | {{AttackData-JCFoF |
| |version=(LP) > LP | | |version=> LP<br><br>(2) |
| |damage=8 | | |damage=8 |
| | |stun=512 |
| | |kdtime=128 |
| | |hitstun= |
| | |specialcancel=N |
| |guard=Mid | | |guard=Mid |
| |startup=11 | | |startup=11 |
| Line 956: |
Line 969: |
| |advBlock=-7 | | |advBlock=-7 |
| |attribute= | | |attribute= |
| |description=*Same animation as Far 5HK; OTG vs M. Lion | | |description=*Same animation as far.5HK; OTG vs M. Lion |
| }} | | }} |
| | }} |
| | {{MoveData |
| | |image=JCFoF MLion AutoN 3.png |
| | |imageSize=160x250px |
| | |caption= |
| | |name= |
| | |input= |
| | |data= |
| {{AttackData-JCFoF | | {{AttackData-JCFoF |
| |version=(LP > LP) > LP | | |version=> LP<br><br>(3) |
| |damage=8 | | |damage=8 |
| | |stun=512 |
| | |kdtime=128 |
| | |hitstun= |
| | |specialcancel=N |
| |guard=High | | |guard=High |
| |startup=22 | | |startup=22 |
| Line 970: |
Line 995: |
| |description=*Doesn't combo | | |description=*Doesn't combo |
| *Same animation as 2HP (only one hit) while sliding forward | | *Same animation as 2HP (only one hit) while sliding forward |
| | }} |
| }} | | }} |
| | {{MoveData |
| | |image=JCFoF MLion AutoN 4.png |
| | |caption= |
| | |name= |
| | |input= |
| | |data= |
| {{AttackData-JCFoF | | {{AttackData-JCFoF |
| |version=(LP > LP > LP) > LP | | |version=> LP<br><br>(4) |
| |damage=8 | | |damage=8 |
| | |stun=512 |
| | |kdtime=128 |
| | |hitstun= |
| | |specialcancel=N |
| |guard=Mid | | |guard=Mid |
| |startup=10 | | |startup=10 |
| Line 982: |
Line 1,018: |
| |attribute= | | |attribute= |
| |description=*Same animation as 5LP | | |description=*Same animation as 5LP |
| | }} |
| }} | | }} |
| | {{MoveData |
| | |image=JCFoF MLion AutoN 5.png |
| | |caption= |
| | |name= |
| | |input= |
| | |data= |
| {{AttackData-JCFoF | | {{AttackData-JCFoF |
| |version=(LP > LP > LP > LP) > LP | | |version=> LP<br><br>(5) |
| |damage=8 | | |damage=8 |
| | |stun=512 |
| | |kdtime=128 |
| | |hitstun= |
| | |specialcancel=N |
| |guard=High | | |guard=High |
| |startup=15 | | |startup=15 |
| Line 993: |
Line 1,040: |
| |advBlock=-10 | | |advBlock=-10 |
| |attribute= | | |attribute= |
| |description=*Same animation as Far 5HP | | |description=*Same animation as far.5HP |
| | }} |
| }} | | }} |
| | {{MoveData |
| | |image=JCFoF MLion AutoN 6.png |
| | |caption= |
| | |name= |
| | |input= |
| | |data= |
| {{AttackData-JCFoF | | {{AttackData-JCFoF |
| |version=(LP > LP > LP > LP > LP) > LP | | |version=> LP<br><br>(6) |
| |damage=12 | | |damage=12 |
| | |stun=1024 |
| | |kdtime=192 |
| | |hitstun= |
| | |specialcancel=N |
| |guard=High | | |guard=High |
| |startup=16 | | |startup=16 |
| Line 1,013: |
Line 1,071: |
| {{MoveData | | {{MoveData |
| |image=JCFoF MLion AutoS 2.png | | |image=JCFoF MLion AutoS 2.png |
| |imageSize=130x250px
| |
| |image2=JCFoF MLion AutoS 3.png
| |
| |imageSize2=110x250px
| |
| |image3=JCFoF MLion AutoS 4.png
| |
| |imageSize3=170x250px
| |
| |image4=JCFoF MLion AutoS 5.png
| |
| |imageSize4=170x250px
| |
| |image5=JCFoF MLion AutoS 6.png
| |
| |imageSize5=170x250px
| |
| |caption= | | |caption= |
| |name= | | |name= |
| Line 1,027: |
Line 1,076: |
| |data= | | |data= |
| {{AttackData-JCFoF | | {{AttackData-JCFoF |
| |version=(LK) > LK | | |version=> LK<br><br>(2) |
| |damage=8 | | |damage=8 |
| | |stun=512 |
| | |kdtime=128 |
| | |hitstun= |
| | |specialcancel=N |
| |guard=Mid | | |guard=Mid |
| |startup=9 | | |startup=9 |
| Line 1,039: |
Line 1,092: |
| *Initial 5LK is a standing low, so LK > LK is a somewhat useful string due to its frame advantage and hitconfirmability | | *Initial 5LK is a standing low, so LK > LK is a somewhat useful string due to its frame advantage and hitconfirmability |
| }} | | }} |
| | }} |
| | {{MoveData |
| | |image=JCFoF MLion AutoS 3.png |
| | |imageSize=155x250px |
| | |caption= |
| | |name= |
| | |input= |
| | |data= |
| {{AttackData-JCFoF | | {{AttackData-JCFoF |
| |version=(LK > LK) > HK | | |version=> HK<br><br>(3) |
| |damage=10 | | |damage=10 |
| | |stun=512 |
| | |kdtime=160 |
| | |hitstun= |
| | |specialcancel=N |
| |guard=Mid | | |guard=Mid |
| |startup=11 | | |startup=11 |
| Line 1,049: |
Line 1,114: |
| |advBlock=-6 | | |advBlock=-6 |
| |attribute= | | |attribute= |
| |description=*Same animation as Far 5HK; OTG vs M. Lion | | |description=*Same animation as far.5HK; OTG vs M. Lion |
| | }} |
| }} | | }} |
| | {{MoveData |
| | |image=JCFoF MLion AutoS 4.png |
| | |caption= |
| | |name= |
| | |input= |
| | |data= |
| {{AttackData-JCFoF | | {{AttackData-JCFoF |
| |version=(LK > LK > HK) > HP | | |version=> HP<br><br>(4) |
| |damage=10 | | |damage=10 |
| | |stun=512 |
| | |kdtime=160 |
| | |hitstun= |
| | |specialcancel=N |
| |guard=High | | |guard=High |
| |startup=18 | | |startup=18 |
| Line 1,062: |
Line 1,138: |
| |attribute= | | |attribute= |
| |description=*Same animation as 6HP cape attack, but rotating in the opposite direction | | |description=*Same animation as 6HP cape attack, but rotating in the opposite direction |
| | }} |
| }} | | }} |
| | {{MoveData |
| | |image=JCFoF MLion AutoS 5.png |
| | |caption= |
| | |name= |
| | |input= |
| | |data= |
| {{AttackData-JCFoF | | {{AttackData-JCFoF |
| |version=(LK > LK > HK > HP) > HP | | |version=> HP<br><br>(5) |
| |damage=10 | | |damage=10 |
| | |stun=512 |
| | |kdtime=160 |
| | |hitstun= |
| | |specialcancel=N |
| |guard=Low | | |guard=Low |
| |startup=12 | | |startup=12 |
| Line 1,074: |
Line 1,161: |
| |attribute= | | |attribute= |
| |description=*Similar animation to 6HP cape attack, but performed while crouching; OTG | | |description=*Similar animation to 6HP cape attack, but performed while crouching; OTG |
| | }} |
| }} | | }} |
| | {{MoveData |
| | |image=JCFoF MLion AutoS 6.png |
| | |caption= |
| | |name= |
| | |input= |
| | |data= |
| {{AttackData-JCFoF | | {{AttackData-JCFoF |
| |version=(LK > LK > HK > HP > HP) > LP+HP | | |version=> LP+HP<br><br>(6) |
| |damage=6x5 | | |damage=6x5 |
| | |stun=512x5 |
| | |kdtime=96x5 |
| | |hitstun= |
| | |specialcancel=N |
| |guard=Mid | | |guard=Mid |
| |startup=17 | | |startup=17 |
| Line 1,093: |
Line 1,191: |
| <!-----------------------------------------------------------------------------Section Divider-----------------------------------------------------------------------------> | | <!-----------------------------------------------------------------------------Section Divider-----------------------------------------------------------------------------> |
|
| |
|
| ==<big>'''Combos and Resets'''</big>== | | ==<big>'''Hurtboxes/Hitstun'''</big>== |
| | | {{HitstunType-JCFoF|char=MLion|size26=350x350|size27=350x350|size29=350x350|size30=350x350|size32=200x200|sizeJug=350x350|sizeStBlk=200x200|sizeCrBlk=250x250|sizeOTG=250x250}} |
| {{Combo-JCFoF/Infobox}}
| | "High" and "Mid" hitstun types do not always correspond to the attack's Guard Level (i.e. how it must be blocked). Low attacks on standing characters generally fall under the "Mid" category for example. The purpose of this table is to understand where the hurtboxes are when a character is reeling from an attack, which helps understand why certain sequences will hit or whiff. Attacks have 2 main types of hitstun they can do to grounded opponents, with further slight differences between light/heavy attacks.<br>Note: The lua console lists the following memory values for hitstun types:<br>L High = 26, H High = 27, L Mid = 29, H Mid = 30, Crouching = 32 |
| | |
| ===<big>'''Hitconfirm Combos'''</big>===
| |
| | |
| ''Combo Note: the easiest post-stun combo is j.HK > j.HP, mash 646LP, juggle 2HK. Be as close as possible when starting the forward jump''<br>
| |
| '''''2LK''' is more reliable for midscreen juggles, and always works after air resets. '''5LK''' is more useful in some character-specific corner juggles.''<br>
| |
| ''When using '''646HP''' in combos, you must be very close to the corner or Lion will cross through, making it very unsafe.''<br>
| |
| {{ComboHeader-JCFoF}} | |
| {{Combo-JCFoF
| |
| | notation= | |
| :2LK > 2LP > 5LP xx mash 646'''LP''',
| |
| :dash '''2LK''' > cl 5HP > cl 5HK
| |
| | damage=54%
| |
| | location=Anywhere
| |
| | charspecific=Everyone but<br>Drunk Jackie
| |
| | description=
| |
| * Lion's only real standard hitconfirm; 2LP > 5LP chains more slowly than usual
| |
| * Juggling with 2LK > cl 5HK > far 5HP is easier to time, but gives much worse positioning
| |
| * In the corner, this sets up Lion for a strong meaty/throw mixup
| |
| | video=[https://www.youtube.com/watch?v=tRvfO_yRsAw video]<br>(0:00)
| |
| |}}
| |
| | |
| {{Combo-JCFoF
| |
| | notation=
| |
| :2LK > 2LP > 5LP xx mash 646'''LP''',
| |
| :dash '''2LK''' > cl 5HK
| |
| | damage=46%
| |
| | location=Anywhere
| |
| | charspecific=Drunk Jackie,<br>Lau
| |
| | description=
| |
| * Same as previous combo, but the juggle is cut short<br>-M. Lion can never get both heavy normals to juggle vs. '''Drunk Jackie'''
| |
| * This route is recommended vs. '''Lau''' due to juggle inconsistencies
| |
| | video=[https://youtu.be/tRvfO_yRsAw?t=7 video]<br>(0:07)
| |
| |}}
| |
| | |
| {{Combo-JCFoF
| |
| | notation=
| |
| :2LK, 2LP x2 > 5LP xx mash 646'''HP''',
| |
| :(dash) '''2LK''' > cl 5HP > cl 5HK '''(stun)'''
| |
| | damage=100%<br>(69%)
| |
| | location=Corner
| |
| | charspecific=Everyone but Lau,<br>Admiral Jackie,<br>Drunk Jackie
| |
| | description=
| |
| * vs. '''Kim-Maree & Thorsten''': microdash before '''2LK'''
| |
| * vs. '''Thorsten & M. Lion''': no stun, but juggle still works
| |
| * vs. '''Yeung''': juggle is very lenient; switch sides first to make it easier
| |
| | video=[https://youtu.be/tRvfO_yRsAw?t=30 video]<br>(0:30)
| |
| |}}
| |
| | |
| {{Combo-JCFoF
| |
| | notation=
| |
| :2LK, 2LP x2 > 5LP xx mash 646'''HP''',
| |
| :dash '''5LK''' > cl 5HP > cl 5HK '''(stun)'''
| |
| | damage=100%<br>(61%)
| |
| | location=Corner
| |
| | charspecific=Lau,<br>Admiral Jackie,<br>*Drunk Jackie
| |
| | description=
| |
| * vs. '''Lau & Admiral''': microdash 5LK required; 2LK will whiff
| |
| * vs. '''Drunk Jackie''': no stun because full juggle can't connect<br>-Use microdash '''5LK > cl 5HK''' (~61% dmg)
| |
| * 5LK will work on the other characters too, but has more strict timing
| |
| | video=[https://youtu.be/tRvfO_yRsAw?t=47 video]<br>(0:47)
| |
| |}}
| |
| | |
| {{Combo-JCFoF
| |
| | notation=
| |
| :cl 5HK > 2HP (1st hit) xx mash 646'''LP''',
| |
| :dash '''2LK''' > cl 5HP > cl 5HK
| |
| | damage=69%
| |
| | location=Anywhere
| |
| | charspecific=Everyone but<br>Yeung, Sam, Kim '''(Standing)'''
| |
| | description=
| |
| * Strong punish combo; otherwise impractical since cl 5HK whiffs on crouchers
| |
| * See earlier combos for character-specific juggle information
| |
| | video=[https://youtu.be/tRvfO_yRsAw?t=89 video]<br>(1:29)
| |
| |}}
| |
| | |
| {{Combo-JCFoF
| |
| | notation=
| |
| :236LP Bomb, dash 2LK > 5LP xx mash 646'''LP''',
| |
| :dash '''2LK''' > cl 5HK > far 5HP '''(stun)'''
| |
| | damage=100%
| |
| | location=Anywhere
| |
| | charspecific=Everyone but Thorsten & M. Lion
| |
| | description=
| |
| * Requires all 5 hits of bomb to connect
| |
| * vs. '''Drunk Jackie''' & '''Lau''': juggle with dash '''2LK > 5LP > cl 5HK''' instead<br>-The normal route can work on Lau, but is less consistent
| |
| | video=[https://youtu.be/tRvfO_yRsAw?t=96 video]<br>(1:36)
| |
| |}}
| |
| | |
| {{Combo-JCFoF
| |
| | notation= | |
| :236LP Bomb, dash cl 5HK > 2HP (1st hit) xx mash 646'''LP''',
| |
| :dash '''2LK''' > cl 5HK > far 5HP '''(stun)'''
| |
| | damage=100%
| |
| | location=Anywhere
| |
| | charspecific=Thorsten
| |
| | description= | |
| * Extremely difficult variation of previous combo to stun Thorsten midscreen
| |
| * Bomb must hit from as close as possible while still getting all 5 hits
| |
| * This ending juggle is much more lenient than the usual 2LK > cl 5HP > cl 5HK route
| |
| | video=[https://youtu.be/tRvfO_yRsAw?t=115 video]<br>(1:55) | |
| |}} | |
| | |
| {{Combo-JCFoF
| |
| | notation=
| |
| :236LP Bomb, [dash 5LP] xx mash 646'''HP''',
| |
| :'''2LK/5LK''' > cl 5HK '''(stun)'''
| |
| | damage=100% | |
| | location=Corner | |
| | charspecific=Universal | |
| | description= | |
| * Rrefer to previous 646HP combos for character-specific juggle information
| |
| * '''[Dash 5LP]''' is only required vs. '''Drunk Jackie, Thorsten, & M. Lion'''
| |
| * vs. '''Drunk Jackie''': juggle with '''5LK > far 5HP''' instead
| |
| * vs. '''M. Lion''': juggle with '''2LK > cl 5HP > cl 5HK''' instead
| |
| | video=[https://youtu.be/tRvfO_yRsAw?t=125 video]<br>(2:05) | |
| |}}
| |
| | |
| |}
| |
| | |
| {| class="wikitable"
| |
| |+ Juggle timing window (in Frames): Midscreen 646LP into 2LK/5LK > cl 5HP > cl 5HK
| |
| |-
| |
| ! Opponent's Character !! 2LK Juggle !! 5LK Juggle !! Notes
| |
| |-
| |
| | Thorsten || style="text-align:center;" |4 || style="text-align:center;" |-- || From most midscreen hitconfirms, 5LK > cl 5HP is impossible
| |
| |-
| |
| | M. Lion || style="text-align:center;" |5 || style="text-align:center;" |-- || From most midscreen hitconfirms, 5LK > cl 5HP is impossible (or 1f timing at best)
| |
| |-
| |
| | Lau || style="text-align:center;" |3 <small>(8)</small> 2 || style="text-align:center;" |2 || Full 2LK juggle only works on the first 3 or final 2 frames; 8f in the middle causes cl 5HK to whiff<br>-5LK > cl 5HP > cl 5HK only works on final 2 frames, very difficult<br>-Recommend using 2LK > cl 5HK instead
| |
| |-
| |
| | Kim-Maree || style="text-align:center;" |9 || style="text-align:center;" |5 || --
| |
| |-
| |
| | Dragonball Jackie || style="text-align:center;" |12 || style="text-align:center;" |8 || --
| |
| |-
| |
| | Drunk Jackie || style="text-align:center;" |12 || style="text-align:center;" |10 || End juggle with only cl 5HK; can't juggle an additional 5HP<br>-Wait until near the end of Lion's dash, as Drunk Jackie gets launched far away
| |
| |-
| |
| | Admiral Jackie || style="text-align:center;" |13 || style="text-align:center;" |9 || --
| |
| |-
| |
| | Sam || style="text-align:center;" |14 || style="text-align:center;" |12 || On the final possible 2LK juggle frame, Sam gets juggled backwards with 2LK (still extremely lenient)
| |
| |-
| |
| | Yeung || style="text-align:center;" |19 || style="text-align:center;" |16 || Both are very lenient; there is 1f where 2LK juggles backwards, so 5LK may be better<br>-It is strategically better to let Yeung land, then use OTG infinite if you can execute it
| |
| |}
| |
| | |
| <!-----------------------------------------------------------------------------Section Divider----------------------------------------------------------------------------->
| |
| | |
| ===<big>'''Throw Combos'''</big>===
| |
| | |
| ''Note: Each character has their most consistent throw juggle listed, but more optimal routes are often possible with strict timing.''<br>''Crouch Throw damage varies based on relative mashing speed between players.''<br>''Stand Throw leaves the opponent in a backturned state for a stronger mixup.''
| |
| {{ComboHeader-JCFoF}}
| |
| {{Combo-JCFoF
| |
| | notation=
| |
| :Stand/[Crouch] Throw, dash '''5LK''' > '''cl 5HP''' > '''cl 5HK'''
| |
| | damage=46%<br>[~42%]
| |
| | location=Near corner
| |
| | charspecific=Yeung, Dragonball Jackie
| |
| | description=
| |
| * If you can't quite get point blank for the juggle, omit the cl 5HP
| |
| * vs. '''Yeung''': using OTG relaunch is a better idea
| |
| | video=[https://youtu.be/tRvfO_yRsAw?t=177 video]<br>(2:57)
| |
| |}}
| |
| | |
| {{Combo-JCFoF
| |
| | notation=
| |
| :Stand/[Crouch] Throw, dash '''5LK''' > '''cl 5HK''' > '''far 5HP'''
| |
| | damage=46%<br>[~42%]
| |
| | location=Near corner
| |
| | charspecific=Admiral Jackie
| |
| | description=
| |
| * Most consistent route vs. Admiral; for stronger mixup, omit the 5HP<br>-5LK > 2LP > cl 5HK can also work, but corner juggle is awkward
| |
| * If very deep in the corner, you may need to dash out before starting the juggle due to turnaround bug
| |
| | video=[https://youtu.be/tRvfO_yRsAw?t=183 video]<br>(3:03)
| |
| |}}
| |
| | |
| {{Combo-JCFoF
| |
| | notation=
| |
| :Stand/[Crouch] Throw, dash '''2LK''' > '''2LP''' > '''cl 5HK'''
| |
| | damage=40%<br>[~36%]
| |
| | location=Near corner
| |
| | charspecific=Lau, Thorsten, Sam, Kim, M. Lion
| |
| | description=
| |
| * The previous route can work on these characters, but is very inconsistent
| |
| * Pushing a strong mixup is more important than getting optimal juggle damage in the corner
| |
| | video=[https://youtu.be/tRvfO_yRsAw?t=190 video]<br>(3:10)
| |
| |}}
| |
| | |
| {{Combo-JCFoF
| |
| | notation=
| |
| :Stand/[Crouch] Throw, dash '''2LP/2LK''' > '''cl 5HK'''
| |
| | damage=37%<br>[~33%]
| |
| | location=Near corner
| |
| | charspecific=Drunk Jackie
| |
| | description=
| |
| * Use '''2LP''' if juggling earlier; '''2LK''' only works very late and is hard to time
| |
| | video=[https://youtu.be/tRvfO_yRsAw?t=196 video]<br>(3:16)
| |
| |}}
| |
| | |
| {{Combo-JCFoF
| |
| | notation=
| |
| :6HP/4HP Stand Throw, dash 2HK
| |
| | damage=33%
| |
| | location=Midscreen
| |
| | charspecific=Yeung, Admiral, Drunk, Dragonball Jackie
| |
| | description=
| |
| * Weak midscreen juggle after throw<br>-Must 2HK near the end of the dash
| |
| * vs. '''Yeung''': using OTG relaunch is a better idea
| |
| | video=[https://youtu.be/tRvfO_yRsAw?t=204 video]<br>(3:24)
| |
| |}}
| |
| | |
| {{Combo-JCFoF
| |
| | notation=
| |
| :3HP/1HP Crouch Throw, dash 2HK
| |
| | damage=~29%
| |
| | location=Midscreen
| |
| | charspecific=Lau, Yeung,<br>Admiral Jackie,<br>Kim, M. Lion
| |
| | description=
| |
| * Weak midscreen juggle after crouch throw<br>-Must 2HK near the end of the dash
| |
| * vs. '''Yeung''': using OTG relaunch is a better idea
| |
| * Throw damage varies based on relative mashing speed between players
| |
| | video=[https://youtu.be/tRvfO_yRsAw?t=209 video]<br>(3:29)
| |
| |}}
| |
| | |
| |}
| |
| | |
| <!-----------------------------------------------------------------------------Section Divider----------------------------------------------------------------------------->
| |
| | |
| ===<big>'''Overhead Combos'''</big>===
| |
| | |
| ''Combo Note: In most cases, the opponent must be crouching to make the first hit of 6HK whiff, reducing M. Lion's pushback''
| |
| {{ComboHeader-JCFoF}}
| |
| {{Combo-JCFoF
| |
| | notation=
| |
| :6HK, 2LP xx mash 646'''LP''',
| |
| :dash [2LK > cl 5HP > cl 5HK]
| |
| | damage=41%*
| |
| | location=Anywhere
| |
| | charspecific=Universal*<br>'''(crouching)'''
| |
| | description=
| |
| * Note: see '''[Hitconfirms Section]''' for character-specific juggle details after 646LP
| |
| * Can use 2LK > 5LP for easier confirm, but damage doesn't change
| |
| | video=[https://youtu.be/tRvfO_yRsAw?t=215 video]<br>(3:35)
| |
| |}}
| |
| | |
| {{Combo-JCFoF
| |
| | notation=
| |
| :6HK, 2LK > 5LP xx mash 646'''HP''',
| |
| :(dash) 2LK > cl 5HP > cl 5HK '''(stun)'''
| |
| | damage=100%<br>(57%)
| |
| | location=Corner
| |
| | charspecific=Universal*<br>'''(crouching)'''
| |
| | description=
| |
| * Note: see '''[Hitconfirms Section]''' for character-specific juggle details after corner 646HP
| |
| * Stuns everyone except '''M. Lion''' (high stun) & '''Drunk Jackie''' (weaker juggle)
| |
| * vs. '''Thorsten''': after 6HK use '''2LK > 2LP > 5LP''', then microdash 1f before 5LK (very impractical)
| |
| | video=[https://youtu.be/tRvfO_yRsAw?t=223 video]<br>(3:43)
| |
| |}}
| |
| | |
| |}
| |
| | |
| <!-----------------------------------------------------------------------------Section Divider----------------------------------------------------------------------------->
| |
| | |
| ===<big>'''OTG Options'''</big>===
| |
| | |
| {{ComboHeader-JCFoF}}
| |
| {{Combo-JCFoF
| |
| | notation=
| |
| :2HK, 5LK, 2HK
| |
| | damage=~12%
| |
| | location=Midscreen
| |
| | charspecific=Universal
| |
| | description=
| |
| * Basic OTG combo. Dash before 5LK if midscreen.
| |
| | video=[https://youtu.be/tRvfO_yRsAw?t=248 video]<br>(4:08)
| |
| |}}
| |
| | |
| {{Combo-JCFoF
| |
| | notation=
| |
| :5LK, (link) mash 646'''LP''',
| |
| :dash out of corner, repeat
| |
| | damage=100%
| |
| | location=Midscreen to Corner
| |
| | charspecific=Yeung
| |
| | description=
| |
| * Yeung OTG infinite. Must slightly delay the 646LP (not a special cancel)
| |
| * Starting midscreen will almost always take you to the corner after one rep
| |
| * Does incredibly low damage each rep; more likely to time out than kill.
| |
| * If Yeung has the life lead, you may need to use a reset at some point.
| |
| | video=[https://youtu.be/tRvfO_yRsAw?t=255 video]<br>(4:15)
| |
| |}}
| |
| | |
| {{Combo-JCFoF
| |
| | notation=
| |
| :5LK, dash 5LK > cl 5HP > cl 5HK
| |
| | damage=~26%
| |
| | location=Anywhere
| |
| | charspecific=Yeung
| |
| | description=
| |
| * Yeung OTG juggle - not an infinite, but easy with good damage + positioning
| |
| * If Yeung is backturned (after 6HP/4HP Throw), won't work midscreen<br>-Needs an alternate juggle route
| |
| | video=[https://youtu.be/tRvfO_yRsAw?t=274 video]<br>(4:34)
| |
| |}}
| |
| | |
| {{Combo-JCFoF
| |
| | notation=
| |
| :2HK, 2LK xx 236HP
| |
| | damage=8% +<br>6% chip
| |
| | location=Midscreen
| |
| | charspecific=Yeung
| |
| | description=
| |
| * Sends Yeung near fullscreen into a meaty bomb for extra chip damage
| |
| * Must start 2HK from very close range
| |
| | video=[https://youtu.be/tRvfO_yRsAw?t=283 video]<br>(4:43)
| |
| |}}
| |
| | |
| {{Combo-JCFoF
| |
| | notation=
| |
| :5LK, 2LK > cl 5HP > cl 5HK, jump,
| |
| :j.LP > j.LK > j.HP, land 2LK (repeat)
| |
| | damage=100%
| |
| | location=Corner
| |
| | charspecific=Yeung
| |
| | description=
| |
| * '''Evil Lion''' OTG Infinite (incredibly difficult)
| |
| * Neutral jump after 6HP/4HP Throw (backturned knockdown)
| |
| * Forward jump after regular knockdown, dash out of corner each rep
| |
| * Must delay the j.LP as late as possible, and hit 2LK immediately after landing
| |
| | video=[https://youtu.be/tRvfO_yRsAw?t=291 video]<br>(4:51)
| |
| |}}
| |
| | |
| |}
| |
| | |
| <!-----------------------------------------------------------------------------Section Divider----------------------------------------------------------------------------->
| |
| | |
| ===<big>'''Miscellaneous Combos'''</big>===
| |
| <!---Combos that don't fall into other categories, plus random, impractical stuff like dash light infinites or "style combos" that aren't likely to actually be used in a match--->
| |
| | |
| {{ComboHeader-JCFoF}}
| |
| {{Combo-JCFoF
| |
| | notation=
| |
| :Wakeup LK, dash 2LK > cl 5HP > cl 5HK
| |
| | damage=Up to<br>41%
| |
| | location=Near Corner
| |
| | charspecific=Universal*
| |
| | description=
| |
| * Note: Juggle options are the same as after 646LP<br>-See '''[Hitconfirms Section]''' for character-specific juggle details
| |
| * Depending on the distance from the corner, you may have to improvise a less optimal juggle<br>Ex: 2LK > cl 5HK; 2LK > 5LP > far 5HP
| |
| * Lighter characters allow more time to dash in for the juggle, enabling combo farther away from the corner
| |
| | video=[https://youtu.be/tRvfO_yRsAw?t=328 video]<br>(5:28)
| |
| |}}
| |
| | |
| {{Combo-JCFoF
| |
| | notation=
| |
| :Pursuit Counter, dash 2LK > cl 5HP > cl 5HK
| |
| | damage=Up to<br>38%
| |
| | location=Anywhere
| |
| | charspecific=Universal*
| |
| | description=
| |
| * Opponents fall very slowly, giving plenty of time for a juggle
| |
| * vs. '''Lau, Admiral, Sam, Kim, M. Lion''': 2LK > 2LP > cl 5HK is much more consistent<br>-If attempting the optimal juggle, delay your dash and juggle as late as possible
| |
| * vs. '''Drunk Jackie''': juggle with 2LK > cl 5HK
| |
| | video=[https://youtu.be/tRvfO_yRsAw?t=335 video]<br>(5:35)
| |
| |}}
| |
| | |
| {{Combo-JCFoF
| |
| | notation=
| |
| :2LK > 2LP > 6HK (2 hits), 5LP xx mash 646LP
| |
| | damage=24%+
| |
| | location=Anywhere
| |
| | charspecific=Yeung<br>'''(Crouching)'''
| |
| | description=
| |
| * Both hits of 6HK combo due to crouching Yeung's expanding hurtbox
| |
| * Can convert this into the Yeung OTG infinite
| |
| * Lion can also chain into 6HP vs. crouching Yeung, but this is always unsafe on hit
| |
| | video=[https://youtu.be/tRvfO_yRsAw?t=341 video]<br>(5:41)
| |
| |}}
| |
| | |
| {{Combo-JCFoF
| |
| | notation=
| |
| :236HP Bomb, dash + forward jump,
| |
| :instant j.LK > j.LP > j.HK > j.HP, mash 646'''HP''',
| |
| :2LK > cl 5HK '''(stun)'''
| |
| | damage=100%
| |
| | location=Corner
| |
| | charspecific=Kim-Maree,<br>Thorsten,<br>M. Lion
| |
| | description=
| |
| * Extremely impractical novelty combo
| |
| * Air normals must be chained slowly to allow a combo after landing
| |
| * Kim & Thorsten will be stunned by just the 646HP
| |
| | video=[https://youtu.be/tRvfO_yRsAw?t=348 video]<br>(5:48)
| |
| |}}
| |
| | |
| |}
| |
| | |
| <!-----------------------------------------------------------------------------Section Divider----------------------------------------------------------------------------->
| |
| | |
| ===<big>'''Evil Lion Combos'''</big>===
| |
| <!---Combos that only work as Boss Version--->
| |
| | |
| {{ComboHeader-JCFoF}}
| |
| {{Combo-JCFoF
| |
| | notation=
| |
| :Mash 646'''LP''', dash 2LK > cl 5HP > cl 5HK,
| |
| :dash 2LK > cl 5HP > cl 5HK '''(stun)'''
| |
| | damage=100%
| |
| | location=Anywhere
| |
| | charspecific=Yeung*, Sam, Kim, Dragonball Jackie
| |
| | description=
| |
| * vs. '''Yeung''': The 2nd juggle must be done as she is very low to the ground<br>-Do a full dash after 1st juggle, then use '''5LK''' instead of 2LK for consistency
| |
| * This route allows a stun combo from raw 646LP, which is a great punish starter in many matchups
| |
| | video=[https://youtu.be/tRvfO_yRsAw?t=371 video]<br>(6:11)
| |
| |}}
| |
| | |
| {{Combo-JCFoF
| |
| | notation=
| |
| :2LP xx mash 646'''LP''', dash 2LK > cl 5HP > cl 5HK,
| |
| :dash 2LK > cl 5HK > cl 5HP '''(stun)'''
| |
| | damage=100%
| |
| | location=Anywhere
| |
| | charspecific=Lau
| |
| | description=
| |
| * It is hard to get the usual 2LK > cl 5HP > cl 5HK juggle vs. Lau<br>-Try doing the 2LK as early as possible while still being in cl 5HP proximity
| |
| * One light normal is needed for stun because the ending juggle is slightly weaker
| |
| * The spacing for the final juggle is very tight; must be directly under Lau
| |
| | video=[https://youtu.be/tRvfO_yRsAw?t=380 video]<br>(6:20)
| |
| |}}
| |
| | |
| {{Combo-JCFoF
| |
| | notation=
| |
| :2LK > 2LP xx mash 646'''LP''', dash 2LK > cl 5HP > cl 5HK,
| |
| :dash 5LK > cl 5HK > far 5HP '''(stun)'''
| |
| | damage=100%
| |
| | location=Anywhere
| |
| | charspecific=Admiral Jackie
| |
| | description=
| |
| * Using '''5LK''' instead of 2LK in the second juggle will time the hit as low as possible, making it easier
| |
| * Two light normals are needed for stun because the ending juggle is slightly weaker
| |
| | video=[https://youtu.be/tRvfO_yRsAw?t=389 video]<br>(6:29)
| |
| |}}
| |
| | |
| {{Combo-JCFoF
| |
| | notation=
| |
| :2LK > 5LP xx 646'''LP''', dash 2LK > cl 5HP > cl 5HK,
| |
| :dash 2LK > cl 5HK > [cl 5HP] '''(stun)'''
| |
| | damage=100%<br>(59%)
| |
| | location=Midscreen to Corner
| |
| | charspecific=Thorsten
| |
| | description=
| |
| * If you can reach the corner, this route will stun Thorsten
| |
| * If you end outside the corner, omit [cl 5HP] in second juggle<br>-Won't stun, but still does good damage
| |
| | video=[https://youtu.be/tRvfO_yRsAw?t=399 video]<br>(6:39)
| |
| |}}
| |
| | |
| {{Combo-JCFoF
| |
| | notation=
| |
| :2LK > 2LP > 5LP xx mash 646'''LP''',
| |
| :dash 2LK > cl 5HK, dash 2LK > cl 5HK
| |
| | damage=52%
| |
| | location=Anywhere
| |
| | charspecific=Drunk Jackie
| |
| | description=
| |
| * M. Lion can't do much to extend his damage vs. Drunk Jackie due to his awkward juggles
| |
| | video=[https://youtu.be/tRvfO_yRsAw?t=408 video]<br>(6:48)
| |
| |}}
| |
| | |
| {{Combo-JCFoF
| |
| | notation=
| |
| :2LK > 2LP > 5LP xx 646'''LP''',
| |
| :dash 2LK > cl 5HP > cl 5HK,
| |
| :2LK > cl 5HP > cl 5HK
| |
| | damage=64%
| |
| | location=Near Corner
| |
| | charspecific=M. Lion
| |
| | description=
| |
| * Must end in the corner for the final juggle to connect
| |
| * Midscreen, it is technically possible to add a 2LP > cl 5HK juggle, but requires frame perfect timing<br>-Better to just go for a mixup or use meaty 236LP Bomb
| |
| * Lion can also add a 6HP midscreen, but this sends Lion away fullscreen for no mixup
| |
| | video=[https://youtu.be/tRvfO_yRsAw?t=414 video]<br>(6:54)
| |
| |}}
| |
| | |
| {{Combo-JCFoF
| |
| | notation=-----
| |
| | damage=-----
| |
| | location=-----
| |
| | charspecific=-----
| |
| | description=-----
| |
| | video=-----
| |
| |}}
| |
| | |
| {{Combo-JCFoF
| |
| | notation=
| |
| :(Stand/Crouch Throw + first juggle),
| |
| :walk/dash 2LK > cl 5HK > cl 5HP
| |
| | damage=44-57%
| |
| | location=Near Corner
| |
| | charspecific=Universal
| |
| | description=
| |
| * See '''"Throw Combos"''' section to see the first juggle route for each character
| |
| * Far 5HP at the end can work on some characters, but gives less time for Lion to reposition
| |
| * vs. '''M. Lion, Admiral, Dragonball Jackie''': 2LK > cl 5HP > cl 5HK also works on final juggle
| |
| | video=[https://youtu.be/tRvfO_yRsAw?t=438 video]<br>(7:18)
| |
| |}}
| |
| | |
| {{Combo-JCFoF
| |
| | notation=-----
| |
| | damage=-----
| |
| | location=-----
| |
| | charspecific=-----
| |
| | description=-----
| |
| | video=-----
| |
| |}}
| |
| | |
| {{Combo-JCFoF
| |
| | notation=
| |
| :236LP, dash 5LP xx mash 646'''LP''',
| |
| :dash 2LK > cl 5HK, dash 2LK > cl 5HK '''(stun)'''
| |
| | damage=100%
| |
| | location=Anywhere
| |
| | charspecific=Universal
| |
| | description=
| |
| * Stun combo from a stray bomb hit
| |
| * vs. '''M. Lion''': add a '''cl 5HP''' at the end to stun<br>-Juggle must end fully in the corner
| |
| | video=[https://youtu.be/tRvfO_yRsAw?t=445 video]<br>(7:25)
| |
| |}}
| |
| | |
| |}
| |
| | |
| <!-----------------------------------------------------------------------------Section Divider----------------------------------------------------------------------------->
| |
| | |
| ==<big>'''Strategy & Matchups'''</big>==
| |
| (click to expand)
| |
| <!--NOTE: "Important Punishes" refers to situations like punishing your opponent's -4 move with a 4f reversal, ranged punishes on moves with lots of pushback, or punishing a low-recovery airborne move (Thorsten 28K) with a juggle combo. Moves that are super unsafe with obvious punishes (like Drunk Jackie's super) don't need to be listed. Punishes are listed for the OPPONENT'S attacks; punishes for THIS character's moves should be listed on the other character pages-->
| |
| | |
| <div style="float: none;"><center><font size="4"><b>General Strategy</b></font></center></div>
| |
| | |
| M. Lion generally runs a hit-and-run gameplan, switching between zoning with 236P (Lion Bomb), harassing with 2HK slide as a poke, and dash into light normals mixed with throws. Any bomb hit can generally be converted into 646P (Lion Crusher) for good damage and an excellent post-juggle mixup. Lion frequently leaves the opponent in a back-turned state with his throw and side switch Lion Crusher, which prevents backdashing out of his resets.
| |
| | |
| A cornerstone of Lion's gameplan is light normals cancelled into 236LP bomb. This is technically risky as the opponent can dash up throw as a read, but Lion gets great chip damage and continued pressure afterward on block, or a full combo on hit. Mix between bomb cancels, chains into 6HK, and dashing into more light normals/throws to keep the opponent guessing.
| |
| | |
| 646LP (Lion Crusher) is your main combo ender, and should always be mashed to get a juggle afterward. 646HP is great at randomly hitting the opponent from half screen, and hard for many characters to punish on block due to its enormous pushback. To use this move effectively, try to keep the opponent midscreen; if they back themselves into the corner, this move becomes nearly useless as it is very punishable without the pushback. Both strengths of Lion Crusher are excellent punish tools, and can punish moves that are normally considered safe due to pushback. The LP version should be used for punishes unless it is too far away to get the followup hits.
| |
| | |
| M. Lion's teleports move him to a fixed position relative to the opponent depending on which button is pressed, rather than maintaining a specific distance apart. This makes them worse than Thorsten's teleports for running away, but they still have very little recovery after the invincibility wears off. It might be worth using to escape the corner even if you get hit, depending on the opponent's strength.
| |
| | |
| <div style="float: none;"><center><font size="4"><b>Anti-Airs</b></font></center></div>
| |
| M. Lion is one of the most awkward characters to anti-air with. He doesn't have a single button that is always his preferred option. Close 5HP hits above and slightly behind him, making it okay against crossups, but the hitbox is mediocre. Far 5HP has a great hitbox, but it doesn't extend very far forward for a far normal and it's quite slow. Far 5HK has a great hitbox against far range jumpins, but will lose clean to any deep jump. 6HP has a disjointed hitbox that works well for far range jumps.
| |
| | |
| 2HP is probably your best bet most of the time. The hitbox priority isn't great, but even on trade Lion can dash up for a juggle afterward. 2LP also has an unusually low hurtbox that can work if the opponent hits an early air normal, but it's not reliable enough to use consistently.
| |
| | |
| <!--------------------------------Mini-Divider----------------------------------------->
| |
| | |
| <div class="mw-collapsible mw-collapsed">
| |
| <div class="mw-collapsible-toggle" style="float: none;"><center><font size="4"><b>Lau Matchup</b></font></center></div>
| |
| <div class="mw-collapsible-content">
| |
| | |
| {| class="wikitable"
| |
| |-
| |
| | <center>'''Lau'''</center>[[File:JCFoF Lau icon.png|link=Jackie Chan in Fists of Fire/Lau]] ||
| |
| <big>'''Important punishes'''</big><br>
| |
| '''2HK:''' 2HK slide (only from max range, or you will be punishable)<br>
| |
| -646HP can punish, but may be unsafe depending on screen position<br>
| |
| -Dash up 5LP xx 646LP (mash) if poorly spaced (not very likely)
| |
| | |
| '''236LK (LK Dragon Kick):''' Throw (if done at close range)<br>
| |
| -Lion's throw range is above average, so can punish from farther<br>
| |
| -Crouch throw can do more damage, but the backturn situation from normal throw is better if you are near a corner<br>
| |
| -Note: it can be difficult to punish properly, and Lau can use DP or Super to beat a failed punish. May be safer to backdash after blocking.<br>
| |
| | |
| '''236HK (HK Dragon Kick):''' Full combo punish<br>
| |
| -If you can survive the chip, stand block to make the spacing easier (otherwise he can fly over your head)<br>
| |
| | |
| '''623P (Rising Dragon):''' Full combo punish<br>
| |
| -Be aware that 623LP can whiff quickly and be hard to punish from farther ranges<br>
| |
| | |
| '''Super (close range):''' block, then dash up into BnB combo<br>
| |
| -Note: if Super is done raw, Lion can HK Teleport behind Lau to avoid chip damage<br>
| |
| | |
| '''Super (short-mid range):''' 2HK or 646HP can punish from surprisingly far<br>
| |
| -646HP usually won't knock down; don't use if it will corner yourself<br>
| |
| | |
| '''Super (~Lau 2HK range):''' jump forward HK combo (can j.HK > j.HP at a specific range, but hard to judge this spacing)<br>
| |
| -From slightly beyond 2HK range, use j.HP into immediate 646LP instead<br>
| |
| -Be careful of range, as Lion has a lot of prejump frames and will get hit if too close to Lau<br>
| |
| -Note: at far range 2HK xx Super, Lion can HK Teleport behind Lau during the gap to avoid chip damage<br>
| |
| | |
| <br>
| |
| <big>'''Juggle Enders'''</big> -- Note that some juggle options can be more limited if started from far away<br>
| |
| '''Mash 646LP:''' dash 2LK > cl 5HK (consistent); dash 2LK > cl 5HP > cl 5HK (only works if 2LK hits at earliest or latest possible timing)<br>
| |
| '''Mash 646HP (corner):''' microdash 5LK > cl 5HP > cl 5HK<br>
| |
| '''Stand/Crouch Throw (corner):''' 2LK > 2LP > cl 5HK<br>
| |
| '''Crouch Throw (midscreen):''' dash 2HK<br>
| |
| | |
| <br>
| |
| <big>'''TOD Combos'''</big><br>
| |
| 1) 2LK > 2LP x2 > 5LP xx mash 646HP, dash 5LK > cl 5HP > cl 5HK (stun)<br>-Corner Only<br>
| |
| 2) 236LP Bomb (5 hits), dash 2LK > 5LP xx mash 646LP, dash 2LK > 5LP > cl 5HK<br>
| |
| 3) 236LP Bomb (5 hits), mash 646HP, dash 5LK > cl 5HK (stun)<br>-Corner Only<br>
| |
| 4) 6HK, 2LK > 5LP xx mash 646HP, dash 5LK > cl 5HP > cl 5HK (stun)<br>-Corner + crouching only, overhead must hit close enough to connect 2 lights afterward<br>
| |
| '''Easy Post-Stun Combo:''' j.HK > j.HP, land, mash 646LP (juggle 2HK if necessary)<br>
| |
| | |
| <br>
| |
| <big>'''Wakeup Attacks'''</big><br>
| |
| Both wakeup attacks can be baited with a backdash, then whiff punished.<br>
| |
| | |
| vs. '''Wakeup LK:''' the first hit must be stand blocked<br>
| |
| -There is a 4f gap between the 2 hits that can be interrupted with mashed 646P or Throw.<br>
| |
| -It is -7 on block, so reversal 646P is a consistent punish against it.<br>
| |
| | |
| vs. '''Wakeup HK:''' despite the sweep animation, this does not hit low. The 2 hits are a true blockstring, and are safe at -2 on block.<br>
| |
| -Recovers crouching, which doesn't have a major effect on Lion's most common combo routes; 646P may take slightly longer to reach than usual.<br>
| |
| | |
| <br>
| |
| <big>'''Strategy'''</big><br>
| |
| Lau counters some of Lion's biggest strengths. For one, Lion's excellent punish game with 646P (Lion Crusher) doesn't affect Lau very much, as 236HP pushes back too far. Lion is also vulnerable to Lau's 236HK if he throws out Lion Bomb in neutral or in blockstrings, as the forward movement will keep Lau out of the blast radius. Lion has to use the bombs from a farther range, which lets Lau sit back and build meter safely. To fight Lau effectively, Lion has to play a bit more offensively, using his great throw range to threaten Lau.
| |
| | |
| |}
| |
| | |
| </div>
| |
| </div>
| |
| <!--------------------------------Mini-Divider----------------------------------------->
| |
| | |
| <div class="mw-collapsible mw-collapsed">
| |
| <div class="mw-collapsible-toggle" style="float: none;"><center><font size="4"><b>Yeung Matchup</b></font></center></div>
| |
| <div class="mw-collapsible-content">
| |
| | |
| {| class="wikitable"
| |
| |-
| |
| | <center>'''Yeung'''</center>[[File:JCFoF Yeung icon.png|link=Jackie Chan in Fists of Fire/Yeung]] ||
| |
| <big>'''Important punishes'''</big><br>
| |
| '''2HK:''' 2HK can punish at any range, but on a close range punish, Lion will be unsafe himself<br>
| |
| -From close ranges, 5LP xx 646LP can punish; reversal 646LP is generally unreliable<br>
| |
| | |
| '''6HK:''' Stand or Crouch Throw can punish on hit or block<br>
| |
| -On block, reversal 646LP (mashed) is an easier punish to time<br>
| |
| -Note that the corner OTG infinite appears to be harder on backturned knockdowns (like Stand Throw), so take this into consideration<br>
| |
| | |
| '''63214P (Crane Wings):''' If cancelled into from 2LP, the LP version can be punished with 2HK on block<br>
| |
| -LP version is totally safe from longer range<br>
| |
| -HP version can be punished on hit or block by 646HP, except at the tip of its range<br>
| |
| -Microdash into 646HP can often punish in this scenario, but is hard to judge the spacing<br>
| |
| | |
| '''41236K (Swallow Kick):''' Dash up and punish with a full knockdown combo<br>
| |
| | |
| '''Super:''' Duck under the first hit, then stuff the approach with 5LK xx 646LP to start the infinite<br>
| |
| -From longer distances, 6HP, far 5HK, or even 236LP can stuff the followup attack<br>
| |
| -If the dash-in portion is blocked, Yeung is safe<br>
| |
| | |
| <br>
| |
| <big>'''Juggle Enders'''</big> -- Note that some juggle options can be more limited if started from far away<br>
| |
| '''Mash 646LP:''' dash 2LK > cl 5HP > cl 5HK<br>
| |
| '''Mash 646HP (corner):''' dash out of corner, 2LK > cl 5HP > cl 5HK<br>
| |
| '''Stand/Crouch Throw (corner):''' 5LK > cl 5HP > cl 5HK<br>
| |
| '''Stand/Crouch Throw (midscreen):''' dash 2HK<br>
| |
| NOTE: It may be preferable to let Yeung get knocked down, then go for an OTG relaunch or infinite.<br>
| |
| | |
| <br>
| |
| <big>'''TOD Combos'''</big><br>
| |
| 1) 2LK > 2LP x2 > 5LP xx mash 646HP, dash out of corner, 2LK > cl 5HP > cl 5HK (stun)<br>-Corner Only<br>
| |
| 2) 236LP Bomb (5 hits), dash 2LK > 5LP xx mash 646LP, dash 2LK > cl 5HK > far 5HP (stun)<br>
| |
| 3) 236LP Bomb (5 hits), mash 646HP, dash out of corner, 2LK > cl 5HK (stun)<br>-Corner Only<br>
| |
| 4) 6HK, 2LK > 5LP xx mash 646HP, 2LK > cl 5HP > cl 5HK (stun)<br>-Corner + crouching only, overhead must hit close enough to connect 2 lights afterward<br>
| |
| '''Easy Post-Stun Combo:''' j.HK > j.HP, land, mash 646LP (juggle 2HK if necessary)<br>
| |
| | |
| <br>
| |
| <big>'''Yeung OTG Infinite'''</big><br>
| |
| 5LK, link 646LP (mash), dash out of corner and repeat<br>
| |
| -Possible to start this midscreen, but much easier in the corner<br>
| |
| -Somewhat difficult to execute; don't cancel the LK into 646LP<br>
| |
| -In general, the point is to run the clock out because this won't do enough damage to kill<br><br>
| |
| '''Alternative OTGs''' (non-infinite):<br>
| |
| 1) 5LK, dash 5LK > cl 5HP > cl 5HK (strong damage + reset)<br>
| |
| 2) 2HK, 2LK xx 236HP (sends Yeung fullscreen into blocked bomb)<br>
| |
| | |
| <br>
| |
| <big>'''Wakeup Attacks'''</big><br>
| |
| Both wakeup attacks can be baited with a backdash, then whiff punished. Wakeup LK has much faster recovery but also moves forward for an easier punish.<br>
| |
| | |
| vs. '''Wakeup LK:''' must be stand blocked<br>
| |
| -From very close range, Wakeup LK will whiff over a crouching opponent; crouch blocking can potentially work against both wakeup options<br>
| |
| -0 on block at worst, and potentially advantageous from farther ranges<br>
| |
| -Mashing 2LP on Yeung's wakeup will stuff Wakeup LK, but loses to Wakeup HK<br>
| |
| -Yeung can pick up juggles from this anywhere, so it is best to assume she will use Wakeup LK instead of HK<br>
| |
| | |
| vs. '''Wakeup HK:''' must be blocked low<br>
| |
| -Punishable at -7 on block; 2HK will always reach for a punish, but 646P will whiff from longer ranges<br>
| |
| -Yeung recovers crouching, but this only matters if you try to dash up for a cl 5HK whiff punish starter.<br>
| |
| | |
| <br>
| |
| <big>'''Strategy'''</big><br>
| |
| _
| |
| | |
| |}
| |
| | |
| </div>
| |
| </div>
| |
| <!--------------------------------Mini-Divider----------------------------------------->
| |
| | |
| <div class="mw-collapsible mw-collapsed">
| |
| <div class="mw-collapsible-toggle" style="float: none;"><center><font size="4"><b>Thorsten Matchup</b></font></center></div>
| |
| <div class="mw-collapsible-content">
| |
| | |
| {| class="wikitable"
| |
| |-
| |
| | <center>'''Thorsten'''</center>[[File:JCFoF Thorsten icon.png|link=Jackie Chan in Fists of Fire/Thorsten]] ||
| |
| <big>'''Important punishes'''</big><br>
| |
| '''46LK (LK Jackknife Storm):''' Throw is generally the best punish if near the corner, as it leads to backturned corner resets<br>
| |
| -Reversal 646LP is an easy punish that gives more corner carry if starting midscreen<br>
| |
| -For a damage increase, you can also plink 2LK~2LP to make the punish window 2f, then chain into 5LP xx 646LP<br>
| |
| | |
| '''46HK (HK Jackknife Storm):''' Punish with a full combo<br>
| |
| -cl 5HK > 2HP xx 646LP will connect for a very strong punish (recommend stand blocking to ensure Thorsten stays in range)<br>
| |
| -Crouch blocking can make 46HK fly over your head at some ranges, making punishes difficult or impossible<br>
| |
| | |
| '''28K (Gatling Kick):''' Punish with a 5LK or Throw combo<br>
| |
| -Only has 3f of landing recovery, making the punish much harder; 2LK will hit Thorsten out of the air, but 5LK will only connect grounded<br>
| |
| -Because of this landing recovery, punishing with a cl 5HK starter is also not recommended<br>
| |
| | |
| '''16P (Slash Sword):''' Dash up into 2LK combo<br>
| |
| -On a ranged meaty connect (where the explosion hits, but his hand doesn't hit you on the way down), it becomes difficult or impossible to punish<br>
| |
| | |
| '''Teleport:''' Dash into 2HK is the most reliable punish; usually hits meaty, making it much safer than usual<br>
| |
| -646HP can work, but can potentially be unsafe even on hit depending on the ranges involved<br>
| |
| | |
| '''Super:''' Dash up into a full combo<br>
| |
| -cl 5HK > 2HP starter is possible, but can be difficult to time; easier if you stand block first, which leaves Thorsten closer<br>
| |
| -HP Teleport (63214HP) can avoid chip damage, and possibly allow a punish afterward depending on screen position<br>
| |
| | |
| <br>
| |
| <big>'''Juggle Enders'''</big> -- Note that some juggle options can be more limited if started from far away<br>
| |
| '''Mash 646LP:''' dash 2LK > cl 5HP > cl 5HK -- Timing can be strict against Thorsten<br>
| |
| '''Mash 646HP (corner):''' 2LK > cl 5HP > cl 5HK<br>
| |
| '''Stand/Crouch Throw (corner):''' 2LK > 2LP > cl 5HK<br>
| |
| | |
| <br>
| |
| <big>'''TOD Combos'''</big><br>
| |
| 1) 236LP Bomb (5 hits), dash cl 5HK > 2HP (1 hit) xx mash 646LP, dash 2LK > cl 5HK > far 5HP<br>-Extremely difficult, requires very tight spacing and 1f timing on cl 5HK<br>
| |
| 2) 236LP Bomb (5 hits), dash 5LP xx mash 646HP, microdash 2LK > cl 5HK (stun)<br>-Corner Only<br>
| |
| 3) 6HK, 2LK > 2LP > 5LP xx mash 646HP, 1f microdash 5LK > cl 5HP > cl 5HK (stun)<br>-Corner + crouching only, overhead must hit close enough to connect 3 lights afterward<br>
| |
| '''Easy Post-Stun Combo:''' j.HK > j.HP, land, mash 646LP (juggle 2HK if necessary)<br>
| |
| | |
| <br> | |
| <big>'''Wakeup Attacks'''</big><br>
| |
| _<br>
| |
| | |
| <big>'''Strategy'''</big><br>
| |
| _
| |
| | |
| |}
| |
| | |
| </div>
| |
| </div>
| |
| <!--------------------------------Mini-Divider----------------------------------------->
| |
| | |
| <div class="mw-collapsible mw-collapsed">
| |
| <div class="mw-collapsible-toggle" style="float: none;"><center><font size="4"><b>Drunk Jackie Matchup</b></font></center></div>
| |
| <div class="mw-collapsible-content">
| |
| | |
| {| class="wikitable"
| |
| |-
| |
| | <center>'''Drunk Jackie'''</center>[[File:JCFoF Drunk icon.png|link=Jackie Chan in Fists of Fire/Drunken Fist Jackie]] ||
| |
| <big>'''Important punishes'''</big><br>
| |
| '''Far 5HK:''' Throw or 646LP to punish, unless it was well spaced<br>
| |
| -2LK and far 5HK are good at stuffing an approaching far 5HK (careful with 5HK, as it has a lot of recovery)<br>
| |
| -646HP can also be good if you aren't sure that the far 5HK was unsafe, as long as there is a lot of room behind Drunk Jackie (since he has trouble chasing down for a punish)<br>
| |
| | |
| '''Light Normal > 6HK Chain:''' No counter to this on hit or block<br>
| |
| -Super or Teleport can go through it with invincibility, but both are easily punished afterward<br>
| |
| | |
| '''236P (Jug Throw):''' Lion can dash through the jug fairly well, allowing a throw or 2LK combo<br>
| |
| -2HK slide can hit while avoiding the jug if close enough; Drunk Jackie's punishes on this are usually weak, so it's worth considering<br>
| |
| -Staying out of range and clashing with your Lion Bombs can eliminate the threat, but generally leads to a stalemate until someone picks a different option<br>
| |
| -Do not attempt to 646P through the jug, as this almost never works<br>
| |
| | |
| '''Blockstring into 236P Jug Throw:''' 646HP can punish and avoid the jug, but don't use if Jackie's back is near the corner<br>
| |
| -2HK also avoids the jug, and won't generally be punished very hard unless done from very close range <br>
| |
| | |
| '''63214P (Drunk Dragon):''' 646LP (mash) is a consistent punish on hit or block<br>
| |
| -Dash up into a combo is possible, but doesn't add that much damage and is harder to time<br>
| |
| | |
| '''236K (Tricky Kick):''' Full combo punish<br>
| |
| -cl 5HK > 2HP works unless it was a very close range HK Tricky Kick (can still work with a quick dash beforehand)<br>
| |
| | |
| '''28P (JackieCopter):''' Full combo punish<br>
| |
| -Be sure to wait until he fully lands<br>
| |
| | |
| '''Super:''' Full combo punish<br>
| |
| -It is possible to time a 236LP Bomb right as he lands, allowing for a stun combo; use when Drunk begins to fall to the ground to hit his landing recovery<br>
| |
| -Only has 10 landing recovery frames, so be ready with the proper timing<br>
| |
| -Note: The proximity guard of Super can prevent you from walking to position yourself for a punish; dash away from Jackie, then walk/dash forward as he descends<br>
| |
| | |
| <br>
| |
| <big>'''Juggle Enders'''</big> -- Note that some juggle options can be more limited if started from far away<br>
| |
| '''Mash 646LP:''' dash 2LK > cl 5HK<br>
| |
| '''Mash 646HP (corner):''' dash 5LK > cl 5HK<br>
| |
| '''Stand/Crouch Throw (corner):''' 2LP > cl 5HK (time the 2LP early -- 2LK also works, but must be timed very late as Drunk bounces)<br>
| |
| '''Stand Throw (midscreen):''' dash 2HK<br>
| |
| | |
| <br>
| |
| <big>'''TOD Combos'''</big><br>
| |
| 1) 236LP Bomb (5 hits), dash 2LK > 5LP xx mash 646LP, dash 2LK > 5LP > cl 5HK<br>
| |
| 2) 236LP Bomb (5 hits), dash 5LP xx mash 646HP, dash 5LK > far 5HP (stun)<br>-Corner Only<br>
| |
| '''Easy Post-Stun Combo:''' j.HK > j.HP, land, mash 646LP (juggle 2HK if necessary)<br>
| |
| | |
| <br>
| |
| <big>'''Wakeup Attacks'''</big><br>
| |
| _<br>
| |
| | |
| <br>
| |
| <big>'''Strategy'''</big><br>
| |
| M. Lion does surprisingly well against Drunk Jackie, who is normally known for his advantage versus the rest of the top tiers. Bomb pressure, if spaced well, is stronger than usual because Drunk's forward dash has shorter total distance than most dashes (despite being the fastest dash overall). This means he will either have to force a closer range to get past bombs, or stay at a longer range to avoid them completely. As M. Lion, you want to force a range where his far 5HK either whiffs or connects too close, making it punishable by throw or LP Lion Crusher.
| |
| | |
| Drunk Jackie has a harder time than most characters punishing HP Lion Crusher, so throw this out randomly unless he is backdashing at fullscreen or near his own corner. If he is staying at this long range, HP Bomb can threaten him while he is too far for his own ranged options.
| |
| | |
| Drunk Jackie is generally weak at punishing lows, so slide can be more useful (plus it might go past a jug). He can technically punish this with far 5HP > 5HK, but this is a knowledge check that many players will fail and it can be hard to know what Drunk Jackie's frame advantage will be after the 5HK connects. If he tries starting the punish with something else like a far 5LK, the 5HP will no longer work because Lion's hurtbox is no longer extended upward.
| |
| | |
| Corner throw loops are incredibly powerful against Drunk, as he has no fast invincible or airborne moves to counter it. As long as you time and space the dash + throw so that his reversal throw won't work, it is virtually inescapable without Super. And if his Super is available, a meaty 2LK after the air reset will beat it clean and lead to a 646HP stun combo.
| |
| | |
| |}
| |
| | |
| </div>
| |
| </div>
| |
| <!--------------------------------Mini-Divider----------------------------------------->
| |
| | |
| <div class="mw-collapsible mw-collapsed">
| |
| <div class="mw-collapsible-toggle" style="float: none;"><center><font size="4"><b>Dragonball Jackie Matchup</b></font></center></div>
| |
| <div class="mw-collapsible-content">
| |
| | |
| {| class="wikitable"
| |
| |-
| |
| | <center>'''Dragonball Jackie'''</center>[[File:JCFoF Spiritual icon.png|link=Jackie Chan in Fists of Fire/Spiritual Kung-Fu Jackie]] ||
| |
| <big>'''Important punishes'''</big><br>
| |
| '''6HP:''' 2HK can punish, even if blocking the 2nd hit<br>
| |
| -If ducking under the 2nd hit, 2LP xx 646LP can often whiff punish<br>
| |
| | |
| '''236HK (HK Crush Kick):''' 646LP (mash) will punish unless spaced perfectly<br>
| |
| | |
| '''41236P (Tiger Fist):''' 646LP (mash) will easily punish<br>
| |
| | |
| '''Super:''' Same as Tiger Fist<br>
| |
| -If used from a distance, Lion can stuff the approaching super with most normals (5LP, 5LK, 2LP, 2LK, far 5HK, 2HK, 6HP)<br>
| |
| -From close range, doing this with 5HK/2HK will trade, generally in Lion's favor<br>
| |
| | |
| <br>
| |
| <big>'''Juggle Enders'''</big> -- Note that some juggle options can be more limited if started from far away<br>
| |
| '''Mash 646LP:''' dash 2LK > cl 5HP > cl 5HK<br>
| |
| '''Mash 646HP (corner):''' 2LK > cl 5HP > cl 5HK<br>
| |
| '''Stand/Crouch Throw (corner):''' 2LK > cl 5HP > cl 5HK<br>
| |
| '''Stand Throw (midscreen):''' dash 2HK<br>
| |
| | |
| <br>
| |
| <big>'''TOD Combos'''</big><br>
| |
| 1) 2LK > 2LP x2 > 5LP xx mash 646HP, 2LK > cl 5HP > cl 5HK (stun)<br>-Corner Only<br>
| |
| 2) 236LP Bomb (5 hits), dash 2LK > 5LP xx mash 646LP, dash 2LK > cl 5HK > far 5HP (stun)<br>
| |
| 3) 236LP Bomb (5 hits), mash 646HP, 2LK > cl 5HK (stun)<br>-Corner Only<br>
| |
| 4) 6HK, 2LK > 5LP xx mash 646HP, 2LK > cl 5HP > cl 5HK (stun)<br>-Corner + crouching only, overhead must hit close enough to connect 2 lights afterward<br>
| |
| '''Easy Post-Stun Combo:''' j.HK > j.HP, land, mash 646LP (juggle 2HK if necessary)<br>
| |
| | |
| <br>
| |
| <big>'''Wakeup Attacks'''</big><br>
| |
| _<br>
| |
| | |
| <br>
| |
| <big>'''Strategy'''</big><br>
| |
| _
| |
| | |
| |}
| |
| | |
| </div>
| |
| </div>
| |
| <!--------------------------------Mini-Divider----------------------------------------->
| |
| | |
| <div class="mw-collapsible mw-collapsed">
| |
| <div class="mw-collapsible-toggle" style="float: none;"><center><font size="4"><b>Admiral Jackie Matchup</b></font></center></div>
| |
| <div class="mw-collapsible-content">
| |
| | |
| {| class="wikitable"
| |
| |-
| |
| | <center>'''Admiral Jackie'''</center>[[File:JCFoF Admiral icon.png|link=Jackie Chan in Fists of Fire/Admiral Jackie]] ||
| |
| <big>'''Important punishes'''</big><br>
| |
| '''2HK:''' 2HK slide can punish at any range<br>
| |
| -646LP can punish from closer ranges (will only get 1 hit near max range); useful because 2HK can be unsafe on hit from close<br>
| |
| | |
| '''41236P (Dragon Palm):''' Dash into a full combo<br>
| |
| -Reversal 646LP will work, but miss most of its hits; try to at least do dash 5LP xx 646LP for an easy, higher damage punish<br>
| |
| | |
| '''623K (Double Dutch):''' Full combo punish<br>
| |
| -cl 5HK > 2HP is possible if Admiral recovers point blank<br>
| |
| | |
| '''Super:''' Microdash 646LP (mashed); input as 6, 4, 66, then hit LP after dashing a few frames<br>
| |
| -With no microdash, reversal LP Lion Crusher won't get the knockdown and can be unsafe<br>
| |
| -Can also dash 5-7f into 5LP, which combos into 646LP knockdown<br>
| |
| -2HK, 6HP, or 646HP can punish more easily, but are significantly less effective and can be unsafe even on hit<br>
| |
| | |
| <br>
| |
| <big>'''Juggle Enders'''</big> -- Note that some juggle options can be more limited if started from far away<br>
| |
| '''Mash 646LP:''' dash 2LK > cl 5HP > cl 5HK<br>
| |
| '''Mash 646HP (corner):''' dash 5LK > cl 5HP > cl 5HK<br>
| |
| '''Stand/Crouch Throw (corner):''' 5LK > cl 5HK > far 5HP -- may need to dash slightly out of corner due to turnaround bug<br>
| |
| '''Stand/Crouch Throw (midscreen):''' dash 2HK<br>
| |
| | |
| <br>
| |
| <big>'''TOD Combos'''</big><br>
| |
| 1) 2LK > 2LP x2 > 5LP xx mash 646HP, dash 5LK > cl 5HP > cl 5HK (stun)<br>-Corner Only<br>
| |
| 2) 236LP Bomb (5 hits), dash 2LK > 5LP xx mash 646LP, dash 2LK > cl 5HK > far 5HP (stun)<br>
| |
| 3) 236LP Bomb (5 hits), mash 646HP, dash 5LK > cl 5HK (stun)<br>-Corner Only<br>
| |
| 4) 6HK, 2LK > 5LP xx mash 646HP, 2LK > cl 5HP > cl 5HK (stun)<br>-Corner + crouching only, overhead must hit close enough to connect 2 lights afterward<br>
| |
| '''Easy Post-Stun Combo:''' j.HK > j.HP, land, mash 646LP (juggle 2HK if necessary)<br>
| |
| | |
| <br>
| |
| <big>'''Wakeup Attacks'''</big><br>
| |
| _<br>
| |
| | |
| <br>
| |
| <big>'''Strategy'''</big><br>
| |
| _
| |
| | |
| |}
| |
| | |
| </div>
| |
| </div>
| |
| <!--------------------------------Mini-Divider----------------------------------------->
| |
| | |
| <div class="mw-collapsible mw-collapsed">
| |
| <div class="mw-collapsible-toggle" style="float: none;"><center><font size="4"><b>Sam Matchup</b></font></center></div>
| |
| <div class="mw-collapsible-content">
| |
| | |
| {| class="wikitable"
| |
| |-
| |
| | <center>'''Sam'''</center>[[File:JCFoF Sam icon.png|link=Jackie Chan in Fists of Fire/Sam]] ||
| |
| <big>'''Important punishes'''</big><br>
| |
| '''236P (Thousand Spears) (Blocked):''' Hold up forward and punish with j.HK > j.HP, dash 5LK > 5LP xx 646LP (mash) into an ending juggle<br>
| |
| -Can omit the 5LK > 5LP upon landing to make it easier, but the timing is fairly lenient<br>
| |
| -It is also possible to punish with a 236LP starter, but the spacing for a TOD combo doesn't generally work, making it weaker than the jump combo<br>
| |
| | |
| '''236P (Thousand Spears) (Whiffed):''' 236LP Bomb can reliably punish due to the long animation; be careful not to move forward into Sam's active frames<br>
| |
| -The followup combo can be difficult; dash 5LP xx 646LP is the most consistent, or just 646HP if it's at a safe screen position<br>
| |
| -A spaced 2HK after seeing the animation end can work, but if too close, Sam can punish this with 236HK<br>
| |
| -646P does not generally work since the early hits won't connect at this range<br>
| |
| | |
| '''214K (Divekick):''' 646LP (mash) works reliably; try to time the LP right as Sam lands, or it will hit him airborne for little damage<br>
| |
| -2HK also works reliably, and will hit meaty enough to be safe<br>
| |
| -From close-mid range, can backdash on reaction and punish the whiff with a full combo<br>
| |
| | |
| '''Super:''' Punish with a full combo when he lands<br>
| |
| -Note: The 5th and 6th hits are overheads, so block these high<br>
| |
| -If chip damage or time are a concern, interrupt the 1st or 3rd hit with a 2LK combo starter (these hits whiff on crouchers)<br>
| |
| | |
| <br>
| |
| <big>'''Juggle Enders'''</big> -- Note that some juggle options can be more limited if started from far away<br>
| |
| '''Mash 646LP:''' dash 2LK > cl 5HP > cl 5HK<br>
| |
| '''Mash 646HP (corner):''' 2LK > cl 5HP > cl 5HK<br>
| |
| '''Stand/Crouch Throw (corner):''' 2LK > 2LP > cl 5HK<br>
| |
| | |
| <br>
| |
| <big>'''TOD Combos'''</big><br>
| |
| 1) 2LK > 2LP x2 > 5LP xx mash 646HP, 2LK > cl 5HP > cl 5HK (stun)<br>-Corner Only<br>
| |
| 2) 236LP Bomb (5 hits), dash 2LK > 5LP xx mash 646LP, dash 2LK > cl 5HK > far 5HP (stun)<br>
| |
| 3) 236LP Bomb (5 hits), mash 646HP, 2LK > cl 5HK (stun)<br>-Corner Only<br>
| |
| 4) 6HK, 2LK > 5LP xx mash 646HP, 2LK > cl 5HP > cl 5HK (stun)<br>-Corner + crouching only, overhead must hit close enough to connect 2 lights afterward<br>
| |
| '''Easy Post-Stun Combo:''' j.HK > j.HP, land, mash 646LP (juggle 2HK if necessary)<br>
| |
| | |
| <br>
| |
| <big>'''Wakeup Attacks'''</big><br>
| |
| _<br>
| |
| | |
| <br>
| |
| <big>'''Strategy'''</big><br>
| |
| _
| |
| | |
| |}
| |
| | |
| </div>
| |
| </div>
| |
| <!--------------------------------Mini-Divider----------------------------------------->
| |
| | |
| <div class="mw-collapsible mw-collapsed">
| |
| <div class="mw-collapsible-toggle" style="float: none;"><center><font size="4"><b>Kim-Maree Matchup</b></font></center></div>
| |
| <div class="mw-collapsible-content">
| |
| | |
| {| class="wikitable"
| |
| |-
| |
| | <center>'''Kim-Maree'''</center>[[File:JCFoF KimMaree icon.png|link=Jackie Chan in Fists of Fire/KimMaree]] ||
| |
| <big>'''Important punishes'''</big><br>
| |
| '''2HK:''' Lion's 2HK can punish Kim's at any range; if too close, dash up into a short combo instead, or you might get throw punished<br>
| |
| | |
| '''6HK:''' Throw (stand or crouch) can punish on hit or block<br>
| |
| -646LP (mash) can punish reliably on block; low risk due to the easy reversal timing<br>
| |
| -Mashing Crouch Throw can interrupt the gap in her 2LK > 6HK string<br>
| |
| | |
| '''236P (Running Lariat):''' Crouch until Kim reaches you, then punish with 2LK > 5LP xx 646LP (mash)<br>
| |
| -Alternatively, Crouch Throw is risk-free since you don't need to stand to attempt it (but is generally a weaker option)<br>
| |
| | |
| '''28P (I Want You!):''' Dash up into a 2LK combo<br>
| |
| | |
| <br>
| |
| <big>'''Juggle Enders'''</big> -- Note that some juggle options can be more limited if started from far away<br>
| |
| '''Mash 646LP:''' dash 2LK > cl 5HP > cl 5HK<br>
| |
| '''Mash 646HP (corner):''' microdash 2LK > cl 5HP > cl 5HK<br>
| |
| '''Stand/Crouch Throw (corner):''' 2LK > 2LP > cl 5HK<br>
| |
| '''Crouch Throw (midscreen):''' dash 2HK<br>
| |
| | |
| <br>
| |
| <big>'''TOD Combos'''</big><br>
| |
| 1) 2LK > 2LP x2 > 5LP xx mash 646HP, microdash 2LK > cl 5HP > cl 5HK (stun)<br>-Corner Only<br>
| |
| 2) 236LP Bomb (5 hits), dash 2LK > 5LP xx mash 646LP, dash 2LK > cl 5HK > far 5HP (stun)<br>
| |
| 3) 236LP Bomb (5 hits), mash 646HP, microdash 2LK > cl 5HK (stun)<br>-Corner Only<br>
| |
| 4) 6HK, 2LK > 5LP xx mash 646HP, 2LK > cl 5HP > cl 5HK (stun)<br>-Corner + crouching only, overhead must hit close enough to connect 2 lights afterward<br>
| |
| '''Easy Post-Stun Combo:''' j.HK > j.HP, land, mash 646LP (juggle 2HK if necessary)<br>
| |
| | |
| <br>
| |
| <big>'''Wakeup Attacks'''</big><br>
| |
| _<br>
| |
| | |
| <br>
| |
| <big>'''Strategy'''</big><br>
| |
| _
| |
| | |
| |}
| |
| | |
| </div>
| |
| </div>
| |
| <!--------------------------------Mini-Divider----------------------------------------->
| |
| | |
| <div class="mw-collapsible mw-collapsed">
| |
| <div class="mw-collapsible-toggle" style="float: none;"><center><font size="4"><b>Mysterious Lion Matchup (Mirror)</b></font></center></div>
| |
| <div class="mw-collapsible-content">
| |
| | |
| {| class="wikitable"
| |
| |-
| |
| | <center>'''M. Lion'''<br>(Mirror)</center>[[File:JCFoF MLion icon.png|link=Jackie Chan in Fists of Fire/Mysterious Lion]] ||
| |
| <big>'''Important punishes'''</big><br>
| |
| '''6HP:''' Duck under it and whiff punish with 2HK (unless you are too close for 2HK to be safe)<br>
| |
| -It is possible to whiff punish with 646LP after ducking, but hard to time<br>
| |
| | |
| '''2HK:''' 646LP unless spaced very well<br>
| |
| -2HK can also punish itself on hit or block, creating an endless loop until one player stops doing it<br>
| |
| | |
| '''646LP (LP Lion Crusher):''' Punish with a 2LK combo (or standing Throw near the corner if attempting throw loops)<br>
| |
| | |
| '''646HP (HP Lion Crusher):''' In almost any situation, Lion can punish HP Lion Crusher with his own HP Lion Crusher<br>
| |
| -This punish will usually lead to a knockdown, either because it hits late or because the opponent corners himself<br>
| |
| -If the 646HP was used from fullscreen, just punish with a 2LK combo into 646LP instead<br>
| |
| | |
| '''Normal xx 236LP (Lion Bomb):''' Dash forward completely past the bomb, then use 2LK or Throwcombo starter<br>
| |
| -If you attempt to punish too early during the dash, your hurtbox may extend backwards into the blast<br>
| |
| -Mashed 646HP can work, but will usually lead to you getting punished unless it kills<br>
| |
| | |
| '''Teleport:''' Dash into 2HK is the most reliable punish; usually hits meaty, making it much safer than usual<br>
| |
| | |
| '''Super:''' If close, can use mashed 646LP to knock him out of the transformation (inconsistent)<br>
| |
| -Once transformed, harassing Chibi-Lion with 236LP and spaced 2HK can keep him locked down<br>
| |
| -He can use self destruct to destroy incoming bombs, but he can be punished with mashed 646HP for trying this (usually into a knockdown)<br>
| |
| | |
| <br>
| |
| <big>'''Juggle Enders'''</big> -- Note that some juggle options can be more limited if started from far away<br>
| |
| '''Mash 646LP:''' dash 2LK > cl 5HP > cl 5HK -- Timing can be strict against M. Lion<br>
| |
| '''Mash 646HP (corner):''' 2LK > cl 5HP > cl 5HK<br>
| |
| '''Stand/Crouch Throw (corner):''' 2LK > 2LP > cl 5HK<br>
| |
| '''Crouch Throw (midscreen):''' dash 2HK<br>
| |
| | |
| <br>
| |
| <big>'''TOD Combos'''</big><br>
| |
| 1) 236LP Bomb (5 hits), dash 5LP xx mash 646HP, 2LK > cl 5HP > cl 5HK (stun)<br>-Corner Only<br>
| |
| '''Easy Post-Stun Combo:''' j.HK > j.HP, land, mash 646LP (juggle 2HK if necessary)<br>
| |
| | |
| <br>
| |
| <big>'''Wakeup Attacks'''</big><br>
| |
| _<br>
| |
| -Note: M. Lion's Wakeup LK has a very similar animation to his wakeup forward roll. Pay attention on his wakeup so you don't react to the wrong move.<br>
| |
| | |
| <br>
| |
| <big>'''Strategy'''</big><br>
| |
| _
| |
| | |
| |}
| |
| | |
| </div>
| |
| </div>
| |
|
| |
|
| <!-----------------------------------------------------------------------------Section Divider-----------------------------------------------------------------------------> | | <!-----------------------------------------------------------------------------Section Divider-----------------------------------------------------------------------------> |
| Line 2,191: |
Line 1,214: |
| <!-----------------------------------------------------------------------------Section Divider-----------------------------------------------------------------------------> | | <!-----------------------------------------------------------------------------Section Divider-----------------------------------------------------------------------------> |
| ==<big>'''Character Poses'''</big>== | | ==<big>'''Character Poses'''</big>== |
| {| class="wikitable" | | {{JCFoF Poses|char=MLion}} |
| |-
| |
| ! Taunt !! Win !! Time Loss/Draw
| |
| |-
| |
| | [[File:JCFoF_MLion_Taunt.png|300x300px|center]] || [[File:JCFoF_MLion_Win.png|300x300px|center]] || [[File:JCFoF_MLion_Draw.png|300x300px|center]]
| |
| |-
| |
| ! Charge !! Perfect !! Loss (KO)
| |
| |-
| |
| | [[File:JCFoF_MLion_Charge.png|300x300px|center]] || [[File:JCFoF_MLion_Perfect.png|300x300px|center]] || [[File:JCFoF_MLion_LossKO.png|300x300px|center]]
| |
| |}
| |
|
| |
|
| <!-----------------------------------------------------------------------------Section Divider-----------------------------------------------------------------------------> | | <!-----------------------------------------------------------------------------Section Divider-----------------------------------------------------------------------------> |
| | |
| ==<big>'''Stages'''</big>== | | ==<big>'''Stages'''</big>== |
|
| |
|
| Line 2,218: |
Line 1,233: |
| ==<big>'''External Links'''</big>== | | ==<big>'''External Links'''</big>== |
| *[https://docs.google.com/document/d/1V5H5JQ_hvfKC7bnRPk7Vz5z3ELji8vuipLH69t48yfg/edit#bookmark=id.gyil52yssiiq Fists of Fire Bible--M. Lion] by RCF -- (View -> disable Print Layout for best experience) | | *[https://docs.google.com/document/d/1V5H5JQ_hvfKC7bnRPk7Vz5z3ELji8vuipLH69t48yfg/edit#bookmark=id.gyil52yssiiq Fists of Fire Bible--M. Lion] by RCF -- (View -> disable Print Layout for best experience) |
| *[https://docs.google.com/spreadsheets/d/1koCRoyhpBoAzur3E3n7crrCXhotuntvT4-Fc4Df1f5I/edit?usp=sharing M. Lion Frame Data Spreadsheet] by Spabobin -- for more visually condensed info | | *[https://docs.google.com/spreadsheets/d/1koCRoyhpBoAzur3E3n7crrCXhotuntvT4-Fc4Df1f5I/edit#gid=1717343240&range=B1:L1 M. Lion Frame Data Spreadsheet] by Spabobin -- for more visually condensed info |
|
| |
|
| <!-----------------------------------------------------------------------------Section Divider-----------------------------------------------------------------------------> | | <!-----------------------------------------------------------------------------Section Divider-----------------------------------------------------------------------------> |
|
| |
|
| <!----------------------------------------------------------------------------------------------
| |
| --------- DON'T EDIT ANYTHING BELOW THIS LINE UNLESS YOU KNOW EXACTLY WHAT YOU'RE DOING --------
| |
| ----------------------------------------------------------------------------------------------->
| |
|
| |
|
| | <center>{{Navigation-JCFoF}}</center><br> |
|
| |
|
| {{Navbox-JCFoF}} | | {{Navbox-JCFoF}} |
