|
|
| Line 250: |
Line 250: |
| |- | | |- |
| | width="" style="background:#f0f0f0;"|''' <font size = "3">- Air throw - j.4/6C</font> ''' | | | width="" style="background:#f0f0f0;"|''' <font size = "3">- Air throw - j.4/6C</font> ''' |
| * '''(Description)''' - Pretty much the same as Hanzo's air throw, meaning it's the ace up your sleeve for air-to-air battles. | | * '''(Description)''' - Pretty much the same as Hanzo's air throw, meaning it's the ace up your sleeve for air-to-air battles. It also means you need to do this when slightly below your opponent. |
|
| |
|
| |} | | |} |
Revision as of 23:58, 14 July 2019
 ガルフォード=D=ウェラー, Galford D. Weller
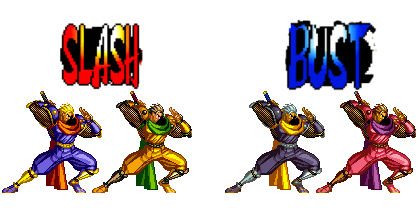 Colors
Introduction
Galford travels Japan extolling the virtues of truth, justice and the American Way. He does this by practicing a fundamentally Japanese martial art while also being really loud and obnoxious about it.
Galford is an odd character. His ninja buttons don't lend themselves to footsies very well despite their utility, and he’s rather flighty in the neutral -- he doesn’t take well to sitting still. What he does have across the board, however, is great mobility, solid projectiles, a grounded combo escape option, and a strong command throw with a numerous ways to set it up.
Slash has Galford attack with his ninja dog Poppy, giving him access to a variety of attacks using her as a projectile to cover several angles. Plasma Dog in particular can be used as a meaty allowing for command throw setups. For more traditional long-range needs, he also has a “regular” fireball with good travel speed. Sadly, none of these things are good enough to make up for his lackluster combo game. Slash Galford is left feeling underwhelming and gimmicky as a result.
Bust Galford puts Poppy on maternity leave, losing all attacks that utilized her talents. He instead is retooled to play more like a more aggressive Hanzo with 3rd Strike Ken hitconfirms. He can combo off of all of his worthwhile normals and has some very active special moves, making his midrange poking game much more threatening and rewarding. He even at long last gets a simple catch-all projectile for command throw okizeme setups. If Hanzo was a bit too tricky and not direct enough for your tastes, give this all-American himbo ninja a shot.
| Strengths |
Weaknesses
|
- Amazing mobility and access to a combo breaker
- Slash can cover awkward angles and zone with his projectiles
- Bust can confirm into great damage and positioning off of any stray hit
|
- Weak footsies and defense
- Slash is very gimmicky and has weak combos
- Bust struggles to meaningfully open up patient opponents
|
Stats
| Damage taken
|
Rage rate
|
Rage duration
|
Throw startup
|
Deflect advantage
|
Deflect disadvantage modifier
|
| 110%
|
75%
|
3.5 sec
|
14f
|
+22
|
±0
|
Normal Moves
Far Slashes
5A
- (Properties) -
- (Description) -
|
5B
- (Properties) -
- (Description) -
|
5C
- (Properties) -
- (Description) -
|
2A
- (Properties) -
- (Description) -
|
2B
- (Properties) -
- (Description) -
|
2C
- (Properties) -
- (Description) -
|
Near Slashes
n.5A
- (Properties) -
- (Description) -
|
n.5B
- (Properties) -
- (Description) -
|
n.5C
- (Properties) -
- (Description) -
|
n.2A
- (Properties) -
- (Description) -
|
n.2B
- (Properties) -
- (Description) -
|
n.2C
- (Properties) -
- (Description) -
|
Overheads
5BC
- (Properties) -
- (Description) -
|
u.5BC
- (Properties) -
- (Description) -
|
Kicks
5D
- (Properties) -
- (Description) -
|
6D
- (Properties) -
- (Description) -
|
2D
- (Properties) -
- (Description) -
|
3D
- (Properties) -
- (Description) -
|
Jumping Normals
j.A
- (Properties) -
- (Description) -
|
j.B
- (Properties) -
- (Description) -
|
j.C
- (Properties) -
- (Description) -
|
j.D
- (Properties) -
- (Description) -
|
Dashing Normals
66A
- (Properties) -
- (Description) -
|
66B
- (Properties) -
- (Description) -
|
66C
- (Properties) -
- (Description) -
|
66D
- (Properties) -
- (Description) -
|
Unarmed Normals
u.5S
- (Properties) -
- (Description) -
|
u.2S
- (Properties) -
- (Description) -
|
uj.S
- (Properties) -
- (Description) -
|
u.66S
- (Properties) -
- (Description) -
|
Command Moves
Sankaku Tobi (Wall Jump)
- (Description) - Galford's wall jump. May be useful for escaping the corner.
|
- Air throw - j.4/6C
- (Description) - Pretty much the same as Hanzo's air throw, meaning it's the ace up your sleeve for air-to-air battles. It also means you need to do this when slightly below your opponent.
|
Special Moves
Universal
- 「Shadow Copy」 - 641236A/B (can be used unarmed)
- (Description) - Galford's version of the shadow clone mixup teleport, and sadly not as safe as Hanzo's equivalent. 641236A will have Galford appear on the left side of the screen, and 641236B has him appear on the right. After 12 frames of startup, Galford disappears and two images of him swap places a few times before he appears in his chosen destination. There is a vulnerable recovery period of 19 frames where he can be punished for doing this, but the opponent will need to have a good read or a good guess to hit him for it. It's largely a gimmick, but maybe you can catch them off guard once or twice.
|
- 「Replica Attack」 - 63214AC/BD (can be used unarmed)
- (Description) - Attack teleport where Galford comes crashing down from the sky either in front of or behind the opponent. 63214AC is in front, 63214BD is behind. This is fairly reactable as far as "mixups" go, but it's completely invincible starting on frame 1 unlike Hanzo's version, and is notably faster than it as well. This lets it feasibly punish some slower projectiles from anywhere on a read or reaction. On hit or block, Galford can hold left/right to bounce in the chosen direction, potentially making punishes a bit trickier for the opposition. Don't rely on this move too much, because the risk heavily outweighs the reward.
|
- 「Imitate Replica」 - AC/BD when hit (can be used unarmed)
- (Description) - Replica attack but done during grounded hitstun -- the Log Trick. Press AC/BD during hitstun from a weapon attack, dizzy, or when knocked down to teleport out Naruto style and retaliate. As with Replica Attack, AC has Galford attack from in front and BD attacks from behind. It’s pretty easy to see coming and block, though just like with Replica Attack, Galford can choose a direction to bounce and make punishes more challenging. It’s obviously risky, but a way to potentially escape back hit combos or stun punishes is something most characters wish they had.
|
Slash
- 「Plasma Blade」 - 236S (can be used unarmed)
- (Description) - Your usual medium-commitment projectile to control horizontal space -- pretty quick for a SamSho projectile, really. It doesn't knock down, but deals a lot of hitstun. This makes it surprisingly okay in some combos, too. Heavier versions travel faster and have longer recovery.
|
- 「Rolling Crush」 - 623C (can be used unarmed)
- (Description) - A fairly damaging command grab. Your play will likely revolve around landing this. It leaves you right next to your opponent with a lot of time to set up a mixup. Unfortunately, because of how the move works, your stage positioning after it lands isn’t consistent, so you may occasionally give up the corner if you use it. You take what you can get with this character.
|
- 「Rush Dog」 - 214A (can be used unarmed)
- (Description) - "Hey, Poppy!" The classic Poppy attack, where she runs forward and headbutts the opponent. Knocks down on hit and sends the opponent a good distance backwards. It's quicker to start up than Plasma Blade, but he stands there pointing for quite a while. You don't get much off of this, but a good trade once in a while never hurt.
|
- 「Machine Gun Dog」 - 214B (can be used unarmed)
- (Description) - Slower Rush Dog that, rather than knocking the opponent down, locks them in place on hit. You don't get much time to follow up afterwards, and the attack's startup is fairly lengthy, so the most you get is a 2C more often than not. Not particularly useful.
|
- 「Replica Dog」 - 214C (can be used unarmed)
- (Description) - Poppy can teleport too, I guess. Rather than run at the opponent head-on, Poppy teleports above them and falls down with a delayed overhead. Like Machine Gun Dog, the startup and recovery for Galford are both fairly lengthy and he can still get hit while pointing, so his possible shenanigans off of this are limited. It does a lot of hitstun if it manages to connect, so you can usually smack them with a 2C.
|
- 「Overhead Crush」 - 214D (can be used unarmed)
- (Description) - A quick Poppy move, for once. Galford hops up and sends Poppy flying at the opponent, bouncing around like a pinball for a little while. Her hitbox remains active until she stops moving, as well. The only move that Slash can consistently combo into on front hit, and it's very useful for that alone. Thankfully it’s very consistent, as Poppy will always hit the opponent immediately when the move is cancelled into. This also makes it good at fishing for trades. The oki positioning afterwards isn’t great and the attack itself is fairly committal, but it’s the best Slash has. And it’s an overhead for once.
|
- 「Plasma Dog」 - 214214A (can be used unarmed)
- (Description) - A funny move. It’s basically just Plasma Blade and Rush Dog thrown into a blender. In exchange for its long startup (noticing a pattern?), Galford can act almost immediately after Poppy takes off. It also comes with a significant amount of blockstun so you can snag them with Rolling Crush. This is probably his most generally useful tool for oki. But don’t be too quick to grab them or this will happen.
|
- WFT「Double Mega Strike Heads」 - 641236C/D
- (Description) - Super gimmicky, what did you expect. Galford attacks from either in front (641236C) or behind (641236D), having a fake copy of himself in the other spot to trick them. Galford himself will appear slightly lower than the fake. It’s technically a left/right guess and quicker than it is in other games, but the opponent can jump out or do pretty much whatever on reaction. If they get out or simply block right, expect a punish. It’ll actually link off of a well timed Plasma Blade from fullscreen but that’s combo video stuff.
|
Bust
- 「Plasma Break」 - 236S (can be used unarmed)
- (Description) - Looks superficially similar to Plasma Blade and has the same frame data, but after travelling a set distance it dissipates, leaving a lingering hitbox where it dissipated. Heavier versions will travel farther before dissipating. The ability to leave out a lasting projectile hitbox forms the backbone of his entire okizeme game in the vein of Hanzo’s Baku’en Ryu.
|
- 「Plasma Factor」 - 6AB/3AB (can be used unarmed)
- (Description) - Super cool electric slash. 6AB is a mid, 3AB is a low. Both versions knock down, have a lot of active frames, and deal huge damage. It's not plus, but it feels quite safe on block at longer distances. Thanks to this, it can be a nice preemptive anti-air or a guard break if the opponent tries to chicken block your Plasma Break oki. 3AB comes out much faster, making it a staple in high-damage combos. Just be careful not to accidentally get a spot dodge or circle step when trying to use this move.
- Like a lot of Galford’s moves, Plasma Factor can be used unarmed. Unlike his other moves, its properties change when unarmed. It sacrifices range for quicker startup and even more damage -- unarmed 6AB twice in a row will combo as well as stun your opponent. He doles out these hands for Justice.
|
- 「Lightning Slash」 - 623C
- (Description) - Lightning fast (heh) rushing kick with a canned slash follow-up. It sideswaps on hit, but it does good damage and combos out of basically everything, including f5B and 2B at max range. Thanks to a lack of recoil cancels, you have no reason to not buffer this off of any recoiling poke. A nice albeit risky punish when used raw if nothing else will come out in time. Be careful using this when you’re cornered, as the positioning can make the second hit whiff, leaving you open.
|
- 「Strike Heads」 - 623D (also from dash/can be used unarmed)
- (Description) - Strike Heads is a command grab that works similarly to Hanzo’s Mozu Otoshi, albeit with less damage. After the drop, Galford will separate from his opponent, but he stays closer to them than Hanzo. If the opponent wakes up into a lingering Plasma Break, snatch them out of blockstun with this. It also has a running version that carries his momentum through the animation and drags himself and his opponent forward slightly during the drop. Galford's incredible run speed means this is a potent threat from almost anywhere on the screen, especially during oki situations. It doesn’t do as much damage as Rolling Crush, and the running version is weaker still, but you’re not exactly starved for openings so it’s not a huge deal.
|
- WFT「Lightning Strike Three」 - 632146C
- (Description) - Really good and really fast WFT. It boasts high damage as far as WFTs are concerned and you can buffer it from any move where you’d normally buffer Lightning Slash. Again, no reason not to buffer it from every medium poke you throw out.
|
Strategy
both techniques press buttons and make combos happen sometimes
Slash
slash strategy
Bust
bust strategy
Combos
Universal
combos both techniques can do
Slash
slash-only combos
Bust
bust-only combos

