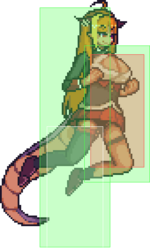
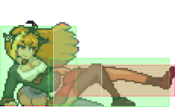
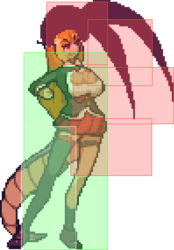
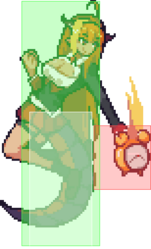
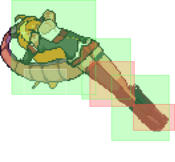
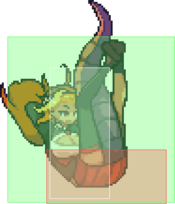
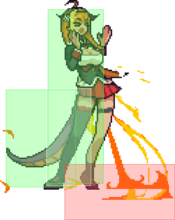
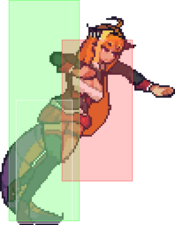
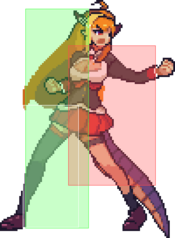
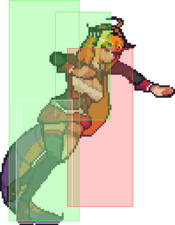
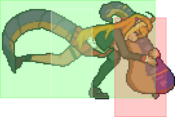
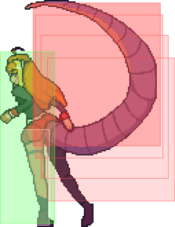
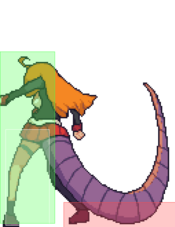
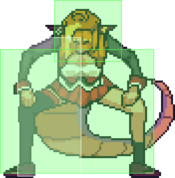
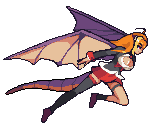
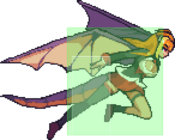
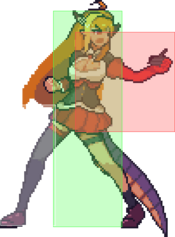
Idol Showdown/Coco Kiryu: Difference between revisions
(→Combos: add combo legend template) |
|||
| (218 intermediate revisions by 16 users not shown) | |||
| Line 1: | Line 1: | ||
{{Version-IS|4.0.2}} | |||
[[File:IS_Coco_Logo.png|250px]] | [[File:IS_Coco_Logo.png|250px]] | ||
'''4th Chairman of the Kiryu Clan''' - ''Dragon-Style Grappling'' | '''4th Chairman of the Kiryu Clan''' - ''Dragon-Style Grappling'' <br> | ||
'''Difficulty''' - ★★★☆☆☆ | |||
{{CharacterIntro-IS|char= Coco | |||
|hp=1100 | |||
|backdash=26F (1~7F {{Property-IS|Full}} Invuln) (1~20F {{Property-IS|grab}} Invuln) | |||
|walkspeed=[[Idol_Showdown/Game_Data#Ground_Movement_Data|Slow]] | |||
|intro= | |||
==Introduction== | |||
{{Content Box|content= | |||
Coco is a hard-hitting yakuza dragon who demolishes her opponents with powerful command grabs. Once Coco manages to close the distance, she shows opponents what it truly means to be the Legendary Dragon of hololive. | |||
'''Unique Passive:''' Coco can use her fire attacks to build up burn damage, which is converted into true damage when she lands her "Dragon Drop" command grab. | |||
[https://wiki.gbl.gg/w/Idol_Showdown/Coco_Kiryu/Strategy#Burn_Damage_System_Explained] | |||
{{CharacterPickReasons | |||
{{ | |intro=[[File:IS_Coco_Icon.png|100px]] | ||
|intro= | |||
'''Coco''' is a hard-hitting yakuza dragon who demolishes her opponents with powerful command grabs. Once Coco manages to close the distance, she shows opponents what it truly means to be the Legendary Dragon of Hololive. | '''Coco''' is a hard-hitting yakuza dragon who demolishes her opponents with powerful command grabs. Once Coco manages to close the distance, she shows opponents what it truly means to be the Legendary Dragon of Hololive. | ||
|pros= *''' | |pros= *'''Essence of Grappler''' - Also known affectionately as the 'Coco Buster', {{input|236G}} has a swift 4f startup, does great damage, and gives her a hard knockdown. When she has 2 bars of meter, {{input|236S}} commands absolute respect from her opponent thanks to it's lack of superflash and ability to eat through attacks with it's super armor. | ||
*'''Threatening | *'''Spitting Fire''' - Coco builds up temporary burn damage on the opponent, and can easily loop {{input|214L}} in combos to stack up a ton of it, allowing her to obliterate an opponent's life by cashing it all out with a single {{input|236G}}. | ||
*'''Threatening Mixups''' - {{input|5L}}, {{input|2L}} and {{input|5M}} all give you terrifying tick throws into either a frametrap, or a delayed {{input|236G}}. After securing a hard knockdown, she also has enough time to go for a high-low mixup on the opponent's wakeup with her {{input|j.S}}. | |||
*'''Deadly Anti-Airs''' - {{input|2H}}, {{input|3H}} and {{input|2S}} are all very effective at snatching the opponent out of the air while evading jump-in attempts, often leading to explosive damage if she has Superchats for {{input|22L}} {{input|22M}} loops. | |||
*'''Great Counter-Pokes''' - {{input|3H}}, {{input|214L}}, {{input|j.M}} and {{input|5H}} can all be very effective at catching extended hurtboxes and punishing attempts to throw projectiles at a distance when used wisely. | |||
*'''Tankiness''' - Has the highest health in the game at 1100, letting her survive more interactions on average than the rest of the cast. | |||
*'''AsaCoco''' - Guaranteed 100% refund if you don't feel it's effects! | |||
|cons= *'''Getting Anti-Aired''' - Coco's strongest oki setup requires her to be in the air, which leaves her susceptible to moves with frame 1 head invulnerability. | |||
*'''Dependence on Resources''' - Coco's big damage routes and combo extensions require use of Superchat cancels and/or assists, and fighting against projectiles can become a real struggle when she does not have access to her {{input|236H}}. | |||
*'''Committal Neutral''' - Coco's best neutral tools have extended hurtboxes during their startup, noticeable blindspots, or slow recovery, making them very risky if used carelessly. | |||
*'''Large Hurtbox''' - She's really, really big. | |||
|width=100 | |||
}} | |||
Please note that this page is full of memes. Don't protest, this is what Kaichou herself would have wanted. | |||
===Burn Effect=== | |||
Burn is potential true damage that will be applied on a successful Essence of Dragon Drop, {{Input|236G}}. | |||
Coco applies a burn on {{Input|5L}}, {{Input|j.M}}, {{Input|214L}}, {{Input|214M}}, and {{Input|214H}}. | |||
Burn can be stacked. It lasts for 3 seconds then begins to heal at 60 per second. | |||
===Recommended Collabs=== | ===Recommended Collabs=== | ||
* [[File:IS_Watson_Icon.png|40px]] '''[[Idol Showdown/Collabs#Amelia_Watson|Amelia]]''' - Amelia's | * [[File:IS_Watson_Icon.png|40px]] '''[[Idol Showdown/Collabs#Amelia_Watson|Amelia]]''' - Amelia's {{Input|214S}} ground pound grants Coco amazing damage during her combos, and allows her to convert off of more moves than she normally would be able to. Her timeslow also not only cripples the opponent but allows Coco to perform {{Input|22L}}/{{Input|22M}} loops without spending any SC, potentially leading to massive damage on hit. | ||
* [[File: | * [[File:IS_Moona_Icon.png|40px]] '''[[Idol Showdown/Collabs#Moona_Hoshinova|Moona]]''' - Moona's {{Input|214S}} is an amazing counter-zoning neutral assist that can convert into a full combo. It is better to save your Superchats for cancels since Moona's off-collab isn't as useful as the damage and combo extensions that the Superchat meter provides. | ||
* [[File: | * [[File:IS_Roboco_Icon.png|40px]] '''[[Idol Showdown/Collabs#Roboco|Roboco]]''' - Roboco's {{Input|214S}} beam can help you get in, as it destroys other projectiles and goes full screen. Just be sure to capitalize on the opportunity it gives you. Her missiles can potentially enable extended {{Input|j.S}} mixups as well. | ||
* [[File: | * [[File:IS_Kanata_Icon.png|40px]] '''[[Idol Showdown/Collabs#Kanata_Amane|Kanata]]''' - Kanata's {{Input|214S}} grab can be converted into a combo from almost anywhere, and a side switching grab makes Soran Bushi pull the opponent towards Coco instead of pushing them away. | ||
* [[File: | * [[File:IS_Kiara_Icon.png|40px]] '''[[Idol Showdown/Collabs#Kiara_Takanashi|Kiara]]''' - So about those zoners... Kiara's reflector can help a ''lot'' with fighting them. Take it and don't look back. Her {{Input|214S}} can also help fix Coco's lacking combo game. | ||
}} | |||
}} | |||
== | == Moves == | ||
=== Standing Normals === | === Standing Normals === | ||
====== <font style="visibility:hidden" size="0">5L</font> ====== | ====== <font style="visibility:hidden" size="0">5L</font> ====== | ||
{{MoveData-IS | {{MoveData-IS | ||
|image=IS_Coco_5L.png | |image=IS_Coco_5L.png | ||
|hitbox=IS_Coco_5L_Hitbox.png | |||
|caption= | |caption= | ||
|name=5L | |name=5L | ||
| Line 42: | Line 62: | ||
|damage=30 | |damage=30 | ||
|guard=Mid | |guard=Mid | ||
|startup= | |startup=5 | ||
|active=3 | |active=3 | ||
|recovery= | |recovery=12 | ||
|advHit= | |advHit=0 | ||
|advBlock=-3 | |advBlock=-3 | ||
|description= *Fingersnap. | |description= | ||
*Decent range. | * Self-Gatling Count: 3 | ||
* Fingersnap. Has low pushback, making it useful for tick throws. | |||
* Decent range and hits crouchers, but can be low profiled by some moves (e.g. Coco's own {{Input|2L}} and {{Input|2H}}). | |||
* Deals 10 burn damage. | |||
}} | }} | ||
}} | }} | ||
| Line 55: | Line 78: | ||
{{MoveData-IS | {{MoveData-IS | ||
|image=IS_Coco_5M.png | |image=IS_Coco_5M.png | ||
|hitbox=IS_Coco_5M_Hitbox.png | |||
|caption=Doko Mitendayo?! | |caption=Doko Mitendayo?! | ||
|name=5M | |name=5M | ||
| Line 62: | Line 86: | ||
|guard=Mid | |guard=Mid | ||
|startup=9 | |startup=9 | ||
|active= | |active=7 | ||
|recovery= | |recovery=24 | ||
|advHit=- | |advHit=-4 | ||
|advBlock=- | |advBlock=-9 | ||
|invul={{Property-IS|Projectile Armor}} | |invul=(9~18) {{Property-IS|Projectile Armor}} | ||
|description= *Advancing normal. Sends Coco forward by round start's distance. | |description=* Advancing normal. Sends Coco forward by round start's distance. | ||
* Armors through projectiles. Coco will still take full damage from said projectile | * Armors through projectiles. Coco will still take full damage from said projectile. | ||
* Forces stand on hit, which means combos into {{Input|214X}} will not whiff. | |||
* On block, leaves Coco close enough for a mixup between command grab and frametrap. | * On block, leaves Coco close enough for a mixup between command grab and frametrap. | ||
* - | * -5 on block / 0 on hit when {{Input|22S}} cancelled. | ||
}} | }} | ||
}} | }} | ||
| Line 77: | Line 102: | ||
{{MoveData-IS | {{MoveData-IS | ||
|image=IS_Coco_5H.png | |image=IS_Coco_5H.png | ||
|hitbox=IS_Coco_5H_Hitbox.png | |||
|caption=Rolling eyes fall... | |caption=Rolling eyes fall... | ||
|name=5H | |name=5H | ||
|data= | |data= | ||
{{AttackData-IS | {{AttackData-IS | ||
|damage= | |damage=100 | ||
|guard=Mid | |guard=Mid | ||
|startup=12 | |startup=12 | ||
|active= | |active=5 | ||
|recovery= | |recovery=24 | ||
|advHit=- | |advHit=-2 | ||
|advBlock=- | |advBlock=-7 | ||
|description= | |description= | ||
* | * Pops the opponent slightly into the air during hitstun, which allows it to combo directly into {{Input|22M}} when close enough. | ||
*Its her kick from her art. A reference to Yakuza's PS2 box art. | * Its her kick from her art. A reference to Yakuza's PS2 box art. | ||
* -5 on block / 0 on hit when {{Input|22S}} cancelled. | |||
}} | }} | ||
}} | }} | ||
| Line 98: | Line 125: | ||
{{MoveData-IS | {{MoveData-IS | ||
|image=IS_Coco_2L.png | |image=IS_Coco_2L.png | ||
|hitbox=IS_Coco_2L_Hitbox.png | |||
|caption=Check your toes! | |caption=Check your toes! | ||
|name=2L | |name=2L | ||
| Line 103: | Line 131: | ||
{{AttackData-IS | {{AttackData-IS | ||
|damage=25 | |damage=25 | ||
|guard=Low | |guard=Low, Air Unblockable | ||
|startup=6 | |startup=6 | ||
|active=2 | |active=2 | ||
|recovery= | |recovery=14 | ||
|advHit= | |advHit=-1 | ||
|advBlock=- | |advBlock=-4 | ||
|description=* | |description= | ||
* Self-Gatling Count: 2 | |||
* Coco's shortest range normal move, but still above average for a light normal. | |||
}} | }} | ||
}} | }} | ||
| Line 116: | Line 146: | ||
{{MoveData-IS | {{MoveData-IS | ||
|image=IS_Coco_2M.png | |image=IS_Coco_2M.png | ||
|hitbox=IS_Coco_2M_Hitbox.png | |||
|caption=The ground-based footsies Idol Showdown is known for! | |caption=The ground-based footsies Idol Showdown is known for! | ||
|name=2M | |name=2M | ||
| Line 121: | Line 152: | ||
{{AttackData-IS | {{AttackData-IS | ||
|damage=60 | |damage=60 | ||
|guard=Low | |guard=Low, Air Unblockable | ||
|startup=10 | |startup=10 | ||
|active= | |active=3 | ||
|recovery= | |recovery=16 | ||
|advHit=- | |advHit=-1 | ||
|advBlock=- | |advBlock=-4 | ||
|description= *Hits at round start, but can only combo into | |description=* Good low poke. | ||
* Hits at round start, but can only combo into {{Input|214L}} at that range. | |||
}} | }} | ||
}} | }} | ||
| Line 135: | Line 166: | ||
{{MoveData-IS | {{MoveData-IS | ||
|image=IS_Coco_2H.png | |image=IS_Coco_2H.png | ||
|hitbox=IS_Coco_2H_Hitbox.png | |||
|caption=Bringing a whole new meaning to "ahead of her time". | |caption=Bringing a whole new meaning to "ahead of her time". | ||
|name=2H | |name=2H | ||
| Line 140: | Line 172: | ||
{{AttackData-IS | {{AttackData-IS | ||
|damage=90 | |damage=90 | ||
|guard=Mid | |guard=Mid, Air Unblockable | ||
|startup=11 | |startup=11 | ||
|active=3 | |active=3 | ||
|recovery= | |recovery=28 | ||
|advHit= | |advHit=Launch | ||
|advBlock=- | |advBlock=-17 | ||
|description= *Rising headbutt. | |invul= (4~13) {{Property-IS|Head}} | ||
* | |description=* Rising headbutt. Poor horizontal range, but hits directly above Coco. | ||
* - | * Anchors the opponent to a specific position on hit. This makes the following combo consistent, and allows it to break super armor. | ||
* Lowers Coco's hurtbox during startup, so some attacks still whiff against it even before the head-invulnerability kicks in. | |||
}} | }} | ||
}} | }} | ||
| Line 155: | Line 188: | ||
{{MoveData-IS | {{MoveData-IS | ||
|image=IS_Coco_3H.png | |image=IS_Coco_3H.png | ||
|hitbox=IS_Coco_3H_Hitbox.png | |||
|caption=This is your new best friend. Treat it well. | |caption=This is your new best friend. Treat it well. | ||
|name=3H | |name=3H | ||
| Line 160: | Line 194: | ||
{{AttackData-IS | {{AttackData-IS | ||
|damage=120 | |damage=120 | ||
|guard=Low | |guard=Low, Air Unblockable | ||
|startup=11 | |startup=11 | ||
|active=3 | |active=3 | ||
|recovery= | |recovery=20 | ||
|advHit=+ | |advHit=+54 (HKD) | ||
|advBlock=- | |advBlock=-11 | ||
|description= *Universal sweep. | |description=* Universal sweep. Very good range and hits at round start. | ||
* Note that {{Input|2M > 3H}} or {{Input|5H > 3H}} will '''not''' combo from round start range. | |||
*Note that | * The hard knockdown leads straight to an OTG combo or a dash up strike-throw mixup. | ||
*EXTREMELY unsafe on block. Punishable even at maximum range by some characters. Cancelling into | * EXTREMELY unsafe on block. Punishable even at maximum range by some characters. Cancelling into {{Input|22S}} just makes it worse at -17 on block. | ||
*If the opponent attempts to punish with a standing attack, it's possible to intercept them by cancelling into | * If the opponent attempts to punish with a standing attack, it's possible to intercept them by cancelling into {{Input|214L}} or {{Input|214M}}. This is still unsafe if the opponent waits. | ||
* Deals a surprisingly low amount of blockstun, which can be abused up close with a late-cancel into {{Input|236G}} for a tick throw. | |||
}} | }} | ||
}} | }} | ||
| Line 178: | Line 213: | ||
{{MoveData-IS | {{MoveData-IS | ||
|image=IS_Coco_jL.png | |image=IS_Coco_jL.png | ||
|hitbox=IS_Coco_jL_Hitbox.png | |||
|caption= Goooood Morning, Motherf*ckers! | |caption= Goooood Morning, Motherf*ckers! | ||
|name=j.L | |name=j.L | ||
| Line 186: | Line 222: | ||
|startup=7 | |startup=7 | ||
|active=6 | |active=6 | ||
|recovery= | |recovery=Until Landing + 2 | ||
|advHit= | |advHit= | ||
|advBlock= | |advBlock= | ||
|description=* Awful horizontal range, but the hitbox is rather low. You need to be up in your opponent's face to hit with it. | |description=* Awful horizontal range, but the hitbox is rather low. You need to be up in your opponent's face to hit with it. | ||
* Has a crossup hitbox. | |||
}} | }} | ||
}} | }} | ||
| Line 196: | Line 233: | ||
{{MoveData-IS | {{MoveData-IS | ||
|image=IS_Coco_jM.png | |image=IS_Coco_jM.png | ||
|hitbox=IS_Coco_jM_Hitbox.png | |||
|caption=If only she used this for more than just an aerial... | |caption=If only she used this for more than just an aerial... | ||
|name=j.M | |name=j.M | ||
| Line 204: | Line 242: | ||
|startup=11 | |startup=11 | ||
|active=5 | |active=5 | ||
|recovery= | |recovery=Until Landing + 3 | ||
|advHit= | |advHit= | ||
|advBlock= | |advBlock= | ||
|description= *Aerial sword normal. Has good horizontal range in front of Coco. | |description=* Aerial sword normal. Has good horizontal range in front of Coco. | ||
* Cannot hit crouching opponents (except Coco) unless almost directly on top of them. | |||
* Does 20 burn damage | |||
}} | }} | ||
}} | }} | ||
| Line 214: | Line 254: | ||
{{MoveData-IS | {{MoveData-IS | ||
|image=IS_Coco_jH.png | |image=IS_Coco_jH.png | ||
|hitbox=IS_Coco_jH_Hitbox.png | |||
|caption= Baraka would be proud. | |||
|name=j.H | |||
|data= | |||
{{AttackData-IS | |||
|damage=90 | |||
|guard=High | |||
|startup=10 | |||
|active=4 | |||
|recovery=Until Landing + 2 | |||
|advHit= | |||
|advBlock= | |||
|description= *Hits at a very nice angle. | |||
}} | |||
}} | |||
===Command Normals=== | |||
====== <font style="visibility:hidden" size="0">j.2H</font> ====== | |||
{{MoveData | |||
|image=IS_Coco_j2H.png | |||
|hitbox=IS_Coco_j2H_Hitbox.png | |||
|caption=There's nothing like a Ground Pound! | |caption=There's nothing like a Ground Pound! | ||
|name= | |name=Hip-Drop | ||
|input='''Air Only''' {{NotationIcon-IS|2}} '''+''' {{NotationIcon-IS|h}} | |||
|data= | |data= | ||
{{AttackData-IS | {{AttackData-IS | ||
| Line 222: | Line 285: | ||
|startup=15 | |startup=15 | ||
|active=16 | |active=16 | ||
|recovery= | |recovery=Until Landing + 9 | ||
|advHit= | |advHit= | ||
|advBlock= | |advBlock= | ||
|description= * Halts | |description=* Halts Coco's horizontal momentum and sends her straight down. | ||
* Not special cancellable. Cannot be cancelled into Dragon Glide like other air normals. | |||
* Punishable on block if it hits high up on a standing opponent. | * Punishable on block if it hits high up on a standing opponent. | ||
* Combos into normals on counterhit, or if it hits very low to the ground such as on the opponents wakeup. | * Combos into normals on counterhit, or if it hits very low to the ground such as on the opponents wakeup. | ||
* | * Drastically extends Coco's hurtbox downwards on startup before rising back into the air. | ||
* | * Can be situationally used to bait certain anti-airs. | ||
}} | }} | ||
}} | }} | ||
== Universal Mechanics == | === Universal Mechanics === | ||
====== <font style="visibility:hidden" size="0">Throw</font> ====== | ====== <font style="visibility:hidden" size="0">Throw</font> ====== | ||
{{MoveData | {{MoveData | ||
|image=IS_Coco_LM.png | |image=IS_Coco_LM.png | ||
|hitbox=IS_Coco_LM_Hitbox.png | |||
|caption= | |caption= | ||
|name=Throw | |name=Throw | ||
|input= | |input={{NotationIcon-IS|l}} '''+'''{{NotationIcon-IS|m}} '''or''' {{NotationIcon-IS|g}} | ||
|data= | |data= | ||
{{AttackData-IS | {{AttackData-IS | ||
|damage=170 | |damage=170 | ||
|guard= | |guard= | ||
|startup=7 | |startup=7 | ||
|active=2 | |active=2 | ||
|recovery= | |recovery=31 | ||
|advHit=KD | |advHit=KD | ||
|advBlock= | |advBlock= | ||
|description= * Universal throw. | |description= | ||
*Total Frames: 39 | |||
Universal throw. Can be followed up with dashing 22G anywhere on the screen for a restand and 65 more damage. | |||
}} | }} | ||
}} | }} | ||
| Line 257: | Line 323: | ||
{{MoveData | {{MoveData | ||
|image=IS_Coco_jL.png | |image=IS_Coco_jL.png | ||
|hitbox=IS_Coco_jL_Hitbox.png | |||
|caption=One of the overheads of all time. | |caption=One of the overheads of all time. | ||
|name=Overhead | |name=Overhead | ||
|input= | |input={{NotationIcon-IS|m}} '''+'''{{NotationIcon-IS|h}} | ||
|data= | |data= | ||
{{AttackData-IS | {{AttackData-IS | ||
|damage=60 | |damage=60 | ||
|guard=High | |guard=High | ||
|startup= | |startup=23 | ||
|active=3 | |active=3 | ||
|recovery= | |recovery=19 | ||
|advHit=2 | |advHit=+2 | ||
|advBlock= | |advBlock=-3 | ||
|description= * Uses the animation of | |invul= (6~36) {{Property-IS|grab}} | ||
* | |description=* Uses the animation of {{Input|j.L}}. Extremely stubby range. | ||
* | * {{Input|CH M+H}} can combo into {{input|5L}} if done close enough. | ||
* {{Input|5M > M+H}} is a combo. | |||
}} | |||
}} | |||
====== <font style="visibility:hidden" size="0">Superchat Reversal</font> ====== | |||
{{MoveData | |||
|image=IS_Coco_5M.png | |||
|hitbox=IS_Coco_SCR_hitbox.png | |||
|caption= | |||
|name=Superchat Reversal | |||
|input=(blocking) {{NotationIcon-IS|6}} '''+''' {{NotationIcon-IS|m}} '''+''' {{NotationIcon-IS|h}} | |||
|data= | |||
{{AttackData-IS | |||
|damage=0 | |||
|guard=Mid | |||
|startup=16 | |||
|active=2 | |||
|recovery=23 | |||
|advHit=0 | |||
|advBlock=-10 | |||
|invul= (1~17) {{Property-IS|full}} | |||
|description= | |||
*Superchat Reversal | |||
}} | }} | ||
}} | }} | ||
==Special Attacks== | === Special Attacks === | ||
====== <font style="visibility:hidden" size="0">214L/M/H</font> ====== | ====== <font style="visibility:hidden" size="0">214L/M/H</font> ====== | ||
{{MoveData | {{MoveData | ||
|name=Verbal Roasting | |name=Verbal Roasting | ||
|input= | |input={{NotationIcon-IS|214}} '''+''' {{NotationIcon-IS|l}} '''/'''{{NotationIcon-IS|m}} '''/'''{{NotationIcon-IS|h}} | ||
|image=IS_Coco_214L.png | |image=IS_Coco_214L.png | ||
|caption=She's certainly spitting fire. | |hitbox=IS_Coco_214L_Hitbox.png | ||
|caption=(L) She's certainly spitting fire. | |||
|image2=IS_Coco_214M.png | |||
|hitbox2=IS_Coco_214M_Hitbox.png | |||
|caption2=(M) Spitting fire, now in blue. | |||
|image3=IS_Coco_214H.png | |||
|hitbox3=IS_Coco_214H_Hitbox.png | |||
|caption3= | |||
|image4= | |||
|hitbox4=IS_Coco_214H_Fire_Hitbox.png | |||
|caption4=(H) Flint Shooter. | |||
|data= | |data= | ||
{{AttackData-IS | {{AttackData-IS | ||
|version=214L / 4S | |version=214L / 4S | ||
|damage= | |damage=30 | ||
|guard=Mid | |guard=Mid | ||
|startup=13 | |startup=13 | ||
|active= | |active=5 | ||
|recovery= | |recovery=21 | ||
|advHit=KD | |advHit=KD | ||
|advBlock=- | |advBlock=-8 | ||
|description= * Shoots a burst of fire ahead. | |description= | ||
* Launches high enough to | * Grants 3 superchats on use | ||
* Shoots a burst of fire ahead. | |||
* Launches high enough to follow up with {{Input|5L}} on standing or other normals if the opponent had already been juggled. | |||
* | * Deals 70 burn damage. | ||
}} | }} | ||
{{AttackData-IS | {{AttackData-IS | ||
|header=no | |header=no | ||
|version=214M | |version=214M | ||
|damage= | |damage=60 | ||
|guard=Mid | |||
|startup=25 | |||
|active=11 | |||
|recovery=17 | |||
|advHit=KD | |||
|advBlock=-4 | |||
|description= | |||
* Grants 3 superchats on use | |||
* Counts as a projectile, so has no hitstop and will clash with other projectiles | |||
* Can be meatied to be upwards of +6 on block | |||
* Deals 120 burn damage. | |||
}} | |||
{{AttackData-IS | |||
|header=no | |||
|version=214H | |||
|damage=60,60 | |||
|guard=Mid | |guard=Mid | ||
|startup= | |startup=16 | ||
|active= | |active=Until Offscreen | ||
|recovery= | |recovery=27 | ||
|advHit=KD | |advHit=KD | ||
|advBlock= | |advBlock=+8~ | ||
|description= | |description= | ||
* | * Fires a quick projectile that crosses along the ground, going under most other projectiles | ||
* Costs 1 Star Meter and grants 5 superchats on use | |||
* | * Deals 20 burn damage per hit for a total of 40. | ||
* | |||
}} | }} | ||
}} | }} | ||
====== <font style="visibility:hidden" size="0"> | ====== <font style="visibility:hidden" size="0">214G</font> ====== | ||
{{MoveData | {{MoveData | ||
|name=Sh*tpost Review | |name=Sh*tpost Review | ||
|input= | |input={{NotationIcon-IS|214}} '''+''' {{NotationIcon-IS|g}} | ||
|image= | |image=IS_Coco214LM.png | ||
| | |hitbox=IS_Coco_214LM_Hitbox.png | ||
|caption=Next meme! | |||
| | |||
|data= | |data= | ||
{{AttackData-IS | {{AttackData-IS | ||
|damage=160 | |damage=160 | ||
|guard=Unblockable | |guard=Unblockable | ||
|startup=5 | |startup=5 | ||
|active=2 | |active=2 | ||
|recovery= | |recovery=60 | ||
|advHit=KD | |advHit=KD | ||
|advBlock= | |advBlock= | ||
|invul={{Property-IS|Grab}} | |invul=(1~6) {{Property-IS|Grab}} | ||
|description= * Switches sides on hit. | |description= | ||
* Grants 5 superchats on use | |||
* Cannot be cancelled into. | |||
* Switches sides on hit. | |||
* Leaves the opponent relatively close for some oki. | * Leaves the opponent relatively close for some oki. | ||
* Alternatively follow up with | * Alternatively follow up with {{Input|22G}} or {{Input|22H}} for an OTG combo. | ||
}} | }} | ||
}} | |||
====== <font style="visibility:hidden" size="0">236G</font> ====== | |||
{{MoveData | |||
|name=Essence of Dragon Drop | |||
|input={{NotationIcon-IS|236}} '''+''' {{NotationIcon-IS|g}} | |||
|image=IS_Coco_236LM(Dragon).png | |||
|hitbox=IS_Coco_236LM_Hitbox.png | |||
|caption=Coco Buster | |||
|data= | |||
{{AttackData-IS | {{AttackData-IS | ||
|damage=280 | |||
|damage= | |||
|guard=Unblockable | |guard=Unblockable | ||
|startup= | |startup=4 | ||
|active=2 | |active=2 | ||
|recovery= | |recovery=60 | ||
|advHit= | |advHit= | ||
|advBlock= | |advBlock= | ||
|invul={{Property-IS|Grab}} | |invul=(1~5) {{Property-IS|Grab}} | ||
|description=* | |description= | ||
* Grants 5 superchats on use | |||
* Coco's big damage grab. Is extremely punishable on whiff, so try not to miss. | |||
* Leaves the opponent at halfscreen distance. | |||
* Any and all burn damage accumulated on an opponent is "cashed out" when this attack lands, increasing its damage tremendously. | |||
* After it hits, the recovery can be cancelled with {{Input|scc j.S}}. Out of the corner, this is mostly useless as the only air normal with enough range to reach the opponent is {{Input|j.M}}, which can be crouched under, but in the corner it can potentially lead to a high/low or left/right mixup using a meaty {{Input|j.M}}, {{Input|2L}} or {{Input|j.H}}. | |||
}} | }} | ||
}} | }} | ||
| Line 357: | Line 486: | ||
{{MoveData | {{MoveData | ||
|name=Acrobatic Assault | |name=Acrobatic Assault | ||
|input= | |input={{NotationIcon-IS|236}} '''+''' {{NotationIcon-IS|l}} '''/'''{{NotationIcon-IS|m}} '''/'''{{NotationIcon-IS|h}} | ||
|image=IS_Coco_236L.png | |image=IS_Coco_236L.png | ||
|hitbox=IS_Coco_236L_Hitbox.png | |||
|caption=L/H versions | |caption=L/H versions | ||
|image2=IS_Coco_236M.png | |image2=IS_Coco_236M.png | ||
|hitbox2=IS_Coco_236M_Hitbox.png | |||
|caption2=Arc-haic Assault | |caption2=Arc-haic Assault | ||
|data= | |data= | ||
{{AttackData-IS | {{AttackData-IS | ||
|version=236L / 5S | |version=236L / 5S | ||
|damage= | |||
|guard= | |||
|startup=33 | |||
|active= | |||
|recovery= | |||
|advHit= | |||
|advBlock= | |||
|invul= | |||
|description= | |||
* Grants 5 superchats on use | |||
* Performs a cartwheel | |||
}} | |||
{{AttackData-IS | |||
|version=236[L] / 5[S] | |||
|damage=160 | |damage=160 | ||
|guard=Unblockable | |guard=Unblockable | ||
|startup= | |startup=31 | ||
|active=2 | |active=2 | ||
|recovery= | |recovery=60 | ||
|advHit=KD | |advHit=KD | ||
|advBlock= | |advBlock= | ||
|invul={{Property-IS|Grab}} | |invul=(23~26) {{Property-IS|Grab}} | ||
|description=* Performs a cartwheel into | |description= | ||
* Grants 5 superchats on use | |||
* Performs a cartwheel into {{Input|214G}} | |||
* Switches sides on hit. | * Switches sides on hit. | ||
}} | }} | ||
| Line 382: | Line 529: | ||
|guard=Unblockable | |guard=Unblockable | ||
|startup=31 | |startup=31 | ||
|active= | |active=31 | ||
|recovery= | |recovery=34 | ||
|advHit=KD | |advHit=KD | ||
|advBlock= | |advBlock= | ||
|invul={{Property-IS|Grab}}( | |invul=(1~30) {{Property-IS|Grab}} (18~30) {{Property-IS|Super Armor}} | ||
|description=* Immediately skips to the recovery animation if the opponent crosses behind it. | |description= | ||
* Grants 5 superchats on use | |||
* Immediately skips to the recovery animation if the opponent crosses behind it. | |||
* Switches sides on hit. | * Switches sides on hit. | ||
* Can link into | * Can link into {{Input|5L}} on hit for a combo. | ||
}} | }} | ||
{{AttackData-IS | {{AttackData-IS | ||
| Line 423: | Line 547: | ||
|startup=25 | |startup=25 | ||
|active=2 | |active=2 | ||
|recovery= | |recovery=54 | ||
|advHit=KD | |advHit=KD | ||
|advBlock= | |advBlock= | ||
|invul={{Property-IS|Projectile}}( | |invul=(1~30) {{Property-IS|Projectile}} (23~26) {{Property-IS|Grab}} | ||
|description= * Performs a cartwheel into | |description= | ||
* | * Costs 1 Star Meter and grants 5 superchats on use | ||
* Performs a projectile-invulnerable cartwheel into {{Input|214G}}. | |||
* Travels a considerable distance and lacks a superfreeze. With a good read, it can be Coco's best answer to projectile zoning, but its lengthy recovery makes it quite risky. | |||
}} | }} | ||
}} | }} | ||
====== <font style="visibility:hidden" size="0"> | ====== <font style="visibility:hidden" size="0">22G</font> ====== | ||
{{MoveData | {{MoveData | ||
|name=Plug-In Type AsaCoco | |name=Plug-In Type AsaCoco | ||
|input= | |input={{NotationIcon-IS|2}} {{NotationIcon-IS|2}} '''+'''{{NotationIcon-IS|g}} | ||
|image=IS_Coco_22LM.png | |image=IS_Coco_22LM.png | ||
|caption= | |hitbox=IS_Coco_22LM_Hitbox.png | ||
|caption= Comes with 500mg of concentrated AsaCoco. | |||
|data= | |data= | ||
{{AttackData-IS | {{AttackData-IS | ||
|damage= | |damage=130(50, 80) | ||
|guard= | |guard= | ||
|startup=11 | |startup=11 | ||
|active=2 | |active=2 | ||
|recovery=26 | |recovery=26 | ||
|advHit= | |advHit=+2 | ||
|advBlock= | |advBlock= | ||
|description= * OTG grab. | |description= | ||
* Grants 5 superchats on use | |||
* | * OTG grab. Deals extra damage at the end of the combo and leads to an IPS restand with slight frame advantage. | ||
* Puts the opponent at the perfect range to reach the opponent with either max range lights or the max range of 236G. | |||
}} | }} | ||
}} | }} | ||
| Line 458: | Line 584: | ||
{{MoveData | {{MoveData | ||
|name=Tail-Grab | |name=Tail-Grab | ||
|input= | |input={{NotationIcon-IS|2}} {{NotationIcon-IS|2}} '''+''' {{NotationIcon-IS|l}} '''/'''{{NotationIcon-IS|m}} '''/'''{{NotationIcon-IS|h}} | ||
|image=IS_Coco_22L.png | |image=IS_Coco_22L.png | ||
|hitbox=IS_Coco_22L_Hitbox.png | |||
|caption=High | |caption=High | ||
|image2=IS_Coco_22M.png | |image2=IS_Coco_22M.png | ||
|hitbox2=IS_Coco_22M_Hitbox.png | |||
|caption2=Long | |caption2=Long | ||
|image3=IS_Coco_22H.png | |image3=IS_Coco_22H.png | ||
| | |hitbox3=IS_Coco_22H_f9-f12_Hitbox.png | ||
|hitbox4=IS_Coco_22H_f14_Hitbox.png | |||
|caption4=Essence of Insertion: Tail-Slam | |||
|data= | |data= | ||
{{AttackData-IS | {{AttackData-IS | ||
|version=22L / 2S | |version=22L / 2S | ||
|damage= | |damage=170(0, 170) | ||
|guard=Unblockable | |guard=Air Unblockable | ||
|startup=5 | |startup=5 | ||
|active=9 | |active=9 | ||
|recovery= | |recovery=34 | ||
|advHit=KD | |advHit=KD | ||
|advBlock= | |advBlock= | ||
|invul={{Property-IS|Head}} | |invul=(3~16) {{Property-IS|Head}} | ||
|description=* Anti-air grab that goes high but not that far. | |description= | ||
* | * Grants 5 superchats on use | ||
* Anti-air grab that goes high but not that far. | |||
* Knocks the opponent down at close range for an OTG combo or a strike-throw mixup. | |||
}} | }} | ||
{{AttackData-IS | {{AttackData-IS | ||
|header=no | |header=no | ||
|version=22M | |version=22M | ||
|damage= | |damage=170(0, 170) | ||
|guard=Unblockable | |guard=Air Unblockable | ||
|startup=7 | |startup=7 | ||
|active=9 | |active=9 | ||
|recovery= | |recovery=34 | ||
|advHit=KD | |advHit=KD | ||
|advBlock= | |advBlock= | ||
|invul={{Property-IS|Head}} | |invul=(3~18) {{Property-IS|Head}} | ||
|description= * Anti-air grab that reaches further but has less vertical range than the light variant. | |description= | ||
* | * Grants 5 superchats on use | ||
* Anti-air grab that reaches further but has less vertical range than the light variant. | |||
* Can loop {{Input|22M scc 22L scc 22M}} for an easy SC combo, but this doesn't build as much meter as {{Input|214L}} loops. | |||
}} | }} | ||
{{AttackData-IS | {{AttackData-IS | ||
|header=no | |header=no | ||
|version=22H | |version=22H | ||
|damage= | |damage=180(0, 120, 60) | ||
|guard=Unblockable | |guard=Air Unblockable | ||
|startup= | |startup=8 | ||
|active=4(1)4 | |active=4(1)4 | ||
|recovery= | |recovery=36 | ||
|advHit= | |advHit=+2 | ||
|advBlock= | |advBlock= | ||
|description=* Frame 9 is a huge anti-air-only hit that reaches high in front of | |description= | ||
* Frame 14 is an OTG-only hit with a long horizontal range. Long enough to connect after a max range | * Costs 1 Star Meter and grants 5 superchats on use | ||
* The followup | * Frame 9 is a huge anti-air-only hit that reaches high above and in front of Coco. | ||
* | * Frame 14 is an OTG-only hit with a long horizontal range. Long enough to connect after a max range {{Input|3H}}. | ||
* | * The followup counts as a separate OTG regardless of how the first hit connects. This means {{Input|22H}} counts as 1 OTG against an airborne opponent, and 2 OTGs against a knocked down opponent. Be careful about hitting the OTG limit. | ||
* Can combo into {{Input|scc 22G}}. In the corner it links into {{Input|22G}} without needing SC. | |||
* If done on a juggle opponent, will restand them into a comboable state | |||
* If done on a grounded opponent as an OTG, will restand them into an IPS state | |||
* Deals 135 burn damage. | |||
}} | }} | ||
}} | }} | ||
| Line 514: | Line 652: | ||
{{MoveData | {{MoveData | ||
|name=Wide Coco | |name=Wide Coco | ||
|input= | |input={{NotationIcon-IS|2}} {{NotationIcon-IS|2}} '''+'''{{NotationIcon-IS|s}} | ||
|image=IS_Coco_22S.png | |image=IS_Coco_22S.png | ||
|hitbox=IS_Coco_22S_Hitbox.png | |||
|caption=Assume THE STANCE | |caption=Assume THE STANCE | ||
|data= | |data= | ||
| Line 522: | Line 661: | ||
|guard= | |guard= | ||
|startup= | |startup= | ||
|active= | |active=0 | ||
|recovery= | |recovery=26+ | ||
|advHit=- | |advHit=- | ||
|advBlock=- | |advBlock=- | ||
|invul={{Property-IS|Projectile}} | |invul=(14~End) {{Property-IS|Projectile}} | ||
|description= * A surprisingly useful move. Causes Coco to begin her crab walk. | |description= | ||
* Projectile invulnerable | * Grants 5 superchats on use | ||
* | * A surprisingly useful move. Causes Coco to begin her crab walk as long as the S button is held. | ||
* | * Projectile invulnerable on the 14th frame until the button is released. Helps against zoning. | ||
* | * Improves the frame advantage of {{Input|5H}} on block or hit. Also improves {{Input|5M}} and {{Input|2H}} though they are still very unsafe. Using it after other normals makes them worse so should be avoided. | ||
* {{Input|214L scc 22S}} is very advantageous on block, assuming the opponent doesn't duck under the fire. | |||
* Can be used in neutral and during blockstrings to somewhat safely generate meter. After {{Input|3H}}, Coco can use this move twice and still have enough time to meaty the opponent. | |||
}} | }} | ||
}} | }} | ||
| Line 538: | Line 679: | ||
{{MoveData | {{MoveData | ||
|name=Dragon Glide | |name=Dragon Glide | ||
|input= | |input='''Air Only''' {{NotationIcon-IS|s}} | ||
|image=IS_Coco_jS.png | |image=IS_Coco_jS.png | ||
|hitbox=IS_Coco_jS_Hitbox.png | |||
|caption= | |caption= | ||
|data= | |data= | ||
| Line 545: | Line 687: | ||
|damage= | |damage= | ||
|guard= | |guard= | ||
|startup= | |startup= | ||
|active= | |active= | ||
|recovery=37 | |recovery= 37 | ||
|advHit= | |advHit= | ||
|advBlock= | |advBlock= | ||
|description= * Coco's airdash. Sends her straight forward, but halts | |description=* Coco's airdash. Sends her straight forward, but halts her horizontal momentum when it's done or when cancelled, causing her to fall straight down. | ||
* | * Can only be performed once per jump. | ||
* Cancellable into air normals after 20 frames. For example, {{Input|j.S > j.L}} can hit as early as frame 27 (20 + 7). | |||
* Allows her to go for high/low mixups after a hard knockdown. {{Input|j.S > j.M}} can be input either late to hit the opponent high on their wakeup, or early to intentionally whiff a fake overhead into a meaty low {{Input|2L}}. However, the high option is vulnerable to moves with 1f head invulnerability (Korone's {{Input|22L}}, Fubuki's {{Input|22L}} and Aki's {{Input|5M}}) and both lose to metered reversals. With a knockdown that gives her enough frame advantage (such as from {{Input|214L}} > {{Input|scc 22S}} > {{Input|3H}}), it can allow her to go for left/right mixups by using {{Input|j.2H}}, as well. | |||
* Has a minimum height requirement which is reached 7 frames after inputting a jump. Starting from the ground, {{Input|j.S > j.L}} hits on frame 34 (7 + 20 + 7). | |||
* Does not have a minimum height requirement when cancelled into from another move. | |||
}} | }} | ||
}} | }} | ||
==Super Star Attack== | === Super Star Attack === | ||
{{MoveData | {{MoveData | ||
|name=Essence of True Form: Just Like a Dragon | |name=Essence of True Form: Just Like a Dragon | ||
|input= | |input={{NotationIcon-IS|236}} '''+''' {{NotationIcon-IS|s}} | ||
|image= | |image=IS_Coco_236SCG.png | ||
| | |hitbox=IS_Coco_236S_Hitbox.png | ||
|caption=''FEEL THE HEAT!'' | |||
| | |||
|data= | |data= | ||
{{AttackData-IS | {{AttackData-IS | ||
|damage= | |damage=289(0,18x16,1) | ||
|guard=Unblockable | |guard=Unblockable | ||
|startup=3 | |startup=3 | ||
|active=2 | |active=2 | ||
|recovery= | |recovery=58 | ||
|advHit=KD | |advHit=KD | ||
|advBlock= | |advBlock= | ||
|invul={{Property-IS|Grab}}(1 | |invul=(1~4) {{Property-IS|Grab}} (1~4) {{Property-IS|Super Armor}} | ||
|description=* | |description=* Costs 2 Star Meter and grants 5 superchats on use | ||
* Has | * A powerful command grab in which Coco blasts the opponent in her true dragon form. | ||
* | * Has significantly more range than Coco's other stationary grabs. Coco with 2 bars is very scary up close. | ||
* Cancelling into this from a dash causes the forward momentum to be preserved in the air for a followup combo. | |||
}} | }} | ||
}} | }} | ||
==Colors== | ==Colors== | ||
| Line 976: | Line 734: | ||
{{ColorGallery/Color|6| text= Cosplay 5<hr>{{Small|Melody (VShojo)}}}} | {{ColorGallery/Color|6| text= Cosplay 5<hr>{{Small|Melody (VShojo)}}}} | ||
{{ColorGallery/Color|7| text= Cosplay 6<hr>{{Small|Potemkin (Guilty Gear)}}}} | {{ColorGallery/Color|7| text= Cosplay 6<hr>{{Small|Potemkin (Guilty Gear)}}}} | ||
{{ColorGallery/Color|8| text= Cosplay 7<hr>{{Small|Tokoyami Towa (Hololive)}}}} | |||
{{ColorGallery/Color|9| text= Cosplay 8<hr>{{Small|Amano Pikamee (VOMS Project)}}}} | |||
{{ColorGallery/Color|10| text= Cosplay 9<hr>{{Small|Coco's PJ Costume (Hololive)}}}} | |||
{{ColorGallery/Color|11| text= Cosplay 10<hr>{{Small|USA (Country)}}}} | |||
}} | }} | ||
==Navigation== | ==Navigation== | ||
{{CharacterSubnav-IS}} | |||
{{Navbox-IS}} | {{Navbox-IS}} | ||
[[Category:Coco Kiryu]] | [[Category:Coco Kiryu]] | ||
[[Category:Idol Showdown]] | [[Category:Idol Showdown]] | ||
Latest revision as of 22:56, 10 June 2024
4th Chairman of the Kiryu Clan - Dragon-Style Grappling
Difficulty - ★★★☆☆☆
Introduction
Coco is a hard-hitting yakuza dragon who demolishes her opponents with powerful command grabs. Once Coco manages to close the distance, she shows opponents what it truly means to be the Legendary Dragon of hololive.
Unique Passive: Coco can use her fire attacks to build up burn damage, which is converted into true damage when she lands her "Dragon Drop" command grab. [1]
| Pick if you like | Avoid if you dislike |
|---|---|
|
|
Please note that this page is full of memes. Don't protest, this is what Kaichou herself would have wanted.
Burn Effect
Burn is potential true damage that will be applied on a successful Essence of Dragon Drop, 236G. Coco applies a burn on 5L, j.M, 214L, 214M, and 214H. Burn can be stacked. It lasts for 3 seconds then begins to heal at 60 per second.
Recommended Collabs
 Amelia - Amelia's 214S ground pound grants Coco amazing damage during her combos, and allows her to convert off of more moves than she normally would be able to. Her timeslow also not only cripples the opponent but allows Coco to perform 22L/22M loops without spending any SC, potentially leading to massive damage on hit.
 Moona - Moona's 214S is an amazing counter-zoning neutral assist that can convert into a full combo. It is better to save your Superchats for cancels since Moona's off-collab isn't as useful as the damage and combo extensions that the Superchat meter provides.
 Roboco - Roboco's 214S beam can help you get in, as it destroys other projectiles and goes full screen. Just be sure to capitalize on the opportunity it gives you. Her missiles can potentially enable extended j.S mixups as well.
 Kanata - Kanata's 214S grab can be converted into a combo from almost anywhere, and a side switching grab makes Soran Bushi pull the opponent towards Coco instead of pushing them away.
 Kiara - So about those zoners... Kiara's reflector can help a lot with fighting them. Take it and don't look back. Her 214S can also help fix Coco's lacking combo game.
Moves
Standing Normals
5L
5L
|
|
|---|---|
Toggle Hitboxes Toggle Hitboxes
|
5M
5M Doko Mitendayo?! Doko Mitendayo?!
|
|
|---|---|
Toggle Hitboxes Toggle Hitboxes
|
5H
5H Rolling eyes fall... Rolling eyes fall...
|
|
|---|---|
Toggle Hitboxes Toggle Hitboxes
|
Crouching Normals
2L
2L Check your toes! Check your toes!
|
|
|---|---|
Toggle Hitboxes Toggle Hitboxes
|
2M
2M The ground-based footsies Idol Showdown is known for! The ground-based footsies Idol Showdown is known for!
|
|
|---|---|
Toggle Hitboxes Toggle Hitboxes
|
2H
2H Bringing a whole new meaning to "ahead of her time". Bringing a whole new meaning to "ahead of her time".
|
|
|---|---|
Toggle Hitboxes Toggle Hitboxes
|
3H
3H This is your new best friend. Treat it well. This is your new best friend. Treat it well.
|
|
|---|---|
Toggle Hitboxes Toggle Hitboxes
|
Jumping Normals
j.L
j.L Goooood Morning, Motherf*ckers! Goooood Morning, Motherf*ckers!
|
|
|---|---|
Toggle Hitboxes Toggle Hitboxes
|
j.M
j.M If only she used this for more than just an aerial... If only she used this for more than just an aerial...
|
|
|---|---|
Toggle Hitboxes Toggle Hitboxes
|
j.H
j.H Baraka would be proud. Baraka would be proud.
|
|
|---|---|
Toggle Hitboxes Toggle Hitboxes
|
Command Normals
j.2H
There's nothing like a Ground Pound! There's nothing like a Ground Pound!
|
|
|---|---|
Toggle Hitboxes Toggle Hitboxes
|
Universal Mechanics
Throw
Toggle Hitboxes Toggle Hitboxes
|
|---|
Overhead
One of the overheads of all time. One of the overheads of all time.
|
|
|---|---|
Toggle Hitboxes Toggle Hitboxes
|
Superchat Reversal
Toggle Hitboxes Toggle Hitboxes
|
|---|
Special Attacks
214L/M/H
(L) She's certainly spitting fire. (L) She's certainly spitting fire. (M) Spitting fire, now in blue. (M) Spitting fire, now in blue. (H) Flint Shooter. (H) Flint Shooter.
|
|
|---|---|
Toggle Hitboxes Toggle Hitboxes
|
214G
Next meme! Next meme!
|
|
|---|---|
Toggle Hitboxes Toggle Hitboxes
|
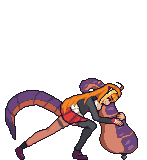
236G
Coco Buster Coco Buster
|
|
|---|---|
Toggle Hitboxes Toggle Hitboxes
|
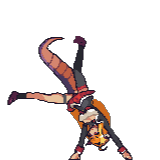
236L/M
L/H versions L/H versions Arc-haic Assault Arc-haic Assault
|
|
|---|---|
Toggle Hitboxes Toggle Hitboxes
|
22G
Comes with 500mg of concentrated AsaCoco. Comes with 500mg of concentrated AsaCoco.
|
|
|---|---|
Toggle Hitboxes Toggle Hitboxes
|
22L/M/H
High High Long Long Essence of Insertion: Tail-Slam Essence of Insertion: Tail-Slam
|
|
|---|---|
Toggle Hitboxes Toggle Hitboxes
|
22S
Assume THE STANCE Assume THE STANCE
|
|
|---|---|
Toggle Hitboxes Toggle Hitboxes
|
j.S
Toggle Hitboxes Toggle Hitboxes
|
|---|
Super Star Attack
FEEL THE HEAT! FEEL THE HEAT!
|
|
|---|---|
Toggle Hitboxes Toggle Hitboxes
|
Colors
Amane Kanata (Hololive)
Akai Haato (Hololive)
Kazuma Kiryu (Yakuza)
Coco Kaine
Melody (VShojo)
Potemkin (Guilty Gear)
Tokoyami Towa (Hololive)
Amano Pikamee (VOMS Project)
Coco's PJ Costume (Hololive)
USA (Country)


