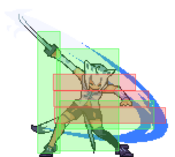
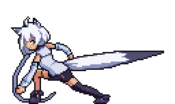
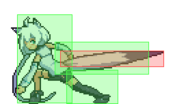
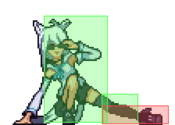
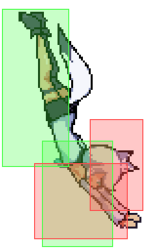
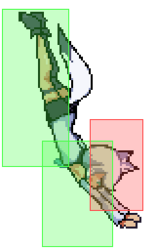
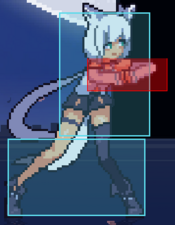
Idol Showdown/Fubuki Shirakami: Difference between revisions
(→Combos: add combo legend template) |
mNo edit summary |
||
| (416 intermediate revisions by 12 users not shown) | |||
| Line 1: | Line 1: | ||
{{Version-IS|4.0.8}} | |||
[[File:IS_Fubuki_Logo.png|250px]] | [[File:IS_Fubuki_Logo.png|250px]] | ||
'''Versatile Fox Spirit''' - ''Adaptable Gacha Mastery'' | '''Versatile Fox Spirit''' - ''Adaptable Gacha Mastery'' <br> | ||
'''Difficulty''' - ★☆☆☆☆☆ | |||
{{ | {{CharacterIntro-IS | ||
|hp=1000 | |||
|backdash=24F (1~5F {{Property-IS|Full}} Invuln) (1~19F {{Property-IS|grab}} Invuln) | |||
|walkspeed=[[Idol_Showdown/Game_Data#Ground_Movement_Data|Average]] | |||
|char= Fubuki | |||
|intro= | |||
==Introduction== | ==Introduction== | ||
{{Content Box|content= | |||
Fubuki is a solid all-rounder who has no problem fighting at any distance. Her opportunistic playstyle rewards players who can take advantage of her unique SSR passive. | Fubuki is a solid all-rounder who has no problem fighting at any distance. Her opportunistic playstyle rewards players who can take advantage of her unique SSR passive. | ||
'''Unique Passive:''' Fubuki's special moves have a small chance to be blessed with SSR luck! SSR moves have properties that make them more powerful than their standard counterparts. Fubuki's "Burger Fox" special grants Fubuki guaranteed SSR luck on her next special | '''Unique Passive:''' Fubuki's special moves have a small chance to be blessed with SSR luck! SSR moves have properties that make them more powerful than their standard counterparts. Fubuki's "Burger Fox" special grants Fubuki guaranteed SSR luck on her next two special moves. If luck isn't on her side, don't fret, the 10th use of the same special move will be a guaranteed SSR as well! [https://wiki.gbl.gg/w/Idol_Showdown/Fubuki_Shirakami/Strategy#Gacha_and_Pity_System_Explained] | ||
{{ | {{CharacterPickReasons | ||
|intro='''Fubuki Shirakami''' is a well-rounded "shoto" character | |intro=[[File:IS_Fubuki_Icon.png|100px]] | ||
'''Fubuki Shirakami''' is a well-rounded "shoto" character that has solid tools for every situation with a sprinkle of [[/Strategy#Gacha_and_Pity_System_Explained|RNG]]. | |||
|pros= | |pros= | ||
* | * '''Flexibility''': Equipped with a balanced set of normals, a variety of reliable anti-airs, a fast forward-moving projectile invuln spin attack, solid projectiles, multiple metered reversals, and the ability to convert resources into safe pressure extensions, Fubuki has at least some way to contest the opponent at every range and is ready for any situation. | ||
* | * '''Easy Hit Confirms''': Fubuki's grounded and air normals have either abnormally long hitstun values or generally lengthy untech times. Combined with the quick startup of her specials, it is very difficult to fumble combo conversions no matter how awkward the initial hits may be. | ||
* Gacha | * '''Gacha''': Fubuki's random SSR-enhanced special moves lead to more damaging combos and have additional neutral or defensive utility without requiring meter to be spent outside of {{input|22S}}. | ||
* '''Cute Fox Girls''' | |||
|cons= | |cons= | ||
* | * '''Generalists''': While Fubuki can perform comfortably in every situation, as a result of other characters being more specialized, very few of her tools are considered the best in their class individually. | ||
* Gacha | * '''Meter Combination Prerequisites''': Fubuki generally has to spend both types of meter at the same time in order to squeeze more damage out of longer-ranged confirms if she doesn't get lucky with SSRs. Most other characters get to choose between spending Star Meter or Superchat Meter respectively for their extensions, and some may not even need to spend anything. | ||
* '''Gacha''': Optimal play requires the player to be able to react to sudden SSRs happening and be ready to adjust their neutral, pressure, combos, knockdowns, and oki timings on the fly. Also, properly keeping track of and implementing Fubuki's unique passive's "[[/Strategy#Gacha_and_Pity_System_Explained|pity]]" system tied to number of specials used in a row may be a bit challenging. | |||
|width=100 | |||
}} | }} | ||
===Recommended Collabs=== | |||
'''Note''': As this section of the page was written shortly after the game was released, its only purpose is to help guide new players towards assists that are generally considered useful for the character, and should be revised by an experienced player as the game develops more. Don't be afraid to pick and try [[Idol_Showdown/Fubuki_Shirakami/Strategy#Assist_Synergy|something else]]! | |||
* [[File:IS_Miko_Icon.png|40px]] '''[[Idol Showdown/Collabs#Miko_Sakura|Miko]]''' - '''Pressure and Patrol + Emergency Lockdown''' | |||
:*Her 5+Col patrols around you in neutral and persists even when you are getting hit, so on top of it being decent for extending your own pressure, it can also be used defensively to make it harder for the opponent to reliably apply their pressure or finish combos. | |||
:*Miko's 6+Col lava bucket keeps the opponent stuck in blockstun for an eternity. This assist allows Fubuki to safely continue pressure and enforce mixups after a knockdown or after making the opponent block normally punishable moves. | |||
* [[File:IS_Kiara_Icon.png|40px]] '''[[Idol Showdown/Collabs#Kiara_Takanashi|Kiara]]''' - '''Projectile Reflector + Charging Star Jumpscare''' | |||
:*Kiara greatly helps Fubuki during neutral against projectile zoners, thanks to her 5+Col reflector assist. | |||
:*Fubuki can also use Kiara's 6+Col in neutral, on defense, to extend combos for massive damage, or even to confirm universal or instant overheads. | |||
* [[File:IS_Subaru_Icon.png|40px]] '''[[Idol Showdown/Collabs#Subaru_Oozora|Subaru]]''' - '''Versatile Call for Backup + Full Screen Sausage''' | |||
:*Subaru's 5+Col can be used in a variety of helpful ways to enforce will in neutral, get opponents off of you on defense, extend pressure or combos, and even set up or confirm mixups. | |||
:*While the startup of Subaru's 6+Col is fairly slow and not too useful for extending combos, it can make the opponent more inclined to jump thanks to its high blockstun which can create openings in neutral to take space or in pressure to snipe a jumpout with any of Fubuki's great anti-airs. | |||
[[Idol_Showdown/Fubuki_Shirakami/Strategy#Assist_Synergy|Additional notes on Assist Synergy and Assists not featured above can be found here.]] | |||
}} | |||
}} | |||
== | ==Moves== | ||
=== Standing Normals === | === Standing Normals === | ||
====== <font style="visibility:hidden" size="0">5L</font> ====== | ====== <font style="visibility:hidden" size="0">5L</font> ====== | ||
| Line 44: | Line 63: | ||
|startup=6 | |startup=6 | ||
|active=3 | |active=3 | ||
|recovery= | |recovery=12 | ||
|advHit= | |advHit=0 | ||
|advBlock=- | |advBlock=-3 | ||
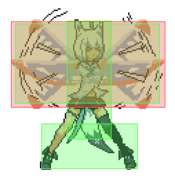
|description=Standard fast jab that hits crouchers | |description= | ||
* Self-Gatling Count: 3 | |||
Standard fast jab that hits crouchers. | |||
}} | }} | ||
}} | }} | ||
| Line 63: | Line 84: | ||
|guard=Mid | |guard=Mid | ||
|startup=7 | |startup=7 | ||
|active= | |active=5 | ||
|recovery= | |recovery=21 | ||
|advHit=- | |advHit=-1 | ||
|advBlock=- | |advBlock=-6 | ||
|description=Fairly quick poke that can be confirmed with 214X even at max range. Has significantly longer blockstun than her other normals, so it is the prime normal to cancel into projectiles | |description=Fairly quick poke that can be confirmed with 214X even at max range. Has significantly longer blockstun than her other normals and a fair bit of pushback, so it is the prime normal to cancel from into projectiles to end blockstrings. | ||
}} | }} | ||
}} | }} | ||
| Line 80: | Line 101: | ||
|data= | |data= | ||
{{AttackData-IS | {{AttackData-IS | ||
|damage= | |damage=30, 55 | ||
|guard=Mid | |guard=Mid | ||
|startup=11 | |startup=11 | ||
|active=2(2)2 | |active=2(2)2 | ||
|recovery= | |recovery=25 | ||
|advHit=+9 | |advHit=+9 | ||
|advBlock=- | |advBlock=-9 | ||
|description=Foward-moving slash that hits twice and inflicts a lengthy amount of hitstun. Can be linked back into Medium or even dashing Light buttons on hit as a result of the massive frame advantage | |description=Foward-moving slash that hits twice and inflicts a lengthy amount of hitstun. Can be linked back into Medium or even dashing Light buttons on hit as a result of the massive frame advantage. | ||
}} | }} | ||
}} | }} | ||
| Line 105: | Line 126: | ||
|startup=5 | |startup=5 | ||
|active=2 | |active=2 | ||
|recovery= | |recovery=14 | ||
|advHit= | |advHit=-1 | ||
|advBlock= | |advBlock=-4 | ||
|description= | |description= | ||
Fubuki's fastest normal. Hits low and | * Self-Gatling Count: 3 | ||
Fubuki's fastest normal. Hits low and uniquely has a self-gatling count of 3. | |||
}} | }} | ||
}} | }} | ||
| Line 125: | Line 147: | ||
|guard=Low, Air Unblockable | |guard=Low, Air Unblockable | ||
|startup=8 | |startup=8 | ||
|active= | |active=3 | ||
|recovery= | |recovery=19 | ||
|advHit=+ | |advHit=+1 | ||
|advBlock=- | |advBlock=-4 | ||
|description= | |description= | ||
Fubuki's low tail poke that has more range than her sweep, but is a bit shorter than her 5M. Has high blockstun compared to her other normals, but less than 5M | Fubuki's low tail poke that has more range than her sweep, but is a bit shorter than her 5M. Has high blockstun compared to her other normals, but less than 5M. Has fairly high base damage for its speed, so it is both a great starter and an amazing combo tool. Can take advantage of the move's low recovery to gatling into a whiff and pull in 5M's hurtbox. | ||
}} | }} | ||
}} | }} | ||
| Line 149: | Line 171: | ||
|recovery=25 | |recovery=25 | ||
|advHit= | |advHit= | ||
|advBlock=- | |advBlock=-14 | ||
|invul= ( | |invul= (5~12) {{Property-IS|head}} | ||
|description= | |description= | ||
* Jump cancellable on hit and block | * Jump cancellable on hit and block | ||
Fubuki's main anti-air and launcher. Head invuln starts up on frame | Fubuki's main anti-air and launcher. Head invuln starts up on frame 5, and it has an amazing hitbox that even covers a bit of the space directly above and behind her. Simple way to launch the opponent in order to start a juggle combo. Will vacuum the opponent in on anti-air or during a juggle, so even awkward angle hits are easy to confirm and keep stable. | ||
}} | }} | ||
}} | }} | ||
| Line 168: | Line 190: | ||
|damage=95 | |damage=95 | ||
|guard=Low,Air Unblockable | |guard=Low,Air Unblockable | ||
|startup= | |startup=9 | ||
|active=3 | |active=3 | ||
|recovery=19 | |recovery=19 | ||
|advHit= | |advHit=HKD | ||
|advBlock=- | |advBlock=-10 | ||
|description=Fubuki's sweep which leads to hard knockdown. Somewhat short compared to her other normals, so be careful in combos and pressure since it is easy to whiff if you are just barely out of range. | |description=Fubuki's sweep which leads to hard knockdown. Somewhat short compared to her other normals, so be careful in combos and pressure, since it is easy to whiff if you are just barely out of range. | ||
}} | }} | ||
}} | }} | ||
| Line 181: | Line 203: | ||
{{MoveData-IS | {{MoveData-IS | ||
|image=IS_Fubuki_jL.png | |image=IS_Fubuki_jL.png | ||
|hitbox=IS_Fubuki_jL_hitbox.png | |||
|resizeImage=yes | |resizeImage=yes | ||
|caption= | |caption= | ||
| Line 190: | Line 213: | ||
|startup=6 | |startup=6 | ||
|active=6 | |active=6 | ||
|recovery=Until Landing + | |recovery=Until Landing + 2 | ||
|advHit= | |advHit= | ||
|advBlock= | |advBlock= -1 | ||
|description= | |description= | ||
* Frame advantage on block is based on highest possible standing block from similar-height opponents and can be more advantageous if blocked deeper (it can also be less advantageous if blocked at max height by taller characters) | |||
A great rising air to air that functions as an instant overhead when used with the SSR version of her air special. You may set up for the instant overhead by cancelling into 22S after a knockdown, or you can try testing your luck. Be careful, though, as even a successful instant overhead cancelled into regular {{input|j.214X}} or {{input|j.S}} will be -7 on hit. | |||
}} | }} | ||
}} | }} | ||
| Line 199: | Line 224: | ||
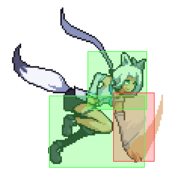
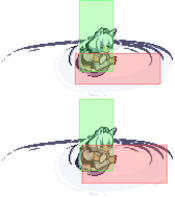
====== <font style="visibility:hidden" size="0">j.M</font> ====== | ====== <font style="visibility:hidden" size="0">j.M</font> ====== | ||
{{MoveData-IS | {{MoveData-IS | ||
|image= | |image=IS_Fubuki_jM_1.png | ||
|hitbox=IS_Fubuki_jM_hitbox_1.png | |||
|caption=Early Active | |||
|image2=IS_Fubuki_jM_2.png | |||
|hitbox2=IS_Fubuki_jM_hitbox_2.png | |||
|caption2=Mid Active | |||
|image3=IS_Fubuki_jM_3.png | |||
|hitbox3=IS_Fubuki_jM_hitbox_3.png | |||
|caption3=Late Active | |||
|resizeImage=yes | |resizeImage=yes | ||
|name=j.M | |name=j.M | ||
|data= | |data= | ||
| Line 208: | Line 240: | ||
|guard=High | |guard=High | ||
|startup=10 | |startup=10 | ||
|active= | |active=5 | ||
|recovery=Until Landing + | |recovery=Until Landing + 3 | ||
|advHit= | |advHit= | ||
|advBlock= | |advBlock= +2 | ||
|description= | |description= | ||
* Frame advantage on block is based on highest possible standing block from similar-height opponents and can be more advantageous if blocked deeper (it can also be less advantageous if blocked at max height by taller characters) | |||
This is Fubuki's furthest reaching air normal. Its active frames start below her before reaching in front and then above her. The hitbox above her in the late active frames is enormous and hard to contest. A great normal to just throw out safely in neutral, especially while being chased by the opponent from the ground or in the air. | |||
}} | }} | ||
}} | }} | ||
| Line 218: | Line 252: | ||
====== <font style="visibility:hidden" size="0">j.H</font> ====== | ====== <font style="visibility:hidden" size="0">j.H</font> ====== | ||
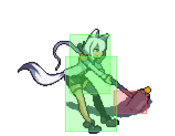
{{MoveData-IS | {{MoveData-IS | ||
|image= | |image=IS_Fubuki_jH_1.png | ||
| | |hitbox=IS_Fubuki_jH_hitbox_1.png | ||
|caption= | |caption=Early Active | ||
|image2=IS_Fubuki_jH_2.png | |||
|hitbox2=IS_Fubuki_jH_hitbox_2.png | |||
|caption2="Sour Hit" Active Until Landing | |||
|name=j.H | |name=j.H | ||
|data= | |data= | ||
{{AttackData-IS | {{AttackData-IS | ||
|damage= | |damage=95→40 | ||
|guard=High | |guard=High | ||
|startup= | |startup=11 | ||
|active=Until Landing | |active=Until Landing | ||
|recovery=Until Landing + | |recovery=Until Landing + 4 | ||
|advHit= | |advHit= | ||
|advBlock=+ | |advBlock=+5 | ||
|description= | |description= | ||
* | * Enters "Sour Hit" state after the first 2 active frames until landing which deals less damage | ||
* Frame advantage on block is based on highest possible standing block from | * Frame advantage on block is based on highest possible standing block from similar-height opponents and can be more advantageous if blocked deeper (it can also be less advantageous if blocked at max height by taller characters) | ||
Active until landing with a crossup hitbox on startup. Leads to an extremely advantageous ground bounce on air hit that is easy to | Active until landing with a crossup hitbox on startup. Leads to an extremely advantageous ground bounce on air hit during the first few active frames that is easy to convert into big damage. This attribute combined with the fact that it is active until landing makes it a very scary move to contest. This move shines its brightest in matchups against characters who do not have a fast or reliable anti-air. | ||
}} | }} | ||
}} | }} | ||
| Line 240: | Line 277: | ||
=== Command Normals === | === Command Normals === | ||
====== <font style="visibility:hidden" size="0">4H</font> ====== | ====== <font style="visibility:hidden" size="0">4H</font> ====== | ||
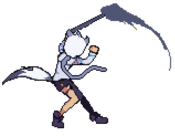
{{MoveData | {{MoveData | ||
|image=IS_Fubuki_4H_1.png | |image=IS_Fubuki_4H_1.png | ||
|resizeImage=yes | |resizeImage=yes | ||
|caption= | |caption=And... | ||
|image2=IS_Fubuki_4H_2.png | |image2=IS_Fubuki_4H_2.png | ||
| | |caption2=Strike! | ||
| | |hitbox=IS_Fubuki_4H_hitbox.png | ||
|name= | |name=Kon'ter | ||
|input={{NotationIcon-IS|4}} '''+''' {{NotationIcon-IS|h}} | |||
|data= | |data= | ||
{{AttackData-IS | {{AttackData-IS | ||
| Line 254: | Line 292: | ||
|startup=20 | |startup=20 | ||
|active=4 | |active=4 | ||
|recovery= | |recovery=22 | ||
|advHit= | |advHit=-9 | ||
|advBlock=- | |advBlock=-12 | ||
|description=Slow command normal with a guardpoint catch midway through startup which makes it a decent frame trap. Has high base damage and gatlings into 2H and 3H, so it is extremely important in combos and pressure. | |invul=(8~19) '''Counter''' | ||
|description=Slow command normal with a guardpoint catch midway through startup when she flashes blue which makes it a decent frame trap. Has high base damage and gatlings into 2H and 3H, so it is extremely important in combos and can be used in pressure. Great for calling out an opponent's Superchat Reversal attempts. | |||
Once the counter activates, the opponent will be stuck in place and 4H's animation will play again from the start, this time with no counter catch frames. The opponent will still be able to cancel out of the move that may have been caught by the counter and hit Fubuki out of the counter catch animation. Loses to multi-hitting moves like her own 5H as the catch animation will not even get to play before getting stuffed. | |||
}} | }} | ||
}} | }} | ||
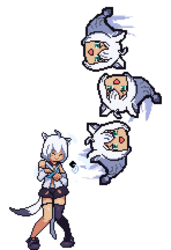
====== <font style="visibility:hidden" size="0">j.2M</font> ====== | ====== <font style="visibility:hidden" size="0">j.2M</font> ====== | ||
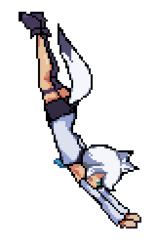
{{MoveData | {{MoveData | ||
|image=IS_Fubuki_j2M.png | |image=IS_Fubuki_j2M.png | ||
|hitbox=IS_Fubuki_j2M_hitbox.png | |||
|resizeImage=yes | |resizeImage=yes | ||
|caption= | |caption= | ||
|name= | |name=Bird Fox | ||
|input='''Air Only''' {{NotationIcon-IS|2}} '''+''' {{NotationIcon-IS|m}} | |||
|data= | |data= | ||
{{AttackData-IS | {{AttackData-IS | ||
|damage= | |damage=20x3 | ||
|guard=High | |guard=High | ||
|startup=10 | |startup=10 | ||
|active= | |active=3(1)2(1)2 | ||
|recovery= Until Landing + 4 | |recovery= Until Landing + 4 | ||
|advHit= | |advHit= | ||
|advBlock= | |advBlock= | ||
|description= | |description= A unique multi-hitting crossup air normal. Has a massive hitbox around Fubuki's upper body that covers more vertical space than any of her other air normals of similar speed in their early active frames. Its multi-hitting attribute makes it quite menacing when used as a meaty jump-in for oki as timings can be varied slightly to change the number of overheads that will occur before Fubuki lands. | ||
}} | }} | ||
}} | }} | ||
== Universal Mechanics == | === Universal Mechanics === | ||
====== <font style="visibility:hidden" size="0">Throw</font> ====== | ====== <font style="visibility:hidden" size="0">Throw</font> ====== | ||
{{MoveData | {{MoveData | ||
|image=IS_Fubuki_LM.png | |image=IS_Fubuki_LM.png | ||
|resizeImage=yes | |resizeImage=yes | ||
|caption=Best friends, okay? | |caption=Best friends, okay? | ||
|name=Throw | |name=Throw | ||
|input= | |input={{NotationIcon-IS|l}} '''+''' {{NotationIcon-IS|m}} '''or''' {{NotationIcon-IS|g}} | ||
|data= | |data= | ||
{{AttackData-IS | {{AttackData-IS | ||
| Line 294: | Line 337: | ||
|startup=7 | |startup=7 | ||
|active=2 | |active=2 | ||
|recovery= | |recovery=31 | ||
|advHit=+36 | |advHit=+36 | ||
|advBlock= | |advBlock= | ||
|description=Leaves Fubuki fairly close and with enough advantage afterward to meaty or jump in even if the opponent quick techs backwards. | |description= | ||
*Total Frames: 39 | |||
Leaves Fubuki fairly close and with enough advantage afterward to meaty or jump in even if the opponent quick techs backwards. | |||
}} | }} | ||
}} | }} | ||
====== <font style="visibility:hidden" size="0">Overhead</font> ====== | ====== <font style="visibility:hidden" size="0">Overhead</font> ====== | ||
{{MoveData | {{MoveData | ||
|image=IS_Fubuki_MH.png | |image=IS_Fubuki_MH.png | ||
|resizeImage=yes | |resizeImage=yes | ||
|caption= | |caption= | ||
|name=Overhead | |name=Overhead | ||
|input= | |input={{NotationIcon-IS|m}} '''+''' {{NotationIcon-IS|h}} | ||
|data= | |data= | ||
{{AttackData-IS | {{AttackData-IS | ||
|damage=60 | |damage=60 | ||
|guard=High | |guard=High | ||
|startup= | |startup=23 | ||
|active=3 | |active=3 | ||
|recovery=19 | |recovery=19 | ||
|advHit=+ | |advHit=+2 | ||
|advBlock= | |advBlock=-3 | ||
|invul= ( | |invul= (6~36) {{Property-IS|grab}} | ||
|description=Universal overhead with invuln against grabs | |description= | ||
*Uniquely has an animation that does not leave the ground until frame 11 which makes it harder to react to | |||
Universal overhead with invuln against grabs after startup. Important for her more advanced meter-generation corner routes as it can be juggled into and out of during combos. | |||
As a result of the high blockstun of Fubuki's {{input|5M}}, this move can be used as a frame trap when cancelled into at close range. If the opponent mashes, Fubuki will be +7 and be able to convert the hit into a combo using {{input|5M}} even midscreen. | |||
}} | }} | ||
}} | }} | ||
== Special Attacks == | ====== <font style="visibility:hidden" size="0">Superchat Reversal</font> ====== | ||
{{MoveData | |||
|image=IS_Fubuki_4H_2.png | |||
|hitbox=IS_Fubuki_SCR_hitbox.png | |||
|caption= | |||
|name=Superchat Reversal | |||
|input=(blocking) {{NotationIcon-IS|6}} '''+''' {{NotationIcon-IS|m}} '''+''' {{NotationIcon-IS|h}} | |||
|data= | |||
{{AttackData-IS | |||
|damage=0 | |||
|guard=Mid | |||
|startup=16 | |||
|active=2 | |||
|recovery=23 | |||
|advHit=0 | |||
|advBlock=-10 | |||
|invul= (1~17) {{Property-IS|full}} | |||
|description= | |||
*Superchat Reversal | |||
}} | |||
}} | |||
=== Special Attacks === | |||
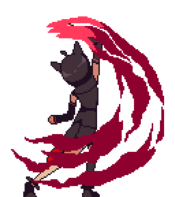
====== <font style="visibility:hidden" size="0">236X</font> ====== | ====== <font style="visibility:hidden" size="0">236X</font> ====== | ||
{{MoveData | {{MoveData | ||
|image=IS_Fubuki_236X_1.png | |image=IS_Fubuki_236X_1.png | ||
|resizeImage=yes | |resizeImage=yes | ||
|caption=L/M | |caption=L/M | ||
|image2=IS_Fubuki_236X_2.png | |image2=IS_Fubuki_236X_2.png | ||
|caption2=SSR | |caption2=SSR | ||
|image3=IS_Fubuki_236X_3.png | |image3=IS_Fubuki_236X_3.png | ||
|caption3=H | |caption3=H | ||
|name=Orunyanke | |name=Orunyanke | ||
|input= | |input={{NotationIcon-IS|236}} '''+''' {{NotationIcon-IS|l}} '''/'''{{NotationIcon-IS|m}} '''/'''{{NotationIcon-IS|h}} | ||
|data= | |data= | ||
{{AttackData-IS | {{AttackData-IS | ||
| Line 341: | Line 411: | ||
|damage=65 | |damage=65 | ||
|guard=Mid | |guard=Mid | ||
|startup= | |startup=17 | ||
|active=Until Offscreen | |active=Until Offscreen | ||
|recovery= | |recovery=29 | ||
|advHit= | |advHit=-3~ | ||
|advBlock=- | |advBlock=-6~ | ||
|description= | |description= | ||
* SSR - | * SSR - ~10% | ||
* Grants 2 superchats on use | |||
* Disappears if Fubuki is hit | |||
* Has a projectile durability of 1x1 | |||
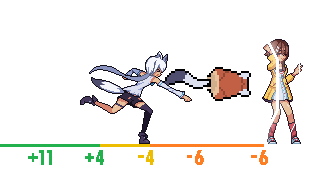
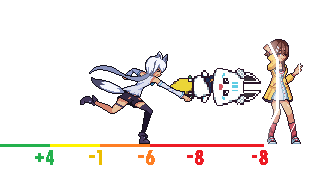
Fubuki's slower projectile. Does not cause Fubuki to be pushed back on block when the opponent's back is to the corner, it instead inherits the pushback from the normal it was cancelled out of. Minus on block at close range, but can be made unpunishable or even plus when done at slightly further distances. Great way to end a pressure string. | |||
As a result of the projectile's slower travel speed, it can become fairly plus at the right distance, as shown in the diagram below. | |||
[[File:IS_Fubuki_236L_diagram_small2.png]] | [[File:IS_Fubuki_236L_diagram_small2.png]] | ||
| Line 359: | Line 434: | ||
|active=Until Offscreen | |active=Until Offscreen | ||
|recovery=31 | |recovery=31 | ||
|advHit=+ | |advHit=+1~ | ||
|advBlock=- | |advBlock=-8~ | ||
|description= | |description= | ||
* SSR - | * SSR - ~10% | ||
* Grants 2 superchats on use | |||
* Disappears if Fubuki is hit | |||
* Has a projectile durability of 1x1 | |||
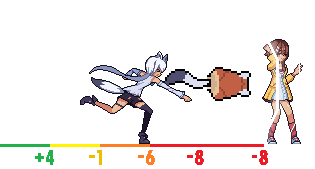
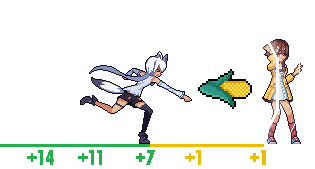
Fubuki's faster projectile. Does not cause Fubuki to be pushed back on block when the opponent's back is to the corner, it instead inherits the pushback from the normal it was cancelled out of. Unsafe on block at close range, but can be made unpunishable or even plus when done at slightly further distances. Great way to end a pressure string. | |||
As a result of the projectile's fast travel speed, its frame data does not change as much from a distance, as shown in the diagram below. In exchange, it can be used to frame trap the opponent even when cancelled into at the tip of normals. | |||
[[File:IS_Fubuki_236M_diagram_small2.png]] | [[File:IS_Fubuki_236M_diagram_small2.png]] | ||
}} | }} | ||
{{AttackData-IS | {{AttackData-IS | ||
|version=SSR | |version=SSR (L) | ||
|damage= | |damage=100 | ||
|guard=Mid | |||
|startup=17 | |||
|active=Until Offscreen | |||
|recovery=29 | |||
|advHit=-3~ | |||
|advBlock=-6~ | |||
|description= | |||
* Grants 2 superchats on use | |||
* Disappears if Fubuki is hit | |||
* Has a projectile durability of 2x1 | |||
Enhanced projectile via luck or 22S that has higher base damage and higher projectile durability despite hitting once. Effectively identical to the regular L version of her projectile. As a result of its higher projectile durability, it will bust through regular projectiles and completely cancel out stronger projectiles that have a projectile durability of 2 (such as her or Korone's 236H). | |||
[[File:IS_Fubuki_236L_SSR_diagram_small2.png]] | |||
}} | |||
{{AttackData-IS | |||
|version=SSR (M) | |||
|damage=100 | |||
|guard=Mid | |guard=Mid | ||
|startup=15 | |startup=15 | ||
|active=Until Offscreen | |active=Until Offscreen | ||
|recovery=31 | |recovery=31 | ||
|advHit=+ | |advHit=+1~ | ||
|advBlock=- | |advBlock=-8~ | ||
|description= | |description= | ||
* | * Grants 2 superchats on use | ||
Enhanced | * Disappears if Fubuki is hit | ||
* Has a projectile durability of 2x1 | |||
Enhanced projectile via luck or 22S that has higher base damage and higher projectile durability despite hitting once. Effectively identical to the regular M version of her projectile. As a result of its higher projectile durability, it will bust through regular projectiles and completely cancel out stronger projectiles that have a projectile durability of 2 (such as her or Korone's 236H). | |||
[[File: | [[File:IS_Fubuki_236M_SSR_diagram_small2.png]] | ||
}} | }} | ||
{{AttackData-IS | {{AttackData-IS | ||
|version=H | |version=H | ||
|damage= | |damage=60x2 | ||
|guard=Mid | |guard=Mid | ||
|startup=13 | |startup=13 | ||
|active=Until Offscreen | |active=Until Offscreen | ||
|recovery=27 | |recovery=27 | ||
|advHit= | |advHit= | ||
|advBlock=+ | |advBlock=+1~ | ||
|description="Kon-cob" Faster startup projectile with 2 hits | |description= | ||
* Costs 1 Star Meter and grants 5 superchats on use | |||
* Does not disappear if Fubuki is hit | |||
* Has a projectile durability of 1x2 | |||
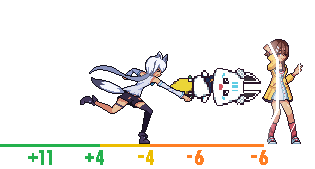
"Kon-cob" Faster startup projectile with 2 hits that leads to a soft knockdown on hit. Useful for extending pressure or even forcing a mixup if done from ranges where its frame advantage on block becomes absurdly plus. | |||
Arguably the best way to use a super chat cancel on block | Arguably the best way to use a super chat cancel on block if you want to further your offense if the opponent doesn't instant block. Take note that 214L and 214M both have 12 frames of blockstun which means that 236H being 13f startup creates a minimum 1f gap between an immediate super chat cancel 236H out of a blocked 214X. Amazing as a frame trap, but the gap being guaranteed means that if the opponent has meter stocked, they can exploit it by doing a reversal. | ||
[[File: | [[File:IS_Fubuki_236H_diagram_small3.png]] | ||
}} | }} | ||
}} | }} | ||
====== <font style="visibility:hidden" size="0">214X</font> ====== | ====== <font style="visibility:hidden" size="0">214X</font> ====== | ||
{{MoveData | {{MoveData | ||
|image=IS_Fubuki_214X.png | |image=IS_Fubuki_214X.png | ||
|hitbox= | |hitbox=IS_Fubuki_214L_hitbox.png | ||
|caption=L | |||
|image2=IS_Fubuki_214X.png | |||
|hitbox2=IS_Fubuki_214M_hitbox.png | |||
|caption2=M | |||
|resizeImage=yes | |resizeImage=yes | ||
|name=Blizzard Swirl | |name=Blizzard Swirl | ||
|input= | |input={{NotationIcon-IS|214}} '''+''' {{NotationIcon-IS|l}} '''/'''{{NotationIcon-IS|m}} '''/'''{{NotationIcon-IS|h}} | ||
|data= | |data= | ||
{{AttackData-IS | {{AttackData-IS | ||
| Line 416: | Line 522: | ||
|recovery=18 | |recovery=18 | ||
|advHit= | |advHit= | ||
|advBlock=- | |advBlock=-9 | ||
|invul= ( | |invul= (6~20) {{Property-IS|projectile}} | ||
|description= | |description= | ||
* SSR - | * SSR - ~10% | ||
* Grants 3 superchats on use | |||
* Projectile invuln during active frames | * Projectile invuln during active frames | ||
Quick low damage tatsu. Use its projectile invuln to slip past projectiles in neutral. Second active hitbox is shorter than the first but reaches further horizontally. 4S uses this version. | |||
Quick low damage tatsu. Use its projectile invuln to slip past projectiles in neutral. | The 2nd hit of the tatsu has a sizeable amount of additional pushback on block which can make punishing this move on block slightly harder for the opponent if you are at a range where the first hit whiffs, especially considering it is only -9. If they expect to be blocking the first hit they may not be ready to press the proper button or dash in order to score a punish. Use with caution, but know that you may be able to get away for free without needing to SCC to be safe depending on relative distance and the matchup (if the opponent has a fast, long-reaching normal/special). | ||
}} | }} | ||
{{AttackData-IS | {{AttackData-IS | ||
| Line 430: | Line 537: | ||
|guard=Mid | |guard=Mid | ||
|startup=10 | |startup=10 | ||
|active= | |active=2(6)2(6)2 | ||
|recovery=20 | |recovery=20 | ||
|advHit= | |advHit= | ||
|advBlock=- | |advBlock=-15 | ||
|invul= ( | |invul= (9~27) {{Property-IS|projectile}} | ||
|description= | |description= | ||
* SSR - | * SSR - ~10% | ||
* Grants 3 superchats on use | |||
* Projectile invuln during active frames | * Projectile invuln during active frames | ||
Slower but higher damaging tatsu. Use its projectile invuln to slip past projectiles in neutral. Second and third active hurtboxes tuck in and are smaller than the first but active hitboxes are identical. | |||
Slower but higher damaging tatsu. Use its projectile invuln to slip past projectiles in neutral. | |||
}} | }} | ||
{{AttackData-IS | {{AttackData-IS | ||
|version=SSR (L) | |version=SSR (L) | ||
|damage= | |damage=55 | ||
|guard=Mid | |guard=Mid | ||
|startup= | |startup=7 | ||
|active=2( | |active=2(9)2 | ||
|recovery= | |recovery=18 | ||
|advHit= | |advHit= | ||
|advBlock=- | |advBlock=-9 | ||
|invul= ( | |invul= (6~20) {{Property-IS|projectile}} | ||
|description= | |description= | ||
* Grants 3 superchats on use | |||
* Projectile invuln during active frames | * Projectile invuln during active frames | ||
Enhanced tatsu via luck or 22S that launches into a wall bounce and allows for easy combo extensions. Same animation as 214L. | |||
Enhanced tatsu via luck or 22S that launches into a wall bounce and allows for easy combo extensions | |||
}} | }} | ||
{{AttackData-IS | {{AttackData-IS | ||
| Line 466: | Line 571: | ||
|recovery=20 | |recovery=20 | ||
|advHit= | |advHit= | ||
|advBlock=- | |advBlock=-15 | ||
|invul= ( | |invul= (9~27) {{Property-IS|projectile}} | ||
|description= | |description= | ||
* Grants 3 superchats on use | |||
* Projectile invuln during active frames | * Projectile invuln during active frames | ||
Enhanced tatsu via luck or 22S that launches into a wall bounce and allows for easy combo extensions. Same animation as 214M. | |||
}} | }} | ||
{{AttackData-IS | {{AttackData-IS | ||
|version=H | |version=H | ||
|damage= | |damage=25x2, 28, 30, 40 | ||
|guard=Mid | |guard=Mid | ||
|startup=10 | |startup=10 | ||
| Line 482: | Line 586: | ||
|recovery=47 | |recovery=47 | ||
|advHit= | |advHit= | ||
|advBlock=- | |advBlock=-61 | ||
|invul= ( | |invul= (9~43) {{Property-IS|projectile}} | ||
|description= | |description= | ||
* Costs 1 Star Meter and grants 5 superchats on use | |||
* Projectile invuln during active frames | * Projectile invuln during active frames | ||
"Rising Blizzard" Tatsu that does, in fact, hit multiple times and ends in a wall bounce at the top of the screen that allows for easy combo extensions. | "Rising Blizzard" Tatsu that does, in fact, hit multiple times and ends in a wall bounce at the top of the screen that allows for easy combo extensions. | ||
| Line 491: | Line 596: | ||
====== <font style="visibility:hidden" size="0">j.214X</font> ====== | ====== <font style="visibility:hidden" size="0">j.214X</font> ====== | ||
{{MoveData | {{MoveData | ||
|image=IS_Fubuki_j214X.png | |image=IS_Fubuki_j214X.png | ||
|hitbox=IS_Fubuki_j214X_hitbox.png | |hitbox=IS_Fubuki_j214X_hitbox.png | ||
| Line 497: | Line 602: | ||
|caption= | |caption= | ||
|name=Aerial Blizzard | |name=Aerial Blizzard | ||
|input= | |input='''Air Only''' {{NotationIcon-IS|s}} | ||
|data= | |data= | ||
{{AttackData-IS | {{AttackData-IS | ||
|version=L/M/H | |version=L/M/H | ||
|damage= | |damage=20, 35 | ||
|guard=Mid | |guard=Mid | ||
|startup=7 | |startup=7 | ||
|active=2(9)2 | |active=2(9)2 | ||
|recovery=Until Landing + | |recovery=Until Landing + 8 | ||
|advHit= | |advHit= | ||
|advBlock=- | |advBlock=-9 | ||
|invul= ( | |invul= (1~9) {{Property-IS|projectile}} | ||
|description= | |description= | ||
* SSR | * SSR - ~10% | ||
* | * Grants 3 superchats on use | ||
* Projectile invuln during startup | |||
* Projectile invuln during | * -21 on hit if only the first part of the tatsu lands | ||
* Frame advantage on block is based on lowest possible startup height (8S) | * Frame advantage on block is based on lowest possible startup height (8S) | ||
Air tatsu that travels at a slight upward angle. Light, Medium, and Heavy versions are all considered the same special and as a result they cannot be SCC'd into each other. Great for ending air combos with a bit of extra corner carry. | |||
Air tatsu that travels at a slight upward angle. Light, Medium, and Heavy versions are all considered the same special | |||
As a result of how quickly it moves forward during its animation and how far the second hit reaches, it can be used at much further ranges than her grounded tatsu to hit the opponent and score a knockdown. It has almost zero pushback on block, so make sure you are on-point with timing a perfect 8S or else you will eat a heavy punish. | |||
}} | }} | ||
{{AttackData-IS | {{AttackData-IS | ||
|version=SSR | |version=SSR | ||
|damage= | |damage=20, 35 | ||
|guard=Mid | |guard=Mid | ||
|startup=7 | |startup=7 | ||
|active=2(9)2 | |active=2(9)2 | ||
|recovery=Until Landing + | |recovery=Until Landing + 8 | ||
|advHit= | |advHit= | ||
|advBlock=- | |advBlock=-9 | ||
|invul= ( | |invul= (1~9) {{Property-IS|projectile}} | ||
|description= | |description= | ||
* Projectile invuln during | * Grants 3 superchats on use | ||
* Projectile invuln during startup | |||
* +9 on hit if only the first part of the tatsu lands | |||
* Frame advantage on block is based on lowest possible startup height (8S) | * Frame advantage on block is based on lowest possible startup height (8S) | ||
Enhanced air tatsu via luck or 22S that also hits twice and causes a wall bounce that allows for easy combo extensions. | Enhanced air tatsu via luck or 22S that also hits twice and causes a wall bounce that allows for easy combo extensions. Must be used to confirm her instant overhead into a combo and make it safe on hit. | ||
}} | }} | ||
}} | }} | ||
====== <font style="visibility:hidden" size="0">22X</font> ====== | ====== <font style="visibility:hidden" size="0">22X</font> ====== | ||
{{MoveData | {{MoveData | ||
|image=IS_Fubuki_22X.png | |image=IS_Fubuki_22X.png | ||
|resizeImage=yes | |resizeImage=yes | ||
|caption= | |caption= | ||
|name=Yukkuri Flip | |name=Yukkuri Flip | ||
|input= | |input={{NotationIcon-IS|2}} {{NotationIcon-IS|2}} '''+''' {{NotationIcon-IS|l}} '''/'''{{NotationIcon-IS|m}} '''/'''{{NotationIcon-IS|h}} | ||
|data= | |data= | ||
{{AttackData-IS | {{AttackData-IS | ||
| Line 551: | Line 657: | ||
|startup=5 | |startup=5 | ||
|active=12 | |active=12 | ||
|recovery= | |recovery=20 + 9L | ||
|advHit= | |advHit= | ||
|advBlock=- | |advBlock=-29 | ||
|invul= ( | |invul= (3~16) {{Property-IS|head}} | ||
|description= | |description= | ||
* SSR - | * SSR - ~10% | ||
* | * Grants 5 superchats on use | ||
Quick and somewhat vertical anti-air. Is not fully invulnerable. 2S uses this version. | * Can be low-profiled | ||
Quick and somewhat vertical anti-air. Is not fully invulnerable, but has very long head invulnerability that starts on frame 1 and a lot of active frames. 2S uses this version. | |||
}} | }} | ||
{{AttackData-IS | {{AttackData-IS | ||
| Line 566: | Line 673: | ||
|startup=7 | |startup=7 | ||
|active=12 | |active=12 | ||
|recovery= | |recovery=20 + 11L | ||
|advHit= | |advHit= | ||
|advBlock=- | |advBlock=-31 | ||
|invul= ( | |invul= (3~18) {{Property-IS|head}} | ||
|description= | |description= | ||
* SSR - 10 | * SSR - ~10% | ||
Slighty slower, but more diagonally-angled anti-air. Is not fully invulnerable. | * Grants 5 superchats on use | ||
* Can be low-profiled | |||
Slighty slower, but more diagonally-angled anti-air. Is not fully invulnerable, but has very long head invulnerability that starts on frame 1 and a lot of active frames. | |||
}} | }} | ||
{{AttackData-IS | {{AttackData-IS | ||
|version=SSR (L) | |version=SSR (L) | ||
|damage= | |damage=125(65, 0, 60) | ||
|guard=Mid, Air Unblockable | |guard=Mid, Air Unblockable | ||
|startup= | |startup=5 | ||
|active=12 | |active=12 | ||
|recovery=28 (Air) | |recovery=28 (Air) | ||
|advHit= | |advHit= | ||
|advBlock=- | |advBlock=-25 | ||
|invul= ( | |invul= (3~16) {{Property-IS|head}} | ||
|description= | |description= | ||
* Grants 5 superchats on use | |||
* Frame advantage on block is based on earliest air recovery | * Frame advantage on block is based on earliest air recovery | ||
Enhanced DP via luck or 22S that launches directly upward and allows for easy combo extensions. Has | Enhanced DP via luck or 22S that launches directly upward and allows for easy combo extensions. Has the same startup as 22L and recovers in the air on block allowing for a falling air normal if the opponent doesn't know they can mash. Same angle as 22L. | ||
}} | }} | ||
{{AttackData-IS | {{AttackData-IS | ||
|version=SSR (M) | |version=SSR (M) | ||
|damage= | |damage=145(85, 0, 60) | ||
|guard=Mid, Air Unblockable | |guard=Mid, Air Unblockable | ||
|startup= | |startup=7 | ||
|active=12 | |active=12 | ||
|recovery=28 (Air) | |recovery=28 (Air) | ||
|advHit= | |advHit= | ||
|advBlock=- | |advBlock=-25 | ||
|invul= ( | |invul= (3~18) {{Property-IS|head}} | ||
|description= | |description= | ||
* Grants 5 superchats on use | |||
* Frame advantage on block is based on earliest air recovery | * Frame advantage on block is based on earliest air recovery | ||
Has generally the same data as 22M. Keep in mind for alternating to not hit combo limit. Same angle as 22M. | |||
}} | }} | ||
{{AttackData-IS | {{AttackData-IS | ||
|version=H | |version=H | ||
|damage= | |damage=50, 0, 35x2 | ||
|guard=Mid, Air Unblockable | |guard=Mid, Air Unblockable | ||
|startup=6 | |startup=6 | ||
|active=12 | |active=12 | ||
|recovery=28 | |recovery=28 | ||
|advHit= | |advHit=KD | ||
|advBlock=-24 | |advBlock=-24 | ||
|invul= (1~ | |invul= (1~7) {{Property-IS|full}} | ||
|description= | |description= | ||
"Shin Yukkuri Flip" True DP with invuln that ends in a | * Costs 1 Star Meter and grants 5 superchats on use | ||
* Cannot be Superchat Cancelled on hit or block | |||
* Can be low-profiled | |||
* Total damage value is based on its use as a starter | |||
"Shin Yukkuri Flip" True DP with invuln that ends in a soft knockdown. Be careful when using as an anti-air as the full invuln runs out midway through active frames unlike the head invuln of 22L and 22M which lasts all the way through active frames. Same angle as 22L. | |||
}} | }} | ||
}} | }} | ||
====== <font style="visibility:hidden" size="0">22S</font> ====== | ====== <font style="visibility:hidden" size="0">22S</font> ====== | ||
{{MoveData | {{MoveData | ||
|image=IS_Fubuki_22S.png | |image=IS_Fubuki_22S.png | ||
|resizeImage=yes | |resizeImage=yes | ||
|caption= | |caption= | ||
|name=Burger Fox | |name=Burger Fox | ||
|input= | |input={{NotationIcon-IS|2}} {{NotationIcon-IS|2}} '''+''' {{NotationIcon-IS|s}} | ||
|data= | |data= | ||
{{AttackData-IS | {{AttackData-IS | ||
| Line 633: | Line 748: | ||
|advHit= | |advHit= | ||
|advBlock= | |advBlock= | ||
|description=*Lasts until | |description= | ||
*Effect | *Costs 1 Star Meter and grants 5 superchats on use | ||
Power-up that guarantees Fubuki's next special | *Lasts until both SSR charges are spent or 25 seconds pass | ||
*Effect cannot be stacked | |||
Power-up that guarantees Fubuki's next 2 special moves are SSRs. If no special is used within 25 seconds of activating Burger Fox, the buff goes away. | |||
By using Simple Inputs, you can avoid spending the stocked SSR while the effect is active. | |||
}} | }} | ||
}} | }} | ||
==Super Star Attack== | ===Super Star Attack=== | ||
{{MoveData | {{MoveData | ||
|name=Kurokami | |name=Kurokami | ||
|input= | |input={{NotationIcon-IS|236}} '''+''' {{NotationIcon-IS|s}} | ||
|image=IS_Fubuki_236S_1.png | |image=IS_Fubuki_236S_1.png | ||
|image2=IS_Fubuki_236S_2.png | |image2=IS_Fubuki_236S_2.png | ||
|hitbox=IS_Fubuki_236S_Projectile_Hitbox.png | |||
|resizeImage=yes | |resizeImage=yes | ||
|caption= | |caption= | ||
|data= | |data= | ||
{{AttackData-IS | {{AttackData-IS | ||
|damage=280(20,26x8,52) | |damage=280(20, 26x8, 52) | ||
|guard= | |guard=Mid | ||
|startup= | |startup=5 | ||
|active= | |active=Until Offscreen | ||
|recovery= | |recovery=88 | ||
|advHit= | |advHit=+4 | ||
|advBlock=- | |advBlock=-48 | ||
|invul= {{Property-IS|full}} | |invul= (1~6) {{Property-IS|full}} | ||
|description= | |description= | ||
*Minimum Damage: | * Minimum Damage: 118 | ||
Fubuki sends out a large projectile that leads to a multi-hitting cinematic super on contact, regardless of distance. | * Costs 2 Star Meter and grants 3 superchats on use | ||
* Total damage value is based on its use as a starter | |||
* Has a projectile durability of 6x1 | |||
Fubuki sends out a large projectile that leads to a multi-hitting cinematic super on contact, regardless of distance. The projectile will bust through most other strong or multi-hit projectiles easily. | |||
If cancelled out of a juggled 236H, the 2nd hit of the multi-hit projectile will inherit the 0.4x minimum scaling that the super has and tack on a decent amount of additional minimum damage. | |||
* Combined Minimum Damage: 147 | |||
* | |||
}} | }} | ||
}} | }} | ||
==Colors== | ==Colors== | ||
| Line 838: | Line 798: | ||
{{ColorGallery/Color|5| text= Cosplay 5<hr>{{Small|Aragami Oga (Holostars)}}}} | {{ColorGallery/Color|5| text= Cosplay 5<hr>{{Small|Aragami Oga (Holostars)}}}} | ||
{{ColorGallery/Color|7| text= Cosplay 6<hr>{{Small|Ky Kiske (Guilty Gear)}}}} | {{ColorGallery/Color|7| text= Cosplay 6<hr>{{Small|Ky Kiske (Guilty Gear)}}}} | ||
{{ColorGallery/Color|8| text= Cosplay 7<hr>{{Small|Sakura Miko (Hololive)}}}} | |||
{{ColorGallery/Color|9| text= Cosplay 8<hr>{{Small|Ayame Nakiri (Hololive)}}}} | |||
{{ColorGallery/Color|10| text= Cosplay 9<hr>{{Small|Inugami Korone (Hololive)}}}} | |||
{{ColorGallery/Color|11| text= Cosplay 10<hr>{{Small|Nekomata Okayu (Hololive)}}}} | |||
}} | }} | ||
==Navigation== | ==Navigation== | ||
{{CharacterSubnav-IS}} | |||
{{Navbox-IS}} | {{Navbox-IS}} | ||
[[Category:Fubuki Shirakami]] | [[Category:Fubuki Shirakami]] | ||
[[Category:Idol Showdown]] | [[Category:Idol Showdown]] | ||
Latest revision as of 16:50, 12 June 2024
Versatile Fox Spirit - Adaptable Gacha Mastery
Difficulty - ★☆☆☆☆☆
Introduction
Fubuki is a solid all-rounder who has no problem fighting at any distance. Her opportunistic playstyle rewards players who can take advantage of her unique SSR passive.
Unique Passive: Fubuki's special moves have a small chance to be blessed with SSR luck! SSR moves have properties that make them more powerful than their standard counterparts. Fubuki's "Burger Fox" special grants Fubuki guaranteed SSR luck on her next two special moves. If luck isn't on her side, don't fret, the 10th use of the same special move will be a guaranteed SSR as well! [1]
Fubuki Shirakami is a well-rounded "shoto" character that has solid tools for every situation with a sprinkle of RNG. |
| Pick if you like | Avoid if you dislike |
|---|---|
|
|
Recommended Collabs
Note: As this section of the page was written shortly after the game was released, its only purpose is to help guide new players towards assists that are generally considered useful for the character, and should be revised by an experienced player as the game develops more. Don't be afraid to pick and try something else!
 Miko - Pressure and Patrol + Emergency Lockdown
- Her 5+Col patrols around you in neutral and persists even when you are getting hit, so on top of it being decent for extending your own pressure, it can also be used defensively to make it harder for the opponent to reliably apply their pressure or finish combos.
- Miko's 6+Col lava bucket keeps the opponent stuck in blockstun for an eternity. This assist allows Fubuki to safely continue pressure and enforce mixups after a knockdown or after making the opponent block normally punishable moves.
 Kiara - Projectile Reflector + Charging Star Jumpscare
- Kiara greatly helps Fubuki during neutral against projectile zoners, thanks to her 5+Col reflector assist.
- Fubuki can also use Kiara's 6+Col in neutral, on defense, to extend combos for massive damage, or even to confirm universal or instant overheads.
 Subaru - Versatile Call for Backup + Full Screen Sausage
- Subaru's 5+Col can be used in a variety of helpful ways to enforce will in neutral, get opponents off of you on defense, extend pressure or combos, and even set up or confirm mixups.
- While the startup of Subaru's 6+Col is fairly slow and not too useful for extending combos, it can make the opponent more inclined to jump thanks to its high blockstun which can create openings in neutral to take space or in pressure to snipe a jumpout with any of Fubuki's great anti-airs.
Additional notes on Assist Synergy and Assists not featured above can be found here.
Moves
Standing Normals
5L
5L Kon kon! Kon kon!
|
|
|---|---|
Toggle Hitboxes Toggle Hitboxes
|
5M
5M
|
|
|---|---|
Toggle Hitboxes Toggle Hitboxes
|
5H
5H
|
|
|---|---|
Toggle Hitboxes Toggle Hitboxes
|
Crouching Normals
2L
2L
|
|
|---|---|
Toggle Hitboxes Toggle Hitboxes
|
2M
2M
|
|
|---|---|
Toggle Hitboxes Toggle Hitboxes
|
2H
2H Electric Wind Fox Fist Electric Wind Fox Fist
|
|
|---|---|
Toggle Hitboxes Toggle Hitboxes
|
3H
3H
|
|
|---|---|
Toggle Hitboxes Toggle Hitboxes
|
Jumping Normals
j.L
j.L
|
|
|---|---|
Toggle Hitboxes Toggle Hitboxes
|
j.M
j.M Early Active Early Active Mid Active Mid Active Late Active Late Active
|
|
|---|---|
Toggle Hitboxes Toggle Hitboxes
|
j.H
j.H Early Active Early Active "Sour Hit" Active Until Landing "Sour Hit" Active Until Landing
|
|
|---|---|
Toggle Hitboxes Toggle Hitboxes
|
Command Normals
4H
And... And... Strike! Strike!
|
|
|---|---|
Toggle Hitboxes Toggle Hitboxes
|
j.2M
Toggle Hitboxes Toggle Hitboxes
|
|---|
Universal Mechanics
Throw
Best friends, okay? Best friends, okay?
|
|---|
Overhead
Superchat Reversal
Toggle Hitboxes Toggle Hitboxes
|
|---|
Special Attacks
236X
L/M L/M SSR SSR H H
|
|---|
214X
L L M M
|
|
|---|---|
Toggle Hitboxes Toggle Hitboxes
|
j.214X
Toggle Hitboxes Toggle Hitboxes
|
|---|
22X
22S
Super Star Attack
Toggle Hitboxes Toggle Hitboxes
|
|---|
Colors
Ookami Mio (Hololive)
Shiranui Flare (Hololive)
Tsunomaki Watame (Hololive)
First design
Aragami Oga (Holostars)
Ky Kiske (Guilty Gear)
Sakura Miko (Hololive)
Ayame Nakiri (Hololive)
Inugami Korone (Hololive)
Nekomata Okayu (Hololive)


