Under Night In-Birth/UNI2/Hyde: Difference between revisions
Crakestraw (talk | contribs) m (→5C) |
Crakestraw (talk | contribs) m (→Throw) |
||
| (25 intermediate revisions by the same user not shown) | |||
| Line 52: | Line 52: | ||
*'''Midscreen Oki:''' Hyde cannot consistently get good oki at midscreen. Most of his routing leaves the opponent far enough that he has to dash after them to keep the pressure on or try a risky option to meaty with instead (e.g. 66C). Couple this with the constant ability to back and sometimes forward tech off his combos and it can be difficult to pin down the opponent. | *'''Midscreen Oki:''' Hyde cannot consistently get good oki at midscreen. Most of his routing leaves the opponent far enough that he has to dash after them to keep the pressure on or try a risky option to meaty with instead (e.g. 66C). Couple this with the constant ability to back and sometimes forward tech off his combos and it can be difficult to pin down the opponent. | ||
*'''Limited Rebeats:''' 2A is Hyde's only good whiff rebeat, but also a great low for pressure; if it's already been used in a string, Hyde is forced to use risky or metered options to deal with shield or reset pressure. | *'''Limited Rebeats:''' 2A is Hyde's only good whiff rebeat, but also a great low for pressure; if it's already been used in a string, Hyde is forced to use risky or metered options to deal with shield or reset pressure. | ||
*'''GRD Control:''' Hyde has to regularly decide between using his Force Functions to augment his neutral and pressure and focusing on the cycle. They're moves that help him immensely | *'''GRD Control:''' Hyde has to regularly decide between using his Force Functions to augment his neutral and pressure and focusing on the cycle. They're moves that help him immensely, but the GRD cost adds up fast. Add that many of his moves can be safely shielded and Hyde can quickly fall behind in GRD if he's not careful. | ||
}} | }} | ||
| Line 101: | Line 101: | ||
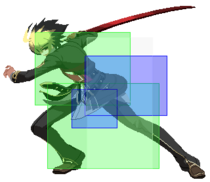
=====5C===== | =====5C===== | ||
{{MoveData-UNI2 | versioned=input |input=5C, 5[C] | {{MoveData-UNI2 | versioned=input |input=5C, 5[C] | ||
| 5C=Hyde steps forward with a large swing of his sword. One of Hyde's best normals due to its reach and damage. Also has a small stagger window, | | 5C=Hyde steps forward with a large swing of his sword. One of Hyde's best normals due to its reach and damage. Also has a small stagger window, but is limited to chaining into a delayed 2C or special. | ||
*Becomes -1 on rebeating to 2A. | *Becomes -1 on rebeating to 2A. | ||
| 5[C]=The charged version moves Hyde forward farther and has better damage and frame advantage, making an already strong normal even better. | | 5[C]=The charged version moves Hyde forward farther and has better damage and frame advantage, making an already strong normal even better. | ||
| Line 122: | Line 122: | ||
{{MoveData-UNI2 | {{MoveData-UNI2 | ||
|input=2B | |input=2B | ||
|description=A crouching horizontal slash. Though not a low, Hyde's 2B is an excellent move due to its frame advantage and push back on block, making it a consistently safe move to end blockstrings on. | |description=A crouching horizontal slash. Though not a low, Hyde's 2B is an excellent move due to its frame advantage and push back on block, making it a consistently safe move to end blockstrings on and an excellent tool for pressure resets. Its stagger window is small and thus tricky to use, but is very strong once you get the hang of it. | ||
}} | }} | ||
| Line 131: | Line 129: | ||
|input=2C | |input=2C | ||
|description=Hyde moves forward slightly as he spins his leg in a sweeping motion for a low hitting kick. Strong combo starter and a common part of combos. | |description=Hyde moves forward slightly as he spins his leg in a sweeping motion for a low hitting kick. Strong combo starter and a common part of combos. | ||
Like 2B, it's stagger window is on the smaller side. But because he moves forward slightly, it's useful as a means of gaining a bit of ground if you've been pushed out during a blockstring. Particularly useful after 2A due the natural gap that chaining A normals into C normals creates, doubly so if 2C is delayed slightly. | |||
*Does not deal chip damage. | *Does not deal chip damage. | ||
}} | }} | ||
| Line 141: | Line 138: | ||
{{MoveData-UNI2 | {{MoveData-UNI2 | ||
|input=jA | |input=jA | ||
|description=Aerial sword poke. Hyde thrusts his sword forward at a downward angle and holds it there. Very fast and active move. | |description=Aerial sword poke. Hyde thrusts his sword forward at a downward angle and holds it there. Very fast and active move. Primarily used in combos, but can be used for jump-ins and as an air-to-air sometimes due to its speed. | ||
*Rising j.A is not an overhead, though it becomes one off assault. | *Rising j.A is not an overhead, though it becomes one off assault. | ||
*After the first hit is blocked, the second hit can be blocked crouching. | *After the first hit is blocked, the second hit can be blocked crouching. | ||
| Line 151: | Line 147: | ||
|input=jB | |input=jB | ||
|description=A downward aerial sword slash. Hyde jumps and swings directly below him. Hyde's go-to move off assaults at point-blank range due to its speed. | |description=A downward aerial sword slash. Hyde jumps and swings directly below him. Hyde's go-to move off assaults at point-blank range due to its speed. | ||
*Can only convert into a combo off assault if the opponent is crouching (doesn't apply to counter hits | *Can only convert into a combo off assault if the opponent is crouching (doesn't apply to counter hits). | ||
}} | }} | ||
=====j.C===== | =====j.C===== | ||
{{MoveData-UNI2 | versioned=input | input=jC, j[C] | {{MoveData-UNI2 | versioned=input | input=jC, j[C] | ||
| jC=Aerial sword slash. Hyde swings his sword at a diagonal angle. | | jC=Aerial sword slash. Hyde swings his sword at a diagonal angle. Has better reach than j.B, but is primarily used as combo filler as it prorates harder than other air normals. | ||
|j[C]=The charged version of j.C. Stronger, has a bigger hitbox, and causes a knockdown on an aerial hit. Unlike most of his air normals, rising j.[C] can be an overhead. Useful for catching the opponent off-guard sometimes. (Whiffs against Linne, Merkava, and Vatista, however.) | |||
|j[C]=The charged version of j.C. Stronger, has a bigger hitbox, and causes a knockdown on an aerial hit. | |||
*If delayed off an assault, it'll whiff just as the charge flash occurs, which can be used to set up lows or throws if the opponent isn't ready for it. | *If delayed off an assault, it'll whiff just as the charge flash occurs, which can be used to set up lows or throws if the opponent isn't ready for it. | ||
*Primarily used in combos like the uncharged version. | *Primarily used in combos like the uncharged version. | ||
| Line 170: | Line 163: | ||
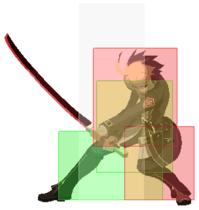
{{MoveData-UNI2 | {{MoveData-UNI2 | ||
|input=6B | |input=6B | ||
|description=Hyde swings his sword twice with two far-reaching strikes that launch the opponent on hit. Very strong move due to its speed and reach | |description=Hyde swings his sword twice with two far-reaching strikes that launch the opponent on hit. Very strong move due to its speed and reach and one of his most common combo starters. A lot of Hyde's best midscreen combos start with 6B, though it's equally strong in pressure. | ||
The first hit can be canceled into normals on block and hit, while the second can only do that on hit. The second hit also has a large stagger window for special moves and his Force Functions, which strengthens his pressure considerably. | |||
*The second hit can also be whiff canceled into any special, but only if the first hit is blocked first. | |||
}} | }} | ||
| Line 180: | Line 171: | ||
{{MoveData-UNI2 | {{MoveData-UNI2 | ||
|input=3B | |input=3B | ||
|description=Hyde stabs his sword forward at a low angle. Fast move and has the largest stagger window of any of his normals. | |description=Hyde stabs his sword forward at a low angle. Fast move and has the largest stagger window of any of his normals. Primarily used for on the ground pickups in combos, though is useful as a poke to catch opponent's retreating due to its reach as a low. | ||
}} | }} | ||
| Line 188: | Line 177: | ||
{{MoveData-UNI2 | {{MoveData-UNI2 | ||
|input=3C | |input=3C | ||
|description=Hyde's anti-air. Hyde moves slightly forward and does a large vertical slash. | |description=Hyde's anti-air. Hyde moves slightly forward and does a large vertical slash. Its massive vertical hitbox can hit almost anything above him, with the exception of Vatista at max flight height. | ||
*Very unsafe on block. Rebeat or special cancel immediately to avoid being punished. | |||
*Very unsafe on block | |||
}} | }} | ||
| Line 196: | Line 184: | ||
{{MoveData-UNI2 | {{MoveData-UNI2 | ||
|input=j6C | |input=j6C | ||
|description=Aerial horizontal sword slash. Hyde swings his sword in front of him in a wide arc with good range. | |description=Aerial horizontal sword slash. Hyde swings his sword in front of him in a wide arc with good range. Causes a wallbounce on aerial hits, which can lead into a combo on counter hit. Useful for corner carry in combos, otherwise. Great for assaults or air-to-airs from afar due to its reach. | ||
*Has to be delayed slightly off assult to hit crouching opponents. | |||
}} | }} | ||
| Line 204: | Line 191: | ||
{{MoveData-UNI2 | {{MoveData-UNI2 | ||
|input=j2C | |input=j2C | ||
|description=Hyde swings his sword around him, catching anything below him. Launches the opponent on hit for an easy combo. | |description=Hyde swings his sword around him, catching anything below him. Launches the opponent on hit for an easy combo. One of Hyde's best air normals in terms of damage. Consistently deals the highest damage off assault, especially on counter hit. | ||
*After the first hit is blocked, the second can be blocked crouching. | *After the first hit is blocked, the second can be blocked crouching. | ||
}} | }} | ||
| Line 214: | Line 200: | ||
{{MoveData-UNI2 | {{MoveData-UNI2 | ||
|input=66B | |input=66B | ||
|description=Hyde charges forward with a fast attack with his knee. Very safe on block and a great combo starter. | |description=Hyde charges forward with a fast attack with his knee. Very safe on block and a great combo starter. Causes the opponent to tumble on hit, making it easy to convert into a combo. | ||
At -2, 66B effectively forces an RPS situation that's in Hyde's favor. Can do delayed special cancels to frame trap (236A and 214A, for instance), mash 2A, or go for a throw. | |||
*Can be either even or +1 on block if spaced correctly. Very, very difficult to do, though. | |||
}} | }} | ||
| Line 223: | Line 208: | ||
{{MoveData-UNI2 | {{MoveData-UNI2 | ||
|input=66C | |input=66C | ||
|description=Hyde stops his dash with a large horizontal slash. Useful both as part of your approach and for starting pressure. | |description=Hyde stops his dash with a large horizontal slash. Useful both as part of your approach and for starting pressure. Causes the opponent to crumple on hit, leading to high damaging combos. Also has a small stagger window for special cancels, which is useful in making this move more threatening on block. | ||
*Can be safe if the move is blocked around max-range as it leaves him at a range that's tough to punish. | |||
}} | }} | ||
| Line 236: | Line 219: | ||
{{MoveData-UNI2 | versioned=input | title=Strict Daze | subtitle=峭刻ノ残滓<br>(ストリクトデイズ) | input=B+C, B+C (Vorpal), [B]+[C], [B]+[C] (Vorpal) | {{MoveData-UNI2 | versioned=input | title=Strict Daze | subtitle=峭刻ノ残滓<br>(ストリクトデイズ) | input=B+C, B+C (Vorpal), [B]+[C], [B]+[C] (Vorpal) | ||
| B+C (Vorpal)=A large forward swing of Hyde's sword. Good range, a large stagger window, and an excellent combo starter make it a very useful move all around. | | B+C (Vorpal)=A large forward swing of Hyde's sword. Good range, a large stagger window, and an excellent combo starter make it a very useful move all around. | ||
The long startup makes this move an easy choice to create frame traps off most any normal. The stagger window on special cancels is also very useful to catch the opponent mashing, allowing for strings like 66C > delay B+C > delay 236A or 22A. Can be special canceled on hit and block. While Vorpal is active it becomes less minus on block. | |||
May require spending meter or Chain Shift to convert hits at midscreen. Counter hits, however, allow for meterless conversions with 236A. | |||
* | *This move can destroy projectiles if timed correctly and becomes special and EX cancelable on doing so. | ||
| [B]+[C] (Vorpal)=The charged version has longer startup, does more damage, and becomes an overhead. Cannot be normal nor special canceled (with the exception of destroying projectiles where it becomes special cancelable). | |||
| [B]+[C] (Vorpal)=The charged version has longer startup, does more damage, and becomes an overhead. Cannot be normal nor special canceled. | The range of the attack increases significantly when charged, making it especially powerful in the corner where you can link into normals for a full combo. If you have 100 meter and Vorpal, you can otherwise CVO cancel it to convert into a combo almost anywhere. Have to be fast, though; any delay and the opponent will recover from the wall bounce before Hyde can land another hit. | ||
*Can be partially charged to create varied frame traps. Harder use that way than 5C is. | |||
}} | }} | ||
=====2B+C===== | =====2B+C===== | ||
{{MoveData-UNI2 | versioned=input | title=Blaring Outrage |input=2B+C, 2[B]+[C] | {{MoveData-UNI2 | versioned=input | title=Blaring Outrage |input=2B+C, 2[B]+[C] | ||
| 2B+C=Hyde swings his sword twice to create a large, X-shaped projectile that destroys most anything it comes into contact with and travels half-way across the screen. Very strong zoning tool. | | 2B+C=Hyde swings his sword twice to create a large, X-shaped projectile that destroys most anything it comes into contact with and travels half-way across the screen. Very strong zoning tool. Both versions also have a small stagger window for special cancels. Can also be made safe easily if spaced correctly, making the threat of a delayed special stronger. | ||
*The initial sword slash is able to destroy projectiles if timed correctly. | *The initial sword slash is able to destroy projectiles if timed correctly. | ||
*Can be special canceled whenever the projectile makes contact with the opponent both on block and hit. | *Can be special canceled whenever the projectile makes contact with the opponent both on block and hit. | ||
| 2[B]+[C]=The charged version delays the launch of the projectile. It also gains an extra hit and travels fullscreen. Being -2 at point-blank makes it good for creating RPS situations like 66B can. The space between it being plus and minus is small at close distances, which can help keep pressure ambiguous, doubly so if you swap between the charged and uncharged versions. | |||
| 2[B]+[C]=The charged version delays the launch of the projectile. It also gains an extra hit and travels fullscreen | Beats most non-super projectiles while still advancing forward, which makes it very good for forcing your way through neutral in some matchups. Particularly potent when paired with Chain Shift, since it lets you run behind it as a very quick and very high-priority approach projectile. | ||
*The projectile's hitbox is bigger on the charged version. | *The projectile's hitbox is bigger on the charged version. | ||
}} | }} | ||
| Line 263: | Line 241: | ||
{{MoveData-UNI2 | {{MoveData-UNI2 | ||
|input=A+D | |input=A+D | ||
|description=Hyde grabs and kicks the opponent away. Allows for a full combo when used in the corner. | |description=Hyde grabs and kicks the opponent away. Allows for a full combo when used in the corner. Being able to combo off his throw is a good part of what makes his strike/throw game scary. While throw combos don't do a whole lot of damage on their own, they add up fast and can really hurt if Hyde has meter to spare. | ||
*If Hyde has Vorpal and at least 100 meter, he can cancel the throw with CVO to get a combo at midscreen. | |||
*If Hyde has Vorpal and at least 100 meter, he can cancel the throw with CVO to get a combo at midscreen | |||
}} | }} | ||
| Line 332: | Line 309: | ||
|input=236X~236C/646C | |input=236X~236C/646C | ||
|command=236X~236C/646C | |command=236X~236C/646C | ||
|description=Full screen detonation of Black Orbiter, commonly referred to as "laser." A powerful but situational tool due to the reads required to make the most of it. | |description=Full screen detonation of Black Orbiter, commonly referred to as "laser." Wallbounces the opponent approximately half-screen toward Hyde after hitting the wall. A powerful but situational tool due to the reads required to make the most of it. | ||
At +9 on block, it has some use in pressure. If used at ranges where 66C can hit, you can cancel into it as soon as possible and hit the opponent if they try to mash. The opponent can safely jump, however, if this trick is used around the maximum range of 66C. | |||
*Allows for easy combos off fireball hits anywhere and a very strong combo starter if the explosion is the first hit. | |||
*The center of the explosion can be used to hit opponents in the air if timed correctly. | *The center of the explosion can be used to hit opponents in the air if timed correctly. | ||
}} | }} | ||
| Line 345: | Line 322: | ||
|input=623A, 623B, 623C | |input=623A, 623B, 623C | ||
|623A=The A version has uses as an anti-air due to it being a five-frame move. 3C is usually the better option since its less risky. | |623A=The A version has uses as an anti-air due to it being a five-frame move. 3C is usually the better option since its less risky. | ||
On hit, you can cancel into j.236C for a full combo if 623A is used as a starter. Can otherwise be used as a combo ender. Particularly useful for Cross Cast Veil Off combo enders. | |||
*J.236C can also be used on block. Can be delayed slightly to create a frame trap. | |||
*The first hit can also be EX canceled on hit or block. You can also use Chain Shift to cancel on whiff. | *The first hit can also be EX canceled on hit or block. You can also use Chain Shift to cancel on whiff. | ||
|623B=The B version is Hyde's main reversal. Has full invul, reaches higher, and does more damage than the A version | |623B=The B version is Hyde's main reversal. Has full invul, reaches higher, and does more damage than the A version. | ||
*Good anti-air as well and can also be used as decent combo starter using Chain Shift. | *Good anti-air as well and can also be used as decent combo starter using Chain Shift. | ||
|623C=The EX version is similar to the B version only it sends the opponent flying rather than dropping them in front of Hyde. Useful for when you need a bit more breathing room. | |623C=The EX version is similar to the B version only it sends the opponent flying rather than dropping them in front of Hyde. Useful for when you need a bit more breathing room.<br><br>Particularly strong as a combo ender as it deals some of the highest damage of Hyde's EX moves when used in combos. The opponent can forward tech there, however. Best saved to secure a round. | ||
}} | }} | ||
| Line 363: | Line 338: | ||
|command=214X | |command=214X | ||
|description= | |description= | ||
|214A=The A version has Hyde leap slightly into the air. | |214A=The A version has Hyde leap slightly into the air. Primarily used for easier pickups in combos since the delays are smaller and the A version always keeps the opponent close to Hyde on landing. This makes 3C links easier since you don't have to microdash first. | ||
*Becomes airborne quickly, making it useful as a throw punish and a situational low-crush. | *Becomes airborne quickly, making it useful as a throw punish and a situational low-crush. | ||
*Can also be used a combo ender, but requires a slight delay on the first hit to achieve a more consistent knockdown on some routes. | *Can also be used a combo ender, but requires a slight delay on the first hit to achieve a more consistent knockdown on some routes. | ||
|214B=The B version has Hyde leap higher into the air. Useful for chasing an opponent down if they're if they're up-backing a lot. | |214B=The B version has Hyde leap higher into the air. Useful for chasing an opponent down if they're if they're up-backing a lot. This version sees the most use in combos since you get access to stronger combo routes, has slightly better corner carry, and a consistent knockdown when used as a combo ender. | ||
|214X~4X=Second hit of Vacant Shift. Delaying this and the final hit are important to many of Hyde's combos. | |||
|214X~4X=Second hit of Vacant Shift. Delaying this and the final hit are important to many of Hyde's combos. | *Can be +1 on block if delayed enough. Easier to do off 214A. | ||
*Can be +1 on block if delayed enough. | *Delayed rekkas have use in pressure, but it can leave yourself open to reversals. | ||
*Delayed rekkas have use in pressure, but it can leave yourself open to reversals | |||
|214X~4X~4X=Final hit of Vacant Shift. Allows for pickups if delayed properly. | |214X~4X~4X=Final hit of Vacant Shift. Allows for pickups if delayed properly. | ||
*The third hit always has a gap between it and the second hit even if you aren't delaying them. | *The third hit always has a gap between it and the second hit even if you aren't delaying them. | ||
|214C=The EX version of Hyde's rekkas require no additional inputs. Primarily used as a combo ender. | |214C=The EX version of Hyde's rekkas require no additional inputs. Primarily used as a combo ender. If it connects, Hyde goes straight into a canned animation. If it's blocked, the opponent is instead knocked back, which can leave Hyde safe if spaced properly.<br><br>As an advancing and airborne five-frame move, it has some -- ''but very limited'' -- use as a quick counter in some situations. Has no invul, though, so it's a high risk maneuver. | ||
}} | }} | ||
| Line 387: | Line 357: | ||
|input=22A, 22B, 22C | |input=22A, 22B, 22C | ||
|22A=The A version erupts a little ways past Hyde and has a fast startup. It's a great midscreen poke and a decent round start option. | |22A=The A version erupts a little ways past Hyde and has a fast startup. It's a great midscreen poke and a decent round start option. | ||
*The sword always hits low on all versions, making the move useful at close-ranges to potentially catch the opponent off-guard. Particularly potent when delayed after using | *The sword always hits low on all versions, making the move useful at close-ranges to potentially catch the opponent off-guard. Particularly potent when delayed after using B+C. | ||
|22B=The B version erupts much farther from Hyde, but also has much slower startup. The slow startup makes it perfect for frame traps, however, especially in the corner where it becomes one of Hyde's best starters. | |22B=The B version erupts much farther from Hyde, but also has much slower startup. The slow startup makes it perfect for frame traps, however, especially in the corner where it becomes one of Hyde's best starters. Can also be used midscreen if spaced correctly. If the sword connects, the flames erupt slightly past the tip of the sword instead, allowing you to convert into a combo with 66C. | ||
*If the flames hit, the move is always +1. In the corner, this is a common reset point for pressure. | |||
*If the flames hit, the move is always +1. In the corner | |22C=The EX version spawns a wave of energy to erupt instead of a single burst, constantly pulling the opponent along with it. On hit, can be useful for easy corner carry. | ||
|22C=The EX version spawns a wave of energy to erupt instead of a single burst, constantly pulling the opponent along with it. On hit, can be useful for easy corner carry. | Like 236C, 22C is a good move for pressure extensions. It's at its strongest when the opponent is in or close to the corner as the flames will bounce off the wall and keep going, thus keeping the opponent locked down for longer. Also useful for building up chip damage while the opponent is GRD broken since they can't shield to negate it. | ||
*Can sometimes help disguise an assault or overhead. Not a reliable tactic, but something worth trying occasionally just to see whether the opponent can react. | *Can sometimes help disguise an assault or overhead. Not a reliable tactic, but something worth trying occasionally just to see whether the opponent can react. | ||
}} | }} | ||
| Line 402: | Line 371: | ||
|overview=Hyde swings his sword straight down and summons a dark sphere. Primarily used to bait and punish throw attempts. | |overview=Hyde swings his sword straight down and summons a dark sphere. Primarily used to bait and punish throw attempts. | ||
|input=j236A, j236B, j236C | |input=j236A, j236B, j236C | ||
|j236A=The A version moves Hyde back a short distance away. The plus frames give you ample time to dash back in or go straight into 5B or 5C without creating a gap. | |j236A=The A version moves Hyde back a short distance away. The plus frames give you ample time to dash back in or go straight into 5B or 5C without creating a gap. Both the A and B versions have a gap between the initial sword strike and the projectile spawning, however, which leaves Hyde open if the opponent is quick. | ||
|j236B=The B version moves Hyde forward instead, allowing for side-swaps when tiger kneed against a crouching opponent. | |j236B=The B version moves Hyde forward instead, allowing for side-swaps when tiger kneed against a crouching opponent. | ||
*A forward jump assault into j.236B can be used to evade some reversals in the corner (Londrekia's B+C, for example). | *A forward jump assault into j.236B can be used to evade some reversals in the corner (Londrekia's B+C, for example). | ||
| Line 416: | Line 384: | ||
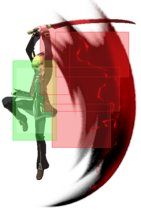
|input=236B+C | |input=236B+C | ||
|command= | |command= | ||
|description=A horizontal reversal. Hyde dashes forward with his sword then leaps into the air with an uppercut and ends with a knockdown kick. | |description=A horizontal reversal. Hyde dashes forward with his sword then leaps into the air with an uppercut and ends with a knockdown kick. Extremely useful for bypassing zoning or countering the opponent's pressure generally. | ||
Depending on your position and the move your attempting to counter, the travel time can sometimes allow the opponent to recover before Veil Bringer makes contact, so be careful. | |||
*Invulnerability runs out after the initial dash, so Hyde can be clipped by very active moves now. | |||
*Has use as both as a combo ender and occasionally as a combo starter if you CS the second to last hit. | *Has use as both as a combo ender and occasionally as a combo starter if you CS the second to last hit. | ||
}} | }} | ||
| Line 428: | Line 395: | ||
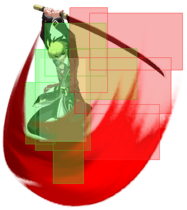
{{MoveData-UNI2 | {{MoveData-UNI2 | ||
|input=41236D | |input=41236D | ||
|description=Hyde stabs the ground and is surrounded by a geyser of red energy. | |description=Hyde stabs the ground and is surrounded by a geyser of red energy. Primarily a combo ender due to the high cost, but also has use as a reversal and anti-air due to being able to combo off it naturally for an easy 4K damage combo. | ||
}} | }} | ||
Latest revision as of 14:16, 11 June 2024

| “ |
He wakes up -- In order to free the girl from the chains of eternity that seal her fate. The |
” |
Story
Hyde is our high schooler protagonist. The power of EXS awakened within Hyde after an encounter with a mysterious young girl named Linne. After a series of gruesome battles, Hyde defeated Paradox--considered to be the strongest wielder of all.
Afterwards, however, Hyde was defeated by an immensely powerful Re-Birth called Kuon the Aeon. Kuon boasted of plans that involved destroying the world as a means to achieve his goal. Hearing this, Linne disappeared. Hyde sets out on his own to confront Kuon and save the world...
| “ |
At least this time I'm not being left behind. |
” |
Gameplay
Being the protagonist of the game, Hyde has the usual "shoto" tools associated with the role (fireball, meterless reversal, etc). He performs well at all ranges with tools like Black Orbiter to cover his approach and Shadow Scare to counter zoners or other long range attacks, while moves like Vacant Shift help rack up damage and provide great corner carry to quickly put his opponent in the corner where Hyde truly excels with his strong rushdown game. His fast normals and varied ways to make himself safe or plus on block through rebeats or spending meter make him difficult to contest. On top of all that, his sword normals do chip damage, meaning that even if the opponent blocks all of your strings, damage can still rack up quickly.
On the flip side, because Hyde's mix relies solely on playing strike/throw, he can have difficulty dealing with patient opponents. If they don't bite on his pressure and can tech throws consistently, Hyde can struggle to open them up, particularly if the opponent has a strong life lead and the clock is ticking. Chip damage helps Hyde maintain a lead, but it doesn't allow him to make comebacks as constant gapless strings, where chip damage is at its strongest, only feed the opponent more GRD. And his only overhead is slow and highly telegraphed, so it's not something you can reliably use to break through your opponent's defenses. He has to get creative to excel at higher levels. Not a weakness, but a definite hurdle to overcome in the long term.
| Hyde is an all-rounder who excels most anywhere, but especially in close-quarters thanks to his strong pressure and lockdown capability. |
| Strengths | Weaknesses |
|---|---|
|
|
All of Hyde's sword normals deal chip damage. It isn't much in the grand scheme, but it adds up fast when Hyde is able to keep the opponent locked down.
Hyde also deals extra chip damage on certain specials:
- B+C
 GuardStartupMid20RecoveryAdvantage--11 and 2B+C
 GuardStartupAll14RecoveryAdvantage--12 deal extra 25 Chip Damage (per hit);
 - 66C
 GuardStartupMid15RecoveryAdvantage--5 deals extra 100 Chip Damage;
 - 22A
 GuardStartupLow, All11RecoveryAdvantage--6/22BGuardStartupLow, All22RecoveryAdvantage-+1 (Eruption), -8 (Sword stab only)/22CGuardStartupLow, All14RecoveryAdvantage-+13~+85 deals extra 30/50/10 Chip Damage on the eruption per hit.


This is a flat number that will not get affected by Chip receiving modifier of the opponent.
With Vorpal, one of Hyde's Force Functions (Strict Daze) has it's recovery decreased. The charged version of that move also has slightly faster startup.
Additionally, Hyde deals even more chip damage on certain specials:
- B+C (Vorpal)GuardStartupMid20RecoveryAdvantage--6 deals extra 150 Chip Damage while [B]+[C] (Vorpal)GuardStartupHigh30RecoveryAdvantage--6 deals 550 extra Chip Damage;
- 2B+CGuardStartupAll14RecoveryAdvantage--12 deals extra 50 Chip Damage (per hit);
- 66CGuardStartupMid15RecoveryAdvantage--5 deals extra 200 Chip Damage;
- 22AGuardStartupLow, All11RecoveryAdvantage--6/22BGuardStartupLow, All22RecoveryAdvantage-+1 (Eruption), -8 (Sword stab only)/22CGuardStartupLow, All14RecoveryAdvantage-+13~+85 deals extra 60/100/20 Chip Damage on the eruption per hit.
Move List
| Frame Data Help | |
|---|---|
| Header | Tooltip |
| Damage | Damage done by this attack. (x) denotes combined damage [x] denotes minimum damage |
| Guard | The way this move must be blocked. High = Can block standing Low = Can block crouching Mid = Can block standing or crouching Air = Can block in the air Air Shield = Can block in the air while shielding Unblockable = Cannot be blocked |
| Cancel | Actions this move can be canceled into on hit or block, unless specially noted. N = Normal Cancelable SE = Self Cancelable SP = Special Cancelable EX = EX/IW Cancelable CS = Chain Shift UNQ = Unique (See description) TH = Throw Cancelable J = Jump Cancelable (Hit cancelable only by default) (X) = Hit cancelable only -X- = Can additionally be cancelled during whiff |
| Property | Special properties this move has. Click on the property to navigate to an explanation. |
| Cost | The resources this move costs to use. GRD = GRD Blocks EXS = EXS Meter Vorpal = Vorpal GRD Break = Causes GRD Break |
| Attribute | Attributes of the attack. Mostly used in situations involving invul. There are two sets of attributes: Strike/Throw and Head/Foot/Dive/Projectile Every move has a Strike/Throw attribute, but doesn't always have Head/Foot/Dive/Projectile attribute. --- Strike = Strike (Anything that isn't a Throw is a Strike) Throw = Throw --- Head = Head (Most jump normals) Foot = Foot Dive = Some air specials Projectile = Projectile |
| Startup | Frame when the first hitbox is present. + denotes the frames before and after super flash. |
| Active | The amount of frames that this move will have a hitbox. (x) denotes frame gaps where there are no hitboxes is present. Due to varied blockstuns, (x) frames are difficult to use to determine punish windows. Generally the larger the numbers, the more time you have to punish. |
| Recovery | Frames that this move has after the active frames if not canceled. |
| Overall | Frames that this move takes from start to finish before the character returns to neutral. |
| Advantage | The difference in frames where you can act before your opponent when this move is blocked (assuming the move isn't canceled and the first active frame is blocked). If the opponent uses a move with startup equal or less than this move's advantage, it will result in opponent hitting that move. ±x~±x denotes a possible range of advantage. The left value is when the active frames hit sooner (generally worse) and the right value is for when the active frames hit later (generally better). |
| Invul | The frames where this move cannot be hit by an attribute. Full = Fully invincible Strike = Strike invincible Throw = Throw invincible Head = Head invincible Foot = Foot invincible Dive = Dive invincible Projectile = Projectile invincible |
Normal Moves
Standing Normals
5A


| Damage | Guard | Startup | Active | Recovery | On-Block | Cancel | Attribute | Invuln |
|---|---|---|---|---|---|---|---|---|
| 200 | Mid | 7 | 3 | Total 24 | -6 | N, SP, EX, CS | Strike |
- Can cancel into itself multiple times by pressing 4A.
- Not useful as a rebeat due to its high recovery.
| Overall | Blockstun | Property | Proration | Combo Proration | Data link |
|---|---|---|---|---|---|
| 24 | Chip Damage | /Data#5A |
5B


| Damage | Guard | Startup | Active | Recovery | On-Block | Cancel | Attribute | Invuln |
|---|---|---|---|---|---|---|---|---|
| 570 | Mid | 9 | 4 | Total 30 | -6 | N, SP, EX, CS | Strike |
Its lack of any stagger window makes it weaker than his other normals when used in pressure, but canceling it into a special at close to or at max-range creates a natural gap that can also allow Hyde to be safe or even plus on block (e.g 5B > 236A). No-canceling it can also be done sometimes since its range is difficult for some characters to contest.
- Can be used as an anti-air. Its hitbox is high enough that it can catch aerial opponents reliably.
| Overall | Blockstun | Property | Proration | Combo Proration | Data link |
|---|---|---|---|---|---|
| 30 | Chip Damage | /Data#5B |
5C


| Version | Damage | Guard | Startup | Active | Recovery | On-Block | Cancel | Attribute | Invuln |
|---|---|---|---|---|---|---|---|---|---|
| 5C | 690 | Mid | 12 | 5 | Total 35 | -6 | N, SP, EX, CS | Strike |
- Becomes -1 on rebeating to 2A.
| Version | Damage | Guard | Startup | Active | Recovery | On-Block | Cancel | Attribute | Invuln |
|---|---|---|---|---|---|---|---|---|---|
| 5[C] | 780 | Mid | 23 | 5 | Total 44 | +1 | N, SP, EX, CS | Strike |
It's +1 by default and can be made +4 by rebeating to 2A. Can additionally be made as much as +5 without needing to rebeat if you space yourself correctly. The farther out Hyde is when it connects, the higher the plus frames.
- Can be partially charged to create variable frame traps (e.g. 5B > partial charge 5C).
- Very small stagger window that can be used for select specials (delayed 22B, for example).
| Version | Overall | Blockstun | Property | Proration | Combo Proration | Data link |
|---|---|---|---|---|---|---|
| 5C | 35 | Chip Damage | /Data#5C | |||
| 5[C] | 44 | Chip Damage | /Data#5[C] |
5[C] :
Crouching Normals
2A


| Damage | Guard | Startup | Active | Recovery | On-Block | Cancel | Attribute | Invuln |
|---|---|---|---|---|---|---|---|---|
| 150 | Low | 5 | 2 | Total 18 | -2 | N, SP, EX, CS | Foot |
- Can easily chain into a delayed B normal or C normal to frame trap.
- Does not deal any chip damage.
| Overall | Blockstun | Property | Proration | Combo Proration | Data link |
|---|---|---|---|---|---|
| 18 | /Data#2A |
2B


| Damage | Guard | Startup | Active | Recovery | On-Block | Cancel | Attribute | Invuln |
|---|---|---|---|---|---|---|---|---|
| 490 | Mid | 10 | 4 | Total 27 | -2 | N, SP, EX, CS | Strike |
| Overall | Blockstun | Property | Proration | Combo Proration | Data link |
|---|---|---|---|---|---|
| 27 | Chip Damage | /Data#2B |
2C


| Damage | Guard | Startup | Active | Recovery | On-Block | Cancel | Attribute | Invuln |
|---|---|---|---|---|---|---|---|---|
| 620 | Low | 12 | 5 | Total 33 | -6 | N, SP, EX, CS | Foot |
Like 2B, it's stagger window is on the smaller side. But because he moves forward slightly, it's useful as a means of gaining a bit of ground if you've been pushed out during a blockstring. Particularly useful after 2A due the natural gap that chaining A normals into C normals creates, doubly so if 2C is delayed slightly.
- Does not deal chip damage.
Air Normals
j.A


| Damage | Guard | Startup | Active | Recovery | On-Block | Cancel | Attribute | Invuln |
|---|---|---|---|---|---|---|---|---|
| 176 | High/Air Shield, Mid/Air Shield | 9 | 8 | - | Varies | N, SP, EX, CS | Head |
- Rising j.A is not an overhead, though it becomes one off assault.
- After the first hit is blocked, the second hit can be blocked crouching.
| Overall | Blockstun | Property | Proration | Combo Proration | Data link |
|---|---|---|---|---|---|
| Chip Damage | /Data#jA |
j.B


| Damage | Guard | Startup | Active | Recovery | On-Block | Cancel | Attribute | Invuln |
|---|---|---|---|---|---|---|---|---|
| 410 | High, Air Shield | 11 | 2 | - | Varies | N, SP, EX, CS | Head |
- Can only convert into a combo off assault if the opponent is crouching (doesn't apply to counter hits).
| Overall | Blockstun | Property | Proration | Combo Proration | Data link |
|---|---|---|---|---|---|
| Chip Damage | /Data#jB |
j.C


Uncharged

Charged


| Version | Damage | Guard | Startup | Active | Recovery | On-Block | Cancel | Attribute | Invuln |
|---|---|---|---|---|---|---|---|---|---|
| jC | 580 | High, Air Shield | 13 | 3 | - | Varies | N, SP, EX, CS | Head |
| Version | Damage | Guard | Startup | Active | Recovery | On-Block | Cancel | Attribute | Invuln |
|---|---|---|---|---|---|---|---|---|---|
| j[C] | 750 | High, Air Shield | 21 | 3 | - | Varies | N, SP, EX, CS | Head |
- If delayed off an assault, it'll whiff just as the charge flash occurs, which can be used to set up lows or throws if the opponent isn't ready for it.
- Primarily used in combos like the uncharged version.
| Version | Overall | Blockstun | Property | Proration | Combo Proration | Data link |
|---|---|---|---|---|---|---|
| jC | Chip Damage | /Data#jC | ||||
| j[C] | Knockdown on air hit, Chip Damage | /Data#j[C] |
j[C] :
Command Normals
6B

First hit

Second Hit


First hit
Second hit


| Damage | Guard | Startup | Active | Recovery | On-Block | Cancel | Attribute | Invuln |
|---|---|---|---|---|---|---|---|---|
| 1030 | Mid | 8 | 2 (10) 2 | Total 42 | -5 | N, SP, EX, CS | Strike |
The first hit can be canceled into normals on block and hit, while the second can only do that on hit. The second hit also has a large stagger window for special moves and his Force Functions, which strengthens his pressure considerably.
- The second hit can also be whiff canceled into any special, but only if the first hit is blocked first.
| Overall | Blockstun | Property | Proration | Combo Proration | Data link |
|---|---|---|---|---|---|
| 42 | Launch, Chip Damage | /Data#6B |
3B


| Damage | Guard | Startup | Active | Recovery | On-Block | Cancel | Attribute | Invuln |
|---|---|---|---|---|---|---|---|---|
| 540 | Low | 9 | 3 | Total 35 | -11 | N, SP, EX, CS | Strike |
| Overall | Blockstun | Property | Proration | Combo Proration | Data link |
|---|---|---|---|---|---|
| 35 | Chip Damage | /Data#3B |
3C


| Damage | Guard | Startup | Active | Recovery | On-Block | Cancel | Attribute | Invuln |
|---|---|---|---|---|---|---|---|---|
| 780 | Mid | 9 | 2 | Total 33 | -7 | N, SP, EX, CS | Strike |
- Very unsafe on block. Rebeat or special cancel immediately to avoid being punished.
| Overall | Blockstun | Property | Proration | Combo Proration | Data link |
|---|---|---|---|---|---|
| 33 | Launch, Chip Damage | /Data#3C |
j.6C


| Damage | Guard | Startup | Active | Recovery | On-Block | Cancel | Attribute | Invuln |
|---|---|---|---|---|---|---|---|---|
| 510 | High, Air Shield | 12 | 4 | - | Varies | N, SP, EX, CS | Head |
- Has to be delayed slightly off assult to hit crouching opponents.
| Overall | Blockstun | Property | Proration | Combo Proration | Data link |
|---|---|---|---|---|---|
| Wall Bounce on air hit, Chip Damage | /Data#j6C |
j.2C


| Damage | Guard | Startup | Active | Recovery | On-Block | Cancel | Attribute | Invuln |
|---|---|---|---|---|---|---|---|---|
| 573 | High, Air Shield | 14 | 3 | - | Varies | N, SP, EX, CS | Head |
- After the first hit is blocked, the second can be blocked crouching.
| Overall | Blockstun | Property | Proration | Combo Proration | Data link |
|---|---|---|---|---|---|
| Launch, Chip Damage | /Data#j2C |
Dash Moves
66B


| Damage | Guard | Startup | Active | Recovery | On-Block | Cancel | Attribute | Invuln |
|---|---|---|---|---|---|---|---|---|
| 620 | Mid | 10 | 4 | Total 23 | -2 | SP, EX, CS | Strike |
At -2, 66B effectively forces an RPS situation that's in Hyde's favor. Can do delayed special cancels to frame trap (236A and 214A, for instance), mash 2A, or go for a throw.
- Can be either even or +1 on block if spaced correctly. Very, very difficult to do, though.
66C

| Damage | Guard | Startup | Active | Recovery | On-Block | Cancel | Attribute | Invuln |
|---|---|---|---|---|---|---|---|---|
| 810 | Mid | 15 | 3 | Total 42 | -5 | SP, EX, CS | Strike |
- Can be safe if the move is blocked around max-range as it leaves him at a range that's tough to punish.
| Overall | Blockstun | Property | Proration | Combo Proration | Data link |
|---|---|---|---|---|---|
| 42 | Crumple, Chip Damage | /Data#66C |
Universal Mechanics
Force Function
B+C
(ストリクトデイズ)
Uncharged
Charged


| Version | Damage | Guard | Startup | Active | Recovery | On-Block | Cancel | Attribute | Invuln |
|---|---|---|---|---|---|---|---|---|---|
| B+C 1 GRD |
1250 | Mid | 20 | 5 | Total 48 | -11 | SP, EX, CS, UNQ | Strike | |
| B+C (Vorpal) 0.5 GRD |
1485 | Mid | 20 | 5 | Total 43 | -6 | SP, EX, CS, UNQ | Strike |
The long startup makes this move an easy choice to create frame traps off most any normal. The stagger window on special cancels is also very useful to catch the opponent mashing, allowing for strings like 66C > delay B+C > delay 236A or 22A. Can be special canceled on hit and block. While Vorpal is active it becomes less minus on block.
May require spending meter or Chain Shift to convert hits at midscreen. Counter hits, however, allow for meterless conversions with 236A.
- This move can destroy projectiles if timed correctly and becomes special and EX cancelable on doing so.
| Version | Damage | Guard | Startup | Active | Recovery | On-Block | Cancel | Attribute | Invuln |
|---|---|---|---|---|---|---|---|---|---|
| [B]+[C] 1 GRD |
1450 | High | 32 | 5 | Total 60 | -11 | CS, UNQ | Strike | |
| [B]+[C] (Vorpal) 0.5 GRD |
1705 | High | 30 | 5 | Total 53 | -6 | CS, UNQ | Strike |
The range of the attack increases significantly when charged, making it especially powerful in the corner where you can link into normals for a full combo. If you have 100 meter and Vorpal, you can otherwise CVO cancel it to convert into a combo almost anywhere. Have to be fast, though; any delay and the opponent will recover from the wall bounce before Hyde can land another hit.
- Can be partially charged to create varied frame traps. Harder use that way than 5C is.
| Version | Overall | Blockstun | Property | Proration | Combo Proration | Data link |
|---|---|---|---|---|---|---|
| B+C | 48 | Wall Bounce, Chip Damage | /Data#B+C | |||
| B+C (Vorpal) |
43 | Wall Bounce, Chip Damage | /Data#B+C | |||
| [B]+[C] | 60 | Wall Bounce, Chip Damage | /Data#[B]+[C] | |||
| [B]+[C] (Vorpal) |
53 | Wall Bounce, Chip Damage | /Data#[B]+[C] |
B+C (Vorpal):
[B]+[C] :
[B]+[C] (Vorpal):
2B+C
(ブレアーアウトエッジ)

Uncharged

Charged

Charged projectile


| Version | Damage | Guard | Startup | Active | Recovery | On-Block | Cancel | Attribute | Invuln |
|---|---|---|---|---|---|---|---|---|---|
| 2B+C 1 GRD (0.5 with Vorpal) |
921 | All | 14 | Varies | Total 52 | -12 | SP, EX, CS | Projectile |
- The initial sword slash is able to destroy projectiles if timed correctly.
- Can be special canceled whenever the projectile makes contact with the opponent both on block and hit.
| Version | Damage | Guard | Startup | Active | Recovery | On-Block | Cancel | Attribute | Invuln |
|---|---|---|---|---|---|---|---|---|---|
| 2[B]+[C] 1 GRD (0.5 with Vorpal) |
1298 | All | 14 | Varies | Total 62 | -2 | SP, EX, CS | Projectile |
Beats most non-super projectiles while still advancing forward, which makes it very good for forcing your way through neutral in some matchups. Particularly potent when paired with Chain Shift, since it lets you run behind it as a very quick and very high-priority approach projectile.
- The projectile's hitbox is bigger on the charged version.
| Version | Overall | Blockstun | Property | Proration | Combo Proration | Data link |
|---|---|---|---|---|---|---|
| 2B+C | 52 | Launch | /Data#2B+C | |||
| 2[B]+[C] | 62 | Launch | /Data#2[B]+[C] |
2[B]+[C] :
Throw


| Damage | Guard | Startup | Active | Recovery | On-Block | Cancel | Attribute | Invuln |
|---|---|---|---|---|---|---|---|---|
| 1420 | Throw | 4 | 3 | Total 30 (whiff), 49 (hit) | +42 | EX, CS | Throw |
- If Hyde has Vorpal and at least 100 meter, he can cancel the throw with CVO to get a combo at midscreen.
| Overall | Blockstun | Property | Proration | Combo Proration | Data link |
|---|---|---|---|---|---|
| 30 (whiff), 49 (hit) | Knockdown, Wall Bounce near corner | /Data#A+D |
Smart Steer


| Damage | Guard | Startup | Active | Recovery | On-Block | Cancel | Attribute | Invuln |
|---|---|---|---|---|---|---|---|---|
| 810, 910 | All, All | 8 | 3(12)4 | 18 | -4 | (IW), CS | Strike |
- This can be done off any normals on hit or block. It's treated as a special cancel.
- Gives you one block of GRD if used early in a combo and takes one away if used in a longer combo.
- Can only chain into IW or IWEXS as it ends in a hard knockdown, though the window to cancel into either is very big.
Guard Thrust

| Damage | Guard | Startup | Active | Recovery | On-Block | Cancel | Attribute | Invuln |
|---|---|---|---|---|---|---|---|---|
| 0 | Mid | 15 | 5 | 26 | -12 | Strike | 1~15 Full, 16~45 Full on hit |
| Overall | Blockstun | Property | Proration | Combo Proration | Data link |
|---|---|---|---|---|---|
| 45 | Launch | /Data#6A+B+C |
Veil Off

| Version | Damage | Guard | Startup | Active | Recovery | On-Block | Cancel | Attribute | Invuln |
|---|---|---|---|---|---|---|---|---|---|
| A+B+C 100+ EXS |
0 | All | 15 | 2 | Total 64 (54 on hit) | -23 | Strike | 1~30 Full |
- Requires at least 100 meter and puts you in Veil Off state which grants 20% more damage, but drains your meter at a slow rate.
- Meter drains much slower when health is below 30% (orange health).
- If your opponent has Vorpal state and is hit with Veil Off outside of a combo, they will lose Vorpal.
| Version | Damage | Guard | Startup | Active | Recovery | On-Block | Cancel | Attribute | Invuln |
|---|---|---|---|---|---|---|---|---|---|
| A+B+C (during a move) 100+ EXS |
0 | All | 2 | 4 | 20 | +3 | Strike | 1~19 Full |
- CVO cancel is treated the same as EX cancel; you can only CVO when you can EX and the opponent is in hit/blockstun.
- Including in the air.
- Requires at least 100 meter and consumes Vorpal state and drains meter at a fast rate.
- Has a lot of hitstun, making it easy to combo from.
- Allows for an additional bounce in the combo if two have been used so far, without hitting the combo bounce limit.
- Pressing A+B+C can be used for a shortcut for Infinite Worth.
- Used mostly as a way to tack on extra damage, or to reliably close out the round.
| Version | Overall | Blockstun | Property | Proration | Combo Proration | Data link |
|---|---|---|---|---|---|---|
| A+B+C | 64 (54 on hit) | Launch | /Data#A+B+C | |||
| A+B+C (during a move) |
25 | Launch | /Data#A+B+C |
A+B+C (during a move):
Special Moves
236X
(ブラックオービター)


EX version


| Version | Damage | Guard | Startup | Active | Recovery | On-Block | Cancel | Attribute | Invuln |
|---|---|---|---|---|---|---|---|---|---|
| 236A | 810 | All | 13 | Until Hit | Total 42 | -7 | -UNQ-, -CS- | Projectile |
| Version | Damage | Guard | Startup | Active | Recovery | On-Block | Cancel | Attribute | Invuln |
|---|---|---|---|---|---|---|---|---|---|
| 236B | 810 | All | 11 | Until Hit | Total 44 | -11 | -UNQ-, -CS- | Projectile |
| Version | Damage | Guard | Startup | Active | Recovery | On-Block | Cancel | Attribute | Invuln |
|---|---|---|---|---|---|---|---|---|---|
| 236C 100 EXS |
330×7 | All | 8 | Until Hit | Total 32 | +28 | -CS- | Projectile |
| Version | Overall | Blockstun | Property | Proration | Combo Proration | Data link |
|---|---|---|---|---|---|---|
| 236A | 42 | Launch | /Data#236A | |||
| 236B | 44 | Launch | /Data#236B | |||
| 236C | 32 | Launch | /Data#236C |
- Cancel Window: 14-29 or successful hit UNQ, 14-29 CS
- 1-29 Counterhit state
236B :
- Cancel Window: 12-29 or successful hit UNQ, 12-29 CS
- 1-29 Counterhit state
236C :
- Cancel Window: 8-21 CS
- 1-22 Counterhit state
236X~6A
(ダークロータス)


| Damage | Guard | Startup | Active | Recovery | On-Block | Cancel | Attribute | Invuln |
|---|---|---|---|---|---|---|---|---|
| 552 | All | 14 | 15 | Total 50 | -3 | -EX-, -CS- | Projectile |
- Launches the opponent on hit, allowing for easy combo conversions as long as you're within range of 66C.
- Can also delay the the detonation on block to create a frame trap.
- Can be used as an anti-air due to the size of the explosion and how active it is.
- Explosion remains even if Hyde is hit, making it almost always trade favorably for him.
| Overall | Blockstun | Property | Proration | Combo Proration | Data link |
|---|---|---|---|---|---|
| 50 | Launch | /Data#236X~6A/236A |
- Cancel Window: 14-46 EX, CS
- 1-43 Counterhit state
236X~6B
(ベンドシニスター)


| Damage | Guard | Startup | Active | Recovery | On-Block | Cancel | Attribute | Invuln |
|---|---|---|---|---|---|---|---|---|
| 720 | Mid | 22 | 2 | 31 | -8 | -EX-, -CS- | Strike |
- Can be used to catch opponents out of the air when trying to jump over the fireball. Also possible to frame trap if timed correctly.
- Unsafe on block at -8, but you can spend meter or use Chain Shift to make it safe if you want to use Sinister Bend's forward momentum as an easy way to close the distance.
| Overall | Blockstun | Property | Proration | Combo Proration | Data link |
|---|---|---|---|---|---|
| 54 | Knockdown | /Data#236X~6B/236B |
- Cancel Window: 22-40 EX, CS
- 1-40 Counterhit state
236X~236C
(ダークロータス アンテシス)


First hit

Fully expanded


| Damage | Guard | Startup | Active | Recovery | On-Block | Cancel | Attribute | Invuln |
|---|---|---|---|---|---|---|---|---|
| 1654 | All | 8 | 15 | Total 33 | +9~+11 | -CS- | Projectile |
At +9 on block, it has some use in pressure. If used at ranges where 66C can hit, you can cancel into it as soon as possible and hit the opponent if they try to mash. The opponent can safely jump, however, if this trick is used around the maximum range of 66C.
- Allows for easy combos off fireball hits anywhere and a very strong combo starter if the explosion is the first hit.
- The center of the explosion can be used to hit opponents in the air if timed correctly.
| Overall | Blockstun | Property | Proration | Combo Proration | Data link |
|---|---|---|---|---|---|
| 33 | Wall Bounce | /Data#236X~236C/646C |
- 1-27 Counterhit state
623X

A Version

B version


EX version


| Version | Damage | Guard | Startup | Active | Recovery | On-Block | Cancel | Attribute | Invuln |
|---|---|---|---|---|---|---|---|---|---|
| 623A | 1433 | Mid | 5 | 9 | Total 51 | -24 | (EX), -CS- | Strike |
On hit, you can cancel into j.236C for a full combo if 623A is used as a starter. Can otherwise be used as a combo ender. Particularly useful for Cross Cast Veil Off combo enders.
- J.236C can also be used on block. Can be delayed slightly to create a frame trap.
- The first hit can also be EX canceled on hit or block. You can also use Chain Shift to cancel on whiff.
| Version | Damage | Guard | Startup | Active | Recovery | On-Block | Cancel | Attribute | Invuln |
|---|---|---|---|---|---|---|---|---|---|
| 623B | 1763 | Mid | 6 | 11 | 55 | -27 | (CS) | Strike |
- Good anti-air as well and can also be used as decent combo starter using Chain Shift.
| Version | Damage | Guard | Startup | Active | Recovery | On-Block | Cancel | Attribute | Invuln |
|---|---|---|---|---|---|---|---|---|---|
| 623C 100 EXS |
1981 | Mid | 5 | 13 | Total 68 | -38 | (CS) | Strike |
Particularly strong as a combo ender as it deals some of the highest damage of Hyde's EX moves when used in combos. The opponent can forward tech there, however. Best saved to secure a round.
| Version | Overall | Blockstun | Property | Proration | Combo Proration | Data link |
|---|---|---|---|---|---|---|
| 623A | 51 | Launch | /Data#623A | |||
| 623B | 71 | Launch | /Data#623B | |||
| 623C | 68 | Launch | /Data#623C |
623B :
- Cancel Window: 13-27 on successful hit CS
- Counterhit state for the entire move
623C :
214X
(ベイカントシフト)

First!

Second!

Third!

EX version

A version
B version

Second hit

Third hit
EX version (first hit)


| Version | Damage | Guard | Startup | Active | Recovery | On-Block | Cancel | Attribute | Invuln |
|---|---|---|---|---|---|---|---|---|---|
| 214A | 450 | All | 11 | 4 | Total 49 | -21 | -EX-, -CS- | Strike |
- Becomes airborne quickly, making it useful as a throw punish and a situational low-crush.
- Can also be used a combo ender, but requires a slight delay on the first hit to achieve a more consistent knockdown on some routes.
| Version | Damage | Guard | Startup | Active | Recovery | On-Block | Cancel | Attribute | Invuln |
|---|---|---|---|---|---|---|---|---|---|
| 214B | 450 | All | 11 | 4 | Total 58 | -30 | -EX-, -CS- | Strike |
| Version | Damage | Guard | Startup | Active | Recovery | On-Block | Cancel | Attribute | Invuln |
|---|---|---|---|---|---|---|---|---|---|
| 214X~4X | 600 | All | 3 | - | +1~-12 | -EX-, -CS- | Strike |
- Can be +1 on block if delayed enough. Easier to do off 214A.
- Delayed rekkas have use in pressure, but it can leave yourself open to reversals.
| Version | Damage | Guard | Startup | Active | Recovery | On-Block | Cancel | Attribute | Invuln |
|---|---|---|---|---|---|---|---|---|---|
| 214X~4X~4X | 950 | All | 4 | - | -9~-14 | -EX-, -CS- | Strike |
- The third hit always has a gap between it and the second hit even if you aren't delaying them.
| Version | Damage | Guard | Startup | Active | Recovery | On-Block | Cancel | Attribute | Invuln |
|---|---|---|---|---|---|---|---|---|---|
| 214C 100 EXS |
2190 | Mid | 5 | 6 | Total 40 | -6~-11 | (CS) | Strike |
As an advancing and airborne five-frame move, it has some -- but very limited -- use as a quick counter in some situations. Has no invul, though, so it's a high risk maneuver.
| Version | Overall | Blockstun | Property | Proration | Combo Proration | Data link |
|---|---|---|---|---|---|---|
| 214A | 49 | Launch | /Data#214A | |||
| 214B | 58 | Launch | /Data#214B | |||
| 214X~4X | Launch | /Data#214X~4X | ||||
| 214X~4X~4X | Tumble, Knockdown | /Data#214X~4X~4X | ||||
| 214C | 40 | Knockdown | /Data#214C |
214B :
214X~4X :
214X~4X~4X :
214C :
22X
(シャドウスケア)


EX version projectile


| Version | Damage | Guard | Startup | Active | Recovery | On-Block | Cancel | Attribute | Invuln |
|---|---|---|---|---|---|---|---|---|---|
| 22A | 1518 | Low, All | 11 | Total 45 | -6 | -EX-, -CS- | Strike (first hit), Projectile (eruption) |
- The sword always hits low on all versions, making the move useful at close-ranges to potentially catch the opponent off-guard. Particularly potent when delayed after using B+C.
| Version | Damage | Guard | Startup | Active | Recovery | On-Block | Cancel | Attribute | Invuln |
|---|---|---|---|---|---|---|---|---|---|
| 22B | 1537 | Low, All | 22 | Total 49 | +1 (Eruption), -8 (Sword stab only) | -EX-, -CS- | Strike (first hit), Projectile (eruption) |
- If the flames hit, the move is always +1. In the corner, this is a common reset point for pressure.
| Version | Damage | Guard | Startup | Active | Recovery | On-Block | Cancel | Attribute | Invuln |
|---|---|---|---|---|---|---|---|---|---|
| 22C 100 EXS |
1838-2023 | Low, All | 14 | Total 49 | +13~+85 | Strike (first hit), Projectile (eruption) |
Like 236C, 22C is a good move for pressure extensions. It's at its strongest when the opponent is in or close to the corner as the flames will bounce off the wall and keep going, thus keeping the opponent locked down for longer. Also useful for building up chip damage while the opponent is GRD broken since they can't shield to negate it.
- Can sometimes help disguise an assault or overhead. Not a reliable tactic, but something worth trying occasionally just to see whether the opponent can react.
j.236X
(ダークロータス)

A/B version


EX version


| Version | Damage | Guard | Startup | Active | Recovery | On-Block | Cancel | Attribute | Invuln |
|---|---|---|---|---|---|---|---|---|---|
| j236A | 1292 | All | 9 | Total 53 | +14 | EX, CS | Strike (first hit), Projectile |
| Version | Damage | Guard | Startup | Active | Recovery | On-Block | Cancel | Attribute | Invuln |
|---|---|---|---|---|---|---|---|---|---|
| j236B | 1292 | All | 9 | Total 54 | +14 | EX, CS | Strike (first hit), Projectile |
- A forward jump assault into j.236B can be used to evade some reversals in the corner (Londrekia's B+C, for example).
| Version | Damage | Guard | Startup | Active | Recovery | On-Block | Cancel | Attribute | Invuln |
|---|---|---|---|---|---|---|---|---|---|
| j236C 100 EXS |
1707 | All | 14 | Total 27 | +24 | Projectile |
- Has a large vacuum effect now, making it easier to use off 623A and in combos.
| Version | Overall | Blockstun | Property | Proration | Combo Proration | Data link |
|---|---|---|---|---|---|---|
| j236A | 53 | Launch | /Data#j236A | |||
| j236B | 54 | Launch | /Data#j236B | |||
| j236C | 27 | Launch | /Data#j236C |
j236B :
j236C :
236B+C
(ベイルブリンガー)


| Damage | Guard | Startup | Active | Recovery | On-Block | Cancel | Attribute | Invuln |
|---|---|---|---|---|---|---|---|---|
| 2045 | Mid | 7 | Total 82 | -29 | (CS) | Strike |
Depending on your position and the move your attempting to counter, the travel time can sometimes allow the opponent to recover before Veil Bringer makes contact, so be careful.
- Invulnerability runs out after the initial dash, so Hyde can be clipped by very active moves now.
- Has use as both as a combo ender and occasionally as a combo starter if you CS the second to last hit.
| Overall | Blockstun | Property | Proration | Combo Proration | Data link |
|---|---|---|---|---|---|
| 82 | Knockdown | /Data#236B+C |
Super Moves
Infinite Worth
(ジャイルボルテクス)


| Damage | Guard | Startup | Active | Recovery | On-Block | Cancel | Attribute | Invuln |
|---|---|---|---|---|---|---|---|---|
| 400, 320×10 [Min: 100, 134×10 (1440)] |
Mid | 1+7 | Total 92 | -18 | Strike |
| Overall | Blockstun | Property | Proration | Combo Proration | Data link |
|---|---|---|---|---|---|
| 92 | Knockdown | 70, 90 (once) | /Data#41236D |
Infinite Worth EXS
(レイジングロア)

| Damage | Guard | Startup | Active | Recovery | On-Block | Cancel | Attribute | Invuln |
|---|---|---|---|---|---|---|---|---|
| 3760 [Min: 1579 (42%)] |
All | 3+14 | 2 | 51 | -25 | Strike | 1~? Full |
- Must have less than 30% health (orange health) to use.
- After the cinematic, characters will be moved to the middle of the stage, regardless of where they were positioned before.
- Due to the cost, it is usually not recommended to use this move unless it will kill the opponent.
| Overall | Blockstun | Property | Proration | Combo Proration | Data link |
|---|---|---|---|---|---|
| 69 | Knockdown | /Data#A+B+C+D |
Notable Rebeats and Gaps
| Attack | Chain | Advantage |
|---|---|---|
| 5B/2B/3B | 2A | -3 |
| 6B(1) | 2A | -3 |
| 5C | 2A | -1 |
| 5[C] | 2A | +4 |
| 2C | 2A | -3 |
| 3C | 2A | -1 |
| Attack | Chain | Frame Gap |
|---|---|---|
| 2A/5A | 2C/5C | 1F |
| 5B/2B/6B(1)/3B/2C | 5[C] | 8F |
| 3C | 5[C] | 6F |
| 5B/2B/6B(1)/3B/2C | B+C | 5F |
| 5B/2B/6B/3B/2C | 22B | 7F |
| 5C/3C/6B(2) | 22B | 5F |
| 5[C]/66C | 22B | 0F |
Videos
External Links
- Hyde Primer: Original primer by Loafer, updated version by DYLanXLusoren.
- Hyde Combo Doc by MIYAGI Muteki.
- Hyde Discord Channel Pins Document
Players to Watch
Disclaimer: This list is derived from community input and is in no way comprehensive or a form of ranking of any kind. Our community criteria can be found here.
| Usual Color | Handles/Links | Region | Status | Notes |
|---|---|---|---|---|
 |
Eve | Japan |
Active | Eve plays other characters as well (Phonon, Mika), but his Hyde is very good. Great pressure and neutral compliment all-around solid play. |
 |
Garmfield twitch |
Canada |
Active | Has very good understanding of the character and is an equally strong player. Often streams sets on Twitch and regularly hangs around the Discord to answer questions. |
 |
Isaac |
Japan |
Active | Known for making some wild plays. His playstyle and decision-making may seem unorthodox to the untrained eye, but speaks to a deep understanding of the fundamentals of the character that allows him to do said plays. |
 |
JDR twitch youtube |
United States |
Active | Regularly competes and performs well at many tournaments. Hasn't streamed any UNICLR sets in awhile, but has a fair number of them archived on his Twitch channel. |
 |
jiyujin twitch youtube |
Japan |
Active | Very well-rounded player. Has strong gameplans in most matchups that are easy to understand and learn from. Hasn't streamed much UNI since UNICLR was released (the majority of matches are from UNIST, so be aware some of the matchup dynamics have changed since that version if you watch any of the UNIST footage). |
 |
MIYAGI Muteki youtube |
Japan |
Active | Extremely active Hyde player in Japan. Regularly competes in tournaments and uploads matches to YouTube. Best known for their combos. Often posts tech and combos on Twitter. |
|
Selo | Germany |
Active | Very strong Hyde player in the EU. Has competed in multiple netplay tournaments and won the Evo 2021 side tournament for UNICLR. Frequently hangs around the Discord to answer questions. |
Colors
Default Unlocks


