Idol Showdown/Suisei Hoshimachi: Difference between revisions

From Mizuumi Wiki
Jump to navigation Jump to search
(→‎2L: 2L forcing hit on standing has been confirmed to be intended)
m (→‎Colors: added reference for color 2)
Line 993: Line 993:
  {{ColorGallery/Color|1|  text= Original Outfit}}
  {{ColorGallery/Color|1|  text= Original Outfit}}
  {{ColorGallery/Color|2|  text= Cosplay 1<hr>{{Small|Anemachi}}}}
  {{ColorGallery/Color|2|  text= Cosplay 1<hr>{{Small|Anemachi}}}}
  {{ColorGallery/Color|3|  text= Cosplay 2}}
  {{ColorGallery/Color|3|  text= Cosplay 2<hr>{{Small|Tokoyami Towa (Hololive)}}}}
  {{ColorGallery/Color|4|  text= Cosplay 3<hr>{{Small|Nanashi Mumei (Hololive)}}}}
  {{ColorGallery/Color|4|  text= Cosplay 3<hr>{{Small|Nanashi Mumei (Hololive)}}}}
  {{ColorGallery/Color|5|  text= Cosplay 4<hr>{{Small|Alternate Outfit}}}}
  {{ColorGallery/Color|5|  text= Cosplay 4<hr>{{Small|Alternate Outfit}}}}

Revision as of 21:56, 10 May 2023

IS Suisei Profile.jpg

IS Suisei Logo.png

Stellar Stylish Idol - Saikou Pressure

Introduction

Playstyle

IS Suisei head.png

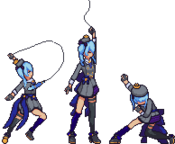
Suisei is a technical fighter who uses her evasive approach options to get in and open the opponent up. Once Suisei gets up close, the defending opponent will find it tricky to escape her offensive momentum.
Pros Cons
  • Incredible Okizeme: 214H is extremely advantageous on block and eats reversals, allowing you to do pretty much whatever you want on the opponent’s wakeup when used in proper setups.
  • Deadly Mix-ups: When using said 214H setups, you get both high/low AND left/right mix. Even if they survive your setplay, you still have a command grab for them to worry about.
  • Well-Rounded Offense: 2L is perfect for tick throws and stagger pressure. Both options lead to great reward. Her command grab gives her oki, and 2L forces standing on hit enabling unique confirms.
  • Idol Step: Suisei uniquely has access to a metered dash cancel technique that improves both her combo and pressure game.
  • Good Meter Build Potential: When optimized, Suisei’s combos give her plenty of bar to use and abuse her plethora of powerful metered options.
  • Weak Defensive Options: Other than system mechanics and a 5F jab, Suisei is completely lacking defensive tools.
  • Struggles Against Zoning: While she isn’t lacking in tools to force her way through neutral, characters with strong projectiles and full screen presence are very problematic for her.
  • Meter Hungry: While her oki is still good without 214H, she can’t guarantee a true 50/50 and beat reversals at the same time without it. She also needs bar for Idol Step, as well as IPS resets.

Moves

Standing Normals

5L
5L
IS Suisei 5L.png
Damage Guard Startup Active Recovery Adv. on Block Adv. on Hit Invulnerability
35

Mid

5f 3f 6f -3 +4

None

Jab. Suisei's fastest normal. More range than 2L, moves you forward.

5M
5M
IS Suisei 5M.png
Dab
Dab
Damage Guard Startup Active Recovery Adv. on Block Adv. on Hit Invulnerability
50 (Stand)

20 (Crouch?)

Mid

7f 5f 11f +4 (Standing)

-9 (Crouching)

+5 (Standing)

??? (Crouching)

None

As of 5/9/2023, this move is currently bugged and not well understood in general. Sometimes standing frame advantage on hit is negated by crouching even when still in hitstun. All information below is subject to change

A high hitting advancing mid that whiffs on crouching opponents at longer ranges. Surprisingly active. Its framedata on both hit and block DRASTICALLY changes depending on if they are standing or crouching. On standing opponents it can link back into 5L. On crouching opponents its straight up punishable without a cancel and is prone to not properly comboing afterwards. You may be tempted to use this for stagger, but make sure you frametrap with a cancel afterwards. The angle at which it hits may make it seem like a decent enough panic anti-air, but its air blockable.

5H
5H
IS Suisei 5H.png
Damage Guard Startup Active Recovery Adv. on Block Adv. on Hit Invulnerability
90

Mid

15f 2f 30f -7 -3

None

Chunky horizontal axe swing. Awful recovery and startup make it ill-suited for use in neutral.

Crouching Normals

2L
2L
IS Suisei 2L.png
Damage Guard Startup Active Recovery Adv. on Block Adv. on Hit Invulnerability
30

Low, Air Unblockable

6f 2f 11f 0 +4

None

Incredibly stubby jab. Mostly inferior to 5L for abare purposes, but being even (0) on block makes it useful for tick throwing. Great for combos as it forces standing on hit, enabling your optimal meter building routes.

2M
2M
IS Suisei 2M.png
Your best friend in neutral
Damage Guard Startup Active Recovery Adv. on Block Adv. on Hit Invulnerability
60

Low, Air Unblockable

8f 4f 15f -7 +3

None

Good low poke thats quite fast for its range. Suisei's lack of good low committal pokes other than this make her very reliant on it.

2H
2H
IS Suisei 2H.png
Damage Guard Startup Active Recovery Adv. on Block Adv. on Hit Invulnerability
85

Mid, Air Unblockable

10f 3f 16f -13 +5

None

Air unblockable launcher. Not much horizontal range compared to other 2Hs making it harder to use consistently as an anti-air.

3H
3H
IS Suisei 3H.png
Damage Guard Startup Active Recovery Adv. on Block Adv. on Hit Invulnerability
100

Low, Air Unblockable

13f 3f 20f -12 +41

None

Short sweep. Hard Knockdown.

Jumping Normals

j.L
j.L
IS Suisei jL.png
Damage Guard Startup Active Recovery Adv. on Block Adv. on Hit Invulnerability
25

High

7f 5f until land+3f - -

None

Standard jL. Mostly used for instant overheads during 214H oki.

j.M
j.M
IS Suisei jM.png
Damage Guard Startup Active Recovery Adv. on Block Adv. on Hit Invulnerability
55

High

9f 4f until land+4f - -

None

Strictly horizontal gunshot. Wallbounces on hit, enables combo extensions in the corner but hurts its utility as an air to air.

j.H
j.H
IS Suisei jH.png
Damage Guard Startup Active Recovery Adv. on Block Adv. on Hit Invulnerability
90

High

10f 4f until land+5f - -

None

A jH with a pretty decent crossup hitbox. Your main jump-in most of the time.

Command Normals

3M
3M
IS Suisei 3M.png
Damage Guard Startup Active Recovery Adv. on Block Adv. on Hit Invulnerability
50

Low

12f 3f 10f -8 -4

None

Low profile slide, goes under most mid height fireballs. Reward on non-counterhit is absolutely terrible, you can only really combo into 236S install. However, on counterhit it combos into 236L and oddly 22L. 22L being the better choice as it grants you a full conversion. Despite being a slide it does not have variable framedata

6H
6H
IS Suisei 6H.png
Sui-ssor Kick!
Sui-ssor Kick!
Damage Guard Startup Active Recovery Adv. on Block Adv. on Hit Invulnerability
95

Mid

19f 3f 18f -10~-11 +5

None

Not an overhead. Wallbounces on counterhit, even in a trade. Being an advancing normal its very useful for combo conversions.

Throw

Throw
L+M
IS Suisei LM.png
Damage Guard Startup Active Recovery Adv. on Block Adv. on Hit Invulnerability
160

Unblockable

7f - 5f(hit)

13f(whiff)

- +31

None

While it may seem pointless to ever consider normal throw over her command grab, it has only about a fifth as much recovery on whiff in comparison. Making it a much safer option against opponents who have shown you they are willing to gamble on jumping out of your strings to escape it. Can be kara'd off of 5M with 6/4M~L plink to increase its range.

Overhead

Overhead
M+H
IS Suisei MH.png
Yes the animation is the same as j.L
Damage Guard Startup Active Recovery Adv. on Block Adv. on Hit Invulnerability
60

High

25f 3f 24f -4 -2

None

Universal standing overhead. You have better mixups than this. No cancel options, being quite reactable, and being minus on hit (lol) limits its usefulness outside of when you only need to hit a sleeping opponent once to kill. You can kara into this, but why?

Special Attacks

236L
Wicked Slice
236L / 5S
IS Suisei 236L.png
Damage Guard Startup Active Recovery Adv. on Block Adv. on Hit Invulnerability
65

Mid

13f 5f 21f -4 +4

None

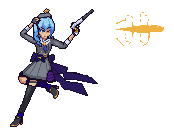
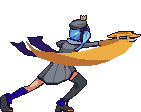
Big horizontal, advancing axe swing thats safe on block. High commitment grounded poke (and really her only other one than 2M) without meter for SSC or 22S cancel. Quite fast for its large range. On hit forces standing, and puts you in a better spot to continue running offense. Cancelled with 22S~6 however it allows for a pressure reset and standing only confirms with 5M 5L link.

236M
Starry Slice
236M / 6S
IS Suisei 236M.png
Damage Guard Startup Active Recovery Adv. on Block Adv. on Hit Invulnerability
161 (80+81)

High

23f 5f (first hit) until land+13f -11 +30

None

Advancing airborne overhead that knocks down on hit and high profiles lows. Very unsafe on block without a cancel. Amazing damage potential as a combo starter.

236H
Heart Harvest
236H
IS Suisei 236H.png
Damage Guard Startup Active Recovery Adv. on Block Adv. on Hit Invulnerability
179 (125+27+27)

Mid

13f 6f (first hit) 18f -14 +6(ground)

+76(air)

None

  • Uses 1 bar of Star Power

Has two versions depending on if the opponent was hit grounded or airborne.

    • Grounded opponents are sideswapped on hit, but is generally not useful for the price as the opponent can tech.
    • Airborne opponents are bounced off the wall back into Suisei, making for a good combo ender or extender if you have excess meter you're willing to spend. You have enough time for Charge lvl 2 fireball oki, or the option to SCC into 214H assuming you have 2 meter.
236G
Tetromino Transhumanism
236G
IS Suisei 236G.png
Damage Guard Startup Active Recovery Adv. on Block Adv. on Hit Invulnerability
203 (18+185)

Unblockable

5f - 7f(hit)

59f(whiff)

- +53

None

A command grab that leaves the opponent directly in front of Suisei. Faster startup and better knockdown makes it all around superior to normal throw with the caveat of having a FULL SECOND of recovery on whiff.

214L/M
Stellar Medley (Close/Far)
214L/M
IS Suisei 214LM.png
Description
A versatile, downwards-angled projectile that can be charged up to level 3 to improve its frame advantage. The light and medium versions cover separate angles. The frame advantage it offers makes it both a somewhat reliable pressure tool and meterless okizeme tool as well. In blockstrings, as long as the startup plays out and the comet is spawned, opponents that mash on Suisei will be hit out of their combo, as it does not go away on hit. Suisei’s best move to whiff in order to build superchat meter.


  • 214L is the least explored of the two as of now. It has better frame advantage when charged than it’s medium counterpart, but the less horizontal angle of the projectile makes it difficult to utilize in setplay. A potential use for this move would be as a preemptive neutral tool as it’s vertical angle makes it suited for catching opponents approaching from above
  • 214M is the most commonly used version, and has a much wider variety of practical use cases. It’s longer horizontal range makes it the closest thing Suisei has to a zoning tool, as well as makes it more easily applicable for setplay. Less frame advantage than the light version, but the difference is negligible in reality.
Version Damage Guard Startup Active Recovery Adv. on Block Adv. on Hit Invulnerability
214L (close/level 1) 65

Mid

26f~52 - 0f +7 -

None

Version Damage Guard Startup Active Recovery Adv. on Block Adv. on Hit Invulnerability
214L (close/level 2) -

Mid

60f~83f - 0f +31 -

None

Takes 33 frames to charge

Version Damage Guard Startup Active Recovery Adv. on Block Adv. on Hit Invulnerability
214L (close/level 3) -

Mid

86f~98f - 0f +21~+72 -

None

Version Damage Guard Startup Active Recovery Adv. on Block Adv. on Hit Invulnerability
214M (far/level 1) 30

Mid

24f~39f - 0f +5 -

None

Version Damage Guard Startup Active Recovery Adv. on Block Adv. on Hit Invulnerability
214M (far/level 2) -

Mid

57f~80f - 0f +25~+28 -

None

Takes 35 frames to charge

Version Damage Guard Startup Active Recovery Adv. on Block Adv. on Hit Invulnerability
214M (far/level 3) -

Mid

85f~109f - 0f +24~+70 -

None

214H
STELLAR into the GALAXY
214H
ISD Suisei 214H.png
The reason you play Suisei
Damage Guard Startup Active Recovery Adv. on Block Adv. on Hit Invulnerability
56 (20+18+18)

Mid

42f, projectile hits on 50f~159f(?) - 0f +55 -

None

  • Uses 1 bar of Star Power

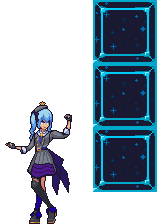
Character-defining okizeme powerhouse move. Incredibly oppressive projectile that eats wakeup reversals and enables all her best mixups. You will be donating most of your meter to this evil ball of blockstun. If you really are tired of playing neutral you can spend the bar just to walk your opponent down with it backing you up as it travels forward with Suisei.

  • The orb spawns almost directly above Suisei, which allows for tech traps and an IPS reset in the corner. You can also use the orb as a combo extender in the corner because of this, but it's not worth the meter.
22L
Hoshispin (Horizontal)
22L
IS Suisei 22L.png
Damage Guard Startup Active Recovery Adv. on Block Adv. on Hit Invulnerability
106 (20+86)

Air Unblockable

10f - 18f(hit)

22f(whiff)

- ~+55

None

Horizontal air unblockable hitgrab. Staple combo tool.

  • Causes a ground bounce the first time it's used in a combo
22M
Hoshispin (Vertical)
22M / 2S
IS Suisei 22M.png
Damage Guard Startup Active Recovery Adv. on Block Adv. on Hit Invulnerability
99

Air Unblockable

15f - 12f(hit)

~30f(whiff)

- +59

None

Vertical air unblockable hitgrab that leads to a lengthy hard knockdown. Staple combo ender.

  • Causes a very small ground bounce, which can be followed up on by certain specials such as 236L or 236H by using a Superchat Cancel. It's not recommended to do this though, as the small amount of extra damage is generally not worth your meter or the loss of okizeme potential.
22H
Psycho Hoshispin
22H
IS Suisei 22H.png
Damage Guard Startup Active Recovery Adv. on Block Adv. on Hit Invulnerability
119 (20+99)

Unblockable

20f - 12f(hit)

~30f(whiff)

- +59f

None

  • Uses 1 bar of Star Power
  • Projectile invulnerable

Makes for a decent albeit gimmicky reversal against some projectile-based oki.

22S
Selfish of a Rough Stone
22S
IS Suisei 22S.png
Similar to FADC from Street Fighter IV
Damage Guard Startup Active Recovery Adv. on Block Adv. on Hit Invulnerability
-

Mid

- - - - -

None

  • Uses 1 bar of Star Power
  • Has three stages. Upon reaching the third stage, Suisei summons 5 comets from the sky.
  • Can be canceled into a forward or backdash at any point during the animation and retain the current charge level.
    • The forward dash can additionally be canceled into any other singular normal, key word singular. Said move can not be cancelled into other normals or specials, so if you want to continue pressure or combo you must link 5M > 5L or 2C > jump cancel.
    • Can be canceled into from other specials. 22S~6 can be as a way to use Star Power rather than a SCC to continue your turn or combo after moves like 236L.
    • This is commonly referred to as "Idol Step"
    • 22S~[6] takes 12f before the dash cancel itself.
    • 5H/2M > 22S~[6] > 5M is a true blockstring.

A short tech video by Frexia about 22S cancel: https://youtu.be/C6HOGX38Mdc. Do note the section on 5M is outdated.

j.S
Stellar Slice
j.S / j.236L / j.236M / j.236H
IS Suisei jS.png
Bandit Revolver!
Bandit Revolver!
Damage Guard Startup Active Recovery Adv. on Block Adv. on Hit Invulnerability
85

High

26f 6f 10f+until land +5~+9 +18

None

WIP description. For now just imagine 236M but plus, as a combo extender, and as an additional air option / poverty airdash. Its pretty good.

  • Using L, M or H for this move will not affect its properties in any way. There is only one version of the move, but it can be done using any of the attack buttons for some reason.
  • You cannot TK specials in this game. You may need to use the simple input (j.S) in order to do this move instantly in the air.

Super Star Attack

SPACE for Virtual GHOST
236S
IS Suisei 236S install.png
Damage Guard Startup Active Recovery Adv. on Block Adv. on Hit Invulnerability
- - - - - - -

None

Installs the Aura to do the actual super

SPACE for Virtual GHOST
during install 236S
IS Suisei 236S ground.png
Damage Guard Startup Active Recovery Adv. on Block Adv. on Hit Invulnerability
- - - - - - -

None

long range dash with commandgrab

SPACE for Virtual GHOST
during install 22S
IS Suisei 236S air.png
Damage Guard Startup Active Recovery Adv. on Block Adv. on Hit Invulnerability
- - - - - - -

None

Antiair commandgrab

Combos

Note: j.S can always be replaced with j.236X for SC meter gain, but it becomes really tight in some routes since TK motions are not present in the game.

Mid-screen

Combo Difficulty Damage Cost Meter Gain Location
  • Easy close starter midscreen route
  • Manually inputting j.236X instead of j.S is actually easy in this route
  • Altered version of the easy route that deals slightly less damage but charges one bar allowing for 214H oki.
  • Manually inputting j.236X instead of j.S is actually easy in this route
  • Hard close starter midscreen route (optimal damage so far)
  • 7jc is for sameside, 9jc is for sideswitch.
  • Anti-Air Combo
  • Use 7jc to stay on the same side and 9jc for sideswitch
  • Metergain combo
  • Will sideswitch after j.236L
  • If the combo gets to the corner it's possible to prevent a sideswitch by doing j.M before j.236L
  • Can be crouched out due to a bug with 5M don't do it until it gets patched
  • Metered confirm off of 236L.
  • Input 5M as 6M and link 5L after 5M.
  • Easier than 22S~6 > 2H, though ending on 5M on block leaves you punishable versus crouchers.
  • Midscreen techtrap loop off any j.S route

Corner

Combo Difficulty Damage Cost Meter Gain Location
  • Close starter Corner route
  • Easier to execute than the equivalent midscreen route due to the lack of a delay on the jc
  • Techtrap, if the opponent techs they get hit by the 2H which is AUB
  • This is the route when the opponent techs
  • Techtrap, if the opponent techs they get hit by the 2H which is AUB
  • This is the route when the opponent doesn't tech
  • IPS Reset route, uses the fact that 214H goes through IPS and reset its counter, meaning that as long as you have meter you can loop the route
  • If the opponent blocks the Orb (214H) they will get hit by the 2H since it's AUB

Theory

WIP

Closerange Combo Starter:

  • 2L/5L>5M/2M>5H>6H>3H>
    • only works when you are close (2A range and a bit further)
    • on further ranges (max range 2L) you have to delay the 3H so 6H moves you froward

5M>5L Loops:

  • 5M can link into 5L if you hit a standing oponent it also moves forward so you can loop 5M>5L
  • requires a standing oponent so its best used after Stuff that forces Standing (2L,236L)
  • might be currently bugged and oponents can crouch in hitstun and make 5M not advantageous enough anymore

Longrange combo Starter:

  • Pretty underwhelming Reward and always requires ressources.
  • max range 2M only combos into 236L
  • 2M>236L>
    • >22S~6>2H>
      • requires 1 meter for the cancel and is VERY tight but it will lead to normal routing
    • >22S~6>5M>5L loops
      • 236L forces Stadning so you can go into the 5M>5L loops
      • requires 1 meter for the cancel and is VERY tight but it will lead to normal routing
    • >236M>22L>
      • requires 2 SCCs
      • 236M has to be put in very fast else it wont combo
      • Probaly the most usefull since Suisei does not realy rquire SSC meter
    • >236H
      • 1 Bar 1 SCC not realy worth it
    • >236S>
    • 236S install
      • 2 Bar 1 SCC

Jumpins:

  • jH
  • j236X
    • links into 2M for Damage
    • links into 2L restand for 5M>5L metergain routes

22L Groundbounce:

    • only thing that Combos from 3C
    • launcher > 22L >
      • you can link 5H>2H which is pretty tight
      • you can link dl.2M>2H which is the most consistent one
      • you can link 5M>2H, which is the easiest
      • you can link with j236X for an easy midscreen combo

>2H>TK236X

  • the game does not honor the inputs before the jump so there is no TK
    • easiest way is to use S button
    • you can do the actual j236X which will gvie you more SCC meter but its tight
  • 2H > 7jc > dl j.S >
    • sameside
    • dl has to be only very slight
    • also works with dl7>jS
  • 2H > 9jc > dl j.S >
    • sideswitch
    • dl has to be only very slight
    • also works with dl8/9>jS

corner only j.236X route

    • 2H>jM>j236X>
      • jM wallbounces so you can hit the j236X

airborn J236X Groundbounce

  • after hitting an airborn oponent with j236X there is a huge groudbounce
  • you have time here to link into 6H>
  • 6H>2H
    • most common route and will probably go into 22M Ender
  • dl.6H > dl.3H > 22L
    • good if you started your Combo with the j236X route or got a raw j236X hit.

Corner 214[L] LVL2 Route:

  • you can combo into a LVL2 charged 214[A] in teh corner
  • 22L > jM > 6H > 214[L] > ...
    • you have to charge 214[L] for around 50 Frames
      • Suisei scribbles on her notepad the pen will she will somewhat write down lines and you can se a visible cut in the animation when the pen resets to a new line
        • you have to let a bit (around 10 frames) after she finishes the first line
      • this is also audible there is a small gap between the scribble sounds you will have to let go a bit (ca 10 frames) after that
    • you can combo with TKj236X or the usual gorunded normals

Ender: 2H>22M

  • Provides HKD
  • 22M only hits when you launch with 2H
  • follow it up with dl.214H > stuff (see oki section)

Techtrap Routing:

  • corner only
  • after 22L or j236X groundbounce
  • >dl2M>5M>5H>6H>2H>jM>j236X>... corner
    • if they tech they will have to block 6H and then get hit by 2H wich is AUB
    • if they don't tech you continue the combo
    • if they dont get reset you might not be able to use another 6H since it will triger IPS!

IPS Reset

  • IPS will trigger after a certain repetition of the same moves in combos
    • 5xM normals, 3xH normals
  • in the croner we can use that to reset the Combo with 2H>214H
    • they will get launched and any immediate followup will not hit, the combo counter is reset and then they can chose to tech in the air
      • Since 214H is so incredebly active it will hit them once thier hurtbox is active again.
      • if they block you can AUB them with 2H if they get hit you can either jM>236X or also 2H them
      • if they backtech and mash they will tech higher and you have to jM>236X this will not reset on tech> block
    • needs a combo with 3x2H
      • the normal starter has to be modified with 2H instead of 3C

236S:

  • starter>236S
    • you can add it after the 3C on the normal starter and continue with a SCC 22L
    • you can add it after 236L to get the install and threaten the Commandgrab or the Antiair Grab
    • you can also combo into it but its only 2 Hits and scaleing very heavily reduces this Damage!

Oki

WIP
22M gives you hard knockdown the best oki after it is 214H you can either SCC it or not which will give you slightly different options


Basics of 214H oki:

  • 2L low >
  • 9jL IOH > land > 2M >
  • 9jH crossup > 2L/M
  • tk9S overhead
  • 9dljS wiff into crossup 2L low

Depending on when you do the 214H and if you micro dash before it your options might change

  • 22M>214H
    • you are somewhat further away after this one you can then dash up and act before 214H hits
      • this leaves a gap to get hit by an invul reversal but if they mash a normal they will get hit by the orb and you can combo even if it trades
    • >dash throw/commandthrow
      • normal throw might be better midscreen since they will waekup and still get hit by the last 2 hits of the 214H projectile
    • >9>jC crossup
    • 50/50 high low mix
      • dash > 2L low > stuff
      • dash > 9jL IOH > 2L/M
  • 22M>microdash>214H
    • 214H will hit meaty so you cant throw
        • >9>jC crossup
    • 50/50 high low mix
      • 2L low > Stuff
      • 9jL IOH>land>2M
      • 2l>dl9jA low into IOH but you cant combo after it so only for when 61 damage kills
      • 2l>2C double low can be jumpcanceled into crossup jC
  • 22M>microdash>dl>214H
    • will leave a gap again so you can throw here


236G commandgrab also gives you enough Advantage to setup 214H

  • 236G>214H will hit meaty but you are somewhat far away
  • 236G>microdash>214H
    • same oki as 22B>microdash>214H
  • 236G>dl214H
    • same oki as 22B>214H
    • do 214H around when they hit the ground after the bounce

Pressure

WIP

Matchups

Vs. Aki
Matchup advice goes here.
Vs. Ayame
Matchup advice goes here.
Vs. Botan
  • 5M>5L blockstring loop seems to work fine on her, no matter if she's stand blocking or crouch blocking.
Vs. Coco
  • 236M wins against her dinosaur grab
Vs. Fubuki
  • Tatsu projectile invuln can sometimes go through non-meaty 214H oki setups. Make sure your setups are meaty even if you give up mix.
Vs. Korone
Matchup advice goes here.
Vs. Sora
  • Sora 22M reflects 214H and can be used as a reversal vs non-meaty EX Comet oki setups, particularly after command grab. Make sure you meaty her even if you need to give up a mixup.
  • Sora 236L note bobs up and down so sliding under it with 3M requires much more precision than vs other characters. Not recommended if the option can be avoided.
Vs. Suisei
  • 8-2 Suisei favored for whoever gets the first hit. Trust no one, not even yourself.
  • Good luck being on the receiving end of your own oki lol.

External Resources

Colors

Original Outfit
Cosplay 1 Anemachi
Cosplay 2 Tokoyami Towa (Hololive)
Cosplay 3 Nanashi Mumei (Hololive)
Cosplay 4 Alternate Outfit
Cosplay 5 Inui Toko (Nijisanji)
Cosplay 6 Sion Eltnam Atlasia (Melty Blood)

Navigation

The Game
FAQ
Glossary
HUD & UI
Virtual Frontier
News & Updates
The Battle System
Controls
System
Resources
Game Data
Idols
Aki Rosenthal
Ayame Nakiri
Botan Shishiro
Coco Kiryu
Fubuki Shirakami
Ninomae InaNis
Korone Inugami
Kureiji Ollie
Pekora Usada
Sora Tokino
Suisei Hoshimachi
Collabs
Kanata Amane
Amelia Watson
Marine Houshou
Iroha Kazama
Risu Ayunda
Mio Ookami
Roboco
Miko Sakura
Kaela Kovalskia
Kiara Takanashi
Moona Hoshinova
AZKi
Subaru Oozora
Fauna Ceres