|
|
| Line 103: |
Line 103: |
| |advBlock= | | |advBlock= |
| |description=* Requires & uses 2 stocks of Star Meter. | | |description=* Requires & uses 2 stocks of Star Meter. |
| Kanata appears and dashes forward, grabbing the opponent and squeezing them. Cannot be comboed off of. | | Kanata appears and dashes forward, grabbing the opponent and squeezing them. |
|
| |
|
| }} | | }} |
Revision as of 02:39, 14 May 2023
Collabs (commonly referred to as Assists) are characters that are called into the fight using a full Superchat Meter or 2 stocks of Star Meter. One is selected during character select, and determines whether or not the point character has 2 or 3 maximum bars of Superchat Meter. They can be called at any time the point character is not in hitstun or blockstun.
Mio Ookami
Full Power Flaming Punch
214S
|
| Damage
|
Guard
|
Startup
|
Active
|
Recovery
|
Adv. on Block
|
Adv. on Hit
|
Invulnerability
|
| 190
|
Mid
|
-
|
-
|
-
|
-
|
-
|
None
|
- Requires and uses 2 stocks of Star Meter.
Mio travels across the screen at an upward angle, wall-bouncing for a full combo on hit.
|
|
Omen
L+H
|
| Damage
|
Guard
|
Startup
|
Active
|
Recovery
|
Adv. on Block
|
Adv. on Hit
|
Invulnerability
|
| -
|
-
|
-
|
-
|
-
|
-
|
-
|
None
|
- Requires and uses a full Superchat meter (2 bars).
Randomly applies debuffs to the opponent.
|
|
Marine Houshou
The Aquamarine
214S
|
| Damage
|
Guard
|
Startup
|
Active
|
Recovery
|
Adv. on Block
|
Adv. on Hit
|
Invulnerability
|
| 50x4 (200)
|
Mid
|
-
|
-
|
-
|
-
|
-
|
None
|
- Requires & uses 2 stocks of Star Meter.
Marine's pirate ship fires its cannons, covering a large area of the screen.
|
|
Hugging Pirate
L+H
|
| Damage
|
Guard
|
Startup
|
Active
|
Recovery
|
Adv. on Block
|
Adv. on Hit
|
Invulnerability
|
| -
|
Unblockable
|
-
|
-
|
-
|
-
|
-
|
None
|
- Requires and uses a full Superchat meter (2 bars).
Marine walks in and slowly approaches the opponent, leaping at them with a grab when she gets close enough. If she manages to grab the opponent, they are temporarily unable to dash and take chip damage from Normal Attacks.
|
|
Kanata Amane
50kg Grip
214S
|
| Damage
|
Guard
|
Startup
|
Active
|
Recovery
|
Adv. on Block
|
Adv. on Hit
|
Invulnerability
|
| 201
|
Unblockable
|
-
|
-
|
-
|
-
|
-
|
None
|
- Requires & uses 2 stocks of Star Meter.
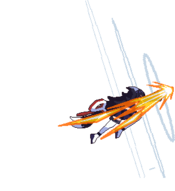
Kanata appears and dashes forward, grabbing the opponent and squeezing them.
|
|
Soran Bushi
L+H
|
| Damage
|
Guard
|
Startup
|
Active
|
Recovery
|
Adv. on Block
|
Adv. on Hit
|
Invulnerability
|
| -
|
-
|
-
|
-
|
-
|
-
|
-
|
None
|
- Requires & uses a full Superchat meter (2 bars).
Kanata appears to perform her famous Soran Bushi dance, temporarily preventing the screen from scrolling and periodically summoning waves that do no damage but push the opponent away significantly.
|
|
Iroha Kazama
Eggplant Slice
214S
|
| Damage
|
Guard
|
Startup
|
Active
|
Recovery
|
Adv. on Block
|
Adv. on Hit
|
Invulnerability
|
| 200
|
Mid
|
-
|
-
|
-
|
-
|
-
|
None
|
- Requires & uses 2 stocks of Star Meter.
A large sword slash that reaches fullscreen.
|
|
NinNinjanai
L+H
|
| Damage
|
Guard
|
Startup
|
Active
|
Recovery
|
Adv. on Block
|
Adv. on Hit
|
Invulnerability
|
| 40X11 (440)
|
Mid
|
-
|
-
|
-
|
-
|
-
|
None
|
- Requires & uses a full Superchat meter (2 bars).
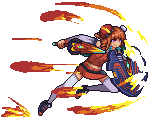
Iroha performs multiple dashing slashes that cover the top half of the screen, catching opponents in the air.
|
|
Risu Ayunda
Isekai Truck
214S
|
| Damage
|
Guard
|
Startup
|
Active
|
Recovery
|
Adv. on Block
|
Adv. on Hit
|
Invulnerability
|
| 150
|
Mid
|
-
|
-
|
-
|
-
|
-
|
None
|
- Requires & uses 2 stocks of Star Meter.
Risu rams her truck into nearby opponents.
|
|
Non-stop Nuts
L+H Respect the nuts! Respect the nuts!
|
| Damage
|
Guard
|
Startup
|
Active
|
Recovery
|
Adv. on Block
|
Adv. on Hit
|
Invulnerability
|
| 20xN
|
Mid
|
-
|
-
|
-
|
-
|
-
|
None
|
- Requires & uses a full Superchat meter (3 bars).
Risu summons nuts that launch at opponents when normals are performed. L attacks down ahead nearby, M attacks further out, and H attacks at an upward angle towards the air.
|
|
Kiara Takanashi
SPARKS
214S
|
| Damage
|
Guard
|
Startup
|
Active
|
Recovery
|
Adv. on Block
|
Adv. on Hit
|
Invulnerability
|
| 20x10 (200)
|
Mid
|
-
|
-
|
-
|
-
|
-
|
None
|
- Requires & uses 2 stocks of Star Meter.
Kiara flies across the screen with a shield charge.
|
|
HINOTORI
L+H
|
| Damage
|
Guard
|
Startup
|
Active
|
Recovery
|
Adv. on Block
|
Adv. on Hit
|
Invulnerability
|
| -
|
-
|
-
|
-
|
-
|
-
|
-
|
None
|
- Requires & uses a full Superchat meter (2 bars).
Kiara floats nearby with her shield out, temporarily reflecting projectiles.
|
|
Amelia Watson
Ground Pound
214S Hide your moms. Hide your moms.
|
| Damage
|
Guard
|
Startup
|
Active
|
Recovery
|
Adv. on Block
|
Adv. on Hit
|
Invulnerability
|
| 160
|
Mid
|
-
|
-
|
-
|
-
|
-
|
None
|
- Requires & uses 2 stocks of Star Meter.
- Can OTG for combos after throw, timing varies depending on character (Aki can only OTG in the corner).
After turning into Smol Ame, Amelia locks on to the opponent's current position and does a ground pound.
|
|
Time Slow
L+H ゴゴゴゴ... ゴゴゴゴ...
|
| Damage
|
Guard
|
Startup
|
Active
|
Recovery
|
Adv. on Block
|
Adv. on Hit
|
Invulnerability
|
| -
|
Unblockable
|
-
|
-
|
-
|
-
|
-
|
None
|
- Requires & uses a full Superchat meter (3 bars).
Amelia temporarily slows the opponent. This also disables the opponent's ability to air tech.
|
|
Roboco
Hi-Spec Beam
214S
|
| Damage
|
Guard
|
Startup
|
Active
|
Recovery
|
Adv. on Block
|
Adv. on Hit
|
Invulnerability
|
| 180
|
Mid
|
-
|
-
|
-
|
-
|
-
|
None
|
- Requires & uses 2 stocks of Star Meter.
Roboco fires a large laser beam that reaches fullscreen. The beam will track to the side the opponent is on if you get crossed up during the activation. It will only track when you are grounded, meaning if you cross-up the opponent with an overhead and use beam in the air, it will not track unless you hit the ground before the startup has ended.
|
|
Hi-Spec Missiles
L+H
|
| Damage
|
Guard
|
Startup
|
Active
|
Recovery
|
Adv. on Block
|
Adv. on Hit
|
Invulnerability
|
| 20x7 (140)
|
Mid
|
-
|
-
|
-
|
-
|
-
|
None
|
- Requires & uses a full Superchat meter (3 bars).
Roboco locks on to the opponent's current position and fires a barrage of missiles.
|
|
Miko Sakura
Lava Disaster
214S
|
| Damage
|
Guard
|
Startup
|
Active
|
Recovery
|
Adv. on Block
|
Adv. on Hit
|
Invulnerability
|
| 12*N
|
Mid
|
-
|
-
|
-
|
-
|
-
|
None
|
- Requires & uses 2 stocks of Star Meter.
Miko trips and spills a lava bucket, producing a long-lasting pillar of fire that locks down opponents.
|
|
Demon King Miko
L+H Nya-hello! Nya-hello! FAQ FAQ
|
| Damage
|
Guard
|
Startup
|
Active
|
Recovery
|
Adv. on Block
|
Adv. on Hit
|
Invulnerability
|
| 65*N
|
Mid
|
-
|
-
|
-
|
-
|
-
|
None
|
- Requires & uses a full Superchat meter (3 bars).
Miko appears behind her point character and walks back and forth nearby. If the opponent gets too close, she faceplants in the opponent's direction. Since Miko can't be interrupted while she does this, her point character is often free to pressure the opponent as she will save them even if they are hit.
|
|
Navigation
| The Game
|
|
| The Battle System
|
|
| Idols
|
|
| Collabs
|
|


