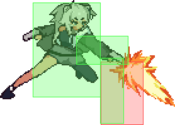
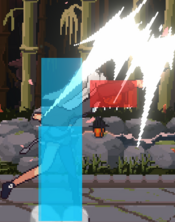
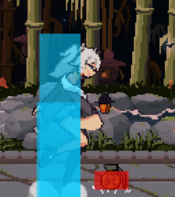
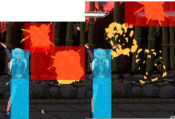
Idol Showdown/Botan Shishiro: Difference between revisions
Aguademizu (talk | contribs) (→Introduction: made collab section talk more about what they do for botan specifically and changed kanata for watson) |
(→Combos: add combo legend template) |
||
| Line 606: | Line 606: | ||
==Combos== | ==Combos== | ||
===General=== | ===General=== | ||
{{ComboLegend-IS}} | |||
() | (WIP, some combos are outdated as of 5/13/23) | ||
Please note that at the time of writing, the game is very new. Combos and Okizeme will most likely need to be re-evaluated by experienced players at a later date, as they are almost certainly not optimal. | Please note that at the time of writing, the game is very new. Combos and Okizeme will most likely need to be re-evaluated by experienced players at a later date, as they are almost certainly not optimal. | ||
| Line 637: | Line 627: | ||
*3H 236M - Meterless max damage ender. Sacrifices oki for damage. | *3H 236M - Meterless max damage ender. Sacrifices oki for damage. | ||
*3H 236M 236S - 2 bar ender. Sacrifices oki for damage. | *3H 236M 236S - 2 bar ender. Sacrifices oki for damage. | ||
===Beginner Combos=== | ===Beginner Combos=== | ||
Revision as of 18:51, 16 May 2023
Special Forces La~Lion - Tactical Space Control
Introduction
| Strengths | Weaknesses |
|---|---|
|
|
Recommended Collabs
Note: As this section of the page was written shortly after the game was released, it's only purpose is to help guide new players towards assists that are generally considered useful for the character, and should be revised by an experienced player as the game develops more. Don't be afraid to pick and try something else!
 Marine - Marine's Off-Collab synergizes well with Botan's multi-hit kit and allows for unblockable setups. 214S is a great full-screen lockdown tool.
 Watson - Watson's 214S evens out the reward on her strike-throw mixup by allowing for full conversions from her grab. Her timeslow nullifies opposing offense and allows Botan to combo meterless off 22M~H.
 Miko - Miko's lava assist is a great lockdown tool that allows Botan to convert off her overheads, and can setup chip-out situations. Her Off-Collab forces Botan's turn back immediately.
 Roboco - Roboco's missiles are versatile. Botan can extend her pressure with them, use them for combos together with her airgrab, and they can force the opponent to back off. In addition, 214S is an ol'reliable instant fullscreen beam assist with great damage.
Normal Moves
Standing Normals
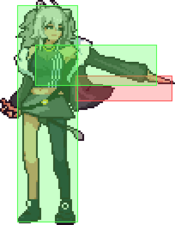
5L
5L
|
|
|---|---|
Toggle Hitboxes Toggle Hitboxes
|
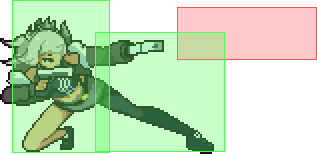
5M
5M
|
|
|---|---|
Toggle Hitboxes Toggle Hitboxes
|
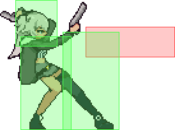
5M~M
5M~M
|
|
|---|---|
Toggle Hitboxes Toggle Hitboxes
|
5H
5H
|
|
|---|---|
Toggle Hitboxes Toggle Hitboxes
|
Crouching Normals
2L
2L
|
|
|---|---|
Toggle Hitboxes Toggle Hitboxes
|
2M
2M
|
|
|---|---|
Toggle Hitboxes Toggle Hitboxes
|
2H
2H
|
|
|---|---|
Toggle Hitboxes Toggle Hitboxes
|
3H
3H
|
|
|---|---|
Toggle Hitboxes Toggle Hitboxes
|
Jumping Normals
j.L
j.L
|
|
|---|---|
Toggle Hitboxes Toggle Hitboxes
|
j.M
j.M
|
|
|---|---|
Toggle Hitboxes Toggle Hitboxes
|
j.H
j.H
|
|
|---|---|
Toggle Hitboxes Toggle Hitboxes
|
Command Normals
j.2H
j.2H
|
|
|---|---|
Toggle Hitboxes Toggle Hitboxes
|
6M
6M
|
|
|---|---|
Toggle Hitboxes Toggle Hitboxes
|
4H
4H
|
|
|---|---|
Toggle Hitboxes Toggle Hitboxes
|
Universal Mechanics
Throw
Throw
L+M |
|
|---|---|
Toggle Hitboxes Toggle Hitboxes
|
Air Throw
Air Throw
j.L+M |
|
|---|---|
Toggle Hitboxes Toggle Hitboxes
|
Overhead
Overhead
M+H |
|
|---|---|
Toggle Hitboxes Toggle Hitboxes
|
Special Attacks
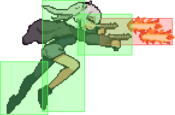
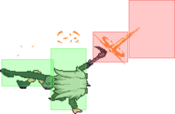
236X
Poi 236L/M/H (High) (High) (Low) (Low) S.S.R.B S.S.R.B
|
|
|---|---|
Toggle Hitboxes Toggle Hitboxes
|
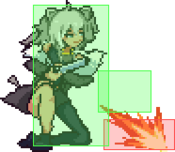
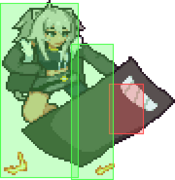
214X
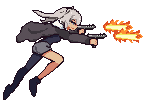
Quickscope 214L/M/H (Low) (Low) (High) (High) MLG Trickshot MLG Trickshot
|
|
|---|---|
Toggle Hitboxes Toggle Hitboxes
|
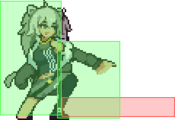
22L
Tactical Roll
22L |
|
|---|---|
Toggle Hitboxes Toggle Hitboxes
|
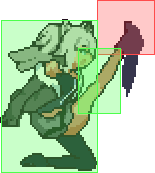
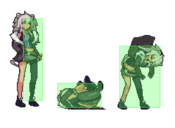
22M/H
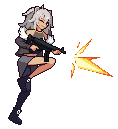
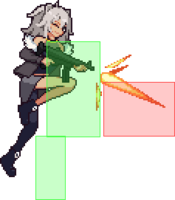
Lioness Leap 22M/H Functionally similar to Akuma's "Demon Flip" from Street Fighter. Functionally similar to Akuma's "Demon Flip" from Street Fighter. M Follow-Up M Follow-Up H Follow-Up H Follow-Up
|
|
|---|---|
Toggle Hitboxes Toggle Hitboxes
|
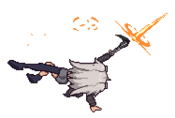
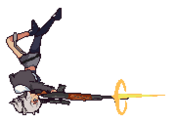
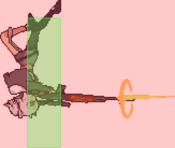
j.214H
Bullet Rain
j.214H |
|
|---|---|
Toggle Hitboxes Toggle Hitboxes
|
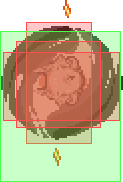
22S
Trials Ascending 22S Literally and figuratively carrying the character Literally and figuratively carrying the character
|
|
|---|---|
Toggle Hitboxes Toggle Hitboxes
|
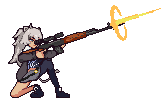
Super Star Attack
Get To Da Choppa!
236S |
|
|---|---|
Toggle Hitboxes Toggle Hitboxes
|
Combos
General
| Combo Notation Help | |
|---|---|
| Disclaimer: Combos are written by different authors, so the notation used can vary from the standard one. For additional information on terminology for Idol Showdown or fighting games in general, please consult the Idol Showdown Glossary or the Fighting Game Glossary. | |
| #X | Input writted with numpad notation for the direction/motion input followed by the action. |
| X > Y | X input is cancelled into Y. |
| X, Y | X input is linked to Y, meaning Y is done after X's recovery frames. |
| X~Y | This notation has two meanings: 1. Use attack X with followup Y. 2. Input X, and then within a few frames, input Y. Sometimes referred to as "kara cancelling". |
| [X] | Input X is held down. |
| {X} | Input is partially charged (as in, not tapped but not held to full charge either). |
| (X) | Input X is optional. Typically, the combo will be easier without this input. |
| X/Y | Choose between input X or input Y. |
| #jc | Jump cancel. The number (7, 8, or 9) indicates which direction the jump cancel should be input if it is important to the combo. |
| j.X | Jumping input X. X should be input while airborne. |
| dl.X | Delayed input X. There will be some delay before inputting X. |
| CH X | Counterhit with input X. This is used for combo starters that require counterhit confirm. |
| OTG X | Input X while the opponent is knocked down but still able to be hit. |
| X(n) | Number of hits of a multihit attack. If an attack is multihit and this is not specified, it is assumed to let the maximum number of hits complete before proceeding. |
| scc | Superchat Cancel. Idol Showdown unique mechanic that allows you to cancel the recovery of one special into another special. |
(WIP, some combos are outdated as of 5/13/23)
Please note that at the time of writing, the game is very new. Combos and Okizeme will most likely need to be re-evaluated by experienced players at a later date, as they are almost certainly not optimal.
Botan's Combos are quite range and position specific, primarily revolving around her various wallbounce and ground bounce limits. Combos can change both in difficulty depending on what you have access to and how close you are the corner, forcing the player to adjust on the fly.
Botan's damage output is fairly high but consistency and optimization can be tricky, so it's better to think of these combos as examples than hard rules to follow. Use your own experience and skill to experiment for what works for you. And remember, any damage is good damage instead of dropping a combo at a bad time.
Hitconfirms
- 2L 5M - Standard hitconfirm. Leads into her biggest combos, but does not connect at max range 2L.
- 2L 2M - Max range 2L hitconfirm. Rarely used, as it does not lead to 2H routes.
- 2M 5H - Long range hitconfirm. Does not lead to 2H routes.
- 5M~M 5H - Long range poke confirm.
Enders
- 3H - Standard ender. Leads to great oki.
- 3H 236M - Meterless max damage ender. Sacrifices oki for damage.
- 3H 236M 236S - 2 bar ender. Sacrifices oki for damage.
Beginner Combos
These combos work on everyone and aren't too difficult.
| Combo | Difficulty | Damage | Cost | Meter Gain | Location |
|---|---|---|---|---|---|
| 2L > 5M~M > 2M > 5H > 2H > dl 3H | 287 | 0 bar | ??? Opp: ??? |
Anywhere | |
|
Works from close range Starters. Basic BnB combo. 3H only needs to be delayed a little and it connects after 2H. Ending in 3H gives Botan her best knockdown for pressure and mixups. Youtube | |||||
| 2L > 2M > 5H > 3H | 191 | 0 bar | ??? Opp: ??? |
Anywhere | |
|
When too far away for 5M to connect. If Botan's not close enough to the opponent, 2H will not connect. 5H can also be replaced with 6M if that feels more comfortable to use. Youtube | |||||
| 2H, 6M > 3H | 238 | 0 bar | ??? Opp: ??? |
Anywhere | |
|
Basic Anti-air combo from 2H. Youtube | |||||
| Air Throw > 5M(1) > 5H(3) > 2H, 6M > 3H | 278 | 0 bar | ??? Opp: ??? |
Anywhere | |
|
Basic Air Throw combo. Youtube | |||||
Intermediate Combos
Midscreen
Keep in mind that if the combo starts too close to the corner, one of the wallbounces may have to be skipped and end the combo early as it risks bouncing the opponent out of the corner.
| Combo | Difficulty | Damage | Cost | Meter Gain | Location |
|---|---|---|---|---|---|
| 2L > 5M~M > 5H > 2H > 214M > 5L > 5M(1) > 5H > 2H > 6M > 3H | 0 bar | ??? Opp: ??? |
Midscreen | ||
|
Simple midscreen only BnB that utilizes a single wallbounce. The standard combo that most of the harder combos will be based on. Learning this will teach you the basics of optimizing Botan's combos. | |||||
| 2L > 5M~M > 5H > 2H > 214M > 5L > 5M(1) > 5H > 2H > 22L~M > 9 > j.AT > 5M(1) > 6M > 3H | 348 | 0 bar | ??? Opp: ??? |
Midscreen | |
|
More advanced version of the above BnB. Useful to learn as it uses many elements of her combo theory. Can be confirmed into super by ending with 3H > 236M > 236S instead. | |||||
| AA 2H > 22LM, 5L > dl 5M(3) > dl 5H(3) > dl 3H > 214M, 5L > 5M(3) > 5H(3) > 3H | 330 | 0 bar | ??? Opp: ??? |
Midscreen | |
|
Anti-air combo from 2H. Youtube | |||||
Corner
| Combo | Difficulty | Damage | Cost | Meter Gain | Location |
|---|---|---|---|---|---|
| 2L > 5M~M > 5H > 2H > 236M, jump Air Throw > 5M > dl.5H > 2H > 3H | 0 bar | ??? Opp: ??? |
Corner | ||
|
Add 4H~H~H > 3H before the 236M to make the grenade work on Ayame. | |||||
Advanced Combos
Combos that require a specific starter, or are more executionally challenging than the General BnBs listed above.
Midscreen
| Combo | Difficulty | Damage | Cost | Meter Gain | Location |
|---|---|---|---|---|---|
| 2L > 5M~M > 5H > 2H > dl.3H > 214M, 2M > 5M~dl.M > 2H > 22L~M, 9j.AT > 5M > dl.5H > 4H~H~H > 3H | Hard | 368 | None | ~1.5 | Midscreen |
|
Substitute the 2M for 5L on Ayame. Close to the corner, omit the first 3H. Even closer than that, omit the 3H and 5H. Youtube | |||||
| 2L > 5M~M > 5H > 2H > dl.3H > 236M > 214H, 8j.2H, 8j.AT, 5M > 5H > 4H~H~H > 3H > 214M, 2M > 5M~dl.M > 2H > 22L~M, 9j.AT > 5M~M > 6M > 3H | Very Hard | 422 | 1 bar, 1 SC | ??? | Midscreen |
|
Substitute the 2M for 5L on Ayame. The final 3H triggers IPS and becomes a soft knockdown. Youtube | |||||
| 2L > 5M~M > 5H > 2H > 3H > 236M > 214H, 8j.2H, 8j.AT, 5M~M > 6M > 214M, 2M > 5M~dl.M > 2H > 22L~M, 9j.AT > 5M~M > 6M > dl.3H > 236M > 236S | Extremely Hard | 455(485) | 3 bar, 1 SC | ??? | Midscreen |
|
Substitute the 2M for 5L on Ayame. Youtube | |||||
| AA 2H, 6M > dl 3C > 214M, 2M > dl.5M > dl.5H > dl 3C > 22LM, 5L > 5M > 5H > dl.3H | Moderate | 400 | None | ??? | Midscreen |
|
Substitute the 2M for 5L on Ayame. The final 3H triggers IPS and becomes a soft knockdown. Youtube | |||||
| Air Throw > 5M > dl.5H > dl.3H 214M, 2M > 5M > dl.5H > 2H > 22LM, 8j.AT > 5M~M > 6M > dl3H | Moderate | 391 | None | ??? | Midscreen |
|
Substitute the 2M for 5L on Ayame. Youtube | |||||
Corner
| Combo | Difficulty | Damage | Cost | Meter Gain | Location |
|---|---|---|---|---|---|
| 2L > 5M~M > 5H > 2H > 236M, 9j.AT > 5M > dl.5H > 2H > dl.236M, 9j.AT > dl.5L > 2M > 5M~dl.M > 6M > 3H | Moderate | 365 | None | ??? | Corner |
|
Add 4H~H~H > 3H after the first 2H on Ayame. If you are slightly too far from the corner, substitute the 5H > 2H with 2H > dl.5H(2) > 3H. Youtube | |||||
| j.AT > 5M > dl.5H > 2H > dl.236M, 9j.AT > dl.5L > 2M > 5M > dl.5H > 4H~H~H > 3H | Moderate | 368 | None | ??? | Corner |
|
Surprise, no Ayame note! Youtube | |||||
Okizeme
- 3H
- Mixup A | 5M~M into strike/throw
- Chain into 2M for a frametrap, or throw to catch opponents blocking.
- Mixup B | 9j2H 2L
- Jumping at different timings causes the j2H to hit or whiff, mixing between a high and low option. Using j.2H at different timings will cause Botan to land on different sides, giving her a left right mixup.
- Due to this option needing 3H to recover, it is recommended to use it from higher 3H knockdowns such as 2H > 3H
- Example: https://youtu.be/-eYa3gi0ScE
- Mixup C | 22M/22H High/Low/Throw
- From 3H ender, you either manually time a 22M, or use 22L as soon as possible then use it's H followup, to put yourself in a position where
- A: You can meaty with L/M followup
- B: You can hit with H followup before they can respond with a normal
- C: You land then use 2L option (Due to this option needing more time, it is recommended to use it from higher 3H knockdowns such as 2H > 3H)
- How you set this up varies on how your 3H connects. A 6M > 3H knockdown will likely require 22L > 22M, whereas a 2H > 3H will require some sort of delay.
- Example: https://youtu.be/ot5dpkVv2hM
- From 3H ender, you either manually time a 22M, or use 22L as soon as possible then use it's H followup, to put yourself in a position where
- Mixup A | 5M~M into strike/throw
- Throw
- Dash 5L is her main okizeme option after throw. You can go into her standard 5M/throw mix, or throw opponents over respecting the 5L.
Strategy
Note: This gameplan was written shortly after the game was released to give newer players a sense of direction, it should be continuously reviewed by experienced players as the game develops more.
During neutral, Botan generally wants to keep her opponent around roundstart range, alternating between forcing her way in and sitting back to catch approaches.
- Her main way of forcing offense is 5M~M into her strike throw pressure.
- Botan has many ways of controlling space to catch approaches. 5M reels her hurtbox backwards to catch opponents dashing or swinging at you, and 2M is great at catching sweeps and other low profile pokes. j2H is an extremely strong neutral tool, and can be used to stuff most grounded approaches or establish pressure depending on the jump direction. Additionally, it is plus on block and leads to Botan's best offensive situations. All 3 options are disjointed and lead to good damage.
- Her main anti air, 2H, is quite slow but is air unblockable, very disjointed, and leads to her highest damage anti air punishes. 5M is faster and works to cover jumpins from further away, but does not cover directly above Botan. Airthrow is a great option for catching jumpins at close range where 2H and 5M would whiff.
- Botan has a plethora of whiff punishes as well. 5H is her fastest and most damaging whiff punish, but is very risky if you miss yourself. 6M is slightly slower, but advances faster and is safer on whiff. 3H is a slight low profile, but has the worst reward of the three.
- If the Botan's opponent is playing too passively, she can catch them off guard with a dash up 2L/throw mix. 2L leads into her close-range pressure, and throw leads back into another 2L/throw mixup.
- If the opponent is spaced too far for her main neutral options, she can establish pressure with grenades. 236L homes into the opponent's current location when thrown out and will often force them to move closer or back away to avoid it. 236M makes them unable to move in from the ground and forces them to either begin blocking her pressure or jump while risking a 2H or airthrow punish. Both grenades deal quite a bit of chip, but are slow and risky while the opponent is close, as well as being punishable if blocked point-blank.
- While 214L rifle shot is extremely punishable when the opponent is around roundstart distance or closer, it's low-profile can dodge and punish other projectiles.
Once Botan forces her opponent to block, you can then go into her strike-throw mix. j2H is plus, 5L is -1, 2L and 5MM are both -3. All of these options let Botan frametrap with a normal, as well as leaving her in range for a grab to catch blocking opponents. If you think your opponent won't respond with a mash, you can attempt to reset this pressure with a jab or j2H. You can work variations into this basic mix:
- 5L can be used for stagger pressure or tick throws as it's -1,
- 5M's followup can be used sooner or later or not at all for another tick throw,
- 2H can catch attempts to jump and block,
- and while risky because of the presence of some character's sweeps, you can also roll back a good distance after committing to her H moves by using 2H>22L. Another option (with meter) is forcefully trying to extend your pressure after a blocked H with 22H, as it dodges lows and is quite fast at around 15-18f minimum startup (depends on the followup).
After Botan gets her knockdown, she can either go for a regular meaty and head back into her close-range pressure or j.2H right on top of the opponent for a very ambiguous sideswitch.
On defense, it becomes your turn to take a risk.
- Her 2L is fast quite stubby, 5L is a bit slower but has good range and is excellent at catching airborne attacks like overheads, and 2M is slower still but can beat out attempts to outspace your jabs.
- With meter, you can use 22S, an advancing armored reversal that leads directly onto her BnB on hit and can be hard to punish even on block. However, 22S is not armored on frame one, and therefore works better out of blockstun than on wakeup.
- Using instant block to generate Superchat Meter can give early access to your Off-Collab, which can be used defensively depending on the assist. Instant block is also a great way to keep the opponent in range of your jabs, as it negates pushback.
Matchups
- Vs. Aki
- Matchup advice goes here.
- Vs. Ayame
- Matchup advice goes here.
- Vs. Botan
- Matchup advice goes here.
- Vs. Coco
- Matchup advice goes here.
- Vs. Fubuki
- Matchup advice goes here.
- Vs. Korone
- Matchup advice goes here.
- Vs. Sora
- 236M (Ground grenades) become much harder to use due to her reflector (22M). 6M can be punished at a lot of ranges on block by 5M. Since zoning becomes more of a two-way street, this match-up requires a lot of patience and capitilisation on your knockdown oppurtunities to snowball the game.
- Vs. Suisei
- Matchup advice goes here.
External Resources
Colors
Yukihana Lamy (Hololive)
Momosuzu Nene (Hololive)
Omaru Polka (Hololive)
Mano Aloe (Hololive)
Botan's New Year Costume (Hololive)
Noel (BlazBlue)


