Idol Showdown/Suisei Hoshimachi: Difference between revisions
(→New Combo Section - WIP Please Ignore: add combo legend template) |
(→Combos: add combo legend template) |
||
| Line 678: | Line 678: | ||
==Combos== | ==Combos== | ||
{{ComboLegend-IS}} | |||
'''Note:''' j.S can always be replaced with j.236X for SC meter gain, but it becomes really tight in some routes since TK motions are not present in the game. | '''Note:''' j.S can always be replaced with j.236X for SC meter gain, but it becomes really tight in some routes since TK motions are not present in the game. | ||
===Mid-screen=== | ===Mid-screen=== | ||
Revision as of 18:55, 16 May 2023
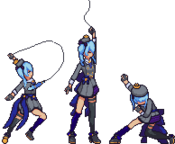
Stellar Stylish Idol - Saikou Pressure
Introduction
|
|
|
| Pros | Cons |
|
|
Moves
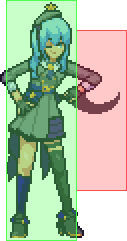
Standing Normals
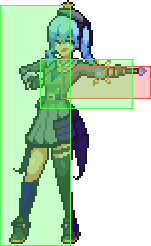
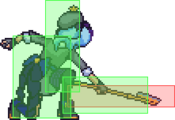
5L
5L
|
|
|---|---|
Toggle Hitboxes Toggle Hitboxes
|
5M
5M Dab Dab
|
|
|---|---|
Toggle Hitboxes Toggle Hitboxes
|
5H
5H
|
|
|---|---|
Toggle Hitboxes Toggle Hitboxes
|
Crouching Normals
2L
2L
|
|
|---|---|
Toggle Hitboxes Toggle Hitboxes
|
2M
2M Your best friend in neutral Your best friend in neutral
|
|
|---|---|
Toggle Hitboxes Toggle Hitboxes
|
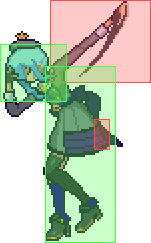
2H
2H
|
|
|---|---|
Toggle Hitboxes Toggle Hitboxes
|
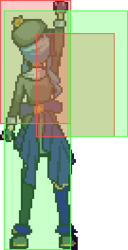
3H
3H
|
|
|---|---|
Toggle Hitboxes Toggle Hitboxes
|
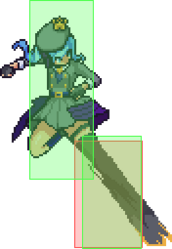
Jumping Normals
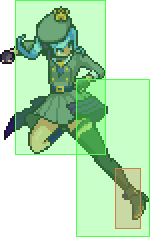
j.L
j.L
|
|
|---|---|
Toggle Hitboxes Toggle Hitboxes
|
j.M
j.M
|
|
|---|---|
Toggle Hitboxes Toggle Hitboxes
|
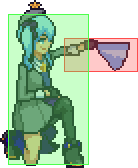
j.H
j.H
|
|
|---|---|
Toggle Hitboxes Toggle Hitboxes
|
Command Normals
3M
3M You got this trying to input dash 2M, didn't you? You got this trying to input dash 2M, didn't you?
|
|
|---|---|
Toggle Hitboxes Toggle Hitboxes
|
6H
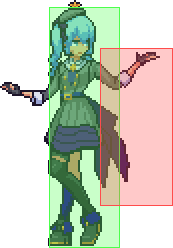
6H Sui-ssor Kick! Sui-ssor Kick!
|
|
|---|---|
Toggle Hitboxes Toggle Hitboxes
|
Throw
Throw
L+M |
|
|---|---|
Toggle Hitboxes Toggle Hitboxes
|
Overhead
Overhead M+H Uses the same sprite as j.L Uses the same sprite as j.L
|
|
|---|---|
Toggle Hitboxes Toggle Hitboxes
|
Special Attacks
236L
Wicked Slice
236L / 5S |
|
|---|---|
Toggle Hitboxes Toggle Hitboxes
|
236M
Starry Slice 236M / 6S Greed Sever! Greed Sever!
|
|
|---|---|
Toggle Hitboxes Toggle Hitboxes
|
236H
Heart Harvest
236H |
|
|---|---|
Toggle Hitboxes Toggle Hitboxes
|
236G
Tetromino Transhumanism
236G |
|
|---|---|
Toggle Hitboxes Toggle Hitboxes
|
214L/M
Stellar Medley (Close/Far)
214L/M |
|
|---|---|
Toggle Hitboxes Toggle Hitboxes
|
214H
STELLAR into the GALAXY 214H The reason you play Suisei The reason you play Suisei
|
|
|---|---|
Toggle Hitboxes Toggle Hitboxes
|
22L
Hoshispin (Horizontal)
22L |
|
|---|---|
Toggle Hitboxes Toggle Hitboxes
|
22M
Hoshispin (Vertical)
22M / 2S |
|
|---|---|
Toggle Hitboxes Toggle Hitboxes
|
22H
Psycho Hoshispin
22H |
|
|---|---|
Toggle Hitboxes Toggle Hitboxes
|
22S
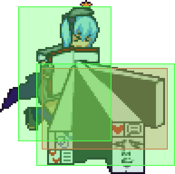
Selfish of a Rough Stone 22S Similar to FADC from Street Fighter IV Similar to FADC from Street Fighter IV
|
|
|---|---|
Toggle Hitboxes Toggle Hitboxes
|
j.S
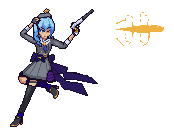
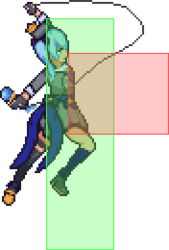
Stellar Slice j.S / j.236L / j.236M / j.236H Bandit Revolver! Bandit Revolver!
|
|
|---|---|
Toggle Hitboxes Toggle Hitboxes
|
Super Star Attack
SPACE for Virtual GHOST 236S The closest thing this game has to a taunt The closest thing this game has to a taunt
|
|
|---|---|
Toggle Hitboxes Toggle Hitboxes
|
SPACE for Virtual GHOST
during install 236S |
|
|---|---|
Toggle Hitboxes Toggle Hitboxes
|
SPACE for Virtual GHOST
during install 22S |
|
|---|---|
Toggle Hitboxes Toggle Hitboxes
|
Combos
| Combo Notation Help | |
|---|---|
| Disclaimer: Combos are written by different authors, so the notation used can vary from the standard one. For additional information on terminology for Idol Showdown or fighting games in general, please consult the Idol Showdown Glossary or the Fighting Game Glossary. | |
| #X | Input writted with numpad notation for the direction/motion input followed by the action. |
| X > Y | X input is cancelled into Y. |
| X, Y | X input is linked to Y, meaning Y is done after X's recovery frames. |
| X~Y | This notation has two meanings: 1. Use attack X with followup Y. 2. Input X, and then within a few frames, input Y. Sometimes referred to as "kara cancelling". |
| [X] | Input X is held down. |
| {X} | Input is partially charged (as in, not tapped but not held to full charge either). |
| (X) | Input X is optional. Typically, the combo will be easier without this input. |
| X/Y | Choose between input X or input Y. |
| #jc | Jump cancel. The number (7, 8, or 9) indicates which direction the jump cancel should be input if it is important to the combo. |
| j.X | Jumping input X. X should be input while airborne. |
| dl.X | Delayed input X. There will be some delay before inputting X. |
| CH X | Counterhit with input X. This is used for combo starters that require counterhit confirm. |
| OTG X | Input X while the opponent is knocked down but still able to be hit. |
| X(n) | Number of hits of a multihit attack. If an attack is multihit and this is not specified, it is assumed to let the maximum number of hits complete before proceeding. |
| scc | Superchat Cancel. Idol Showdown unique mechanic that allows you to cancel the recovery of one special into another special. |
Note: j.S can always be replaced with j.236X for SC meter gain, but it becomes really tight in some routes since TK motions are not present in the game.
Mid-screen
| Combo | Difficulty | Damage | Cost | Meter Gain | Location |
|---|---|---|---|---|---|
| (2L) > 2M > 5H > 6H > dl.3H > 22L > j.S > 5L > 5M > 2H > 22M | Easy | 273(2L), 345(2M) | 0 bar | 1.1(2L), 1.1(2M) Opp: ?% |
Anywhere |
|
|||||
| (2L) > 2M > 5H > 6H > dl.3H > 22L > 5H/dl.2M > 2H > 7/9jc > dl.j.S > dash > 5L > 2L > 2M > 5M > 2H > 22M | Hard | 295(2L), 371(2M) | 0 bar | 1.6(2L), 1.5(2M) Opp: ?% |
Anywhere |
|
|||||
| (2L) > 2M > 5H > 6H > dl.3H > 22L > 5H > 2H > 9jc > j.M > j.S > dl.6H > (walk back >) 5L > 2L > 2M > 5M > 2H > 22M | 303(2L), 383(2M) | 0 bar | 1.8(2L), 1.7(2M) Opp: ?% |
Near Corner | |
|
|||||
| 2H > 7/9jc > dl.j.S > dash > dl.6H > dl.3H > 22L > (dash > 5L > 2L > 2M > 5M)/(5H) > 2H > 22M | 355/367 | 0 bar | 1.2/0.9 Opp: ?% |
Anywhere | |
|
|||||
| 2L > 2M > 5M > 5L > (2M >) 5M > 5L > 5M > 2M > 5H > 6H > dl.3H > 22L > 5L > 2L > 5H > 2H > 7jc/9jc > dl.j.S > dash > 5L > 2L > 2M > 5M > 2H > 22M | Medium | 239 (244) | 0 bar | 2.3 (2.4) Opp: ?% |
Anywhere |
|
|||||
| 2L > 2M > 5M > 5L > 2M > 5M > 5L > dl.5M > 5L > 2M > 5H > 6H > 5L > 5M > 2M > 5H > 6H > dl.3H > 22L > dash > 2L > 2H > 7jc/9jc > dl.j.S > dash > 2L > 2H > 22M | 247 | 0 bar | 2.6 Opp: ?% |
Anywhere | |
|
|||||
| 2M > 236L > 22S~6 > 5M > 5L > 5H > 6H > dl.3H > 22L > 5H > 2H > 7jc/9jc > j.S > dash > 5L > 2L > 2M > 5M > 2H > 22M | 297 | 1 bar | 1.7 Opp: ?% |
Anywhere | |
|
|||||
| 2M > 236L > 22S~6 > 2H > 7/9jc > dl.j.S > dash > dl.6H > dl.3H > 22L > (5L > 2L > 2M > 5M)/(5H) > 2H > 22M | 320/322 | 1 bar | 1.4/1.1 Opp: ?% |
Anywhere | |
|
|||||
Corner
| Combo | Difficulty | Damage | Cost | Meter Gain | Location |
|---|---|---|---|---|---|
| (2L) > 2M > 5H > 6H > dash > dl.6H > dl.3H > 22L > dash > 2M > 5M > 5H > 2H > 9jc > j.M > j.S > dash > 5L > 2L > 2M > 5M > 2H > 22M | 309(2L), 389(2M) | 0 bar | 2.0(2L), 1.9(2M) Opp: ?% |
Corner | |
|
|||||
| 2L > 2M > 5M > 5L > 5M > 5H > 214M > dash > 2L > 2M > 5M > 5L > 5M > 5H > 214M > dash > 2L > 5L > 2M > 3H > 22L > j.M > dash > 6H > 214{L} > 6H > 2H > 7jc > dl.j.S > dash > 5L > 2L > 2M > 2H > 22M | 266 | 0 bar | 3.0 Opp: ?% |
Anywhere | |
|
|||||
Theory
WIP
Grounded hit starters:
- Midscreen buttons > 5H > (dl.)6H > dl.3H/dl.2H > etc.
- Always delay 3H/2H for consistency, 6H only needs to be delayed off specific spacings (e.g. max range 5L), doesn't work off max range 5H even with delays.
- Corner buttons > 5H > 6H > dash > dl.6H > dl.3H/2H > etc.
- The wallbounce on 6H allows for another 6H for more damage.
- While optional, adding a dash builds a small amount of meter.
Far grounded hit:
- Requires resources.
- Max range 2M only combos into 236L
- 2M > 236L >
- 22S~6 > 5M > 5L > etc.
- 236L forces standing so the 5M > 5L link is always possible.
- Costs 1 bar, from max range 2M it may be necessary to delay 22S for the slight forward movement or else 5M may whiff.
- 22S~6 > 2H > etc.
- Costs 1 bar, goes into standard routing.
- 236M > 22L > etc.
- Costs 2 SCCs, goes into standard routing.
- 236M has to be done quite quickly, otherwise it may not combo.
- Practical as Suisei rarely needs to SCC.
- 22S~6 > 5M > 5L > etc.
5M > 5L loops: 5M can link into 5L if hit on a standing opponent, and the forward movement on 5M allows this to be looped.
- Requires a standing opponent so its mainly used after moves that force a standing state (2L and 236L).
- Leads to lower damage due to reaching minimum scaling very early, however it allows for high meter build midscreen (corner routes already build enough).
Combo extenders:
- 3H > 22L
- Ideal way to lead into 22L, can be set up on air hit with a low 5H or 6H.
- Midscreen, go into either delayed 2M (ease) or 5H (damage).
- In the corner always go into 2M as 5H > 2H still works even after doing M normals.
- Midscreen 2H > 7jc/9jc > dl.j.S
- Main way to go into j.S, going into it directly from 22L will lose lots of damage.
- Go into either 6H to extend a combo, or an ending string.
- Too little delay will either make j.S whiff or have it sideswap even with 7jc, too much delay will allow the opponent to block.
- 7jc for sameside, 9jc for sideswap. In the corner this piece will always sideswap.
- Corner 2H > 9jc > j.S
- The corner wallbounce on j.M results in this easier piece that also does more damage.
- Corner 2H > 8jc > dl.j.M
- Rare combo piece used when j.S has been used but not j.M. Can land and go into a standard ending string.
- Corner 6H (wallbounce)
- On a grounded hit (i.e. in a starting string), generally goes into another 6H.
- On an air hit, can link into basically anything, but generally goes either into 5H > dl.3H > 22L, or an ending string.
Combo enders (after 22L or j.S):
- (22L > 5H)/(j.S > 6H) > 2H > 22M
- Most damaging ender only when not at super low scaling yet (rare after fully optimized combos).
- 22L/j.S > dash > 5L > 2L > 2M > 5M > 2H > 22M
- Higher damage after full combos due to minimum damage scaling, and also builds the most meter.
- Does work at any screen position, but 5L should hit point blank (hence the dash) so 5M doesn't whiff, and not too high so 2M doesn't whiff.
- If the opponent is entering the corner but not fully in it, 5M may whiff due to collision box jank, hence omit it in this case.
Corner 214[L] LVL2 Route:
- you can combo into a LVL2 charged 214[A] in the corner
- 22L > jM > 6H > 214[L] > ...
- you have to charge 214[L] for around 50 Frames
- Suisei scribbles on her notepad the pen will she will somewhat write down lines and you can se a visible cut in the animation when the pen resets to a new line
- you have to let a bit (around 10 frames) after she finishes the first line
- this is also audible there is a small gap between the scribble sounds you will have to let go a bit (ca 10 frames) after that
- Suisei scribbles on her notepad the pen will she will somewhat write down lines and you can se a visible cut in the animation when the pen resets to a new line
- you can combo with TKj236X or the usual grounded normals
- you have to charge 214[L] for around 50 Frames
236S:
- Can add it after grounded hit 3H and continue with a SCC 22L.
- While it is possible to combo into 22S, its lack of minimum damage means it rarely does meaningful damage for its cost (19 damage at 0.05x scaling).
New Combo Section - WIP Please Ignore
| Combo Notation Help | |
|---|---|
| Disclaimer: Combos are written by different authors, so the notation used can vary from the standard one. For additional information on terminology for Idol Showdown or fighting games in general, please consult the Idol Showdown Glossary or the Fighting Game Glossary. | |
| #X | Input writted with numpad notation for the direction/motion input followed by the action. |
| X > Y | X input is cancelled into Y. |
| X, Y | X input is linked to Y, meaning Y is done after X's recovery frames. |
| X~Y | This notation has two meanings: 1. Use attack X with followup Y. 2. Input X, and then within a few frames, input Y. Sometimes referred to as "kara cancelling". |
| [X] | Input X is held down. |
| {X} | Input is partially charged (as in, not tapped but not held to full charge either). |
| (X) | Input X is optional. Typically, the combo will be easier without this input. |
| X/Y | Choose between input X or input Y. |
| #jc | Jump cancel. The number (7, 8, or 9) indicates which direction the jump cancel should be input if it is important to the combo. |
| j.X | Jumping input X. X should be input while airborne. |
| dl.X | Delayed input X. There will be some delay before inputting X. |
| CH X | Counterhit with input X. This is used for combo starters that require counterhit confirm. |
| OTG X | Input X while the opponent is knocked down but still able to be hit. |
| X(n) | Number of hits of a multihit attack. If an attack is multihit and this is not specified, it is assumed to let the maximum number of hits complete before proceeding. |
| scc | Superchat Cancel. Idol Showdown unique mechanic that allows you to cancel the recovery of one special into another special. |
Suisei has a very modular combo structure that allows her to build her routes based on the situation and easily adapt them to spacing, meter and damage requirements, as well as difficulty in execution. Most routes aim to end in a 22M knockdown because it's the best move to setup the Orb oki, and it's important to consider when to sacrifice damage in favor of building enough meter for 214H (The Orb). In addition, when assembling together the combo blocks it's necessary to prevent the route from triggering IPS.
Example Combos
| Combo | Difficulty | Damage | Cost | Meter Gain | Location |
|---|---|---|---|---|---|
| 2M > 5H > 6H > 2H > 22M | Beginner | 282 | 0 bar | 0.6 Opp: ?% |
Anywhere |
|
|||||
| 2M > 5H > 6H > dl.3H > 22L, j.S, 5L > 5M > 2H > 22M | Easy | 345 | 0 bar | 1.1 Opp: ?% |
Anywhere |
|
|||||
| 236M scc 236H, dl.6H > 2H > 22L, j.S, 6H > 2H > 22M | Easy | 480 | 1 bar, 1 SC | 0.4 Opp: ?% |
Midscreen |
|
|||||
| 2M > 5H > 6H > dl.3H > 22L, 5H > 2H > 8jc j.M > j.S, 6H > 2H > 22M | Medium | 372 | 0 bar | 1.3 Opp: ?% |
Near Corner |
|
|||||
| 2L > 2M > 5M, 5L > (2M) > 5M, 5L > 5M > 2M > 5H > 6H > dl.3H > 22L, 5L > 2L > 5H > 2H > 7jc/9jc dl.j.S, 66 > 5L > 2L > 2M > 5M > 2H > 22M | Medium | 239 (244) | 0 bar | 2.3 (2.4) Opp: ?% |
Anywhere |
|
|||||
| 2L > 2M > 5H > 6H > dl.3H > 22L > 5H > 2H > 7jc dl.j.S, 66 > 5L > 2L > 2M > 5M > 2H > 22M | Hard | 295 | 0 bar | 1.6 Opp: ?% |
Midscreen |
|
|||||
| 2H > 7jc dl.j.S, 66 > dl.6H > dl.3H > 22L > 5H > 2H > 22M | Hard | 367 | 0 bar | 0.9 Opp: ?% |
Midscreen |
|
|||||
| 2M > 236L > 22S~6 > 5M >, 5L > 5H > 6H > dl.3H > 22L, 5H > 2H > 7jc j.S > 66 > 5L > 2L > 2M > 5M > 2H > 22M | Hard | 297 | 1 bar | 1.7 Opp: ?% |
Anywhere |
|
|||||
| 2M > 236L > 22S~6 > 2H > 7/9jc dl.j.S, 66 > dl.6H > dl.3H > 22L, 5L > 2L > 2M > 5M > 2H > 22M | Hard | 320 | 1 bar | 1.4 Opp: ?% |
Anywhere |
|
|||||
Structure
Note: j.S can always be replaced with j.236X for SC meter gain, but it becomes really tight in some routes since TK motions are not present in the game.
Note: One or more moves inside "()" mean that those moves are optional and can be skipped without breaking the combo.
Starters
Most starters aim to confirm into 6H, from which various extension are possible in Midscreen or Corner.
Meterless Starters:
Anywhere
- (2L/5L) > 2M/5M > 5H > 6H
- Basic grounded starter, leads to normal routing.
- 5M leads to less damage, but can be easier to execute off of 5L.
- Might need to delay the 6H at longer 2M ranges.
- 2H > 7/9jc > dl.j.S
- Anti-Air starter, leads to normal routing.
- 7jc will stay on the same side while 9jc will sideswitch.
- 2H > 22L
- A much easier conversion off of anti-air that leads into usual routing after 22L. May cause problems with the IPS if you attempt longer combos after this.
- 2L > 2M > 5M > 5L > (2M >) 5M > 5L > 5M > 2M > 5H > 6H
- Meterbuild-focused starter, sacrifices damage for the whole combo in favor of building meter.
- (5H) > 236M
- Harder to connect starter due to slower and unsafe moves.
- Midscreen can lead to the highest damaging Suisei routes.
- Can still transition to normal routing.
Metered Starters:
Anywhere
- (2M) > 236L > 22S~6 > 5M > 5L > 5H > 6H
- Main way to confirm a long range poke (2M/236L) into normal routing.
- Requires one bar of meter.
- (2M) > 236L scc 236M
- Easier confirm for long range pokes.
- Confirms directly into 22L, see combo extensions to continue the routing from here.
- Requires 1 bar of Superchat meter, but Suisei doesn't otherwise use it often.
Extensions
Combo extensions aim to get a knockup to confirm into 22L, and then extend against the opp while they are juggling.
Meterless Extensions:
Anywhere
- [from 6H] > dl.3H > 22L
- Most effective extension for damage.
- Can be extended further before the ender.
- [from 6H] > dl.2H > 22L
- Easier but less damaging extension.
- Doesn't connect at longer ranges.
- Can be extended further before the ender.
- [from 22L] > dl.j.S
- Simplest extension from 22L right into j.S.
- If j.S is inputted too early it will result in a scc, but the combo will not drop, making it suitable for beginners.
- [from 22L/j.S] > land > 5H/dl.2M
- Short extension that leads directly into the ender.
- Can be necessary when the route would trigger IPS otherwise.
- [from j.S] > land > 6H
- Easy extension that leads to the ender.
- Can result in the route not building enough meter for the oki if starting with 0 bars.
- [from j.S] > land > 5L > 5M
- Easy extension that leads to the ender.
- Sacrifices a bit of damage for meterbuilding, required in easier routes to get to 1 bar for oki.
- [from j.S] > land > 5L > 2L > 2M > 5M > 5H
- Higher damaging alternative that leads to the ender.
- Might not be viable when using a 2M in previous extensions due to IPS if the route started from 2M.
Midscreen
- [from 22L] > land > 5H/dl.2M > 2H > 7/9jc > dl.j.S
- Harder but higher damage extension from 22L.
- The 5H link is much harder than the dl.2M one.
- 7jc will stay on the same side while 9jc will sideswitch.
Corner
- [from 6H] > 6H
- 6H wallbounces in the corner, and it can be looped into itself for some extra damage.
- Yes that's all that's the extension.
- [from 22L] > land > 5H/dl.2M > 2H > jc > j.5M > j.S
- Corner version of the midscreen hard extension.
- Easier execution than its midscreen counterpart.
- The 5H link is much harder than the dl.2M one.
Metered Extensions
Anywhere
- [from 236M] scc 22L
- Easy way to get into normal routing from 236M.
- [from 236L/236M] > 22S~6 > 2H > 7/9jc > dl.j.S
- Metered confirm off of 236L/M, leading into normal routing
- Can be used in corner after 236M since the 236H extension does not work.
- 7jc will stay on the same side while 9jc will sideswitch.
Midscreen
- [from 236M] scc 236H > 6H
- Metered extension leading into normal routing.
- Highest damage extension for Suisei.
- Doesn't work in corner due to 236H dropping immediately.
Enders
Suisei enders aim to get a hard knockdown with 22M in order to setup the oki and unplug her opponent's controller begin her setplay game.
Note: "[any normal]" refers to any normal except 3M.
Meterless Enders:
Anywhere
- [any normal] > 2H > 22M
- Easy and straightforward ender leading to the perfect oki setup.
- Honestly all Suisei needs to start her setplay game.
Strategy
Oki
22M gives you hard knockdown the best oki after it is 214H you can either SCC it or not which will give you slightly different options
TLDR:
- 22M or 236G for HKD
- 66>214H>...
- ...>9jA IOH
- ...>2L low
- 66>dl.214H/214H>66>
- also allows commandgrab
Basics of 214H oki:
- 2L low >
- 2M low >
- 9jL IOH > land > 2M >
- 9jH crossup > 2L/M
- 9jH[4] sameside > 2L/M
- tk9S overhead
- 9dljS wiff into crossup 2L low
Depending on when you do the 214H and if you micro dash before it your options might change
22M
- 22M>214H
- you are somewhat further away after this one you can then dash up and act before 214H hits
- this leaves a gap to get hit by an invul reversal but if they mash a normal they will get hit by the orb and you can combo even if it trades
- >dash throw/commandthrow
- normal throw might be better midscreen since they will waekup and still get hit by the last 2 hits of the 214H projectile
- >9>jH crossup
- >9[4]>jH sameside>sameside 2L
- >9[4]>jH sameside>crossup 2L
- if you crossup after the jC mostly depends an the amount of back drift
- 50/50 high low mix
- dash > 2L low > stuff
- dash > 9jL IOH > 2L/M
- you are somewhat further away after this one you can then dash up and act before 214H hits
- 22M>microdash>214H
- 214H will hit meaty so you cant throw
- >9[4]>jH crossup
- you cant drift enought o make jH not crossup
- 50/50 high low mix
- 2L low > Stuff
- 9jL IOH>land>2M
- 2L>dl9jL low into IOH but you cant combo after it so only for when 61 damage kills
- 2L>2H can Pressure can lead to all the fun 2H pressure
- 214H will hit meaty so you cant throw
- 22M>microdash>dl>214H
- will leave a gap again so you can throw here
Tetris oki 236G commandgrab also gives you enough Advantage to setup 214H
- 236G>214H will hit meaty but you are somewhat far away
- 236G>microdash>214H
- same oki as 22B>microdash>214H
- 236G>dl214H
- same oki as 22B>214H
- do 214H around when they hit the ground after the bounce
Meterless oki
- 66>214[L]
- only slightly charge the 214L
- hits meaty if charge time is correct
- botan can't shopingcart out of it!
- invul reversals beat it on the 214L recovery
- 66>dl.214L
- should work the same as above
- 66>(w)214L
- WARNING gimmicky!
- whiffs so you can do a commandgrab if you have made them respect the normal oki
- missing scribble sound might give it away!
- might be fuzzy mashable!
- 214[M]>
- hit meaty but you are somewhat to far away to do stuff
- 2M can combo but its longrange so only 236L is viable
- tkJS for plusframes but it is 2H mashable even if they get hit by the projectile!
- has some wierd interactions with invul reversals
- korones 22H will wiff even if you charege a bit to long
- ayames 22H will punish the 214M if not done perfectly!
- 214M>
- WARNING gimmicky!
- whiffs so you can do a commandgrab if you have made them respect the normal oki
- baits invul reversals by just holding 1 after
Pressure
Suisei's Pressure can be oppressive if she manages to get close
- she has great tools for staggering
- a lot of ways to reset pressure
- and also tools to make people pay if they start anticipating the resets instead of reacting to them
- she can make any blockstring safe
TLDR
- 5L>2L +0!
- 5L>5M>...
- ...>5L>5M
- ...> staggered Nomals
- ...> Commandgrab
- 2H>jc.jS for + Frames
- 6H to close back the gap if you spaced to far for 2H
- 214L/M > dash Pressure reset
- 236L to make Blockstring save but lose your turn
- 22S~6 > to reset Pressure
5L>2L
- 2L is 0 on block but has very short range
- 5L is -3 but moves forward and has a bit more range
- so you have an advancing string that is neutral on block and still can be delay canceled for frametraps
- Loop it into itself (if yous tarted very close) go for a dl.2M/5M to mix in frametraps, or use command throw
5M
- 5M is 7F advancing and -2 on Block
- also a very good button in stagger pressure with a lot of cancel options
- follow up options are very ambiguous so its a good point to reset the pressure
- you will probably be in 5L range
2H
- probably the best button to route to for non stagger pressure
- it's jump cancelable so you have a lot of options here
- if done before 6H it can still be cancelled into 5H if it's open
- 2H>(dl.)5H
- true blockstring if canceled immediately else it can frametrap
- will beat them mashing if they expected a jumpcancel option
- jc.Stuff
- 7jc.jS> overhead into + Frames
- 7jc.dl.jS> overhead crossup into + Frames
- timing it pretty specific if you do it to late jS will wiff!
- 9([4])jc.dl.jH> "crossup" overhead
- if you just do 9 jH might whiff
- 9[4]jc.dl.jH> sameside overhead > crossup low
- hold 4 immediately after jumping and do jH a bit earlier
- 8[6]jc.jH> sameside overhead
- 7 wait for a whiffed 2H then j236X (might not work on all of the cast)
- if you do j236X early you might whiff crouchers and low 2H hurtboxes like Botan
- if you do it late (on whe way down) you might not be able to punish anymore (test if botan just beats it)
- all of the jc stuff can be mashed out of most of the time even by 2H
- you will have to make them actually react to the jump cancel and not just mash by mixing in 5H/6H frametraps
- 214X > Pressure
- see below
- dl.236L Frametrap
- 22S>6>...
>5H
- hurtbox is atrocious, DO NOT USE UNLESS CANCELED INTO!
- has a lot of blockstun
- has even more recovery
- gigantic cancel window
- probably the best button to do a 22S>6 cancel from
- Cancels into 6H and 2H for a continued blocksting
- dl.6H, dl.2H for frametraps
- probably the best point for a 236M
- 236M is somewhat reactable
- mix in 3H for a low
- 3H can be hard to hitconfirm since you need a very fast 22L
- 22L should not be buffered! it will kill you if they block.
6H
- forward advancing with a lot of startup and active frames
- its often a natural frametrap
- natural frametrap with a VERY small gap from 2H
- true blockstring form 5H
- can only be cancelled to 2H and 3H
- will lock you out of any other normals afterwards!
- probably the best thing is to go to 2H and use the followups from that
- will send the opponent flying from counterhit
- probably not the best thing to have happen if you are not close to the corner
236L
- it will make all pressure safe but to be neutral it needs to be spaced very far
- you cant really do a blockstring into the safe version!
214X
- is in general a good option to reset pressure
- both options are mashable by most B normals but its somewhat hard to do it on reaction
- will then most likely trade
- what you can get off it is somewhat space dependent
- you can normalize the spacing with advancing normals like 5L, 5M, 5H and esspecially 6H and 3M
- in general 214L hits later and is somewhat mashable although it will trade with most stuff
- 214M hits earlier but also causes more pushback
- here are some ideas for pressure resets:
- 214L
- 214L>dash>(dl).5L or dl.236G command grab
- >214L>5L>(w2L)>2M/5H>...
- when you are very close or moving forward so mostly after (5L)>5M, close 5H or 6H
- you have to hit the 5L during teh beginning of the 214L blockstun
- 2M will be nearly a true blockstring 5H will be a frametrap
- 5M will whiff on crouch block after 5L or 5L>(w2L) so you can't reliably use it there
- in the corner you can nearly always go for 5L>2L
- 2L(w) is a F-Ciel style bootleg rebeat (don't know if it is useful at all but it is funny!)
- 5L>2L(w)> kara command throw (236M~G) seems to be possible but the timing and spacing is very strict
- microwalk command throw 23[6].dlG seems to be a bit more consistent
- 5L>2L(w)> kara command throw (236M~G) seems to be possible but the timing and spacing is very strict
- you can microwalk after the 214L to make 5L>2L connect but timing is pretty tight
- 214M
- hits earlier then 214M so you are not ready for a 5L/M while they are still in range
- 214M > dash 5L/Command throw
- follow up buttons that hit are 2M, 5H, 6H, 3M
- from 2M and 5H you need to go into a special or 6H
- double 214M
- stuff>3H>214M>2M/5H>214M>dl.236L
- spaces 236L so that it is less negative or even 0(testing needed!)
- might be hard to enforce pressure since the gaps for the 214M are pretty large
- 214X>TKjS
- this will look nearly indistinguishable form 236M but it is +
- somewhat reactable
Specific Pressure Strings
- Corner 5M>5H>214M Blocksting loops
- has very small gaps between 5H>214M and 214M>5M
- not mashable!
- they need to use a invuln reversal or a collab to get out
- it is actually quite hard to buffer a reversal in this string
- might interact differently with some moves (testing needed!)
- Sora 22M will just beat it!
Closing Thoughts
- Very delayed stagger pressure is somewhat succeptible to chicken blocking
- you might be able to do 22L on reaction if you got them blocking in the air!
ToDos:
- check jc.jS against 7Frame buttons that AA! can they just mash those?
- Check against wich 2H mash we lose against when doing 6H>2H followups with everything but 236L frametrap or block, against which chars cant we even block
- test 2H>7 wait for wiff 2H then j236X against all characters
- stuff>3H>214M>2M/5H>214M>dl.236L test if we can steal back our turn here or do we still lose in the 5F wars
- test Corner 5M>5H>214M Blocksting loops which reversals and buttons let people escape
- or dont and let them find out themselves^^
Defense
TLDR
- no invul reversals!
- 5L best abare button!
- 2L rather bad since 6F and low range!
- 2M if they use a spaced special move
- Collabs can be your best defensive tools
Suisei does not have a real full invul reversal so defense can be tough.
The saving grace is somewhat 2M if they end a Blockstring and then try to do a special that is slow enough you can often mash out with it (eg. most of botans specials lose or at worst trade)
Other good abare buttons are 5L and 5M since they move forward and are fast.
2L is a slightly bad abare button since its only 6F and has very short range.
You can also use a Collab Partner when the enemy leaves gaps in the sting.
Especially Superchat Collab, basically free since you dont have to let go of 1 and just mash til there is a gap
A good example is Roboco: Both of her Call-ins can be used defensively in the corner.
The laser should leave you plus even if they block.
If they want to not get hit by the missiles, they have to move forward into you which will most likely give you an opportunity to throw or mash out.
Might not work against characters that can pressure form further away like Aki
Also she is offscreen when she fires the missiles in the corner so your opponent might not realize that you called her and stay offensive.
Your Collab Choice should take usefulness as a defensive tool into consideration.
Matchups
- Vs. Aki
- 2M can catch her during her pressure if she is too predictable with the 214M (stomp call-in) resets
- Vs. Ayame
- Matchup Advice goes here
- Vs. Botan
- 3M low profiles some parts of her 2C
- most of her specials after a Blockstring that ends with 2H will lose to 2M unless she instantly cancels into low sniper.
- 3M can low profile j.2H
- Will often hit the Botan airborne or counterhit, so buffering 22L might be a good idea to get a combo
- 22L can catch Botans that try to abuse j2H in Neutral
- 22L hops over rolling grenade and will not get hit by a high grenade following it, but doing this too predictably is exploitable as you are still stuck in 22L recovery.
- ToDo; test 22L against 2 consecutive rolling grenades
- Vs. Coco
- 236M wins against her dinosaur grab
- Using 236L in blockstrings is dangerous as it puts you in range of her 236G command grab at -2~0.
- 214L/M in strings is dangerous for similar reasons, her command grab doesnt trade with the fireball so it gives her a free opportunity to 236G you.
- Vs. Fubuki
- Fubuki 22H can trade with 214H mixups in her favor as it launches Suisei back when the first hit connects, resetting to neutral. Giving up oki to bait vs Fubuki players aware of this is recommended
- 3M low profiles her 5M
- 3M low profiles fireballs
- Punish tatsus / jS with 2M
- Vs. Korone
- 3M low profiles her 5M (at long range)
- 3M low profiles the fireballs
- you can relatively consistently do 22H into her "infinite" 5M>236X blocksting during the Fireball parts
- Buffer 22 after/during 5M and then react to the 236X
- Vs. Sora
- Sora 22M reflects 214H and can be used as a reversal vs non-meaty EX Comet oki setups, particularly after command grab. Make sure you meaty her even if you need to give up a mixup.
- 22M in general can invalidate a lot of 214X stuff also in pressure, dont be to predictable with it!
- Sora 236L note bobs up and down so sliding under it with 3M requires much more precision than vs other characters. Not recommended if the option can be avoided.
- 236L at the end of her standard blockstrings will trade with your 2M but not in your favor.
- Vs. Suisei
- 8-2 Suisei favored for whoever gets the first hit. Trust no one, not even yourself.
- Good luck being on the receiving end of your own oki lol.
- When Suisei routes into 22L, bursting here will sideswitch her. This is useful when you are cornered as it will put her in the corner instead of launching her away.
- Bursting her IOH setups on hit has the same effect.
- You can fuzzy mash 5L>5M after 6H>2H this will punish jS, 214X and trying to reset it will lose to 236L
- you should still be able to block or even 2H a jC
- Blocking jS while you are airborn youself massively reduces the frameadvantage chickenblocking after 6H>2H is not a bad idea
External Resources
Colors
Anemachi
Tokoyami Towa (Hololive)
Nanashi Mumei (Hololive)
Alternate Outfit
Inui Toko (Nijisanji)
Sion Eltnam Atlasia (Melty Blood)


