|
|
| Line 225: |
Line 225: |
| |input=214S | | |input=214S |
| |image=IS Kiara 214S.png | | |image=IS Kiara 214S.png |
| |caption= | | |caption="Strike a match and burn it up!" |
| |data= | | |data= |
| {{AttackData-IS | | {{AttackData-IS |
| Line 245: |
Line 245: |
| |input=L+H | | |input=L+H |
| |image=IS Kiara LH.png | | |image=IS Kiara LH.png |
| |caption= | | |caption="Could you tell me please, where I need to go?" |
| |data= | | |data= |
| {{AttackData-IS | | {{AttackData-IS |
Revision as of 00:28, 20 May 2023
Collabs (commonly referred to as Assists) are characters that are called into the fight using a full Superchat Meter or 2 stocks of Star Meter. One is selected during character select, and determines whether or not the point character has 2 or 3 maximum bars of Superchat Meter. They can be called at any time the point character is not in hitstun or blockstun.
Mio Ookami
Full Power Flaming Punch
214S
|
| Damage
|
Guard
|
Startup
|
Active
|
Recovery
|
Adv. on Block
|
Adv. on Hit
|
Invulnerability
|
| 190
|
Mid
|
21f
|
31f (goes off-screen around 15f)
|
-
|
+26
|
-
|
None
|
- Requires and uses 2 stocks of Star Meter.
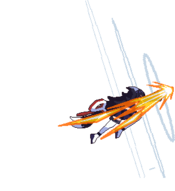
Mio travels across the screen at an upward angle, wall-bouncing for a full combo on hit. Deals a great amount of pushback on block, and the short superflash can make it hard to IB. Has no additional effects on scaling, making this an excellent way to gain additional damage and extensions on characters with limited combo potential. Will miss at point-blank.
|
|
Omen
L+H
|
| Damage
|
Guard
|
Startup
|
Active
|
Recovery
|
Adv. on Block
|
Adv. on Hit
|
Invulnerability
|
| -
|
-
|
180f (each card pull)
|
See below
|
-
|
-
|
-
|
None
|
- Requires and uses a full Superchat meter (2 bars).
Mio draws 5 random cards from a tarot deck in regular intervals, each applying a debuff to the opponent. All debuffs last 5 seconds unless otherwise specified.
- Poison: Deals 75 damage over time. Lasts around 3 seconds.
- ATK-: Attacks from the opponent now deal 0.85x their usual damage. Does not stack with itself.
- DEF-: The opponent receives 1.21x as much damage from attacks (includes chip from all sources). Does not stack with itself.
- Crow: The opponent receives additional chip damage from all attacks (including those that usually don't deal chip, such as normals). Chip dealt is equal to 0.4x the attack's damage. Does not stack with itself.
- Skull: The opponent loses around 1/8 of a bar of meter.
|
|
Marine Houshou
The Aquamarine
214S
|
| Damage
|
Guard
|
Startup
|
Active
|
Recovery
|
Adv. on Block
|
Adv. on Hit
|
Invulnerability
|
| 50x4 (200)
|
Mid
|
-
|
-
|
-
|
+30f (each hit)
|
-
|
None
|
- Requires & uses 2 stocks of Star Meter.
Marine's pirate ship appears from behind the point character and fires its cannons 4 times in quick succession, the first one centered in the middle of the screen and each successive one aiming at a spot further forward. Without IB, it will usually push back the opponent enough to hit at least twice in quick succession. Will only hit once in the corner. Useful to immediately force the opponent into the corner and begin your offense.
|
|
Hugging Pirate
L+H I'm horny~! I'm horny~!
|
| Damage
|
Guard
|
Startup
|
Active
|
Recovery
|
Adv. on Block
|
Adv. on Hit
|
Invulnerability
|
| 0
|
Unblockable
|
1f
|
360f
|
-
|
-
|
+32f
|
None
|
- Requires and uses a full Superchat meter (2 bars).
Marine walks in and slowly approaches the opponent, leaping at them with an unblockable grab when she gets close enough. If she manages to grab the opponent, they become stuck in hitstun for 32f, and are temporarily unable to dash in addition to taking chip damage from normals for 6 seconds (360f). Chip dealt is equal to 0.2x the attacks' damage. Ideal for unblockable setups.
|
|
Kanata Amane
50kg Grip
214S
|
| Damage
|
Guard
|
Startup
|
Active
|
Recovery
|
Adv. on Block
|
Adv. on Hit
|
Invulnerability
|
| 201
|
Unblockable
|
46f
|
-
|
-
|
-
|
+31f
|
None
|
- Requires & uses 2 stocks of Star Meter.
Kanata appears and dashes forward, grabbing the opponent and squeezing them. Whiffs on jumping opponents. While the opponent appears to be in an invulnerable state afterwards, certain attacks can still hit them (such as Coco's 214X or Sora's 5H), which allows for unblockable reset setups when used as a meaty.
|
|
Soran Bushi
L+H
|
| Damage
|
Guard
|
Startup
|
Active
|
Recovery
|
Adv. on Block
|
Adv. on Hit
|
Invulnerability
|
| -
|
-
|
-
|
-
|
-
|
-
|
-
|
None
|
- Requires & uses a full Superchat meter (2 bars).
Kanata appears to perform her famous Soran Bushi dance, temporarily preventing the screen from scrolling and periodically summoning waves that do no damage but push the opponent away significantly. Waves work during either player's hitstun, which can break combos. As this assist does not track your current position, you can use it just before switching sides to have the waves force the opponent into you, which can serve as a fake corner midscreen.
|
|
Iroha Kazama
Eggplant Slice
214S
|
| Damage
|
Guard
|
Startup
|
Active
|
Recovery
|
Adv. on Block
|
Adv. on Hit
|
Invulnerability
|
| 200
|
Mid
|
-
|
-
|
-
|
-
|
-
|
None
|
- Requires & uses 2 stocks of Star Meter.
A large sword slash that reaches fullscreen.
|
|
NinNinjanai
L+H
|
| Damage
|
Guard
|
Startup
|
Active
|
Recovery
|
Adv. on Block
|
Adv. on Hit
|
Invulnerability
|
| 40X11 (440)
|
Mid
|
-
|
-
|
-
|
-
|
-
|
None
|
- Requires & uses a full Superchat meter (2 bars).
Iroha performs multiple dashing slashes that cover the top half of the screen, catching opponents in the air.
|
|
Risu Ayunda
Isekai Truck
214S
|
| Damage
|
Guard
|
Startup
|
Active
|
Recovery
|
Adv. on Block
|
Adv. on Hit
|
Invulnerability
|
| 150
|
Mid
|
-
|
-
|
-
|
-
|
-
|
None
|
- Requires & uses 2 stocks of Star Meter.
Risu rams her truck into nearby opponents.
|
|
Non-stop Nuts
L+H Respect the nuts! Respect the nuts!
|
| Damage
|
Guard
|
Startup
|
Active
|
Recovery
|
Adv. on Block
|
Adv. on Hit
|
Invulnerability
|
| 20xN
|
Mid
|
-
|
-
|
-
|
-
|
-
|
None
|
- Requires & uses a full Superchat meter (3 bars).
Risu summons nuts that launch at opponents when normals are performed. L attacks down ahead nearby, M attacks further out, and H attacks at an upward angle towards the air.
|
|
Kiara Takanashi
SPARKS
214S "Strike a match and burn it up!" "Strike a match and burn it up!"
|
| Damage
|
Guard
|
Startup
|
Active
|
Recovery
|
Adv. on Block
|
Adv. on Hit
|
Invulnerability
|
| 20x10 (200)
|
Mid
|
-
|
-
|
-
|
-
|
-
|
None
|
- Requires & uses 2 stocks of Star Meter.
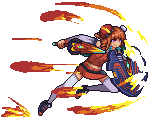
Kiara flies across the screen with a shield charge.
|
|
HINOTORI
L+H "Could you tell me please, where I need to go?" "Could you tell me please, where I need to go?"
|
| Damage
|
Guard
|
Startup
|
Active
|
Recovery
|
Adv. on Block
|
Adv. on Hit
|
Invulnerability
|
| -
|
-
|
-
|
-
|
-
|
-
|
-
|
None
|
- Requires & uses a full Superchat meter (2 bars).
Kiara floats nearby with her shield out, temporarily reflecting projectiles.
|
|
Amelia Watson
Ground Pound
214S Hide your moms. Hide your moms.
|
| Damage
|
Guard
|
Startup
|
Active
|
Recovery
|
Adv. on Block
|
Adv. on Hit
|
Invulnerability
|
| 160
|
Mid
|
-
|
-
|
-
|
-
|
-
|
None
|
- Requires & uses 2 stocks of Star Meter.
- Can OTG for combos after throw, timing varies depending on character (Aki can only OTG in the corner).
After turning into Smol Ame, Amelia locks on to the opponent's current position and does a ground pound.
|
|
Time Slow
L+H ゴゴゴゴ... ゴゴゴゴ...
|
| Damage
|
Guard
|
Startup
|
Active
|
Recovery
|
Adv. on Block
|
Adv. on Hit
|
Invulnerability
|
| -
|
Unblockable
|
-
|
-
|
-
|
-
|
-
|
None
|
- Requires & uses a full Superchat meter (3 bars).
Amelia temporarily slows the opponent. This also disables the opponent's ability to air tech.
|
|
Roboco
Hi-Spec Beam
214S
|
| Damage
|
Guard
|
Startup
|
Active
|
Recovery
|
Adv. on Block
|
Adv. on Hit
|
Invulnerability
|
| 180
|
Mid
|
-
|
-
|
-
|
-
|
-
|
None
|
- Requires & uses 2 stocks of Star Meter.
Roboco fires a large laser beam that reaches fullscreen. The beam will track to the opponent's side if you are grounded.
- For some reason if you hit beam late into the animation it will do a lot more damage and hits. Launching someone in the air and doing beam to catch them while they are falling can provide a ton of extra damage while also leaving them in the air long enough to pick the combo back up.
|
|
Hi-Spec Missiles
L+H
|
| Damage
|
Guard
|
Startup
|
Active
|
Recovery
|
Adv. on Block
|
Adv. on Hit
|
Invulnerability
|
| 20x7 (140)
|
Mid
|
-
|
-
|
-
|
-
|
-
|
None
|
- Requires & uses a full Superchat meter (3 bars).
Roboco locks on to the opponent's current position and fires a barrage of missiles.
|
|
Miko Sakura
Lava Disaster
214S
|
| Damage
|
Guard
|
Startup
|
Active
|
Recovery
|
Adv. on Block
|
Adv. on Hit
|
Invulnerability
|
| 12*N
|
Mid
|
-
|
-
|
-
|
-
|
-
|
None
|
- Requires & uses 2 stocks of Star Meter.
Miko trips and spills a lava bucket, producing a long-lasting pillar of fire that locks down opponents.
|
|
Demon King Miko
L+H Nya-hello! Nya-hello! FAQ FAQ
|
| Damage
|
Guard
|
Startup
|
Active
|
Recovery
|
Adv. on Block
|
Adv. on Hit
|
Invulnerability
|
| 65*N
|
Mid
|
-
|
-
|
-
|
-
|
-
|
None
|
- Requires & uses a full Superchat meter (3 bars).
Miko appears behind her point character and walks back and forth nearby. If the opponent gets too close, she faceplants in the opponent's direction. Since Miko can't be interrupted while she does this, her point character is often free to pressure the opponent as she will save them even if they are hit.
|
|
Navigation
| The Game
|
|
| The Battle System
|
|
| Idols
|
|
| Collabs
|
|


