Virtuous Pure Idol - Sonnant Seiso Setplay
Introduction
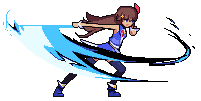
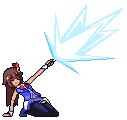
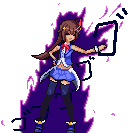
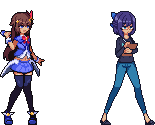
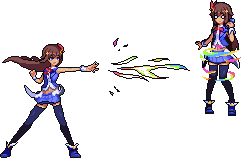
Sora Tokino is an idol who sets the stage with her musical lockdown. She orchestrates her array of musical projectiles to set up safe approach opportunities and enforce 'respect' from her kouhai.
- Sora is capable of good keepout and space control through moves such as 5M, 6M, and the note projectiles. 6L and 2H are strong anti airs making it very hard to get in on her. Off of a HKD however, she turns into a setplay monster capable of opening you up with oppresive pressure and multiple high/low and left/right mixups anywhere on screen.
236M is a meterless projectile which gives big plus frames on block. It can be crouched midscreen.
22H costs 1 Bar of meter, but summons A-chan to lock them down, giving you time to run a free 50/50 mixup anywhere on screen, or set notes so that you can run even more mixups after. A-chan can be destroyed if hit though, so just throwing out 22H isn't a very good idea.
j.L is also a 9 frame overhead which you can cancel into off of any jump cancelable move like 2M. It doesn't give a combo on hit, but there are setups off of a HKD that lets you confirm it off of a note detonate or certain assists.
All her oki leads to mixup/pressure and she is rewarded with loopable oki when guessing right.
She has the best control over her airdrift in the game which enables ambigous left/right mixups.
Soras combos grant both high Super Chat and Meter Gain, and since her resourceless combos already enable strong setups, most will go into assists for conversions, pressure and neutral utility.
| Pick if you like |
Avoid if you dislike
|
|
|
|
Normal Moves
Standing Normals
5L
5L
|
| Damage
|
Guard
|
Startup
|
Active
|
Recovery
|
Adv. on Block
|
Adv. on Hit
|
Invulnerability
|
| 25
|
Mid
|
6
|
3
|
-
|
-2
|
-
|
None
|
Your go-to stagger pressure button; safer than 2L and prorates less.
|
|
5M
5M
|
| Damage
|
Guard
|
Startup
|
Active
|
Recovery
|
Adv. on Block
|
Adv. on Hit
|
Invulnerability
|
| 50
|
Mid
|
9
|
2
|
-
|
-9
|
-
|
None
|
One of Sora's best poking tools in neutral. Can confirm into both 6M and sometimes 2H, depending on the spacing.
|
|
5H
5H
|
| Damage
|
Guard
|
Startup
|
Active
|
Recovery
|
Adv. on Block
|
Adv. on Hit
|
Invulnerability
|
| 90
|
Mid
|
9
|
8
|
-
|
-5
|
-
|
None
|
A grounded "combo filler" button. You wont be pressing this much.
|
|
Crouching Normals
2L
2L
|
| Damage
|
Guard
|
Startup
|
Active
|
Recovery
|
Adv. on Block
|
Adv. on Hit
|
Invulnerability
|
| 25
|
Mid
|
6
|
2
|
-
|
-3
|
-
|
None
|
Another stagger pressure normal. Also a go-to starter. Being slightly more minus than 5L, it makes up for it with slightly more range.
|
|
2M
2M
|
| Damage
|
Guard
|
Startup
|
Active
|
Recovery
|
Adv. on Block
|
Adv. on Hit
|
Invulnerability
|
| 48
|
Mid
|
10
|
4 (4) 2
|
-
|
-7
|
-
|
None
|
A multihitting normal. Jump cancelable on block and hit. Mainly used to IOH with j.L.
|
|
2H
2H
|
| Damage
|
Guard
|
Startup
|
Active
|
Recovery
|
Adv. on Block
|
Adv. on Hit
|
Invulnerability
|
| 85
|
Mid
|
13
|
6
|
-
|
-15
|
-
|
None
|
The God Button. This normal does it all. While it is Sora's main combo extension, it is also air unblockable, making it her best antiair next to 6L, which is only good because it gatlings into 2H. Jump cancelable on block or hit, this normal will also be frequently used in blockstrings and to catch people jumping out of Sora's pressure.
|
|
3H
3H
|
| Damage
|
Guard
|
Startup
|
Active
|
Recovery
|
Adv. on Block
|
Adv. on Hit
|
Invulnerability
|
| 95
|
Low
|
11
|
3
|
-
|
-15
|
-
|
None
|
The universal sweep. With its long range, this will primarily be used to end combos and set up 214M Okizeme. Hitting aerial opponents with it will take some getting used to, however, as its vertical range is minimal. 3H also has utility as the "low" option in unreactable high/low note setups, as it can be gatlinged from any normal.
|
|
Jumping Normals
j.L
j.L
|
| Damage
|
Guard
|
Startup
|
Active
|
Recovery
|
Adv. on Block
|
Adv. on Hit
|
Invulnerability
|
| 30
|
High
|
6
|
5
|
-
|
-
|
-
|
None
|
Sora's go-to instant overhead option with her note pressure. Prorates actually extremely well and is also confirmable with certain collabs.
|
|
j.M
j.M
|
| Damage
|
Guard
|
Startup
|
Active
|
Recovery
|
Adv. on Block
|
Adv. on Hit
|
Invulnerability
|
| 50
|
High
|
10
|
4
|
-
|
-
|
-
|
None
|
Sora's horizontally gigantic air-to-air. With its thin hitbox, however, you will often find it being low-profiled if used while landing.
|
|
j.H
j.H
|
| Damage
|
Guard
|
Startup
|
Active
|
Recovery
|
Adv. on Block
|
Adv. on Hit
|
Invulnerability
|
| 75
|
High
|
11
|
3
|
-
|
-
|
-
|
None
|
Sora's staple cross-up button. With a decent horizontal, cross-up, and vertical hitbox, this is Sora's main air button if the opponent is on the ground. If an aerial opponent is hit by j.H, it will cause a soft knockdown state.
|
|
Command Normals
6L
6L long hand long hand
|
| Damage
|
Guard
|
Startup
|
Active
|
Recovery
|
Adv. on Block
|
Adv. on Hit
|
Invulnerability
|
| -
|
Mid
|
6
|
3
|
-
|
-
|
-
|
None
|
The second God Button. This move is heavily disjointed both vertically and horizontally. In the air, 6L jails into 2H for an air unblockable setup. Of all the L normals, this is the safest at -1. The downside? 6L whiffs on crouchers and standing Ayame.
|
|
6M
6M
|
| Damage
|
Guard
|
Startup
|
Active
|
Recovery
|
Adv. on Block
|
Adv. on Hit
|
Invulnerability
|
| -
|
Mid
|
15
|
6
|
-
|
-
|
-
|
None
|
The third God Button. This move is more disjointed than some characters entire movesets. 6M is used to control space in neutral as well as confirming off of 5M into a 22L safe jump. This move is also used in corner loops like 5M 6M 22M. A warning, however, as it has even more recovery than 5M and can easily be jumped over.
|
|
6H
6H
|
| Damage
|
Guard
|
Startup
|
Active
|
Recovery
|
Adv. on Block
|
Adv. on Hit
|
Invulnerability
|
| -
|
High
|
21
|
12
|
-
|
-
|
-
|
None
|
Soda-chan is actaully Sora's best starter. Confirming with either collab or note, 6H can easily devastate a health bar. With an insane 21 frame startup, this move is faster than the UOH and is almost unreactable.
|
|
Universal Mechanics
Throw
Throw
L+M
|
| Damage
|
Guard
|
Startup
|
Active
|
Recovery
|
Adv. on Block
|
Adv. on Hit
|
Invulnerability
|
| -
|
-
|
7
|
2
|
-
|
-
|
-
|
None
|
|
Overhead
Overhead
M+H
|
| Damage
|
Guard
|
Startup
|
Active
|
Recovery
|
Adv. on Block
|
Adv. on Hit
|
Invulnerability
|
| -
|
High
|
25
|
3
|
-
|
-
|
-
|
None
|
|
Special Attacks
214X
Re:Play
214X
|
| Version
|
Damage
|
Guard
|
Startup
|
Active
|
Recovery
|
Adv. on Block
|
Adv. on Hit
|
Invulnerability
|
| L
|
-
|
Mid
|
-
|
-
|
-
|
-
|
-
|
None
|
| Version
|
Damage
|
Guard
|
Startup
|
Active
|
Recovery
|
Adv. on Block
|
Adv. on Hit
|
Invulnerability
|
| M
|
-
|
Mid
|
-
|
-
|
-
|
-
|
-
|
None
|
| Version
|
Damage
|
Guard
|
Startup
|
Active
|
Recovery
|
Adv. on Block
|
Adv. on Hit
|
Invulnerability
|
| H
|
-
|
Mid
|
-
|
-
|
-
|
-
|
-
|
None
|
|
236X
On Stage!
236X
|
| Version
|
Damage
|
Guard
|
Startup
|
Active
|
Recovery
|
Adv. on Block
|
Adv. on Hit
|
Invulnerability
|
| L
|
-
|
Mid
|
-
|
-
|
-
|
-
|
-
|
None
|
| Version
|
Damage
|
Guard
|
Startup
|
Active
|
Recovery
|
Adv. on Block
|
Adv. on Hit
|
Invulnerability
|
| M
|
-
|
Mid
|
-
|
-
|
-
|
-
|
-
|
None
|
| Version
|
Damage
|
Guard
|
Startup
|
Active
|
Recovery
|
Adv. on Block
|
Adv. on Hit
|
Invulnerability
|
| H
|
-
|
Mid
|
-
|
-
|
-
|
-
|
-
|
None
|
|
22X
22X 22L 22L 22M 22M 22H 22H
|
| Version
|
Damage
|
Guard
|
Startup
|
Active
|
Recovery
|
Adv. on Block
|
Adv. on Hit
|
Invulnerability
|
| L
|
-
|
Mid
|
-
|
-
|
-
|
-
|
-
|
None
|
| Version
|
Damage
|
Guard
|
Startup
|
Active
|
Recovery
|
Adv. on Block
|
Adv. on Hit
|
Invulnerability
|
| M
|
-
|
Mid
|
-
|
-
|
-
|
-
|
-
|
None
|
| Version
|
Damage
|
Guard
|
Startup
|
Active
|
Recovery
|
Adv. on Block
|
Adv. on Hit
|
Invulnerability
|
| H
|
-
|
Mid
|
-
|
-
|
-
|
-
|
-
|
None
|
|
Super Star Attacks
236S
Blue Sky Symphony
236S
|
| Damage
|
Guard
|
Startup
|
Active
|
Recovery
|
Adv. on Block
|
Adv. on Hit
|
Invulnerability
|
| -
|
-
|
-
|
-
|
-
|
-
|
-
|
None
|
|
214S
Rakka-Chan
22S
|
| Damage
|
Guard
|
Startup
|
Active
|
Recovery
|
Adv. on Block
|
Adv. on Hit
|
Invulnerability
|
| -
|
-
|
-
|
-
|
-
|
-
|
-
|
None
|
|
Combos
Mid-screen
| Combo
|
Difficulty
|
Damage
|
Cost
|
Meter Gain
|
Location
|
- Works anywhere but will do less damage in the corner.
- Replace the first 5H with 6L if 2L hits far.
- Starting with 5L works, and does more damage.
- Video
|
Corner
Matchups
- Vs. Aki
- Matchup advice goes here.
- Vs. Ayame
- Matchup advice goes here.
- Vs. Botan
- Matchup advice goes here.
- Vs. Coco
- Matchup advice goes here.
- Vs. Fubuki
- Matchup advice goes here.
- Vs. Korone
- Matchup advice goes here.
- Vs. Sora
- Matchup advice goes here.
- Vs. Suisei
- Matchup advice goes here.
Setplay
External Resources
Colors
Navigation
| The Game
|
|
| The Battle System
|
|
| Idols
|
|
| Collabs
|
|


