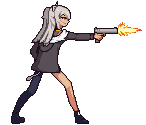
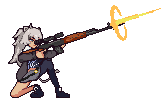
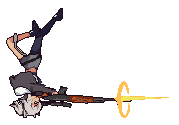
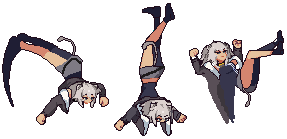
Idol Showdown/Botan Shishiro
Special Forces La~Lion - Tactical Space Control
Introduction
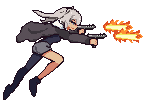
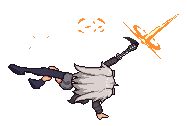
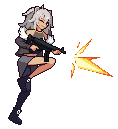
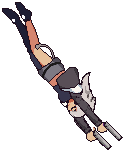
Botan Shishiro is a tactical lioness who controls space on the battlefield with her vast arsenal of ballistic weapons. When faced with close-quarter engagements, however, Botan has no problem repositioning or taking initiative for herself.
| Pick if you like | Avoid if you dislike |
|---|---|
|
|
Recommended Collabs
 Miko - Miko's 214S assist allows Botan to convert off her 22M/H overhead followup, and forces the opponent into uncomfortable situations where they can take huge amounts of chip damage. Her Off-Collab is great on defense as well, as it is uninterruptible and allows you to take your turn back immediately.
 Marine - Thanks to the large amount of multi-hit normals on her kit, the added chip during Marine's Off-Collab can be devastating for the opponent. Her 214S can make her zoning even harder to deal with as well.
 Kanata - Kanata's Off-Collab forces opponents right where Botan wants them: far away enough that she's allowed to set up her grenade pressure, or in the air, where they'll be easy to hit with either a throw or her air-unblockable 2H. Her 214S can make Botan's strike-throw pressure even scarier to deal with.
Gameplan
- Note: This gameplan was written shortly after the game was released to give newer players a sense of direction, it should be reviewed by an experienced player after the game develops more.
Botan is a zoner who has a myriad of tools for making it difficult for her opponent to approach her, as well as some scary offensive tools to take advantage of a knockdown should her opponent suffer a clean hit.
In neutral, Botan will generally try and stay at a long range from her opponents to allow her to set up her 236X grenades. These will restrict her opponents options, allowing her to take advantage of the situation. Due to these moves being quite slow, Botan should use her other strong long range options, such as 6M, 214X, 4H, etc. to prevent her opponent from using moves and forcing them to slowly approach and block, or risk taking damage. It's when her opponents are approaching slowly that Botan can set up multiple grenades.
Once Botan has her grenades on the field, her opponents will be prevented from taking some options. For example, if she has a 236M grenade bouncing on the ground, your opponent can no longer dash directly at you; they must block the grenade first. If they choose to do this, Botan can either set up another grenade (at long range) or dash at them and force them to block a normal (at closer ranges), allowing her to go into her close range pressure. If they instead choose some character specific option, or approach from air, Botan can account for this and think of what tools she has access to to stifle these options as much as possible. With grenades on the field, Botan will have to take less risks then her opponent, making her neutral even more powerful.
When Botan gets into close range in an advantaged way, such as when her opponent is blocking or has been knocked down, that is when she can use her 22M/22H to start becoming hard to defend against. Getting close range only on her own terms is much more preferable for Botan then taking a risk at close range.
Should her opponent successfully bridge the gap, it becomes Botan's turn to take a risk. Being a zoner, she has less tools then most characters on defence, and hopes to lose neutral as little as possible. Should you inevitably be put in the situation however, some good tools to keep in mind are 2L(as its your fastest normal) or 2M(it's long range can catch opponents trying to dash after a normal) when you spot an opening or predict your opponent to go for something slow. 5L is a good option if your opponent is going for a slow, airborne attack such as the universal overhead (although its hard to combo off of), and 22S has armour so it can be used to blast out of pressure if your opponent leaves a big enough gap. Keep in mind that you can use the universal mechanic Instant Blocking (IB) to create gaps in your opponents pressure if you are struggling to find them manually. Botan's goal here is to get some sort of combo or knockdown to buy her space to breathe, and get back to executing her neutral gameplan
Normal Moves
Standing Normals
5L
5L
|
|---|
5M
5M
|
|---|
5H
5H
|
|---|
Crouching Normals
2L
2L
|
|---|
2M
2M
|
|---|
2H
2H
|
|---|
3H
3H
|
|---|
Jumping Normals
j.L
j.L
|
|---|
j.M
j.M
|
|---|
j.H
j.H
|
|---|
Command Normals
5M~M
5M~M
|
|---|
j.2H
j.2H
|
|---|
6M
6M
|
|---|
4H
4H
|
|---|
Universal Mechanics
Throw
Throw
L+M |
|---|
Air Throw
Air Throw
j.L+M |
|---|
Overhead
Overhead
M+H |
|---|
Special Attacks
236X
Poi 236L/M/H (High) (High) (Low) (Low) S.S.R.B S.S.R.B
|
|---|
214X
Quickscope 214L/M/H (Low) (Low) (High) (High) MLG Trickshot MLG Trickshot
|
|---|
22L
Tactical Roll
22L |
|---|
22M/H
Lioness Leap 22M/H Functionally similar to Akuma's "Demon Flip" from Street Fighter. Functionally similar to Akuma's "Demon Flip" from Street Fighter. M Follow-Up M Follow-Up H Follow-Up H Follow-Up
|
|---|
j.214H
Bullet Rain
j.214H |
|---|
22S
Trials Ascending
22S |
|---|
Super Star Attack
Get To Da Choppa!
236S |
|---|
Combos
General
(WIP)
Legend [] means 'optional'
() means number of hits in a multi-hit attack when not all hits are used.
> means 'cancel'
, means 'link' to let the previous move finish completely and then combo
AA means 'Anti-Air'
dl means 'delay'
Please note that at the time of writing, the game is very new. Combos and Okizeme will most likely need to be re-evaluated by experienced players at a later date, as they are almost certainly not optimal.
Botan's Combos are quite range and position specific, primarily revolving around her various wallbounce and ground bounce limits. Combos can change both in difficulty depending on what you have access to and how close you are the corner, forcing the player to adjust on the fly.
Botan's damage output is fairly high but consistency and optimization can be tricky, so it's better to think of these combos as examples than hard rules to follow. Use your own experience and skill to experiment for what works for you. And remember, any damage is good damage instead of dropping a combo at a bad time.
Basic and Universal
These combos work on everyone and aren't too difficult.
| Combo | Difficulty | Damage | Cost | Meter Gain | Location |
|---|---|---|---|---|---|
| [5L/2L] > 5M(3)~M > 2M > 5H(3) > 2H > dl 3H | ??? | 0 bar | ??? Opp: ??? |
Anywhere | |
|
Works from close range Starters. Basic BnB combo. 3H only needs to be delayed a little and it connects after 2H. Ending in 3H gives Botan her best knockdown for pressure and mixups. Youtube | |||||
| [5L/2L] > 2M > 5H(3) > 3H | ??? | 0 bar | ??? Opp: ??? |
Anywhere | |
|
When too far away for 5M to connect. If Botan's not close enough to the opponent, 2H will not connect. 5H can also be replaced with 6M if that feels more comfortable to use. Youtube | |||||
| [5L/2L] > 5M(3)~M > 2M > 5H(3) > 2H > 214M, 5L > 5M(1) > 5H(3) > 2H, 6M > dl 3H | ??? | 0 bar | ??? Opp: ??? |
Midscreen | |
|
Variant of the first combo, incoperating a wallbounce for extra damage. The standard combo that most of the harder combos will be based on. Learning this will teach you the basics of optimizing Botan's combos. Youtube | |||||
| 2H, 6M > 3H | ??? | 0 bar | ??? Opp: ??? |
Anywhere | |
|
Basic Anti-air combo from 2H. Youtube | |||||
| Air Throw > 5M(1) > 5H(3) > 2H, 6M > 3H | ??? | 0 bar | ??? Opp: ??? |
Anywhere | |
|
Basic Air Throw combo. Youtube | |||||
Midscreen
Keep in mind that if the combo starts too close to the corner, one of the wallbounces may have to be skipped and end the combo early as it risks bouncing the opponent out of the corner.
| Combo | Difficulty | Damage | Cost | Meter Gain | Location |
|---|---|---|---|---|---|
| 5L/2L] > 5M(3)~M > 2M > 5H(3) > 2H > 214M, 5A > 5M(1) > 5H(3) > 2H > 22LM, jump Air Throw > 5M(1) > 6M > 3H | ??? | 0 bar | ??? Opp: ??? |
Midscreen | |
|
Works from close range Starters. The standard combo that most of the following combos will be based on. Depending on skill and resources, it can be further optimized with meter or including 3H before the first Gunshot for extra damage. Depending on height and when 5L hits, it's possible to let all 3 hits of 5M hit airborne targets, but this can be inconsistent. If landing the air throw feels inconsistent, it can be skipped and go straight into 5L > 5M(1) instead. Youtube | |||||
| [5L/2L]> 5M(3)~M > 2M > 5H(3) > 2H > 214M, 2M > 5H(3) > 2H > 22LM, jump Air Throw > 5M(1) > 6M > 3H | ??? | 0 bar | ??? Opp: ??? |
Midscreen | |
|
Basically the same as above, but with 2M instead of 5L > 5M(1). Doesn't work on Ayame due to her small hitbox. Youtube | |||||
| AA 2H, 6M > dl 3C > 214M, 5L > dl 5M(3) > dl 5H(3) > dl 3C > 22LM, 5L > 5M(3) > 5H(3) > 3H | ??? | 0 bar | ??? Opp: ??? |
Midscreen | |
|
Anti-air combo from 2H. Due to 2H using up the ground bounce at the first hit, it's not possible to use it again to extend the combo as it will just result in a knockdown. Due to the number of 3H in this combo, it hits the combo limit at the end and becomes a soft knockdown. Youtube | |||||
| AA 2H > 22LM, 5L > dl 5M(3) > dl 5H(3) > dl 3H > 214M, 5L > 5M(3) > 5H(3) > 3H | ??? | 0 bar | ??? Opp: ??? |
Midscreen | |
|
Variant Anti-air combo from 2H. Same as above, but going straight into 22LM can give consistency depending on screen position, especially as 22LM can be delayed to make the wallbounce work even close to the corner. Youtube | |||||
| Air Throw > 5M(1) > 5H(3) > dl 3H 214M, 5L > 5M(3) > 5H(3) > 2H > 22LM, jump Air Throw > 5M(1) > 6M > 3H | ??? | 0 bar | ??? Opp: ??? |
Midscreen | |
|
Air Throw combo. Youtube | |||||
Corner
| Combo | Difficulty | Damage | Cost | Meter Gain | Location |
|---|---|---|---|---|---|
| [5L/2L] > 5M(3)~M > 2M > 5H(3) > 2H > dl 3H > 236M, jump Air Throw > 5M(1) > 5H(3) > 2H > 236M, jump Air Throw > 5M(1) > 6M > 3H | ??? | 0 bar | ??? Opp: ??? |
Corner | |
|
Grenade loop. The 3H > 236M is necessary to make the first grenade work on small hitbox characters. The combo works even when at a distance where the first 5M whiffs the to the corner making 5H > 2H consistent even when spaced out. | |||||
| Air Throw > 5M(1) > 5H(3) > dl 3H > 236M, jump Air Throw > 5M(1) > 5H(3) > 2H, 6M > 3H | ??? | 0 bar | ??? Opp: ??? |
Corner | |
|
Corner Air Throw combo. Due to the combo limit of connecting 3 Air Throws, a small variant of the combo can instead be done with only 1 grenade. | |||||
Okizeme
- 3H
- Our main meterless okizeme ender. Can be special cancelled at various timings for a meaty 22M setup, or left to recover for more options
- Mixup A | 22M/22H High/Low/Throw
- From 3H ender, you either manually time a 22M, or use 22L as soon as possible then use it's H followup, to put yourself in a position where
- A: You can meaty with L/M followup
- B: You can hit with H followup before they can respond with a normal
- C: You land then use 2L option (Due to this option needing more time, it is recommended to use it from higher 3H knockdowns such as 2H > 3H)
- How you set this up varies on how your 3H connects. A 6M > 3H knockdown will likely require 22L > 22M, whereas a 2H > 3H will require some sort of delay.
- Example: https://youtu.be/ot5dpkVv2hM
- From 3H ender, you either manually time a 22M, or use 22L as soon as possible then use it's H followup, to put yourself in a position where
- Mixup A | 22M/22H High/Low/Throw
- Mixup B | j9 (Forward Jump) > j2H
- From 3H ender, you let 3H recover, then do a forward jump, and use j.2H at different timings to appear on different sides. Then, you land and 2L.
- Due to this option needing 3H to recover, it is recommended to use it from higher 3H knockdowns such as 2H > 3H
- Example: https://youtu.be/-eYa3gi0ScE
- Mixup B | j9 (Forward Jump) > j2H
Matchups
- Vs. Aki
- Matchup advice goes here.
- Vs. Ayame
- Matchup advice goes here.
- Vs. Botan
- Matchup advice goes here.
- Vs. Coco
- Matchup advice goes here.
- Vs. Fubuki
- Matchup advice goes here.
- Vs. Korone
- Matchup advice goes here.
- Vs. Sora
- 236M (Ground grenades) become much harder to use due to her reflector (22M). 6M can be punished at a lot of ranges on block by 5M. Since zoning becomes more of a two-way street, this match-up requires a lot of patience and capitilisation on your knockdown oppurtunities to snowball the game.
- Vs. Suisei
- Matchup advice goes here.
External Resources
Colors
Yukihana Lamy (Hololive)
Momosuzu Nene (Hololive)
Omaru Polka (Hololive)
Mano Aloe (Hololive)
Dante (Devil May Cry)
Noel (BlazBlue)


