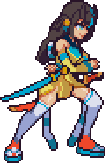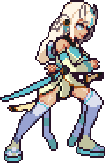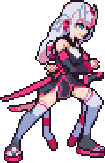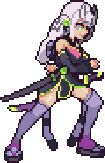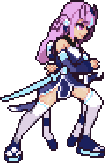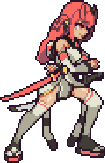
Playful Giggling Ojou - Nonstop Oni Offense
Introduction
Playstyle
|

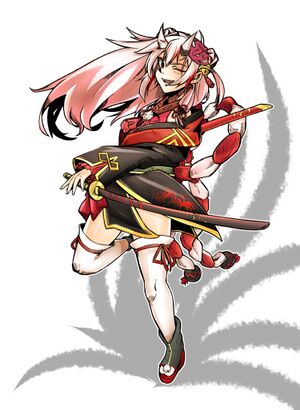
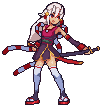
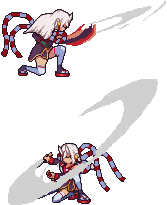
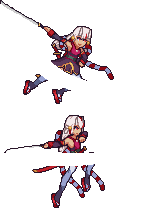
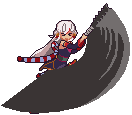
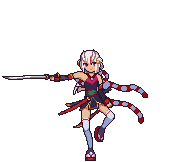
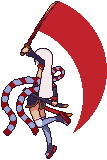
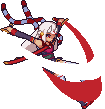
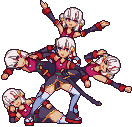
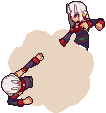
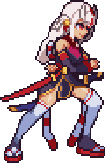
Ayame is a high-speed oni who excels in closing in on opponents from the midrange. She can keep the pressure on opponents with her dual katanas, leaving little room to escape. |
| Pros |
Cons |
- An easy-to-play and fast well-rounded Character
- Small hurtbox that may influence interactions
- Great Anti-Air options
- Notable conversion potential
- Strong mid-range pokes
- A massive high damage invincible reversal
- Good meter gain
- Cute as heck!
|
- No meterless projectiles
- Linear pressure
- Poor anti-zoning gameplay
- Meter reliance
- Unsafe normals and special moves
|
Normal Moves
Standing Normals
5L
5L Ittoryu Ittoryu
|
| Damage
|
Guard
|
Startup
|
Active
|
Recovery
|
Adv. on Block
|
Adv. on Hit
|
Invulnerability
|
| 25~
|
Mid
|
5
|
-
|
-
|
-1
|
+4
|
None
|
A quick mid poke. Useful for her stagger pressure when chained in tandem with 2L and 5M. The speed also makes this a good option to check the opponent as a general abare tool.
|
|
5M
5M Nitoryu Nitoryu
|
| Damage
|
Guard
|
Startup
|
Active
|
Recovery
|
Adv. on Block
|
Adv. on Hit
|
Invulnerability
|
| 60~
|
Mid
|
7
|
-
|
-
|
-7
|
0
|
None
|
A forward advancing slash with good range. Useful for confirming hits and stagger pressure.
|
|
5H
5H
|
| Damage
|
Guard
|
Startup
|
Active
|
Recovery
|
Adv. on Block
|
Adv. on Hit
|
Invulnerability
|
| 85~
|
Mid
|
10
|
-
|
-
|
-8
|
+28
|
None
|
A shorter range double slash. Good for confirming into 22L for combos and stagger pressure. Wall bounces on corner hit for extra combo conversions.
|
|
Crouching Normals
2L
2L
|
| Damage
|
Guard
|
Startup
|
Active
|
Recovery
|
Adv. on Block
|
Adv. on Hit
|
Invulnerability
|
| 20~
|
Low, Air Unblockable
|
5
|
-
|
-
|
-2
|
+2
|
None
|
A quick jab that hits low. Another important tool for general abare and her stagger pressure in tandem with 5L. It's a fast low, so it can be used for high low mixups as well.
|
|
2M
2M
|
| Damage
|
Guard
|
Startup
|
Active
|
Recovery
|
Adv. on Block
|
Adv. on Hit
|
Invulnerability
|
| 55~
|
Low, Air Unblockable
|
8
|
-
|
-
|
-7
|
0
|
None
|
A long range low slash. This normal is one of Ayame's most important pokes. It's one of her farthest ranged buttons that confirms easily into 236M even at max range.
- Very useful for pressure and poking
- This attack is air unblockable, so it is useful for tech traps.
|
|
2H
2H
|
| Damage
|
Guard
|
Startup
|
Active
|
Recovery
|
Adv. on Block
|
Adv. on Hit
|
Invulnerability
|
| 45-86~
|
Mid
|
11
|
-
|
-
|
-11
|
KND
|
None
|
A 2 hitting slash that acts as one of her launchers. The first hit is a mid, but the reach is quite significant. This button is very minus on block, but you can special cancel or jump cancel it on block/hit. It also functions as a serviceable anti-air and is heavily used in her combos. The second hit has a much more vertical hitbox and is multihit if it hits by itself.
|
|
3H
3H Haiya Haiya
|
| Damage
|
Guard
|
Startup
|
Active
|
Recovery
|
Adv. on Block
|
Adv. on Hit
|
Invulnerability
|
| 70~
|
Low
|
11
|
-
|
-
|
-15
|
KND
|
None
|
A generic sweep. Mostly overshadowed by her 2M and other assortment of low options. It is special cancelable, but not generally recommended to use.
|
|
Jumping Normals
j.L
j.L
|
| Damage
|
Guard
|
Startup
|
Active
|
Recovery
|
Adv. on Block
|
Adv. on Hit
|
Invulnerability
|
| 30~
|
High
|
6
|
-
|
-
|
-
|
-
|
None
|
Quick jumping normal, not generally very useful. Could work as a fast air to air.
|
|
j.M
j.M
|
| Damage
|
Guard
|
Startup
|
Active
|
Recovery
|
Adv. on Block
|
Adv. on Hit
|
Invulnerability
|
| 45-86~
|
High
|
9,20
|
-
|
-
|
-
|
-
|
None
|
2 hitting jumping normal. Useful in combos and jumpins. On taller characters you can get both hits of jM to connect, leading to some strong sequences.
|
|
j.H
j.H
|
| Damage
|
Guard
|
Startup
|
Active
|
Recovery
|
Adv. on Block
|
Adv. on Hit
|
Invulnerability
|
| 90~
|
High
|
13
|
-
|
-
|
-
|
-
|
None
|
A larger slower jump-in. Useful to use in tandem with jM as her go to jumpins. Can hit crossup which can see use in corner steal jump-ins.
|
|
Universal Mechanics
Throw
Throw
L+M
|
| Damage
|
Guard
|
Startup
|
Active
|
Recovery
|
Adv. on Block
|
Adv. on Hit
|
Invulnerability
|
| 160~
|
-
|
7
|
2
|
-
|
-
|
-
|
None
|
|
Overhead
Overhead
M+H
|
| Damage
|
Guard
|
Startup
|
Active
|
Recovery
|
Adv. on Block
|
Adv. on Hit
|
Invulnerability
|
| 60~
|
High
|
-
|
-
|
-
|
-
|
-
|
None
|
Universal standing overhead
|
|
Special Attacks
236X
Asura's Fury
236 L/M/H
|
| Version
|
Damage
|
Guard
|
Startup
|
Active
|
Recovery
|
Adv. on Block
|
Adv. on Hit
|
Invulnerability
|
| L / 5S
|
40
|
Mid
|
11
|
-
|
-
|
-3
|
1
|
None
|
| LL / 5SS
|
35
|
Mid
|
10
|
-
|
-
|
-7
|
-1
|
None
|
| LLL / 5SSS
|
47
|
Mid
|
13
|
-
|
-
|
-10
|
KND
|
None
|
Ayame's Rekka series. 236L on it's own is a safe way to end your pressure, but threatening with the rest of the hits is a good way to push stagger pressure. However, most of the hits are unsafe on block. In air juggle, 236LL is good for maintaining oki and 236LLL is good for damage conversions. Can be super chat cancelled into 22L for a full combo.
- Be careful using this at long range as the second hit can whiff.
|
| M / 6S
|
45
|
Mid
|
18
|
-
|
-
|
-6
|
-2
|
None
|
| MM / 6SS
|
41
|
Mid
|
15
|
-
|
-
|
-8
|
-6
|
None
|
| MMM / 6SSS
|
64
|
Mid
|
13
|
-
|
-
|
-14
|
KND
|
None
|
Very similar to the L version, however it reaches much farther at the cost of being more unsafe in general. This will be the version of the rekka you want to use as a poke and for confirming from pokes as it consistently reaches after common moves like 2M and 5H. Can be super chat cancelled into 22L for a full combo.
|
| H
|
60
|
Mid
|
13
|
-
|
-
|
-8
|
0
|
None
|
| HH
|
63
|
Mid
|
11
|
-
|
-
|
-7
|
-5
|
None
|
| HHH
|
63
|
Mid
|
13
|
-
|
-
|
-8
|
-6
|
None
|
| HHHH
|
50
|
Mid
|
13
|
-
|
-
|
-14
|
KND
|
None
|
| HHH8H
|
72
|
High
|
-
|
-
|
-
|
-18
|
KND
|
None
|
| HHH2H
|
72
|
Low
|
11
|
-
|
-
|
-9
|
KND
|
None
|
Ayame's H version of the rekka is the most versatile. Same as the other version, but more damage and more stagger opportunities.
- You can hit 8H for the final hit to get an overhead
- 2H for the final hit to get a low
|
|
22X
Demon Cutter
22 L/M/H
|
| Version
|
Damage
|
Guard
|
Startup
|
Active
|
Recovery
|
Adv. on Block
|
Adv. on Hit
|
Invulnerability
|
| L / 2S
|
75~
|
Mid
|
9
|
-
|
-
|
-18
|
KND
|
None
|
Ayame swings her katana upwards. One of her most useful combo tools for launching the opponent into a full juggle. This can also be used as a servicable anti-air.
|
| M
|
143~
|
Mid, Air Unblockable
|
10
|
-
|
-
|
-46
|
KND
|
None
|
Similar to the L version, but this move acts as one of her more consistent combo enders for decent oki. Also a serviceable anti-air.
- Air Unblockable, which is useful for tech traps.
|
| H
|
184~
|
Mid
|
5
|
-
|
-63
|
-
|
-
|
None
|
This version of the attack is her invincible reversal. Launches the opponent on hit for high damage combo opportunities. It hits all around her head and can beat bursts.
- Uses one bar of Star Power
- Invincible reversal
- Burst bait tool
|
|
214X
Oni Flip
214 L/M/H
|
| Version
|
Damage
|
Guard
|
Startup
|
Active
|
Recovery
|
Adv. on Block
|
Adv. on Hit
|
Invulnerability
|
| L / 4S
|
75~
|
Mid
|
17
|
-
|
-
|
-5~
|
6
|
None
|
Ayame does a short quick flip-kick, useful as a combo ender for good oki. 214x flips can also go over some fireballs, but it is very inconsistent and spacing dependent. Advantage on block is also dependent on spacing.
|
| M
|
75~
|
Mid
|
23
|
-
|
-
|
-5~
|
5
|
None
|
Same as the L version, but she goes much farther. This version can be used in for combos in the corner as well as tech traps.
|
| H
|
65~
|
Mid
|
18
|
-
|
-
|
-5~
|
5
|
None
|
Same as the M version but fullscreen.
- Uses one bar of Star Power
- Useful for surprise attacks to beat fireball startup from full screen.
|
|
j.214X
Heavenly Oni Flip
j.214 L/M/H
|
| Version
|
Damage
|
Guard
|
Startup
|
Active
|
Recovery
|
Adv. on Block
|
Adv. on Hit
|
Invulnerability
|
| L/M/H/S
|
75~
|
Mid
|
17
|
-
|
-
|
-8~
|
-1
|
None
|
Ayame does a quick flip attack on air going downward. Mostly used to as a combo ender and a way to leverage 22S mixups. All versions are unsafe on block.
|
|
22S
Karma and Shiranui
22 S
|
| Damage
|
Guard
|
Startup
|
Active
|
Recovery
|
Adv. on Block
|
Adv. on Hit
|
Invulnerability
|
| 75~
|
Unblockable
|
11f
|
-
|
-
|
-3
|
-
|
None
|
Ayame summons a wisp projectile that plants a bomb on the opponent that will detonate after a short amount of time. The wisp projectile is unblockable, and can be setup in combos or blockstring. The detonation itself occurs shortly after the projectile hits. The detonation is blockable, but ayame can leverage it for mixups.
- Uses one bar of Star Power
- Can be used to make attacks safe
- Useful for pressure and mixups
|
|
Super Star Attack
I'm the Real One!
236S
|
| Damage
|
Guard
|
Startup
|
Active
|
Recovery
|
Adv. on Block
|
Adv. on Hit
|
Invulnerability
|
| 269
|
Mid
|
5
|
-
|
-
|
-29
|
KND
|
None
|
High damaging super for 2 star gauge. Has high scaled damage, so a very useful way to spend meter for damage at the end of combos. This is also invincible on startup, but 22H is a better reversal in general.
- Uses two bars of Star Power
|
|
Combos
| Combo Notation Help
|
Disclaimer: Combos are written by different authors, so the notation used can vary from the standard one.
For additional information on terminology for Idol Showdown or fighting games in general, please consult the Idol Showdown Glossary or the Fighting Game Glossary.
|
| #X |
Input writted with numpad notation for the direction/motion input followed by the action.
|
| X > Y |
X input is cancelled into Y.
|
| X, Y |
X input is linked to Y, meaning Y is done after X's recovery frames.
|
| X~Y |
This notation has two meanings: 1. Use attack X with followup Y. 2. Input X, and then within a few frames, input Y. Sometimes referred to as "kara cancelling".
|
| [X] |
Input X is held down.
|
| {X} |
Input is partially charged (as in, not tapped but not held to full charge either).
|
| (X) |
Input X is optional. Typically, the combo will be easier without this input.
|
| X/Y |
Choose between input X or input Y.
|
| #jc |
Jump cancel. The number (7, 8, or 9) indicates which direction the jump cancel should be input if it is important to the combo.
|
| j.X |
Jumping input X. X should be input while airborne.
|
| dl.X |
Delayed input X. There will be some delay before inputting X.
|
| CH X |
Counterhit with input X. This is used for combo starters that require counterhit confirm.
|
| OTG X |
Input X while the opponent is knocked down but still able to be hit.
|
| X(n) |
Number of hits of a multihit attack. If an attack is multihit and this is not specified, it is assumed to let the maximum number of hits complete before proceeding.
|
| scc |
Superchat Cancel. Idol Showdown unique mechanic that allows you to cancel the recovery of one special into another special.
|
General
Mid-screen
| Combo
|
Difficulty
|
Damage
|
Cost
|
Meter Gain
|
Location
|
- Basic midscreen BNB for decent damage
|
- Midscreen BNB spending 1-2 superchat meter, adding more corner carry
|
Corner
| Combo
|
Difficulty
|
Damage
|
Cost
|
Meter Gain
|
Location
|
|
|
Combo Theory
Mid-screen
The goal of a combo midscreen is to secure oki, as well as get as much corner carry as possible. Ending combos with 22M gives a good amount of carry and consistent oki. By spending superchat meter, 236MMM can be used to extend combos and carry the enemy further.
Corner
The corner allows access to 214M in combos. After lifting the enemy with a move such as 5H, 214M can be used to loop into another string. Keep the juggle limit in mind, 2 flips before an ender is best.
Enders
Meterless combos should be ended with 22M, which gives enough time to dash up for oki. For 1 meter, 22H easily works in the same places. Be careful when routing into 236S, if they are bounced too high (e.g. with a high hitting 236MMM), they may recover before landing in the super. 2H > 236S seems to keep them low enough.
Recommended Collabs
- Kanata Amane
- Insert Text Description.
- Amelia Watson
- Insert Text Description.
- Marine Houshou
- Insert Text Description.
- Iroha Kazama
- Insert Text Description.
- Mio Ookami
- Insert Text Description.
- Roboco
- Insert Text Description.
- Miko Sakura
- Insert Text Description.
- Kiara Takanashi
- Insert Text Description.
Matchups
- Vs. Aki
- Matchup advice goes here.
- Vs. Ayame
- Matchup advice goes here.
- Vs. Botan
- Matchup advice goes here.
- Vs. Coco
- Matchup advice goes here.
- Vs. Fubuki
- Matchup advice goes here.
- Vs. Korone
- Matchup advice goes here.
- Vs. Sora
- Matchup advice goes here.
- Vs. Suisei
- Matchup advice goes here.
External Resources
Colors
Navigation
| The Game
|
|
| The Battle System
|
|
| Idols
|
|
| Collabs
|
|
