Introduction
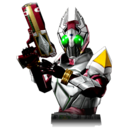
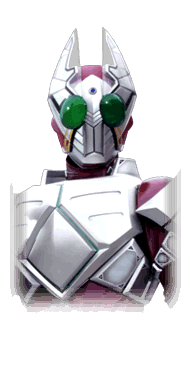 Kamen Rider Garren
Kamen Rider Garren is here to kick ass and take names, but the only name he's managed to take so far is SAYOKOOOOOOOO.
Garren is something of a graceless power zoner. His main strength is being able to convert long-ranged hits into a full combo, leading into massive damage. Some of his strings have him tumble backwards while firing, a trait that synergizes well with the Assault Style's access to free Rider Cancels.
This adds up to a very charming and unique take on the Kamen Rider zoner: a slapstick guy falling all over the place who, nonetheless, can absolutely explode you.
Playstyle
 Kamen Rider Garren puts his whole body into keeping you out and blowing you up. Kamen Rider Garren puts his whole body into keeping you out and blowing you up. |
| Pros |
Cons |
- Fullscreen Loop Combos: Garren is able to link together highly damaging combos from a distance, where it's difficult to burst effectively.
- Built-in Mobility: Some of Garren's strings move him backwards while firing, which helps to make closing the distance difficult.
- Great Assault Synergy: Free RCs during Assault Mode pair really well with Garren's kit, and he has excellent points to Instant Charge to build the meter necessary to play his game.
|
- Limited Close-Range Strikes: Garren has projectile strings to tear up opponents from a distance, but he lacks normals that function as a panic button up close.
- Defense: Garren is difficult to pin down, but if he finds himself without Rider Gauge and low on Guard Gauge, he's in trouble.
|
Form Select
Move List
Normal Moves
5LLL
5LLL
|
| Version
|
Damage
|
Guard
|
Startup
|
Active
|
Recovery
|
Block Adv.
|
Hit Adv.
|
| 5L
|
-
|
Y
|
-
|
-
|
-
|
-
|
-
|
A stepping elbow. Not a bad normal, but neither is it Garren's fastest normal. Mostly useful for its string followups.
|
| 5LL
|
-
|
Y
|
-
|
-
|
-
|
-
|
-
|
A stepping thrust kick. Covers quite a bit of distance.
|
| 5LLL
|
-
|
Y
|
-
|
-
|
-
|
-
|
-
|
A dash punch that covers a lot of distance very quickly. Unsafe on block unless it's spaced out, but can be very useful to RC if Garren needs to get in fast.
|
|
5LH
5LH
|
| Version
|
Damage
|
Guard
|
Startup
|
Active
|
Recovery
|
Block Adv.
|
Hit Adv.
|
| 5L
|
-
|
Y
|
-
|
-
|
-
|
-
|
-
|
A stepping elbow. Not a bad normal, but neither is it Garren's fastest normal. Mostly useful for its string followups.
|
| 5LH
|
-
|
Y
|
-
|
-
|
-
|
-
|
-
|
Garren dives backwards and fires a projectile that knocks the opponent away. This string can be followed up with an Instant Charge by pressing the Special Attack button.
An extremely useful string for building meter quickly. The gunshot comes out pretty fast, all things considered, and it's not uncommon for your opponents to be caught off guard and get clipped.
|
|
4/6LLL
4/6LLL
|
| Version
|
Damage
|
Guard
|
Startup
|
Active
|
Recovery
|
Block Adv.
|
Hit Adv.
|
| 4/6L
|
-
|
Y
|
-
|
-
|
-
|
-
|
-
|
A high kick. Garren's slowest and overall least used light starter. Unsafe on block.
|
| 4/6LL
|
-
|
Y
|
-
|
-
|
-
|
-
|
-
|
A stepping thrust kick that knocks the opponent away on hit. Unsafe on block.
|
|
4/6LH
4/6LH
|
| Version
|
Damage
|
Guard
|
Startup
|
Active
|
Recovery
|
Block Adv.
|
Hit Adv.
|
| 4/6L
|
-
|
Y
|
-
|
-
|
-
|
-
|
-
|
A high kick. Garren's slowest and overall least used light starter. Unsafe on block.
|
| 4/6LH
|
-
|
Y
|
-
|
-
|
-
|
-
|
-
|
Garren kneels and fires two shots that launch the opponent on hit. This actually has quite a bit of untechable time, and can be comboed into Fire Upper (dS) with an RC. The main reason it's not used is solely that Garren has better options.
|
|
2/8LL
2/8LL
|
| Version
|
Damage
|
Guard
|
Startup
|
Active
|
Recovery
|
Block Adv.
|
Hit Adv.
|
| 2/8L
|
-
|
Y
|
-
|
-
|
-
|
-
|
-
|
A stepping low kick. Garren's fastest light normal.
|
| 2/8LL
|
-
|
Y
|
-
|
-
|
-
|
-
|
-
|
A quick no-look straight punch. Knocks the opponent away on hit.
|
|
2/8LH
2/8LH
|
| Version
|
Damage
|
Guard
|
Startup
|
Active
|
Recovery
|
Block Adv.
|
Hit Adv.
|
| 2/8L
|
-
|
Y
|
-
|
-
|
-
|
-
|
-
|
A stepping low kick. Garren's fastest light normal.
|
| 2/8LH
|
-
|
Y
|
-
|
-
|
-
|
-
|
-
|
An elbow that launches the opponent on hit. Can be followed up with a Combo Jump into its aircombo followup string, jLHS.
This launcher is mostly secondary to Garren's gameplan, but sees some niche use as 2/8L is Garren's fastest punish.
|
| 2/8LHH
|
-
|
Y
|
-
|
-
|
-
|
-
|
-
|
Garren flings himself backwards while firing a shot. An alternate ender to the launcher. Pretty nice because it creates a lot of distance.
|
|
5HH
5HH
|
| Version
|
Damage
|
Guard
|
Startup
|
Active
|
Recovery
|
Block Adv.
|
Hit Adv.
|
| 5H
|
-
|
Y
|
-
|
-
|
-
|
-
|
-
|
Garren fires a shot straight ahead.
|
| Version
|
Damage
|
Guard
|
Startup
|
Active
|
Recovery
|
Block Adv.
|
Hit Adv.
|
| 5H
|
-
|
Y
|
-
|
-
|
-
|
-
|
-
|
Garren flings himself backward while firing a shot. A useful string for zoning.
|
|
6HHH
6HHH
|
| Version
|
Damage
|
Guard
|
Startup
|
Active
|
Recovery
|
Block Adv.
|
Hit Adv.
|
| 6H
|
-
|
Y
|
-
|
-
|
-
|
-
|
-
|
Garren hipfires a single shot. A great starter for use in long-ranged neutral.
|
| Version
|
Damage
|
Guard
|
Startup
|
Active
|
Recovery
|
Block Adv.
|
Hit Adv.
|
| 6HH
|
-
|
Y
|
-
|
-
|
-
|
-
|
-
|
Garren kneels and fires two more shots, launching the opponent on hit. Has enough untech time to guarantee the string, but is air techable and guarantees little else.
|
| Version
|
Damage
|
Guard
|
Startup
|
Active
|
Recovery
|
Block Adv.
|
Hit Adv.
|
| 6HH
|
-
|
Y
|
-
|
-
|
-
|
-
|
-
|
Garren fires one final shot forward. This string can be followed up with an Instant Charge by pressing the Special Attack button.
|
|
2/8H
2/8H
|
| Damage
|
Guard
|
Startup
|
Active
|
Recovery
|
Block Adv.
|
Hit Adv.
|
| -
|
Y
|
-
|
-
|
-
|
-
|
-
|
Garren kneels and fires one single shot. Overall, not a very useful move, as it compares unfavorably to Garren's other heavies in every respect. It may be able to dodge some high attacks, but I wouldn't count on it.
|
|
Assault Mode
Assault 5LLLL
5LLLL (Assault Mode)
|
| Version
|
Damage
|
Guard
|
Startup
|
Active
|
Recovery
|
Block Adv.
|
Hit Adv.
|
| 5L
|
-
|
Y
|
-
|
-
|
-
|
-
|
-
|
|
|
| 5LL
|
-
|
Y
|
-
|
-
|
-
|
-
|
-
|
|
|
| 5LLL
|
-
|
Y
|
-
|
-
|
-
|
-
|
-
|
|
|
| 5LLLL
|
-
|
Y
|
-
|
-
|
-
|
-
|
-
|
A hopping axe kick that launches the opponent on hit.
|
|
Assault 5LHHH
5LHHH (Assault Mode)
|
| Version
|
Damage
|
Guard
|
Startup
|
Active
|
Recovery
|
Block Adv.
|
Hit Adv.
|
| 5L
|
-
|
Y
|
-
|
-
|
-
|
-
|
-
|
|
|
| 5LH
|
-
|
Y
|
-
|
-
|
-
|
-
|
-
|
Garren fires a shot forward.
|
| 5LHH
|
-
|
Y
|
-
|
-
|
-
|
-
|
-
|
Garren flings himself backward and fires a shot, which unlike every other version of this attack, does not launch the opponent on hit.
|
| 5LHHH
|
-
|
Y
|
-
|
-
|
-
|
-
|
-
|
Garren stands back up and fires a shot. Notably, this does not knock the opponent down, which is great since Garren prefers to combo the opponent standing.
|
|
Special Moves
5S
Fire Bullet
5S~S~S
|
| Damage
|
Guard
|
Startup
|
Active
|
Recovery
|
Block Adv.
|
Hit Adv.
|
| -
|
Y
|
-
|
-
|
-
|
-
|
-
|
Garren shoots a giant fireball up to three times. A projectile rekka, and the lynchpin of Garren's moveset.
All three fireballs are technically unsafe on block at close range, with the third one being extra unsafe. The fireball followups are delayable and hitconfirmable, allowing Garren to minimize his own risk and catch opponents trying to punish him.
These fireballs are so advantageous on hit that Garren is even able to link a Dash Shot off of the first or second projectile, and even from long distance. The dash shot then combos back into Fire Bullet, allowing Garren's loop combo.
|
|
DS
Fire Upper
any direction + S
|
| Damage
|
Guard
|
Startup
|
Active
|
Recovery
|
Block Adv.
|
Hit Adv.
|
| -
|
N/A
|
-
|
-
|
-
|
-
|
-
|
Garren uppercuts in place. Has a great vertical hitbox, making it sort of useful as an anti-air, but it's really slow to come out and recover so the risk often outweighs the benefits.
|
|
JS
Burning Smash
jS
|
| Damage
|
Guard
|
Startup
|
Active
|
Recovery
|
Block Adv.
|
Hit Adv.
|
| -
|
Y
|
-
|
-
|
-
|
-
|
-
|
Garren flips and does a falling kick. Inherits his momentum, so it's a little tricky to aim. Crumples the opponent on hit.
Unsafe on block, so it carries a lot of risk, but can be a useful punishing tool against characters who force you into the air.
|
|
Universal Mechanics
Throw
Throw
4H
|
| Damage
|
Guard
|
Startup
|
Active
|
Recovery
|
Block Adv.
|
Hit Adv.
|
| -
|
Y
|
-
|
-
|
-
|
-
|
-
|
Garren's throw. Causes a hard knockdown. Garren can combo a 2/8L from this against the wall, but no more than that.
|
|
Dash Action
Dash Action Dash Shot Dash Shot
|
| Damage
|
Guard
|
Startup
|
Active
|
Recovery
|
Block Adv.
|
Hit Adv.
|
| -
|
Y
|
-
|
-
|
-
|
-
|
-
|
A generic Dash Shot-type Dash Action. Costs .5 stocks of the Rider Gauge and can chain into itself up to 3 shots. Dash Shot tracks the opponent's position when firing, including vertically, so although these shots aren't homing, they can be used to snipe the opponent out of the air.
Dash Shot recovers instantly when its user returns to neutral.
|
|
Rider Art
Rider Art Super Jump Super Jump
|
| Damage
|
Guard
|
Startup
|
Active
|
Recovery
|
Block Adv.
|
Hit Adv.
|
| -
|
Y
|
-
|
-
|
-
|
-
|
-
|
Standard Super Jump-type Rider Art. Costs .5 stocks of the Rider Gauge.
|
|
Style Action
Style Action Assault Mode Assault Mode
|
| Damage
|
Guard
|
Startup
|
Active
|
Recovery
|
Block Adv.
|
Hit Adv.
|
| -
|
Y
|
-
|
-
|
-
|
-
|
-
|
Garren uses the Assault Style. Pressing Style Action with at least two stocks of Rider Gauge at any time besides during hitstun activates Assault Mode.
During Assault Mode, Garren gains the following extended strings:
- 5LLLL
- 5LHHH
- dS (replaces Fire Upper with Burning Smash)
|
|
Combos
- jS > jS
- jS > Rider Finale
- Garren's jS crumples, which gives him some important links but not a full combo.
- [5S~S > DA] > repeat xN > 5S~S~S
- Garren's Dash Action loop, and his main important combo.
- You can also connect most grounded hits into this using RC.
Navigation
| General
|
|
|
Showa
|
| Kamen Rider
|
|
| Kamen Rider V3
|
|
| Kamen Rider Amazon
|
|
| Kamen Rider BLACK (RX)
|
|
|
Heisei Phase 1
|
| Kamen Rider Kuuga
|
|
| Kamen Rider Agito
|
|
| Kamen Rider Ryuki
|
|
| Kamen Rider 555
|
|
| Kamen Rider Blade
|
|
| Kamen Rider Hibiki
|
|
| Kamen Rider Kabuto
|
|
| Kamen Rider Den-O
|
|
| Kamen Rider Kiva
|
|
| Kamen Rider Decade
|
|
|
Heisei Phase 2
|
| Kamen Rider W
|
|
| Kamen Rider OOO
|
|
| Kamen Rider Fourze
|
|
| Kamen Rider Wizard
|
|
