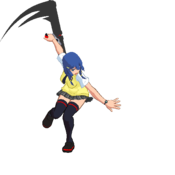
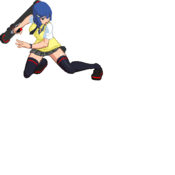
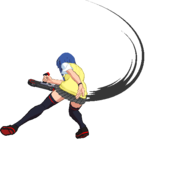
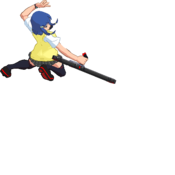
Introduction
Source Game: Umihara Kawase
Story
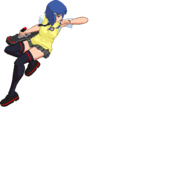
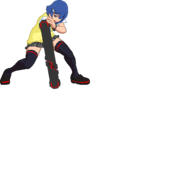
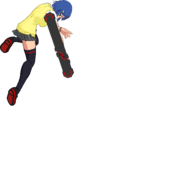
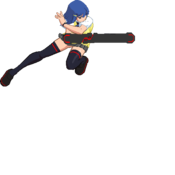
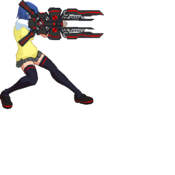
Yokoyama Noko works for the Time Enforcement Commission as a time cop. Before she could participate in Blade Strangers, she had to escape from PreCrime officers that wanted to arrest her for killing a man 36 hours into the future.
Gameplay
Health: 10,500
Gameplay overview here
Move List
Normal Moves
Light Attack
5L
|
| Damage
|
Startup
|
Active
|
Recovery
|
Block Adv
|
Hit Adv
|
Cancels
|
Guard
|
Hitbox
|
Scaling
|
| 500
|
6
|
|
|
0
|
2
|
|
M
|
-
|
|
While Noko's 5L doesn't contribute to her potent high/low mixups, it's a great tool for starting pressure regardless. It has above average range for a light normal, and since its followups also have good range, she'll rarely need to worry about combos whiffing because the opponent is too far away.
5L, much like most characters' jabs, confirms into itself on counter hit. Combined with its range and Noko's quick dash, she can easily keep the opponent in place with repeated 5Ls, and confirm into a knockdown if the opponent tries to press a button.
|
|
Light Attack x2
6L
|
| Damage
|
Startup
|
Active
|
Recovery
|
Block Adv
|
Hit Adv
|
Cancels
|
Guard
|
Hitbox
|
Scaling
|
| 600
|
7
|
|
|
-2
|
1
|
|
M
|
-
|
|
Because of this move's range, it's effective as a poke to be used in the neutral game. Its main benefit over her other long-range buttons is that she can cancel it into other normals, mainly 6LL, 2H, or even 6E. This allows you to create easily hit confirmable, safe blockstrings, even while further away from the opponent.
|
|
Light Attack x3
6L
|
| Damage
|
Startup
|
Active
|
Recovery
|
Block Adv
|
Hit Adv
|
Cancels
|
Guard
|
Hitbox
|
Scaling
|
|
|
7
|
|
|
-3
|
1
|
|
M
|
-
|
|
This move will generally force you to end your pressure, since it has lots of pushback on block. However, because of this, it leaves you at a comfortable range at which to play neutral.
This move doesn't have such a high vertical hitbox, which makes it slightly awkward to use in air conversions without implementing a delay.
|
|
Light Attack - Crouch
2L
|
| Damage
|
Startup
|
Active
|
Recovery
|
Block Adv
|
Hit Adv
|
Cancels
|
Guard
|
Hitbox
|
Scaling
|
| 400
|
6
|
|
|
-1
|
0
|
|
L
|
-
|
|
Noko's speed, as well as 2L and its followups' range, make this move a threatening low in almost any situation. Noko can easily run in and out while poking with this move, conditioning opponents to block low so that you can start opening them up with her deadly instant overhead. Unlike 5L, however, this move doesn't link into anything on counter hit, so you'll probably want to immediately cancel this move into 6L or something else.
|
|
Heavy Attack
5H
|
| Damage
|
Startup
|
Active
|
Recovery
|
Block Adv
|
Hit Adv
|
Cancels
|
Guard
|
Hitbox
|
Scaling
|
| 850
|
9
|
|
|
-6
|
0
|
|
M
|
-
|
|
A step-in normal that is good for confirming into either Light Pile Driver or any version of Rekka. It doesn't have a good vertical hitbox, but it's possible to confirm it into Heavy Pile Driver if the opponent is in the air at a reasonable height.
|
|
Down Shoot
6H
|
| Damage
|
Startup
|
Active
|
Recovery
|
Block Adv
|
Hit Adv
|
Cancels
|
Guard
|
Hitbox
|
Scaling
|
| 1050 [1400]
|
13 [44]
|
|
|
-2 [-1]
|
3 [Launch]
|
|
M
|
-
|
|
Noko's 6H stands out as one of the only charged 6Hs that bounces the opponent off the ground rather than blasting them to the wall. This allows her to combo from it at any point on the screen, and midscreen routes that involve 6[H] do a hefty amount of damage. Aside from its combo potential, 6H has good range and links into 6HS regardless of charge, allowing you to score a good knockdown from just about any confirm.
|
|
Broad-Axe Kick
4H
|
| Damage
|
Startup
|
Active
|
Recovery
|
Block Adv
|
Hit Adv
|
Cancels
|
Guard
|
Hitbox
|
Scaling
|
| 750
|
8
|
|
|
0
|
3
|
|
M
|
-
|
|
Nothing about this move is miserable. It has more range than it appears to, has good startup, and very little recovery, making it a prime choice for the neutral game. 4H is a great move to buffer into specials, allowing you to easily punish the opponent for approaching while still remaining safe if they don't. Additionally, this move links into 2H on counterhit, and if you're willing to spend meter you can get massive damage from this confirm.
To top it all off, 4H is also Noko's only move other than 5L that's 0 on block. Noko players will often use 2L>4H in pressure since it can easily be hit confirmed, and if 4H is blocked Noko is left in a good position.
|
|
Heavy Attack - Crouch
2H
|
| Damage
|
Startup
|
Active
|
Recovery
|
Block Adv
|
Hit Adv
|
Cancels
|
Guard
|
Hitbox
|
Scaling
|
| 700
|
8
|
|
|
-3
|
2
|
|
L
|
-
|
|
2H is arguably Noko's most reliable poke. It's fast and has good range, but the important part is that this move has a gigantic cancel window. It's possible to hit confirm this move into something like 6S, but using Offensive Skill is even easier and leads to a very high damage combo. If 2H counterhits, then the confirm becomes even easier.
|
|
Clean Sweep
3H
|
| Damage
|
Startup
|
Active
|
Recovery
|
Block Adv
|
Hit Adv
|
Cancels
|
Guard
|
Hitbox
|
Scaling
|
| 850
|
12
|
|
|
-2
|
1
|
|
M
|
-
|
|
Although this move has a decent hitbox, its poor speed and recovery make it an unreliable option on its own. However, much like 2H, 3H also has a long cancel window, and it has better framedata on block, which means that it might have some utility in long ranged blockstrings. Otherwise, it's pretty useful as a combo extender.
|
|
Elbow Strike
j.8L
|
| Damage
|
Startup
|
Active
|
Recovery
|
Block Adv
|
Hit Adv
|
Cancels
|
Guard
|
Hitbox
|
Scaling
|
| 450
|
5
|
|
|
7
|
9
|
|
H
|
-
|
|
j.8L's primary use is as a combo tool. It's very fast, has high juggle potential, and hits in a good area above her, making it easy to extend combos with. Generally speaking, canceling j.8L into a delayed heavy air normal will allow Noko to continue her combo once she hits the ground.
|
|
Level Kick
j.8H
|
| Damage
|
Startup
|
Active
|
Recovery
|
Block Adv
|
Hit Adv
|
Cancels
|
Guard
|
Hitbox
|
Scaling
|
| 750
|
7
|
|
|
7
|
16
|
|
H
|
-
|
|
Since Noko is one of the only characters that can chain her air normals, this attack makes for an excellent combo extender for juggles. This attack sends the opponent at a high trajectory to allow Noko to follow up with some of her slower attacks.
|
|
Skull Splitter
j.2H
|
| Damage
|
Startup
|
Active
|
Recovery
|
Block Adv
|
Hit Adv
|
Cancels
|
Guard
|
Hitbox
|
Scaling
|
| 850
|
9
|
|
|
7
|
16
|
|
H
|
-
|
|
j.2H has a gigantic hitbox under Noko. It can function similarly to Shovel Knight's infamous j.E; by super jumping forward and using j.2H immediately, Noko can rapidly close distance and gain advantage on block all at once.
|
|
Unique Attacks
Anti-Air Attack
5E
|
| Damage
|
Startup
|
Active
|
Recovery
|
Block Adv
|
Hit Adv
|
Cancels
|
Guard
|
Hitbox
|
Scaling
|
| 800
|
11
|
|
|
-4
|
0
|
|
M
|
-
|
|
Noko doesn't have any other consistent anti airs, so 5E is always your best bet. This move actually has a really good vertical hitbox, but fails to reach opponents who are further away from you. By spending a meter to combo from this anti air, you can get huge damage, even midscreen.
|
|
Low Attack
2E
|
| Damage
|
Startup
|
Active
|
Recovery
|
Block Adv
|
Hit Adv
|
Cancels
|
Guard
|
Hitbox
|
Scaling
|
| 800
|
9
|
|
|
-6
|
|
|
L
|
-
|
|
Noko already has a strong low option (2L) and can easily score knockdowns from her LLL autocombo, so this move doesn't really have much of a purpose. In certain situations, however, it can be used as a punish tool when 4E isn't fast enough.
|
|
Down Attack
3E
|
| Damage
|
Startup
|
Active
|
Recovery
|
Block Adv
|
Hit Adv
|
Cancels
|
Guard
|
Hitbox
|
Scaling
|
| 1500
|
12
|
|
|
|
|
|
OTG
|
-
|
|
Noko can easily condition the opponent into doing delayed wakeups by using her j.2SE as oki. Similarly, if the opponent keeps doing delayed wakeups, punishing with 3E will force them to do normal wakeups more often, allowing Noko to harass with her deadly instant overhead without having to worry about wasting meter. She has no way to capitalize on a successful 3E without burning meter, but since she builds meter rather quickly this shouldn't be a problem.
|
|
Skills
Pile Combination
5S/HS/SE x3
Definitely Not A Rekka
|
| Version
|
Damage
|
Startup
|
Active
|
Recovery
|
Block Adv
|
Hit Adv
|
Cancels
|
Guard
|
Hitbox
|
Scaling
|
| Light
|
400, 500, 900; All Hits-1430
|
16
|
|
|
-2, -7, -13
|
1, -2, 2
|
|
M
|
-
|
|
First hit is -2 on block so its safe, but the rest of the hits are very punishable. Good for pressuring the opponent.
|
| Version
|
Damage
|
Startup
|
Active
|
Recovery
|
Block Adv
|
Hit Adv
|
Cancels
|
Guard
|
Hitbox
|
Scaling
|
| Heavy
|
800, 500, 900; All Hits-1830
|
|
|
|
-6, -7, -13
|
-3, -2, 2
|
|
M
|
-
|
|
Travels farther and does more damage, but all hits are unsafe if blocked.
|
| Version
|
Damage
|
Startup
|
Active
|
Recovery
|
Block Adv
|
Hit Adv
|
Cancels
|
Guard
|
Hitbox
|
Scaling
|
| EX
|
1900
|
9
|
|
|
-8
|
4
|
|
M
|
-
|
|
Leaves you +4 on hit, so a great pressure tool to use on the offense, but costs 1/2 a bar and unsafe if blocked.
|
|
Fake Smash
4S/HS/SE
"So, this character's like Slayer, right?"
|
|
Plasma Collider
6S/HS/SE
Building Meter 101
|
|
Pile Drive (Aerial)
j.S/HS/SE
Everything you loved about Pile Drive, now in the air!
|
|
Anti-Air Pile Drive (Aerial)
j.2S/HS/SE
Use the EX version
|
|
Universal Commands
Ultra Skills
Plasma Field
5HSE
|
| Damage
|
Startup
|
Active
|
Recovery
|
Block Adv
|
Hit Adv
|
Cancels
|
Guard
|
Hitbox
|
Scaling
|
| 2400 (3400)
|
10
|
|
|
-20
|
Knockdown
|
|
M
|
-
|
|
Has fairly quick start up and has a vacuum windbox that pulls the opponent in. Lacks any type of invulnerability so not recommended as a reversal option. Use if you want to net in some extra damage or end a round. Left in a very bad position if blocked.
|
|
Hyper Accelerator
2HSE
OVERACCEL
|
|
Strategy
Offense
Defense
Neutral
Combos
Optimal Combo Doc (By MrZ5523)
Midscreen
Corner


