Overview
Lore
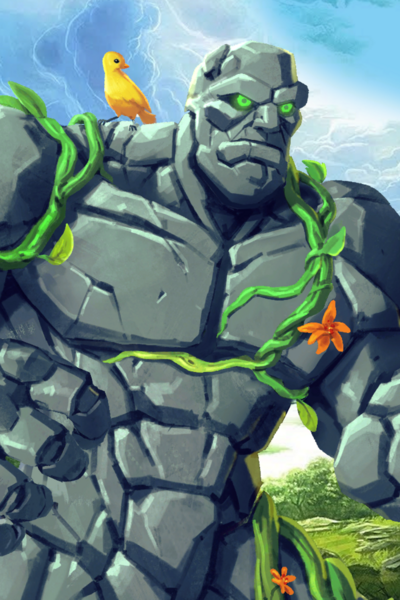
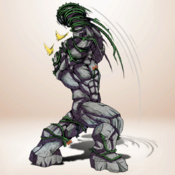
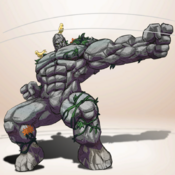
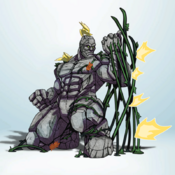
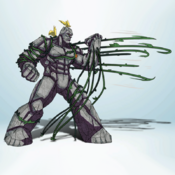
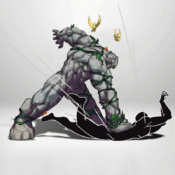
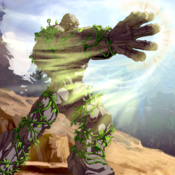
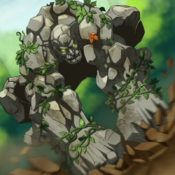
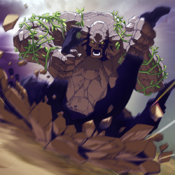
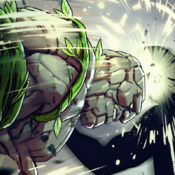
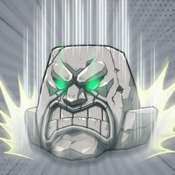
Garus Rook was not always made of stone, though the circumstances of his transformation are little-known. What is known is that his stone form seems to have slowed his aging and provide incredible armor. He governs the Morningstar Sanctuary, a haven for free thinking, artistic endeavors, and scientific research that is immune to the tyrannical laws of Flagstone. He is kind, thoughtful, and wise. Rook, and his long-time friend DeGrey, are old enough to remember the last time a government stole its citizens' personal freedoms, and DeGrey urged Rook to create an event that would unite the disparate peoples and remind them they are not so different from one another. That event is the Fantasy Strike tournament.
Character Stats
| Health |
Character Type |
Maximum Combo Points |
Unique Trait
|
| 100 |
Grappling |
3 |
Rock Armor. Your normal attacks beat faster A, B, and C normals, but they damage you first. Their (beaten) attacks can't knock down or gain the edge and you can't combo.
|
Overview
| Strengths |
Weaknesses
|
- THE Grappler. Rook's throws are monstrous and demand the opponent play around them carefully. His normal throw is extremely efficient, allowing him to deal a chunk of damage AND score a knockdown instead of having to choose between the two. His special throw is able to run over A, B, and C normals allowing him to force the opponent into slower more committal options. His signature super throw - Checkmate Buster - is the highest damage super in the game.
- Knockdown Vortex. The opponent cannot avoid being knocked down against Rook; his ability Earthquake, forces the issue. Once the opponent is knocked down, Rook's already solid neutral game plan evolves into a terrifying low risk, high reward mix-up. Worst of all, unlike most characters, Rook can knock an opponent down using both throws AND attacks - this means the opponent cannot guarantee a return to neutral by playing an attack.
- Rock Solid Defense. Unlike many grappler characters, Rook has excellent defense options both in neutral and when he is knocked down. His armored pseudo-reversal Y is safe and can only be contested by a super or dodge. His normals and Z special throw have armor against A, B, and C normals meaning that they can often replace his normal low block, with higher reward on a good read. He has a safe on block, super reversal with S1 and his 15 speed S2 super throw can act as the ultimate call-out against an opponent's throw. Instead of a dodge he has a unique block move that guards high and low, in addition to allowing him to punish strikes with his normal throw - best of all, unlike a dodge, it can be used while knocked down! The cherry on top of all this is that he also has the highest health total in the game.
|
- Moss Grows On You. Rook has glacially slow attacks and will often need to rely on armored strikes or his Entangling Vines counter to deter the opponent from attacking. Fireballs in particular are an attack that beats almost all of his moves - he will have to snipe these out of play using a well placed A, Y, or S1. This aspect of his gameplay can also sometimes lead to Rook having to muscle through poor opening hands as he attempts to dig into his deck for answers.
- High Gas Prices. Rook's most pressing weakness is resource management. Rook struggles to build meter with chain combos, and powering up for his expensive supers drains his hand. Employing his unique block costs extra cards, and exchanging for it back costs him more momentum. Rook's only way to naturally build his hand size is by blocking, which will allow other characters to run their offense on him.
- Big Reads Required. The only strong confirm Rook has is using X to link into A for the knockdown. While it is possible to combo into Y, it is often better used a pseudo-reversal or a way to beat a fireball. Both of his supers cannot combo and he has no dodge to confirm into either of them. Much of Rook's high health total will need to be spent making big reads and losing combat when things don't work out.
|
Moves
Normal Moves
A. Quick Low Sweep
|
| Move Type
|
Damage
|
Block Damage
|
Speed
|
Combo Type
|
Combo Points
|
Attributes
|
| Normal Attack
|
5
|
0
|
7
|
Chain Combo
|
1
|
Low, Knockdown. Rock Armor against A, B, and C normals.
|
- Rook's best normal attack by far. Don't power-up with this!
- Alongside Y, one of Rook's key answers to fighting fireballs. When used on his turn, he can win the speed tie and land a knockdown.
- Can be confirmed into with X. For example, against a knocked down opponent, F>X>A or C>X>A is a great high/low mix-up.
|
|
C. Light Low Attack
|
| Move Type
|
Damage
|
Block Damage
|
Speed
|
Combo Type
|
Combo Points
|
Attributes
|
| Normal Attack
|
6
|
0
|
5
|
Chain Combo
|
1
|
Low. Rock Armor against A, B, and C normals.
|
- Primarily used as a low threat against a knocked down opponent; functions well as a poke against other grapplers. Also a great option for powering up with.
- Generally less effective as Rock Armor normal since its damage is lower than E/F.
|
|
D. Medium Attack
|
| Move Type
|
Damage
|
Block Damage
|
Speed
|
Combo Type
|
Combo Points
|
Attributes
|
| Normal Attack
|
7
|
0
|
4
|
Chain Combo
|
1
|
Rock Armor against A, B, and C normals.
|
- Rook's worst normal and his best option to power-up with.
- Can also be used in a chain combo, such as CDE against a knocked down opponent.
|
|
E. Heavy High Attack
|
| Move Type
|
Damage
|
Block Damage
|
Speed
|
Combo Type
|
Combo Points
|
Attributes
|
| Normal Attack
|
8
|
0
|
3
|
Chain Combo
|
1
|
High. Rock Armor against A, B, and C normals.
|
- Rook's most threatening high normal attack against a knocked down opponent, thanks to E>F.
- Solid Rock Armor opener as well. Also works well as a power-up option.
|
|
F. Power High Attack
|
| Move Type
|
Damage
|
Block Damage
|
Speed
|
Combo Type
|
Combo Points
|
Attributes
|
| Normal Attack
|
9
|
0
|
2
|
-
|
1
|
High. Rock Armor against A, B, and C normals.
|
- Rook's best rock armor normal opener thanks to its high damage. Also works well against a knocked down opponent when comboing into X, such as F>X>A.
- Also a good choice for powering up.
|
|
Low Block
|
| Move Type
|
Damage
|
Block Damage
|
Speed
|
Combo Type
|
Combo Points
|
Attributes
|
| Normal Block
|
-
|
-
|
-
|
-
|
-
|
On block: Draw a card. Recurring
|
- Rook needs to block to draw cards - use this a lot!
- Against characters with low A, B, and C normals, Rock Armor normals can be used in place of this. This means sometimes you can skip exchanging back a low block, if you are in a good position to use a normal attack in its place.
|
|
High Block
|
| Move Type
|
Damage
|
Block Damage
|
Speed
|
Combo Type
|
Combo Points
|
Attributes
|
| Normal Block
|
-
|
-
|
-
|
-
|
-
|
On block: Draw a card. Recurring
|
- Rook needs to block to draw cards - use this a lot!
- Against characters with high A, B, and C normals, Rock Armor normals can be used in place of this. This means sometimes you can skip exchanging back a low block, if you are in a good position to use a normal attack in its place.
|
|
Entangling Vines
|
| Move Type
|
Damage
|
Block Damage
|
Speed
|
Combo Type
|
Combo Points
|
Attributes
|
| Normal Block
|
-
|
-
|
-
|
-
|
-
|
Avoids block damage. Strikes are unsafe against this, but you may only punish with a normal throw.
|
- Very powerful defensive option, but is resource intensive to use. You will often have to wait until the mid-late game to start playing this more heavily.
- With a normal throw in hand, this forms a true mix-up against opponent's without a projectile. All attacks lose to this block, and all other options lose to throw!
- Great option when you are knocked down, as it allows you to totally avoid the high/low mix-up. Especially in this situation, it's okay to use this move without a throw in hand as a purely defensive move.
- Be mindful that this sometimes WEAKENS your punish if it blocks an unsafe on block move - as you can only punish with normal throw.
|
|
Throw
|
| Move Type
|
Damage
|
Block Damage
|
Speed
|
Combo Type
|
Combo Points
|
Attributes
|
| Normal Throw
|
12
|
-
|
8
|
Can't Combo
|
-
|
Knockdown
|
- Fantastic high speed throw with very efficient damage and knockdown. Surprisingly also a good option to power-up with, as you have 4 copies of throw and 2 special throws, meaning you are likely to draw into this option more often.
- As a grappler, you will need to use this to pressure your opponent's resource and force them to attack. It's okay and should be expected to lose some combats playing this, draining your opponents hand by making them attack is part of your bigger game plan.
- Against other grapplers, playing this on your turn is helpful to win the speed tie. Be careful of having it sniped by one of their 9 speed special throws!
|
|
Special Moves
X. Thunderclap
|
| Move Type
|
Damage
|
Block Damage
|
Speed
|
Combo Type
|
Combo Points
|
Attributes
|
| Special Attack
|
6
|
2
|
6
|
Linker
|
1
|
-
|
- Primarily used to confirm other normals into A, such as F>X>A. Generally not a good choice as an opener, except when fighting another grappler due to its lackluster speed.
- Also sometimes a viable option to power-up with.
|
|
Y. Landslide
|
| Move Type
|
Damage
|
Block Damage
|
Speed
|
Combo Type
|
Combo Points
|
Attributes
|
| Special Attack
|
9
|
1
|
5
|
Ender
|
2
|
Armored, Pump Any 1 Card: +5 Damage
|
- Rook's most important special move. Best used as a pseudo-reversal opener or as a defensive poke when under pressure. Do NOT power-up with this or combo into it generally.
- Pairs well with S2 when it is online, as it functions similarly without spending meter. If the opponent knows about S2 and may dodge to avoid it, it would be better to lose a Y than S2.
|
|
Z. Windmill Crusher
|
| Move Type
|
Damage
|
Block Damage
|
Speed
|
Combo Type
|
Combo Points
|
Attributes
|
| Special Throw
|
16
|
-
|
9
|
Can't Combo
|
-
|
Light Armor
|
- Rook's grappler style special throw. Useful when fighting other grapplers as a way to out-speed their 8 speed normal throw on their turn.
- Can also situationally be used in place of a rock armor normal to replace one of his blocks.
|
|
Super Moves
S1. Headcrush
|
| Move Type
|
Damage
|
Block Damage
|
Speed
|
Combo Type
|
Combo Points
|
Attributes
|
| Super Attack
|
10
|
3
|
12
|
Can't Combo
|
-
|
Costs 2 Super Meter. Pump 1 Super: +10 Damage
|
- Rook's only true reversal and a very solid defensive move, albeit expensive to use. Generally preferred to draw one from your deck or power-up for this after getting S2 first.
- When S2 is also online, creates a scary 50/50 situation. If you hit with S1 you can discard S2 to deal a meaty 20 damage, and if the opponent blocks or dodges to avoid S1 they may eat S2 instead. Keep in mind, both sides of this mix loses to a faster reversal than S2.
|
|
S2. Checkmate Buster
|
| Move Type
|
Damage
|
Block Damage
|
Speed
|
Combo Type
|
Combo Points
|
Attributes
|
| Super Throw
|
50
|
-
|
15
|
Can't Combo
|
-
|
Costs 3 Super Meter.
|
- The most damaging super move in the game and Rook's preferred super to threaten. Pairs well with S1 to create a scary high damage 50/50 strike throw mix-up.
- Half of this move's strength is NOT playing it. Rook can gain a lot of ground knowing the opponent is afraid to do anything other than attack once his S2 is available.
- Can be "confirmed" into by blocking an unsafe move!
|
|
Ability Card
Earthquake
|
| Move Type
|
Damage
|
Block Damage
|
Speed
|
Combo Type
|
Combo Points
|
Attributes
|
| Ability
|
-
|
-
|
-
|
-
|
-
|
If you're not knocked down and this is your first main phase action, knock down the opponent and end your main phase.
|
- Very powerful ability that allows Rook to set-up a great mix-up at basically no cost. The opponent just has to deal with it.
- The biggest challenge to using this is trying to get the most worth out of it. For example, if you start your turn and the opponent has a block in their discard (such as if you just threw them), playing this is very strong. As you know your opponent won't be able to block high and low.
|
|
Combos
Basic
Knockdown Confirm. F > X > A = 20 Damage + Knockdown. (Works well with any non-A normal opener).
Super "Confirm". Normal Block an Unsafe Move > S2 = 50 Damage + Emotional Damage.
During Knockdown
Low Mix-Up Chain. C > D > E = 21 Damage + 2 Meter.
High Mix-Up Chain. E > F = 17 Damage + 1 Meter.
Strategy
Basic Game Plan
Rook's most basic goal at the start of a match is to begin building a hand, and by extension, meter. His base move set has no way to draw cards outside of blocking, so you will spend most of the early game trying to land successful blocks. Your core mix-up in the early game is block / throw - the important weakness of this mix-up, is that both options will lose to fireballs. Rook, like other grapplers, struggles against fireballs and will need to attempt to snipe them out of play either using his armored Landslide special (Y) or attacking with his A normal on his own turn. You shouldn't worry too much about losing life at this point in the game, Rook's bulky 100 health total is intended to give him extra mileage to survive the early game while he builds up his supplies. Rook has many great offensive and defensive options, but he has to worry about running himself out of gas in the early game since many of them are quite resource hungry.
Rook's first few power-ups lead him into the next stage of his game plan, where he can begin cashing out his built up resources for damage. Rook has fantastic defensive options with the right resources available - Headcrush (S1) is a powerful, safe on block reversal and his Entangling Vines block forms a complete mix-up against all non-projectiles moves when paired with a throw. Entangling Vines is also great because it avoids the high/low mix-up on knockdown. Rook's two supers form the ultimate high risk, high reward mix-up - the opponent will need a reversal faster than speed 12 to contest it! If the opponent attacks, his Headcrush (S1) deals a chunky 20 damage on pump, and if they do anything else they eat the life bar annihilating Checkmate Buster (S2, referred to as CMB from here on) for 50 damage! CMB is Rook's scariest option and you should keep it a looming threat over the opponent - anytime Rook has full meter, you can count on them feeling pressured to try to keep attacking you. Rook's supers create significant mental pressure on the opponent and capitalizing on this hesitation can make neutral interactions suddenly feel weighted in his favor.
The next half of Rook's offense is capitalizing on his ability to easily inflict knockdowns. Rook's slow attack speed can be ignored while the opponent is knocked down, making his bulky high damage normal attacks a big threat! Since his A normal knocks down, he can also loop this situation even when attacking (something most non-grapplers can't do), by comboing into it with Thunderclap (X). If Rook can make his opponent lose a block on their turn, such as by throwing them or hitting them high/low, it makes for a great opportunity to use his ability Earthquake. Earthquake forces a knock down - you can exploit this even better since you know the opponent is missing of one of their blocks. At this stage of the game, you will also want to keep your best normal moves, A and Entangling Vines, online by exchanging for them more frequently. Exchanging for these in turn helps Rook land more knockdowns.
Powering Up
Rook's meter management and power up choices require different approaches depending on how the early game develops. Your first power-up should either be for CMB (S2) or two meter. If you have been blocking well and you expect you can safely power-up again in a couple turns, CMB (S2) is the right choice. If you drew Headcrush (S1) early from your deck - or want to bluff that you did - then powering up for two meter is preferred. It is important to remember that Rook needs 3 meter and BOTH super moves in hand to threaten his full super mix-up; this makes for a more lengthy meter building process than most of the cast. In the worst case scenario, where Rook lands no chain combos and draws neither super from his deck, this will require 3 power-ups (and 6 discarded cards, which is hefty price to pay for Rook). Your goal while powering up each game will be finding a more card efficient path to get there.
Rock Armor
Rook's unique trait is not quite as bombastic as other characters, but contains a lot of room for optimization. Its best use is to help improve how efficiently he can cover defensive options while not having to solely rely on blocks. Rook's normals can take the place of one or both of his blocks depending on what character he is fighting. Characters like Argagarg/Troq who have high/low mix-ups off their A and B normals can have this mix-up filtered by Rook covering both options with a Rock normal. Secondarily, rock armor also allows Rook to "block" while preventing himself from being thrown. Rock armor is less effective while knocked down, as the opponent is more incentivized to use slower normal attacks. Against most of the cast, Rook's A normal has excellent coverage and beats many of their options - it will outspeed their slower D/E/F attacks that beat rock armor, and will armor through their fast A/B/C attacks. Against specifically grapplers, Rook's C normal also has very good coverage, thanks to their slower average attack speed. When deciding what to exchange for on a turn, keep in mind that you may be able to delay picking up another block if you already have rock armor normals to cover some of its applications; ideally this will mean you are more often able to make optimal exchanges to create power-up pairs or set-up a chain. Lastly, trading damage with a rock armor normal is almost always in Rook's favor. In addition to having higher damage on his normals than most of the cast, Rook's higher life total means he will typically come out ahead even if your normal did less damage than the opponent's normal.
Matchups
| Geiger
|
| Something about gears.
|
