Million Arthur: Arcana Blood/Iai Arthur: Difference between revisions
Jump to navigation
Jump to search

Iai Arthur


(→Elemental Attacks: Descriptions) |
(→Colors) |
||
| (12 intermediate revisions by 2 users not shown) | |||
| Line 15: | Line 15: | ||
|-style="text-align:left;" | |-style="text-align:left;" | ||
! Strengths !! Weaknesses | ! Strengths !! Weaknesses | ||
|- style="vertical-align:top;text- | |- style="vertical-align:top;text-align:left" | ||
| style="width: 50%;"| | | style="width: 50%;"| | ||
*Normals have good hitboxes | *Normals have good hitboxes | ||
| Line 33: | Line 33: | ||
*Enide | *Enide | ||
:Iai's | :Great assist to use in both neutral and combos. | ||
:Great for mixing up Iai's commital step dash and movements by stopping her and summoning a large hitbox infront of her | |||
:Off stray hits, Iai is able to confirm from many otherwise impossible situations with a well timed 236B>236D~C. | |||
:Synergises amazingly well with Iai's natural ice element allowing for great combo flexibility | |||
*Hawkeye | *Hawkeye | ||
:Often seen paired with Enide | :Decent neutral and pressure assist | ||
:Slow startup but is often used in Iai's favour for controlling neutral, allowing her to setup advantageous situations with its great frame advantageous | |||
:Often seen paired with Enide, allowing her to pick up from stray hits into an easy combo | |||
*Mercenary Arthur | *Mercenary Arthur | ||
: | :Good assist for corner pressure and combos | ||
:Forces launch on grounded opponents, allowing combos from 236D~C and 623B | |||
:Can also be used to setup j.D freeze okizeme, using the long untechable time from j.D CH into setting up a mixup with many of Iai's rolls and specials | |||
*Balin | |||
:All-round good assist, great at controlling space and forcing pressure | |||
:Its low pushback is good for approach and or forcing Iai's turn and establishing mixup opportunities from certain attacks such as 236D~B or 236D~C | |||
:Overall a bit lackluster in supplementing Iai's combo ability | |||
*Lancelot | *Lancelot | ||
: | :Good utility support, serving to cover Iai's movements in neutral and okizeme | ||
:Can be used as a counter-poke in neutral to absorb attacks and strike back | |||
:With 236A/B, Iai can easily pick up off stray hits | |||
:Iai's consistent knockdowns and good corner carry from 236D~C can allow Lancelot to be used as good okizeme. Adjusting the timing on Lancelot cancel can allow an array of mixups | |||
*Pharsalia | *Pharsalia | ||
: | :Used solely for maximising damage off EB combos | ||
:Iai's great range of reilable routes off EB combos allows this to be a consistent damage dealer | |||
:Synergises great with Iai's 623XX super as its ice element does not break the multiplier. This can lead to extremely high damaging EB combos such as 623XX > Pharsalia > 623XX | |||
==Normal Moves== | ==Normal Moves== | ||
| Line 148: | Line 164: | ||
|comboSca= | |comboSca= | ||
|description=Iai jumps and dashes behind the opponent before dive-kicking them to the grounded | |description=Iai jumps and dashes behind the opponent before dive-kicking them to the grounded | ||
*Can only be performed on hit | |||
*Finisher to the autocombo if performed below 100 meter. If Iai has more than 100 meter, this cannot be performed and instead she will perform her 236xx Million Skill "Cross Air Flash" | *Finisher to the autocombo if performed below 100 meter. If Iai has more than 100 meter, this cannot be performed and instead she will perform her 236xx Million Skill "Cross Air Flash" | ||
*Side-swaps with the opponent, returning to the original side | *Side-swaps with the opponent, returning to the original side | ||
}} | }} | ||
}} | }} | ||
====== <font style="visibility:hidden" size="0">5B</font> ====== | ====== <font style="visibility:hidden" size="0">5B</font> ====== | ||
{{MoveData | {{MoveData | ||
| Line 422: | Line 440: | ||
|data= | |data= | ||
{{AttackData-MAAB | {{AttackData-MAAB | ||
|damage= | |damage=2550 | ||
|guard=Throw | |guard=Throw | ||
|startup= | |startup= 7 | ||
|active= | |active= | ||
|recovery= | |recovery= | ||
| Line 431: | Line 449: | ||
|startSca= | |startSca= | ||
|comboSca= | |comboSca= | ||
|description= | |description=Iai grabs the opponent and smacks them with her hilt, launching them before slashing down with her sword | ||
*Opponent will be put in an OTG state after throw | |||
*In the corner, OTG hits can be added for a minor damage increase. Comboing OTG > Kriemhild can allow a full combo | |||
}} | }} | ||
}} | }} | ||
| Line 443: | Line 463: | ||
|data= | |data= | ||
{{AttackData-MAAB | {{AttackData-MAAB | ||
|damage= | |damage=2550 | ||
|guard=Throw | |guard=Throw | ||
|startup= | |startup= 7 | ||
|active= | |active= | ||
|recovery= | |recovery= | ||
| Line 452: | Line 472: | ||
|startSca= | |startSca= | ||
|comboSca= | |comboSca= | ||
|description= | |description=Iai does her forward throw, but backwards! Grabs the opponent and smacks them with her hilt, launching them before slashing down with her sword | ||
*Opponent will be put in an OTG state after throw | |||
*In the corner, OTG hits can be added for a minor damage increase. Comboing OTG > Kriemhild can allow a full combo | |||
}} | }} | ||
}} | }} | ||
| Line 464: | Line 486: | ||
|data= | |data= | ||
{{AttackData-MAAB | {{AttackData-MAAB | ||
|damage= | |damage=2550 | ||
|guard=Throw | |guard=Throw | ||
|startup= | |startup= 5 | ||
|active= | |active= | ||
|recovery= | |recovery= | ||
| Line 473: | Line 495: | ||
|startSca= | |startSca= | ||
|comboSca= | |comboSca= | ||
|description= | |description=Iai grabs the opponent and does two slashes, sending the opponent across the screen | ||
*The first slash, if cancelled will knock them down close to Iai, the second will knock them further away. | |||
*The second hit is untechable until landing, when Iai is comboing mid-screen, she needs to air dash to chase after the opponent | |||
}} | }} | ||
}} | }} | ||
| Line 492: | Line 516: | ||
|data= | |data= | ||
{{AttackData-MAAB | {{AttackData-MAAB | ||
|version= | |version=236A | ||
|damage= | |damage=1700 | ||
|guard= | |guard=All | ||
|startup= | |startup=14-80 | ||
|active= | |active= | ||
|recovery= | |recovery= | ||
|frameAdv= | |frameAdv= -6 | ||
|element= | |element= | ||
|startSca= | |startSca= | ||
|comboSca= | |comboSca= | ||
|description= | |description= | ||
}} | }} | ||
{{AttackData-MAAB | {{AttackData-MAAB | ||
|header=no | |header=no | ||
|version= | |version=236B | ||
|damage= | |damage=1700 | ||
|guard= | |guard=All | ||
|startup= | |startup= 16-80 | ||
|active= | |active= | ||
|recovery= | |recovery= | ||
|frameAdv= - | |frameAdv= -17 | ||
|element= | |element= | ||
|startSca= | |startSca= | ||
|comboSca= | |comboSca= | ||
|description= | |description= | ||
}} | }} | ||
{{AttackData-MAAB | {{AttackData-MAAB | ||
|header=no | |header=no | ||
|version= | |version=236C | ||
|damage= | |damage= 1700 | ||
|guard= | |guard=L | ||
|startup= | |startup= 18-80 | ||
|active= | |active= | ||
|recovery= | |recovery= | ||
|frameAdv= - | |frameAdv= -27 | ||
|element= | |element= | ||
|startSca= | |startSca= | ||
|comboSca= | |comboSca= | ||
|description= | |description= | ||
}} | }} | ||
{{AttackData-MAAB | {{AttackData-MAAB | ||
|header=no | |header=no | ||
|version= | |version=Feint | ||
|damage= | |damage= | ||
|guard= | |guard=N/A | ||
|startup= | |startup= | ||
|active= | |active= | ||
|recovery= | |recovery= 6 (feint) | ||
|frameAdv= | |frameAdv= | ||
|element= | |element= | ||
|startSca= | |startSca= | ||
|comboSca= | |comboSca= | ||
|description= | |description=Iai enters into a draw stance before slashing at an angle. | ||
*Attack can be held for up to 80f. Upon max charge or button release, Iai will slash at an angle based on the initial input | |||
*On hit or block, Iai can cancel into 236D and its subsequent follow-ups | |||
*While maintaining stance by holding the button, Iai can feint and quickly return to neutral by pressing any other button | |||
*Due to differing startup values, the earliest cancel window differs per version with 236A being the fastest and 236C being the slowest | |||
*5C/2C into 236A~Feint leaves Iai at +1 and is integral to maintaining pressure and stance cancel combos in EB | |||
*236A~Feint can also be buffered via 236A~A at a certain timing, which differs from hit or block. | |||
}} | }} | ||
}} | }} | ||
| Line 558: | Line 588: | ||
|version=A | |version=A | ||
|damage=2600 | |damage=2600 | ||
|guard= | |guard=H | ||
|startup=27 | |startup=27 | ||
|active= | |active= | ||
| Line 566: | Line 596: | ||
|startSca= | |startSca= | ||
|comboSca= | |comboSca= | ||
|description= | |description= | ||
}} | }} | ||
{{AttackData-MAAB | {{AttackData-MAAB | ||
| Line 572: | Line 602: | ||
|version=B | |version=B | ||
|damage=2700 | |damage=2700 | ||
|guard= | |guard=H | ||
|startup=30 | |startup=30 | ||
|active= | |active= | ||
| Line 580: | Line 610: | ||
|startSca= | |startSca= | ||
|comboSca= | |comboSca= | ||
|description= | |description= | ||
}} | }} | ||
{{AttackData-MAAB | {{AttackData-MAAB | ||
| Line 586: | Line 616: | ||
|version=C | |version=C | ||
|damage=2800 | |damage=2800 | ||
|guard= | |guard=H | ||
|startup=33 | |startup=33 | ||
|active= | |active= | ||
| Line 594: | Line 624: | ||
|startSca= | |startSca= | ||
|comboSca= | |comboSca= | ||
|description= | |description=Iai teleports to the sky before falling down with a slash | ||
*Iai is airborne from frame 6 | |||
*The teleport can sometimes avoid attacks | |||
*Startup may vary slightly based on standing/crouching state and character specific hurtboxes | |||
*A version will allow tech on hit, B version will put the opponent into an OTG state and C version will bounce the opponent, allowing for a follow-up combo | |||
}} | }} | ||
}} | }} | ||
| Line 614: | Line 648: | ||
|data= | |data= | ||
{{AttackData-MAAB | {{AttackData-MAAB | ||
|version= | |version=236D | ||
|damage= | |damage= | ||
|guard= | |guard= | ||
|startup= | |startup= | ||
|active= | |active= | ||
|recovery= | |recovery=Total 56 frames | ||
|frameAdv= | |frameAdv= | ||
|element=Ice | |element=Ice | ||
|startSca= | |startSca= | ||
|comboSca= | |comboSca= | ||
|description= | |description=Iai enters a stance and slides across the ground. From her stance she can cancel into a number of followups | ||
*Lowers Iai to the ground and can low profile some attacks | |||
*Can cancel into followups from 8F and onwards | |||
}} | }} | ||
{{AttackData-MAAB | {{AttackData-MAAB | ||
| Line 633: | Line 669: | ||
|startup= | |startup= | ||
|active= | |active= | ||
|recovery= | |recovery=31 | ||
|frameAdv= | |frameAdv= | ||
|element= | |element= | ||
|startSca= | |startSca= | ||
|comboSca= | |comboSca= | ||
|description= | |description=Iai cancels her slide into a roll | ||
*This can cross-up an opponent | |||
*Great for left/right okizeme | |||
*Cancelling into this as soon as possible is the fastest method to exit stance and can sometimes serve as a combo piece | |||
}} | }} | ||
{{AttackData-MAAB | {{AttackData-MAAB | ||
|header=no | |header=no | ||
|version=~B | |version=~B | ||
|damage= | |damage=2200 | ||
|guard= L | |guard= L | ||
|startup= | |startup= 9 | ||
|active= | |active= | ||
|recovery= | |recovery= | ||
| Line 652: | Line 691: | ||
|startSca= | |startSca= | ||
|comboSca= | |comboSca= | ||
|description=Makibarai. | |description=Makibarai. Iai slides fast and low to the ground and slashes the opponent's legs | ||
*Low profiles lower than 236D and has projectile invulnerability | |||
*Can cross up early in its active frames | |||
*Fast and reaches very far, using this to attack before cancelling into a support/EB can be a great way to approach and force Iai's turn | |||
}} | }} | ||
{{AttackData-MAAB | {{AttackData-MAAB | ||
|header=no | |header=no | ||
|version=~C | |version=~C | ||
|damage= | |damage=2400 | ||
|guard= H | |guard= H | ||
|startup= | |startup= 25 | ||
|active= | |active= | ||
|recovery= | |recovery= | ||
| Line 666: | Line 708: | ||
|startSca= | |startSca= | ||
|comboSca= | |comboSca= | ||
|description=Crescent Blade Flash. | |description=Crescent Blade Flash. Iai leaps into the sky before performing a leaping crescent slash | ||
*Knocks down the opponent on hit | |||
*Common combo ender after 236A/B and can be comboed from with some supports | |||
*On block, Iai can cancel into support to remain airborne and threaten a high/low mixup | |||
}} | }} | ||
{{AttackData-MAAB | {{AttackData-MAAB | ||
|header=no | |header=no | ||
|version=~D | |version=~D | ||
|damage= | |damage=2400 | ||
|guard= | |guard= All | ||
|startup= | |startup= 37 | ||
|active= | |active= | ||
|recovery= | |recovery= | ||
| Line 680: | Line 725: | ||
|startSca= | |startSca= | ||
|comboSca= | |comboSca= | ||
|description= | |description=Iai dashes forward before releasing an ice flower behind herself | ||
*Does not hit cross-up | |||
*Iai is able to side swap with the opponent right until she stops her dash | |||
*Although the startup is quite lengthy, the far dash incorporated into the attack may make it difficult to interrupt for some characters | |||
}} | }} | ||
}} | }} | ||
| Line 700: | Line 748: | ||
|data= | |data= | ||
{{AttackData-MAAB | {{AttackData-MAAB | ||
|version= | |version=236D | ||
|damage= | |damage= | ||
|guard= | |guard= | ||
|startup= | |startup= | ||
|active= | |active= | ||
|recovery= | |recovery=Until Landing + 12 | ||
|frameAdv= | |frameAdv= | ||
|element= | |element= | ||
|startSca= | |startSca= | ||
|comboSca= | |comboSca= | ||
|description= | |description=Iai enters a stance and leaps diagonally upwards into the sky. From her stance she can cancel into followup attacks | ||
*Can cancel into followups from frame 14 onwards | |||
*With all of Iai's strong follow-up options, TKing this off jump cancellable normals such as 5B can make Iai's pressure and mixup tough to deal with | |||
}} | }} | ||
{{AttackData-MAAB | {{AttackData-MAAB | ||
| Line 719: | Line 769: | ||
|startup= | |startup= | ||
|active= | |active= | ||
|recovery= | |recovery=Until Landing + 12 | ||
|frameAdv= | |frameAdv= | ||
|element= | |element= | ||
|startSca= | |startSca= | ||
|comboSca= | |comboSca= | ||
|description= | |description=Iai dives to the ground towards the opponent | ||
*Tracks the opponent on startup and dives at a set steep angle towards the opponent | |||
*If done at close horizontal range, the dive's set angle can allow Iai to crossup the opponent on landing | |||
}} | }} | ||
{{AttackData-MAAB | {{AttackData-MAAB | ||
|header=no | |header=no | ||
|version=~B | |version=~B | ||
|damage= | |damage=2000 | ||
|guard= H | |guard=H | ||
|startup= | |startup=17 | ||
|active= | |active= | ||
|recovery= | |recovery=Until Landing + 7 | ||
|frameAdv= | |frameAdv=~Varies to +7 | ||
|element= | |element= | ||
|startSca= | |startSca= | ||
|comboSca= | |comboSca= | ||
|description= Hayabusa Strike. Iai | |description= Hayabusa Strike. Iai dives down towards the opponent with a kick. | ||
*Tracks the opponent on startup and dives at a set steep angle towards the opponent | |||
*Generally positive on block but can be up to +7 when hitting the opponent's feet | |||
*Great for mixup and pressure. Mixing up the ~A and ~B follow ups can keep the opponent guessing what side Iai will be on. At certain ranges, delaying the ~B followup from dive can force a left/right mixup | |||
}} | }} | ||
{{AttackData-MAAB | {{AttackData-MAAB | ||
|header=no | |header=no | ||
|version=~C | |version=~C | ||
|damage= | |damage=2400 | ||
|guard= H | |guard=H | ||
|startup= | |startup= 16 | ||
|active= | |active= | ||
|recovery= | |recovery=Until Landing + 16 | ||
|frameAdv= | |frameAdv=Varies | ||
|element= | |element= | ||
|startSca= | |startSca= | ||
|comboSca= | |comboSca= | ||
|description=Crescent Blade Flash. Knocks down on hit | |description=Crescent Blade Flash. Similar to the ~C followup from her ground slide, Iai leaps across the sky and does a large crescent slash | ||
*Knocks down on hit | |||
*Leaps extremely far forward and can hit cross-up | |||
*Difficult to combo from at certain positionings but in conjunction with Iai's other mix-up tools, can serve as a potent mixup for stray damage | |||
}} | }} | ||
{{AttackData-MAAB | {{AttackData-MAAB | ||
|header=no | |header=no | ||
|version=~D | |version=~D | ||
|damage= | |damage=800*4 | ||
|guard= | |guard=All | ||
|startup= | |startup= | ||
|active= | |active= | ||
|recovery= | |recovery=Until Landing + 12 | ||
|frameAdv= | |frameAdv=Varies | ||
|element=Ice | |element=Ice | ||
|startSca= | |startSca= | ||
|comboSca= | |comboSca= | ||
|description= Ice Shard. | |description= Ice Shard. Iai leaps further into the sky before twirling and dropping 4 icicle shards down in a fan pattern | ||
*With the slow fall speed of the projectiles, Iai is extremely positive on block. Coupled with the amount of projectiles, this can be hard to dodge when Iai is at low heights | |||
*Because the shards fall at different angles, at high enough heights, it's possible to weave between the icicles | |||
}} | }} | ||
}} | }} | ||
| Line 776: | Line 836: | ||
|caption= | |caption= | ||
|name=Cross Air Flash | |name=Cross Air Flash | ||
|input=236XX | |input=236XX/J.236XX | ||
|data= | |data= | ||
{{AttackData-MAAB | {{AttackData-MAAB | ||
|damage= | |damage=6800 | ||
|guard= | |guard=All | ||
|startup= | |startup=9 | ||
|active= | |active= | ||
|recovery= | |recovery= | ||
|frameAdv= - | |frameAdv=-34 | ||
|element= | |element= | ||
|startSca= | |startSca= | ||
|comboSca= | |comboSca= | ||
|description= | |description=Iai leaps forward. Upon contact with the opponent, Iai will perform two dramatic slashes | ||
*Decent super to combo into but its lack of element bonus and Iai's great synergy with EB combos tends to leave this underused | |||
*Does not cause knockdown at high heights or scalings | |||
}} | }} | ||
}} | }} | ||
| Line 799: | Line 861: | ||
|data= | |data= | ||
{{AttackData-MAAB | {{AttackData-MAAB | ||
|damage= | |damage=6608 | ||
|guard= | |guard=All | ||
|startup= | |startup=15 | ||
|active= | |active= | ||
|recovery= | |recovery= | ||
| Line 808: | Line 870: | ||
|startSca= | |startSca= | ||
|comboSca= | |comboSca= | ||
|description= | |description=Iai smashes her sword into the ground, summoning a large wall of ice. On a clean hit, Iai will perform additional followup attacks | ||
*Reversal super | |||
*Clean hit is hitbox based and very generous. As long as they are within the ice wall, and not hit by the edge, Iai will perform the follow up | |||
*At further ranges, one of the followup slashes may whiff and the super will do slightly less damage | |||
*Its full ice element and large hitbox makes this the super of choice in conjunction with EB combos. It can also be cancelled into 3 mana supports (e.g Phalseria) for even more damage and even retain the ice element bonus | |||
}} | }} | ||
}} | }} | ||
| Line 820: | Line 886: | ||
|data= | |data= | ||
{{AttackData-MAAB | {{AttackData-MAAB | ||
|damage= | |damage=10000 | ||
|guard= | |guard=All | ||
|startup= | |startup=14 | ||
|active= | |active= | ||
|recovery= -58 | |recovery= -58 | ||
| Line 829: | Line 895: | ||
|startSca= | |startSca= | ||
|comboSca= | |comboSca= | ||
|description= | |description=Iai throws a flower that floats slowly across. Upon impact with the opponent, she will perform 3 powerful slashes | ||
*Great for damage but may struggle to connect on some routes due to the projectile travel speed | |||
*Generally 623XX is more preferable as its faster startup allows a more stable combo into Phalseria, which can then be comboed into another 623XX for equal or more damage | |||
*Coupled with Iai's ability to easily use EB combos means that, although this attack does add a lot of damage, it's generally not seen in lieu of more meter efficient reliable routes | |||
}} | }} | ||
}} | }} | ||
| Line 901: | Line 970: | ||
==Colors== | ==Colors== | ||
''Note: Colors 20 and 21 were pre-order exclusives for JP PSN and Amazon respectively. Unfortunately, they aren't selectable on Steam without the use of Cheat Engine.'' | |||
{{ColorGallery | filePrefix=Iai_| colors= | |||
| | {{ColorGallery/Color|1}} | ||
{{ColorGallery/Color|2}} | |||
{{ColorGallery/Color|3}} | |||
{{ColorGallery/Color|4}} | |||
{{ColorGallery/Color|5}} | |||
{{ColorGallery/Color|6}} | |||
{{ColorGallery/Color|7}} | |||
{{ColorGallery/Color|8}} | |||
{{ColorGallery/Color|9}} | |||
{{ColorGallery/Color|10}} | |||
{{ColorGallery/Color|11}} | |||
{{ColorGallery/Color|12}} | |||
{{ColorGallery/Color|13}} | |||
{{ColorGallery/Color|14}} | |||
{{ColorGallery/Color|15}} | |||
{{ColorGallery/Color|16}} | |||
{{ColorGallery/Color|17}} | |||
{{ColorGallery/Color|18}} | |||
{{ColorGallery/Color|19}} | |||
{{ColorGallery/Color|20}} | |||
{{ColorGallery/Color|21}} | |||
}} | }} | ||
Latest revision as of 20:32, 8 May 2021

Profile
- EN Name: Iai Arthur
- JP Name: 居合アーサー
- Voice Actress: Sumire Uesaka
- Element: Ice
- Health: 21000
Overview
Stance character with battou strikes. Has very strong mixup potential in both left/right and high/low varieties. Can carry into the corner very easily off a conversion if desired. Has no run but instead has a dash.
| Strengths | Weaknesses |
|---|---|
|
|
Recommended Support Knights
- Enide
- Great assist to use in both neutral and combos.
- Great for mixing up Iai's commital step dash and movements by stopping her and summoning a large hitbox infront of her
- Off stray hits, Iai is able to confirm from many otherwise impossible situations with a well timed 236B>236D~C.
- Synergises amazingly well with Iai's natural ice element allowing for great combo flexibility
- Hawkeye
- Decent neutral and pressure assist
- Slow startup but is often used in Iai's favour for controlling neutral, allowing her to setup advantageous situations with its great frame advantageous
- Often seen paired with Enide, allowing her to pick up from stray hits into an easy combo
- Mercenary Arthur
- Good assist for corner pressure and combos
- Forces launch on grounded opponents, allowing combos from 236D~C and 623B
- Can also be used to setup j.D freeze okizeme, using the long untechable time from j.D CH into setting up a mixup with many of Iai's rolls and specials
- Balin
- All-round good assist, great at controlling space and forcing pressure
- Its low pushback is good for approach and or forcing Iai's turn and establishing mixup opportunities from certain attacks such as 236D~B or 236D~C
- Overall a bit lackluster in supplementing Iai's combo ability
- Lancelot
- Good utility support, serving to cover Iai's movements in neutral and okizeme
- Can be used as a counter-poke in neutral to absorb attacks and strike back
- With 236A/B, Iai can easily pick up off stray hits
- Iai's consistent knockdowns and good corner carry from 236D~C can allow Lancelot to be used as good okizeme. Adjusting the timing on Lancelot cancel can allow an array of mixups
- Pharsalia
- Used solely for maximising damage off EB combos
- Iai's great range of reilable routes off EB combos allows this to be a consistent damage dealer
- Synergises great with Iai's 623XX super as its ice element does not break the multiplier. This can lead to extremely high damaging EB combos such as 623XX > Pharsalia > 623XX
Normal Moves
5A
5A  |
|---|
5AA
5AA  |
|---|
5AAA
5AAA  |
|---|
5AAAA
5AAAA  |
|---|
5AAAAA
5AAAAA  |
|---|
5B
5B  |
|---|
5C
5C  |
|---|
6C
6C  |
|---|
2A
2A  |
|---|
2B
2B  |
|---|
2C
2C  |
|---|
j.A
j.A  |
|---|
j.B
j.B  |
|---|
j.C
j.C  |
|---|
Elemental Attacks
5D
Ice Flower 5D  5D 5D  5[D] 5[D]
|
|---|
j.D
Ice Moon j.D  |
|---|
Throws
5/6B+C
Forward Throw 5/6B+C  |
|---|
4B+C
Back Throw 4B+C  |
|---|
j.B+C
Air Throw j.B+C  |
|---|
Special Moves
236A/B/C
Piercing Strike  236A/B/C 236A/B/C  ~A ~A  ~B ~B ~C ~C
|
|---|
623A/B/C
Snowfall Edge 623A/B/C  |
|---|
236D
Freezing Glide  236D 236D  ~A ~A  ~B ~B  ~C ~C  ~D ~D
|
|---|
j236D
Air Freezing Glide  j.236D j.236D  ~A ~A  ~B ~B  ~C ~C  ~D ~D
|
|---|
Million Skill
236XX
Cross Air Flash 236XX/J.236XX  |
|---|
623XX
Ice Blade Sculpture 623XX  |
|---|
Million Excalibur
Chaotic Seasons (Snow Moon Flowers) 214XX  |
|---|
Combos
Solo Combos
A Starter
- Autocombo > Million Skill
- Autocombo into super.
- 5AAA > 236[X]~X > 5AAAA > 236D~C
- Advanced 5/2A confirm. After the first autocombo you need to manually cancel into 236A/B/C to be able to cancel the stance. Any version will work so if you're having trouble with the stance cancel try other combinations of buttons to see which feels best.
- 2/5A > 2/5B > 5C > 236B > 236D~C
- Works from most ranges on standing or crouching, but not at max range.
- 2/5A > 2/5B > 5C > 236C > 236D~B
- More consistent than the above, but harder to extend because of the ender.
- 2/5A > 2/5B > 2C > 236D~B
- 2/5A > 2/5B > 2C > Lifee assist > 236B > 236D~C
2C starter
- 2C > 236D~B > A+B+C > Dash > 5AA > 5B > 5C > Airdash > j.B > j.C > 5AA > 5B > 5C > 236A > 236D~C
236A/B/C Starter
- 236A/B > 236D~C
- 236A > 236D~D > 5A > 5B > 5C > 236B > 236D~C
- Only works near the opponent otherwise the 236D~D will not connect and they will fly outward and tech.
- 236C > 236D~B
623A/B/C Starter
- 623A/B (ch) > 236A/B > 236D~C
- 623C > 5A > 5B > Jump Cancel > j.B > (j.C) / (Jump Cancel > j.B > j.D)
- 623C > 5B > 236A/B > 236D~C
- 623C > 5B > Jump Cancel > j.A > j.B > Jump Cancel > j.B > j.C
236D~X Starter
- 236D~B > A+B+C > Dash > 5AA > 5B > 5C > Airdash > j.B > j.C > 5AA > 5B > 5C > 236B > 236D~C
- 236D~D > Dash > 5AA > 5B > 5C > 236A > 236D~C
Grab Starters
- Grab > A+B+C > 5AA > 5B > 5C > Airdash > j.B > j.C > 5AA > 5B > 5C > Jump Cancel > j.A > j.B > j.C > (j.D > 236XX)
- Grab > A+B+C > 5AA > 5B > 5C > Airdash > j.B > j.C > 5AA > 5B > 5C > (236A > 236D~C) / (236XX/623XX)
Corner
- 2/5A > 2/5B > 5C > 236B > 236D~C
- 2/5A > 2/5B > 5C > 236B > 236D~A > 5B > Jump Cancel > j.B Jump Cancel > j.B > j.C
Enchant Boost Starters
- 2/5A > 5B > 5C > 236[X]~X > Micro Dash > 5A > 5B > 5C > 236[X]~X > Micro Dash > 5A > 5B > 5C > 236B > 236D~C
- 2/5A > 5B > 6C > Airdash > j.B > j.C > 5AA > 5B > 5C > 236A > 236D~C
Support Knight Combos
236A/B/C Starter
- 236A/B > 236D~C > A+B+C > dash > 5B > Lifee assist > airdash > j.B > j.C > 5AA > 5B > 5C > (236A > 236D~C) / (623XX > Pharsalia assist)
- 236C > 236D~B > A+B+C > dash > 5B > 5C > airdash > j.B > j.C > 5AA > 5B > 5C > (236A > 236D~C) / (623XX > Pharsalia assist)
623A/B/C Starter
- 623B > A+B+C > dash > 5B > Lifee assist > airdash > j.B > j.C > 5AA > 5B > 5C > (236A > 236D~C) / (623XX > Pharsalia assist)
236D~X Starters
- 236D~C > A+B+C > Dash > 5B > Lifee assist > Airdash > j.B > j.C > 5AA > 5B > 5C > 236A > 236D~C
- You don't need to input "Dash" if you do this combo when the opponent is in the corner. Also note that if this combo is done in midscreen keep in mind the beginning 236D~C will in fact put you on the other side of the opponent after the Enchant Boost activation.
Corner
- 623B > A+B+C > 5B > Lifee assist > Airdash > j.B > j.C > 5AA > 5B > 5C > 236A > 236D~C
- 623C > 5A > 5B > Jump Cancel > j.A > j.B > Jump Cancel > j.A > j.B > j.C > (j.D > Mercenary Arthur assist > j.236D~C)
- Counter Hit 623A/B also leads into this same combo.
Videos
- Iai Arthur official combo video A by Square Enix (2017)
- Iai Arthur official combo video B by Square Enix (2017)
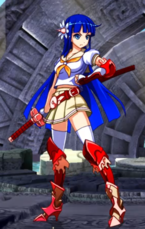
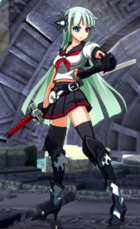
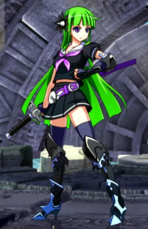
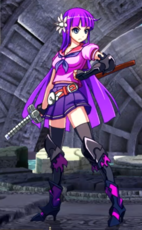
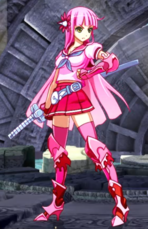
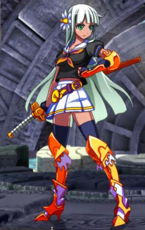
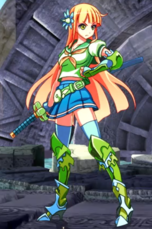
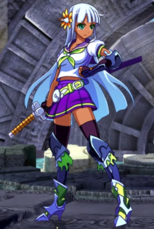
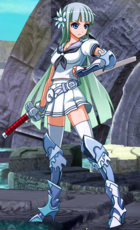
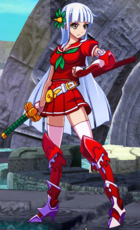
Colors
Note: Colors 20 and 21 were pre-order exclusives for JP PSN and Amazon respectively. Unfortunately, they aren't selectable on Steam without the use of Cheat Engine.
Color 1

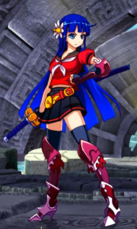
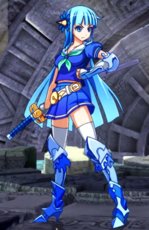
Color 2

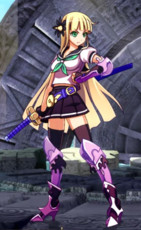
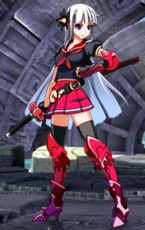
Color 3

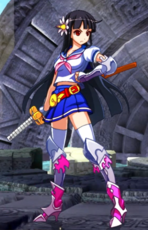
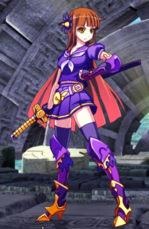
Color 4

Color 5

Color 6

Color 7

Color 8

Color 9

Color 10

Color 11

Color 12

Color 13

Color 14

Color 15

Color 16

Color 17

Color 18

Color 19

Color 20

Color 21

External Links
- Twitter hashtag: #MAAB_IA


