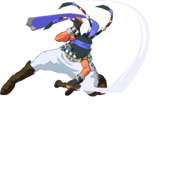
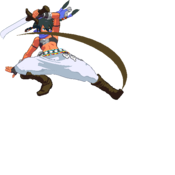
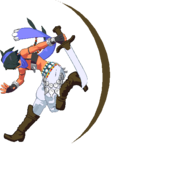
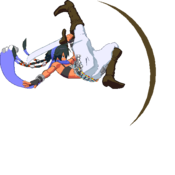
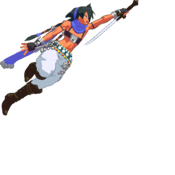
Blade Strangers/Ali: Difference between revisions
Motionstahp (talk | contribs) |
|||
| (35 intermediate revisions by 2 users not shown) | |||
| Line 1: | Line 1: | ||
[[image:blastr_ali.jpg|300px|thumb|right|<center><font size="3">'''Ali'''</font></center>]] | [[image:blastr_ali.jpg|300px|thumb|right|<center><font size="3">'''Ali'''</font></center>]] | ||
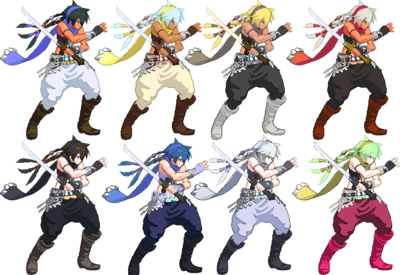
[[Image:blade_strangers_ali_colors.png|400px|thumb|right|<center><font size="3">Colors</font></center>]] | |||
=Introduction= | =Introduction= | ||
| Line 7: | Line 9: | ||
==Story== | ==Story== | ||
You are a computer simulation. Your existence is meaningless. Might as well use your incredibly degenerate bomb oki to wreak havoc. | |||
==Gameplay== | ==Gameplay== | ||
| Line 13: | Line 15: | ||
Health: 10,000 | Health: 10,000 | ||
Commanding, low-risk oki off every touch. Strong air-to-airs. Lacks in overall damage compared to some characters, but the layered mixup game involving bombs more than makes up for it. | |||
===Strengths/Weaknesses=== | |||
{| | |||
|-style="text-align:left;" | |||
! Strengths !! Weaknesses | |||
|- style="vertical-align:top;text-alighn:left" | |||
| style="width: 50%;"| | |||
* | |||
* | |||
| style="width: 50%;"| | |||
* | |||
* | |||
|- | |||
|} | |||
=Move List= | =Move List= | ||
| Line 30: | Line 47: | ||
|active= | |active= | ||
|recovery= | |recovery= | ||
|blockAdv= | |blockAdv=0 | ||
|hitAdv= | |hitAdv=2 | ||
|hitbox= | |hitbox= | ||
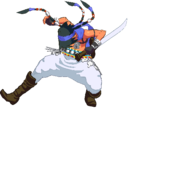
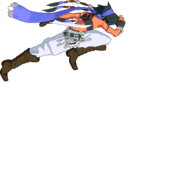
|description= | |description=Your fastest light attack. Useful for taking away advantage at close range. Links from Flash after EX Hayate (5S+E~S). | ||
}} | }} | ||
}} | }} | ||
{{BLASTR-Move | {{BLASTR-Move | ||
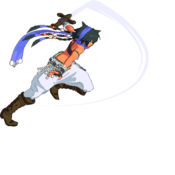
|image=BLASTR_Ali_5LL.png | |image=BLASTR_Ali_5LL.png | ||
|caption= | |caption= Light Attack 2x | ||
|name=5LL | |name=5LL | ||
|data= | |data= | ||
| Line 49: | Line 65: | ||
|active= | |active= | ||
|recovery= | |recovery= | ||
|blockAdv= | |blockAdv=-2 | ||
|hitAdv= | |hitAdv=2 | ||
|hitbox= | |hitbox= | ||
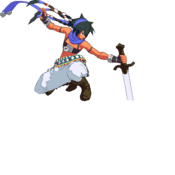
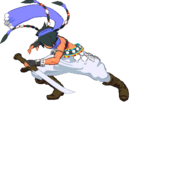
|description= | |description=Similar to her 6L. Used in confirms. Chains into 6H, unlike 5L. | ||
}} | }} | ||
}} | }} | ||
{{BLASTR-Move | {{BLASTR-Move | ||
|image=BLASTR_Ali_5LLL.png | |image=BLASTR_Ali_5LLL.png | ||
|caption= Light Attack | |caption= Light Attack 3x | ||
|name=5LLL | |name=5LLL | ||
|data= | |data= | ||
| Line 68: | Line 83: | ||
|active= | |active= | ||
|recovery= | |recovery= | ||
|blockAdv= | |blockAdv=-4 | ||
|hitAdv= | |hitAdv=0 | ||
|hitbox= | |hitbox= | ||
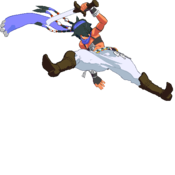
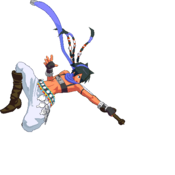
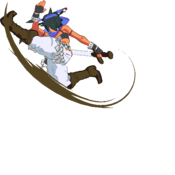
|description= | |description=The third hit of Ali's light string. Gives you more time to confirm and moves you forward, but is less advantageous on block compared to 5LL | ||
}} | }} | ||
}} | }} | ||
| Line 88: | Line 103: | ||
|active= | |active= | ||
|recovery= | |recovery= | ||
|blockAdv= | |blockAdv=-2 | ||
|hitAdv= | |hitAdv=2 | ||
|hitbox= | |||
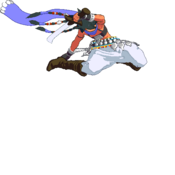
|description=Slightly slower than 5L in exchange for more range. Links from Meteor after EX Hayate (S+E~H). | |||
}} | |||
}} | |||
{{BLASTR-Move | |||
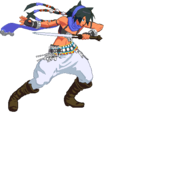
|image=BLASTR_Ali_6LL.png | |||
|caption= Forward Light Attack 2x | |||
|name=6LL | |||
|data= | |||
{{BLASTR-Data | |||
|damage=560 | |||
|cancel= | |||
|guard=M | |||
|startup=13 | |||
|active= | |||
|recovery= | |||
|blockAdv=-4 | |||
|hitAdv=0 | |||
|hitbox= | |hitbox= | ||
|description= | |description=The second hit of Ali's forward light string. Allows you time to confirm, but is less advantageous on block compared to 5LL. | ||
}} | }} | ||
}} | }} | ||
| Line 108: | Line 142: | ||
|active= | |active= | ||
|recovery= | |recovery= | ||
|blockAdv= | |blockAdv=-1 | ||
|hitAdv= | |hitAdv=1 | ||
|hitbox= | |||
|description=The crouching alternative to 5L. Functions similarly, yet is slightly minus on block. | |||
}} | |||
}} | |||
{{BLASTR-Move | |||
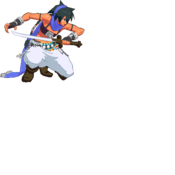
|image=BLASTR_Ali_2LL.png | |||
|caption= Crouching Light Attack 2x | |||
|name=2LL | |||
|data= | |||
{{BLASTR-Data | |||
|damage=350 | |||
|cancel= | |||
|guard=M | |||
|startup=7 | |||
|active= | |||
|recovery= | |||
|blockAdv=-2 | |||
|hitAdv=2 | |||
|hitbox= | |||
|description=Very similar to 5LL in application. | |||
}} | |||
}} | |||
{{BLASTR-Move | |||
|image=BLASTR_Ali_2LLL.png | |||
|caption= Crouching Light Attack 3x | |||
|name=2LLL | |||
|data= | |||
{{BLASTR-Data | |||
|damage=420 | |||
|cancel= | |||
|guard=M | |||
|startup=13 | |||
|active= | |||
|recovery= | |||
|blockAdv=-4 | |||
|hitAdv=0 | |||
|hitbox= | |hitbox= | ||
|description= | |description=Very similar to 5LLL in application. | ||
}} | }} | ||
}} | }} | ||
| Line 128: | Line 198: | ||
|active= | |active= | ||
|recovery= | |recovery= | ||
|blockAdv= | |blockAdv=7 | ||
|hitAdv= | |hitAdv=11 | ||
|hitbox= | |hitbox= | ||
|description= | |description=A fast air-to-air. Chains into a j.H normal or into j.HS for a full pickup. | ||
}} | }} | ||
}} | }} | ||
| Line 138: | Line 208: | ||
{{BLASTR-Move | {{BLASTR-Move | ||
|image=BLASTR_Ali_j.8L.png | |image=BLASTR_Ali_j.8L.png | ||
|caption= | |caption= Hilt Thrust | ||
|name=j.8L | |name=j.8L | ||
|data= | |data= | ||
| Line 148: | Line 218: | ||
|active= | |active= | ||
|recovery= | |recovery= | ||
|blockAdv= | |blockAdv=7 | ||
|hitAdv= | |hitAdv=11 | ||
|hitbox= | |hitbox= | ||
|description= | |description=Another fast air-to-air with a larger hitbox, allowing you to pickup the opponent after a 2E+S launcher where j.L would give you trouble. | ||
}} | }} | ||
}} | }} | ||
| Line 168: | Line 238: | ||
|active= | |active= | ||
|recovery= | |recovery= | ||
|blockAdv= | |blockAdv=-5 | ||
|hitAdv= | |hitAdv=1 | ||
|hitbox= | |hitbox= | ||
|description= | |description=A decently sized heavy normal that combos into various Hayate options on hit. Like 3H, can confirm into a late EX Hayate on hit to combo into Flash (Giving you a subsequent 5L link). | ||
}} | }} | ||
}} | }} | ||
| Line 188: | Line 258: | ||
|active= | |active= | ||
|recovery= | |recovery= | ||
|blockAdv= | |blockAdv=-6 [-3] | ||
|hitAdv= | |hitAdv=1 [Launches] | ||
|hitbox= | |hitbox= | ||
|description= | |description=Chargeable. Charged version causes wall bounce on hit. The forward movement allows for 2E+S launch combos midscreen or picking up off an air-hit by chaining 6L6H. Mostly unsafe on block unless charged. Cancel Charged 6H into 4S into 5E for a fun and damaging corner route. | ||
}} | }} | ||
}} | }} | ||
| Line 199: | Line 269: | ||
{{BLASTR-Move | {{BLASTR-Move | ||
|image=BLASTR_Ali_4H.png | |image=BLASTR_Ali_4H.png | ||
|caption= | |caption= Stomach Kick | ||
|name=4H | |name=4H | ||
|data= | |data= | ||
| Line 209: | Line 279: | ||
|active= | |active= | ||
|recovery= | |recovery= | ||
|blockAdv= | |blockAdv=-1 | ||
|hitAdv= | |hitAdv=3 | ||
|hitbox= | |hitbox= | ||
|description= | |description=A vertical hitbox with the lowest total duration of Ali's heavy normals. Good for high-up juggles when trying to squeeze enough advantage out of your knockdowns for Bomb setups. | ||
}} | }} | ||
}} | }} | ||
| Line 229: | Line 299: | ||
|active= | |active= | ||
|recovery= | |recovery= | ||
|blockAdv= | |blockAdv=-3 | ||
|hitAdv= | |hitAdv=0 | ||
|hitbox= | |hitbox= | ||
|description= | |description=Ali's fastest low hit. Doesn't allow you to confirm raw like her other heavy normals, but due to it's shorter duration compared to 3H, it's a great tool during bomb mixups. | ||
}} | }} | ||
}} | }} | ||
| Line 249: | Line 319: | ||
|active= | |active= | ||
|recovery= | |recovery= | ||
|blockAdv= | |blockAdv=-6 | ||
|hitAdv= | |hitAdv=1 | ||
|hitbox= | |hitbox= | ||
|description= | |description=A fast, far-reaching low. This move confirms into a late EX Hayate Flash on hit. | ||
}} | }} | ||
}} | }} | ||
| Line 269: | Line 339: | ||
|active= | |active= | ||
|recovery= | |recovery= | ||
|blockAdv= | |blockAdv=9 | ||
|hitAdv= | |hitAdv=14 | ||
|hitbox= | |hitbox= | ||
|description= | |description=A fast, low-hitting hitbox. A faster alternative to j.3H, which makes it more useful for certain situations such as falling after an Air Bomb. | ||
}} | }} | ||
}} | }} | ||
| Line 279: | Line 349: | ||
{{BLASTR-Move | {{BLASTR-Move | ||
|image=BLASTR_Ali_j.3H.png | |image=BLASTR_Ali_j.3H.png | ||
|caption= | |caption= Axe Kick | ||
|name=j.3H | |name=j.3H | ||
|data= | |data= | ||
| Line 289: | Line 359: | ||
|active= | |active= | ||
|recovery= | |recovery= | ||
|blockAdv= | |blockAdv=10 | ||
|hitAdv= | |hitAdv=16 | ||
|hitbox= | |hitbox= | ||
|description= | |description=A very low-hitting hitbox. Covers a lot of vertical space and allows Ali to hit sooner in her jump arc than she would otherwise. | ||
}} | }} | ||
}} | }} | ||
| Line 299: | Line 369: | ||
{{BLASTR-Move | {{BLASTR-Move | ||
|image=BLASTR_Ali_j.8H.png | |image=BLASTR_Ali_j.8H.png | ||
|caption= | |caption= Split Kick | ||
|name=j.8H | |name=j.8H | ||
|data= | |data= | ||
| Line 309: | Line 379: | ||
|active= | |active= | ||
|recovery= | |recovery= | ||
|blockAdv= | |blockAdv=9 | ||
|hitAdv= | |hitAdv=16 | ||
|hitbox= | |hitbox= | ||
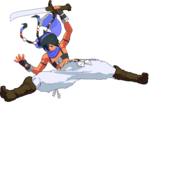
|description= | |description= Great for crossups. | ||
}} | }} | ||
}} | }} | ||
| Line 332: | Line 402: | ||
|hitAdv= | |hitAdv= | ||
|hitbox= | |hitbox= | ||
|description=Universal anti-air. Head invulnerable on frame 5. | |description=Universal anti-air. Head invulnerable on frame 5. Can combo from an anti-air hit if you get a really high Counter-hit juggle, or if you cancel late with Offensive Skill. | ||
}} | }} | ||
}} | }} | ||
| Line 352: | Line 422: | ||
|hitAdv= | |hitAdv= | ||
|hitbox= | |hitbox= | ||
|description=Universal overhead. | |description=Universal overhead. 4S followed by a whiffed 5L will give you the timing needed to combo a Bomb from this. Combos into Offensive Skill otherwise. | ||
}} | }} | ||
}} | }} | ||
| Line 372: | Line 442: | ||
|hitAdv= | |hitAdv= | ||
|hitbox= | |hitbox= | ||
|description=Universal knockback attack. Crumples on counter hit. | |description=Universal knockback attack. Crumples on counter hit. Potential followups on counter-hit are things like charged 6H. | ||
}} | }} | ||
}} | }} | ||
| Line 392: | Line 462: | ||
|hitAdv= | |hitAdv= | ||
|hitbox= | |hitbox= | ||
|description=Universal | |description=Universal sweeping attack. Knocks down. Confirms into Offensive Skill if you want damage from it. | ||
}} | }} | ||
}} | }} | ||
| Line 412: | Line 482: | ||
|hitAdv= | |hitAdv= | ||
|hitbox= | |hitbox= | ||
|description=Universal Chase Attack. Can OTG and forces hard knockdown on hit. | |description=Universal Chase Attack. Can OTG and forces hard knockdown on hit. 4S into 3E allows you to OTG pickup without using Offensive Skill. | ||
}} | }} | ||
}} | }} | ||
| Line 432: | Line 502: | ||
|hitAdv= | |hitAdv= | ||
|hitbox= | |hitbox= | ||
|description=Ground bounce on counter hit. | |description=Ground bounce on counter hit. Slow, and has a fairly small hitbox for the startup. Ground bounce starters are nothing to scoff at, however. | ||
}} | }} | ||
}} | }} | ||
| Line 452: | Line 522: | ||
|hitAdv= | |hitAdv= | ||
|hitbox= | |hitbox= | ||
|description=Stance. Cancellable from frame 12. | |description=Stance. Cancellable from frame 12. This one is mostly used over Heavy due to it's startup when range isn't important. | ||
}} | }} | ||
}} | }} | ||
{{BLASTR-Move | {{BLASTR-Move | ||
|image= | |image=BLASTR_Ali_6S.png | ||
|caption= Hayate (Heavy) | |caption= Hayate (Heavy) | ||
|name=6H+S | |name=6H+S | ||
| Line 470: | Line 540: | ||
|hitAdv= | |hitAdv= | ||
|hitbox= | |hitbox= | ||
|description=Stance. Cancellable from frame 16. | |description=Stance. Cancellable from frame 16. Slower than the Light version, making it less useful for ending air combos. | ||
}} | }} | ||
}} | }} | ||
{{BLASTR-Move | {{BLASTR-Move | ||
|image=BLASTR_Ali_6S | |image=BLASTR_Ali_6S.png | ||
|caption= Hayate (EX) | |caption= Hayate (EX) | ||
|name=6S+E | |name=6S+E | ||
| Line 506: | Line 576: | ||
|hitAdv= | |hitAdv= | ||
|hitbox= | |hitbox= | ||
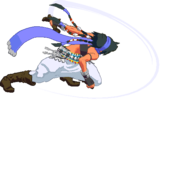
|description= | |description=Rumor has it, off certain normals, Ali can be at advantage if Dust is done on the earliest possible frame. Tell no one. | ||
}} | }} | ||
}} | }} | ||
| Line 524: | Line 594: | ||
|hitAdv= | |hitAdv= | ||
|hitbox= | |hitbox= | ||
|description= | |description= A fairly fast overhead. Reactable offline. Safe on block, advantageous on hit, but leaves a large gap off many blocked normals. EX Hayate's version links into 6L. | ||
}} | }} | ||
}} | }} | ||
| Line 542: | Line 612: | ||
|hitAdv= | |hitAdv= | ||
|hitbox= | |hitbox= | ||
|description= | |description=Ends in a fairly advantageous knockdown on air and ground hit, and can be linked into off all heavy normals. | ||
}} | }} | ||
}} | }} | ||
| Line 560: | Line 630: | ||
|hitAdv= | |hitAdv= | ||
|hitbox= | |hitbox= | ||
|description= | |description=Safe on block, advantageous on hit. The version in EX Hayate links into 5L and allows you to confirm off single hits of 5H and 3H. | ||
}} | }} | ||
}} | }} | ||
| Line 580: | Line 650: | ||
|hitAdv= | |hitAdv= | ||
|hitbox= | |hitbox= | ||
|description= | |description=Damage ender that leaves you close to the opponent. Not as much advantage as a Hell knockdown. | ||
}} | }} | ||
}} | }} | ||
| Line 598: | Line 668: | ||
|hitAdv= | |hitAdv= | ||
|hitbox= | |hitbox= | ||
|description= | |description=Damage ender that leaves you further way from the opponent compared to the Light version. Still not as much advantage as a Hell knockdown. | ||
}} | }} | ||
}} | }} | ||
{{BLASTR-Move | {{BLASTR-Move | ||
|image=BLASTR_Ali_2S+E.png | |image=BLASTR_Ali_2S+E.png | ||
|caption= Reppukyaku (EX | |caption= Reppukyaku (EX) | ||
|name=2S+E | |name=2S+E | ||
|data= | |data= | ||
| Line 616: | Line 686: | ||
|hitAdv= | |hitAdv= | ||
|hitbox= | |hitbox= | ||
|description=Requires 1/2 a bar of the Skill Gauge. Launches on hit. | |description=Requires 1/2 a bar of the Skill Gauge. Launches on ground or air hit. Very unsafe on block. | ||
}} | }} | ||
}} | }} | ||
| Line 636: | Line 706: | ||
|hitAdv= | |hitAdv= | ||
|hitbox= | |hitbox= | ||
|description=Explodes after 81 frames. | |description=Explodes after 81 frames. This move is the corner-stone of Ali's pressure. Get a decent knockdown and throw it out. As mentioned above, you can time a 6E afterwards for pickup by whiffing 5L, which also sets up timing for 2H into a similar extension. Disappears if Ali is hit. | ||
}} | }} | ||
}} | }} | ||
{{BLASTR-Move | {{BLASTR-Move | ||
|image= | |image=BLASTR_Ali_4S.png | ||
|caption= Explosive Bomb (Heavy) | |caption= Explosive Bomb (Heavy) | ||
|name=4H+S | |name=4H+S | ||
| Line 654: | Line 724: | ||
|hitAdv= | |hitAdv= | ||
|hitbox= | |hitbox= | ||
|description=Explodes after 91 frames. | |description=Explodes after 91 frames. Has a further arc compared to 4S and explodes later. Useful for setups where you don't want the bomb to explodes ASAP. Disappears if Ali is hit. | ||
}} | }} | ||
}} | }} | ||
{{BLASTR-Move | {{BLASTR-Move | ||
|image=BLASTR_Ali_4S | |image=BLASTR_Ali_4S.png | ||
|caption= Explosive Bomb (EX) | |caption= Explosive Bomb (EX) | ||
|name=4S+E | |name=4S+E | ||
| Line 672: | Line 742: | ||
|hitAdv= | |hitAdv= | ||
|hitbox= | |hitbox= | ||
|description=Requires 1/2 a bar of the Skill | |description=Requires 1/2 a bar of the Skill Gauge. Explodes after 81, 91, and 101 frames. Covers the screen in Bombs, giving you a much wider timing window to approach and convert. This is actually very scary in a neutral situation, as the opponent cannot interact with the bombs and they explode later than 4S or 4HS. Disappears if Ali is hit. | ||
}} | }} | ||
}} | }} | ||
| Line 692: | Line 762: | ||
|hitAdv= | |hitAdv= | ||
|hitbox= | |hitbox= | ||
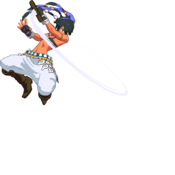
|description= | |description=An aerial attack with good horizontal range that's slightly disjointed. Makes for good air-footsies when paired with bomb. Can be quite unsafe if blocked. | ||
}} | }} | ||
}} | }} | ||
| Line 710: | Line 780: | ||
|hitAdv= | |hitAdv= | ||
|hitbox= | |hitbox= | ||
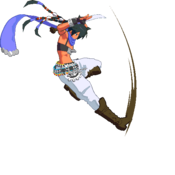
|description= | |description=An aerial attack with great vertical and surprising horizontal range. Leads to full combo on air and ground hit in many situations. Disjointed and allows Ali to descend as early as she wants in her jump arc. Great for counterpoking. Great for suddenly turning a bomb you suspect will be blocked into frame advantage if you're airborne. | ||
}} | }} | ||
}} | }} | ||
{{BLASTR-Move | {{BLASTR-Move | ||
|image=BLASTR_Ali_j.S | |image=BLASTR_Ali_j.S.png | ||
|caption= Hayabusa (EX) | |caption= Hayabusa (EX) | ||
|name=j.S+E | |name=j.S+E | ||
| Line 728: | Line 798: | ||
|hitAdv= | |hitAdv= | ||
|hitbox= | |hitbox= | ||
|description=Requires 1/2 a bar from the Skill Gauge. | |description=Requires 1/2 a bar from the Skill Gauge. Pops the opponent up for further conversion. Being an EX move, it's very useful for increasing combo damage and carrying the opponent to the corner. | ||
}} | }} | ||
}} | }} | ||
| Line 748: | Line 818: | ||
|hitAdv= | |hitAdv= | ||
|hitbox= | |hitbox= | ||
|description= | |description=A vertical dive that slightly follows Ali's air trajectory as she drops. Good for when you need to get grounded immediately. Great when paired with 4S. Very unsafe otherwise. | ||
}} | }} | ||
}} | }} | ||
{{BLASTR-Move | {{BLASTR-Move | ||
|image=BLASTR_Ali_j. | |image=BLASTR_Ali_j.2S.png | ||
|caption= Uzura (Heavy) | |caption= Uzura (Heavy) | ||
|name=j.2H+S | |name=j.2H+S | ||
| Line 766: | Line 836: | ||
|hitAdv= | |hitAdv= | ||
|hitbox= | |hitbox= | ||
|description= | |description=A safer and slower version of its lighter counterpart. | ||
}} | }} | ||
}} | }} | ||
{{BLASTR-Move | {{BLASTR-Move | ||
|image=BLASTR_Ali_j.2S | |image=BLASTR_Ali_j.2S.png | ||
|caption= Uzura | |caption= Uzura | ||
|name=j.2S+E | |name=j.2S+E | ||
| Line 784: | Line 854: | ||
|hitAdv= | |hitAdv= | ||
|hitbox= | |hitbox= | ||
|description=Requires 1/2 a bar from the Skill Gauge. | |description=Requires 1/2 a bar from the Skill Gauge. Comboable on a low hit and much safer than it's non-EX sisters. | ||
}} | }} | ||
}} | }} | ||
| Line 805: | Line 875: | ||
|hitAdv= | |hitAdv= | ||
|hitbox= | |hitbox= | ||
|description=Explodes after 91 frames. | |description=Explodes after 91 frames. Similar in application to grounded 4S, however, this move allows you to act out of an air-state when it recovers. j.4S into j.H+S, j.4S into j.2S and many other variations are useful for pressure, neutral and okizeme. Disappears if Ali is hit. | ||
}} | }} | ||
}} | }} | ||
{{BLASTR-Move | {{BLASTR-Move | ||
|image=BLASTR_Ali_j. | |image=BLASTR_Ali_j.4S.png | ||
|caption= Aerial Explosive Bomb (Heavy) | |caption= Aerial Explosive Bomb (Heavy) | ||
|name=j.4H+S | |name=j.4H+S | ||
| Line 823: | Line 893: | ||
|hitAdv= | |hitAdv= | ||
|hitbox= | |hitbox= | ||
|description=Explodes after 111 frames. | |description=Explodes after 111 frames. Flies further and explodes later than j.4S, making it more useful at range to try and instigate action from your opponent. Disappears if Ali is hit. | ||
}} | }} | ||
}} | }} | ||
{{BLASTR-Move | {{BLASTR-Move | ||
|image=BLASTR_Ali_j.4S | |image=BLASTR_Ali_j.4S.png | ||
|caption= Aerial Explosive Bomb (EX) | |caption= Aerial Explosive Bomb (EX) | ||
|name=j.4S+E | |name=j.4S+E | ||
| Line 841: | Line 911: | ||
|hitAdv= | |hitAdv= | ||
|hitbox= | |hitbox= | ||
|description=Requires 1/2 a bar of the Skill Gauge. Explodes after 101, 111, and 121 frames. | |description=Requires 1/2 a bar of the Skill Gauge. Explodes after 101, 111, and 121 frames. The notable thing is that this explodes far later than grounded 4E+S. Done off a forward jump, this covers a lot of ground and returns you to a state where you can approach afterwards, making it a pretty terrifying presence in neutral if you need to approach. Disappears if Ali is hit. | ||
}} | }} | ||
}} | }} | ||
| Line 862: | Line 932: | ||
|hitAdv= | |hitAdv= | ||
|hitbox= | |hitbox= | ||
|description=Universal Throw. | |description=Universal Throw. 4S and it's ilk ''does'' combo from this, making for some degenerate full conversions into more oki. | ||
}} | }} | ||
}} | }} | ||
| Line 882: | Line 952: | ||
|hitAdv= | |hitAdv= | ||
|hitbox= | |hitbox= | ||
|description=Requires 1 bar of the Skill Gauge. | |description=Requires 1 bar of the Skill Gauge. Allows you to extend off anti-air 5E and 2E, or 6E when used as a mixup sans bombs. | ||
}} | }} | ||
}} | }} | ||
{{BLASTR-Move | {{BLASTR-Move | ||
|image= | |image=BLASTR_Ali_j.L+E.png | ||
|caption= Offensive Skill (upward) | |caption= Offensive Skill (upward) | ||
|name=8L+E | |name=8L+E | ||
| Line 900: | Line 970: | ||
|hitAdv= | |hitAdv= | ||
|hitbox= | |hitbox= | ||
|description=Requires 1 bar of the Skill Gauge. | |description=Requires 1 bar of the Skill Gauge. Similar application as 5L+E, with a more vertical flavor. | ||
}} | }} | ||
}} | }} | ||
| Line 918: | Line 988: | ||
|hitAdv= | |hitAdv= | ||
|hitbox= | |hitbox= | ||
|description=Requires 1 bar of the Skill Gauge. | |description=Requires 1 bar of the Skill Gauge. Allows for stray air-conversions off moves like j.S where you wouldn't be able to convert otherwise. | ||
}} | }} | ||
}} | }} | ||
| Line 924: | Line 994: | ||
{{BLASTR-Move | {{BLASTR-Move | ||
|image= | |image=BLASTR_Ali_4E.png | ||
|caption= Defensive Skill | |caption= Defensive Skill | ||
|name=4L+E | |name=4L+E | ||
| Line 938: | Line 1,008: | ||
|hitAdv= | |hitAdv= | ||
|hitbox= | |hitbox= | ||
|description=Requires 1 bar of the Skill Gauge. | |description=Requires 1 bar of the Skill Gauge. Useful for dealing with the pressure options of certain characters. Namely Shovel Knight gem pressure. | ||
}} | }} | ||
}} | }} | ||
==Ultra Skills== | ==Ultra Skills== | ||
{{BLASTR-Move | |||
|image=BLASTR_Ali_H+S+E.png | |||
|caption= Meteor Dance Lv. 1 | |||
|name=H+S+E | |||
|data= | |||
{{BLASTR-Data | |||
|damage=2300 | |||
|cancel= | |||
|guard=M | |||
|startup=9 | |||
|active= | |||
|recovery= | |||
|blockAdv= | |||
|hitAdv= | |||
|hitbox= | |||
|description=Requires 1 bar of the Skill Gauge. A damaging ender when you need to finish off the opponent. Puts you fullscreen and does not lead to oki. | |||
}} | |||
}} | |||
{{BLASTR-Move | |||
|image=BLASTR_Ali_H+S+E.png | |||
|caption= Meteor Dance Lv. 2 | |||
|name=H+S+E 2x | |||
|data= | |||
{{BLASTR-Data | |||
|damage=3700 | |||
|cancel= | |||
|guard=M | |||
|startup=9 | |||
|active= | |||
|recovery= | |||
|blockAdv= | |||
|hitAdv= | |||
|hitbox= | |||
|description=Requires 2 bars of the Skill Gauge. More damage than the single-bar version. Same non-existent oki situation afterwards. | |||
}} | |||
}} | |||
{{BLASTR-Move | |||
|image=BLASTR_Ali_2H+S+E.png | |||
|caption= Requiem Lv. 1 | |||
|name=2H+S+E | |||
|data= | |||
{{BLASTR-Data | |||
|damage=2000 | |||
|cancel= | |||
|guard=UNB | |||
|startup=26 | |||
|active= | |||
|recovery= | |||
|blockAdv= | |||
|hitAdv= | |||
|hitbox= | |||
|description=Requires 1 bar of the Skill Gauge. Frame 0 post-flash, meaning you cannot jump out if you're not in a throw invulnerable state when it goes off. Paired with 4S on knockdown, it can lead to some suspect unblockable setups. Would be way worse if trying to jump away from something like this didn't lead to full combo and oki when Ali runs her bog-standard pressure game. Leaves you in front of the opponent for some modest pressure afterwards. | |||
}} | |||
}} | |||
{{BLASTR-Move | |||
|image=BLASTR_Ali_2H+S+E.png | |||
|caption= Requiem Lv. 2 | |||
|name=2H+S+E 2x | |||
|data= | |||
{{BLASTR-Data | |||
|damage=3200 | |||
|cancel= | |||
|guard=UNB | |||
|startup=26 | |||
|active= | |||
|recovery= | |||
|blockAdv= | |||
|hitAdv= | |||
|hitbox= | |||
|description=Requires 2 bars of the Skill Gauge. More damage than the single-bar version. Leaves you in front of the opponent for some modest pressure afterwards. | |||
}} | |||
}} | |||
=Strategy= | =Strategy= | ||
==Offense== | ==Offense== | ||
'''Bomb Oki''' | |||
Overhead: | |||
4S > Whiff 5L > 6E > 4S Explodes > 5L Pickup | |||
Low: | |||
4S > walk forward > 2B > 4S Explodes > 5L pickup | |||
Throw: | |||
4S > walk forward > L+H > 4S Explodes > 4B pickup | |||
difficult, easier in corner | |||
Down Attack: | |||
4S > walk forward > 3E > 4S Explodes > 5L Pickup | |||
(the explosion should catch them trying to punish your 3E) | |||
DP Bait: | |||
4S > Whiff 5L > Block reversal > 4S explodes > 5L pickup | |||
Alternative DP bait setups look like this[https://twitter.com/mr6tennis/status/1034990646610735105]: | |||
4S > walk back > 3B > 4S explodes > 5S~L > 2L Pickup | |||
Can add a 2nd mixup if you use 5S+E instead | |||
'''Universal Stuff''' | |||
6E versus 3H is still quite the potent mixup even if you don't have a Bomb over your opponent. | |||
Throws in this game can't be broken on reaction. Walking in and out of throw range can oftentimes provoke a reactionary throw break attempt, which can be punished with 3H and other normals. | |||
==Defense== | ==Defense== | ||
Due to a lack of reversal options, you're getting out the ol' fashioned way. You can save meter for Guard Cancel, or you can look for outs to counterpoke or instant-air j.H+S. | |||
Throws in this game lose outright to normals, so if you really expect a tick-throw you can 4E for CH damage. | |||
==Neutral== | ==Neutral== | ||
Depending on the matchup, you'll be throwing out Bombs and moving forward after them, jockeying for space. j.H+S is actually a very good poke here, as it masks when you actually intend to jump-in as you can do it at any point in the jump arc, and it cleanly beats out certain normals and anti-airs at range. If you can get your opponent to block a bomb, you can run throw mixups, go for an ambiguous crossup, or continue pressure. | |||
3H is probably your longest button with the highest reward on hit, while still being a low. Learn to confirm off it right into EX Hayate > Flash to turn stray counterpokes into oki. | |||
EX Bombs are very useful in matchups where you have trouble approaching. It's expensive, but your opponent is normally forced to answer them or risk being put in a bad situation. | |||
=Combos= | =Combos= | ||
==Midscreen== | ==Midscreen== | ||
5L,L,L,6H xx 5S~E | |||
j.H+S > 5L,L,L,6H xx 5S~E | |||
3H xx 5S~E | |||
5L,L,L,6H xx 2ES > 9j.L,H xx j.5H+S > 4H xx 5S~E | |||
6L,L,6H xx 2ES > 9j.L,H xx j.5H+S > 4H xx 5S~E | |||
3H xx 5ES~S > 5L,L,L,6H xx 2ES > 9j.L,H xx j.5H+S > 4H xx 5S~E | |||
==Corner== | ==Corner== | ||
Latest revision as of 06:53, 6 September 2018
Introduction
Source Game: Code of Princess
Story
You are a computer simulation. Your existence is meaningless. Might as well use your incredibly degenerate bomb oki to wreak havoc.
Gameplay
Health: 10,000
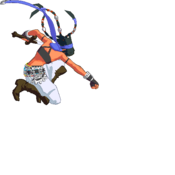
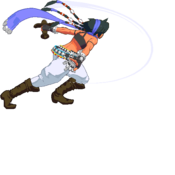
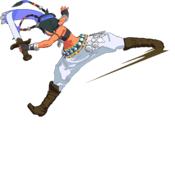
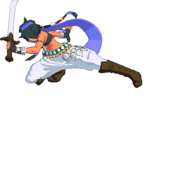
Commanding, low-risk oki off every touch. Strong air-to-airs. Lacks in overall damage compared to some characters, but the layered mixup game involving bombs more than makes up for it.
Strengths/Weaknesses
| Strengths | Weaknesses |
|---|---|
|
|
|
Move List
Light Attacks
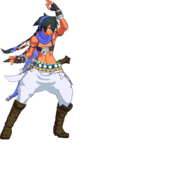
| 5L Light Attack |
|---|
| 5LL Light Attack 2x |
|---|
| 5LLL Light Attack 3x |
|---|
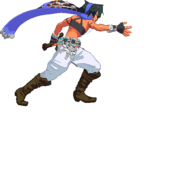
| 6L Forward Light Attack |
|---|
| 6LL Forward Light Attack 2x |
|---|
| 2L Crouching Light Attack |
|---|
| 2LL Crouching Light Attack 2x |
|---|
| 2LLL Crouching Light Attack 3x |
|---|
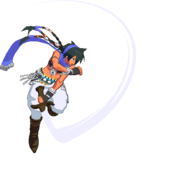
| j.L Jumping Light Attack |
|---|
| j.8L Hilt Thrust |
|---|
Heavy Attacks
| 5H Heavy Attack |
|---|
| 6H Slide Kick |
|---|
| 4H Stomach Kick |
|---|
| 2H Crouching Heavy Attack |
|---|
| 3H Cleave |
|---|
| j.H Jumping Heavy Attack |
|---|
| j.3H Axe Kick |
|---|
| j.8H Split Kick |
|---|
Unique Attacks
| 5E Anti Air |
|---|
| 6E Overhead |
|---|
| 4E Knock Back |
|---|
| 2E Sweep |
|---|
| 3E Chase Attack |
|---|
| j.E Jumping Knock Back |
|---|
Skills
| 6S Hayate |
|---|
| 6H+S Hayate (Heavy) |
|---|
| 6S+E Hayate (EX) |
|---|
| L (during Hayate) Dust |
|---|
| H (during Hayate) Meteor |
|---|
| E (during Hayate) Hell |
|---|
| S (during Hayate) Flash |
|---|
| 2S Reppukyaku |
|---|
| 2H+S Reppukyaku (Heavy) |
|---|
| 2S+E Reppukyaku (EX) |
|---|
| 4S Explosive Bomb |
|---|
| 4H+S Explosive Bomb (Heavy) |
|---|
| 4S+E Explosive Bomb (EX) |
|---|
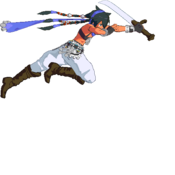
| j.S Hayabusa |
|---|
| j.H+S Hayabusa (Heavy) |
|---|
| j.S+E Hayabusa (EX) |
|---|
| j.2S Uzura |
|---|
| j.2H+S Uzura (Heavy) |
|---|
| j.2S+E Uzura |
|---|
| j.4S Aerial Explosive Bomb |
|---|
| j.4H+S Aerial Explosive Bomb (Heavy) |
|---|
| j.4S+E Aerial Explosive Bomb (EX) |
|---|
Universal Commands
| L+H Throw |
|---|
| L+E Offensive Skill (horizontal) |
|---|
| 8L+E Offensive Skill (upward) |
|---|
| j.L+E Aerial Offensive Skill |
|---|
| 4L+E Defensive Skill |
|---|
Ultra Skills
| H+S+E Meteor Dance Lv. 1 |
|---|
| H+S+E 2x Meteor Dance Lv. 2 |
|---|
| 2H+S+E Requiem Lv. 1 |
|---|
| 2H+S+E 2x Requiem Lv. 2 |
|---|
Strategy
Offense
Bomb Oki
Overhead: 4S > Whiff 5L > 6E > 4S Explodes > 5L Pickup
Low: 4S > walk forward > 2B > 4S Explodes > 5L pickup
Throw: 4S > walk forward > L+H > 4S Explodes > 4B pickup difficult, easier in corner
Down Attack: 4S > walk forward > 3E > 4S Explodes > 5L Pickup (the explosion should catch them trying to punish your 3E)
DP Bait: 4S > Whiff 5L > Block reversal > 4S explodes > 5L pickup
Alternative DP bait setups look like this[1]: 4S > walk back > 3B > 4S explodes > 5S~L > 2L Pickup
Can add a 2nd mixup if you use 5S+E instead
Universal Stuff
6E versus 3H is still quite the potent mixup even if you don't have a Bomb over your opponent.
Throws in this game can't be broken on reaction. Walking in and out of throw range can oftentimes provoke a reactionary throw break attempt, which can be punished with 3H and other normals.
Defense
Due to a lack of reversal options, you're getting out the ol' fashioned way. You can save meter for Guard Cancel, or you can look for outs to counterpoke or instant-air j.H+S.
Throws in this game lose outright to normals, so if you really expect a tick-throw you can 4E for CH damage.
Neutral
Depending on the matchup, you'll be throwing out Bombs and moving forward after them, jockeying for space. j.H+S is actually a very good poke here, as it masks when you actually intend to jump-in as you can do it at any point in the jump arc, and it cleanly beats out certain normals and anti-airs at range. If you can get your opponent to block a bomb, you can run throw mixups, go for an ambiguous crossup, or continue pressure.
3H is probably your longest button with the highest reward on hit, while still being a low. Learn to confirm off it right into EX Hayate > Flash to turn stray counterpokes into oki.
EX Bombs are very useful in matchups where you have trouble approaching. It's expensive, but your opponent is normally forced to answer them or risk being put in a bad situation.
Combos
Midscreen
5L,L,L,6H xx 5S~E
j.H+S > 5L,L,L,6H xx 5S~E
3H xx 5S~E
5L,L,L,6H xx 2ES > 9j.L,H xx j.5H+S > 4H xx 5S~E
6L,L,6H xx 2ES > 9j.L,H xx j.5H+S > 4H xx 5S~E
3H xx 5ES~S > 5L,L,L,6H xx 2ES > 9j.L,H xx j.5H+S > 4H xx 5S~E

