Million Arthur: Arcana Blood/Iai Arthur: Difference between revisions
Jump to navigation
Jump to search
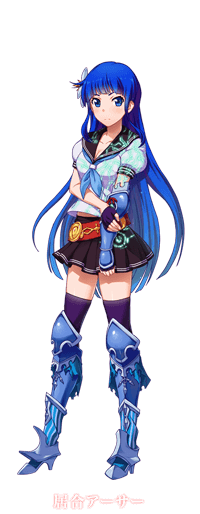
Iai Arthur
mNo edit summary |
m (→External Links) |
||
| Line 720: | Line 720: | ||
==External Links== | ==External Links== | ||
<!-- | <!--To make adjustments to Iai's hashtag go to Million_Arthur:_Arcana_Blood/FAQ--> | ||
* | *Twitter hashtag: {{#lst:Million Arthur: Arcana Blood/FAQ|Iai Hashtag}} | ||
{{MAAB}} | {{MAAB}} | ||
[[Category:Million Arthur: Arcana Blood]] | [[Category:Million Arthur: Arcana Blood]] | ||
Revision as of 12:54, 28 October 2019

Profile
Name: Iai Arthur
Voice Actress: Sumire Uesaka
Element: Ice
Health: 21000
Overview
Stance character with battou strikes. Has very strong mixup potential in both left/right and high/low varieties. Can carry into the corner very easily off a conversion if desired. Has no run but instead has a dash.
Recommended Support Knights
Normal Moves
5A
5A  |
|---|
5AA
5AA  |
|---|
5AAA
5AAA  |
|---|
5AAAA
5AAAA  |
|---|
5AAAAA
5AAAAA  |
|---|
5B
5B  |
|---|
5C
5C  |
|---|
6C
6C  |
|---|
2A
2A  |
|---|
2B
2B  |
|---|
2C
2C  |
|---|
j.A
j.A  |
|---|
j.B
j.B  |
|---|
j.C
j.C  |
|---|
Elemental Attacks
5D
Ice Flower 5D  5D 5D  5[D] 5[D]
|
|---|
j.D
Ice Moon j.D  |
|---|
Throws
5/6B+C
Forward Throw 5/6B+C  |
|---|
4B+C
Back Throw 4B+C  |
|---|
j.B+C
Air Throw j.B+C  |
|---|
Special Moves
236A/B/C
Piercing Strike  236A/B/C 236A/B/C  ~A ~A  ~B ~B ~C ~C
|
|---|
623A/B/C
Snowfall Edge 623A/B/C  |
|---|
236D
Freezing Glide  236D 236D  ~A ~A  ~B ~B  ~C ~C  ~D ~D
|
|---|
j236D
Air Freezing Glide  j.236D j.236D  ~A ~A  ~B ~B  ~C ~C  ~D ~D
|
|---|
Million Skill
236XX
Cross Air Flash 236XX  |
|---|
623XX
Ice Blade Sculpture 623XX  |
|---|
Million Excalibur
Chaotic Seasons (Snow Moon Flowers) 214XX  |
|---|
Combos
Solo Combos
A Starter
- Autocombo > Million Skill
- Autocombo into super.
- 5AAA > 236[X]~X > 5AAAA > 236D~C
- Advanced 5/2A confirm. After the first autocombo you need to manually cancel into 236A/B/C to be able to cancel the stance. Any version will work so if you're having trouble with the stance cancel try other combinations of buttons to see which feels best.
- 2/5A > 2/5B > 5C > 236B > 236D~C
- Works from most ranges on standing or crouching, but not at max range.
- 2/5A > 2/5B > 5C > 236C > 236D~B
- More consistent than the above, but harder to extend because of the ender.
- 2/5A > 2/5B > 2C > 236D~B
- 2/5A > 2/5B > 2C > reafe assist > 236B > 236D~C
2C starter
- 2C > 236D~B > A+B+C > Dash > 5AA > 5B > 5C > Airdash > 5AA > 5B > 5C > 236A > 236D~C
236A/B/C Starter
- 236A/B > 236D~C
- 236A > 236D~D > 5A > 5B > 5C > 236B > 236D~C
- Only works near the opponent otherwise the 236D~D will not connect and they will fly outward and tech.
- 236C > 236D~B
623A/B/C Starter
- 623A/B (ch) > 236A/B > 236D~C
- 623C > 5A > 5B > Jump Cancel > j.B > (j.C) / (Jump Cancel > j.B > j.D)
- 623C > 5B > 236A/B > 236D~C
- 623C > 5B > Jump Cancel > j.A > j.B > Jump Cancel > j.B > j.C
236D~X Starter
- 236D~B > A+B+C > Dash > 5AA > 5B > 5C > Airdash > j.B > j.C > 5AA > 5B > 5C > 236B > 236D~C
- 236D~D > Dash > 5AA > 5B > 5C > 236A > 236D~C
Grab Starters
- Grab > A+B+C > 5AA > 5B > 5C > Airdash > j.B > j.C > 5AA > 5B > 5C > Jump Cancel > j.A > j.B > j.C > (j.D > 236XX)
- Grab > A+B+C > 5AA > 5B > 5C > Airdash > j.B > j.C > 5AA > 5B > 5C > (236A > 236D~C) / (236XX/623XX)
Corner
- 2/5A > 2/5B > 5C > 236B > 236D~C
- 2/5A > 2/5B > 5C > 236B > 236D~A > 5B > Jump Cancel > j.B Jump Cancel > j.B > j.C
Enchant Boost Starters
- 2/5A > 5B > 5C > 236[X]~X > Micro Dash > 5A > 5B > 5C > 236[X]~X > Micro Dash > 5A > 5B > 5C > 236B > 236D~C
- 2/5A > 5B > 6C > Airdash > j.B > j.C > 5AA > 5B > 5C > 236A > 236D~C
Support Knight Combos
236A/B/C Starter
- 236A/B > 236D~C > A+B+C > dash > 5B > reafe assist > airdash > j.B > j.C > 5AA > 5B > 5C > (236A > 236D~C) / (623XX > falsaria assist)
- 236C > 236D~B > A+B+C > dash > 5B > 5C > airdash > j.B > j.C > 5AA > 5B > 5C > (236A > 236D~C) / (623XX > falsaria assist)
623A/B/C Starter
- 623B > A+B+C > dash > 5B > reafe assist > airdash > j.B > j.C > 5AA > 5B > 5C > (236A > 236D~C) / (623XX > falsaria assist)
236D~X Starters
- 236D~C > A+B+C > Dash > 5B > Reafe assist > Airdash > j.B > j.C > 5AA > 5B > 5C > 236A > 236D~C
- You don't need to input "Dash" if you do this combo when the opponent is in the corner. Also note that if this combo is done in midscreen keep in mind the beginning 236D~C will in fact put you on the other side of the opponent after the Enchant Boost activation.
Corner
- 623B > A+B+C > 5B > Reafe assist > Airdash > j.B > j.C > 5AA > 5B > 5C > 236A > 236D~C
- 623C > 5A > 5B > Jump Cancel > j.A > j.B > Jump Cancel > j.A > j.B > j.C > (j.D > Mercenary Arthur assist > j.236D~C)
- Counter Hit 623A/B also leads into this same combo.
Videos
- Iai Arthur official combo video A by Square Enix (2017)
- Iai Arthur official combo video B by Square Enix (2017)
Colors
External Links
- Twitter hashtag: #MAAB_IA


