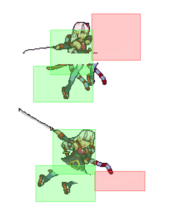
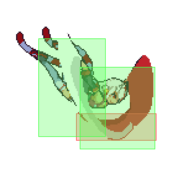
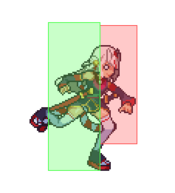
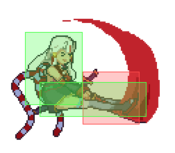
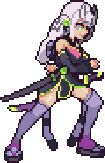
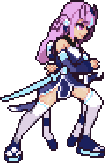
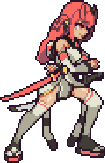
Idol Showdown/Ayame Nakiri: Difference between revisions
(→Colors: added references for colors, no idea what color 3 is) |
m (→22X) |
||
| (202 intermediate revisions by 17 users not shown) | |||
| Line 1: | Line 1: | ||
{{Version-IS|4.0.9}} | |||
[[File:IS_Ayame_Logo.png|250px]] | [[File:IS_Ayame_Logo.png|250px]] | ||
'''Playful Giggling Ojou''' - ''Nonstop Oni Offense'' | '''Playful Giggling Ojou''' - ''Nonstop Oni Offense'' <br> | ||
'''Difficulty''' - ★★☆☆☆☆ | |||
{{CharacterIntro-IS|char= Ayame | |||
|hp=950 | |||
|backdash=24F (1~4F {{Property-IS|Full}} Invuln) (1~18F {{Property-IS|grab}} Invuln) | |||
|walkspeed=[[Idol_Showdown/Game_Data#Ground_Movement_Data|Fast]] | |||
|intro= | |||
==Introduction== | ==Introduction== | ||
{{ | {{Content Box|content= | ||
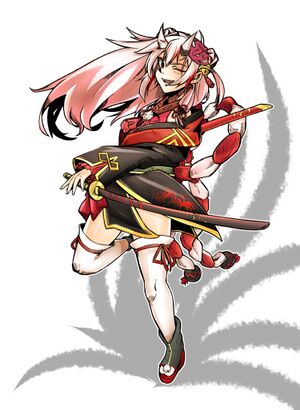
|intro=[[File: | Ayame is a neutral oriented rushdown character who excels at mid to close-ranged poking and pressure. | ||
Ayame focuses on poking at the opponent in the close to midrange with her pokes such as {{input|2M}} and {{input|236L}}/{{input|236M}}. She can use her long pokes to poke and close the distance to her opponent with well-rounded options while keeping opposing aggression at check with a highly impactful and infamous reversal, {{input|22H}}. With the help of her faster buttons such as {{input|5L}} and {{input|2L}}, Ayame becomes effective at locking down her opponent and keeping them at their toes with frame traps and grabs. She can utilize her {{input|214X}} to evade some fireballs or snipe the startup of the opponent's attacks. Most of Ayame's gameplan revolves around conditioning your opponent and making smart and intelligent reads on offense. Great attention to the opponent's tendencies and habits is key, as her reward off of neutral pokes and frametraps is very high. Overall Ayame is a simple character with an easy-to-understand gameplan, but she has complexity in her combo routes and offense. She is a character who is easy to pick up, but requires a strong, neutrally sound player to master. | |||
{{CharacterPickReasons | |||
|intro=[[File:IS_Ayame_Icon.png|100px]] | |||
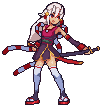
'''Ayame''' is a high-speed oni who excels in closing in on opponents from the midrange. She can keep the pressure on opponents with her dual katanas, leaving little room to escape. | '''Ayame''' is a high-speed oni who excels in closing in on opponents from the midrange. She can keep the pressure on opponents with her dual katanas, leaving little room to escape. | ||
|pros= *An easy-to-play and fast well-rounded Character | |pros= *An easy-to-play and fast well-rounded Character | ||
*Great Anti-Air options | *Great Anti-Air options | ||
* | *Great conversion potential | ||
* | *Good mid-range pokes | ||
* | *Massive high damage invincible reversal | ||
*Good meter gain | *Good star meter gain | ||
*Cute as heck! | *Cute as heck! | ||
|cons= *No meterless projectiles | |cons= *No meterless projectiles | ||
*Linear pressure | *Linear pressure | ||
*Poor anti-zoning gameplay | *Poor resourceless anti-zoning gameplay | ||
* | *Star meter and superchat reliance | ||
* | |width=100 | ||
}} | |||
===Recommended Collabs=== | |||
'''2 BAR COSTS:''' They are cheap, most effective in eengaging or anti-zoning. | |||
* [[File:IS_Kiara_Icon.png|40px]] '''[[Idol Showdown/Collabs#Kiara_Takanashi|Kiara]]''' | |||
:* Kiara's L+H off collab is a projectile reflect, which is obviously very useful in projectile oriented matchups such as Suisei, Sora, and Botan. | |||
:* Her call-in is a strong tool for initiation and sniping counterpokes with good reward. It also acts as a combo extender that Ayame may benefit from. | |||
* [[File:IS_Subaru_Icon.png|40px]] '''[[Idol Showdown/Collabs#Subaru_Oozara|Subaru]]''' | |||
:* Subaru's call-in is a decent fullscreen poke that Ayame can use to close the distance and for combo conversions. | |||
:* Her L+H off collab is a cheap and powerful neutral tool. Extremely useful for forcing an approach vs any character, especially zoners. | |||
:* Recommended if you want to focus on neutral more with the ability to be either safe or be aggressive in approach. | |||
* [[File:IS_Kaela_Icon.png|40px]] '''[[Idol Showdown/Collabs#Kaela_Kovalskia|Kaela]]''' | |||
:* Kaela's call-in is a high damage hammer swing that wallsplats in the corner. This is a useful tool for Ayame to use as a way to convert from mixups such as universal overhead. | |||
:* Her L+H off collab is a useful as way to buff Ayame's offense and defense. Preventing chip damage and a general damage reduction is good for Ayame since she is low health and the damage buff makes her already high damage even scarier. | |||
'''3 BAR COSTS:''' Expensive superchat cost. Generally doesn't not get a lot of usage for Ayame | |||
* [[File:IS_Moona_Icon.png|40px]] '''[[Idol Showdown/Collabs#Moona_Hoshinova|Moona]]''' | |||
:* Moona's {{input|214S}} call-in is a nearly unreactable snipe that is certain to catch your opponents off guard during scrambles. Ayame is unfortunately not able to take advantage of OTG that Moona offers, but it is still a decent neutral snipe tool. | |||
:* Her L+H off collab is the opposite of Kanata's waves assist. Moona's off-collab is a costlier yet the most aggressive form of gravity where you are able to lock down your opponent at one position. It may be beneficial for Ayame with the lockdown that Moona's gravity offers. | |||
:* Recommended if you want to have a subtle yet aggressive approach in neutral while retaining the ability to have a snipe to discourage disrespect. | |||
}} | |||
}} | }} | ||
== | == Moves == | ||
=== Standing Normals === | === Standing Normals === | ||
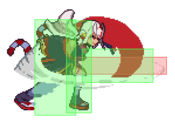
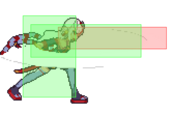
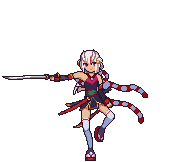
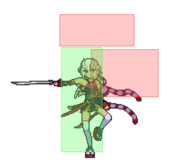
====== <font style="visibility:hidden" size="0">5L</font> ====== | ====== <font style="visibility:hidden" size="0">5L</font> ====== | ||
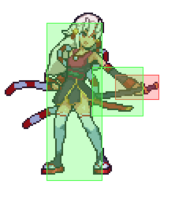
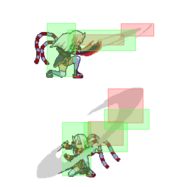
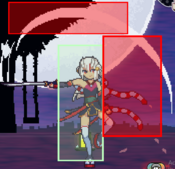
{{MoveData | {{MoveData-IS | ||
|image=Ayame_standing_light.png | |image=Ayame_standing_light.png | ||
|hitbox=IS_Ayame_5L_hitbox.png | |||
|caption=Ittoryu | |caption=Ittoryu | ||
|name=5L | |name=5L | ||
|data= | |data= | ||
{{AttackData-IS | {{AttackData-IS | ||
|damage=25 | |damage=25 | ||
|guard=Mid | |guard=Mid | ||
|startup=5 | |startup=5 | ||
|active= | |active=3 | ||
|recovery= | |recovery=11 | ||
|advHit=+ | |advHit=+1 | ||
|advBlock=- | |advBlock=-2 | ||
|description=A quick mid poke. Useful for her stagger pressure when chained | |description= | ||
* Self-Gatling Count: 3 | |||
A quick mid poke and Ayame's fastest startup normal. Useful for her stagger pressure when chained into itself or {{input|2L}} and {{input|5M}}. The speed also makes this a good option to check the opponent as a general abare tool. | |||
This is one of your most important pressure tools used to discourage your opponent is pressing buttons at a close distance. Staggering with {{input|5L}}, {{input|2L}} and throw is the cornerstone of her pressure. | |||
}} | }} | ||
}} | }} | ||
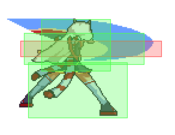
====== <font style="visibility:hidden" size="0">5M</font> ====== | ====== <font style="visibility:hidden" size="0">5M</font> ====== | ||
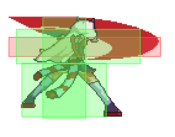
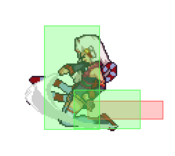
{{MoveData | {{MoveData-IS | ||
|image=Ayame.png | |image=Ayame.png | ||
|hitbox=IS_Ayame_5M_hitbox.png | |||
|caption=Nitoryu | |caption=Nitoryu | ||
|name=5M | |name=5M | ||
|data= | |data= | ||
{{AttackData-IS | {{AttackData-IS | ||
|damage=60 | |damage=60 | ||
|guard=Mid | |guard=Mid | ||
|startup= | |startup=8 | ||
|active= | |active=5 | ||
|recovery= | |recovery=14 | ||
|advHit= | |advHit=+1 | ||
|advBlock=- | |advBlock=-3 | ||
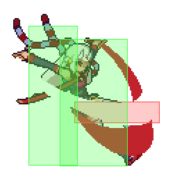
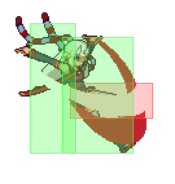
|description=A forward advancing slash with good range. Useful for confirming hits and | |description=A forward advancing slash with good range and low recovery. Useful for continuing stagger pressure, setting up spacing traps, and confirming hits. | ||
A great normal to use for poking and whiff punishing from slightly farther than point blank range. It is slightly forward advancing, so it can be good as a pressure ender since it's safe on block. | |||
}} | }} | ||
}} | }} | ||
====== <font style="visibility:hidden" size="0">5H</font> ====== | ====== <font style="visibility:hidden" size="0">5H</font> ====== | ||
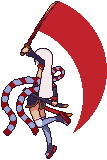
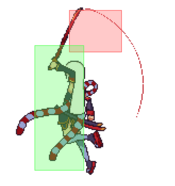
{{MoveData | {{MoveData-IS | ||
|image=Ayame 5H.png | |image=Ayame 5H.png | ||
|hitbox=IS_Ayame_5H_hitbox.png | |||
|caption= | |caption= | ||
|name=5H | |name=5H | ||
|data= | |data= | ||
{{AttackData-IS | {{AttackData-IS | ||
|damage=85 | |damage=85 | ||
|guard=Mid | |guard=Mid | ||
|startup= | |startup=12 | ||
|active= | |active=3 | ||
|recovery= | |recovery=19 | ||
|advHit= | |advHit=-2 | ||
|advBlock=- | |advBlock=-6 | ||
|description=A shorter range double slash. Good for confirming into 22L for combos and stagger pressure. Wall bounces on corner hit for extra combo conversions. | |description=A shorter range double slash. Good for confirming into {{input|22L}} for combos and stagger pressure. Wall bounces on corner hit for extra combo conversions. | ||
Quite a slow normal. Not generally used for poking. | |||
}} | }} | ||
}} | }} | ||
| Line 83: | Line 136: | ||
=== Crouching Normals === | === Crouching Normals === | ||
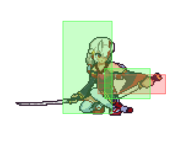
====== <font style="visibility:hidden" size="0">2L</font> ====== | ====== <font style="visibility:hidden" size="0">2L</font> ====== | ||
{{MoveData | {{MoveData-IS | ||
|image=Ayame 2L.png | |image=Ayame 2L.png | ||
|hitbox=IS_Ayame_2L_hitbox.png | |||
|caption= | |caption= | ||
|name=2L | |name=2L | ||
|data= | |data= | ||
{{AttackData-IS | {{AttackData-IS | ||
|damage=20 | |damage=20 | ||
|guard=Low | |guard=Low, Air Unblockable | ||
|startup= | |startup=6 | ||
|active= | |active=2 | ||
|recovery= | |recovery=12 | ||
|advHit=+ | |advHit=+1 | ||
|advBlock=- | |advBlock=-2 | ||
|description=A quick jab that hits low. Another important tool for general abare and her stagger pressure in tandem with 5L. It's | |description= | ||
* Self-Gatling Count: 2 | |||
A quick jab that hits low. Another important tool for general abare and her stagger pressure in tandem with {{input|5L}}. | |||
Useful when used in tandem with {{input|5L}} as strings for stagger pressure, tick throws, and frame traps. It's also useful to check your opponent for trying to jump out of your pressure since it is air unblockable. | |||
}} | }} | ||
}} | }} | ||
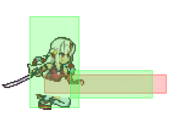
====== <font style="visibility:hidden" size="0">2M</font> ====== | ====== <font style="visibility:hidden" size="0">2M</font> ====== | ||
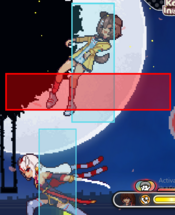
{{MoveData | {{MoveData-IS | ||
|image=Ayame 2M.png | |image=Ayame 2M.png | ||
|hitbox=IS_Ayame_2M_hitbox.png | |||
|caption= | |caption= | ||
|name=2M | |name=2M | ||
|data= | |data= | ||
{{AttackData-IS | {{AttackData-IS | ||
|damage=55 | |damage=55 | ||
|guard=Low | |guard=Low, Air Unblockable | ||
|startup= | |startup=9 | ||
|active= | |active=3 | ||
|recovery= | |recovery=20 | ||
|advHit= | |advHit=0 | ||
|advBlock=- | |advBlock=-5 | ||
|description=A long range low slash. This normal is one of Ayame's most important pokes | |description=A long range low slash that is generally not punishable on block when spaced. This normal is one of Ayame's most important pokes as it's one of her farthest ranged buttons that confirms easily into a combo with {{input|236X}} even at max range. | ||
{{input|2M}} is a vital tool to use in pressure and poking due to it being a low and having long range. Useful in catching your opponent walking backwards in the midrange and easy hitconfirms into high damage. | |||
}} | }} | ||
}} | }} | ||
====== <font style="visibility:hidden" size="0">2H</font> ====== | ====== <font style="visibility:hidden" size="0">2H</font> ====== | ||
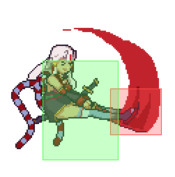
{{MoveData | {{MoveData-IS | ||
|image=Ayame 2H.png | |image=Ayame 2H.png | ||
|hitbox=IS_Ayame_2H_hitbox.png | |||
|caption= | |caption= | ||
|name=2H | |name=2H | ||
|data= | |data= | ||
{{AttackData-IS | {{AttackData-IS | ||
|damage= | |damage=86(43x2) | ||
|guard=Mid | |guard=Mid, Air Unblockable | ||
|startup=11 | |startup=11 | ||
|active= | |active=2(10)3 | ||
|recovery= | |recovery=24 | ||
|advHit= | |advHit=Launch | ||
|advBlock=- | |advBlock=-13 | ||
|description=A | |invul= (5~25) {{Property-IS|head}} | ||
|description=A two-hitting slash with a significant reach. It is a unique {{input|2H}} as it does not directly launch your opponent to the air. The entire move will be active unless cancelled by a special cancel or jump cancel on block/hit. The second hit has a much more vertical hitbox and is a multi-hit if it lands by itself. | |||
This button has long range, but is kind of awkward to convert from. It is advised to use this move as an anti-air diagonal to Ayame’s reach instead of above (where 22L / 22M is more effective) unless against certain HEAD moves. | |||
}} | }} | ||
}} | }} | ||
====== <font style="visibility:hidden" size="0">3H</font> ====== | ====== <font style="visibility:hidden" size="0">3H</font> ====== | ||
{{MoveData | {{MoveData-IS | ||
|image=Ayame 3H.png | |image=Ayame 3H.png | ||
|hitbox=IS_Ayame_3H_hitbox.png | |||
|caption=Haiya | |caption=Haiya | ||
|name=3H | |name=3H | ||
|data= | |data= | ||
{{AttackData-IS | {{AttackData-IS | ||
|damage= | |damage=95 | ||
|guard=Low | |guard=Low, Air Unblockable | ||
|startup=11 | |startup=11 | ||
|active= | |active=3 | ||
|recovery= | |recovery=24 | ||
|advHit= | |advHit=HKD | ||
|advBlock=- | |advBlock=-11 | ||
|description=A generic sweep. | |description=A generic sweep that knocks up for a combo or leads to a strong knockdown when used as a combo ender. Useful for extending combos and setting up oki. | ||
}} | }} | ||
}} | }} | ||
| Line 158: | Line 222: | ||
=== Jumping Normals === | === Jumping Normals === | ||
====== <font style="visibility:hidden" size="0">j.L</font> ====== | ====== <font style="visibility:hidden" size="0">j.L</font> ====== | ||
{{MoveData | {{MoveData-IS | ||
|image=Ayame j.L.png | |image=Ayame j.L.png | ||
|hitbox=IS_Ayame_JL_hitbox.png | |||
|caption= | |caption= | ||
|name=j.L | |name=j.L | ||
|data= | |data= | ||
{{AttackData-IS | {{AttackData-IS | ||
|damage=30 | |damage=30 | ||
|guard=High | |guard=High | ||
|startup= | |startup=6 | ||
|active= | |active=5 | ||
|recovery= | |recovery=Until Landing + 2 | ||
|advHit= | |advHit= | ||
|advBlock= | |advBlock= | ||
|description= Quick jumping normal, not generally very useful. Could work as a fast air to air. | |description= Quick jumping normal, not generally very useful outside of combos. Could work as a fast air to air. | ||
For jumpins, {{input|j.L}} may be used as an alternative to {{input|j.M}} due to its deceptive blockstun that sets up into a frame trap or a tick throw. | |||
}} | }} | ||
}} | }} | ||
====== <font style="visibility:hidden" size="0">j.M</font> ====== | ====== <font style="visibility:hidden" size="0">j.M</font> ====== | ||
{{MoveData | {{MoveData-IS | ||
|image=Ayame j.M.png | |image=Ayame j.M.png | ||
|hitbox=IS_Ayame_JM_hitbox.png | |||
|caption= | |caption= | ||
|name=j.M | |name=j.M | ||
|data= | |data= | ||
{{AttackData-IS | {{AttackData-IS | ||
|damage= | |damage=86(43x2) | ||
|guard=High | |guard=High | ||
|startup= | |startup=9 | ||
|active= | |active=4(8)4 | ||
|recovery= | |recovery=Until Landing + 3 | ||
|advHit= | |advHit= | ||
|advBlock= | |advBlock= | ||
|description= 2 hitting jumping normal. Useful in combos and jumpins. On taller characters you can get both hits of | |description= 2 hitting jumping normal. Useful in combos and jumpins. On taller characters you can get both hits of {{input|j.M}} to connect, leading to some strong combos. | ||
This is one of her go to jumpins as it has good jumpin utility as it has a strong downwards hitbox. | |||
}} | }} | ||
}} | }} | ||
====== <font style="visibility:hidden" size="0">j.H</font> ====== | ====== <font style="visibility:hidden" size="0">j.H</font> ====== | ||
{{MoveData | {{MoveData-IS | ||
|image=Ayame j.H.png | |image=Ayame j.H.png | ||
|hitbox=IS_Ayame_JH_hitbox.png | |||
|caption= | |caption= | ||
|name=j.H | |name=j.H | ||
|data= | |data= | ||
{{AttackData-IS | {{AttackData-IS | ||
|damage=90 | |damage=90 | ||
|guard=High | |guard=High | ||
|startup= | |startup=13 | ||
|active= | |active=4 | ||
|recovery= | |recovery=Until Landing + 4 | ||
|advHit= | |advHit= | ||
|advBlock= | |advBlock= | ||
|description=A larger slower | |description=A larger slower jump-in. Useful to use in tandem with {{input|j.M}} as her go to jumpins. Can hit crossup which is useful in her knockdown mixups. | ||
}} | }} | ||
}} | }} | ||
== Universal Mechanics == | === Universal Mechanics === | ||
====== <font style="visibility:hidden" size="0">Throw</font> ====== | ====== <font style="visibility:hidden" size="0">Throw</font> ====== | ||
{{MoveData | {{MoveData | ||
|image=Ayame Throw.png | |image=Ayame Throw.png | ||
|hitbox=IS_Ayame_throw_hitbox.png | |||
|caption= | |caption= | ||
|name=Throw | |name=Throw | ||
|input= | |input={{NotationIcon-IS|l}} '''+''' {{NotationIcon-IS|m}} '''or''' {{NotationIcon-IS|g}} | ||
|data= | |data= | ||
{{AttackData-IS | {{AttackData-IS | ||
|damage=160 | |damage=160 | ||
|guard= | |guard= | ||
|startup=7 | |startup=7 | ||
|active=2 | |active=2 | ||
|recovery= | |recovery=31 | ||
|advHit= | |advHit=+28 | ||
|advBlock= | |advBlock= | ||
|description= | |description= | ||
*Total Frames: 39 | |||
Ayame's universal grab. | |||
}} | }} | ||
}} | }} | ||
| Line 234: | Line 308: | ||
{{MoveData | {{MoveData | ||
|image=Ayame j.L.png | |image=Ayame j.L.png | ||
|hitbox=IS_Ayame_overhead_hitbox.png | |||
|caption= | |caption= | ||
|name=Overhead | |name=Overhead | ||
|input= | |input={{NotationIcon-IS|m}} '''+''' {{NotationIcon-IS|h}} | ||
|data= | |data= | ||
{{AttackData-IS | {{AttackData-IS | ||
|damage=60 | |damage=60 | ||
|guard=High | |guard=High | ||
|startup= | |startup=23 | ||
|active= | |active=3 | ||
|recovery= | |recovery=19 | ||
|advHit= | |advHit=+2 | ||
|advBlock= | |advBlock=-3 | ||
|description=Universal standing overhead | |invul= (6~36) {{Property-IS|grab}} | ||
|description= | |||
*Confirm into 5L or 2L on counterhitting a grab tech | |||
Universal standing overhead. | |||
}} | |||
}} | |||
====== <font style="visibility:hidden" size="0">Superchat Reversal</font> ====== | |||
{{MoveData | |||
|image=Ayame 5H.png | |||
|hitbox=IS_Ayame_SCR_hitbox.png | |||
|caption= | |||
|name=Superchat Reversal | |||
|input=(blocking) {{NotationIcon-IS|6}} '''+''' {{NotationIcon-IS|m}} '''+''' {{NotationIcon-IS|h}} | |||
|data= | |||
{{AttackData-IS | |||
|damage=0 | |||
|guard=Mid | |||
|startup=16 | |||
|active=2 | |||
|recovery=23 | |||
|advHit=0 | |||
|advBlock=-10 | |||
|invul= (1~17) {{Property-IS|full}} | |||
|description= | |||
*Superchat Reversal | |||
}} | }} | ||
}} | }} | ||
== Special Attacks == | === Special Attacks === | ||
====== <font style="visibility:hidden" size="0">236X</font> ====== | ====== <font style="visibility:hidden" size="0">236X</font> ====== | ||
{{MoveData | {{MoveData | ||
|name=Asura's Fury | |name=Asura's Fury | ||
|input=236 | |input={{NotationIcon-IS|236}} '''+''' {{NotationIcon-IS|l}} '''/'''{{NotationIcon-IS|m}} '''/'''{{NotationIcon-IS|h}} | ||
|image=IS Ayame 236Followup1.png | |image=IS Ayame 236Followup1.png | ||
|image2=IS Ayame 236Followup2.png | |image2=IS Ayame 236Followup2.png | ||
|image3=IS Ayame 236Followup3.png | |image3=IS Ayame 236Followup3.png | ||
|hitbox=IS_Ayame_236L_hitbox.png | |||
|hitbox2=IS_Ayame_236LL_hitbox.png | |||
|hitbox3=IS_Ayame_236LLL_hitbox.png | |||
|caption= | |caption= | ||
|data= | |data= | ||
| Line 263: | Line 366: | ||
|version=L / 5S | |version=L / 5S | ||
|damage=40 | |damage=40 | ||
|guard= | |guard=Mid | ||
|startup= | |startup=11 | ||
|active= | |active=3 | ||
|recovery= | |recovery=20 | ||
|advHit= | |advHit=-3 | ||
|advBlock=- | |advBlock=-7 | ||
}} | }} | ||
{{AttackData-IS | {{AttackData-IS | ||
|header=no | |header=no | ||
|version= | |version=L~L / 5S~S | ||
|damage= | |damage=34 | ||
|guard= | |guard=Mid | ||
|startup= | |startup=10 | ||
|active= | |active=2 | ||
|recovery= | |recovery=24 | ||
|advHit= | |advHit=-6 | ||
|advBlock=- | |advBlock=-10 | ||
}} | }} | ||
{{AttackData-IS | {{AttackData-IS | ||
|header=no | |header=no | ||
|version= | |version=L~M / 5S~M | ||
|damage= | |damage=160(80, 80) | ||
|guard= | |guard=Low, Air Unblockable | ||
|startup= | |startup=22 | ||
|active= | |active=3(10)2 | ||
|recovery= | |recovery=30 | ||
|advHit= | |advHit=KD | ||
|advBlock=- | |advBlock=-20 | ||
|description= | |description= | ||
}} | }} | ||
{{AttackData-IS | {{AttackData-IS | ||
|header=no | |header=no | ||
|version= | |version=L~H / 5S~H | ||
|damage= | |damage=60 | ||
|guard= | |guard=High | ||
|startup= | |startup=23 | ||
|active= | |active=2 | ||
|recovery= | |recovery=19 | ||
|advHit= | |advHit=KD | ||
|advBlock=-9 | |advBlock=-9 | ||
|description= | |||
}} | }} | ||
{{AttackData-IS | {{AttackData-IS | ||
|header=no | |header=no | ||
|version= | |version=L~L~L / 5S~S~S | ||
|damage= | |damage=48 | ||
|guard= | |guard=Mid | ||
|startup= | |startup=13 | ||
|active= | |active=2 | ||
|recovery= | |recovery=30 | ||
|advHit= | |advHit=KD | ||
|advBlock=- | |advBlock=-10 | ||
|description= | |description= | ||
*236L Grants 3 superchats on use | |||
*236LL Grants 2 superchats on use only if the {{input|236X}} command is input a second time | |||
*236LLL Grants 1 superchat on use only if the {{input|236X}} command is input a third time | |||
Ayame's Rekka series. {{input|236L}} on its own is a safe way to end your pressure, but threatening with the rest of the hits is a good way to push stagger pressure. However, most of the hits are unsafe on block. In air juggle, {{input|236LLL}} always knocksdown, making it useful for oki and corner carry. Can be super chat cancelled into {{input|22L}} for a full combo. | |||
By inputing {{input|236L}}~{{input|M}} or {{input|236L}}~{{input|H}}, you will get a low or an overhead followup respectively. Both followups air fairly slow, but a good way to check the opponents reactions as they lead to full combos with resources. The low rekka has a followup hit that will wallsplat if the first hit connects. All followups are superchat cancelable on whiff as long as the first hit of the rekka connected with the opponent. | |||
}} | }} | ||
{{AttackData-IS | {{AttackData-IS | ||
|header=no | |header=no | ||
|version= | |version=M / 5S+ M | ||
|damage= | |damage=45 | ||
|guard= | |guard=Mid | ||
|startup= | |startup=18 | ||
|active= | |active=3 | ||
|recovery= | |recovery=25 | ||
|advHit= | |advHit=-1 | ||
|advBlock=- | |advBlock=-6 | ||
}} | }} | ||
{{AttackData-IS | {{AttackData-IS | ||
|header=no | |header=no | ||
|version= | |version=M~M / 5S+ M~S | ||
|damage= | |damage=40 | ||
|guard= | |guard=Mid | ||
|startup= | |startup=15 | ||
|active= | |active=2 | ||
|recovery= | |recovery=28 | ||
|advHit= | |advHit=-3 | ||
|advBlock=- | |advBlock=-8 | ||
}} | }} | ||
{{AttackData-IS | {{AttackData-IS | ||
|header=no | |header=no | ||
|version= | |version=M~M~M / 5S+ M~S~S | ||
|damage= | |damage=55 | ||
|guard= | |guard=Mid | ||
|startup= | |startup=13 | ||
|active= | |active=2 | ||
|recovery= | |recovery=34 | ||
|advHit= | |advHit=KD | ||
|advBlock=- | |advBlock=-14 | ||
|description= | |||
*236M Grants 3 superchats on use | |||
*236MM Grants 2 superchats on use only if the {{input|236X}} command is input a second time | |||
*236MMM Grants 1 superchat on use only if the {{input|236X}} command is input a third time | |||
Very similar to the L version, however it reaches much farther at the cost of having slower startup and more recovery. This version of rekka is useful for long range poking as it consistently reaches at ranges where 236L or 2M cannot reach. Can be super chat cancelled into 22L for a full combo. | |||
Unlike {{input|236L}}, there are no overhead or low followups. However, the mid followups are still very useful for stagger pressure has they have a huge cancel window. | |||
}} | }} | ||
{{AttackData-IS | {{AttackData-IS | ||
|header=no | |header=no | ||
|version= | |version=H | ||
|damage= | |damage=80 | ||
|guard= | |guard=Mid | ||
|startup= | |startup=14 | ||
|active= | |active=3 | ||
|recovery= | |recovery=25 | ||
|advHit= | |advHit=-3 | ||
|advBlock=- | |advBlock=-8 | ||
}} | }} | ||
{{AttackData-IS | {{AttackData-IS | ||
|header=no | |header=no | ||
|version= | |version=H~H | ||
|damage= | |damage=60 | ||
|guard= | |guard=Mid | ||
|startup= | |startup=11 | ||
|active= | |active=3 | ||
|recovery= | |recovery=25 | ||
|advHit= | |advHit=-3 | ||
|advBlock=- | |advBlock=-8 | ||
}} | }} | ||
{{AttackData-IS | {{AttackData-IS | ||
|header=no | |header=no | ||
|version= | |version=H~H~H | ||
|damage= | |damage=40 | ||
|guard= | |guard=Mid | ||
|startup= | |startup=13 | ||
|active= | |active=2 | ||
|recovery= | |recovery=34 | ||
|advHit= | |advHit=Launch | ||
|advBlock=- | |advBlock=-14 | ||
|description= | |description= | ||
*236H Costs 1 Star Meter and grants 5 superchats on use | |||
*236HH Grants 3 superchats on use only if the {{input|236X}} command is input a second time | |||
*236HHH Grants 2 superchats on use only if the {{input|236X}} command is input a third time | |||
The last hit of the EX rekka launches the opponent high enough to followup on the ground without having to spend a bar for a superchat cancel. Very useful for converting pokes such as {{input|2M}} into full combos without having to spend superchat for the combo conversion. | |||
}} | }} | ||
}} | }} | ||
| Line 402: | Line 508: | ||
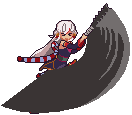
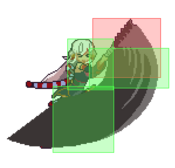
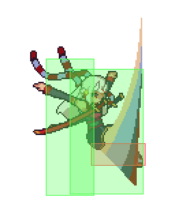
{{MoveData | {{MoveData | ||
|name=Demon Cutter | |name=Demon Cutter | ||
|input= | |input={{NotationIcon-IS|2}} {{NotationIcon-IS|2}} '''+''' {{NotationIcon-IS|l}} '''/'''{{NotationIcon-IS|m}} '''/'''{{NotationIcon-IS|h}} | ||
|image=IS Ayame 22L.png | |image=IS Ayame 22L.png | ||
|image2=IS Ayame 22M Hit2.png | |image2=IS Ayame 22M Hit2.png | ||
|hitbox=IS_Ayame_22L1_hitbox.png | |||
|hitbox2=IS_Ayame_22M_hitbox.png | |||
|hitbox3=IS_Ayame_22H1_hitbox.png | |||
|hitbox4=IS_Ayame_22H2_hitbox.png | |||
|caption= | |caption= | ||
|data= | |data= | ||
{{AttackData-IS | {{AttackData-IS | ||
|version=L / 2S | |version=L / 2S | ||
|damage=75 | |damage=75 | ||
|guard= | |guard=Mid | ||
|startup= | |startup=9 | ||
|active= | |active=6 | ||
|recovery= | |recovery=26 | ||
|advHit= | |advHit=Launch | ||
|advBlock=- | |advBlock=-20 | ||
|description= Ayame swings her katana upwards. One of her most useful combo tools for launching the opponent into a full juggle. This can also be used as a | |description= | ||
*Grants 5 superchats on use | |||
Ayame swings her katana upwards. One of her most useful combo tools for launching the opponent into a full juggle. This can also be used as a serviceable anti-air despite not having head invulnerability, be careful as it is air blockable. Since this move vacuums on hit, it can also be useful to hit extended hurtboxes and punish moves from long distances. | |||
}} | }} | ||
{{AttackData-IS | {{AttackData-IS | ||
|header=no | |header=no | ||
|version=M | |version=M / 2S+ M | ||
|damage=143 | |damage=143(75, 68) | ||
|guard= | |guard=Mid, Air Unblockable | ||
|startup= | |startup=10 | ||
|active= | |active=6(4)4 | ||
|recovery= | |recovery=35 | ||
|advHit=KND | |advHit=KND | ||
|advBlock=- | |advBlock=-47 | ||
|description= Similar to the L version, but this move | |invul= (3~20) {{Property-IS|head}} | ||
*Air Unblockable | |description= | ||
*Grants 5 superchats on use | |||
Similar to the L version, but this move has head invuln through active frames and is air unblockable. Acts as one of her more consistent combo enders for decent oki. | |||
Also useful for getting high combo damage with super chat by using {{input|22M}} SCC {{input|22L}} in combos. | |||
*Air Unblockable | |||
}} | }} | ||
{{AttackData-IS | {{AttackData-IS | ||
|header=no | |header=no | ||
|version=H | |version=H / 2S+ H | ||
|damage= | |damage= 180(75, 35, 70) | ||
|guard= | |guard=Mid, Air Unblockable | ||
|startup= | |startup=6 | ||
|active= | |active=5(4)11 | ||
|recovery=- | |recovery=41 | ||
|advHit= | |invul= (1~10) {{Property-IS|full}} | ||
|advBlock= | |advHit=KND | ||
|description= This version of the attack is her invincible reversal | |advBlock=-48 | ||
|description= | |||
*Costs 1 Star Meter and grants 5 superchats on use | |||
This version of the attack is her invincible reversal. It hits all around her head while also being a great anti-air with air unblockable properties. | |||
{{input|22H}} also has very fast startup, which works extremely well in tandem to its impressive range. This combination makes it very good at punishing specific moves that would otherwise not be punishable. | |||
}} | }} | ||
}} | }} | ||
| Line 451: | Line 568: | ||
{{MoveData | {{MoveData | ||
|name=Oni Flip | |name=Oni Flip | ||
|input=214 | |input={{NotationIcon-IS|214}} '''+''' {{NotationIcon-IS|l}} '''/'''{{NotationIcon-IS|m}} '''/'''{{NotationIcon-IS|h}} | ||
|image=IS Ayame 214L.png | |image=IS Ayame 214L.png | ||
|image2=IS Ayame 214M.png | |image2=IS Ayame 214M.png | ||
|hitbox=IS_Ayame_214L_hitbox.png | |||
|hitbox2=IS_Ayame_214M_hitbox.png | |||
|caption= | |caption= | ||
|data= | |data= | ||
{{AttackData-IS | {{AttackData-IS | ||
|version=L / 4S | |version=L / 4S | ||
|damage=75 | |damage=75 | ||
|guard= | |guard=Mid | ||
|startup= | |startup=17 | ||
|active= | |active=2 | ||
|recovery= | |recovery=12 | ||
|advHit= | |advHit=+1~ | ||
|advBlock=- | |advBlock=-2~ | ||
|description= Ayame does a short quick flip-kick, useful as a combo ender for good oki. 214x flips can also go over some fireballs, but it is very inconsistent and spacing dependent. Advantage on block is also dependent on spacing. | |description= | ||
* Grants 3 superchats on use | |||
Ayame does a short quick flip-kick, useful as a combo ender for good oki. 214x flips can also go over some fireballs, but it is very inconsistent and spacing dependent. Advantage on block is also dependent on spacing. | |||
}} | }} | ||
{{AttackData-IS | {{AttackData-IS | ||
|header=no | |header=no | ||
|version=M | |version=M / 4S+ M | ||
|damage=75 | |damage=75 | ||
|guard= | |guard=Mid | ||
|startup= | |startup=23 | ||
|active= | |active=6 | ||
|recovery= | |recovery=16 | ||
|advHit= | |advHit=+3~ | ||
|advBlock=- | |advBlock=-2~ | ||
|description= Same as the L version, but she goes much farther. This version can be used in for combos in the corner as well as tech traps. | |description= | ||
* Grants 3 superchats on use | |||
* Frame advantage on crouch block: +1 | |||
* Frame advantage on crouch hit: +6 | |||
Same as the L version, but she goes much farther. This version can be used in for combos in the corner as well as tech traps. As a result of having more active frames, it can potentially be closer to 0 on block depending on spacing. | |||
}} | }} | ||
{{AttackData-IS | {{AttackData-IS | ||
|header=no | |header=no | ||
|version=H | |version=H / 4S + H | ||
|damage=65 | |damage=65 | ||
|guard= | |guard=Mid | ||
|startup= | |startup=19 | ||
|active= | |active=4 | ||
|recovery= | |recovery=11 | ||
|advHit= | |advHit=+4~+7 | ||
|advBlock=- | |advBlock=0~+3 | ||
|description= | |invul= (8~27) {{Property-IS|projectile}} | ||
* | |description= | ||
*Costs 1 Star Meter and grants 3 superchats on use | |||
*Frame advantage on corner crossup stand block: +1 | |||
*Frame advantage on corner crossup stand hit: +5 | |||
Similar to the M version, but is faster goes fullscreen. | |||
*Great gap closer in combos especially from {{input|2H}} starters or during rejump combos. | |||
*Useful for surprise attacks to beat fireball startup from full screen. | *Useful for surprise attacks to beat fireball startup from full screen. | ||
*For some reason crosses up in the corner against standing opponents and leads to greater frame advantage. | |||
}} | }} | ||
}} | }} | ||
| Line 498: | Line 629: | ||
{{MoveData | {{MoveData | ||
|name=Heavenly Oni Flip | |name=Heavenly Oni Flip | ||
|input= | |input='''Air Only'''{{NotationIcon-IS|s}} | ||
|image=IS Ayame 214M.png | |image=IS Ayame 214M.png | ||
|hitbox=IS_Ayame_J214L_hitbox.png | |||
|caption= | |caption= | ||
|data= | |data= | ||
{{AttackData-IS | {{AttackData-IS | ||
|version=L/M/H/S | |version=L/M/H/S | ||
|damage=75 | |damage=75 | ||
|guard= | |guard=Mid | ||
|startup= | |startup=17 | ||
|active= | |active=2 | ||
|recovery= | |recovery=Until Landing + 16 | ||
|advHit= | |advHit=+5~+17 | ||
|advBlock= | |advBlock=-19~-6 | ||
|description= Ayame does a quick flip attack on air going downward. Mostly used to as a combo | |description= | ||
* Grants 3 superchats on use | |||
Ayame does a quick flip attack on air going downward that causes a groundbounce on air hit. Mostly used to as a combo extender and a way to leverage 22S mixups. All versions are unsafe on block, but if properly spaced can be unpunishable due to pushback. | |||
*Leads to combos on hit, so good for SCCing into and going over lows and fireballs. | |||
}} | }} | ||
}} | }} | ||
| Line 518: | Line 653: | ||
{{MoveData | {{MoveData | ||
|name=Karma and Shiranui | |name=Karma and Shiranui | ||
|input= | |input={{NotationIcon-IS|2}} {{NotationIcon-IS|2}} '''+''' {{NotationIcon-IS|s}} | ||
|image=IS Ayame 22S Startup.png | |image=IS Ayame 22S Startup.png | ||
|image2=IS Ayame 22S-Ghost Updated.png | |image2=IS Ayame 22S-Ghost Updated.png | ||
| Line 524: | Line 659: | ||
|data= | |data= | ||
{{AttackData-IS | {{AttackData-IS | ||
|damage= | |version=Projectile | ||
|guard= | |damage=5 | ||
|startup= | |guard=Mid | ||
|active= | |startup=15 | ||
|recovery= | |active=Until Offscreen | ||
|advHit= | |recovery=25 | ||
|advBlock=- | |advHit=+1 | ||
|description= | |advBlock=-2 | ||
* | |description= | ||
*Costs 1 Star Meter and grants 10 superchats on use | |||
*Can be used to make attacks safe | *Can be used to make attacks safe | ||
*Useful for pressure and mixups | *Useful for pressure and mixups | ||
Ayame summons a wisp projectile that plants a bomb on the opponent that will detonate after a short amount of time. The wisp projectile will inflict the detonation status even on block, and can be setup in combos or blockstring. The detonation itself occurs shortly after the projectile hits. The detonation is blockable, but Ayame can leverage it for mixups. | |||
The ghosts have a few set paths they can travel along the screen which are chosen at random. | |||
}} | |||
{{AttackData-IS | |||
|version=Detonation | |||
|damage=75(15x5) | |||
|guard=Mid | |||
|startup=107 | |||
|active=1x5 | |||
|recovery=- | |||
|advHit=+44 | |||
|advBlock=+38 | |||
|description= | |||
*Advantage based on Ayame not acting until detonation occurs | |||
*Ayame's shadow will appear behind the opponent 4 frames before the detonation occurs | |||
}} | }} | ||
}} | }} | ||
==Super Star Attack== | ===Super Star Attack=== | ||
{{MoveData | {{MoveData | ||
|name=I'm the Real One! | |name=I'm the Real One! | ||
|input= | |input={{NotationIcon-IS|236}} '''+''' {{NotationIcon-IS|s}} | ||
|image=IS Ayame 236S.png | |image=IS Ayame 236S.png | ||
|image2=IS Ayame 22S Active.png | |image2=IS Ayame 22S Active.png | ||
| Line 547: | Line 699: | ||
|data= | |data= | ||
{{AttackData-IS | {{AttackData-IS | ||
|damage= | |damage=288(19x14, 22) | ||
|guard= | |guard=Mid | ||
|startup= | |startup=6 | ||
|active= | |active=2(3)x15 | ||
|recovery= | |recovery=39 | ||
|advHit= | |advHit=KD | ||
|advBlock=- | |advBlock=-29 | ||
|description=High damaging super for 2 star gauge. Has high scaled damage, so a very useful way to spend meter for damage at the end of combos. This is also invincible on startup, but 22H is a better reversal in general. | |invul= (1~7) {{Property-IS|full}} | ||
|description= | |||
*Minimum Damage: 121 | |||
*Deals 61 chip damage on block | |||
*Costs 2 Star Meter and grants 5 superchats on use | |||
High damaging super for 2 star gauge. Has high scaled damage, so a very useful way to spend meter for damage at the end of combos. This is also invincible on startup, but 22H is a better reversal in general. | |||
}} | }} | ||
}} | }} | ||
==Colors== | ==Colors== | ||
| Line 653: | Line 720: | ||
{{ColorGallery/Color|2| text= Cosplay 1<hr>{{Small|Oozora Subaru (Hololive)}}}} | {{ColorGallery/Color|2| text= Cosplay 1<hr>{{Small|Oozora Subaru (Hololive)}}}} | ||
{{ColorGallery/Color|3| text= Cosplay 2<hr>{{Small|Kazama Iroha (Hololive)}}}} | {{ColorGallery/Color|3| text= Cosplay 2<hr>{{Small|Kazama Iroha (Hololive)}}}} | ||
{{ColorGallery/Color|4| text= Cosplay 3}} | {{ColorGallery/Color|4| text= Cosplay 3<hr>{{Small|Kagura Nana (Character Designer)}}}} | ||
{{ColorGallery/Color|5| text= Cosplay 4<hr>{{Small|Murasaki Shion (Hololive)}}}} | {{ColorGallery/Color|5| text= Cosplay 4<hr>{{Small|Murasaki Shion (Hololive)}}}} | ||
{{ColorGallery/Color|6| text= Cosplay 5<hr>{{Small|Minato Aqua (Hololive)}}}} | {{ColorGallery/Color|6| text= Cosplay 5<hr>{{Small|Minato Aqua (Hololive)}}}} | ||
{{ColorGallery/Color|7| text= Cosplay 6<hr>{{Small|Baiken (Guilty Gear)}}}} | {{ColorGallery/Color|7| text= Cosplay 6<hr>{{Small|Baiken (Guilty Gear)}}}} | ||
{{ColorGallery/Color|8| text= Cosplay 7<hr>{{Small|Ookami Mio (Hololive)}}}} | |||
{{ColorGallery/Color|9| text= Cosplay 8<hr>{{Small|Shirakami Fubuki (Hololive)}}}} | |||
{{ColorGallery/Color|10| text= Cosplay 9<hr>{{Small|Jett (Valorant)}}}} | |||
{{ColorGallery/Color|11| text= Cosplay 10<hr>{{Small|Nezuko Kamado (Demon Slayer)}}}} | |||
}} | }} | ||
==Navigation== | ==Navigation== | ||
{{CharacterSubnav-IS}} | |||
{{Navbox-IS}} | {{Navbox-IS}} | ||
[[Category:Ayame Nakiri]] | [[Category:Ayame Nakiri]] | ||
[[Category:Idol Showdown]] | [[Category:Idol Showdown]] | ||
Latest revision as of 10:51, 13 June 2024
Playful Giggling Ojou - Nonstop Oni Offense
Difficulty - ★★☆☆☆☆
Introduction
Ayame is a neutral oriented rushdown character who excels at mid to close-ranged poking and pressure.
Ayame focuses on poking at the opponent in the close to midrange with her pokes such as 2M and 236L/236M. She can use her long pokes to poke and close the distance to her opponent with well-rounded options while keeping opposing aggression at check with a highly impactful and infamous reversal, 22H. With the help of her faster buttons such as 5L and 2L, Ayame becomes effective at locking down her opponent and keeping them at their toes with frame traps and grabs. She can utilize her 214X to evade some fireballs or snipe the startup of the opponent's attacks. Most of Ayame's gameplan revolves around conditioning your opponent and making smart and intelligent reads on offense. Great attention to the opponent's tendencies and habits is key, as her reward off of neutral pokes and frametraps is very high. Overall Ayame is a simple character with an easy-to-understand gameplan, but she has complexity in her combo routes and offense. She is a character who is easy to pick up, but requires a strong, neutrally sound player to master.
Ayame is a high-speed oni who excels in closing in on opponents from the midrange. She can keep the pressure on opponents with her dual katanas, leaving little room to escape. |
| Pick if you like | Avoid if you dislike |
|---|---|
|
|
Recommended Collabs
2 BAR COSTS: They are cheap, most effective in eengaging or anti-zoning.
- Kiara's L+H off collab is a projectile reflect, which is obviously very useful in projectile oriented matchups such as Suisei, Sora, and Botan.
- Her call-in is a strong tool for initiation and sniping counterpokes with good reward. It also acts as a combo extender that Ayame may benefit from.
- Subaru's call-in is a decent fullscreen poke that Ayame can use to close the distance and for combo conversions.
- Her L+H off collab is a cheap and powerful neutral tool. Extremely useful for forcing an approach vs any character, especially zoners.
- Recommended if you want to focus on neutral more with the ability to be either safe or be aggressive in approach.
- Kaela's call-in is a high damage hammer swing that wallsplats in the corner. This is a useful tool for Ayame to use as a way to convert from mixups such as universal overhead.
- Her L+H off collab is a useful as way to buff Ayame's offense and defense. Preventing chip damage and a general damage reduction is good for Ayame since she is low health and the damage buff makes her already high damage even scarier.
3 BAR COSTS: Expensive superchat cost. Generally doesn't not get a lot of usage for Ayame
- Moona's 214S call-in is a nearly unreactable snipe that is certain to catch your opponents off guard during scrambles. Ayame is unfortunately not able to take advantage of OTG that Moona offers, but it is still a decent neutral snipe tool.
- Her L+H off collab is the opposite of Kanata's waves assist. Moona's off-collab is a costlier yet the most aggressive form of gravity where you are able to lock down your opponent at one position. It may be beneficial for Ayame with the lockdown that Moona's gravity offers.
- Recommended if you want to have a subtle yet aggressive approach in neutral while retaining the ability to have a snipe to discourage disrespect.
Moves
Standing Normals
5L
5L Ittoryu Ittoryu
|
|
|---|---|
Toggle Hitboxes Toggle Hitboxes
|
5M
5M Nitoryu Nitoryu
|
|
|---|---|
Toggle Hitboxes Toggle Hitboxes
|
5H
5H
|
|
|---|---|
Toggle Hitboxes Toggle Hitboxes
|
Crouching Normals
2L
2L
|
|
|---|---|
Toggle Hitboxes Toggle Hitboxes
|
2M
2M
|
|
|---|---|
Toggle Hitboxes Toggle Hitboxes
|
2H
2H
|
|
|---|---|
Toggle Hitboxes Toggle Hitboxes
|
3H
3H Haiya Haiya
|
|
|---|---|
Toggle Hitboxes Toggle Hitboxes
|
Jumping Normals
j.L
j.L
|
|
|---|---|
Toggle Hitboxes Toggle Hitboxes
|
j.M
j.M
|
|
|---|---|
Toggle Hitboxes Toggle Hitboxes
|
j.H
j.H
|
|
|---|---|
Toggle Hitboxes Toggle Hitboxes
|
Universal Mechanics
Throw
Toggle Hitboxes Toggle Hitboxes
|
|---|
Overhead
Toggle Hitboxes Toggle Hitboxes
|
|---|
Superchat Reversal
Toggle Hitboxes Toggle Hitboxes
|
|---|
Special Attacks
236X
Toggle Hitboxes Toggle Hitboxes
|
|---|
22X
Toggle Hitboxes Toggle Hitboxes
|
|---|
214X
Toggle Hitboxes Toggle Hitboxes
|
|---|
j.214X
Toggle Hitboxes Toggle Hitboxes
|
|---|
22S
Super Star Attack
Colors
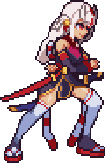
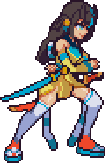
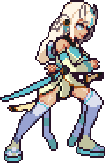
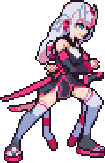
Oozora Subaru (Hololive)
Kazama Iroha (Hololive)
Kagura Nana (Character Designer)
Murasaki Shion (Hololive)
Minato Aqua (Hololive)
Baiken (Guilty Gear)
Ookami Mio (Hololive)
Shirakami Fubuki (Hololive)
Jett (Valorant)
Nezuko Kamado (Demon Slayer)

