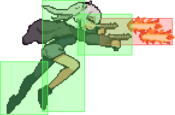
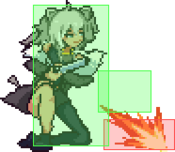
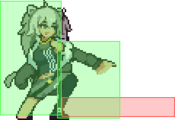
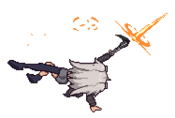
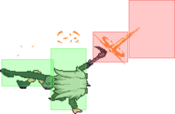
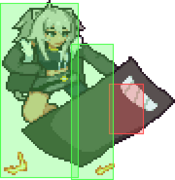
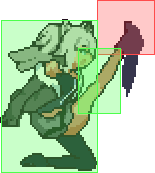
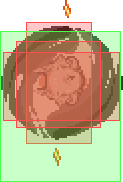
Idol Showdown/Botan Shishiro: Difference between revisions
(→Corner: relocating 2 combos to advanced) |
mNo edit summary |
||
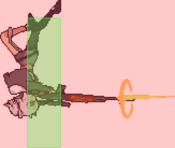
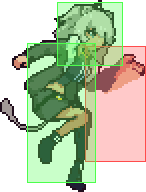
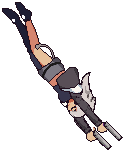
| (310 intermediate revisions by 14 users not shown) | |||
| Line 1: | Line 1: | ||
{{Version-IS|4.0.8}} | |||
[[File:IS_Botan_Logo.png|250px]] | [[File:IS_Botan_Logo.png|250px]] | ||
'''Special Forces La~Lion''' - ''Tactical Space Control'' | '''Special Forces La~Lion''' - ''Tactical Space Control'' <br> | ||
'''Difficulty''' - ★★★★☆☆ | |||
{{CharacterIntro-IS|char= Botan | |||
|hp=1000 | |||
|backdash=27F (1~5F {{Property-IS|Full}} Invuln) (1~21F {{Property-IS|grab}} Invuln) | |||
|walkspeed=[[Idol_Showdown/Game_Data#Ground_Movement_Data|Fast]] | |||
|intro= | |||
==Introduction== | ==Introduction== | ||
{{Content Box|content= | {{Content Box|content= | ||
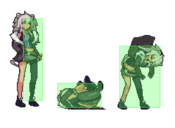
Botan Shishiro is a versatile neutral control character that's able to suffocate her opponents at most ranges by pressuring them with retreating and advancing disjointed attacks, such as <span style="color:darkgoldenrod">6M</span> or <span style="color:red">2H</span>, and slow, high-damage projectiles that shut down approaches when set up. Her amazing combo game and easy conversions allow her to shred down her opponents' health with meterless access to multiple wallbounces via <span style="color:darkgoldenrod">214M</span> and <span style="color:blue">22L~M</span>, as well as an air grab that serves as both a starter and a extender. During her combos, she generates large amounts of meter, often giving her fast access to her metered options and assist calls, such as a fast forward advancing armored reversal (<span style="color:purple">22S</span>) that converts into combos even when done from far away, and allows her to punish her opponent during their own blockstring thanks to it's incredibly fast startup. | |||
However, the lacking speed of her projectile attacks makes her full-screen zoning weak, especially against characters that have similar but faster tools, and when Botan's backed into a corner, the limits of her shopping cart reversal (it whiffs on jumping opponents, isn't armored on it's first frame, and past a short distance she can be hit out of it by every other metered reversal on the game on reaction), as well as the slow startup of her main anti-airs and lack of range on her <span style="color:blue">2L</span> are most apparent and can all make it difficult to break out of her opponent's pressure, especially so if she's left without any resources. | |||
Once Botan gets her opponent to block, often after setting up a grenade, her strong strike/throw mixup using <span style="color:darkgoldenrod">5M</span> has opportunities for pressure resets and frametraps and can make her very scary to deal with thanks to the obscene reward she gets on hit. | |||
{{CharacterPickReasons | |||
|intro=[[File:IS Botan Icon.png|100px]] | |||
'''Botan''' is a mid-range high damage fighter that walls her opponent out with disjointed moving normals and capitalizes with her up-close pressure. | |||
|pros= | |||
*'''Neutral Control''': Equipped with disjointed, hard-to-contest pokes (5M, j.2H), phenomenal whiff punishing tools (6M, 5H), and strong anti airs (2H, AT), Botan has a fantastic neutral game with plenty of ways to get her offense started. | |||
*'''Absurd Combo Potential''': Botan shreds her opponents' health and carries them to the corner from almost every starter without any meter, while easily gaining enough to access her supers and assist calls. | |||
*'''Midscreen Pressure''': Up-close, she can enforce terrifying strike/throw offense with immense reward on hit and plenty of opportunities for frametraps, resets, and ambiguous tick throws. | |||
|cons= | |||
*'''Awkward Defense''': While not powerless, her fastest normal (2L) is stubby, her main anti-air options are slow, and her armored super (22S) can lose to other metered reversals and whiffs on jumping approaches. | |||
|width=100 | |||
}} | |||
===Recommended Collabs=== | ===Recommended Collabs=== | ||
'''Note''': As this section of the page was written shortly after the game was released, | '''Note''': As this section of the page was written shortly after the game was released, its only purpose is to help guide new players towards assists that are generally considered useful for the character, and should be revised by an experienced player as the game develops more. Don't be afraid to pick and try something else! | ||
* [[File: | * [[File:IS_Watson_Icon.png|40px]] '''[[Idol Showdown/Collabs#Amelia_Watson|Watson]]''' - Watson's 214S evens out the reward on her strike-throw mixup by allowing for full conversions from her grab. Her timeslow nullifies opposing offense and allows Botan to combo meterless off 22M~H. | ||
* [[File:IS_Miko_Icon.png|40px]] '''[[Idol Showdown/Collabs#Miko_Sakura|Miko]]''' - Miko's lava assist is a great lockdown tool that allows Botan to convert off her overheads, and can setup chip-out situations. Her Off-Collab forces Botan's turn back immediately. | |||
* [[File: | * [[File:IS_Roboco_Icon.png|40px]] '''[[Idol Showdown/Collabs#Roboco|Roboco]]''' - Roboco's missiles are versatile. Botan can extend her pressure with them, use them for combos together with her airgrab, and they can force the opponent to back off. In addition, 214S is an ol'reliable instant fullscreen beam assist with great damage. | ||
* [[File:IS_Roboco_Icon.png|40px]] '''[[Idol Showdown/Collabs#Roboco|Roboco]]''' - Roboco's | |||
}} | |||
}} | }} | ||
== | ==Moves== | ||
=== Standing Normals === | === Standing Normals === | ||
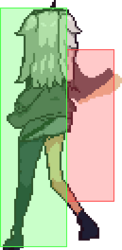
====== <font style="visibility:hidden" size="0">5L</font> ====== | ====== <font style="visibility:hidden" size="0">5L</font> ====== | ||
{{MoveData | {{MoveData | ||
|image=IS_Botan_5L.png | |image=IS_Botan_5L.png | ||
| | |hitbox=IS_Botan_5L_Hitbox.png | ||
|caption= | |caption= | ||
|name=5L | |name=5L | ||
| Line 34: | Line 53: | ||
|startup=6 | |startup=6 | ||
|active=3 | |active=3 | ||
|recovery= | |recovery=12 | ||
|advHit= | |advHit=0 | ||
|advBlock=- | |advBlock=-3 | ||
|description=Fast, high 5L. Does not whiff on any crouchers, and has a good range. Can still be low profiled. | |description= | ||
* Self-Gatling Count: 3 | |||
Fast, high 5L. Does not whiff on any crouchers, and has a good range. Can still be low profiled. | |||
}} | }} | ||
}} | }} | ||
| Line 44: | Line 65: | ||
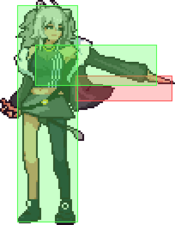
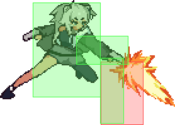
{{MoveData | {{MoveData | ||
|image=IS_Botan_5M.png | |image=IS_Botan_5M.png | ||
|hitbox=IS_Botan_5M_Hitbox.png | |||
|resizeImage=no | |resizeImage=no | ||
|caption= | |caption= | ||
| Line 49: | Line 71: | ||
|data= | |data= | ||
{{AttackData-IS | {{AttackData-IS | ||
|damage= | |damage=28x3 | ||
|guard=Mid | |guard=Mid | ||
|startup=10 | |startup=10 | ||
|active=2 | |active=2(3)2(4)2 | ||
|recovery= | |recovery=27* | ||
|advHit= | |advHit=+2 | ||
|advBlock=-3 | |advBlock=-3 | ||
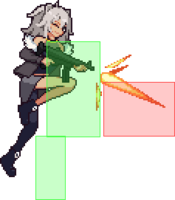
|description=Gives access to 5M~M even on whiff, making it a great tool during both neutral and pressure. | |description= | ||
*While this move's recovery is 37, the last 10 of those frames can be cancelled into block or any other action which reduces true recovery to 27 | |||
Gives access to 5M~M even on whiff, making it a great tool during both neutral and pressure. Botan's hurtbox leans backward and the hitbox is disjointed, allowing it to avoid a lot of moves, and the presence of a forward advancing follow-up makes it hard to contest and punish. When blocked, the presence of a follow-up and relatively small frame disadvantage makes tick throw attempts hard to react to. | |||
}} | }} | ||
}} | }} | ||
====== <font style="visibility:hidden" size="0">5M~M</font> ====== | ====== <font style="visibility:hidden" size="0">5M~M</font> ====== | ||
{{MoveData | {{MoveData | ||
|image=IS_Botan_5MM.png | |image=IS_Botan_5MM.png | ||
| | |hitbox=IS_Botan_5MM_Hitbox.png | ||
|caption= | |caption= | ||
|name=5M~M | |name=5M~M | ||
|data= | |data= | ||
{{AttackData-IS | {{AttackData-IS | ||
|damage= | |damage=59 | ||
|guard=Mid | |guard=Mid | ||
|startup=15 | |startup=15 | ||
|active=2 | |active=2 | ||
|recovery= | |recovery=27 | ||
|advHit= | |advHit=-2 | ||
|advBlock=- | |advBlock=-7 | ||
|description=Very large forward movement and little knockback make this move a handy | |description= | ||
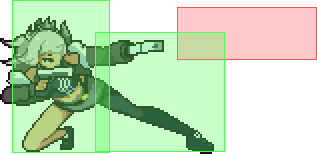
Very large forward movement and little knockback make this move a handy stabilizer for combos, an excellent whiff punishing tool, and central to Botan's pressure. Confirms even if only the last hit of 5M connects. Despite being unsafe on block, the forward movement and 2M chain allow for ambiguous pressure resets, as the former means that the opponent will be put right in range of 2L or a throw, and the latter will catch opponents trying to mash out of blockstun. Has a high amount of recovery on whiff. Cancellable during it's startup (following the usual chain rules). | |||
}} | }} | ||
}} | }} | ||
| Line 82: | Line 107: | ||
{{MoveData | {{MoveData | ||
|image=IS_Botan_5H.png | |image=IS_Botan_5H.png | ||
| | |hitbox=IS_Botan_5H_Hitbox.png | ||
|caption= | |caption= | ||
|name=5H | |name=5H | ||
|data= | |data= | ||
{{AttackData-IS | {{AttackData-IS | ||
|damage= | |damage=33x3 | ||
|guard=Mid | |guard=Mid | ||
|startup=13 | |startup=13 | ||
|active=2 | |active=2(2)2(2)2 | ||
|recovery= | |recovery=33 | ||
|advHit=- | |advHit=-8 | ||
|advBlock=- | |advBlock=-13 | ||
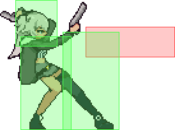
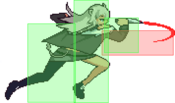
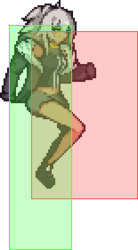
|description=This move has a lot of forward movement, making it | |description=This move has a lot of forward movement, making it an essential whiff punish as well as combo tool and deceptively long in terms of reach. | ||
}} | }} | ||
}} | }} | ||
| Line 102: | Line 127: | ||
{{MoveData | {{MoveData | ||
|image=IS_Botan_2L.png | |image=IS_Botan_2L.png | ||
| | |hitbox=IS_Botan_2L_Hitbox.png | ||
|caption= | |caption= | ||
|name=2L | |name=2L | ||
| Line 108: | Line 133: | ||
{{AttackData-IS | {{AttackData-IS | ||
|damage=30 | |damage=30 | ||
|guard=Low | |guard=Low,Air Unblockable | ||
|startup=5 | |startup=5 | ||
|active=2 | |active=2 | ||
|recovery= | |recovery=13 | ||
|advHit= | |advHit=0 | ||
|advBlock=-3 | |advBlock=-3 | ||
|description=Her fastest normal, and a low. Ok range. Good for defense or mix-ups due to its speed. | |description= | ||
* Self-Gatling Count: 2 | |||
Her fastest normal, and a low. Ok range. Good for defense or mix-ups due to its speed. | |||
}} | }} | ||
}} | }} | ||
| Line 121: | Line 148: | ||
{{MoveData | {{MoveData | ||
|image=IS_Botan_2M.png | |image=IS_Botan_2M.png | ||
| | |hitbox=IS_Botan_2M_Hitbox.png | ||
|caption= | |caption= | ||
|name=2M | |name=2M | ||
| Line 127: | Line 154: | ||
{{AttackData-IS | {{AttackData-IS | ||
|damage=70 | |damage=70 | ||
|guard=Low | |guard=Low,Air Unblockable | ||
|startup= | |startup=10 | ||
|active=2 | |active=2 | ||
|recovery= | |recovery=18 | ||
|advHit= | |advHit=0 | ||
|advBlock=-4 | |advBlock=-4 | ||
|description=Good range for its speed. Can be used in pressure or defense at certain spacings to check your opponent, as well as after a dash as a neutral tool. | |description=Good range for its speed. Can be used in pressure or defense at certain spacings to check your opponent, as well as after a dash as a neutral tool. | ||
| Line 140: | Line 167: | ||
{{MoveData | {{MoveData | ||
|image=IS_Botan_2H.png | |image=IS_Botan_2H.png | ||
| | |hitbox=IS_Botan_2H_Hitbox.png | ||
|caption= | |caption= | ||
|name=2H | |name=2H | ||
| Line 150: | Line 177: | ||
|active=3 | |active=3 | ||
|recovery=28 | |recovery=28 | ||
|advHit= | |advHit=Launch | ||
|advBlock=- | |advBlock=-17 | ||
|invul= (6~20) {{Property-IS|head}} | |||
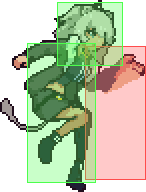
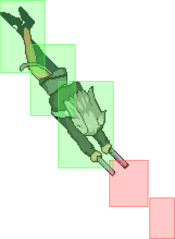
|description=Botan sways back a significant distance and shoots the opponent, launching them on hit. Not jump cancellable unlike most 2H's and quite slow. It's huge disjointed hitbox make it ideal to catch jump-ins, but opponents expecting it can dash in and low profile it, and despite the backwards movement it leaves you very vulnerable during it's recovery frames. Air unblockable and important combo tool. | |description=Botan sways back a significant distance and shoots the opponent, launching them on hit. Not jump cancellable unlike most 2H's and quite slow. It's huge disjointed hitbox make it ideal to catch jump-ins, but opponents expecting it can dash in and low profile it, and despite the backwards movement it leaves you very vulnerable during it's recovery frames. Air unblockable and important combo tool. | ||
}} | }} | ||
| Line 159: | Line 187: | ||
{{MoveData | {{MoveData | ||
|image=IS_Botan_3H.png | |image=IS_Botan_3H.png | ||
| | |hitbox=IS_Botan_3H_Hitbox.png | ||
|caption= | |caption= | ||
|name=3H | |name=3H | ||
| Line 165: | Line 193: | ||
{{AttackData-IS | {{AttackData-IS | ||
|damage=90 | |damage=90 | ||
|guard=Low | |guard=Low,Air Unblockable | ||
|startup= | |startup=13 | ||
|active=12 | |active=12 | ||
|recovery= | |recovery=23 | ||
|advHit= | |advHit=HKD | ||
|advBlock=- | |advBlock=-19 | ||
|description=Sliding sweep. Goes very far and gives an untechable knockdown afterwards regardless of height, which gives her a very favorable knockdown when the opponent is launched first via 2H. Go-to meterless combo ender. | |description=Sliding sweep. Goes very far and gives an untechable knockdown afterwards regardless of height, which gives her a very favorable knockdown when the opponent is launched first via 2H. Go-to meterless combo ender. | ||
}} | }} | ||
| Line 179: | Line 207: | ||
{{MoveData | {{MoveData | ||
|image=IS_Botan_jL.png | |image=IS_Botan_jL.png | ||
| | |hitbox=IS_Botan_jL_Hitbox.png | ||
|caption= | |caption= | ||
|name=j.L | |name=j.L | ||
| Line 188: | Line 216: | ||
|startup=5 | |startup=5 | ||
|active=6 | |active=6 | ||
|recovery= | |recovery=Until Landing + 2 | ||
|advHit= | |advHit= | ||
|advBlock= | |advBlock= | ||
|description=Very fast and high j.L. Whiffs on crouchers, so should primarily be used against airborne opponents. | |description= | ||
Very fast and high j.L. Whiffs on crouchers, so should primarily be used against airborne opponents. | |||
A great air-to-air that has massive juggle untech time and can be confirmed into j.2H easily. | |||
}} | }} | ||
}} | }} | ||
| Line 198: | Line 229: | ||
{{MoveData | {{MoveData | ||
|image=IS_Botan_jM.png | |image=IS_Botan_jM.png | ||
| | |hitbox=IS_Botan_jM_Hitbox.png | ||
|caption= | |caption= | ||
|name=j.M | |name=j.M | ||
| Line 207: | Line 238: | ||
|startup=10 | |startup=10 | ||
|active=4 | |active=4 | ||
|recovery= | |recovery=Until Landing + 3 | ||
|advHit= | |advHit= | ||
|advBlock= | |advBlock= | ||
|description= | |description= | ||
The disjointed hitbox at a 45 degree angle makes it a good jump-in tool when spaced right. Can be used alongside j.S and j.2H to make Botan very difficult to anti-air. | |||
}} | }} | ||
}} | }} | ||
| Line 217: | Line 249: | ||
{{MoveData | {{MoveData | ||
|image=IS_Botan_jH.png | |image=IS_Botan_jH.png | ||
| | |hitbox=IS_Botan_jH_Hitbox.png | ||
|caption= | |caption= | ||
|name=j.H | |name=j.H | ||
|data= | |data= | ||
{{AttackData-IS | {{AttackData-IS | ||
|damage= | |damage=30x3 | ||
|guard= | |guard=High | ||
|startup= | |startup=14 | ||
|active= | |active=4(2)4(2)4 | ||
|recovery= | |recovery=Until Landing + 4 | ||
|advHit= | |advHit= | ||
|advBlock= | |advBlock= | ||
|description= | |description= | ||
Multi-hitting crossup air normal. Advantageous even when blocked at maximum possible height by taller characters. | |||
}} | }} | ||
}} | }} | ||
| Line 238: | Line 271: | ||
{{MoveData | {{MoveData | ||
|image=IS_Botan_j2H.png | |image=IS_Botan_j2H.png | ||
| | |hitbox=IS_Botan_j2H_Hitbox.png | ||
|caption= | |caption= | ||
|name= | |name=Lead Curtain | ||
|input='''Air Only''' {{NotationIcon-IS|2}} '''+''' {{NotationIcon-IS|h}} | |||
|data= | |data= | ||
{{AttackData-IS | {{AttackData-IS | ||
|damage= | |damage=30x3 | ||
|guard=High | |guard=High | ||
|startup=12 | |startup=12 | ||
|active=2 | |active=2(2)2(2)2 | ||
|recovery= | |recovery=Until Landing + 10 | ||
|advHit= | |advHit= | ||
|advBlock= | |advBlock= | ||
|description=Halts Botan's momentum and sends her straight down. Has a respectable hitbox and is | |description=Halts Botan's momentum and sends her straight down. Has a respectable disjointed hitbox and is generally plus or even on block depending on how many hits are blocked, but has a lot of landing recovery, which makes it fairly punishable on whiff. It can whiff on crouching opponents if done at the apex of her jump. | ||
}} | }} | ||
}} | }} | ||
| Line 257: | Line 291: | ||
{{MoveData | {{MoveData | ||
|image=IS_Botan_6M.png | |image=IS_Botan_6M.png | ||
| | |hitbox=IS_Botan_6M_Hitbox.png | ||
|caption= | |caption= | ||
|name= | |name=CQC | ||
|input={{NotationIcon-IS|6}} + {{NotationIcon-IS|m}} | |||
|data= | |data= | ||
{{AttackData-IS | {{AttackData-IS | ||
| Line 266: | Line 301: | ||
|startup=17 | |startup=17 | ||
|active=2 | |active=2 | ||
|recovery= | |recovery=26 | ||
|advHit=- | |advHit=-4 | ||
|advBlock=- | |advBlock=-9 | ||
|description=Ridiculously long-range poke due to Botan moving significantly forward during the startup, but somewhat slow. It can be cancelled to keep the forward movement on hit or block, allowing for knockdown or combos on hit, or left uncancelled to return to Botan's original postion safely. Can be punished if used too predictably. Only cancels into 3H and special moves. | |description=Ridiculously long-range poke due to Botan moving significantly forward during the startup, but somewhat slow. It can be cancelled to keep the forward movement on hit or block, allowing for knockdown or combos on hit, or left uncancelled to return to Botan's original postion safely. Can be punished if used too predictably. Only cancels into 3H and special moves. | ||
}} | }} | ||
| Line 276: | Line 311: | ||
{{MoveData | {{MoveData | ||
|image=IS_Botan_4H.png | |image=IS_Botan_4H.png | ||
| | |hitbox=IS_Botan_4H_Hitbox.png | ||
|caption= | |caption= | ||
|name= | |name=Mag Dump | ||
|input= {{NotationIcon-IS|4}} '''+''' {{NotationIcon-IS|h}} | |||
|data= | |data= | ||
{{AttackData-IS | {{AttackData-IS | ||
|damage= | |version=4H | ||
|damage=35 | |||
|guard=Mid | |guard=Mid | ||
|startup=21 | |startup=21 | ||
|active= | |active=Until Expiration | ||
|recovery= | |recovery=38 | ||
|advHit=- | |advHit=-16~-8 | ||
|advBlock= | |advBlock=-21~-13 | ||
}} | |||
{{AttackData-IS | |||
|header=no | |||
|version=4H~H~H | |||
|damage=35 | |||
|guard=Mid | |||
|startup=10 | |||
|active=Until Expiration | |||
|recovery=33 | |||
|advHit=-11~-3 | |||
|advBlock=-16~-8 | |||
|description= | |description= | ||
* Chip damage per shot: 18 | |||
* Whiffs on crouching opponents | * Whiffs on crouching opponents | ||
* Can be cancelled into itself | * Can be cancelled into itself up to 3 times on hit or block, but not whiff | ||
A lower commitment projectile that | * The second and third shot have faster startup and lower recovery than the first shot | ||
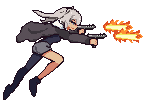
A lower commitment projectile that can be low profiled, but deals a lot of chip damage on block. An okay long-range keepaway option. | |||
All 3 shots are special cancellable on hit and block. Only the 3rd and final shot is cancellable into 2H or 3H on hit and block. | |||
}} | }} | ||
}} | }} | ||
== | === Air Throw === | ||
====== <font style="visibility:hidden" size="0">Throw</font> ====== | ====== <font style="visibility:hidden" size="0">Air Throw</font> ====== | ||
{{MoveData | {{MoveData | ||
|image= | |image=IS_Botan_jLM.png | ||
| | |hitbox=IS_Botan_jLM_Hitbox.png | ||
|caption= | |caption= | ||
|name= | |name=Aerial Takedown | ||
|input= | |input= '''Air Only''' {{NotationIcon-IS|g}} | ||
|data= | |data= | ||
{{AttackData-IS | {{AttackData-IS | ||
|damage= | |damage=0, 90 | ||
|guard=Unblockable | |guard=Air Unblockable | ||
|startup=7 | |startup=7 | ||
|active=2 | |active=2 | ||
|recovery= | |recovery=Until Landing | ||
|advHit= | |advHit= | ||
|advBlock= | |advBlock= | ||
|description= | |description=Combo-able air throw. | ||
}} | }} | ||
}} | }} | ||
====== <font style="visibility:hidden" size="0"> | === Universal Mechanics === | ||
====== <font style="visibility:hidden" size="0">Throw</font> ====== | |||
{{MoveData | {{MoveData | ||
|image= | |image=IS_Botan_LM.png | ||
| | |hitbox=IS_Botan_LM_Hitbox.png | ||
|caption= | |caption= | ||
|name= | |name=Throw | ||
|input= | |input= {{NotationIcon-IS|l}} '''+''' {{NotationIcon-IS|m}} '''or''' {{NotationIcon-IS|g}} | ||
|data= | |data= | ||
{{AttackData-IS | {{AttackData-IS | ||
|damage= | |damage=140 | ||
|guard= | |guard= | ||
|startup=7 | |startup=7 | ||
|active=2 | |active=2 | ||
|recovery= | |recovery=31 | ||
|advHit= | |advHit= | ||
|advBlock= | |advBlock= | ||
|description= | |description= | ||
*Total Frames: 39 | |||
Botan's universal grab. Leaves opponent backturned, so they will roll backwards into Botan's direction if they opt to quick tech. | |||
}} | }} | ||
}} | }} | ||
| Line 339: | Line 394: | ||
{{MoveData | {{MoveData | ||
|image=IS_Botan_MH.png | |image=IS_Botan_MH.png | ||
| | |hitbox=IS_Botan_MH_Hitbox.png | ||
|caption= | |caption= | ||
|name=Overhead | |name=Overhead | ||
|input= | |input= {{NotationIcon-IS|m}} '''+''' {{NotationIcon-IS|h}} | ||
|data= | |data= | ||
{{AttackData-IS | {{AttackData-IS | ||
|damage=60 | |damage=60 | ||
|guard=High | |guard=High | ||
|startup= | |startup=23 | ||
|active=3 | |active=3 | ||
|recovery= | |recovery=19 | ||
|advHit= | |advHit=+2 | ||
|advBlock= | |advBlock=-3 | ||
|description=Universal standing overhead | |invul= (6~36) {{Property-IS|grab}} | ||
|description=Universal standing overhead. | |||
}} | |||
}} | |||
====== <font style="visibility:hidden" size="0">Superchat Reversal</font> ====== | |||
{{MoveData | |||
|image=IS_Botan_5MM.png | |||
|hitbox=IS_Botan_SCR_hitbox.png | |||
|caption= | |||
|name=Superchat Reversal | |||
|input=(blocking) {{NotationIcon-IS|6}} '''+''' {{NotationIcon-IS|m}} '''+''' {{NotationIcon-IS|h}} | |||
|data= | |||
{{AttackData-IS | |||
|damage=0 | |||
|guard=Mid | |||
|startup=16 | |||
|active=2 | |||
|recovery=23 | |||
|advHit=0 | |||
|advBlock=-10 | |||
|invul= (1~17) {{Property-IS|full}} | |||
|description= | |||
*Superchat Reversal | |||
}} | }} | ||
}} | }} | ||
== Special Attacks == | |||
=== Special Attacks === | |||
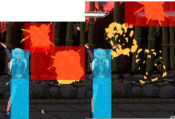
====== <font style="visibility:hidden" size="0">236X</font> ====== | ====== <font style="visibility:hidden" size="0">236X</font> ====== | ||
{{MoveData | {{MoveData | ||
|name=Poi | |name=Poi | ||
|input= | |input={{NotationIcon-IS|236}} '''+''' {{NotationIcon-IS|l}} '''/'''{{NotationIcon-IS|m}} '''/'''{{NotationIcon-IS|h}} | ||
|image=IS_Botan_236L.png | |image=IS_Botan_236L.png | ||
| | |hitbox=IS_Botan_236L_Hitbox.png | ||
|caption=(High) | |caption=(High) | ||
|image2=IS_Botan_236M.png | |image2=IS_Botan_236M.png | ||
|hitbox2=IS_Botan_236M_Hitbox.png | |||
|caption2=(Low) | |caption2=(Low) | ||
|image3=IS_Botan_236H.png | |image3=IS_Botan_236H.png | ||
|hitbox3=IS_Botan_236H_Hitbox.png | |||
|caption3=S.S.R.B | |caption3=S.S.R.B | ||
|data= | |data= | ||
{{AttackData-IS | {{AttackData-IS | ||
|version=L | |version=L | ||
|damage= | |damage=137 | ||
|guard=Mid | |guard=Mid | ||
|startup= | |startup=23 | ||
|active= | |active=Until Expiration | ||
|recovery= | |recovery=36 | ||
|advHit= | |advHit=Launch | ||
|advBlock= | |advBlock=0~ | ||
|description= | |description= | ||
*Botan | *Grants 2 superchats on use | ||
Botan's grenade series help her zoning be a lot more oppressive. The light version is an anti-air grenade, flying up and away from Botan and tracking the opponent's | *Chip damage: 32 | ||
*Has a projectile durability of 1x1 | |||
*Whiffs on crouching opponents at point blank | |||
*Botan can only have 1 of each grenade type on screen | |||
Botan's grenade series help her zoning be a lot more oppressive. The light version is an anti-air grenade, flying up and away from Botan and tracking the opponent's current location. Due to the fact that this move tracks only on startup, it is not perfect at contesting the air, but it's initial angle can snipe many aerial approaches. | |||
}} | }} | ||
| Line 386: | Line 472: | ||
|header=no | |header=no | ||
|version=M | |version=M | ||
|damage= | |damage=137 | ||
|guard=Mid | |guard=Mid | ||
|startup= | |startup=25 | ||
|active= | |active=Until Expiration | ||
|recovery= | |recovery=36 | ||
|advHit= | |advHit=Launch | ||
|advBlock= | |advBlock=-3~ | ||
|description= The medium version bounces along the ground at a slow and steady rate, making it a very good and long lasting check against characters that want to approach from the ground, and enhancing Botan's anti-air options as a result. | |description= | ||
*Grants 2 superchats on use | |||
*Chip damage: 32 | |||
*Has a projectile durability of 1x1 | |||
The medium version bounces along the ground at a slow and steady rate, making it a very good and long-lasting check against characters that want to approach from the ground, and enhancing Botan's anti-air options as a result. With just a bit of space between you and the opponent, the frame advantage of the grenade can be made massively plus on block. | |||
}} | }} | ||
{{AttackData-IS | {{AttackData-IS | ||
|header=no | |header=no | ||
|version=H | |version=H | ||
|damage= | |damage=40x3 | ||
|guard=Mid | |guard=Mid,Air Unblockable | ||
|startup= | |startup=12 | ||
|active= | |active=15 | ||
|recovery= | |recovery=14 | ||
|advHit= | |advHit=Launch | ||
|advBlock= | |advBlock=-13~-10 | ||
|description= The heavy version is quite different from the standard variants | |invul= (1~26) {{Property-IS|head}} | ||
|description= | |||
*Grants 5 superchats on use | |||
The heavy version is quite different from the standard variants. It shoots an array of explosions slightly above and in front of Botan's head and has frame 1 head invuln. This is a very big, disjointed, and rather fast move that contests a lot of airspace and sends them far, making it useful as a twitch anti-air to react with. Can be superchat cancelled into 214M for a followup. | |||
}} | }} | ||
}} | }} | ||
| Line 412: | Line 505: | ||
{{MoveData | {{MoveData | ||
|name=Quickscope | |name=Quickscope | ||
|input= | |input={{NotationIcon-IS|214}} '''+''' {{NotationIcon-IS|l}} '''/'''{{NotationIcon-IS|m}} '''/'''{{NotationIcon-IS|h}} | ||
|image=IS_Botan_214L.png | |image=IS_Botan_214L.png | ||
| | |hitbox=IS_Botan_214L_Hitbox.png | ||
|caption=(Low) | |caption=(Low) | ||
|image2=IS_Botan_214M.png | |image2=IS_Botan_214M.png | ||
|hitbox2=IS_Botan_214M_Hitbox.png | |||
|caption2=(High) | |caption2=(High) | ||
|image3=IS_Botan_214H.png | |image3=IS_Botan_214H.png | ||
|hitbox3=IS_Botan_214H_Hitbox.png | |||
|caption3=MLG Trickshot | |caption3=MLG Trickshot | ||
|data= | |data= | ||
| Line 425: | Line 520: | ||
|damage=90 | |damage=90 | ||
|guard=Mid | |guard=Mid | ||
|startup= | |startup=27 | ||
|active= | |active=Until Offscreen | ||
|recovery= | |recovery=45 | ||
|advHit= | |advHit=+6 | ||
|advBlock=- | |advBlock=-12 | ||
|description= Grounded sniper shot. Despite | |description= | ||
* Grants 3 superchats on use | |||
Grounded sniper shot. Despite its long startup, its absurd low profile from 4f onwards makes this move a usable "anti-projectile projectile" and it can be superchat cancelled into 22L to extend using the respective sniper followup. | |||
}} | }} | ||
{{AttackData-IS | {{AttackData-IS | ||
| Line 437: | Line 534: | ||
|damage=90 | |damage=90 | ||
|guard=Mid | |guard=Mid | ||
|startup= | |startup=22 | ||
|active= | |active=Until Offscreen | ||
|recovery= | |recovery=44 | ||
|advHit= | |advHit=+4 | ||
|advBlock=-11 | |advBlock=-11 | ||
|description= Anti-air sniper shot. Shoots at a 45 degree angle and gives an incredible wallbounce on hit, making it | |description= | ||
* Grants 3 superchats on use | |||
Anti-air sniper shot. Shoots at a 45 degree angle and gives an incredible wallbounce on hit, making it Botan's main combo extender during her BnBs. Not air unblockable and covers a similar angle to 2H, but causes massive pushback on air block which sends the opponent full screen. Both 214M's wallbounce and 22L~M's wallbounce can be used in a single combo. | |||
}} | }} | ||
{{AttackData-IS | {{AttackData-IS | ||
| Line 449: | Line 548: | ||
|damage=120 | |damage=120 | ||
|guard=Mid | |guard=Mid | ||
|startup= | |startup=22 | ||
|active= | |active=1 | ||
|recovery= | |recovery=30 | ||
|advHit= | |advHit=KD | ||
|advBlock=-20 | |advBlock=-20 | ||
|description= Botan leaps with her sniper rifle and trickshots her opponent, covering the entire screen. | |description= | ||
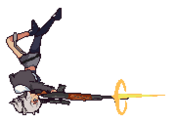
* Costs 1 Star Meter and grants 5 superchats on use | |||
Botan leaps with her sniper rifle and trickshots her opponent, covering the entire screen. Its slow startup means it can't confirm off of everything, but due to it possessing a similar wallbounce as 214M on airborne opponents, it can be a very powerful combo extender or punish tool. Deals a massive amount of chip on block and sends the opponent full screen if they block the move while jumping. | |||
}} | }} | ||
}} | }} | ||
| Line 461: | Line 562: | ||
{{MoveData | {{MoveData | ||
|name=Tactical Roll | |name=Tactical Roll | ||
|input= | |input={{NotationIcon-IS|2}} {{NotationIcon-IS|2}} '''+'''{{NotationIcon-IS|l}} | ||
|image=IS_Botan_22L.png | |image=IS_Botan_22L.png | ||
| | |hitbox=IS_Botan_22L_Hitbox.png | ||
|caption= | |caption=Tactical Retreat | ||
|image2=IS_Botan_214L.png | |||
|caption2=L Follow-Up | |||
|image3=IS_Botan_214M.png | |||
|caption3=M Follow-Up | |||
|image4=IS_Botan_22M.png | |||
|caption4=H Follow-Up | |||
|data= | |data= | ||
{{AttackData-IS | {{AttackData-IS | ||
|version=22L | |||
|damage= | |||
|guard= | |||
|startup= | |||
|active= | |||
|recovery=57 | |||
|advHit= | |||
|advBlock= | |||
|invul=(1~57) {{Property-IS|Grab}} | |||
|description= | |||
* Grants 5 superchats on use | |||
* Earliest followup cancel: 11th frame | |||
* Grab invuln persists for the entire duration of the move, but will go away the moment a followup is cancelled into | |||
Botan rolls backwards. Botan cannot use standard attacks during this animation, but she has access to 3 followups, based on the button pressed during it. Because the followups are treated as different moves from their regular counterparts, 22L~M can wallbounce in the middle of a combo even if 214M has been used already. | |||
}} | |||
{{AttackData-IS | |||
|header=no | |||
|version=22L~L | |||
|damage=90 | |||
|guard=Mid | |||
|startup=17 | |||
|active=Until Offscreen | |||
|recovery=44 | |||
|advHit=+7 | |||
|advBlock=-11 | |||
|description= | |||
* Fastest possible effective startup: 28F | |||
Slower than {{input|214L}} by 1 frame when taking into account {{input|22L}}'s startup, but has 1 frame less recovery compared to {{input|214L}}. | |||
}} | |||
{{AttackData-IS | |||
|header=no | |||
|version=22L~M | |||
|damage=90 | |||
|guard=Mid | |||
|startup=17 | |||
|active=Until Offscreen | |||
|recovery=44 | |||
|advHit=+4 | |||
|advBlock=-12 | |||
|description= | |||
* Fastest possible effective startup: 28F | |||
Slower than {{input|214M}} by 6 frames when taking into account {{input|22L}}'s startup. | |||
}} | |||
{{AttackData-IS | |||
|header=no | |||
|version=22L~H | |||
|damage= | |damage= | ||
|guard= | |guard= | ||
|startup= | |startup= | ||
|active= | |active= | ||
|recovery= | |recovery=58 | ||
|advHit= | |advHit= | ||
|advBlock= | |advBlock= | ||
|description= | |description= | ||
Effectively identical to {{input|22M}}. | |||
}} | }} | ||
}} | }} | ||
====== <font style="visibility:hidden" size="0">22M | ====== <font style="visibility:hidden" size="0">22M</font> ====== | ||
{{MoveData | {{MoveData | ||
|name=Lioness Leap | |name=Lioness Leap | ||
|input= | |input={{NotationIcon-IS|2}} {{NotationIcon-IS|2}} '''+'''{{NotationIcon-IS|m}} | ||
|image=IS_Botan_22M.png | |image=IS_Botan_22M.png | ||
|hitbox=IS_Botan_22M_Hitbox.png | |||
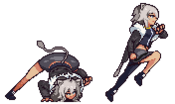
|caption=Functionally similar to Akuma's "Demon Flip" from Street Fighter. | |caption=Functionally similar to Akuma's "Demon Flip" from Street Fighter. | ||
|image2=IS_Botan_22X_M_followup.png | |image2=IS_Botan_3H.png | ||
| | |hitbox2=IS_Botan_3H_Hitbox.png | ||
| | |caption2=L Follow-Up | ||
| | |image3=IS_Botan_22X_M_followup.png | ||
| | |hitbox3=IS_Botan_jM_Hitbox.png | ||
|caption3=M Follow-Up | |||
|image4=IS_Botan_22X_H_followup.png | |||
|hitbox4=IS_Botan_22X_H_followup_Hitbox.png | |||
|caption4=H Follow-Up | |||
|data= | |data= | ||
{{AttackData-IS | {{AttackData-IS | ||
|version= | |version=22M | ||
|damage= | |damage= | ||
|guard= | |guard= | ||
|startup= | |startup= | ||
|active= | |active= | ||
|recovery= | |recovery=58 | ||
|advHit= | |advHit= | ||
|advBlock= | |advBlock= | ||
|description= Botan does a slow frontflip. Botan cannot use standard attacks during this animation, but she has access to | |description= | ||
* Grants 5 superchats on use | |||
* | * Earliest followup cancel: 30th frame | ||
Botan does a slow frontflip. Botan cannot use standard attacks during this animation, but she has access to 3 followups, based on the button pressed during it. | |||
}} | |||
{{AttackData-IS | |||
|header=no | |||
|version=22M~L | |||
|damage=90 | |||
|guard=Low,Air Unblockable | |||
|startup=Until Landing (Earliest 12) | |||
|active=6 | |||
|recovery=20 | |||
|advHit=HKD | |||
|advBlock=-3~ | |||
|description= | |||
*Fastest possible effective startup: 42F | |||
Botan falls to the ground quickly and does a safe on block low that is similar to her 3H. Just like her 3H, actually leads to a hard knockdown. | |||
}} | |||
{{AttackData-IS | |||
|header=no | |||
|version=22M~M | |||
|damage=90 | |||
|guard=High | |||
|startup=10 | |||
|active=Until Landing (Max 6) | |||
|recovery=14 | |||
|advHit=KD | |||
|advBlock=-4~ | |||
|description= | |||
*Fastest possible effective startup: 40F | |||
Botan descends and does a safe on block overhead that is similar to her j.M. | |||
}} | }} | ||
{{AttackData-IS | {{AttackData-IS | ||
|header=no | |header=no | ||
|version=H | |version=22M~H | ||
|damage=0, 90 | |||
|guard=Unblockable | |||
|startup=7 | |||
|active=Until Landing (Max 9) | |||
|recovery=12 | |||
|advHit=Launch | |||
|advBlock=Launch | |||
|description= | |||
*Fastest possible effective startup: 37F | |||
Botan does an air-to-ground command grab that is similar to her Air Grab. This is unblockable against standing opponents, but will whiff on crouching opponents. | |||
}} | |||
}} | |||
====== <font style="visibility:hidden" size="0">22H</font> ====== | |||
{{MoveData | |||
|name=Lightning Leap | |||
|input={{NotationIcon-IS|2}} {{NotationIcon-IS|2}} '''+'''{{NotationIcon-IS|h}} | |||
|image=IS_Botan_22M.png | |||
|hitbox=IS_Botan_22M_Hitbox.png | |||
|caption=But what if Demon Flip was faster? | |||
|image2=IS_Botan_3H.png | |||
|hitbox2=IS_Botan_3H_Hitbox.png | |||
|caption2=L Follow-Up | |||
|image3=IS_Botan_22X_M_followup.png | |||
|hitbox3=IS_Botan_jM_Hitbox.png | |||
|caption3=M Follow-Up | |||
|image4=IS_Botan_22X_H_followup.png | |||
|hitbox4=IS_Botan_22X_H_followup_Hitbox.png | |||
|caption4=H Follow-Up | |||
|data= | |||
{{AttackData-IS | |||
|version=22H | |||
|damage= | |damage= | ||
|guard= | |guard= | ||
|startup= | |startup= | ||
|active= | |active= | ||
|recovery= | |recovery=48 | ||
|advHit= | |advHit= | ||
|advBlock= | |advBlock= | ||
|description= | |description= | ||
* Costs 1 Star Meter and grants 5 superchats on use | |||
* Earliest followup cancel: 8th frame | |||
A much faster version of Lioness Leap that costs meter and allows the followups to be done much earlier in the move's startup. | |||
}} | |||
{{AttackData-IS | |||
|header=no | |||
|version=22H~L | |||
|damage=90 | |||
|guard=Low,Air Unblockable | |||
|startup=Until Landing (Earliest 11) | |||
|active=6 | |||
|recovery=20 | |||
|advHit=HKD | |||
|advBlock=~-3 | |||
|description= | |||
*Fastest possible effective startup: 19F | |||
Quick low followup that leads to a hard knockdown. | |||
}} | |||
{{AttackData-IS | |||
|header=no | |||
|version=22H~M | |||
|damage=90 | |||
|guard=High | |||
|startup=10 | |||
|active=Until Landing (Max 6) | |||
|recovery=14 | |||
|advHit=KD | |||
|advBlock=~-3 | |||
|description= | |||
*Fastest possible effective startup: 19F | |||
*It is possible to input so quickly that the overhead whiffs resulting in a 31F empty cancel | |||
Quick overhead followup. | |||
}} | |||
{{AttackData-IS | |||
|header=no | |||
|version=22H~H | |||
|damage=0,90 | |||
|guard=Unblockable | |||
|startup=7 | |||
|active=Until Landing (Max 9) | |||
|recovery=12 | |||
|advHit=Launch | |||
|advBlock=Launch | |||
|description= | |||
*Fastest possible effective startup: 15F | |||
Quick command grab followup that only works on standing opponents. Whiffs on crouchers. | |||
}} | }} | ||
}} | }} | ||
| Line 525: | Line 786: | ||
{{MoveData | {{MoveData | ||
|name=Bullet Rain | |name=Bullet Rain | ||
|input= | |input='''Air Only''' {{NotationIcon-IS|s}} | ||
|image=IS_Botan_j214H.png | |image=IS_Botan_j214H.png | ||
| | |hitbox=IS_Botan_j214H_Hitbox.png | ||
|caption= | |caption= | ||
|data= | |data= | ||
{{AttackData-IS | {{AttackData-IS | ||
|damage= | |damage=16x6 | ||
|guard= | |guard=Mid | ||
|startup= | |startup=13 | ||
|active= | |active=30 | ||
|recovery= | |recovery=Until Landing + 14 | ||
|advHit= | |advHit= | ||
|advBlock= | |advBlock= | ||
|description= A retreating attack where Botan sprays her guns to propel herself away from the opponent. Despite altering Botan's air trajectory mid-jump, it can be very unsafe even on hit if used too early during a jump, and it's seemingly lacking hitstun makes it impossible to combo out of. When used very close to the ground, Botan will go immediately into her landing animation, adding a bit of endlag while netting her a little bit of [[Idol_Showdown/System#Superchat_Meter|Superchat]] meter. | |description= | ||
* Grants 3 superchats on use | |||
* Rather than having 6 separate active hitboxes, it just always consistently deals 6 hits when the opponent makes contact with the move's active frames | |||
A retreating attack where Botan sprays her guns to propel herself away from the opponent. Despite altering Botan's air trajectory mid-jump, it can be very unsafe even on hit if used too early during a jump, and it's seemingly lacking hitstun makes it impossible to combo out of. When used very close to the ground, Botan will go immediately into her landing animation, adding a bit of endlag while netting her a little bit of [[Idol_Showdown/System#Superchat_Meter|Superchat]] meter. | |||
}} | }} | ||
}} | }} | ||
| Line 545: | Line 809: | ||
{{MoveData | {{MoveData | ||
|name=Trials Ascending | |name=Trials Ascending | ||
|input= | |input={{NotationIcon-IS|2}} {{NotationIcon-IS|2}} '''+'''{{NotationIcon-IS|s}} | ||
|image=IS_Botan_22S.png | |image=IS_Botan_22S.png | ||
| | |hitbox=IS_Botan_22S_Hitbox.png | ||
|caption= | |caption= | ||
|data= | |data= | ||
{{AttackData-IS | {{AttackData-IS | ||
|damage= | |damage=135(27x5) | ||
|guard=Mid | |guard=Mid | ||
|startup= | |startup=7 | ||
|active= | |active=7(3)7(3)7(3)7 | ||
|recovery= | |recovery=22 | ||
|advHit= | |advHit= | ||
|advBlock=- | |advBlock=-10 | ||
|invul= {{Property-IS|Super Armor}} | |invul= (1~40) {{Property-IS|Super Armor}} | ||
|description= | |description= | ||
* | * Costs 1 Star Meter and grants 5 superchats on use | ||
An advancing armored attack where Botan charges forward in her shopping cart. | An advancing armored attack where Botan charges forward in her shopping cart. Botan's metered reversal and an excellent way to punish blockstrings with gaps, as the super armor will win out against opposing EX DPs (but not 236S supers). Activating this move on wakeup or out of blockstun will disable grab protection which allows Botan's superarmor frames to be grabbed. | ||
}} | }} | ||
}} | }} | ||
==Super Star Attack== | === Super Star Attack === | ||
{{MoveData | {{MoveData | ||
|name=Get To Da Choppa! | |name=Get To Da Choppa! | ||
|input= | |input={{NotationIcon-IS|236}} '''+'''{{NotationIcon-IS|s}} | ||
|image=IS_Botan_236S.png | |image=IS_Botan_236S.png | ||
| | |hitbox=IS_Botan_236S_Hitbox.png | ||
|image2=IS_Botan_236S_Custscene.png | |image2=IS_Botan_236S_Custscene.png | ||
|caption= | |caption= | ||
|data= | |data= | ||
{{AttackData-IS | {{AttackData-IS | ||
|damage=255 | |damage=255(1,78,176) | ||
|guard=Mid | |guard=Mid | ||
|startup= | |startup=18 | ||
|active=10 | |active=10 | ||
|recovery= | |recovery=28 | ||
|advHit= | |advHit= | ||
|advBlock= | |advBlock= | ||
|description=Anti-air super. Botan does a large leap that only hits airborne opponents, and a cinematic plays should she hit her opponent, doing large amounts of damage. | |description= | ||
*Costs 1 Star Meter and grants 5 superchats on use | |||
*Minimum damage: 120 | |||
Anti-air super. Botan does a large leap that only hits airborne opponents, and a cinematic plays should she hit her opponent, doing large amounts of damage. | |||
}} | }} | ||
}} | }} | ||
{{MoveData | |||
= | |name=Gun Game | ||
= | |input={{NotationIcon-IS|214}} '''+'''{{NotationIcon-IS|s}} | ||
|image=IS_Botan_4H.png | |||
|hitbox=IS_Botan_236S_Hitbox.png | |||
|caption= | |||
= | |||
|data= | |data= | ||
{{AttackData-IS | |||
|damage=215(25, 10x19) | |||
|guard=Mid | |||
|startup=10 | |||
|active=4+? | |||
|recovery=Total 182 | |||
|advHit=KD | |||
|advBlock=-21 | |||
|invul= (1~13) {{Property-IS|full}} | |||
|description= | |||
*Costs 1 Star Meter and grants 5 superchats on use | |||
*Minimum damage: 106 | |||
*Chip damage: 38 | |||
Longer ranged super that has invuln. After the initial non-projectile hit, the first projectile comes out on frame 25. | |||
}} | |||
}} | }} | ||
==Colors== | ==Colors== | ||
| Line 879: | Line 886: | ||
{{ColorGallery/Color|6| text= Cosplay 5<hr>{{Small|Botan's New Year Costume (Hololive)}}}} | {{ColorGallery/Color|6| text= Cosplay 5<hr>{{Small|Botan's New Year Costume (Hololive)}}}} | ||
{{ColorGallery/Color|7| text= Cosplay 6<hr>{{Small|Noel (BlazBlue)}}}} | {{ColorGallery/Color|7| text= Cosplay 6<hr>{{Small|Noel (BlazBlue)}}}} | ||
{{ColorGallery/Color|8| text= Cosplay 7<hr>{{Small|no direct reference}}}} | |||
{{ColorGallery/Color|9| text= Cosplay 8<hr>{{Small|Marisa (Street Fighter 6)}}}} | |||
{{ColorGallery/Color|10| text= Cosplay 9<hr>{{Small|Kaguya (Under Night In-Birth)}}}} | |||
{{ColorGallery/Color|11| text= Cosplay 10<hr>{{Small|Dante (Devil May Cry)}}}} | |||
}} | }} | ||
==Navigation== | ==Navigation== | ||
{{CharacterSubnav-IS}} | |||
{{Navbox-IS}} | {{Navbox-IS}} | ||
[[Category:Botan Shishiro]] | [[Category:Botan Shishiro]] | ||
[[Category:Idol Showdown]] | [[Category:Idol Showdown]] | ||
Latest revision as of 16:47, 12 June 2024
Special Forces La~Lion - Tactical Space Control
Difficulty - ★★★★☆☆
Introduction
Botan Shishiro is a versatile neutral control character that's able to suffocate her opponents at most ranges by pressuring them with retreating and advancing disjointed attacks, such as 6M or 2H, and slow, high-damage projectiles that shut down approaches when set up. Her amazing combo game and easy conversions allow her to shred down her opponents' health with meterless access to multiple wallbounces via 214M and 22L~M, as well as an air grab that serves as both a starter and a extender. During her combos, she generates large amounts of meter, often giving her fast access to her metered options and assist calls, such as a fast forward advancing armored reversal (22S) that converts into combos even when done from far away, and allows her to punish her opponent during their own blockstring thanks to it's incredibly fast startup.
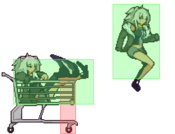
However, the lacking speed of her projectile attacks makes her full-screen zoning weak, especially against characters that have similar but faster tools, and when Botan's backed into a corner, the limits of her shopping cart reversal (it whiffs on jumping opponents, isn't armored on it's first frame, and past a short distance she can be hit out of it by every other metered reversal on the game on reaction), as well as the slow startup of her main anti-airs and lack of range on her 2L are most apparent and can all make it difficult to break out of her opponent's pressure, especially so if she's left without any resources.
Once Botan gets her opponent to block, often after setting up a grenade, her strong strike/throw mixup using 5M has opportunities for pressure resets and frametraps and can make her very scary to deal with thanks to the obscene reward she gets on hit.
Botan is a mid-range high damage fighter that walls her opponent out with disjointed moving normals and capitalizes with her up-close pressure. |
| Pick if you like | Avoid if you dislike |
|---|---|
|
|
Recommended Collabs
Note: As this section of the page was written shortly after the game was released, its only purpose is to help guide new players towards assists that are generally considered useful for the character, and should be revised by an experienced player as the game develops more. Don't be afraid to pick and try something else!
 Watson - Watson's 214S evens out the reward on her strike-throw mixup by allowing for full conversions from her grab. Her timeslow nullifies opposing offense and allows Botan to combo meterless off 22M~H.
 Miko - Miko's lava assist is a great lockdown tool that allows Botan to convert off her overheads, and can setup chip-out situations. Her Off-Collab forces Botan's turn back immediately.
 Roboco - Roboco's missiles are versatile. Botan can extend her pressure with them, use them for combos together with her airgrab, and they can force the opponent to back off. In addition, 214S is an ol'reliable instant fullscreen beam assist with great damage.
Moves
Standing Normals
5L
5L
|
|
|---|---|
Toggle Hitboxes Toggle Hitboxes
|
5M
5M
|
|
|---|---|
Toggle Hitboxes Toggle Hitboxes
|
5M~M
5M~M
|
|
|---|---|
Toggle Hitboxes Toggle Hitboxes
|
5H
5H
|
|
|---|---|
Toggle Hitboxes Toggle Hitboxes
|
Crouching Normals
2L
2L
|
|
|---|---|
Toggle Hitboxes Toggle Hitboxes
|
2M
2M
|
|
|---|---|
Toggle Hitboxes Toggle Hitboxes
|
2H
2H
|
|
|---|---|
Toggle Hitboxes Toggle Hitboxes
|
3H
3H
|
|
|---|---|
Toggle Hitboxes Toggle Hitboxes
|
Jumping Normals
j.L
j.L
|
|
|---|---|
Toggle Hitboxes Toggle Hitboxes
|
j.M
j.M
|
|
|---|---|
Toggle Hitboxes Toggle Hitboxes
|
j.H
j.H
|
|
|---|---|
Toggle Hitboxes Toggle Hitboxes
|
Command Normals
j.2H
Toggle Hitboxes Toggle Hitboxes
|
|---|
6M
Toggle Hitboxes Toggle Hitboxes
|
|---|
4H
Toggle Hitboxes Toggle Hitboxes
|
|---|
Air Throw
Air Throw
Toggle Hitboxes Toggle Hitboxes
|
|---|
Universal Mechanics
Throw
Toggle Hitboxes Toggle Hitboxes
|
|---|
Overhead
Toggle Hitboxes Toggle Hitboxes
|
|---|
Superchat Reversal
Toggle Hitboxes Toggle Hitboxes
|
|---|
Special Attacks
236X
(High) (High) (Low) (Low) S.S.R.B S.S.R.B
|
|
|---|---|
Toggle Hitboxes Toggle Hitboxes
|
214X
(Low) (Low) (High) (High) MLG Trickshot MLG Trickshot
|
|
|---|---|
Toggle Hitboxes Toggle Hitboxes
|
22L
Tactical Retreat Tactical Retreat L Follow-Up L Follow-Up M Follow-Up M Follow-Up H Follow-Up H Follow-Up
|
|
|---|---|
Toggle Hitboxes Toggle Hitboxes
|
22M
Functionally similar to Akuma's "Demon Flip" from Street Fighter. Functionally similar to Akuma's "Demon Flip" from Street Fighter. L Follow-Up L Follow-Up M Follow-Up M Follow-Up H Follow-Up H Follow-Up
|
|
|---|---|
Toggle Hitboxes Toggle Hitboxes
|
22H
But what if Demon Flip was faster? But what if Demon Flip was faster? L Follow-Up L Follow-Up M Follow-Up M Follow-Up H Follow-Up H Follow-Up
|
|
|---|---|
Toggle Hitboxes Toggle Hitboxes
|
j.214H
Toggle Hitboxes Toggle Hitboxes
|
|---|
22S
Toggle Hitboxes Toggle Hitboxes
|
|---|
Super Star Attack
Toggle Hitboxes Toggle Hitboxes
|
|---|
Toggle Hitboxes Toggle Hitboxes
|
|---|
Colors
Yukihana Lamy (Hololive)
Momosuzu Nene (Hololive)
Omaru Polka (Hololive)
Mano Aloe (Hololive)
Botan's New Year Costume (Hololive)
Noel (BlazBlue)
no direct reference
Marisa (Street Fighter 6)
Kaguya (Under Night In-Birth)
Dante (Devil May Cry)


