Yomi 2/Argagarg: Difference between revisions
< Yomi 2
Jump to navigation
Jump to search
No edit summary |
|||
| (11 intermediate revisions by 2 users not shown) | |||
| Line 17: | Line 17: | ||
{{ProConTable | {{ProConTable | ||
|pros= | |pros= | ||
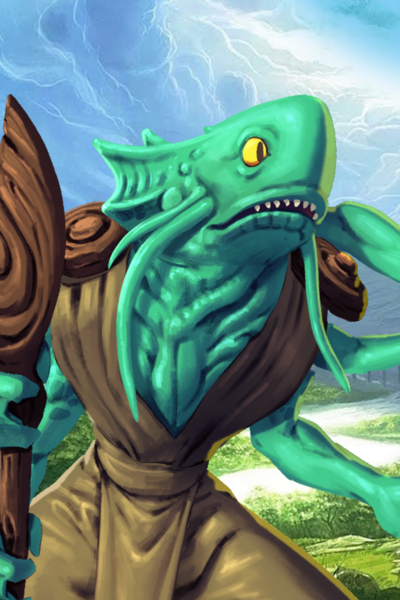
* Argagarg has | *'''Death of a Thousand Pokes.''' Argagarg has a fantastic set of low risk, low damage neutral attacks to pepper the opponent with. In addition to a fireball, his Y is very fast and he has access to a quick high/low mix-up using his A and B normals. Argagarg's ability, Poison, will deal constant damage each turn he goes without being hit - turning otherwise neutral combat interactions into small victories for him. | ||
*'''It's Turtle Time!''' Argagarg has a wide selection of excellent pokes and defensive tools, making it very challenging to crack his defenses. His S1 super block allows him to avoid high/low mix-ups while knocked down, and become complete untouchable while at Long Range. In addition to this, opponents will have a tough time challenging his pseudo-reversal Z without committing to a super. | |||
*'''Card E-fish-ent.''' Argagarg has a very card efficient play style that will generally result in him maintaining a healthy hand size. His combos are short and he has lots of cards that recur back to his hand, such as S1 and his ability. | |||
* | |||
|cons= | |cons= | ||
* Argagarg's low combo point maximum and lack of a C normal attack make him reliant on his specials and supers for damaging conversions. | *'''Death of a Thousand Turns.''' Argagarg's low combo point maximum and lack of a C normal attack make him reliant on his specials and supers for damaging conversions. Overall, this also makes it difficult for Argagarg to make a comeback if the opponent gets a life lead on him. | ||
* Argagarg | *'''Fish with Prep Time.''' Argagarg will often need to take some risks to set-up his truly uncrackable turns, either by initiating Long Range with a confirm into F or calling out a strike with S1. If he loses this defensive momentum or never gets it started in the first place, it can be be difficult for him to turn his meagerly rewarding pokes into anything meaningful. | ||
* Argagarg | *'''Awkward Normals.''' Argagarg can, and will need to, recur his Poison ability by exchanging for blocks. Due to this, he is often unable to use his exchange for normals he would otherwise want, like A or B. This often leaves him with only one normal block in hand at a time and can make him extra vulnerable if knocked down without super meter for S1. | ||
}} | }} | ||
| Line 91: | Line 90: | ||
}} | }} | ||
{{MoveData | {{MoveData | ||
|name=F. '''Power | |name=F. '''Power Shove''' | ||
|image= Yomi2_Argagarg_F.png | |image= Yomi2_Argagarg_F.png | ||
|data= | |data= | ||
| Line 156: | Line 155: | ||
{{AttackData-Yomi2 | {{AttackData-Yomi2 | ||
| moveType = <span style="color: purple; cursor:help" title="{{#lst:Yomi_2/Glossary|throw}}">Throw</span> | | moveType = <span style="color: purple; cursor:help" title="{{#lst:Yomi_2/Glossary|throw}}">Throw</span> | ||
| damage = | | damage = 6 | ||
| blockDamage = | | blockDamage = | ||
| speed = 3 | | speed = 3 | ||
| Line 165: | Line 164: | ||
}} | }} | ||
}} | }} | ||
===Special Moves=== | ===Special Moves=== | ||
{{MoveData | {{MoveData | ||
| Line 207: | Line 207: | ||
| comboType = <span style="color: purple; cursor:help" title="{{#lst:Yomi_2/Glossary|starter}}">Starter</span> | | comboType = <span style="color: purple; cursor:help" title="{{#lst:Yomi_2/Glossary|starter}}">Starter</span> | ||
| comboPoints = 2 | | comboPoints = 2 | ||
| attributes = <span style="color: purple; cursor:help" title="{{#lst:Yomi_2/Glossary|projectile}}">Lv. 1 Projectile</span>, If you get hit by a normal or special attack, the opponent can't combo or pump and takes | | attributes = <span style="color: purple; cursor:help" title="{{#lst:Yomi_2/Glossary|projectile}}">Lv. 1 Projectile</span>, If you get hit by a normal or special attack, the opponent can't combo or pump and takes 6 damage from a goldfish, Pushes - If you didn't get hit, this gets: <span style="color: purple; cursor:help" title="{{#lst:Yomi_2/Glossary|longRange}}">Long Range</span>. | ||
| description = WIP. Complete later. | | description = WIP. Complete later. | ||
}} | }} | ||
| Line 261: | Line 261: | ||
===Basic=== | ===Basic=== | ||
'''X Confirm.''' X > F = 8 Damage + Long Range. | |||
'''Throw Confirm.''' Throw > F = 14 Damage + Long Range. | |||
'''Chain Confirm.''' Y > E > F = 19 Damage / 25 Damage with Pump + Long Range + 1 Meter. | |||
'''Poke Super Confirm.''' A > S2 = 19 Damage. | |||
'''Max Damage Super Confirm.''' Y > S2 = 22 Damage / 28 Damage with Pump + The Edge. | |||
'''Super Long Range Confirm.''' S2 > F = 23 Damage + Long Range. | |||
=== During Knockdown === | |||
'''High Mix-Up Confirm.''' A > Y > F = 16 Damage / 22 Damage with Pump + Long Range. | |||
'''Low Mix-Up Confirm.''' E > F = 13 Damage + Long Rage + 1 Meter. | |||
==Strategy== | ==Strategy== | ||
| Line 269: | Line 284: | ||
==Matchups== | ==Matchups== | ||
{{MatchupData-MKD | |||
| character =Grave | |||
| image =yomi_2_grave_icon.png | |||
| charLink =Yomi_2/Grave | |||
| favorability ={{Property-UNI|Even}} | |||
| data = | |||
}} | |||
{{MatchupData-MKD | |||
| character =Jaina | |||
| image =yomi_2_jaina_icon.png | |||
| charLink =Yomi_2/Jaina | |||
| favorability ={{Property-UNI|Even}} | |||
| data = | |||
}} | |||
{{MatchupData-MKD | |||
| character =Argagarg | |||
| image =yomi_2_argagarg_icon.png | |||
| charLink =Yomi_2/Argagarg | |||
| favorability ={{Property-UNI|Even}} | |||
| data = | |||
}} | |||
{ | {{MatchupData-MKD | ||
| character =Geiger | |||
| image =yomi_2_geiger_icon.png | |||
| | | charLink =Yomi_2/Geiger | ||
| | | favorability = | ||
| | | data =Something about gears. | ||
| | }} | ||
| | |||
| | {{MatchupData-MKD | ||
|| | | character =Setsuki | ||
| | | image =yomi_2_setsuki_icon.png | ||
| | | charLink =Yomi_2/Setsuki | ||
| | | favorability ={{Property-UNI|Even}} | ||
|| | | data = | ||
| | }} | ||
| | |||
| | {{MatchupData-MKD | ||
|| | | character =Valerie | ||
| image =yomi_2_valerie_icon.png | |||
| | | charLink =Yomi_2/Valerie | ||
| | | favorability ={{Property-UNI|Even}} | ||
|| | | data = | ||
| | }} | ||
| | {{MatchupData-MKD | ||
|| | | character =Rook | ||
| | | image =yomi_2_rook_icon.png | ||
| charLink =Yomi_2/Rook | |||
| | | favorability = | ||
| | | data = | ||
}} | |||
| | |||
{{MatchupData-MKD | |||
|| | | character =Midori | ||
| | | image =yomi_2_midori_icon.png | ||
| charLink =Yomi_2/Midori | |||
| favorability ={{Property-UNI|Even}} | |||
| data = | |||
}} | |||
| | {{MatchupData-MKD | ||
| | | character =Lum | ||
| image =yomi_2_lum_icon.png | |||
| | | charLink =Yomi_2/Lum | ||
| favorability ={{Property-UNI|Even}} | |||
|| | | data = | ||
| | }} | ||
{{MatchupData-MKD | |||
| character =DeGrey | |||
| image =yomi_2_degrey_icon.png | |||
| charLink =Yomi_2/DeGrey | |||
| favorability ={{Property-UNI|Even}} | |||
| data = | |||
}} | |||
{{MatchupData-MKD | |||
| character =Menelker | |||
| image =yomi_2_menelker_icon.png | |||
| charLink =Yomi_2/Menelker | |||
| favorability ={{Property-UNI|Even}} | |||
| data = | |||
}} | |||
<noinclude> | <noinclude> | ||
Latest revision as of 13:24, 15 February 2024
Overview
Lore
WIP. Complete brief character lore write-up.
Character Stats
| Health | Character Type | Maximum Combo Points | Unique Trait |
|---|---|---|---|
| 85 | Zoning | 3 | Hex of Murkwood. Start the game with your Poison ability card in your hand (as an extra card). Whenever you exchange to return a High or Low Block to your hand, fetch a Poison ability card from your discard pile. |
Overview
WIP. Complete overview of character gameplay.
| Strengths | Weaknesses |
|---|---|
|
|
Moves
Normal Moves
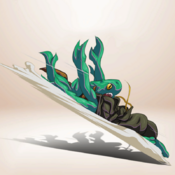
A. Quick High Attack
|
|---|
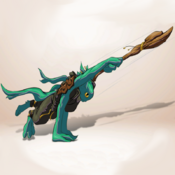
B. Light Low Attack
|
|---|
D. Medium Attack
|
|---|
E. Heavy Low Attack
|
|---|
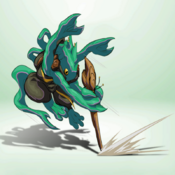
F. Power Shove
|
|---|
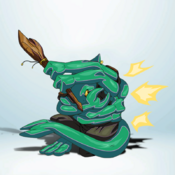
Low Block
|
|---|
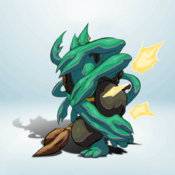
High Block
|
|---|
Dodge
|
|---|
Throw
|
|---|
Special Moves
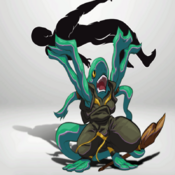
X. Flying Fish
|
|---|
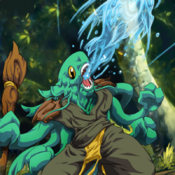
Y. Sparkling Bubble
|
|---|
Z. Rushing River
|
|---|
Super Moves
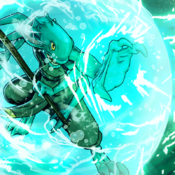
S1. Bubble Shield
|
|---|
S2. Giant Fish
|
|---|
Ability Card
Poison
|
|---|
Combos
Basic
X Confirm. X > F = 8 Damage + Long Range.
Throw Confirm. Throw > F = 14 Damage + Long Range.
Chain Confirm. Y > E > F = 19 Damage / 25 Damage with Pump + Long Range + 1 Meter.
Poke Super Confirm. A > S2 = 19 Damage.
Max Damage Super Confirm. Y > S2 = 22 Damage / 28 Damage with Pump + The Edge.
Super Long Range Confirm. S2 > F = 23 Damage + Long Range.
During Knockdown
High Mix-Up Confirm. A > Y > F = 16 Damage / 22 Damage with Pump + Long Range.
Low Mix-Up Confirm. E > F = 13 Damage + Long Rage + 1 Meter.
Strategy
General
WIP. Complete later.
Matchups
| Grave[No Data] (Even) |
|---|
| Jaina[No Data] (Even) |
|---|
| Argagarg[No Data] (Even) |
|---|
| Geiger |
|---|
| Something about gears. |
| Setsuki[No Data] (Even) |
|---|
| Valerie[No Data] (Even) |
|---|
| Rook[No Data] |
|---|
| Midori[No Data] (Even) |
|---|
| Lum[No Data] (Even) |
|---|
| DeGrey[No Data] (Even) |
|---|
| Menelker[No Data] (Even) |
|---|
