Million Arthur: Arcana Blood/Iai Arthur: Difference between revisions
Jump to navigation
Jump to search
Iai Arthur
mNo edit summary |
No edit summary |
||
| Line 57: | Line 57: | ||
|recovery= | |recovery= | ||
|frameAdv= -5 | |frameAdv= -5 | ||
| | |element= | ||
|description= Jump cancelable | |description= Jump cancelable | ||
}} | }} | ||
| Line 74: | Line 74: | ||
|recovery= | |recovery= | ||
|frameAdv= -8 | |frameAdv= -8 | ||
| | |element= | ||
|description= Hilt thrust. Stagger with it, but be careful cause it's real minus. 2A cancels into this move but not 5A. | |description= Hilt thrust. Stagger with it, but be careful cause it's real minus. 2A cancels into this move but not 5A. | ||
}} | }} | ||
| Line 92: | Line 92: | ||
|recovery= | |recovery= | ||
|frameAdv= -11 | |frameAdv= -11 | ||
| | |element= | ||
|description= Side swaps. Can cancel into specials only on hit. On block can cancel into 5AAAA which can then be cancelled into 236D~ to be made safe. | |description= Side swaps. Can cancel into specials only on hit. On block can cancel into 5AAAA which can then be cancelled into 236D~ to be made safe. | ||
}} | }} | ||
| Line 110: | Line 110: | ||
|recovery= | |recovery= | ||
|frameAdv= -16 | |frameAdv= -16 | ||
| | |element= | ||
|description= Shares it's animation with 236B, it also shares most of 236B's properties, but cannot be held/feinted. Can be cancelled into 236D | |description= Shares it's animation with 236B, it also shares most of 236B's properties, but cannot be held/feinted. Can be cancelled into 236D | ||
}} | }} | ||
| Line 128: | Line 128: | ||
|recovery= | |recovery= | ||
|frameAdv= | |frameAdv= | ||
| | |element= | ||
|description= Finisher to the autocombo if below 100 gauge, if more than 100 gauge can go into her 236 Million Skill. | |description= Finisher to the autocombo if below 100 gauge, if more than 100 gauge can go into her 236 Million Skill. | ||
}} | }} | ||
| Line 145: | Line 145: | ||
|recovery= | |recovery= | ||
|frameAdv= -2 | |frameAdv= -2 | ||
| | |element= | ||
|description= Hits high above Iai. Hits grounded opponents infront on 11f. Jump cancelable | |description= Hits high above Iai. Hits grounded opponents infront on 11f. Jump cancelable | ||
}} | }} | ||
| Line 163: | Line 163: | ||
|recovery= | |recovery= | ||
|frameAdv= -13 | |frameAdv= -13 | ||
| | |element= | ||
|description= Big horizontal button, longer range than 2C. This normal has enough blockstun that if you go into 236A and then feint right away you'll be slightly plus. | |description= Big horizontal button, longer range than 2C. This normal has enough blockstun that if you go into 236A and then feint right away you'll be slightly plus. | ||
}} | }} | ||
| Line 181: | Line 181: | ||
|recovery= | |recovery= | ||
|frameAdv= -7 | |frameAdv= -7 | ||
| | |element= | ||
|description= Big upwards anti-air leg. Jump cancelable. Outside of the corner you'll need to cancel to 236A or 236B to combo | |description= Big upwards anti-air leg. Jump cancelable. Outside of the corner you'll need to cancel to 236A or 236B to combo | ||
}} | }} | ||
| Line 198: | Line 198: | ||
|recovery= | |recovery= | ||
|frameAdv= -3 | |frameAdv= -3 | ||
| | |element= | ||
|description= Chains into itself once. Will continue into 5AA and the rest of the auto combo, but only after it's chained into itself, so 2A>5A does not work. | |description= Chains into itself once. Will continue into 5AA and the rest of the auto combo, but only after it's chained into itself, so 2A>5A does not work. | ||
}} | }} | ||
| Line 215: | Line 215: | ||
|recovery= | |recovery= | ||
|frameAdv= -6 | |frameAdv= -6 | ||
| | |element= | ||
|description= Hits twice, only the first hit is a low. | |description= Hits twice, only the first hit is a low. | ||
}} | }} | ||
| Line 232: | Line 232: | ||
|recovery= | |recovery= | ||
|frameAdv= -13 | |frameAdv= -13 | ||
| | |element= | ||
|description= Sweep | |description= Sweep | ||
}} | }} | ||
| Line 249: | Line 249: | ||
|recovery= | |recovery= | ||
|frameAdv= | |frameAdv= | ||
| | |element= | ||
|description= Iai kicks downward, hits a little bit behind Iai as well, so it can cross up. Jump cancelable. Against Iai, Snow White, Zex, Reisz, and Iori you can get a rising j.A to connect against them standing. A setup for this would be late airdash j.B > j.C > land > rising j.A. From there you can cancel into a fast assist like Kriemhild or Enide to continue a combo. | |description= Iai kicks downward, hits a little bit behind Iai as well, so it can cross up. Jump cancelable. Against Iai, Snow White, Zex, Reisz, and Iori you can get a rising j.A to connect against them standing. A setup for this would be late airdash j.B > j.C > land > rising j.A. From there you can cancel into a fast assist like Kriemhild or Enide to continue a combo. | ||
}} | }} | ||
| Line 266: | Line 266: | ||
|recovery= | |recovery= | ||
|frameAdv= | |frameAdv= | ||
| | |element= | ||
|description= Iai slashes out in front of herself. Hits kind of high so it can be weird as a jump-in. Jump cancelable. | |description= Iai slashes out in front of herself. Hits kind of high so it can be weird as a jump-in. Jump cancelable. | ||
}} | }} | ||
| Line 283: | Line 283: | ||
|recovery= | |recovery= | ||
|frameAdv= | |frameAdv= | ||
| | |element= | ||
|description=Iai slashes downward. Knocks down on air hit and can then be canceled into j.236D for oki options. | |description=Iai slashes downward. Knocks down on air hit and can then be canceled into j.236D for oki options. | ||
}} | }} | ||
| Line 306: | Line 306: | ||
|recovery= | |recovery= | ||
|frameAdv= -12 | |frameAdv= -12 | ||
| | |element=Ice | ||
|description= When held launches an ice block across the ground. | |description= When held launches an ice block across the ground. | ||
}} | }} | ||
| Line 318: | Line 318: | ||
|recovery= | |recovery= | ||
|frameAdv= 8 | |frameAdv= 8 | ||
| | |element=Ice | ||
|description= When held launches an ice block across the ground. | |description= When held launches an ice block across the ground. | ||
}} | }} | ||
| Line 336: | Line 336: | ||
|recovery= | |recovery= | ||
|frameAdv= | |frameAdv= | ||
| | |element=Ice | ||
|description=Hits on both sides. Hits really high up relative to Iai's feet so it's easy to whiff against crouchers | |description=Hits on both sides. Hits really high up relative to Iai's feet so it's easy to whiff against crouchers | ||
}} | }} | ||
| Line 356: | Line 356: | ||
|recovery= | |recovery= | ||
|frameAdv= | |frameAdv= | ||
| | |element=Throw | ||
|description=Hits Twice | |description=Hits Twice | ||
}} | }} | ||
| Line 375: | Line 375: | ||
|recovery= | |recovery= | ||
|frameAdv= | |frameAdv= | ||
| | |element= | ||
|description=Hits Twice | |description=Hits Twice | ||
}} | }} | ||
| Line 394: | Line 394: | ||
|recovery= | |recovery= | ||
|frameAdv= | |frameAdv= | ||
| | |element= | ||
|description=Hits Twice | |description=Hits Twice | ||
}} | }} | ||
| Line 421: | Line 421: | ||
|recovery= 6f (feint) | |recovery= 6f (feint) | ||
|frameAdv= | |frameAdv= | ||
| | |element= | ||
|description=Iai enters into stance on button press and then slashes on button release. While in stance you can cancel out by pressing any button. Each version can be stance canceled at a different timing due to their startup, that means A feints are the fastest, C feints are the slowest. All versions can be canceled into 236D on hit or block. | |description=Iai enters into stance on button press and then slashes on button release. While in stance you can cancel out by pressing any button. Each version can be stance canceled at a different timing due to their startup, that means A feints are the fastest, C feints are the slowest. All versions can be canceled into 236D on hit or block. | ||
}} | }} | ||
| Line 433: | Line 433: | ||
|recovery= | |recovery= | ||
|frameAdv= -6 | |frameAdv= -6 | ||
| | |element= | ||
|description=A version is at an upward angle. If you feint after C normals you'll be slightly plus, after B normals you'll be even, after A normals you'll be negative | |description=A version is at an upward angle. If you feint after C normals you'll be slightly plus, after B normals you'll be even, after A normals you'll be negative | ||
}} | }} | ||
| Line 445: | Line 445: | ||
|recovery= | |recovery= | ||
|frameAdv= -17 | |frameAdv= -17 | ||
| | |element= | ||
|description=B version is at a less extreme angle. | |description=B version is at a less extreme angle. | ||
}} | }} | ||
| Line 457: | Line 457: | ||
|recovery= | |recovery= | ||
|frameAdv= -27 | |frameAdv= -27 | ||
| | |element= | ||
|description=C version is straight ahead on the ground and hits low. | |description=C version is straight ahead on the ground and hits low. | ||
}} | }} | ||
| Line 477: | Line 477: | ||
|recovery= | |recovery= | ||
|frameAdv=-10 | |frameAdv=-10 | ||
| | |element= | ||
|description=Airborne from frame 6. Soft Knockdown. Iai teleports up and falls down with her sword. All versions move the same distance. The timing to connect on a crouching opponent will depend on the character's size. For reference, A version will connect on a crouching Iai after 30f, B version after 26f, C version after 33f. | |description=Airborne from frame 6. Soft Knockdown. Iai teleports up and falls down with her sword. All versions move the same distance. The timing to connect on a crouching opponent will depend on the character's size. For reference, A version will connect on a crouching Iai after 30f, B version after 26f, C version after 33f. | ||
}} | }} | ||
| Line 489: | Line 489: | ||
|recovery= | |recovery= | ||
|frameAdv=-11 | |frameAdv=-11 | ||
| | |element= | ||
|description=Airborne from frame 6. Hard Knockdown. | |description=Airborne from frame 6. Hard Knockdown. | ||
}} | }} | ||
| Line 501: | Line 501: | ||
|recovery= | |recovery= | ||
|frameAdv=-12 | |frameAdv=-12 | ||
| | |element= | ||
|description=Airborne from frame 6. Bounces opponent on hit. | |description=Airborne from frame 6. Bounces opponent on hit. | ||
}} | }} | ||
| Line 529: | Line 529: | ||
|recovery= | |recovery= | ||
|frameAdv= | |frameAdv= | ||
| | |element=Ice | ||
|description=Command Run. Total duration is 56 frames. | |description=Command Run. Total duration is 56 frames. | ||
}} | }} | ||
| Line 541: | Line 541: | ||
|recovery= | |recovery= | ||
|frameAdv= | |frameAdv= | ||
| | |element= | ||
|description=Ground Roll. Takes 31f to complete. Passes through the opponent if close enough meaning you can left/right opponents trying to block you. Doing this right away out of the dash is the fastest way to recover, you can use it to extend combos following a 236A/B in the corner | |description=Ground Roll. Takes 31f to complete. Passes through the opponent if close enough meaning you can left/right opponents trying to block you. Doing this right away out of the dash is the fastest way to recover, you can use it to extend combos following a 236A/B in the corner | ||
}} | }} | ||
| Line 553: | Line 553: | ||
|recovery= | |recovery= | ||
|frameAdv= -14 | |frameAdv= -14 | ||
| | |element= | ||
|description=Makibarai. Very long range low, also very punishable. Projectile invun. | |description=Makibarai. Very long range low, also very punishable. Projectile invun. | ||
}} | }} | ||
| Line 565: | Line 565: | ||
|recovery= | |recovery= | ||
|frameAdv= -15 | |frameAdv= -15 | ||
| | |element= | ||
|description=Crescent Blade Flash. Long range overhead. Knocks down on hit, can followup with some assists. Common way to end combos following a 236A/B | |description=Crescent Blade Flash. Long range overhead. Knocks down on hit, can followup with some assists. Common way to end combos following a 236A/B | ||
}} | }} | ||
| Line 577: | Line 577: | ||
|recovery= | |recovery= | ||
|frameAdv= +23 | |frameAdv= +23 | ||
| | |element=Ice | ||
|description= Reverse Ice Flower. Can be blocked either forwards or backwards. There's a bit of a gap after moving through the opponent where Iai can be hit, but it looks very similar to the A followup, which makes it trickier to react to than it seems. | |description= Reverse Ice Flower. Can be blocked either forwards or backwards. There's a bit of a gap after moving through the opponent where Iai can be hit, but it looks very similar to the A followup, which makes it trickier to react to than it seems. | ||
}} | }} | ||
| Line 605: | Line 605: | ||
|recovery= | |recovery= | ||
|frameAdv= | |frameAdv= | ||
| | |element=Ice | ||
|description= Air command dash, angles upwords, TK this off of 5B to get the party started. | |description= Air command dash, angles upwords, TK this off of 5B to get the party started. | ||
}} | }} | ||
| Line 617: | Line 617: | ||
|recovery= | |recovery= | ||
|frameAdv= | |frameAdv= | ||
| | |element= | ||
|description= Dive. Iai fast falls to the ground, she can pass through the opponent and it's really hard to tell what side you're going to end up on sometimes, but don't fret, if you can't tell what side your mix-up is going to be on, then what chance does your opponent have? | |description= Dive. Iai fast falls to the ground, she can pass through the opponent and it's really hard to tell what side you're going to end up on sometimes, but don't fret, if you can't tell what side your mix-up is going to be on, then what chance does your opponent have? | ||
}} | }} | ||
| Line 629: | Line 629: | ||
|recovery= | |recovery= | ||
|frameAdv= | |frameAdv= | ||
| | |element= | ||
|description= Hayabusa Strike. Iai will correct herself somewhat to hit the opponent and divekick, so this can end up in a few different angles. It can also cross up. The lower you are the more advantage you'll have. When hitting low you tend to be in the ball park of +7, so it's almost always your turn. Be wary if you do it from really high up though. | |description= Hayabusa Strike. Iai will correct herself somewhat to hit the opponent and divekick, so this can end up in a few different angles. It can also cross up. The lower you are the more advantage you'll have. When hitting low you tend to be in the ball park of +7, so it's almost always your turn. Be wary if you do it from really high up though. | ||
}} | }} | ||
| Line 641: | Line 641: | ||
|recovery= | |recovery= | ||
|frameAdv= | |frameAdv= | ||
| | |element= | ||
|description=Crescent Blade Flash. Knocks down on hit. | |description=Crescent Blade Flash. Knocks down on hit. | ||
}} | }} | ||
| Line 653: | Line 653: | ||
|recovery= | |recovery= | ||
|frameAdv= | |frameAdv= | ||
| | |element=Ice | ||
|description= Ice Shard. The projectiles fall below Iai and kind of cover for her. Iai can't act on the way down but she's real plus when the opponent blocks the ice shards. It's possible to kind of weave through them and make it whiff, but not likely. | |description= Ice Shard. The projectiles fall below Iai and kind of cover for her. Iai can't act on the way down but she's real plus when the opponent blocks the ice shards. It's possible to kind of weave through them and make it whiff, but not likely. | ||
}} | }} | ||
| Line 673: | Line 673: | ||
|recovery= | |recovery= | ||
|frameAdv= -20 | |frameAdv= -20 | ||
| | |element= | ||
|description=Air okay. Iai dashes forward for a big anime slash. | |description=Air okay. Iai dashes forward for a big anime slash. | ||
}} | }} | ||
| Line 691: | Line 691: | ||
|recovery= | |recovery= | ||
|frameAdv= -49 | |frameAdv= -49 | ||
| | |element=Ice | ||
|description= A big diagonal ice shard explodes outwards, if the opponent is close enough Iai slashes them a bunch. Because of the ice | |description= A big diagonal ice shard explodes outwards, if the opponent is close enough Iai slashes them a bunch. Because of the ice element this super is a good way to end enchant boost combos if you have the meter to burn. | ||
}} | }} | ||
}} | }} | ||
| Line 710: | Line 710: | ||
|recovery= -58 | |recovery= -58 | ||
|frameAdv= | |frameAdv= | ||
| | |element=Ice | ||
|description= | |description= | ||
}} | }} | ||
Revision as of 14:42, 13 November 2019

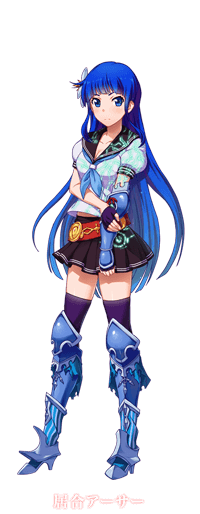
Profile
- EN Name: Iai Arthur
- JP Name: 居合アーサー
- Voice Actress: Sumire Uesaka
- Element: Ice
- Health: 21000
Overview
Stance character with battou strikes. Has very strong mixup potential in both left/right and high/low varieties. Can carry into the corner very easily off a conversion if desired. Has no run but instead has a dash.
| Strengths | Weaknesses |
|---|---|
|
|
Recommended Support Knights
- Enide
- Iai's ice element synergises with Enide and element counters, offering easy access to screen carry and opening up many damage opportunities.
- Hawkeye
- Often seen paired with Enide. Hawkeye allows Iai to use Enide offensively in neutral, allowing her to pick up from hits she otherwise may not have been able to confirm
- Mercenary Arthur
- Mercenary’s extended hitstun allows Iai to set up j.D CH enders leading to left right okizeme
- Lancelot
- Okizeme support. Iai can set up a number of advantageous situations and mixups from 236D~C ender
- Pharsalia
- Key support for maximising damage off EB combos. Iai has an elemental super allowing for double elemental super combos
Normal Moves
5A
5A  |
|---|
5AA
5AA  |
|---|
5AAA
5AAA  |
|---|
5AAAA
5AAAA  |
|---|
5AAAAA
5AAAAA  |
|---|
5B
5B  |
|---|
5C
5C  |
|---|
6C
6C  |
|---|
2A
2A  |
|---|
2B
2B  |
|---|
2C
2C  |
|---|
j.A
j.A  |
|---|
j.B
j.B  |
|---|
j.C
j.C  |
|---|
Elemental Attacks
5D
Ice Flower 5D  5D 5D  5[D] 5[D]
|
|---|
j.D
Ice Moon j.D  |
|---|
Throws
5/6B+C
Forward Throw 5/6B+C  |
|---|
4B+C
Back Throw 4B+C  |
|---|
j.B+C
Air Throw j.B+C  |
|---|
Special Moves
236A/B/C
Piercing Strike  236A/B/C 236A/B/C  ~A ~A  ~B ~B ~C ~C
|
|---|
623A/B/C
Snowfall Edge 623A/B/C  |
|---|
236D
Freezing Glide  236D 236D  ~A ~A  ~B ~B  ~C ~C  ~D ~D
|
|---|
j236D
Air Freezing Glide  j.236D j.236D  ~A ~A  ~B ~B  ~C ~C  ~D ~D
|
|---|
Million Skill
236XX
Cross Air Flash 236XX  |
|---|
623XX
Ice Blade Sculpture 623XX  |
|---|
Million Excalibur
Chaotic Seasons (Snow Moon Flowers) 214XX  |
|---|
Combos
Solo Combos
A Starter
- Autocombo > Million Skill
- Autocombo into super.
- 5AAA > 236[X]~X > 5AAAA > 236D~C
- Advanced 5/2A confirm. After the first autocombo you need to manually cancel into 236A/B/C to be able to cancel the stance. Any version will work so if you're having trouble with the stance cancel try other combinations of buttons to see which feels best.
- 2/5A > 2/5B > 5C > 236B > 236D~C
- Works from most ranges on standing or crouching, but not at max range.
- 2/5A > 2/5B > 5C > 236C > 236D~B
- More consistent than the above, but harder to extend because of the ender.
- 2/5A > 2/5B > 2C > 236D~B
- 2/5A > 2/5B > 2C > reafe assist > 236B > 236D~C
2C starter
- 2C > 236D~B > A+B+C > Dash > 5AA > 5B > 5C > Airdash > 5AA > 5B > 5C > 236A > 236D~C
236A/B/C Starter
- 236A/B > 236D~C
- 236A > 236D~D > 5A > 5B > 5C > 236B > 236D~C
- Only works near the opponent otherwise the 236D~D will not connect and they will fly outward and tech.
- 236C > 236D~B
623A/B/C Starter
- 623A/B (ch) > 236A/B > 236D~C
- 623C > 5A > 5B > Jump Cancel > j.B > (j.C) / (Jump Cancel > j.B > j.D)
- 623C > 5B > 236A/B > 236D~C
- 623C > 5B > Jump Cancel > j.A > j.B > Jump Cancel > j.B > j.C
236D~X Starter
- 236D~B > A+B+C > Dash > 5AA > 5B > 5C > Airdash > j.B > j.C > 5AA > 5B > 5C > 236B > 236D~C
- 236D~D > Dash > 5AA > 5B > 5C > 236A > 236D~C
Grab Starters
- Grab > A+B+C > 5AA > 5B > 5C > Airdash > j.B > j.C > 5AA > 5B > 5C > Jump Cancel > j.A > j.B > j.C > (j.D > 236XX)
- Grab > A+B+C > 5AA > 5B > 5C > Airdash > j.B > j.C > 5AA > 5B > 5C > (236A > 236D~C) / (236XX/623XX)
Corner
- 2/5A > 2/5B > 5C > 236B > 236D~C
- 2/5A > 2/5B > 5C > 236B > 236D~A > 5B > Jump Cancel > j.B Jump Cancel > j.B > j.C
Enchant Boost Starters
- 2/5A > 5B > 5C > 236[X]~X > Micro Dash > 5A > 5B > 5C > 236[X]~X > Micro Dash > 5A > 5B > 5C > 236B > 236D~C
- 2/5A > 5B > 6C > Airdash > j.B > j.C > 5AA > 5B > 5C > 236A > 236D~C
Support Knight Combos
236A/B/C Starter
- 236A/B > 236D~C > A+B+C > dash > 5B > reafe assist > airdash > j.B > j.C > 5AA > 5B > 5C > (236A > 236D~C) / (623XX > falsaria assist)
- 236C > 236D~B > A+B+C > dash > 5B > 5C > airdash > j.B > j.C > 5AA > 5B > 5C > (236A > 236D~C) / (623XX > falsaria assist)
623A/B/C Starter
- 623B > A+B+C > dash > 5B > reafe assist > airdash > j.B > j.C > 5AA > 5B > 5C > (236A > 236D~C) / (623XX > falsaria assist)
236D~X Starters
- 236D~C > A+B+C > Dash > 5B > Reafe assist > Airdash > j.B > j.C > 5AA > 5B > 5C > 236A > 236D~C
- You don't need to input "Dash" if you do this combo when the opponent is in the corner. Also note that if this combo is done in midscreen keep in mind the beginning 236D~C will in fact put you on the other side of the opponent after the Enchant Boost activation.
Corner
- 623B > A+B+C > 5B > Reafe assist > Airdash > j.B > j.C > 5AA > 5B > 5C > 236A > 236D~C
- 623C > 5A > 5B > Jump Cancel > j.A > j.B > Jump Cancel > j.A > j.B > j.C > (j.D > Mercenary Arthur assist > j.236D~C)
- Counter Hit 623A/B also leads into this same combo.
Videos
- Iai Arthur official combo video A by Square Enix (2017)
- Iai Arthur official combo video B by Square Enix (2017)
Colors
External Links
- Twitter hashtag: #MAAB_IA


