Street Fighter: The Movie/Balrog (Boxer): Difference between revisions
Jump to navigation
Jump to search
The Opponent (talk | contribs) (Add move list with damage values) |
(→Throws) |
||
| (21 intermediate revisions by 2 users not shown) | |||
| Line 1: | Line 1: | ||
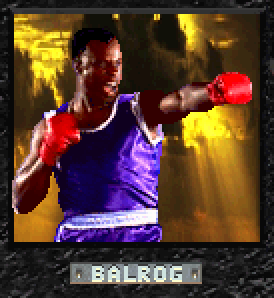
[[File:SFTM-Balrog-Portrait.png|frame]] | [[File:SFTM-Balrog-Portrait.png|frame]] | ||
* Stagger frames: 36 | |||
==Introduction== | |||
* Played by: [https://www.imdb.com/name/nm0005598/ Grand L. Bush] | |||
* Stagger frames: 36 | |||
The boxer is named '''Balrog''' in all versions of the game, due to the movie using Capcom USA's character name changes in the Japanese dub. | |||
===Playstyle=== | |||
'''Balrog''' excels at rushdown, not unlike his traditional ''Street Fighter II'' equivalent. Thanks to the shorter charge duration of this game, Balrog is able to do his charge attacks in much quicker succession. Due to the actor's much shorter arm length compared to that of the sprite-based boxer of Capcom's game, his normals have less importance in controlling space. | |||
With Reflect Glove, Balrog can shut down any projectile spam that his Buffalo Headbutt cannot safely evade, as he can simply stand in place and push fireballs and other objects away as long as he likes. | |||
==Normals== | ==Normals== | ||
===Standing=== | ===Standing=== | ||
{{MoveData | {{MoveData | ||
|name=s.LP | |name=s.LP | ||
|image=SFTM-Balrog-sLP.png | |||
|data={{AttackData-SFTM | |data={{AttackData-SFTM | ||
|damage=7 | |damage=7 | ||
|guard=Mid | |guard=Mid | ||
|meter=1 | |meter=1 | ||
|stun=8 | |||
|description=Standard jab. | |||
}} | }} | ||
}} | }} | ||
{{MoveData | {{MoveData | ||
|name=s.MP | |name=s.MP | ||
|image=SFTM-Balrog-sMP.png | |||
|data={{AttackData-SFTM | |data={{AttackData-SFTM | ||
|damage=10 | |damage=10 | ||
|guard=Mid | |guard=Mid | ||
|meter=1 | |meter=1 | ||
|stun=7 | |||
|property=Knockdown | |property=Knockdown | ||
|description=Launches standing opponents and can be used to begin juggles on airborne opponents. | |description=Launches standing opponents and can be used to begin juggles on airborne opponents. | ||
| Line 23: | Line 39: | ||
{{MoveData | {{MoveData | ||
|name=s.HP | |name=s.HP | ||
|image=SFTM-Balrog-sHP.png | |||
|data={{AttackData-SFTM | |data={{AttackData-SFTM | ||
|damage=13 | |damage=13 | ||
|guard=Mid | |guard=Mid | ||
|meter=1 | |meter=1 | ||
|stun=20 | |||
}} | }} | ||
}} | }} | ||
{{MoveData | {{MoveData | ||
|name=s.LK | |name=s.LK | ||
|image=SFTM-Balrog-sLK.png | |||
|data={{AttackData-SFTM | |data={{AttackData-SFTM | ||
|damage=7 | |damage=7 | ||
|guard=Mid | |guard=Mid | ||
|meter=1 | |meter=1 | ||
|stun=8 | |||
}} | }} | ||
}} | }} | ||
{{MoveData | {{MoveData | ||
|name=s.MK | |name=s.MK | ||
|image=SFTM-Balrog-sMK.png | |||
|data={{AttackData-SFTM | |data={{AttackData-SFTM | ||
|damage=9 | |damage=9 | ||
|guard=Mid | |guard=Mid | ||
|meter=1 | |meter=1 | ||
|stun=6 | |||
|property=Stagger | |property=Stagger | ||
}} | }} | ||
| Line 48: | Line 70: | ||
{{MoveData | {{MoveData | ||
|name=s.HK | |name=s.HK | ||
|image=SFTM-Balrog-sMK.png | |||
|data={{AttackData-SFTM | |data={{AttackData-SFTM | ||
|damage=13 | |damage=13 | ||
|guard=Mid | |guard=Mid | ||
|meter=1 | |meter=1 | ||
|stun=10 | |||
|property=Stagger | |property=Stagger | ||
}} | }} | ||
}} | }} | ||
===Crouching=== | ===Crouching=== | ||
{{MoveData | {{MoveData | ||
|name=cr.LP | |name=cr.LP | ||
|image=SFTM-Balrog-crLP.png | |||
|data={{AttackData-SFTM | |data={{AttackData-SFTM | ||
|damage=7 | |damage=7 | ||
|guard=Low | |guard=Low | ||
|meter=1 | |meter=1 | ||
|stun=4 | |||
}} | }} | ||
}} | }} | ||
{{MoveData | {{MoveData | ||
|name=cr.MP | |name=cr.MP | ||
|image=SFTM-Balrog-crLP.png | |||
|data={{AttackData-SFTM | |data={{AttackData-SFTM | ||
|damage=10 | |damage=10 | ||
|guard=Mid | |guard=Mid | ||
|meter=1 | |meter=1 | ||
|stun=7 | |||
}} | }} | ||
}} | }} | ||
{{MoveData | {{MoveData | ||
|name=cr.HP | |name=cr.HP | ||
|image=SFTM-Balrog-crHP.png | |||
|data={{AttackData-SFTM | |data={{AttackData-SFTM | ||
|damage=13 | |damage=13 | ||
|guard=Mid | |guard=Mid | ||
|meter=1 | |meter=1 | ||
|stun=20 | |||
|description=Though the animation is an uppercut, it does not launch. | |description=Though the animation is an uppercut, it does not launch. | ||
}} | }} | ||
| Line 83: | Line 114: | ||
{{MoveData | {{MoveData | ||
|name=cr.LK | |name=cr.LK | ||
|image=SFTM-Balrog-crLP.png | |||
|data={{AttackData-SFTM | |data={{AttackData-SFTM | ||
|damage=7 | |damage=7 | ||
|guard=Low | |guard=Low | ||
|meter=1 | |meter=1 | ||
|stun=4 | |||
}} | }} | ||
}} | }} | ||
{{MoveData | {{MoveData | ||
|name=cr.MK | |name=cr.MK | ||
|image=SFTM-Balrog-crMK.png | |||
|data={{AttackData-SFTM | |data={{AttackData-SFTM | ||
|damage=9 | |damage=9 | ||
|guard=Low | |guard=Low | ||
|meter=1 | |meter=1 | ||
|stun=6 | |||
}} | }} | ||
}} | }} | ||
{{MoveData | {{MoveData | ||
|name=cr.HK | |name=cr.HK | ||
|image=SFTM-Balrog-crHK.png | |||
|data={{AttackData-SFTM | |data={{AttackData-SFTM | ||
|damage=13 | |damage=13 | ||
|guard=Low | |guard=Low | ||
|meter=1 | |meter=1 | ||
|stun=10 | |||
|property=Knockdown | |property=Knockdown | ||
|description=Can chain into itself and juggle. Ideal for use as a combo ender and for applying pressure, in neutral or after a blocked super. | |description=Acts as a sweep, but goes above other cr.HKs and will frequently beat them. Can chain into itself and juggle. Ideal for use as a combo ender and for applying pressure, in neutral or after a blocked super. | ||
}} | }} | ||
}} | }} | ||
===Air=== | ===Air=== | ||
{{MoveData | {{MoveData | ||
|name=j.LP | |name=j.LP | ||
|image=SFTM-Balrog-jLP.png | |||
|data={{AttackData-SFTM | |data={{AttackData-SFTM | ||
|damage=7 | |damage=7 | ||
|guard=High | |guard=High | ||
|meter=1 | |meter=1 | ||
|stun=8 | |||
|active=Until landing | |active=Until landing | ||
}} | }} | ||
| Line 119: | Line 159: | ||
{{MoveData | {{MoveData | ||
|name=j.MP | |name=j.MP | ||
|image=SFTM-Balrog-jMP.png | |||
|data={{AttackData-SFTM | |data={{AttackData-SFTM | ||
|damage=10 | |damage=10 | ||
|guard=High | |guard=High | ||
|meter=1 | |meter=1 | ||
|stun=14 | |||
|active=Until landing | |active=Until landing | ||
}} | }} | ||
| Line 128: | Line 170: | ||
{{MoveData | {{MoveData | ||
|name=j.HP | |name=j.HP | ||
|image=SFTM-Balrog-jMP.png | |||
|data={{AttackData-SFTM | |data={{AttackData-SFTM | ||
|damage=13 | |damage=13 | ||
|guard=High | |guard=High | ||
|meter=1 | |meter=1 | ||
|stun=20 | |||
|active=Until landing | |active=Until landing | ||
}} | }} | ||
| Line 137: | Line 181: | ||
{{MoveData | {{MoveData | ||
|name=j.LK | |name=j.LK | ||
|image=SFTM-Balrog-jLP.png | |||
|data={{AttackData-SFTM | |data={{AttackData-SFTM | ||
|damage=7 | |damage=7 | ||
|guard=High | |guard=High | ||
|meter=1 | |meter=1 | ||
|stun=8 | |||
|active=Until landing | |active=Until landing | ||
}} | }} | ||
| Line 146: | Line 192: | ||
{{MoveData | {{MoveData | ||
|name=j.MK | |name=j.MK | ||
|image=SFTM-Balrog-jMP.png | |||
|data={{AttackData-SFTM | |data={{AttackData-SFTM | ||
|damage=9 | |damage=9 | ||
|guard=High | |guard=High | ||
|meter=1 | |meter=1 | ||
|stun=14 | |||
|active=Until landing | |active=Until landing | ||
}} | }} | ||
| Line 155: | Line 203: | ||
{{MoveData | {{MoveData | ||
|name=j.HK | |name=j.HK | ||
|image=SFTM-Balrog-jMP.png | |||
|data={{AttackData-SFTM | |data={{AttackData-SFTM | ||
|damage=13 | |damage=13 | ||
|guard=High | |guard=High | ||
|meter=1 | |meter=1 | ||
|stun=20 | |||
|active=Until landing | |active=Until landing | ||
}} | }} | ||
}} | }} | ||
== | |||
==Universal Mechanics== | |||
===Throws=== | |||
{{MoveData | |||
|name=Head Bomber | |||
|input=''Close''<br />b/f+HP | |||
|image=SFTM-Balrog-HeadBomber.png | |||
|data={{AttackData-SFTM | |||
|damage=3x2-6=6-18 | |||
|stun=8-14 | |||
|property=Stagger | |||
|description=Hits three times without extra input. Mash the joystick for up to six hits. The opponent can also mash the joystick to reduce the number of hits. | |||
}} | |||
}} | |||
{{MoveData | |||
|name=Shoulder Throw | |||
|input=''Close''<br />b/f+MK or HK | |||
|image=SFTM-Balrog-ShoulderThrow.png | |||
|data={{AttackData-SFTM | |||
|damage=12 | |||
|stun=6 | |||
|property=Escapable, Counterable | |||
|description=f+K will throw behind Balrog, b+K will throw in front. Can be used OTG. With the proper timing and spacing, the front throw can be used to catch opponents in a throw loop if they are unaware of the throw escape/counter mechanisms. | |||
}} | |||
}} | |||
===Throw Counters=== | |||
{{MoveData | |||
|name=Throw Counter/Reversal | |||
|input=u+HP | |||
|data={{AttackData-SFTM | |||
|damage=13 | |||
|description=This input and data are for Balrog's opponent after he lands a throw. See [[Street Fighter: The Movie/Mechanics#Throws|Throws]] for more information. | |||
}} | |||
}} | |||
{{MoveData | |||
|name=Slammaster | |||
|input=d+HK | |||
|data={{AttackData-SFTM | |||
|damage=13 | |||
|description=This input and data are for Balrog's opponent after he reverses a countered throw. See [[Street Fighter: The Movie/Mechanics#Throws|Throws]] for more information. | |||
}} | |||
}} | |||
===Interrupts=== | |||
{{MoveData | |||
|name=Buffalo Headbutt | |||
|input=''During blockstun''<br />u+HP | |||
|image=SFTM-Balrog-InterruptHeadbutt.png | |||
|data={{AttackData-SFTM | |||
|damage=7+8=15 | |||
|guard=Mid | |||
|meter=5 (+1 on each hit) | |||
|stun=4+21=25 | |||
|description=Faster and longer travel than HP Buffalo Headbutt. | |||
}} | |||
}} | |||
{{MoveData | |||
|name=Dash Upper | |||
|input=''During blockstun''<br />f+HK | |||
|image=SFTM-Balrog-InterruptUpper.png | |||
|data={{AttackData-SFTM | |||
|damage=3 | |||
|guard=Mid | |||
|meter=5 (+1 on hit) | |||
|stun=1 | |||
|property=Knockdown | |||
|description=Same travel distance as HK Dash Upper, but far less damage. Another buffered charge move can follow this move immediately. | |||
}} | |||
}} | |||
===Regeneration=== | |||
{{MoveData | |||
|name=Regeneration | |||
|input=Hold HK, release | |||
|image=SFTM-Balrog-Regeneration.png | |||
|data={{AttackData-SFTM | |||
|description=Recovers 17 health over 34 frames. See [[Street Fighter: The Movie/Mechanics#Regeneration|Regeneration]] for more information. | |||
}} | |||
}} | |||
===Danger Move=== | |||
{{MoveData | |||
|name=Jab Punch Frenzy | |||
|input=''10 health or less''<br />Hold LK, f, f, release LK | |||
|image=SFTM-Balrog-sLP.png | |||
|image2=SFTM-Balrog-OneTwoJabs.png | |||
|data={{AttackData-SFTM | |||
|damage=7+5+4+3=19 | |||
|guard=Mid | |||
|meter=4 (+1 on each hit) | |||
|stun=8x4=24 | |||
|description=Does not push back Balrog or his opponent. A poor option for low health situations with extremely limited utility. Regeneration or LK Dash Upper is preferable, as the latter can knock down. | |||
}} | |||
}} | |||
==Special Moves== | |||
{{MoveData | |||
|name=One-Two Jabs | |||
|input=LP LP LP... | |||
|image=SFTM-Balrog-OneTwoJabs.png | |||
|data={{AttackData-SFTM | |||
|damage=13 | |||
|guard=Mid | |||
|meter=1 each hit | |||
|stun=8 each hit | |||
|description=Repeated LPs with a different animation and less recovery. From point blank, this can land at least two hits. Has the input of a mash special move, but isn't a true one as it does not gain extra meter. | |||
}} | |||
}} | |||
{{MoveData | |||
|name=Ground One-Two Jabs | |||
|input=cr.MP cr.MP cr.MP... | |||
|image=SFTM-Balrog-GroundOneTwoJabs.png | |||
|data={{AttackData-SFTM | |||
|damage=13 | |||
|guard=Low | |||
|meter=1 each hit | |||
|stun=7 each hit | |||
|description=Repeated crouching MPs with a different animation and less recovery. From point blank, this can land at least two hits. More utility than standing One-Two Jabs as it is faster and reduces recovery more. Has the input of a mash special move, but isn't a true one as it does not gain extra meter. | |||
}} | |||
}} | |||
{{MoveData | {{MoveData | ||
|name=Turn Punch | |name=Turn Punch | ||
|input=Hold P, release | |input=Hold P, release | ||
|image=SFTM-Balrog-TurnPunch.png | |||
|data={{AttackData-SFTM | |data={{AttackData-SFTM | ||
|damage=13 | |damage=13 | ||
|guard=Mid | |guard=Mid | ||
|meter=5 (+1 on hit) | |meter=5 (+1 on hit) | ||
|stun=10 | |||
|property=Stagger | |property=Stagger | ||
|description=Only one punch button is needed for this move. By holding two or three punch buttons and releasing in succession, up to three Turn Punches can be done in a row. All versions are identical. | |description=Only one punch button is needed for this move. By holding two or three punch buttons and releasing in succession, up to three Turn Punches can be done in a row. All versions are identical. | ||
| Line 177: | Line 348: | ||
|name=Charge Upper | |name=Charge Upper | ||
|input=Hold 3K, release | |input=Hold 3K, release | ||
|image=SFTM-Balrog-ChargeUpper.png | |||
|data={{AttackData-SFTM | |data={{AttackData-SFTM | ||
|version=60 frames/<br />2 game seconds | |version=1: 60 frames/<br />2 game seconds <span style="cursor:help; border-bottom: 1px dotted #800080" title="1 game second is 34 frames long. Game second lengths in this table are rounded up.">*</span> | ||
|damage=8 | |damage=8 | ||
|guard=Mid | |guard=Mid | ||
|meter=9 (+1 on hit) | |meter=9 (+1 on hit) | ||
|stun=9 | |||
|property=Knockdown | |property=Knockdown | ||
}} | }} | ||
{{AttackData-SFTM | {{AttackData-SFTM | ||
|version=128 frames/<br />4 game seconds | |version=2: 128 frames/<br />4 game seconds | ||
|damage=19 | |damage=19 | ||
|guard=Mid | |guard=Mid | ||
|meter=13 (+1 on hit) | |meter=13 (+1 on hit) | ||
|stun=14 | |||
|property=Knockdown | |property=Knockdown | ||
}} | }} | ||
{{AttackData-SFTM | {{AttackData-SFTM | ||
|version=256 frames/<br />8 game seconds | |version=3: 256 frames/<br />8 game seconds | ||
|damage=26 | |damage=26 | ||
|guard=Mid | |guard=Mid | ||
|meter=27 (+1 on hit) | |meter=27 (+1 on hit) | ||
|stun=23 | |||
|property=Knockdown | |property=Knockdown | ||
}} | }} | ||
{{AttackData-SFTM | {{AttackData-SFTM | ||
|version=512 frames/<br />15 game seconds | |version=4: 512 frames/<br />15 game seconds | ||
|damage=33 | |damage=33 | ||
|guard=Mid | |guard=Mid | ||
|meter=37 (+1 on hit) | |meter=37 (+1 on hit) | ||
|stun=30 | |||
|property=Knockdown | |property=Knockdown | ||
}} | }} | ||
{{AttackData-SFTM | {{AttackData-SFTM | ||
|version=1,024 frames/<br />30 game seconds | |version=5+: 1,024 frames/<br />30 game seconds | ||
|damage=53 | |damage=53 | ||
|guard=Mid | |guard=Mid | ||
|meter=49 (+1 on hit) | |meter=49 (+1 on hit) | ||
|stun=40 | |||
|property=Knockdown | |property=Knockdown | ||
|description=A high-risk/high-reward tool with very little startup, a deceptively long active period, and very large meter gain with longer charges. Travel distance and speed scales up with each level, and the strongest version rushes full screen at high speed. | |description=A high-risk/high-reward tool with very little startup, a deceptively long active period, and very large meter gain with longer charges. Travel distance and speed scales up with each level, and the strongest version rushes full screen at high speed.<br />'''Caution:''' If the super meter is full and regeneration is available, the regeneration will take priority if HK is released first, wasting the charge. Caution must be used to ensure either LK or MK is released first in this case. | ||
}} | }} | ||
}} | }} | ||
| Line 217: | Line 394: | ||
|name=Dash Straight | |name=Dash Straight | ||
|input=[b]f+P | |input=[b]f+P | ||
|image=SFTM-Balrog-DashStraight.png | |||
|data={{AttackData-SFTM | |data={{AttackData-SFTM | ||
|version=LP | |version=LP | ||
| Line 222: | Line 400: | ||
|guard=Mid | |guard=Mid | ||
|meter=5 (+1 on hit) | |meter=5 (+1 on hit) | ||
|stun=10 | |||
|property=Knockdown | |property=Knockdown | ||
}} | }} | ||
| Line 229: | Line 408: | ||
|guard=Mid | |guard=Mid | ||
|meter=5 (+1 on hit) | |meter=5 (+1 on hit) | ||
|stun=10 | |||
|property=Knockdown | |property=Knockdown | ||
}} | }} | ||
| Line 236: | Line 416: | ||
|guard=Mid | |guard=Mid | ||
|meter=5 (+1 on hit) | |meter=5 (+1 on hit) | ||
|stun=10 | |||
|property=Knockdown | |property=Knockdown | ||
|description=An aura forms over Balrog's fist, giving it incredible reach that can outrange many pokes. Each version differs by distance traveled. | |description=An aura forms over Balrog's fist, giving it incredible reach that can outrange many pokes. Each version differs by distance traveled. | ||
| Line 243: | Line 424: | ||
|name=Dash Upper | |name=Dash Upper | ||
|input=[b]f+K | |input=[b]f+K | ||
|image=SFTM-Balrog-DashUpper.png | |||
|data={{AttackData-SFTM | |data={{AttackData-SFTM | ||
|version=LK | |version=LK | ||
| Line 248: | Line 430: | ||
|guard=Mid | |guard=Mid | ||
|meter=5 (+1 on hit) | |meter=5 (+1 on hit) | ||
|stun=10 | |||
|property=Knockdown | |property=Knockdown | ||
}} | }} | ||
| Line 255: | Line 438: | ||
|guard=Mid | |guard=Mid | ||
|meter=5 (+1 on hit) | |meter=5 (+1 on hit) | ||
|stun=10 | |||
|property=Knockdown | |property=Knockdown | ||
}} | }} | ||
| Line 262: | Line 446: | ||
|guard=Mid | |guard=Mid | ||
|meter=5 (+1 on hit) | |meter=5 (+1 on hit) | ||
|stun=10 | |||
|property=Knockdown | |property=Knockdown | ||
|description=Preferred over Dash Straight when less startup and/or lower reach is needed, at the expense of shorter range and longer recovery. Each version differs by distance traveled; use lower strengths close to the corner. This move can be used alone in okizeme to repeatedly knock down an opponent who fails to block low. | |description=Preferred over Dash Straight when less startup and/or lower reach is needed, at the expense of shorter range and longer recovery. Each version differs by distance traveled; use lower strengths close to the corner. This move can be used alone in okizeme to repeatedly knock down an opponent who fails to block low. | ||
| Line 269: | Line 454: | ||
|name=Buffalo Headbutt | |name=Buffalo Headbutt | ||
|input=[d]u+P | |input=[d]u+P | ||
|image=SFTM-Balrog-LPHeadbutt.png | |||
|caption=LP | |||
|image2=SFTM-Balrog-MPHeadbutt.png | |||
|caption2=MP | |||
|image3=SFTM-Balrog-HPHeadbutt.png | |||
|caption3=HP | |||
|data={{AttackData-SFTM | |data={{AttackData-SFTM | ||
|version=LP | |version=LP | ||
| Line 274: | Line 465: | ||
|guard=Mid | |guard=Mid | ||
|meter=5+1 (+1 on each hit) | |meter=5+1 (+1 on each hit) | ||
|stun=4+8=12 | |||
|property=Projectile Invincible | |property=Projectile Invincible | ||
|description=The LP version travels the smallest distance off the ground, making it the safest option to avoid projectiles while building meter. Holding down-back will allow Balrog to block most projectiles that do not pass through the headbutt. | |description=The LP version travels the smallest distance off the ground, making it the safest option to avoid projectiles while building meter. Holding down-back will allow Balrog to block most projectiles that do not pass through the headbutt. | ||
| Line 282: | Line 474: | ||
|guard=Mid | |guard=Mid | ||
|meter=5+1 (+1 on each hit) | |meter=5+1 (+1 on each hit) | ||
|stun=4+8=12 | |||
|property=Projectile Invincible | |property=Projectile Invincible | ||
}} | }} | ||
| Line 289: | Line 482: | ||
|guard=Mid | |guard=Mid | ||
|meter=5+1 (+1 on each hit) | |meter=5+1 (+1 on each hit) | ||
|stun=4+8=12 | |||
|property=Projectile Invincible | |property=Projectile Invincible | ||
|description=The travel on HP Buffalo Headbutt makes it a decent option for approaching, though it is the least safe version against projectiles as it leaves him the highest in the air during recovery. | |description=The travel on HP Buffalo Headbutt makes it a decent option for approaching, though it is the least safe version against projectiles as it leaves him the highest in the air during recovery. | ||
| Line 296: | Line 490: | ||
|name=Shadow Upper | |name=Shadow Upper | ||
|input=QCB+HK | |input=QCB+HK | ||
|image=SFTM-Balrog-ShadowUpper.png | |||
|data={{AttackData-SFTM | |data={{AttackData-SFTM | ||
|damage=13+8+5+4=30 | |damage=13+8+5+4=30 | ||
|guard=Mid | |guard=Mid | ||
|meter=9 (+1 on each hit) | |meter=9 (+1 on each hit) | ||
|stun=10x4=40 | |||
|description=Hits up to four times at point blank range. Best used for quickly building meter from a safe distance. Has shadow trail. | |description=Hits up to four times at point blank range. Best used for quickly building meter from a safe distance. Has shadow trail. | ||
}} | }} | ||
| Line 306: | Line 502: | ||
|name=Reflect Glove | |name=Reflect Glove | ||
|input=MP+MK | |input=MP+MK | ||
|image=SFTM-Balrog-ReflectGlove.png | |||
|data={{AttackData-SFTM | |data={{AttackData-SFTM | ||
|damage=- | |damage=- | ||
| Line 313: | Line 510: | ||
}} | }} | ||
}} | }} | ||
==Super Moves== | ==Super Moves== | ||
{{MoveData | {{MoveData | ||
|name=Crazy Buffalo | |name=Crazy Buffalo | ||
|input=[b]f, b, f+P | |input=[b]f, b, f+P | ||
|image=SFTM-Balrog-CrazyBuffalo1.png | |||
|image2=SFTM-Balrog-CrazyBuffalo2.png | |||
|data={{AttackData-SFTM | |data={{AttackData-SFTM | ||
|damage=13+8+5+4=30 | |damage=13+8+5+4=30 | ||
|guard=Mid | |guard=Mid | ||
|stun=10x4=40 | |||
|property=Stagger | |property=Stagger | ||
|description=Balrog dashes straight and punches four times, each one causing stagger, then does a dash uppercut that does no damage but the launches the opponent high into the air. At this point, air juggles are possible if pushback is minimal. Balrog will auto-correct direction if his opponent changes sides between punches. Has blue trail. <br />If [[Street Fighter: The Movie/Akuma|Akuma]] is hit with any of these punches, he will be able to recover from stagger quickly enough to block the remaining punches and potentially punish. | |description=Balrog dashes straight and punches four times, each one causing stagger, then does a dash uppercut that does no damage but the launches the opponent high into the air. At this point, air juggles are possible if pushback is minimal. Balrog will auto-correct direction if his opponent changes sides between punches. Has blue trail. <br />If [[Street Fighter: The Movie/Akuma|Akuma]] is hit with any of these punches, he will be able to recover from stagger quickly enough to block the remaining punches and potentially punish. Video: [https://twitter.com/The_Opponent/status/1358747902613553153] | ||
}} | }} | ||
}} | }} | ||
| Line 405: | Line 528: | ||
|name=Dash Ground One-Two | |name=Dash Ground One-Two | ||
|input=[b] QCF, QCF+K | |input=[b] QCF, QCF+K | ||
|image=SFTM-Balrog-DashGroundOneTwo1.png | |||
|image2=SFTM-Balrog-DashGroundOneTwo2.png | |||
|image3=SFTM-Balrog-DashGroundOneTwo3.png | |||
|data={{AttackData-SFTM | |data={{AttackData-SFTM | ||
|damage=13+5+5+3+3+3+3+3=38 | |damage=13+5+5+3+3+3+3+3=38 | ||
|guard=Mid | |guard=Mid | ||
|description=Balrog dashes straight while punching four times. If any of these punches connect, he follows with low punches and finishes with an uppercut that does no damage but launches the opponent high into the air. Has red trail. | |stun=20+8+20+8+7+7+7+7=84 | ||
|description=Balrog dashes straight while punching four times, without pushback. If any of these punches connect, he follows with low punches and finishes with an uppercut that does no damage but launches the opponent high into the air. Has red trail. | |||
If the full combo lands, stun is nearly guaranteed as it does 84/85 stun damage. | |||
}} | }} | ||
}} | }} | ||
==Combos== | |||
{{Navbox-SFTM}} | |||
[[Category:Street Fighter: The Movie]] | |||
Latest revision as of 12:03, 26 June 2023

Introduction
- Played by: Grand L. Bush
- Stagger frames: 36
The boxer is named Balrog in all versions of the game, due to the movie using Capcom USA's character name changes in the Japanese dub.
Playstyle
Balrog excels at rushdown, not unlike his traditional Street Fighter II equivalent. Thanks to the shorter charge duration of this game, Balrog is able to do his charge attacks in much quicker succession. Due to the actor's much shorter arm length compared to that of the sprite-based boxer of Capcom's game, his normals have less importance in controlling space.
With Reflect Glove, Balrog can shut down any projectile spam that his Buffalo Headbutt cannot safely evade, as he can simply stand in place and push fireballs and other objects away as long as he likes.
Normals
Standing
s.LP  |
|---|
s.MP  |
|---|
s.HP  |
|---|
s.LK  |
|---|
s.MK  |
|---|
s.HK |
|---|
Crouching
cr.LP  |
|---|
cr.MP |
|---|
cr.HP  |
|---|
cr.LK |
|---|
cr.MK  |
|---|
cr.HK  |
|---|
Air
j.LP  |
|---|
j.MP  |
|---|
j.HP |
|---|
j.LK |
|---|
j.MK |
|---|
j.HK |
|---|
Universal Mechanics
Throws
Head Bomber Close b/f+HP  |
|---|
Shoulder Throw Close b/f+MK or HK  |
|---|
Throw Counters
Throw Counter/Reversal
u+HP |
|---|
Slammaster
d+HK |
|---|
Interrupts
Buffalo Headbutt During blockstun u+HP  |
|---|
Dash Upper During blockstun f+HK  |
|---|
Regeneration
Regeneration Hold HK, release  |
|---|
Danger Move
Jab Punch Frenzy 10 health or less Hold LK, f, f, release LK  |
|---|
Special Moves
One-Two Jabs LP LP LP... |
|---|
Ground One-Two Jabs cr.MP cr.MP cr.MP...  |
|---|
Turn Punch Hold P, release  |
|---|
Charge Upper Hold 3K, release  |
|---|
Dash Straight [b]f+P  |
|---|
Dash Upper [b]f+K  |
|---|
Buffalo Headbutt [d]u+P  LP LP  MP MP  HP HP
|
|---|
Shadow Upper QCB+HK  |
|---|
Reflect Glove MP+MK  |
|---|
Super Moves
Crazy Buffalo [b]f, b, f+P   |
|---|
Dash Ground One-Two [b] QCF, QCF+K    |
|---|