Street Fighter: The Movie/Blade: Difference between revisions
Jump to navigation
Jump to search
(→Tips) |
|||
| Line 17: | Line 17: | ||
==Normals== | ==Normals== | ||
==Universal Mechanics== | ==Universal Mechanics== | ||
===Throws=== | |||
{{MoveData | |||
|name=Shoulder Throw | |||
|input=b/f+MP or HP | |||
|image= | |||
|data={{AttackData-SFTM | |||
|damage= | |||
|guard= | |||
|meter= | |||
|stun= | |||
|property=Escapable, Counterable | |||
|description= | |||
}} | |||
}} | |||
===Throw Counters=== | |||
{{MoveData | |||
|name=Throw Counter/Reversal | |||
|input=u+MP | |||
|data={{AttackData-SFTM | |||
|damage= | |||
|description=This input and data are for Blade's opponent after he lands Shoulder Throw (b/f+MP/HP). See [[Street Fighter: The Movie/Mechanics#Throws|Throws]] for more information. | |||
}} | |||
}} | |||
{{MoveData | |||
|name=Slammaster | |||
|input=d+MK | |||
|data={{AttackData-SFTM | |||
|damage= | |||
|description=This input and data are for Blade's opponent after he reverses a countered throw. See [[Street Fighter: The Movie/Mechanics#Throws|Throws]] for more information. | |||
}} | |||
}} | |||
===Interrupts=== | |||
{{MoveData | |||
|name=Low Slide | |||
|input=''During blockstun, standing or crouching''<br />f+LK | |||
|image= | |||
|data={{AttackData-SFTM | |||
|damage= | |||
|guard=Low | |||
|meter= | |||
|stun= | |||
|property=Knockdown | |||
|description=Knocks the opponent back and hits low. Very sneaky due to how low to the ground it is. | |||
}} | |||
}} | |||
{{MoveData | |||
|name=Dashing Knee | |||
|input=''During blockstun, standing''<br />f+MK | |||
|image= | |||
|data={{AttackData-SFTM | |||
|damage= | |||
|guard=Mid | |||
|meter= | |||
|stun= | |||
|property=Knockdown | |||
|description=Is a bit slower than the Low Slide interrupt, thus can be beat by well timed normals. It doesn't low profile like the Low Slide and if you're charging MK for a Sky Dagger Kick or Bazooka you can't do it without losing charge. Still, it has a few uses in certain situations where your other Interrupts might fall short. | |||
}} | |||
}} | |||
{{MoveData | |||
|name=Stun Rod | |||
|input=''During blockstun, standing''<br />u+MP | |||
|image= | |||
|data={{AttackData-SFTM | |||
|damage= | |||
|guard=Mid | |||
|meter= | |||
|stun= | |||
|property=Knockdown | |||
|description=The slowest of Blade's Interrupts but also has the longest range. It's hitbox is rather high so it is at risk of getting stuffed or missing entirely against crouching attacks, plus you can't do it without losing charge if you were holding MP for a regular Stun Rod. Much like the Dashing Knee, it's not as useful as the Low Slide Interrupt, but don't forget about it. | |||
}} | |||
}} | |||
===Regeneration=== | |||
{{MoveData | |||
|name=Regeneration | |||
|input=Hold LK+MK, release | |||
|image= | |||
|data={{AttackData-SFTM | |||
|description=Recovers 17 health over 34 frames. See [[Street Fighter: The Movie/Mechanics#Regeneration|Regeneration]] for more information. | |||
}} | |||
}} | |||
===Danger Move=== | |||
{{MoveData | |||
|name=Bazooka | |||
|input=''10 health or less''<br />Hold MK, QCF, Release MK | |||
|image= | |||
|data={{AttackData-SFTM | |||
|damage= | |||
|guard=Mid | |||
|meter= | |||
|stun= | |||
|property=Knockdown | |||
|description=It's incredibly slow and impractical, but it's also really funny. There are setups for it after an opponent escapes a throw near the corner. Since you'll often be holding MK to charge a Sky Dagger Kick anyway, it doesn't hurt to let it rip every once in a while. You'll be surprised at how often it actually works, but be careful because characters such as Balrog and Zangief can reflect the rocket back at you. Also, there is a glitch where holding other buttons while doing this move will lock Blade out of his Assassin Dagger moves for the rest of the round, so make sure you stop charging Stun Rod or Neck Hanging Tree before letting go of MK. | |||
}} | |||
}} | |||
==Special Moves== | ==Special Moves== | ||
==Super Moves== | ==Super Moves== | ||
Revision as of 05:45, 20 June 2023

Introduction
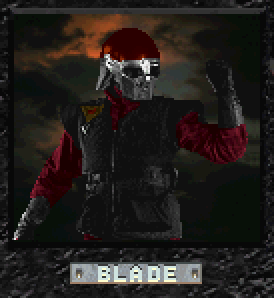
- Played by: Alan Noon
- Stagger frames: 32
Playstyle
Play Blade if:
- You like to dictate the pace of the match by repeatedly switching between offense and defense
- You want an air projectile without playing akuma
- You have quick decision making skills
Do not play Blade if:
- You aren't comfortable holding multiple buttons to charge attacks
- You want to stick to a particular gameplan without deviations
Normals
Universal Mechanics
Throws
Shoulder Throw
b/f+MP or HP |
|---|
Throw Counters
Throw Counter/Reversal
u+MP |
|---|
Slammaster
d+MK |
|---|
Interrupts
Low Slide
During blockstun, standing or crouching f+LK |
|---|
Dashing Knee
During blockstun, standing f+MK |
|---|
Stun Rod
During blockstun, standing u+MP |
|---|
Regeneration
Regeneration
Hold LK+MK, release |
|---|
Danger Move
Bazooka
10 health or less Hold MK, QCF, Release MK |
|---|
Special Moves
Super Moves
Combos
Tips
- After landing Neck Hanging Tree (hold HP, then forward or backward close to opponent, release HP), mash the joystick in all directions to prolong the choke duration and increase damage.
- If any buttons or directions are charged while the desperation Bazooka (hold MP, QCF, release MP at low health) is executed, Blade will no longer be able to use Assassin Dagger moves (forward, back, forward, P; QCF + P in air) for the rest of the round due to a programming oversight.