KILL la KILL IF/Controls
Introduction
With KLKIF being on the PS4, Switch, and PC, a notation system is to be put in place to better explain specific attacks or combos across all platforms.
To make the learning process as smooth as possible, numpad notation will be used for directional inputs as they're used in multiple other fighting games.
Numpad Notation
|
= |
|
= |
|
When no directional input is pressed (neutral.) | |
The directions used to do a horizontal attack. Inputting either left(4) or right(6) will give you the same attack. | |
The directions used to do a vertical attack. Inputting either down(2) or up(8) will give you the same attack. |
Notations
The notation that is tied to Close Ranged Attack. Example: Horizontal Close Ranged Attack = 4/6A | |
The notation that is tied to Long Ranged Attack. Example: Standing Long Ranged Attack = 5B | |
The notation that is tied to Break Attack. Example: Standing Break Attack = 5C | |
Short for Step Dash or Dash Attack (an attack out of a Step Dash.) Example: Close Ranged Attack from a Step Dash = d.A Example: Step Dash forward = d8 Example: Step Dash, but direction does not matter = dX | |
Short for Enhanced Attack (an attack when timed correctly will become enhanced.) Example: Enhanced Close Ranged Attack from a Step Dash = E5A | |
Short for Guard (Blocking). | |
Short for Homing Dash (an attack out of a Homing Dash.) Example: Close Ranged Attack from a Homing Dash after a Wallsplat = Wallsplat HD d.A Example: Aerial Homing Dash = j.HD (Jump + Guard is done for Homing Dash). | |
Short for jump. Example: Jumping Long Ranged Attack = j.B | |
Short for Special, done with Deathblow + an attack button. Example: Break Attack Special = sp.C (Deathblow + Guard is done for Valor Burst and Counter Burst). | |
Indication that you need to cancel an attack that hits multiple times before all of the hits connect. Example: 5A(3) = Cancel after the third hit from 5A | |
| The notation that is tied to holding down a button.
Example: Charged Long Ranged Attack = 5[B] | |
| The notation that is tied to holding down a button, but releasing it at a specific time.
Example: Partial Charged Long Ranged Attack = 5]B[ | |
| The notation means doing exact frame attacks
Example: 5:A means when 5A is done frame perfectly for a certain situation. | |
The notation means delay Example: 5A dl 5A | |
The notation means cancel Example: 5B > d8 = Canceling Neutral B's recovery with a Front Step Dash. |
Movement
Since KLKIF is a 3D arena fighter, you'll be free to move side to side, forward and back, diagonally, or in circles.
Regardless of the position of your character (or if the over-the-shoulder camera is behind them or not), forward will always be forward, right will always be right, etc.
| Walkspeed Ranking | |||||
|---|---|---|---|---|---|
| Inumuta (Thermo Optic Camouflage) | 1st | ||||
| Ryuko (Valor Level 1) | 2nd | ||||
| Mako (Tension Level 4) | 3rd | ||||
| Inumuta | 4th | ||||
| Satsuki Dual-Wield | 5th | ||||
| Ryuko | 6th | ||||
| Ryuko Dual-Wield (Valor Level 1) | 7th | ||||
| Mako (Tension Level 3) | 8th | ||||
| Mako (Tension Level 2) | 9th | ||||
| Satsuki | 10th | ||||
| Ryuko Dual-Wield | 11th | ||||
| Jakuzure | 12th | ||||
| Mako | 13rd | ||||
| Sanageyama | 14th | ||||
| Nui | 15th | ||||
| Gamagoori | 16th | ||||
| DTR | 17th | ||||
| Ragyo | 18th | ||||
Jump
Pressing the Jump button makes your character jump with free movement in the air afterwards.
With this you can jump forward, and then drift back to your original landing spot. You can also do sick 360's.
Guard
Pressing the Guard button causes your character to block in place against incoming attacks.
Attacks do not deal chip damage, and you're rewarded meter for successfully blocking attacks.
Types of Attacks
KLKIF is a 3 button fighter with each button having their own unique purpose.
There are the expected grounded and aerial attacks, but everyone also has exclusive attacks from dashing.
Close Ranged Attacks
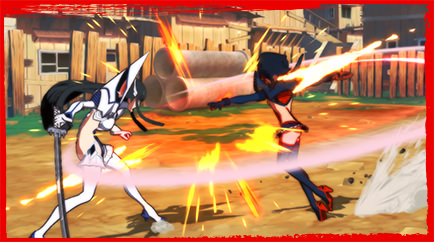
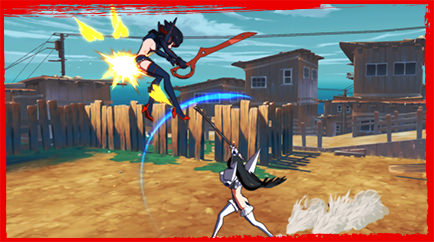
Your go-to attacks to throw out when close to your opponent and to quickly apply pressure.
Pressing the button multiple times performs followup attacks. Depending on the inputted direction, you will perform an attack that excels in covering specific actions.
Horizontal inputs will give you attacks that hit to the side, allowing you to catch Step Dashes and side movement. These moves don't hit as high and can be jumped.
Vertical inputs give you a narrow attack that hits upwards. Generally used as an anti-air that can be a combo starter.
Long Ranged Attacks
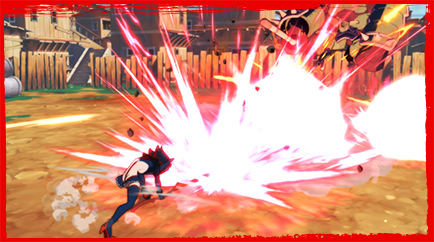
A character's mid to long range options mostly consisting of projectiles.
Long Ranged Attacks can cancel into multiple followups afterwards which doesn't make you much of a sitting duck when zoning. This can be used to close the distance on your opponent and travel with your projectiles.
Charging Long Ranged Attacks will give the move additional effects such as increased range, speed, damage, etc. You can also charge aerial Long Ranged Attacks to air stall, causing your character to float based on the direction of your jump.
Break Attacks
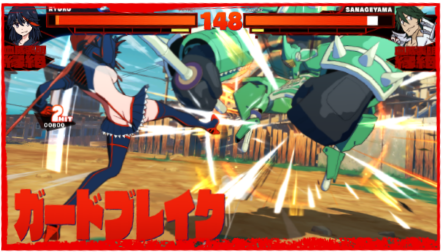
Unblockable attacks that act as a replacement for having no grab system. On startup, the character emits flashing stars and plays the familiar Goku Uniform "dingaling" sound.
Although they have weaknesses such as slow startup, long recovery, or short range, they're strong options if the opponent doesn't counterplay against them.
Horizontal Step Dash is invincible against most Break Attacks on frame 1.
Some Break Attacks must be jumped instead of sidestepped.
Step Dash
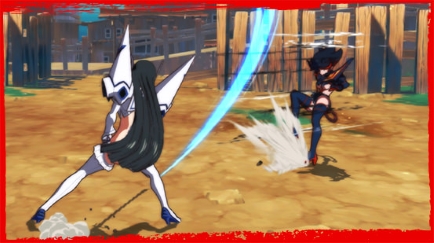
A universal dash that can be performed while blocking and inputting a direction. Can be performed left, right, forward, or back.
Specific moves can be done exclusively out of a vertical Step Dash (Ragyo can do Dash attacks from horizontal Step Dashes as well.)
Step Dash can be done in the air to perform an Air Dash. Air Dashing to the ground lets you act immediately into a Dash attack.
Horizontal Step Dash is invincible against most Break Attacks on frame 1, making it a good wakeup option to avoid Break Attack okizeme.
Commonly known as "sidestep".
Homing Dash
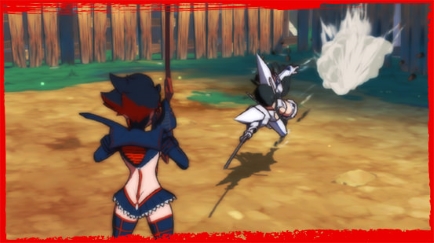
Homing Dash causes your character to home in on the opponent and quickly attack for 50 damage.
This can be performed by pressing the jump button while blocking. Jumping while airborne causes you to do an aerial Homing Dash.
Homing Dash allows you to armor through low priority projectiles after the initial startup.
Both variants of Homing Dash can be dash canceled after the initial startup.
Grounded Homing Dash can be canceled into Dash attacks.
| Homing Dash Speed Ranking | |||||
|---|---|---|---|---|---|
| Satsuki Dual-Wield (Enhanced) | 1st | ||||
| Satsuki (Enhanced) | 2nd | ||||
| Ryuko (Valor Level 1) | 3rd | ||||
| Mako (Tension Level 4) | 4th | ||||
| Satsuki Dual-Wield | 5th | ||||
| Ragyo | 6th | ||||
| Satsuki | 7th | ||||
| Ryuko Dual-Wield (Valor Level 1) | 8th | ||||
| Mako (Tension Level 3) | 9th | ||||
| Inumuta | 10th | ||||
| Mako (Tension Level 2) | 11th | ||||
| Ryuko | 12th | ||||
| Sanageyama | 13th | ||||
| Ryuko Dual-Wield | 14th | ||||
| Nui | 15th | ||||
| Gamagoori | 16th | ||||
| Mako | 17th | ||||
| DTR | 18th | ||||
| Jakuzure | 19th | ||||