|
| Health |
12,500
|
| Meter Multiplier |
0.75x
|
| Walkspeed |
17th
|
| Homing Dash Speed |
6th
|
| Homing Dash Duration |
90
|
| Height |
12.00
|
| Weight |
3
|
| Jump Height |
-
|
| Jump Duration |
-
|
| Side Step Dash Invul |
1-19
|
| Front Step Dash Total |
-
|
| Side Step Dash Total |
-
|
| Back Step Dash Total |
-
|
| Has Forced A Ender |
Yes
|
| Has Forced B Ender |
Yes
|
| Has Forced C Ender |
No
|
Introduction
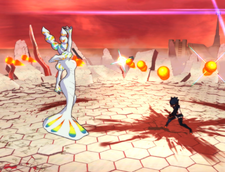
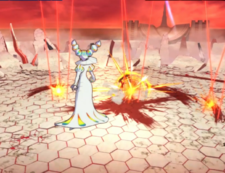
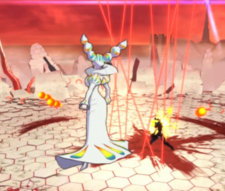
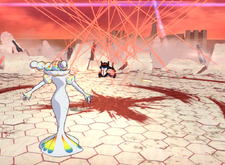
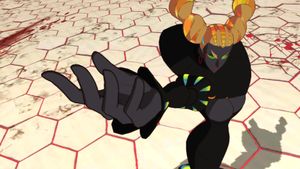
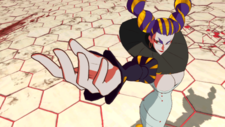
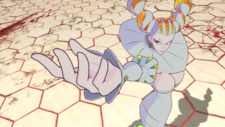
Ragyo Kiryuin (鬼龍院 羅暁)
Revocs Corporation's CEO, a chair of Honnōji Academy's board of directors and the true antagonist of KILL la KILL.
Overview
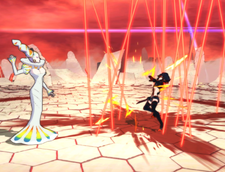
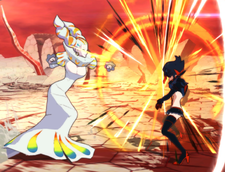
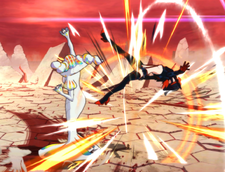
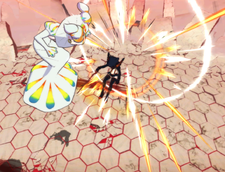
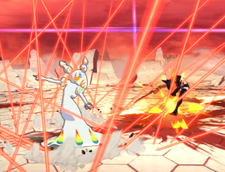
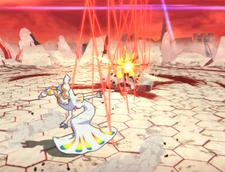
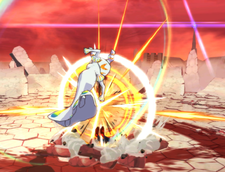
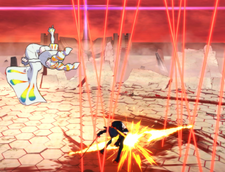
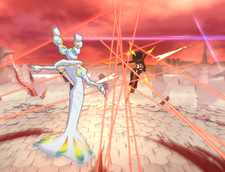
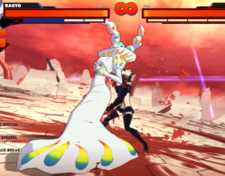
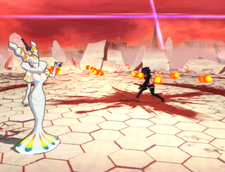
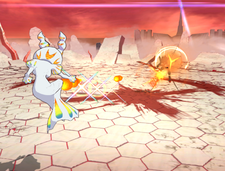
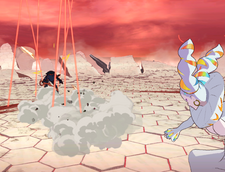
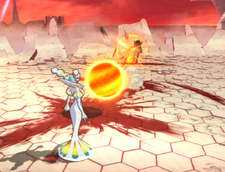
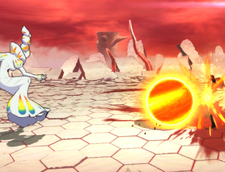
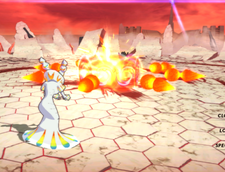
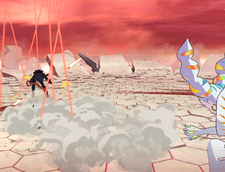
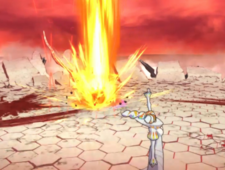
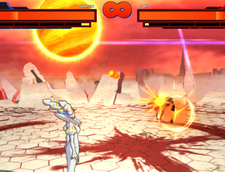
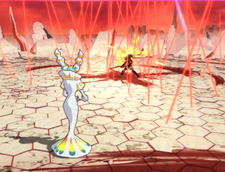
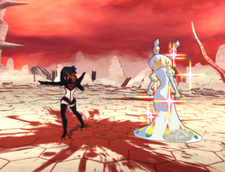
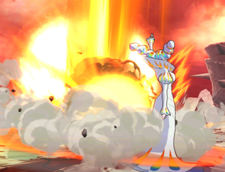
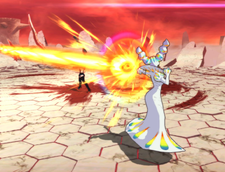
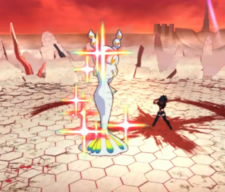
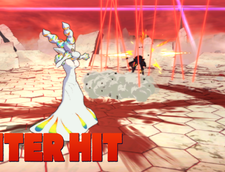
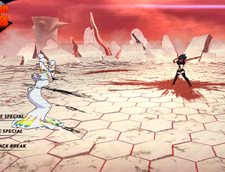
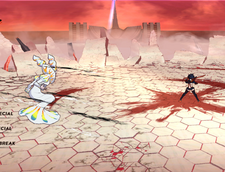
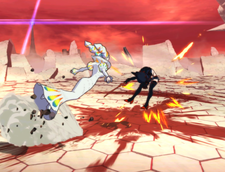
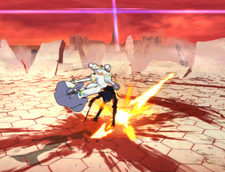
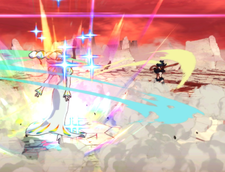
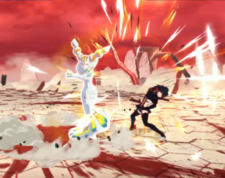
Ragyo is a setplay character that specializes in capitalizing off the opponent's mistakes and using her attacks in tandem with setplay to create unblockable setups. She has massive normals, numerous setplay options, and many moves that can jail from fullscreen. Her unburstable damage output is phenomenal as well due to her ability to combo from long distances and her threatening sp.C. Ragyo's most important tool, j.C, when utilized properly she can smother the opponent in a vortex of unblockable setups making it very hard for the opponent to retaliate against her in neutral. Ragyo's Valor Level 1 is also very strong as she gains the ability to combo off of a counter hit Counter Burst and winning Bloody Valor as the defender, making nearly any attack on Ragyo from the opponent a grave risk and costly if she has meter. However, due to how slow Ragyo's movement and attacks are, how much meter she gives the opponent, and her lack of any real way to open her opponents up without j.C, she must be patient and try to read the opponent if she is to reap any rewards and secure the activation of j.C and or attain Valor Level 1.
Playstyle
 Ragyo is a setplay character who snowballs into unblockable setups. Ragyo is a setplay character who snowballs into unblockable setups. |
| Pros |
Cons |
- Space Control: Ragyo has a vast array of massive normals, setplay tools, and tracking moves that can cover large sections of the stage and jail the opponent from fullscreen.
- Unburstables: Ragyo can do heavy unburstable damage, with her ability to combo from far distances as well as sp.C being one of the best burst bait supers in the game with it's massive counter hit damage, it is very dangerous to burst her in most situations.
- Unique Defense: Ragyo's Valor Level 1 gives her the ability to combo her opponent after a Counter-Hit Counter Burst while also removing meter cooldown from herself, this makes attacks against her very risky if she gains it. Her Valor Level 1 also allows her to combo opponents after they challenge her to Bloody Valor, assuming the opponent loses.
- Vortex Queen: Ragyo is able to snowball into her infamous unblockable loop vortex if given the chance to activate j.C, which only requires one hit in most cases.
- Knowledge Checks: Ragyo has a large variety of ways to knowledge check her opponents, forcing them to always pay close attention and consider specific counterplay options as they try their hardest to react to all of her options.
|
- Sluggish: Ragyo has the slowest walkspeed in the game, so most characters can glue themselves to her going into the next round regardless if she wins or not.
- Overly Committal: The majority of Ragyo's moves lack frame advantage, are slow in startup and recovery, and lack good cancel options. This makes nearly anything she does telegraphed and a commitment, also her sidestep has a low amount of sidestep invul, making it easily punishable.
- Gimmick Offense: Ragyo will struggle against patient opponents as almost all of her kit can just be blocked, sidestepped, or homing dashed with little to no risk, she lacks any real way to open her opponents up and is entirely reliant on j.C being out.
- Meter Issues: Ragyo has very low meter gain and she will be combo food when most characters get in on her, she also gives her opponent an immense amount of meter on hit and on block.
- Combo Limit: Ragyo's high prorate values heavily limit her damage and combo potential.
- Infested: Ragyo's gameplan is prone to unpredictable bugs that she cannot control, such as her unblockables doing no hitstun as an example, and most of these will happen at random and can cost her the round or even the game.
|
Valor Level 1
- Gains Life Fiber Wire Attack as an automatic follow-up if your Counter Burst successfully counter hits.
- Gains Speech Counter as an automatic follow-up when winning Bloody Valor as the defender.
- Increased damage dealt when winning Bloody Valor as the defender (1500 to 3000).
Valor Level 2
- Break Attack Special enhanced.
Notables
- Ragyo can perform Dash attacks from a vertical or horizontal Step Dash.
- Ragyo has a Princess Peach-esque float when she descends after jumping.
Close Ranged Attacks
5A Fiber: Baste Fiber: Baste Disciplinary Strike Disciplinary Strike Disciplinary Strike Disciplinary Strike Disciplinary Strike Disciplinary Strike Disciplinary Strike Disciplinary Strike Purge the Rebels Purge the Rebels
|
| Version
|
Damage
|
Prorate
|
Priority
|
Startup
|
On Hit
|
On Block
|
Counter Hit
|
| 5A
|
280
|
50
|
5
|
26
|
-
|
-
|
+300 Damage
|
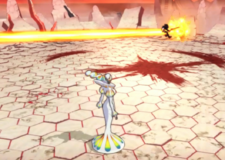
Ragyo creates a wall of Life Fibers in front of her, can hit sidesteps.
- Deletes projectiles on contact.
- Can cancel into 5AA, 5BB, or d4/6.C on hit/block.
- If canceled into d4/6.C, it will always fire from the left to the right.
- There are a few rare bugs that can occur at random where 5A will either not cancel into it's follow-ups on hit/block, have heavily delayed startup, or both.
- On hit/block, Ragyo can whiff the next 5A or j.A and whiff cancel into any of their respective follow-ups for a short time.
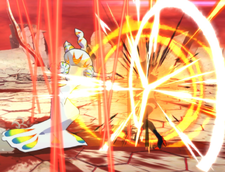
- An essential move in Ragyo's kit. 5A is one of her best moves as it's very spammable, acts as a phenomenal spacing tool, and it's great at catching homing dashes and reckless opponents.
|
| 5AA
|
300
|
0
|
4
|
24
|
-
|
-
|
+300 Damage
|
Ragyo teleports towards the opponent and punches them.
- Only available if 5A hits/was blocked.
- If either left/up or right/down is pressed during the startup, Ragyo will slightly veer her teleport to her left or right depending on what was pressed.
- Left/Up will teleport Ragyo to her right but angles herself to the left.
- Right/Down will teleport Ragyo to her left but angles herself to the right.
- Can cancel into 5AAA, 5BB, or 5BAAC on hit/block.
- If canceled into 5BAAC on block, Ragyo will not teleport and will only do the laser.
|
| 5AAA
|
340
|
0
|
4
|
-
|
-
|
-
|
+300 Damage
|
Follow-up punch.
- Only available if 5AA hits/was blocked.
- Can cancel into 5AAAA, 5BB, or 5BAAC on hit/block.
- If canceled into 5BAAC on block, Ragyo will not teleport and will only do the laser.
|
| 5AAAA
|
300
|
25
|
4
|
-
|
Knockdown
|
N/A
|
+300 Damage
|
Ragyo performs an uppercut that launches the opponent.
- Ragyo's Forced Enders become available on hit if combo proration is 200 or higher.
- If done from 4/6A, 2/8A, or d.A, she will teleport to the opponent before performing the uppercut, Forced Enders are not available from this variant.
- Ragyo lacks a hurtbox for the first 3 frames of the teleport.
- Can cancel into 5AAAAA, 5BB, or j.BAAC on hit.
- When Forced Enders become available, cancel options change to j.AAA, d.B, and j.BAAC on hit.
- Ragyo teleports into the air if 5AAAA wasn't canceled into anything or was blocked/whiffed.
- Upon teleporting, Ragyo can cancel into j.A, j.BB, or j.C.
|
| 5AAAAA
|
360
|
25
|
4
|
-
|
Knockdown
|
N/A
|
N/A
|
Ragyo teleports above the opponent and spikes them to the ground.
- Only available if 5AAAA hits.
- Can cancel into 5AAAAAA (Ender), 4/6A (Ender), 2/8A (Ender), d.B or d2/8.C on hit.
|
| 5AAAAAA (Ender)
|
1740
|
0
|
5
|
-
|
Sliding Knockdown
|
N/A
|
N/A
|
Ragyo teleports to the ground and finishes the chain with a damaging blow.
- Only available if 5AAAAA hits.
- Removes Meter Cooldown on hit.
|
|
4/6A (Ender) Fiber: Whiplash Fiber: Whiplash
|
| Damage
|
Prorate
|
Priority
|
Startup
|
On Hit
|
On Block
|
Counter Hit
|
| 100*8, 420
|
0, 200
|
9, 9
|
-
|
Knockdown
|
N/A
|
N/A
|
Ragyo disappears and tangles the opponent within a web of Life Fibers before reappearing behind them, dispersing the web which sends the opponent flying into a knockdown, can hit sidesteps.
- Only available if 5AAAAA hits.
- Afterwards, Ragyo disperses the web and the opponent gets sent flying into a knockdown.
- Removes Meter Cooldown on hit.
- A multi-hit attack with great meter build.
- If spaced and angled correctly in relation to a wall, 4/6A (Ender) can be forced into phasing Ragyo through the opponent as she is reappearing. Ragyo will end up in front of the opponent instead of behind them before dispersing the web, allowing for new follow-up options.
- This is commonly referred to as a "wall push" or "wall pushing".
- This only works on specific stages, those being Polling Grounds and Thread Palace.
|
|
2/8A (Ender) Fiber: Shear Fiber: Shear
|
| Damage
|
Prorate
|
Priority
|
Startup
|
On Hit
|
On Block
|
Counter Hit
|
| 280*6
|
50
|
4
|
-
|
Launch
|
N/A
|
N/A
|
Ragyo raises multiple Life Fibers from under the opponent, launching them towards her.
- Only available if 5AAAAA hits.
- Not all hits will connect if used midscreen, needs to be used near and facing the wall for all of the hits to consistently connect.
- Tracks the opponent, will still confirm even if moves such as 5[B] or j.C knock the opponent away from her.
- Can cancel into j.AA, d.B, or j.BAAC.
- If performed close enough to the wall when canceling into j.AA, the opponent will be launched high enough to the point where Ragyo can confirm an Aerial Homing Dash afterwards.
|
|
4/6A Fiber: Transect Fiber: Transect
|
| Damage
|
Prorate
|
Priority
|
Startup
|
On Hit
|
On Block
|
Counter Hit
|
| 640
|
50
|
5
|
39
|
Launch
|
-
|
+600 Damage
|
Ragyo surrounds herself in a barrier of Life Fibers that can wallsplat and hit sidesteps.
- Guard Point from frames 8 to 37.
- Can cancel into 5AAAA, 5BB, or d4/6.C on hit.
- If canceled into d4/6.C, it will always fire from the left to the right.
- Neither 5BB or d4/6.C combo from 4/6A when canceled.
- Ragyo's meterless pseudo-reversal. It's very slow, but has massive range and little recovery. While Ragyo doesn't gain armor until frame 8, this move is still very good at catching opponents trying to pressure or get in on her due to it's range.
|
|
2/8A Fiber: Vertical Section Fiber: Vertical Section
|
| Damage
|
Prorate
|
Priority
|
Startup
|
On Hit
|
On Block
|
Counter Hit
|
| 400*5
|
50
|
5
|
34
|
Knockdown
|
-
|
+600 Damage
|
Ragyo throws down a row of Life Fibers ahead of her, the row is made up of 5 individual sections of Life Fibers.
- Not all of the individual sections will connect if used midscreen, needs to be used near and facing the wall for all of the sections to consistently connect.
- Uppercut Invulnerability on startup.
- Deletes projectiles on contact.
- Can cancel into 5AAAA, 5BB, or d4/6.C on hit.
- If canceled into d4/6.C, it will always fire from the left to the right.
- There is a small chance for a bug to occur at random where 2/8A will come out after a large delay.
- One of Ragyo's main combo tools due to the high damage that comes from stacking the sections against the wall, and it's range which allows Ragyo to convert off of specific attacks and wallsplats from a distance.
- Can be used for calling out homing dashes from the opponent due to it's long range, however it is extremely easy to dodge and react to though, use sparingly outside of combos.
|
|
d.A Crooked Beatdown Crooked Beatdown
|
| Damage
|
Prorate
|
Priority
|
Startup
|
On Hit
|
On Block
|
Counter Hit
|
| 450
|
25
|
4
|
23
|
Knockdown
|
-
|
+300 Damage
|
Ragyo jumps ahead and does an overhead punch that can wallsplat.
- Can be done from either a vertical or horizontal Step Dash.
- Guard Point from frames 14 to 25.
- Inputting d.A quickly from a vertical Step Dash will cancel the dash distance.
- Can cancel into 5AAAA, 5BB, or 5BAAC on hit/block.
- If Ragyo hits a projectile with d.A, she can cancel into any of d.A's follow-ups.
- Can be counter hit by ground only attacks.
- Has a tendency to overshoot and whiff on smaller characters.
- Ragyo can phase through opponents by doing a front Step Dash into d.A at point blank range with proper timing.
- Ragyo's collision box can sometimes push opponents away from her during d.A, making them potentially avoid the hitbox.
|
|
j.A Fiber: Tangling Yarn Fiber: Tangling Yarn Crush the Resistance Crush the Resistance Crush the Resistance Crush the Resistance
|
| Version
|
Damage
|
Prorate
|
Priority
|
Startup
|
On Hit
|
On Block
|
Counter Hit
|
| j.A
|
160, 240
|
0, 25
|
4, 4
|
23
|
Knockdown
|
-
|
+340 Damage
|
Ragyo throws out a wall of Life Fibers, can hit OTG.
- Deletes projectiles on contact.
- Ragyo's arm has a separate hitbox from the wall, making this attack multi-hit at close range.
- Can cancel into j.AA, d.B, or j.d2/8.C on hit/block.
- Ignores Uppercut Invulnerabilty.
- Extremely punishable on whiff due to the long recovery, use sparingly.
|
| j.AA
|
60*4
|
25
|
4
|
-
|
Launch
|
-
|
+300 Damage
|
Ragyo teleports above the opponent and does a downward swing, slamming the opponent towards the ground in a rainbow explosion, can hit OTG.
- Amount of hits is based on height.
- Can cancel into j.AAA, d.B, or j.d2/8.C on hit.
|
| j.AAA
|
200*2, 440
|
0, 200
|
4, 4
|
-
|
Knockdown
|
N/A
|
N/A
|
Ragyo creates a triad of Life Fibers that pops the opponent up to where she is in the air before knocking them down to the ground.
- Resets combo proration to 200 upon the final hit.
- If combo proration is 200 or higher, becomes available after 5AAAA as Ragyo's Forced A Ender.
- Can cancel into j.BB or j.C.
|
|
sp.A Annihilate the Rebellion Annihilate the Rebellion
|
| Damage
|
Prorate
|
Priority
|
Startup
|
On Hit
|
On Block
|
Counter Hit
|
| 300, 240, 300, 680
|
0
|
6
|
11
|
Knockdown
|
-
|
+2040 Damage
|
Ragyo fullscreen teleports towards the opponent, jabbing them before uppercutting them into a fan of Life Fibers, dealing high damage and knockback for stage control.
- When used, all of Ragyo's projectiles and j.C will be cleared off the stage.
- Can be performed on the ground or in the air.
- True Invulnerability on startup.
- Due to an oversight with the teleport, Ragyo can sometimes have her collision box push opponents away from her during the teleport, causing her to miss.
- Being a fullscreen teleport super and a reversal, it's great at sniping opponents at any range. Also good as an ender to certain combos.
|
|
Long Ranged Attacks
5B Fiber Bullet Fiber Bullet Fiber Bullet: Chasedown Fiber Bullet: Chasedown Fiber Bullet: Chasedown Fiber Bullet: Chasedown
|
| Version
|
Damage
|
Prorate
|
Priority
|
Startup
|
On Hit
|
On Block
|
Counter Hit
|
| 5B
|
60*1~15
|
0
|
1
|
76
|
-
|
-
|
+300 Damage
|
Ragyo creates a barrage of projectiles one by one, then fires them all at once at the opponent, can hit OTG.
- A maximum of 15 projectiles can be created.
- Dash cancelable while charging and after firing.
- Upon dash canceling while charging, all projectiles created will be fired at the opponent
- Can cancel into 5BA, 5BB, d4/6.C, or a Step Dash.
- If canceled into d4/6.C, it can be fired left to right or right to left by pressing left or right, will fire from right to left if no direction is pressed.
- If canceled into d4/6.C, projectiles will continuously spawn for an additional second before firing at the opponent.
- A minimum amount of projectiles must be created before being able to cancel into anything, each cancel option requires a different minimum.
- A minimum of 4 projectiles must be created before being able to cancel into 5BA or a Step Dash.
- A minimum of 7 projectiles must be created before being able to cancel into 5BB.
- A minimum of 2 projectiles must be created before being able to cancel into d4/6.C.
- If the cancel is delayed, cancel options change to 5BA, 5BB, 5C, and a Step Dash.
- A core tool in Ragyo's kit, as important moves such as 5BA are locked behind this move. This move is a double edged sword in a way, while it is the gateway to many of her tools, the move itself is slow, lacks priority, and gives the opponent a lot of meter on block.
|
| 5BB
|
60*4, 200
|
0, 25
|
1, 1
|
-
|
Knockdown
|
-
|
+300 Damage
|
Five follow-up tracking projectiles shot in a line that pushes Ragyo back and into the air, can hit OTG.
- The final projectile deals 200 damage instead of the usual 60.
- Can be done from a horizontal Air Dash.
- Can cancel into j.BA, 5BBB, or d4/6.C.
- If canceled into d4/6.C, it will always fire from the right to the left.
- Can be counter hit by ground only attacks.
|
| 5BBB
|
660
|
0
|
2
|
-
|
Knockdown
|
Guard Crush
|
+300 Damage
|
Ragyo fires a tracking projectile straight ahead that can wallsplat and hit OTG, causes a Guard Crush on block.
- Can cancel into j.BB or j.C before landing.
- Ragyo's primary tool for getting j.C out due to the high knockback and ability to wallsplat, the projectile itself can be bursted, but if the opponent is too high up when bursting Ragyo can punish them with 2/8A or d2/8.C depending on her distance from the opponent.
|
|
5BA Fiber Bullet: Tacking Fiber Bullet: Tacking Fiber Bullet: Tacking Fiber Bullet: Tacking
|
| Version
|
Damage
|
Prorate
|
Priority
|
Startup
|
On Hit
|
On Block
|
Counter Hit
|
| 5BA
|
200
|
25
|
4
|
27
|
Crumple
|
-
|
+300 Damage
|
Ragyo creates a Life Fiber cage on top of the opponent from fullscreen distance, can hit sidesteps.
- Cancel options are based off the opponent's height.
- Can cancel into 5BAA, d.B, or d4/6.C.
- If canceled into d4/6.C, it will always fire from the left to the right.
- When the opponent is high enough, can cancel into 5BAA, d.B, or j.d2/8.C.
- Is rather inconsistent at catching homing dashes.
- Ragyo's primary jailing tool, can punish opponents from any distance. While it can just be blocked, Ragyo will usually be safe at most distances as she can cancel into d.B.
|
| 5BAA
|
250*2
|
50, 50
|
4, 4
|
30
|
Sliding Knockdown
|
-
|
+300 Damage
|
Follow-up Life Fibers that hit twice and pull the opponent towards Ragyo on hit/block, can hit sidesteps.
- Can cancel into d.B or 5BAAC.
|
|
5BAAC Authority: Crucifixion Authority: Crucifixion
|
| Damage
|
Prorate
|
Priority
|
Startup
|
On Hit
|
Guard Break
|
Counter Hit
|
| 200, 600
|
0, 50
|
4, 7
|
39
|
Knockdown
|
+600 Damage
|
+300 Damage / +600 Damage
|
Ragyo teleports behind the opponent and forms a Life Fiber cage on top of them (doesn't Guard Break), can hit OTG. She then shoots a follow-up laser straight ahead that can wallsplat (does Guard Break).
- Puts Ragyo in an airborne state regardless of her position.
- Can cancel into d4/6.CC.
- Can be counter hit by ground only attacks.
|
|
5[B] Fiber Bullet: Homing Fiber Bullet: Homing
|
| Damage
|
Prorate
|
Priority
|
Startup
|
On Hit
|
On Block
|
Counter Hit
|
| 300, 50*13
|
50, 0
|
3, 0
|
191
|
-
|
Guard Crush
|
+300 Damage
|
Once charged, the charged projectiles form into a slow tracking Life Fiber ball that can Guard Crush upon formation. After a short delay, the ball cannot Guard Crush anymore and loses it's initial hitbox, but now will act as a turret that shoots 13 projectiles in the direction of the opponent.
- The Life Fiber ball is destroyed if Ragyo is hit.
- The Life Fiber ball can be homing dashed through after the initial formation.
- Dash cancelable while charging.
- Threshold Armor from frames to 157 to 168.
- Threshold is 200 damage before it wears off.
- Can cancel into 5BA, 5C, or a Step Dash.
- If canceled during the sparkles on startup, cancel options change to 5BA, d4/6.C, and a Step Dash.
- If canceled into d4/6.C, it can be fired left to right or right to left by pressing left or right, will fire from right to left if no direction is pressed.
- This move is borderline useless due to being very high risk to get out while giving a mediocre reward in most cases. 5[B]'s Guard Crush is nigh unusable due to Ragyo not being able to realistically confirm anything from it unless she has j.BB already set behind the opponent with specific spacing. Ragyo has more effective tools that can let her lockdown opponents, but with far less risk and much higher reward such as j.C. While 5[B] can give Ragyo her highest damage combos, the chance of those ever happening in a real match is slim to none due to the requirements needed.
|
|
d.B Fiber Bullet: Moth to Flame Fiber Bullet: Moth to Flame
|
| Damage
|
Prorate
|
Priority
|
Startup
|
On Hit
|
On Block
|
Counter Hit
|
| 300*4, 180, 100*8, 100*8
|
0, 0, 50, 50
|
3, 3, 1, 1
|
45
|
Sliding Knockdown
|
-
|
+300 Damage
|
Ragyo places down a Life Fiber ball on the ground and gets pushed back into the air.
- The Life Fiber ball has a vacuum effect, sucking in the opponent when nearby.
- Once the Life Fiber ball hits an opponent or their block, the ball will change to hitting in short pulses.
- After 2 seconds, the Life Fiber ball explodes into 8 projectiles that shoot in all directions.
- The Life Fiber ball and it's subsequent projectiles are destroyed if Ragyo is hit.
- Can be performed on the ground or in the air.
- Inputting d.B quickly from a vertical Step Dash will cancel the dash distance.
- If combo proration is 200 or higher, becomes available after 5AAAA as Ragyo's Forced B Ender.
- Can cancel into j.BAA, j.BB, d4/6.CC, an Air Dash, or an Aerial Homing Dash.
- Commonly referred to as "fiber ball".
- An important tool for Ragyo as it can act as a buffer in neutral and many of her moves can cancel into it, letting her be somewhat safe after certain moves on block. Positioning when doing d.B in neutral is important as it can be homing dashed from certain angles. Can be used for okizeme after specific combos and situations.
|
|
j.B Fiber Bullet: Obscurity Fiber Bullet: Obscurity Fiber Bullet: Constrict Fiber Bullet: Constrict
|
| Version
|
Damage
|
Prorate
|
Priority
|
Startup
|
On Hit
|
On Block
|
Counter Hit
|
| j.B
|
60*1~12
|
0
|
1
|
94
|
Knockdown
|
-
|
+300 Damage
|
Aerial version of 5B, can hit OTG.
- A maximum of 12 projectiles can be created.
- Air Dash cancelable while charging.
- Upon Air Dash canceling, all projectiles created will be fired at the opponent
- A minimum of 4 projectiles must be made before being able to cancel into anything.
- Can cancel into j.BA, j.BB, j.d2/8.C, or an Air Dash.
- If canceled into j.d2/8.C, projectiles will continuously spawn for an additional second before firing at the opponent.
- A minimum amount of projectiles must be created before being able to cancel into anything, each cancel option requires a different minimum.
- A minimum of 4 projectiles must be created before being able to cancel into j.BA or an Air Dash.
- A minimum of 7 projectiles must be created before being able to cancel into j.BB.
- A minimum of 2 projectiles must be created before being able to cancel into j.d2/8.C.
- If the cancel is delayed, cancel options change to j.BA, j.BB, and 5BAAC.
|
| j.BB
|
240, 340
|
0, 100
|
1, 5
|
-
|
Launch
|
-
|
-
|
Ragyo fires three projectiles, one to the left, right, and in front of her, can hit OTG. On contact with the ground, each projectile will erupt into a spire of Life Fibers, these spires will stay active for 7 seconds, can hit OTG.
- Ragyo's height from the ground during j.BB's startup will determine how much horizontal spread the Fibers have between each other, the higher the height the larger the spread.
- Fiber placements will not extend beyond the walls of the stage, and will erupt along the wall.
- If the opponent is hit with one of the Fiber spires, all spires despawn and the opponent will be stunned for 1.5 seconds.
- All spires also despawn if one of them hits an opponent's block.
- Despawns if Ragyo hits the opponent with anything, except for the following moves.
- 5B, 5BB, 5BBB, 5[B], d.B, j.B, j.[B], sp.B, d4/6.CC, and j.C (1st and 2nd lasers only).
- Disjointed Break Attacks will delete the Fibers on contact.
- Can cancel into j.AA on hit/block or d4/6.CC.
- Commonly referred to as "fence".
- This move can be used for a plethora of situations such as in neutral or certain setups. Hiding inside or behind the Life Fiber spires can protect Ragyo from many threats, she will have to be aware of the threats that j.BB cannot protect her from though such as armored moves or certain Break Attacks.
|
|
j.BA Fiber Bullet: Tacking Fiber Bullet: Tacking Fiber Bullet: Tacking Fiber Bullet: Tacking
|
| Version
|
Damage
|
Prorate
|
Priority
|
Startup
|
On Hit
|
On Block
|
Counter Hit
|
| j.BA
|
200
|
25
|
4
|
-
|
Crumple
|
-
|
+300 Damage
|
Aerial version of 5BA, can hit sidesteps.
- Can cancel into j.BAA, d.B, or j.d2/8.C.
|
| j.BAA
|
250
|
50
|
4
|
-
|
Sliding Knockdown
|
-
|
+300 Damage
|
Aerial version of 5BAA, hits once instead of twice, can hit sidesteps.
- Can cancel into d.B or j.BAAC.
|
|
j.BAAC Authority: Crucifixion Authority: Crucifixion
|
| Damage
|
Prorate
|
Priority
|
Startup
|
On Hit
|
Guard Break
|
Counter Hit
|
| 200, 600
|
0, 50
|
4, 7
|
39
|
Knockdown
|
+600 Damage
|
+300 Damage / +600 Damage
|
Aerial version of 5BAAC, the laser is replaced with a pillar.
- The pillar is identical to the one used in j.d2/8.C.
- Can cancel into d4/6.CC.
- If the opponent is knocked close enough to Ragyo and low enough to the ground, 5A can be used as a follow-up on hit.
|
|
j.[B] Fiber Bullet: Pour Fiber Bullet: Pour
|
| Damage
|
Prorate
|
Priority
|
Startup
|
On Hit
|
On Block
|
Counter Hit
|
| 80*12
|
0
|
1
|
259
|
Knockdown
|
-
|
+300 Damage
|
Aerial version of 5[B], slowly descends to the ground instead of tracking, lacks a hitbox upon formation, has faster projectiles, and does not guard crush either.
- Fires only 12 projectiles instead of the usual 13, but does a total of 960 damage.
- If the opponent is inside j.[B] right before it fires, they will be hit 2 additional times, dealing 1120 damage in total.
- Air Dash cancelable while charging.
- Can cancel into j.BA, j.C, or an Air Dash.
- If canceled during the sparkles on startup, cancel options change to j.BA, j.d2/8.C, and an Air Dash.
- Much like 5[B], this move suffers from all of the same problems, except it lacks an initial hitbox entirely and has slower startup on top of that, do not use this move, Ragyo is better off using j.C.
|
|
sp.B Fiber Bullet: Bind Fiber Bullet: Bind
|
| Damage
|
Prorate
|
Priority
|
Startup
|
On Hit
|
On Block
|
Counter Hit
|
| 160, 20*9, 100
|
0, 0, 200
|
3, 4, 4
|
-
|
Crumple / Launch
|
-
|
+300 Damage
|
Ragyo fires a large projectile at the opponent, can hit OTG. On contact with the ground or the opponent, it erupts into a massive cluster of Life Fibers that cover a large area around the opponent, launches and can wallsplat instead of crumpling if the opponent was hit while in the air.
- Distance traveled is based on the opponent's height.
- Can be performed on the ground or in the air.
- Situational super, borderline useless when it comes to combos, but it can be used to confirm 5C or get j.C out from certain attacks such as j.BAAC or j.d2/8.C due to it wallsplatting. It is also one of Ragyo's best tools to use during j.C to create unblockable setups due to being very active and covering a large area.
|
|
Break Attacks
5C Authority Authority
|
| Damage
|
Prorate
|
Priority
|
Startup
|
On Hit
|
Guard Break
|
Counter Hit
|
| 2500
|
0
|
7
|
72
|
Sliding Knockdown
|
+600 Damage
|
+600 Damage
|
Ragyo begins to charge, then lets loose a fullscreen laser ahead, can hit OTG.
- Can move the laser left or right while active.
- Left/Up will move the laser left.
- Right/Down will move the laser right.
- Dash cancelable during the startup.
- Primarily used as a combo ender.
|
|
d2/8.C Authority: Jetstream Authority: Jetstream
|
| Damage
|
Prorate
|
Priority
|
Startup
|
On Hit
|
Guard Break
|
Counter Hit
|
| 250*3, 440
|
0, 150
|
7, 7
|
28 / 42
|
Knockdown
|
+600 Damage
|
+600 Damage
|
From an immediate back/forward dash, Ragyo fullscreen teleports behind the opponent and stops time. Afterwards, time resumes and she fires four pillars in a straight line, can hit OTG.
- These pillars will track the opponent and their tracking is based on distance, the closer the opponent is the better the tracking gets.
- The final pillar deals 190 more damage than the first 3 pillars, dealing 440 damage instead of 250.
- If delayed, Ragyo doesn't teleport and fires the four pillars from where she stands.
- The startup for the non teleport version is nearly twice as slow as the teleport version due to not stopping time.
- If done from a Homing Dash, Ragyo will always do the non teleport version.
- The window to perform the non teleport version from a back Step Dash is significantly shorter than the window for performing it from a forward dash.
- The non teleport version is dash cancelable during the startup.
- This move does not break tracking despite the time stop, allowing any tracking moves to instantly turn around and hit her.
- In 1.03, Ragyo is now able to cancel into other attacks on hit, allowing her to convert from this move.
- However, this move heavily prorates her combo limit on hit, so it will only allow for small combos.
- Commonly referred to as "pillars".
|
|
d4/6.C Alternate Break Alternate Break Alternate Break Finisher Alternate Break Finisher
|
| Version
|
Damage
|
Prorate
|
Priority
|
Startup
|
On Hit
|
Guard Break
|
Counter Hit
|
| d4/6.C
|
600
|
50
|
7
|
54
|
Knockdown
|
+600 Damage
|
+600 Damage
|
Ragyo fires a quick laser panning from side to side that can wallsplat.
- The side the laser initially starts on is based on Ragyo's dash.
- Dash to the right, starts from the left. Dash to the left, starts from the right.
- Puts Ragyo in an airborne state regardless of her position.
- Can be done from a horizontal Air Dash.
- Can cancel into d4/6.CC.
- There is a bug that will cause d4/6.C's hitbox to be removed if it's firing arc starts from outside the stage's walls.
- Commonly referred to as "sweep laser".
|
| d4/6.CC
|
1800
|
300
|
7
|
108
|
Knockdown
|
+1200 Damage
|
+1200 Damage
|
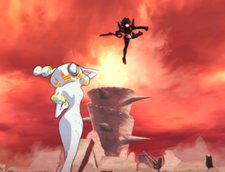
Ragyo teleports in front of the opponent and starts winding up, after the wind up she steps forward and performs a guard breaking uppercut that creates a pillar which hits OTG, she then teleports backwards a set distance.
- During the wind up, Ragyo tracks the opponent until she performs the uppercut.
- Threshold Armor on startup.
- Threshold is 500 damage before it wears off.
- Dash cancelable during the startup
|
|
j.C Authority: Enclose Authority: Enclose
|
| Damage
|
Prorate
|
Priority
|
Startup
|
On Hit
|
Guard Break
|
Counter Hit
|
| 440, 440, 600
|
50, 50, 50
|
7, 7, 7
|
150
|
Sliding Knockdown
|
+600 Damage
|
+600 Damage
|
Ragyo poses elegantly and after a delay, she spawns three ground level lasers.
- The first is fired directly in front of the opponent, the second comes from the opponent's left, and the third is from their right.
- The third laser deals 160 more damage than the first 2 lasers, dealing 600 damage instead of 440. The third laser also has unique properties.
- On hit, Ragyo can whiff cancel 4/6A, 2/8A, and sp.A into any of their respective follow-ups if done during the laser's startup animation.
- On hit, j.BB will despawn if already active.
- Each laser spawned will track the opponent until they fire.
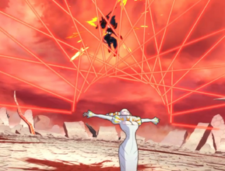
- The interval in-between each laser is 4.10 seconds (250 frames).
- Can move and act while active.
- Goes away if Ragyo is hit.
- If Ragyo is hit during the startup animation of a j.C laser, the laser will fire regardless of her being in hitstun.
- Tying or losing a clash also deactivates j.C.
- Performing either 5AAAAAA (Ender), 4/6A (Ender), sp.A, sp.C, Valor Burst, or her Fiber Lost during j.C's active period, regardless of them hitting or whiffing, will deactivate j.C.
- However, if a j.C laser is in it's startup animation during 5AAAAAA (Ender), 4/6A (Ender), sp.A, sp.C, Valor Burst, or her Fiber lost, it will not dissipate and will fire regardless, but any further lasers will be deactivated.
- Performing another j.C while a previous j.C is already active will deactivate it regardless of whether or not the move was canceled.
- Cannot hit knocked down opponents.
- Cannot hit airborne opponents.
- No sliding knockdown on Guard Break.
- Air Dash cancelable during the startup.
- Can cancel into an Air Dash or an Aerial Homing Dash afterwards.
- There is a small chance for a bug to occur at random where any unblockable setup done with j.C will do no hitstun.
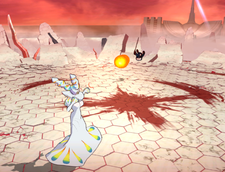
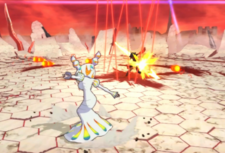
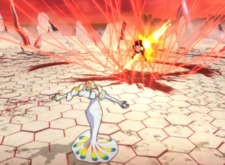
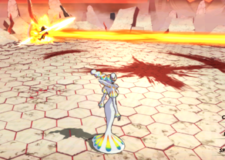
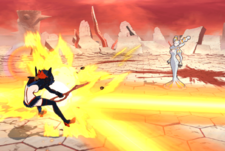
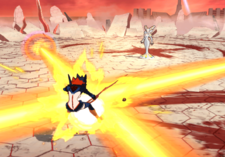
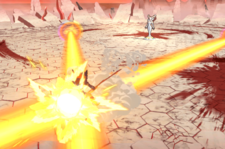
- The reason you play Ragyo, this is her most vital tool as it lets her circumvent her biggest weakness of not being able to open opponents up by allowing her to vortex them with her unblockable loops. Ragyo's neutral, defense, and zoning become much more potent as well when j.C is active. The possibilities are near endless for how many different setups she can create with j.C out, however the move isn't without flaws. Ragyo will have to hit the opponent beforehand in most cases if she wants to get j.C out, which she will struggle to do. Certain character specific tools can be used to try and bypass j.C. Drawbacks aside, this move is not to be underestimated when active.
|
|
j.d2/8.C Authority: Crucifixion Authority: Crucifixion
|
| Damage
|
Prorate
|
Priority
|
Startup
|
On Hit
|
Guard Break
|
Counter Hit
|
| 600
|
50
|
7
|
39
|
Knockdown
|
+600 Damage
|
+600 Damage
|
From a back/forward Air Dash, Ragyo fires a single explosive pillar under the opponent, can hit OTG.
- Can perform aerials afterwards.
- Can cancel into d4/6.CC.
- One of Ragyo's faster Break Attacks, but is extremely punishable on whiff due to the long recovery, use sparingly.
|
|
sp.C Authoritarian Burst Authoritarian Burst Authoritarian Overflow Authoritarian Overflow
|
| Version
|
Damage
|
Prorate
|
Priority
|
Startup
|
On Hit
|
Guard Break
|
Counter Hit
|
| Normal
|
160 / (500*5)*3
|
0 / 0
|
9 / 9
|
1, 36
|
Knockdown
|
+600 Damage
|
+600 Damage
|
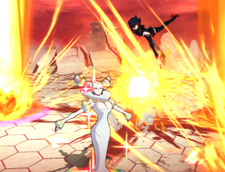
Ragyo poses majestically, turning her entire body into a guard breaking hitbox as she creates 3 waves of 5 pillars surrounding her, the pillars can hit OTG.
- Can move while active.
- Movement speed is greatly reduced while sp.C is active.
- Ragyo's body deals 160 damage and launches the opponent.
- Her body becomes a hitbox on frame 1.
- This can be used to bounce the opponent into more pillars for additional damage.
- Ragyo's hitbox will not hit any characters when they idle, with the exception of Sanageyama.
- The layout of the pillars is RNG based.
- Pillar placements will not extend beyond the walls of the stage, and will clump together when near a wall.
- When used, all of Ragyo's projectiles and j.C will be cleared off the stage.
- Can be performed on the ground or in the air.
- Threshold Armor on startup.
- Threshold is 1000 damage before it wears off.
- Can follow-up into sp.A afterwards if you bounce the opponent on Ragyo's head or hit the opponent with multiple pillars at once during the final volley of pillars.
|
| Valor Level 2
|
160 / (500*5)*5, 400
|
0 / 0, 300
|
9 / 9, 9
|
1, 26
|
Knockdown
|
+600 Damage
|
+600 Damage
|
At Valor Level 2, the wave count increases from 3 to 5, pillar startup is decreased by 10 frames, more pillars are created, the radius for possible pillar spawn locations becomes significantly larger, and Ragyo gains a vacuum effect. If the opponent is hit by the final wave of pillars, they will be teleported directly above Ragyo where she will then take away 1-3 bars of meter from the opponent and put them in Meter Cooldown for 8 seconds, afterwards the opponent will get sent flying into a knockdown
- Meter taken is dependent on opposing character's meter multiplier.
- Threshold Armor on startup.
- Threshold is 2500 damage before it wears off.
- If Ragyo's armor is broken during the startup animation of a pillar wave, the pillars will fire regardless of her being in hitstun.
- At Valor Level 2, following-up into sp.A no longer requires her to bounce the opponent on her head and will now require different timing and is much tighter to land. The correct timing for sp.A after Valor Level 2 sp.C is right when the opponent falls onto the ground and "sinks" into it during the knockdown, can be inconsistent to do on certain characters.
|
|
General Moves
Life Fiber Wire Attack
|
| Damage
|
Prorate
|
Priority
|
Startup
|
On Hit
|
On Block
|
Counter Hit
|
| 600
|
100
|
4
|
-
|
Launch
|
N/A
|
N/A
|
At Valor Level 1, Ragyo will automatically envelop the opponent in a large Life Fiber cage if her Counter Burst counter hits, allowing her to follow-up with a combo on hit.
- If Ragyo's Counter Burst does not counter hit upon hit, she will not initiate the move.
- On hit, Ragyo will automatically have any Meter Cooldown on her removed, she will gain half a bar of meter, and the opponent will not be able to Counter Burst for 1.5 seconds (90 frames).
- Can cancel into 5BAA, d.B, d4/6.CC, a Step Dash, or a Homing Dash when performed on the ground.
- Can cancel into j.BAA, d.B, d4/6.CC, an Air Dash, or an Aerial Homing Dash when performed in the air.
- Does a massive amount of hitstun, allowing for many possible follow-ups outside of her cancel options.
- Commonly referred to as "CH Burst Fibers".
|
|
Speech Counter Mock Mock Taunt Taunt Provoke Provoke
|
| Damage
|
Prorate
|
Priority
|
Startup
|
On Hit
|
On Block
|
Counter Hit
|
| 800
|
100
|
4
|
-
|
Sliding Knockdown
|
N/A
|
N/A
|
At Valor Level 1, after a successful victory from Bloody Valor as the defender, a pair of lasers will be summoned that fire independently of Ragyo at the opponent, allowing her to follow-up with a combo on hit.
- Depending on which Bloody Valor option Ragyo wins with as the defender, it will make her do a different attack with each one varying in knockback and appearance.
- If Ragyo wins with Mock, Ragyo will attack with her 5AAAA animation before the lasers are summoned.
- Mock will cause the least amount of knockback out of the 3 Bloody Valor options.
- If Ragyo wins with Taunt, Ragyo will attack with her j.d2/8.C animation before the lasers are summoned.
- Taunt will cause the 2nd most amount of knockback out of the 3 Bloody Valor options.
- If Ragyo wins with Provoke, Ragyo will attack with her 5BBB animation before the lasers are summoned.
- Provoke will cause the most amount of knockback out of the 3 Bloody Valor options.
- Speech Counter takes priority over Ragyo's other moves, making most moves Ragyo does during the active frames of Speech Counter whiff.
- On hit, Ragyo can whiff cancel 4/6A, 2/8A, and sp.A into any of their respective follow-ups if done during the laser's startup animation.
- Speech Counter can be bursted by the opponent, but due to the active frames the opponent will not be able to outlast the active frames and will get hit.
- The opponent's counter burst will also not hit Ragyo regardless of what Bloody Valor option she won with, as she will be outside of burst range.
- Speech Counter is incapable of counter hitting, even if the opponent attempts to burst them when they get hit, it will not initiate a counter hit.
- Commonly referred to as "Defender Lasers".
|
|
Step Dash
|
| Damage
|
Prorate
|
Priority
|
Startup
|
On Hit
|
On Block
|
Counter Hit
|
| N/A
|
N/A
|
N/A
|
1
|
N/A
|
N/A
|
N/A
|
Ragyo performs a Step Dash.
- Ragyo's Step Dash has her teleport in the direction she stepped in, cannot phase through opponents.
- Ragyo's Side Step Dash has Sidestep Invulnerability from frames 1-19.
- Ragyo's Front Step Dash can cancel into d.A, d.B, d2/8.C, a Step Dash, or a Homing Dash.
- Ragyo's Side Step Dash can cancel into d.A, 5B, d4/6.C, a Step Dash, or a Homing Dash.
- Ragyo's Back Step Dash can cancel into d.A, d.B, d2/8.C, a Step Dash, or a Homing Dash.
- Ragyo's Side Step Dash can break another Ragyo's Homing Dash tracking in the mirror.
|
|
Air Dash
|
| Damage
|
Prorate
|
Priority
|
Startup
|
On Hit
|
On Block
|
Counter Hit
|
| N/A
|
N/A
|
N/A
|
1
|
N/A
|
N/A
|
N/A
|
Ragyo performs an Air Dash.
- Ragyo's Air Dash has her teleport in the direction she stepped in, cannot phase through opponents.
- Ragyo's Front Air Dash can cancel into j.A, d.B, and j.d2/8.C, or an Air Dash.
- If performed close enough to the ground, cancel options change to d.A, d.B, and d2/8.C (non teleport).
- Ragyo's Side Air Dash can cancel into j.A, 5BB, d4/6.C, or an Air Dash.
- Ragyo's Back Air Dash can cancel into j.A, d.B, and j.d2/8.C, or an Air Dash.
- If performed close enough to the ground, cancel options change to j.A, d.B, and 5C.
- If the cancel is delayed, cancel options change to d.A, d.B, and 5C.
- Ragyo's Front Air Dash and Back Air Dash have different properties from one another.
- Front Air Dash can be canceled into supers while her Back Air Dash cannot.
- Front Air Dash takes longer to land on the ground than Back Air Dash.
- Ragyo can snap herself to the ground from a Side Air Dash that is low to the ground by canceling into her Close Range Attack follow-up as low to the ground as possible to quickly perform normals that she wouldn't normally be able to do from an Air Dash, these include 5A, 4/6A, and 2/8A.
|
|
Homing Dash
|
| Damage
|
Prorate
|
Priority
|
Startup
|
On Hit
|
On Block
|
Counter Hit
|
| 50
|
25
|
2
|
21
|
Launch
|
-
|
+300 Damage
|
Ragyo homes in on the opponent and quickly attacks, can hit sidesteps.
- On hit, can perform d.A, 5BB, 5BAAC, or a Step Dash afterwards.
- Homing Dash can be canceled into Dash attacks after the initial startup.
- Allows you to armor through low priority projectiles after the initial startup.
- Dash cancelable after the initial startup.
- Non-lethal, cannot KO.
- Ragyo's Homing Dash tracking is bugged, will break upon the opponent using certain moves with Sidestep Invulnerability at a specific timing.
|
|
Aerial Homing Dash
|
| Damage
|
Prorate
|
Priority
|
Startup
|
On Hit
|
On Block
|
Counter Hit
|
| 50
|
25
|
2
|
21
|
Launch
|
-
|
+300 Damage
|
Ragyo homes in on the opponent and quickly attacks, can hit sidesteps.
- On hit, can perform j.A, 5BB, 5BAAC, or an Air Dash afterwards.
- Allows you to armor through low priority projectiles after the initial startup.
- Air Dash cancelable after the initial startup.
- Non-lethal, cannot KO.
- Ragyo can phase through opponents by doing a Front Air Dash from the Aerial Homing Dash with proper timing and height.
|
|
Valor Burst
|
| Damage
|
Prorate
|
Priority
|
Startup
|
On Hit
|
On Block
|
Counter Hit
|
| 250*4, 500
|
0
|
9
|
15
|
Bloody Valor / Sliding Knockdown
|
Guard Crush
|
+300 Damage
|
A Burst that has been performed while your character is in a free state.
- Once activated, you become invincible and release a multi-hit shockwave, can hit sidesteps and OTG.
- On hit, Bloody Valor will commence.
- At Valor Level 3, Valor Burst won't trigger Bloody Valor and will only cause a Sliding Knockdown.
- Non-lethal cannot KO.
|
|
Counter Burst
|
| Damage
|
Prorate
|
Priority
|
Startup
|
On Hit
|
On Block
|
Counter Hit
|
| 10
|
0
|
9
|
15
|
Sliding Knockdown
|
-
|
+590 Damage
|
A Burst that has been performed under the effects of hitstun or blockstun.
- Once activated, you become invincible and knockback the opponent, can hit sidesteps.
- Counter Burst can be performed in the air.
- You will not be able to perform any action until you land on the ground.
- Meter Cooldown for 7 seconds.
- Non-lethal, cannot KO.
|
|
FIBER LOST SECRET ARTS Multicolored Cruelty Multicolored Cruelty
|
| Damage
|
Prorate
|
Priority
|
Startup
|
On Hit
|
On Block
|
Counter Hit
|
| 10*2, SEN-I-SOSHITSU
|
0
|
9
|
37
|
SEN-I-SOSHITSU
|
-
|
SEN-I-SOSHITSU
|
Ragyo teleports fullscreen to the opponent regardless of distance and punches them (similar to 5AAA.)
- Massive amount of pushback on block.
- When used, all of Ragyo's projectiles and j.C will be cleared off the stage.
- True Invulnerability on startup.
- "In my opinion, nothing is uglier than a person wearing clothes THAT DON'T FIT THEM!"
|
|
Colors
Notable Players
Disclaimer: This list is derived from community input and is in no way comprehensive or a form of ranking of any kind. Our community criteria can be found here.
| Usual Color |
Handles/Links |
Region |
Status |
Notes
|
|
|
AthenaDiva
@Athena_Diva_
|

United States
NY
|
Active
|
Plays on Steam
The top dog of Ragyo, is a lab monster, j.C my beloved.
Example Play
|
|
|
AtomicOreo
@AtomicOreo
|

United States
LA
|
Inactive
|
Plays on PS/Steam
Lab monster, was one of the first pioneers of Ragyo in the early days of the game, has been playing Ragyo since before the game released.
Example Play
|
|
|
Datpoodlenoodle
@datpoodlenoodle
|

Australia
|
Inactive
|
Plays on Steam/Switch
Average Ragyo mirror enjoyer.
Example Play
|
|
|
Josh
@josh12465
|

United Kingdom
|
Inactive
|
Plays on PS
Really hates Nonon.
Example Play
|
|
|
PuellaSins
@TwinTailTwist
|

United States
NV
|
Retired
|
Plays on PS/Steam
One of the first professional Ragyo players, has displayed amazing gameplay at local tournaments such as EVO, created her basics guide.
Example Play
|
External Links

