KILL la KILL IF/Mechanics
Match Format
Default matches have a four star handicap, 180 second timer, and are a best of 3 in rounds.
Once one round ends, everything carries over to the next round. This would be:
- Health
- Timer
- SP Gauge
- Valor Level
- The position you were in when the round ended.
- Character traits such as Damage Charge or the Analyze Gauge.
Follow-Ups
Most moves have a select group of moves that they can cancel into as follow-ups.
An example being, Ragyo's 5A can cancel into 5AA, 5BB, or d4/6.C as follow-ups.
You can achieve each follow-up by simply pressing the corresponding button of the follow-up option, Ragyo canceling 5A into 5BB is really just doing 5AB. The same applies for the other 2 options, as it would just be doing 5AA or 5AC. Another example would be Ragyo's d.B canceling into j.BB as a follow-up. You aren't actually doing d.B into a jump to do j.BB, you just have to do d.BB, and you will get d.B's corresponding Long Range Attack follow-up. This keeps the notation simple and easy.
No other normals can be chosen as follow-ups to Ragyo's 5A aside from the 3 moves listed above, as these are the move's cancel options. Every move's options are different, some even include Step Dash or Air Dash as an option. You can think of it like each move having a rekka tied to it.
The only moves that can be chosen as follow-ups that aren't within the move's normal follow-up options are metered options like Nui's EX Attacks, Specials, Supers, Valor Burst, or FIBER LOST SECRET ARTS.
However, some normals (usually Enders) cannot be canceled into anything, even metered options.
Knockdown
When a player is on the ground, they're vulnerable to getting hit until their get up animation starts.
Another form of knockdown in this game is Sliding Knockdown. The character rolls and tumbles for a period of time which allows for combo extension.
Wakeup
The start of wakeup invulnerability is indicated by a yellow flash and your character hopping off of the ground from a knockdown or sliding knockdown.
Wakeup invulnerability is extended beyond the character's wakeup animation to where they're shortly invulnerable during their neutral state, allowing them to turn most moves into a reversal.
From the start of the get up animation, you are given True Invulnerability for 64 frames in total, you can act for the last 21 frames of the True Invulnerability, turning nearly anything you press during this into a reversal.
Wakeup invulnerability also occurs after getting launched into the air, if you aren't immediately hit afterwards your character will automatically gain wakeup invulnerability and quickly fall to the ground.
After gaining wakeup invulnerability in the air, you will have True Invulnerability until you land to the ground.
Counter Hit
Interrupting the startup frames of an opponent’s attack or horizontal Step Dash causes your attack to deal an extra 300 damage. This only applies to the first hit if Its a multi-hit.
Certain moves benefit more from a Counter Hit, such as Ryuko’s 2/8A dealing an extra 600 damage when Its a Counter Hit. Other effects include extended hitstun, Crumple, etc.
Guard Crush
Upon blocking certain moves (commonly charged Long Ranged Attacks), your character will be vulnerable for a short time before being able to act again.
Guard Crush moves cannot pierce Guard Point.
Clashing & Priority
Nearly every move has a set priority, priority is dictated by a number, each move will have a number going from 0 to 9. The higher the number, the higher the priority of the move is.
Most moves tend to have a priority from 0 to 5, anything higher is usually only reserved for certain Break Attacks, Nui's EX Attacks, Specials, Supers, Valor Burst, Counter Burst, and FIBER LOST SECRET ARTS.
Homing Dash and Aerial Homing Dash have a priority of 2.
Valor Burst and Counter Burst have a priority of 9.
When two moves of the same priority clash, both characters "lose" the clash, receive meter, are knocked back, and recover on the same frame.
Every attack in the game has a different clash duration.
The same effect Guard Crush gives happens when a move of greater priority clashes with a move of lower priority. The character with the higher priority move continues through their animation, while the character with the lower priority move will be put into a vulnerable state.
Upon clashing in the air, your character will be knocked backwards. Can perform aerials afterwards.
Clashing will grant both players SP gauge even when in Meter Cooldown.
Negative Priority
Certain moves have negative priority and moves with negative priority will lose to moves that have a 0 or higher in priority. Very few moves have this type of priority and the only instance of negative priority are moves having a priority of -1 as there is no negative priority below -1. If two -1 priority moves clash with each other, the clash will be no different than a clash between two 1 priority moves.
Wallsplat
Launching the opponent while their back is to the wall will cause a wallsplat. The opponent is stuck to the wall and slowly slides down to the ground. This allows for combo extension and big damage potential.
Each wallsplat in a single combo will decrease the amount of time the opponent is stuck to the wall.
Attacks that are done to a wallsplatted opponent receive 30% damage scaling. Scaling will kick in again after a second wallsplat, damage will reach it's minimum after the second wallsplat and will not decrease any further past this point.
Combo Proration
The Combo Proration system was added to prevent infinites that were present early on in the game's lifespan.
There is a limit to how much you can use one specific move in a combo. It'll still do the same amount of damage, but once it reaches this limit the opponent will tech out and the combo will end.
Combo'ing off of a wallsplatted opponent will increase this limiter and not allow that many loops as before.
As the limit value increases, the following effects will occur:
1st phase - limit 100 or higher Receiver will gain 50% meter faster
2nd phase - limit 200 or higher Attackers combos will automatically shift to forced enders where possible
3rd Phase - limit 300 or higher Opponent will recover faster
Armor
There's two types of armor a move can have.
Guard Point
Armor that protects you from taking damage or hitstun from incoming attacks, essentially acting like blocking during a move.
This armor can be pierced by Break Attacks though, and depending on the move it is not always frame 1. Beating out this armor with a Break Attack will give you a Guard Break.
Guard Point behaves differently when a character is at 0 HP. You can be alive and be at 0 HP by being hit by a non lethal attack such as Homing Dash when at 1 HP, your HP will be reduced to 0 but you will still be alive. When at 0 HP, Guard Point will protect you from a singular non Break Attack hit regardless of damage, but will immediately break after this takes place, leaving you open to be hit.
Threshold Armor
With this armor you still take damage, but are unaffected by Break Attacks and hitstun.
Each move with this armor has a specific threshold of damage it takes before wearing off.
Invulnerability
There's three types of invulnerability a move can have.
True Invulnerability
As the name implies, Invulnerability that protects you from everything and cannot be hit under any circumstances.
Sidestep Invulnerability
Invulnerability that protects you from any attack that does not hit sidesteps.
Uppercut Invulnerability
Invulnerability that protects you from dash attacks or aerials, commonly referred to as "8A Invul".
Composite Invulnerability
Invulnerability that protects you from any attack that does not hit sidesteps, dash attacks, and aerials, it is essentially a combination of Sidestep Invulnerability and Uppercut Invulnerability.
Low Health Recovery
If you’re at low enough health (HP bar starts flashing), and you bring the match into round 3, you will be rewarded health recovery at the beginning of round 3.
SP Gauge

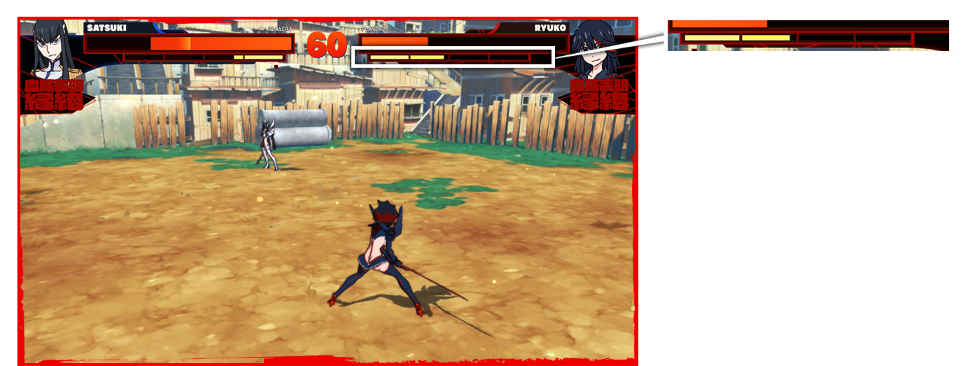
The SP Gauge is used to perform actions such as Specials, Burst, and FIBER LOST SECRET ARTS. It's broken up into four 25% integers.
The SP Gauge increases whenever you:
- Hit the opponent.
- Get hit by the opponent.
- Guard an opponent's attack.
- Clash with the opponent's attack.
| Meter Consumption | |||||
|---|---|---|---|---|---|
| Nui's EX Attacks | One bar (25%) | ||||
| Specials | Two bars (50%) | ||||
| Burst | Two bars (50%) | ||||
| FIBER LOST SECRET ARTS | Four bars (100%) | ||||
Meter Cooldown
Upon using meter to perform an action, the SP Gauge turns blue and freezes for awhile. During this time, your meter will not be able to increase.
The exception to this would be landing a Valor Burst that leads into Bloody Valor, and the potential SP gained from winning Bloody Valor.
The duration of Meter Cooldown depends on the move. The cooldown duration after Specials is shorter than Counter Burst for example.
Counter Burst will give the user meter cooldown for 15 seconds (900 frames).
Counter Burst (Counter Hit) will give the user meter cooldown for 7 seconds (420 frames).
Valor Burst will give the user meter cooldown for 5 seconds (300 frames).
Burst

Pressing Deathblow + Guard will have you perform a burst, which will spend two bars of your SP Gauge.
There are two types of Bursts:
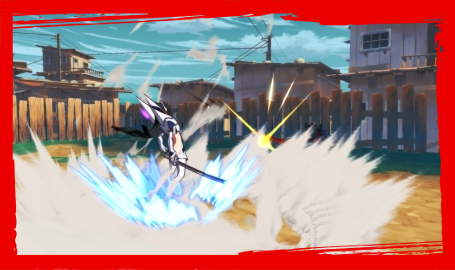
Valor Burst
A Burst that has been performed while your character is in a free state and not under the effects of hitstun or blockstun.
Once activated, you gain True Invulnerability on startup and you release a multi-hit shockwave that deals 1500 damage (non-lethal, cannot KO).
If the opponent is hit by Valor Burst, Bloody Valor will commence.
Valor Burst itself can be beaten by Counter Burst if bursted before the final hit of the shockwave hits.
Depending on the character, Valor Burst will or will not have the user's projectiles be deleted upon activation.
Valor Burst applies Meter Cooldown on the user for 5 seconds upon use.
Valor Burst leaves you 0 on block with it's Guard Crush.
Counter Burst
A Burst that has been performed while your character is under the effects of hitstun or blockstun.
Once activated, you become invincible and can break free of the opponent's combo or guard pressure.
The shockwave knocks back the opponent and deals 10 damage (non-lethal, cannot KO).
Counter Burst can also be performed in the air. However, you will not be able to perform any action until you land on the ground.
Counter Burst applies Meter Cooldown on the user for 16 seconds upon use.
FIBER LOST SECRET ARTS

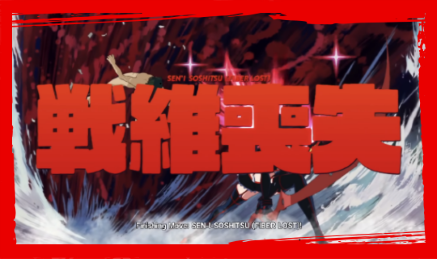
FIBER LOST SECRET ARTS (Fiber Lost or Seni for short) is an instant kill attack that can be performed by using the same input you would use for Valor Burst once you have Valor Level 3 and your SP Gauge is at max.
Landing this on your opponent will immediately end the match and declare you the winner.
They can be combo'd into as well.
Depending on the character, FIBER LOST SECRET ARTS will or will not have the user's projectiles be deleted upon activation.