Street Fighter 1 MR/Adon/Strategy: Difference between revisions
(Established Adon Strategy Page (Minimal work + Skeleton)) |
No edit summary |
||
| Line 4: | Line 4: | ||
===General Strategy=== | ===General Strategy=== | ||
Adon obtains | Adon obtains his win condition at the moment he finds an opening and is able to mix between a low in {{clr|2|2B}} / {{clr|5|2D}} or an overhead in {{clr|2|214B}} '''Jaguar Kick''', and when he scores a hit, converts it into big damage and can maintain offense. Adon's mix and damage helps to make incredible comebacks, and infinite blockstrings help to maintain a life lead. | ||
== Neutral == | == Neutral == | ||
| Line 10: | Line 10: | ||
===Long Range/Closing Space=== | ===Long Range/Closing Space=== | ||
Right at round start, the onus is on Adon to close in the distance and make his way past pokes and fireballs. Walk speed and run speed are naturally high for SF1MR, and Adon has a long low poke in {{clr|2|2B}} to help his | Right at round start, the onus is on Adon to close in the distance and make his way past pokes and fireballs. Walk speed and run speed are naturally high for SF1MR, and Adon has a long low poke in {{clr|2|2B}} to help his burst movement approaches. Adon is also blessed with a safe mobility special in '''Jaguar Kick''' {{clr|2|(214B)}}, which he can use to hop over most low pokes that some characters are reliant on, or hop over low fireballs like Sagat's Low Tiger Shot and Geki's A Shuriken Toss. | ||
Whenever Adon has built meter off his offense and needs to find another approach, his {{clr|2|236236K}} | <gallery widths="280px" heights="160px" mode="nolines"> | ||
SF1MR_Adon_2B.PNG | '''{{clr|2|2B}}''' | |||
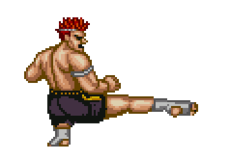
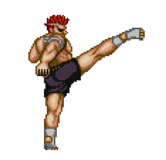
SF1MR_Adon_214K.PNG | '''Jaguar Kick {{clr|2|(214B)}}''' | |||
</gallery> | |||
Whenever Adon has built meter off his offense and needs to find another approach, his '''Jaguar Revolver''' {{clr|2|(236236K)}} shines as a threat to close distance. You can YOLO it to hope to sneak past a poke or to gain block pressure, or you can use it on reaction to any fireball to invuln your way past them. This limits the threat that some characters can pose to wall you if you represent this as an anti-fireball option. | |||
<gallery widths="280px" heights="160px" mode="nolines"> | |||
SF1MR_Adon_214K.PNG | '''Jaguar Revolver {{clr|2|(236236K)}}''' | |||
</gallery> | |||
===Midrange/Footsies=== | ===Midrange/Footsies=== | ||
Adon plays footsies very well utilizing his {{clr|2|2B}} for poking/counterpoking. It is a very nice poke by itself, and it also high/low mixes anyone that low blocks it. It's also an amazing punish tool and is great in Adon's long range confirms where he would need to cancel into {{clr|5|2D}} or '''Jaguar Kick''' {{clr|2|(214B)}}. While Adon primarily uses 2B for all situations in footsies, he also has other various pokes like {{clr|5|2D}} which is another cancellable low that knocks down, or his {{clr|5|5D}} which can preemptively antiair. | |||
<gallery widths="280px" heights="160px" mode="nolines"> | |||
SF1MR_Adon_2B.PNG | '''{{clr|2|2B}}''' | |||
SF1MR_Adon_2B.PNG | '''{{clr|5|2D}}''' | |||
SF1MR_Adon_5D.PNG | '''{{clr|5|5D}}''' | |||
</gallery> | |||
===Close Range=== | ===Close Range=== | ||
Adon likes a good scramble situation as his returns on a right guess give him great damage. {{clr|1|5A}} and {{clr|1|2A}} are the main mashing tools Adon uses that can give him confirms into his great punish normals, or they can make for excellent jabwalk normals. Unsurprisingly, {{clr|2|2B}} is also useful here as it is + on block, and only 1 frame slower than his A normals with the same returns on hit. | |||
<gallery widths="280px" heights="160px" mode="nolines"> | |||
SF1MR_Adon_5A.PNG | '''{{clr|1|5A}}''' | |||
SF1MR_Adon_2A.PNG | '''{{clr|1|2A}}''' | |||
SF1MR_Adon_2B.PNG | '''{{clr|2|2B}}''' | |||
</gallery> | |||
== Offense == | == Offense == | ||
Revision as of 13:04, 28 September 2022
Strategy
General Strategy
Adon obtains his win condition at the moment he finds an opening and is able to mix between a low in 2B / 2D or an overhead in 214B Jaguar Kick, and when he scores a hit, converts it into big damage and can maintain offense. Adon's mix and damage helps to make incredible comebacks, and infinite blockstrings help to maintain a life lead.
Neutral
Long Range/Closing Space
Right at round start, the onus is on Adon to close in the distance and make his way past pokes and fireballs. Walk speed and run speed are naturally high for SF1MR, and Adon has a long low poke in 2B to help his burst movement approaches. Adon is also blessed with a safe mobility special in Jaguar Kick (214B), which he can use to hop over most low pokes that some characters are reliant on, or hop over low fireballs like Sagat's Low Tiger Shot and Geki's A Shuriken Toss.
2B

Jaguar Kick (214B)


Whenever Adon has built meter off his offense and needs to find another approach, his Jaguar Revolver (236236K) shines as a threat to close distance. You can YOLO it to hope to sneak past a poke or to gain block pressure, or you can use it on reaction to any fireball to invuln your way past them. This limits the threat that some characters can pose to wall you if you represent this as an anti-fireball option.
Jaguar Revolver (236236K)
Midrange/Footsies
Adon plays footsies very well utilizing his 2B for poking/counterpoking. It is a very nice poke by itself, and it also high/low mixes anyone that low blocks it. It's also an amazing punish tool and is great in Adon's long range confirms where he would need to cancel into 2D or Jaguar Kick (214B). While Adon primarily uses 2B for all situations in footsies, he also has other various pokes like 2D which is another cancellable low that knocks down, or his 5D which can preemptively antiair.
2B
2D
5D

Close Range
Adon likes a good scramble situation as his returns on a right guess give him great damage. 5A and 2A are the main mashing tools Adon uses that can give him confirms into his great punish normals, or they can make for excellent jabwalk normals. Unsurprisingly, 2B is also useful here as it is + on block, and only 1 frame slower than his A normals with the same returns on hit.

5A

2A
2B

