Street Fighter 1 MR/Ryu: Difference between revisions
Callie Rose (talk | contribs) No edit summary |
No edit summary |
||
| (12 intermediate revisions by 2 users not shown) | |||
| Line 1: | Line 1: | ||
__NOTOC__ | |||
{{SF1MR Character Subnav|char=Ryu}} | {{SF1MR Character Subnav|char=Ryu}} | ||
{{2 Column Flex|flex1=7|flex2=3|reverse=yes|content1= | |||
<div style="padding: 0px 5px; margin-top:15px; float:left;"> | |||
{{FP Box|header={{Big|'''Ryu'''}}|content= | |||
'''Ryu''' is the ever wandering warrior who practices Shotokan karate. He comes to the scene in SF1 looking to beat all of the best fighters around the world, and is the protagonist and only playable character in the original SF1. He travels to defeat the champions of multiple countries before fighting Sagat, the strongest of them all. After defeating Sagat, Ryu walked into the distance, eager for his next fight. | '''Ryu''' is the ever wandering warrior who practices Shotokan karate. He comes to the scene in SF1 looking to beat all of the best fighters around the world, and is the protagonist and only playable character in the original SF1. He travels to defeat the champions of multiple countries before fighting Sagat, the strongest of them all. After defeating Sagat, Ryu walked into the distance, eager for his next fight. | ||
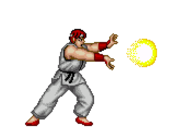
Ryu is likely the most familiar character to his other appearances in SF1MR. Just like always, Ryu tosses his signature '''Hadouken {{clr|1|(236P)}}''' fireballs to zone the opponent out, and knocks them out of the air with various powerful anti-airs. This gameplay is turned up to 10 in SF1MR, mostly since Hadoukens are much more powerful than usual, dealing a ton of damage and recovering very fast. Ryu has simple and useful gatlings as well, and while his offense is comparatively weak due to being mixless and lacking an infinite blockstring, he still easily ends in + frames with a '''{{clr|7|2D}}''' to Hadouken cancel. This is in stark contrast to his shoto counterpart Ken, who in this game doesn't have the same frame advantage on his Hadokens, and as a big twist from typical SF titles, this makes Ryu better offensively. His damage is only average, but his combos are very stable in exchange, and he has some decent combo variety as well. He also has '''Shinku Hadouken {{clr|1|(236236P)}}''', an amazing zoning and anti-zoning tool that is very combo friendly. | |||
Ryu in SF1MR is | |||
He has a few things holding him back from being totally dominant, however. While his combos are stable, they lack massive damage output without specific situations. He often finds himself punishing by just doing a '''{{clr|2|2B}}''' > '''{{clr|7|2D}}''' gatling for a safe taunt. He's also mixless, and lacks the infinite blockstrings of other mixless characters, forcing him to rely on neutral and smart defense to win. Notably, his '''Tatsu {{clr|2|(214K)}}''' is near useless in both neutral and combos, limiting his potential damage even harder. | |||
{{ | If you want a solid, stable zoner with a great super and some good pokes, Ryu is perfect. | ||
------ | |||
<div style="margin-top:15px; align:left;"> | |||
{{StrengthsAndWeaknessesNoPlaystyle | |||
|pros= | |pros= | ||
*'''Zoning:''' | *'''Zoning:''' Hadoukens are fast and recover even faster, and Ryu has great anti-airs with 5D and Shoryuken, making approaching difficult | ||
*''' | *'''Simple:''' His gameplan is straightforward, and you have to learn very few character specific things to win | ||
*''' | *'''Normals:''' Ryu has solid pokes, anti-airs, and punish normals all around, like '''{{clr|2|2B}}''', '''{{clr|3|2C}}''', '''{{clr|7|2D}}''', '''{{clr|7|5D}}''', and both of his neutral jump normals | ||
*'''Shinku Hadouken:''' Shinku Hadouken is a massive damage multihit fireball that blows through other zoning attempts | |||
|cons= | |cons= | ||
*''' | *'''Mixless:''' Throws are not a universal concept in SF1MR, and Ryu lacks an overhead or a crossup. This forces him to rely on chip to make realistic comebacks, making it so getting the life lead is necessary to win | ||
*'''Low Damage:''' | *'''Low Damage:''' While his average damage is good, he lacks the insane peaks of better characters, leaving his punishes to be lower than usual | ||
*'''Outclassed:''' Ryu is strong, but others are just much stronger, and this leaves Ryu "honest" to a degree | |||
}} | }} | ||
}} | }} | ||
</div> | |||
</div> | |||
|content2= | |content2= | ||
{{ | {{FP Box|header={{Big|'''Profile'''}}|content= | ||
<center><div style="display:flex; overflow-x:hidden; justify-content: {{{portraitalign|center}}};">[[File:SF1MR_portrait_Ryu.png|frameless|400px|right]]</div></center> | |||
------ | |||
<center> | |||
{{Big|'''Stats and Vitals'''}} | |||
</br> | |||
<div style="text-align:justify;> | |||
*'''Attack Rating''' = 100 | *'''Attack Rating''' = 100 | ||
*'''Armor Rating''' = 100 | *'''Armor Rating''' = 100 | ||
*'''Forward Walk Speed''' = 2.5 | *'''Forward Walk Speed''' = 2.5 | ||
*'''Taunt''' = 30f | *'''Taunt''' = 30f | ||
}} | </div> | ||
</center> | |||
{{ | ------ | ||
<center> | |||
{{Big|'''Movelist'''}} | |||
<div style="text-align:left;"> | |||
;Special Moves | |||
:'''{{clr|1|236A/C}}''' - ''Hadouken'': Fireball | |||
:'''{{clr|2|214B/D}}''' - ''Tatsumaki Senpukyaku'': Tatsu | |||
:'''{{clr|1|6236A/C}}''' - ''Shoryuken'': Uppercut/DP | |||
;Supers | |||
:'''{{clr|1|236236P}}''' - ''Shinku Hadouken'': Extremely high damage and easy to confirm combo ender and anti-zoning tool | |||
:'''{{clr|2|214214K}}''' - ''Shinku Tatsumaki'': Reversal super and corner combo super | |||
;Unique Attacks | |||
:'''{{clr|2|nj.B}}''', '''{{clr|7|nj.D}}'''</div></center> | |||
------ | |||
<center> | |||
{{Big|'''Colors'''}}</br> | |||
[[File:SF1MR_Ryu_colors.png|borderless|200px]] | |||
}} | }} | ||
}} | }} | ||
</div> | |||
== Normals == | == Normals == | ||
| Line 60: | Line 66: | ||
{{MoveData | {{MoveData | ||
|name = Stand Light Punch | |name = Stand Light Punch | ||
|input = 5A | |input = '''{{clr|1|5A}}''' | ||
|image = SF1MR_Ryu_5A.PNG | |image = SF1MR_Ryu_5A.PNG | ||
|hitbox = SF1MR_Ryu_5A_HB.PNG | |hitbox = SF1MR_Ryu_5A_HB.PNG | ||
| Line 75: | Line 81: | ||
|description = | |description = | ||
* Mashing panic button | * Mashing panic button | ||
Ryu's 5A is a fairly standard jab for linking and panic situations, but is usually outshined by 2A, which has better links and better cancels overall. | Ryu's '''{{clr|1|5A}}''' is a fairly standard jab for linking and panic situations, but is usually outshined by '''{{clr|1|2A}}''', which has better links and better cancels overall. | ||
}} | }} | ||
}} | }} | ||
| Line 81: | Line 87: | ||
{{MoveData | {{MoveData | ||
|name = Stand Light Kick | |name = Stand Light Kick | ||
|input = 5B | |input = '''{{clr|2|5B}}''' | ||
|image = SF1MR_Ryu_5B.PNG | |image = SF1MR_Ryu_5B.PNG | ||
|hitbox = SF1MR_Ryu_5B_HB.PNG | |hitbox = SF1MR_Ryu_5B_HB.PNG | ||
| Line 102: | Line 108: | ||
{{MoveData | {{MoveData | ||
|name = Stand Heavy Punch | |name = Stand Heavy Punch | ||
|input = 5C | |input = '''{{clr|3|5C}}''' | ||
|image = SF1MR_Ryu_5C.PNG | |image = SF1MR_Ryu_5C.PNG | ||
|hitbox = SF1MR_Ryu_5C_HB.PNG | |hitbox = SF1MR_Ryu_5C_HB.PNG | ||
| Line 116: | Line 122: | ||
|advBlock = -6 | |advBlock = -6 | ||
|description = | |description = | ||
* Highest damage normal, links to 2A | * Highest damage normal, links to '''{{clr|1|2A}}''' | ||
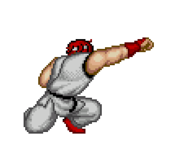
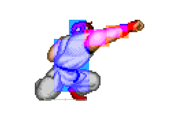
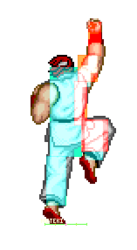
Ryu winds up and hits the opponent with a big punch. Too slow to be worth much, the startup is so long that 5A > 5C won't combo even as a cancel. It does do quite a lot of damage if it does hit however. | Ryu winds up and hits the opponent with a big punch. Too slow to be worth much, the startup is so long that '''{{clr|1|5A}}''' > '''{{clr|3|5C}}''' won't combo even as a cancel. It does do quite a lot of damage if it does hit however. | ||
}} | }} | ||
}} | }} | ||
| Line 123: | Line 129: | ||
{{MoveData | {{MoveData | ||
|name = Stand Heavy Kick | |name = Stand Heavy Kick | ||
|input = 5D | |input = '''{{clr|7|5D}}''' | ||
|image = SF1MR_Ryu_5D.PNG | |image = SF1MR_Ryu_5D.PNG | ||
|hitbox = SF1MR_Ryu_5D_HB.PNG | |hitbox = SF1MR_Ryu_5D_HB.PNG | ||
| Line 138: | Line 144: | ||
|description = | |description = | ||
* Air unblockable | * Air unblockable | ||
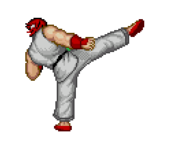
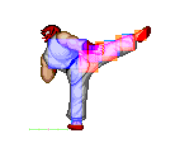
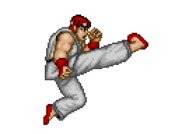
Ryu kicks at a similar angle to 5B, but slower with more power. High startup makes it difficult to use as a reaction anti-air, but on a read it isn't bad, especially for jumps from far away. Similar to Ryu's 5A > 5C, 5B > 5D does not combo. | Ryu kicks at a similar angle to '''{{clr|2|5B}}''', but slower with more power. High startup makes it difficult to use as a reaction anti-air, but on a read it isn't bad, especially for jumps from far away. Similar to Ryu's 5A > 5C, 5B > 5D does not combo. | ||
}} | }} | ||
}} | }} | ||
| Line 145: | Line 151: | ||
{{MoveData | {{MoveData | ||
|name = Crouch Light Punch | |name = Crouch Light Punch | ||
|input = 2A | |input = '''{{clr|1|2A}}''' | ||
|image = SF1MR_Ryu_2A.PNG | |image = SF1MR_Ryu_2A.PNG | ||
|hitbox = SF1MR_Ryu_2A_HB.PNG | |hitbox = SF1MR_Ryu_2A_HB.PNG | ||
| Line 160: | Line 166: | ||
|description = | |description = | ||
* Main normal for linking and pressure | * Main normal for linking and pressure | ||
One of Ryu's main normals for linking, as it cancels into 2C, which is the main normal Ryu wants to land. Can be useful for mashing and pressure, but 2B is faster and hits low. | One of Ryu's main normals for linking, as it cancels into '''{{clr|3|2C}}''', which is the main normal Ryu wants to land. Can be useful for mashing and pressure, but '''{{clr|2|2B}}''' is faster and hits low. | ||
}} | }} | ||
}} | }} | ||
| Line 166: | Line 172: | ||
{{MoveData | {{MoveData | ||
|name = Crouch Light Kick | |name = Crouch Light Kick | ||
|input = 2B | |input = '''{{clr|2|2B}}''' | ||
|image = SF1MR_Ryu_2B.PNG | |image = SF1MR_Ryu_2B.PNG | ||
|hitbox = SF1MR_Ryu_2B_HB.PNG | |hitbox = SF1MR_Ryu_2B_HB.PNG | ||
| Line 180: | Line 186: | ||
|advBlock = -2 | |advBlock = -2 | ||
|description = | |description = | ||
* Confirm for 2D and low poke | * Confirm for '''{{clr|7|2D}}''' and low poke | ||
A classic low poke. Useful as a link after 2C and a cancel after 2A to ensure that a 2D ender will connect. 2B > 2D is almost always possible and is Ryu's main combo route. On it's own, 2B is an alright button to stuff approaches and occasionally poke with. | A classic low poke. Useful as a link after '''{{clr|3|2C}}''' and a cancel after '''{{clr|1|2A}}''' '''{{clr|1|2A}}''' to ensure that a '''{{clr|7|2D}}''' ender will connect. '''{{clr|2|2B}}''' > '''{{clr|7|2D}}''' is almost always possible and is Ryu's main combo route. On it's own, '''{{clr|2|2B}}''' is an alright button to stuff approaches and occasionally poke with. | ||
}} | }} | ||
}} | }} | ||
| Line 187: | Line 193: | ||
{{MoveData | {{MoveData | ||
|name = Crouch Heavy Punch | |name = Crouch Heavy Punch | ||
|input = 2C | |input = '''{{clr|3|2C}}''' | ||
|image = SF1MR_Ryu_2A.PNG | |image = SF1MR_Ryu_2A.PNG | ||
|hitbox = SF1MR_Ryu_2C_HB.PNG | |hitbox = SF1MR_Ryu_2C_HB.PNG | ||
| Line 201: | Line 207: | ||
|advBlock = +11 | |advBlock = +11 | ||
|description = | |description = | ||
* Only cancel that combos to Tatsu | * Only cancel that combos to '''Tatsu {{clr|2|(214K)}}''' | ||
Ryu's main normal to cancel into grounded specials, usually Tatsu. Since Tatsu is so inconsistent on most characters, you'll usually use this as a high damage link tool. Similar to 2B > 2D, if a 2C connects you can almost always link 2D for a big damage combo using only 2 normals. You can even link 2C into itself for high damage punishes like 2C, 2C, 2D. | Ryu's main normal to cancel into grounded specials, usually Tatsu. Since Tatsu is so inconsistent on most characters, you'll usually use this as a high damage link tool. Similar to '''{{clr|2|2B}}''' > '''{{clr|7|2D}}''', if a '''{{clr|3|2C}}''' connects you can almost always link '''{{clr|7|2D}}''' for a big damage combo using only 2 normals. You can even link 2C into itself for high damage punishes like '''{{clr|3|2C}}''', '''{{clr|3|2C}}''', '''{{clr|7|2D}}'''. | ||
}} | }} | ||
}} | }} | ||
| Line 208: | Line 214: | ||
{{MoveData | {{MoveData | ||
|name = Crouch Heavy Kick | |name = Crouch Heavy Kick | ||
|input = 2D | |input = '''{{clr|7|2D}}''' | ||
|image = SF1MR_Ryu_2D.PNG | |image = SF1MR_Ryu_2D.PNG | ||
|hitbox = SF1MR_Ryu_2D_HB.PNG | |hitbox = SF1MR_Ryu_2D_HB.PNG | ||
| Line 222: | Line 228: | ||
|advBlock = -2 | |advBlock = -2 | ||
|description = | |description = | ||
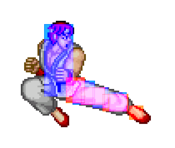
* Long reach, safe, and confirms into Shinku Hadouken | * Long reach, safe, and confirms into '''Shinku Hadouken '''{{clr|1|(236236P)}}''' | ||
The budget combo ender and poke. Since it cancels to fireball on block, it's pretty safe to poke around with, and unlike what you may be used to with sweeps in a majority of SF games, it's safe and very fast on its own. It can be linked or cancelled into fairly easily from most of Ryu's routes, making it a much more consistent combo ender, something he lacks in his specials. Unlike other characters, Ryu's only juggle from a cancelled 2D is Shinku Hadouken, and it can drop hits at longer ranges. | The budget combo ender and poke. Since it cancels to fireball on block, it's pretty safe to poke around with, and unlike what you may be used to with sweeps in a majority of SF games, it's safe and very fast on its own. It can be linked or cancelled into fairly easily from most of Ryu's routes, making it a much more consistent combo ender, something he lacks in his specials. Unlike other characters, Ryu's only juggle from a cancelled '''{{clr|7|2D}}''' is Shinku Hadouken, and it can drop hits at longer ranges. | ||
}} | }} | ||
}} | }} | ||
| Line 230: | Line 236: | ||
{{MoveData | {{MoveData | ||
|name = Jump Light Punch | |name = Jump Light Punch | ||
|input = j.A | |input = '''{{clr|1|j.A}}''' | ||
|image = SF1MR_Ryu_jA.PNG | |image = SF1MR_Ryu_jA.PNG | ||
|hitbox = SF1MR_Ryu_jA_HB.PNG | |hitbox = SF1MR_Ryu_jA_HB.PNG | ||
| Line 251: | Line 257: | ||
{{MoveData | {{MoveData | ||
|name = Jump Light Kick | |name = Jump Light Kick | ||
|input = j.B | |input = '''{{clr|2|j.B}}''' | ||
|image = SF1MR_Ryu_jB.PNG | |image = SF1MR_Ryu_jB.PNG | ||
|hitbox = SF1MR_Ryu_jB_HB.PNG | |hitbox = SF1MR_Ryu_jB_HB.PNG | ||
| Line 266: | Line 272: | ||
|description = | |description = | ||
* Very active and hits below him, good for safejumps. | * Very active and hits below him, good for safejumps. | ||
Ryu sticks out his leg and lets the hitbox linger for the full jump like j.A. More useful as a jump-in, especially since the long active frames can catch a lot of bad anti-airs. Jumping on top of a knocked down opponent with this can actually make a surprising mixup, or even a safejump depending on the character. | Ryu sticks out his leg and lets the hitbox linger for the full jump like '''{{clr|1|j.A}}'''. More useful as a jump-in, especially since the long active frames can catch a lot of bad anti-airs. Jumping on top of a knocked down opponent with this can actually make a surprising mixup, or even a safejump depending on the character. | ||
}} | }} | ||
}} | }} | ||
| Line 272: | Line 278: | ||
{{MoveData | {{MoveData | ||
|name = Jump Heavy Punch | |name = Jump Heavy Punch | ||
|input = j.C | |input = '''{{clr|3|j.C}}''' | ||
|image = SF1MR_Ryu_jC.PNG | |image = SF1MR_Ryu_jC.PNG | ||
|hitbox = SF1MR_Ryu_jC_HB.PNG | |hitbox = SF1MR_Ryu_jC_HB.PNG | ||
| Line 287: | Line 293: | ||
|description = | |description = | ||
* High damage air-to-air. | * High damage air-to-air. | ||
Ryu punches out in front of him. Fairly high damage, but the hitbox is pretty high up, so you'll mostly stick to j.D as a heavy jump-in. Can snipe people air-to-air however. | Ryu punches out in front of him. Fairly high damage, but the hitbox is pretty high up, so you'll mostly stick to '''{{clr|7|j.D}}''' as a heavy jump-in. Can snipe people air-to-air however. | ||
}} | }} | ||
}} | }} | ||
| Line 293: | Line 299: | ||
{{MoveData | {{MoveData | ||
|name = Jump Heavy Kick | |name = Jump Heavy Kick | ||
|input = j.D | |input = '''{{clr|7|j.D}}''' | ||
|image = SF1MR_Ryu_jD.PNG | |image = SF1MR_Ryu_jD.PNG | ||
|hitbox = SF1MR_Ryu_jD_HB.PNG | |hitbox = SF1MR_Ryu_jD_HB.PNG | ||
| Line 315: | Line 321: | ||
{{MoveData | {{MoveData | ||
|name = Taunt | |name = Taunt | ||
|input = A+B | |input = '''{{clr|2|A+B}}''' | ||
|image = SF1MR_Ryu_Taunt.PNG | |image = SF1MR_Ryu_Taunt.PNG | ||
|hitbox = SF1MR_Ryu_Taunt_HB.PNG | |hitbox = SF1MR_Ryu_Taunt_HB.PNG | ||
| Line 330: | Line 336: | ||
|description = | |description = | ||
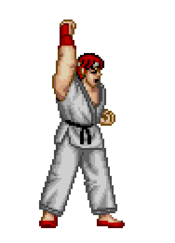
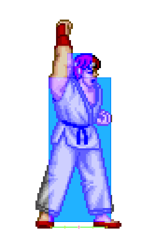
* Taunt builds 1 bar of meter instantly, regardless of if Ryu is hit out of it or not, hence the 1 frame startup. | * Taunt builds 1 bar of meter instantly, regardless of if Ryu is hit out of it or not, hence the 1 frame startup. | ||
Ryu's taunt is fairly fast, allowing him to use it relatively safely in neutral or after any knockdown without giving up much space. Taunting smartly is important, as Ryu loves having constant Shinku Hadouken. | Ryu's taunt is fairly fast, allowing him to use it relatively safely in neutral or after any knockdown without giving up much space. Taunting smartly is important, as Ryu loves having constant '''Shinku Hadouken'''. | ||
}} | }} | ||
}} | }} | ||
| Line 337: | Line 343: | ||
{{MoveData | {{MoveData | ||
|name = Neutral Jump Light Kick | |name = Neutral Jump Light Kick | ||
|input = nj.B | |input = '''{{clr|2|nj.B}}''' | ||
|image = SF1MR_Ryu_njB.PNG | |image = SF1MR_Ryu_njB.PNG | ||
|hitbox = SF1MR_Ryu_njB_First_HB.PNG | |hitbox = SF1MR_Ryu_njB_First_HB.PNG | ||
| Line 353: | Line 359: | ||
|description = | |description = | ||
* Sweeping hitbox to catch multiple angles. | * Sweeping hitbox to catch multiple angles. | ||
A great neutral jump air-to-air with very high damage. Outside of air-to-air however, it doesn't have much use, as nj.D covers the high damage neutral jump starter role much better. However, in midscreen, it has less pushback than nj.D, allowing for higher damage followups. | A great neutral jump air-to-air with very high damage. Outside of air-to-air however, it doesn't have much use, as '''{{clr|7|nj.D}}''' covers the high damage neutral jump starter role much better. However, in midscreen, it has less pushback than '''{{clr|7|nj.D}}''', allowing for higher damage followups. | ||
}} | }} | ||
}} | }} | ||
| Line 360: | Line 366: | ||
{{MoveData | {{MoveData | ||
|name = Neutral Jump Heavy Kick | |name = Neutral Jump Heavy Kick | ||
|input = nj.D | |input = '''{{clr|7|nj.D}}''' | ||
|image = SF1MR_Ryu_njD.PNG | |image = SF1MR_Ryu_njD.PNG | ||
|hitbox = SF1MR_Ryu_njD_HB.PNG | |hitbox = SF1MR_Ryu_njD_HB.PNG | ||
| Line 375: | Line 381: | ||
|description = | |description = | ||
* Very high hitstun and pushback, comparable to a j.CD from the KOF series. | * Very high hitstun and pushback, comparable to a j.CD from the KOF series. | ||
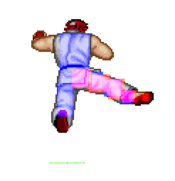
A spinning kick with massive hitstun and pushback. In the corner, this can connect and still allow for a 2C, 2C, 2D, making for a massive damage starter. It can also be a good air-to-air, but nj.B is a bit better thanks to the faster startup and higher active frames. In midscreen, pushback with this can be a bit too strong to get much more than a 2D after. | A spinning kick with massive hitstun and pushback. In the corner, this can connect and still allow for a '''{{clr|3|2C}}''', '''{{clr|3|2C}}''', '''{{clr|7|2D}}''', making for a massive damage starter. It can also be a good air-to-air, but '''{{clr|2|nj.B}}''' is a bit better thanks to the faster startup and higher active frames. In midscreen, pushback with this can be a bit too strong to get much more than a '''{{clr|7|2D}}''' after. | ||
}} | }} | ||
}} | }} | ||
| Line 382: | Line 388: | ||
{{MoveData | {{MoveData | ||
|name = Hadouken | |name = Hadouken | ||
|input = 236A/C | |input = '''{{clr|1|236A/C}}''' | ||
|image = SF1MR_Ryu_236P.PNG | |image = SF1MR_Ryu_236P.PNG | ||
|hitbox = SF1MR_Ryu_236P_First_HB.PNG | |hitbox = SF1MR_Ryu_236P_First_HB.PNG | ||
| Line 411: | Line 417: | ||
|advBlock = +1 | |advBlock = +1 | ||
|description = | |description = | ||
* A version is slow but weak, C version is fast and strong | * '''{{clr|1|A}}''' version is slow but weak, '''{{clr|3|C}}''' version is fast and strong | ||
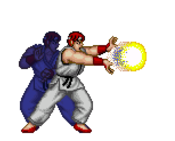
Ryu's iconic Hadouken. Useful zoning tools, especially in conjunction with his uppercut, as they take up much of the screen. SF1MR has a lot of anti-zoning tools however, and these come with shockingly hefty recovery, so use with caution. These are also Ryu's preferred way to deal chip, as Ryu is a mixless character, forcing him to rely on chip to make certain comebacks. | Ryu's iconic Hadouken. Useful zoning tools, especially in conjunction with his uppercut, as they take up much of the screen. SF1MR has a lot of anti-zoning tools however, and these come with shockingly hefty recovery, so use with caution. These are also Ryu's preferred way to deal chip, as Ryu is a mixless character, forcing him to rely on chip to make certain comebacks. | ||
}} | }} | ||
| Line 419: | Line 425: | ||
{{MoveData | {{MoveData | ||
|name = Shoryuken | |name = Shoryuken | ||
|input = 6236A/C | |input = '''{{clr|1|6236A/C}}''' | ||
|image = SF1MR_Ryu_6236P.PNG | |image = SF1MR_Ryu_6236P.PNG | ||
|hitbox = SF1MR_Ryu_6236P_HB.PNG | |hitbox = SF1MR_Ryu_6236P_HB.PNG | ||
| Line 455: | Line 461: | ||
{{MoveData | {{MoveData | ||
|name = Tatsumaki Senpukyaku | |name = Tatsumaki Senpukyaku | ||
|input = 214B/D | |input = '''{{clr|2|214B/D}}''' | ||
|image = SF1MR_Ryu_214K.PNG | |image = SF1MR_Ryu_214K.PNG | ||
|hitbox = SF1MR_Ryu_214K_HB.PNG | |hitbox = SF1MR_Ryu_214K_HB.PNG | ||
| Line 484: | Line 490: | ||
|description = | |description = | ||
* Off the ground frame 4 | * Off the ground frame 4 | ||
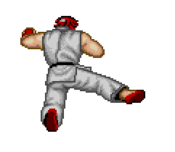
Ryu spins through the air with multiple kicks. Much more awkward than the Tatsu he has in other games, mostly because of the ridiculous height he rises to. Tatsus whiff on everyone except Sagat crouching, and a shocking amount of characters standing and reeling animations. Additionally, they only combo from 2C. All of this put together make them very situational and hard to use in combos. The additional height does help get over things like fireballs, but they're quite slow, so this isn't entirely useful. | Ryu spins through the air with multiple kicks. Much more awkward than the Tatsu he has in other games, mostly because of the ridiculous height he rises to. Tatsus whiff on everyone except Sagat crouching, and a shocking amount of characters standing and reeling animations. Additionally, they only combo from '''{{clr|3|2C}}'''. All of this put together make them very situational and hard to use in combos. The additional height does help get over things like fireballs, but they're quite slow, so this isn't entirely useful. | ||
}} | }} | ||
}} | }} | ||
| Line 491: | Line 497: | ||
{{MoveData | {{MoveData | ||
|name = Shinku Hadouken | |name = Shinku Hadouken | ||
|input = 236236P | |input = '''{{clr|1|236236P}}''' | ||
|image = SF1MR_Ryu_236236P.PNG | |image = SF1MR_Ryu_236236P.PNG | ||
|hitbox = SF1MR_Ryu_236236P_First_HB.PNG | |hitbox = SF1MR_Ryu_236236P_First_HB.PNG | ||
| Line 514: | Line 520: | ||
{{MoveData | {{MoveData | ||
|name = Shinku Tatsumaki Senpukyaku | |name = Shinku Tatsumaki Senpukyaku | ||
|input = 214214K | |input = '''{{clr|2|214214K}}''' | ||
|image = SF1MR_Ryu_214214K.PNG | |image = SF1MR_Ryu_214214K.PNG | ||
|hitbox = SF1MR_Ryu_214214K_HB.PNG | |hitbox = SF1MR_Ryu_214214K_HB.PNG | ||
Latest revision as of 17:24, 27 October 2022
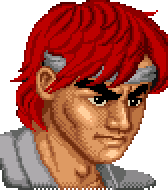
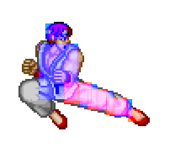
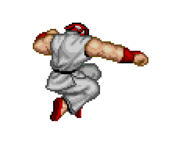
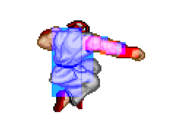
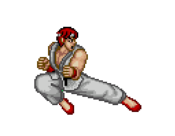
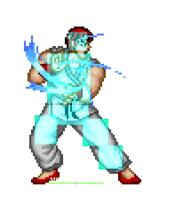
Ryu is the ever wandering warrior who practices Shotokan karate. He comes to the scene in SF1 looking to beat all of the best fighters around the world, and is the protagonist and only playable character in the original SF1. He travels to defeat the champions of multiple countries before fighting Sagat, the strongest of them all. After defeating Sagat, Ryu walked into the distance, eager for his next fight.
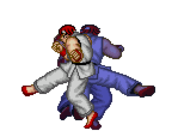
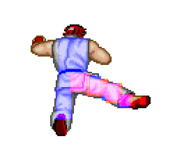
Ryu is likely the most familiar character to his other appearances in SF1MR. Just like always, Ryu tosses his signature Hadouken (236P) fireballs to zone the opponent out, and knocks them out of the air with various powerful anti-airs. This gameplay is turned up to 10 in SF1MR, mostly since Hadoukens are much more powerful than usual, dealing a ton of damage and recovering very fast. Ryu has simple and useful gatlings as well, and while his offense is comparatively weak due to being mixless and lacking an infinite blockstring, he still easily ends in + frames with a 2D to Hadouken cancel. This is in stark contrast to his shoto counterpart Ken, who in this game doesn't have the same frame advantage on his Hadokens, and as a big twist from typical SF titles, this makes Ryu better offensively. His damage is only average, but his combos are very stable in exchange, and he has some decent combo variety as well. He also has Shinku Hadouken (236236P), an amazing zoning and anti-zoning tool that is very combo friendly.
He has a few things holding him back from being totally dominant, however. While his combos are stable, they lack massive damage output without specific situations. He often finds himself punishing by just doing a 2B > 2D gatling for a safe taunt. He's also mixless, and lacks the infinite blockstrings of other mixless characters, forcing him to rely on neutral and smart defense to win. Notably, his Tatsu (214K) is near useless in both neutral and combos, limiting his potential damage even harder.
If you want a solid, stable zoner with a great super and some good pokes, Ryu is perfect.
| Pros | Cons |
|
|
Stats and Vitals
- Attack Rating = 100
- Armor Rating = 100
- Forward Walk Speed = 2.5
- Taunt = 30f
Movelist
- Special Moves
- 236A/C - Hadouken: Fireball
- 214B/D - Tatsumaki Senpukyaku: Tatsu
- 6236A/C - Shoryuken: Uppercut/DP
- Supers
- 236236P - Shinku Hadouken: Extremely high damage and easy to confirm combo ender and anti-zoning tool
- 214214K - Shinku Tatsumaki: Reversal super and corner combo super
- Unique Attacks
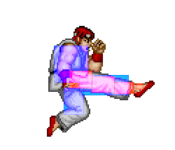
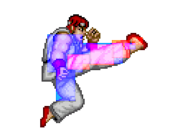
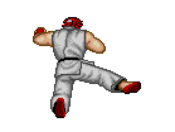
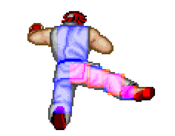
- nj.B, nj.D
Normals
Standing Normals
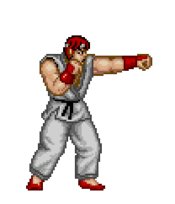
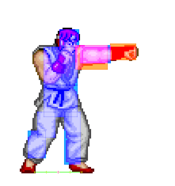
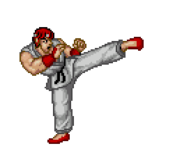
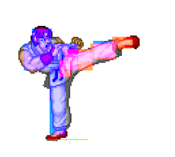
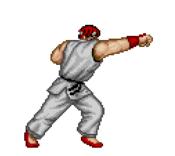
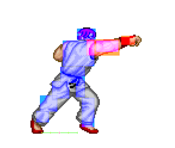
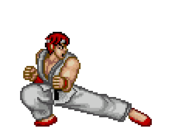
Stand Light Punch
5A |
|
|---|---|
Toggle Hitboxes Toggle Hitboxes
|
Stand Light Kick
5B |
|
|---|---|
Toggle Hitboxes Toggle Hitboxes
|
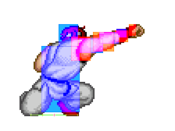
Stand Heavy Punch
5C |
|
|---|---|
Toggle Hitboxes Toggle Hitboxes
|
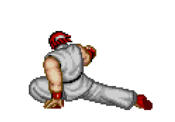
Stand Heavy Kick
5D |
|
|---|---|
Toggle Hitboxes Toggle Hitboxes
|
Crouching Normals
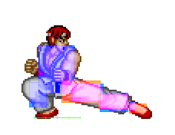
Crouch Light Punch
2A |
|
|---|---|
Toggle Hitboxes Toggle Hitboxes
|
Crouch Light Kick
2B |
|
|---|---|
Toggle Hitboxes Toggle Hitboxes
|
Crouch Heavy Punch
2C |
|
|---|---|
Toggle Hitboxes Toggle Hitboxes
|
Crouch Heavy Kick
2D |
|
|---|---|
Toggle Hitboxes Toggle Hitboxes
|
Jumping Normals
Jump Light Punch
j.A |
|
|---|---|
Toggle Hitboxes Toggle Hitboxes
|
Jump Light Kick
j.B |
|
|---|---|
Toggle Hitboxes Toggle Hitboxes
|
Jump Heavy Punch
j.C |
|
|---|---|
Toggle Hitboxes Toggle Hitboxes
|
Jump Heavy Kick
j.D |
|
|---|---|
Toggle Hitboxes Toggle Hitboxes
|
Taunt
Taunt
A+B |
|
|---|---|
Toggle Hitboxes Toggle Hitboxes
|
Unique Attacks
Neutral Jump Light Kick
nj.B |
|
|---|---|
Toggle Hitboxes Toggle Hitboxes
|
Neutral Jump Heavy Kick
nj.D |
|
|---|---|
Toggle Hitboxes Toggle Hitboxes
|
Special Attacks
Hadouken
236A/C |
|
|---|---|
Toggle Hitboxes Toggle Hitboxes
|
Shoryuken
6236A/C |
|
|---|---|
Toggle Hitboxes Toggle Hitboxes
|
Tatsumaki Senpukyaku
214B/D |
|
|---|---|
Toggle Hitboxes Toggle Hitboxes
|
Supers
Shinku Hadouken
236236P |
|
|---|---|
Toggle Hitboxes Toggle Hitboxes
|
Shinku Tatsumaki Senpukyaku
214214K |
|
|---|---|
Toggle Hitboxes Toggle Hitboxes
|
