Street Fighter 1 MR/Ken: Difference between revisions
No edit summary |
|||
| (10 intermediate revisions by 2 users not shown) | |||
| Line 1: | Line 1: | ||
__NOTOC__ | |||
{{SF1MR Character Subnav|char=Ken}} | |||
{{2 Column Flex|flex1=7|flex2=3|reverse=yes|content1= | |||
<div style="padding: 0px 5px; margin-top:15px; float:left;"> | |||
{{FP Box|header={{Big|'''Ken'''}}|content= | |||
'''Ken''' is Ryu's best friend and training partner. Heir to the Master's family, Ken comes from a lot of wealth and power. He was rowdy and energetic throughout his youth, and loved to get into fights. To ensure his son didn't become too much of a hassle, his father sent him to train with an old friend named Gouken. There, he met Ryu, and the two became rivals as they learned to master the arts of shotokan karate. Ken joins the Street Fighter tournament for the same reason as Ryu, hoping to fight highly skilled opponents from around the world. | |||
Ken is the second in the duo that the community commonly calls "shotos". In the original Street Fighter 1, Ken was simply a player 2 alt with no differences to Ryu. SF1MR adds minor differences, usually just small frame data changes. While Ryu has more frame advantage to take care of his lack of mix with substantial pressure options, Ken trades that out for a faster fireball and DP game, giving him effectively better zoning than Ryu. | |||
Ken is the second in the duo that the community commonly calls "shotos". In the original Street Fighter 1, Ken was simply a player 2 alt with no differences to Ryu. SF1MR adds minor differences, usually just small frame data changes. | |||
In comparison to Ryu, Ken is generally faster but lacks the same frame advantage. His '''Shoryuken {{clr|1|(6236P)}}''' is incredible, being active on the first frame and going incredibly high. These make amazing reversals and defensive tools, but still maintain the same high risk. His '''Tatsumaki Senpukyaku {{clr|2|(214K)}}''' is faster overall, and allows for some stronger corner combos, alongside only being 0 on block unlike Ryu's -3 version. Ken's '''Hadouken {{clr|1|(236P)}}''' fireball is a frame faster, but unfortunately is also a frame slower on recovery, and lacks the same frame advantage that Ryu has from his. | |||
{{ | The two have a large difference in their supers. Ken has '''Shoryureppa {{clr|1|(236236P)}}''', an easy to confirm combo ending super, and '''Shinryuken {{clr|2|(236236K)}}''', a stellar anti-air/reversal super with some amazing combo potential in the corner with Ken's Shinryuken loops. Overall, Ken has better anti-airs and more potential damage, plus better defense. However, he lacks Ryu's stable zoning, powerful super, and better frame advantage. | ||
------ | |||
<div style="margin-top:15px; align:left;"> | |||
{{StrengthsAndWeaknessesNoPlaystyle | |||
|pros= | |pros= | ||
*'''Zoning:''' With his faster Hadokens and Shoryukens, Ken is better at chucking out fireballs and stuffing approaches against them, giving him great play for long range. | |||
*'''Reversals:''' Ken sports some amazing defensive reversals, from his immediately active Shoryuken to his lightning fast supers | *'''Reversals:''' Ken sports some amazing defensive reversals, from his immediately active Shoryuken to his lightning fast supers | ||
*'''Simple:''' Like Ryu, Ken is a fairly simple character to understand at a glance | *'''Simple:''' Like Ryu, Ken is a fairly simple character to understand at a glance | ||
| Line 24: | Line 21: | ||
|cons= | |cons= | ||
*'''Frame Advantage:''' Ken struggles to push any plus on block moves, usually ending with a simple cancel to Hadouken for a small amount of plus frames that he can struggle to capitalize on. As a mixless character, this can make proper comebacks hard | *'''Frame Advantage:''' Ken struggles to push any plus on block moves, usually ending with a simple cancel to Hadouken for a small amount of plus frames that he can struggle to capitalize on. As a mixless character, this can make proper comebacks hard | ||
*'''Situational Damage:''' While Shinryuken loops and Shoryureppa confirms are damaging, they can't always be done. Shinryuken loops usually require hitting a Tatsu in the corner, a notoriously inconsistent special, and Shoryureppa can drop hits at range or after a 2D launch | *'''Situational Damage:''' While Shinryuken loops and Shoryureppa confirms are damaging, they can't always be done. Shinryuken loops usually require hitting a Tatsu in the corner, a notoriously inconsistent special, and Shoryureppa can drop hits at range or after a '''{{clr|7|2D}}''' launch | ||
}} | }} | ||
}} | }} | ||
</div> | |||
</div> | |||
|content2= | |content2= | ||
{{ | {{FP Box|header={{Big|'''Profile'''}}|content= | ||
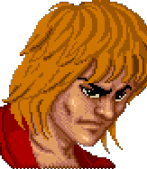
<center><div style="display:flex; overflow-x:hidden; justify-content: {{{portraitalign|center}}};">[[File:SF1MR_Ken_Portrait.png|frameless|400px|right]]</div></center> | |||
------ | |||
<center> | |||
{{Big|'''Stats and Vitals'''}} | |||
</br> | |||
<div style="text-align:justify;> | |||
*'''Attack Rating''' = 100 | *'''Attack Rating''' = 100 | ||
*'''Armor Rating''' = 100 | *'''Armor Rating''' = 100 | ||
| Line 48: | Line 39: | ||
*'''Backward Walk Speed''' = -2.3 | *'''Backward Walk Speed''' = -2.3 | ||
*'''Taunt''' = 30f | *'''Taunt''' = 30f | ||
}} | </div> | ||
</center> | |||
{{ | ------ | ||
<center> | |||
{{Big|'''Movelist'''}} | |||
<div style="text-align:left;"> | |||
;Special Moves | |||
:{{clr|1|'''236A/C'''}} - ''Hadouken'': Zoning/Blockstring Ender | |||
:{{clr|2|'''214B/D'''}} - ''Tatsumaki Senpukyaku'': Combo Ender/Extender | |||
:{{clr|1|'''6236A/C'''}} - ''Shoryuken'': Anti-air/Reversal | |||
;Supers | |||
:{{clr|1|'''236236P'''}} - ''Shoryureppa'': Extremely high damage combo ender | |||
:{{clr|2|'''236236K'''}} - ''Shinryuken'': Reversal, anti-air, and corner combo super | |||
;Unique Attacks | |||
:{{clr|2|'''nj.B'''}}, {{clr|7|'''nj.D'''}}</div></center> | |||
------ | |||
<center> | |||
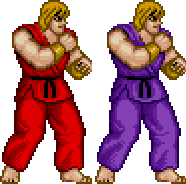
{{Big|'''Colors'''}}</br> | |||
[[File:SF1MR_Ken_colors.png|borderless|200px]] | |||
}} | }} | ||
}} | }} | ||
</div> | |||
== Normals == | == Normals == | ||
| Line 62: | Line 66: | ||
{{MoveData | {{MoveData | ||
|name = Stand Light Punch | |name = Stand Light Punch | ||
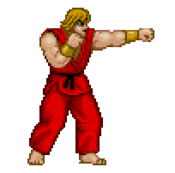
|input = 5A | |input = '''{{clr|1|5A}}''' | ||
|image = | |image = SF1MR_Ken_5A.PNG | ||
|hitbox = | |hitbox = | ||
|data = | |data = | ||
| Line 72: | Line 76: | ||
|active = 3 | |active = 3 | ||
|recovery = 3 | |recovery = 3 | ||
|cancel = GA/SP/SU | |||
|advHit = +7 | |advHit = +7 | ||
|advBlock = 2 | |advBlock = +2 | ||
|description = | |description = | ||
A fairly standard jab for mashing and pressure. | |||
}} | }} | ||
}} | }} | ||
| Line 82: | Line 86: | ||
{{MoveData | {{MoveData | ||
|name = Stand Light Kick | |name = Stand Light Kick | ||
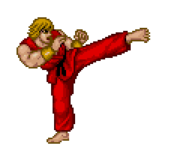
|input = 5B | |input = '''{{clr|2|5B}}''' | ||
|image = | |image = SF1MR_Ken_5B.PNG | ||
|hitbox = | |hitbox = | ||
|data = | |data = | ||
| Line 92: | Line 96: | ||
|active = 5 | |active = 5 | ||
|recovery = 4 | |recovery = 4 | ||
|cancel = GA/SP/SU | |||
|advHit = +2 | |advHit = +2 | ||
|advBlock = -3 | |advBlock = -3 | ||
|description = | |description = | ||
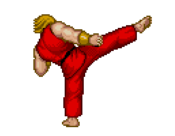
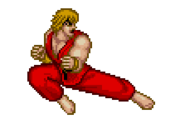
The classic shoto light kick. Somewhat useful to evade low pokes, but not much use otherwise. | |||
The classic shoto light kick. Somewhat useful | |||
}} | }} | ||
}} | }} | ||
| Line 102: | Line 106: | ||
{{MoveData | {{MoveData | ||
|name = Stand Heavy Punch | |name = Stand Heavy Punch | ||
|input = 5C | |input = '''{{clr|3|5C}}''' | ||
|image = | |image = SF1MR_Ken_5C.PNG | ||
|hitbox = | |hitbox = | ||
|data = | |data = | ||
| Line 112: | Line 116: | ||
|active = 12 | |active = 12 | ||
|recovery = 8 | |recovery = 8 | ||
|cancel = N/A | |||
|advHit = +6 | |advHit = +6 | ||
|advBlock = -3 | |advBlock = -3 | ||
|description = | |description = | ||
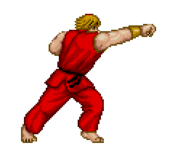
A big punch with huge startup and high damage. If you block something super unsafe, this can be a good place to start your punish for max damage. Otherwise, not much use for it. | |||
}} | }} | ||
}} | }} | ||
| Line 122: | Line 126: | ||
{{MoveData | {{MoveData | ||
|name = Stand Heavy Kick | |name = Stand Heavy Kick | ||
|input = 5D | |input = '''{{clr|7|5D}}''' | ||
|image = | |image = SF1MR_Ken_5D.PNG | ||
|hitbox = | |hitbox = | ||
|data = | |data = | ||
| Line 132: | Line 136: | ||
|active = 7 | |active = 7 | ||
|recovery = 13 | |recovery = 13 | ||
|cancel = N/A | |||
|advHit = -5 | |advHit = -5 | ||
|advBlock = -4 | |advBlock = -4 | ||
|description = | |description = | ||
* | * Air Unblockable | ||
A slower but far reaching air unblockable kick. Meant mostly for anti-airs, as it lacks a cancel and is punishable on grounded hit by some characters. As an anti-air, it's quite reliable if used a bit early, but the slow startup leaves it weak as a reaction anti-air. | |||
}} | }} | ||
}} | }} | ||
| Line 143: | Line 148: | ||
{{MoveData | {{MoveData | ||
|name = Crouch Light Punch | |name = Crouch Light Punch | ||
|input = 2A | |input = '''{{clr|1|2A}}''' | ||
|image = | |image = SF1MR_Ken_2A.PNG | ||
|hitbox = | |hitbox = | ||
|data = | |data = | ||
| Line 153: | Line 158: | ||
|active = 3 | |active = 3 | ||
|recovery = 3 | |recovery = 3 | ||
|cancel = GA | |||
|advHit = +5 | |advHit = +5 | ||
|advBlock = +3 | |advBlock = +3 | ||
|description = | |description = | ||
A useful '''{{clr|1|2A}}''' for pressure, linking, and punishing. Not much purpose outside of brawling, but it works wonders in those scramble situations. | |||
}} | }} | ||
}} | }} | ||
| Line 163: | Line 168: | ||
{{MoveData | {{MoveData | ||
|name = Crouch Light Kick | |name = Crouch Light Kick | ||
|input = 2B | |input = '''{{clr|2|2B}}''' | ||
|image = | |image = SF1MR_Ken_2B.PNG | ||
|hitbox = | |hitbox = | ||
|data = | |data = | ||
| Line 173: | Line 178: | ||
|active = 4 | |active = 4 | ||
|recovery = 2 | |recovery = 2 | ||
|cancel = GA/SP/SU | |||
|advHit = +7 | |advHit = +7 | ||
|advBlock = -3 | |advBlock = -3 | ||
|description = | |description = | ||
A simple low kick. One of Ken's more useful normals for poking, and seen often to cancel into '''{{clr|7|2D}}''', '''Hadouken''', or '''Shoryureppa'''. It hits low, but Ken lacks much overhead threat to mix it with. This is still solid after an empty jump for a surprise low, however. | |||
}} | }} | ||
}} | }} | ||
| Line 183: | Line 188: | ||
{{MoveData | {{MoveData | ||
|name = Crouch Heavy Punch | |name = Crouch Heavy Punch | ||
|input = 2C | |input = '''{{clr|3|2C}}''' | ||
|image = | |image = SF1MR_Ken_2A.PNG | ||
|hitbox = | |hitbox = | ||
|data = | |data = | ||
| Line 193: | Line 198: | ||
|active = 6 | |active = 6 | ||
|recovery = 6 | |recovery = 6 | ||
|cancel = SP/SU | |||
|advHit = +10 | |advHit = +10 | ||
|advBlock = +11 | |advBlock = +11 | ||
|description = | |description = | ||
A slower and heavier version of '''{{clr|1|2A}}'''. Heavily plus on block and hit, and can be even more plus on a meaty, making it one of Ken's main normals to start offense and punishes with. It also is the only move that combos into '''Tatsu''', making it key to max damage routes, though this requires a close connect. | |||
}} | }} | ||
}} | }} | ||
| Line 203: | Line 208: | ||
{{MoveData | {{MoveData | ||
|name = Crouch Heavy Kick | |name = Crouch Heavy Kick | ||
|input = 2D | |input = '''{{clr|7|2D}}''' | ||
|image = | |image = SF1MR_Ken_2D.PNG | ||
|hitbox = | |hitbox = | ||
|data = | |data = | ||
| Line 213: | Line 218: | ||
|active = 8 | |active = 8 | ||
|recovery = 10 | |recovery = 10 | ||
|cancel = SP/SU | |||
|advHit = KD | |advHit = KD | ||
|advBlock = -2 | |advBlock = -2 | ||
|description = | |description = | ||
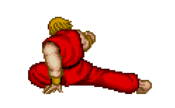
Kens main combo ender and a stellar neutral poke. Surprisingly low total duration, and safely cancels to fireball for a blockstring. Since none of Kens specials are necessarily combo friendly, you often end combos in this. Luckily, it's quite combo friendly, linking or cancelling from a majority of his other normals. The long range makes these links consistent and forgiving as well. | |||
}} | }} | ||
}} | }} | ||
| Line 224: | Line 229: | ||
{{MoveData | {{MoveData | ||
|name = Jump Light Punch | |name = Jump Light Punch | ||
|input = j.A | |input = '''{{clr|1|j.A}}''' | ||
|image = | |image = SF1MR_Ken_jA.PNG | ||
|hitbox = | |hitbox = | ||
|data = | |data = | ||
| Line 234: | Line 239: | ||
|active = Until Landing | |active = Until Landing | ||
|recovery = 2 | |recovery = 2 | ||
|cancel = N/A | |||
|advHit = Varies | |advHit = Varies | ||
|advBlock = Varies | |advBlock = Varies | ||
|description = | |description = | ||
Ken sticks out a fist that has a lingering hitbox till he lands. Can be an air interrupt, but not much else. | Ken sticks out a fist that has a lingering hitbox till he lands. Can be an air interrupt, but not much else. | ||
}} | }} | ||
| Line 244: | Line 249: | ||
{{MoveData | {{MoveData | ||
|name = Jump Light Kick | |name = Jump Light Kick | ||
|input = j.B | |input = '''{{clr|2|j.B}}''' | ||
|image = | |image = SF1MR_Ken_jB.PNG | ||
|hitbox = | |hitbox = | ||
|data = | |data = | ||
| Line 254: | Line 259: | ||
|active = Until Landing | |active = Until Landing | ||
|recovery = 2 | |recovery = 2 | ||
|cancel = N/A | |||
|advHit = Varies | |advHit = Varies | ||
|advBlock = Varies | |advBlock = Varies | ||
|description = | |description = | ||
Ken sticks out his leg and lets the hitbox linger for the full jump like '''{{clr|1|j.A}}'''. More useful as a jump-in, especially since the long active frames can catch a lot of bad anti-airs. Jumping on top of a knocked down opponent with this can actually make a surprising mixup, or even a safejump depending on the character. | |||
Ken sticks out his leg and lets the hitbox linger for the full jump like j.A. More useful as a jump-in, especially since the long active frames can catch a lot of bad anti-airs. Jumping on top of a knocked down opponent with this can actually make a surprising mixup, or even a safejump depending on the character. | |||
}} | }} | ||
}} | }} | ||
| Line 264: | Line 269: | ||
{{MoveData | {{MoveData | ||
|name = Jump Heavy Punch | |name = Jump Heavy Punch | ||
|input = j.C | |input = '''{{clr|3|j.C}}''' | ||
|image = | |image = SF1MR_Ken_jC.PNG | ||
|hitbox = | |hitbox = | ||
|data = | |data = | ||
| Line 274: | Line 279: | ||
|active = 8 | |active = 8 | ||
|recovery = 2 | |recovery = 2 | ||
|cancel = N/A | |||
|advHit = Varies | |advHit = Varies | ||
|advBlock = Varies | |advBlock = Varies | ||
|description = | |description = | ||
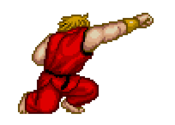
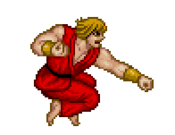
Ken punches out in front of him. Fairly high damage, but the hitbox is pretty high up, so you'll mostly stick to '''{{clr|7|j.D}}''' as a heavy jump-in. Can snipe people air-to-air however. | |||
Ken punches out in front of him. Fairly high damage, but the hitbox is pretty high up, so you'll mostly stick to j.D as a heavy jump-in. Can snipe people air-to-air however. | |||
}} | }} | ||
}} | }} | ||
| Line 284: | Line 289: | ||
{{MoveData | {{MoveData | ||
|name = Jump Heavy Kick | |name = Jump Heavy Kick | ||
|input = j.D | |input = '''{{clr|7|j.D}}''' | ||
|image = | |image = SF1MR_Ken_jB.PNG | ||
|hitbox = | |hitbox = | ||
|data = | |data = | ||
| Line 294: | Line 299: | ||
|active = 11 | |active = 11 | ||
|recovery = 2 | |recovery = 2 | ||
|cancel = N/A | |||
|advHit = Varies | |advHit = Varies | ||
|advBlock = Varies | |advBlock = Varies | ||
|description = | |description = | ||
The main jump-in normal to use in most situations. Great forward range, fast startup, lots of active frames, and high damage and hitstun make it a very consistent normal. | The main jump-in normal to use in most situations. Great forward range, fast startup, lots of active frames, and high damage and hitstun make it a very consistent normal. | ||
}} | }} | ||
| Line 305: | Line 310: | ||
{{MoveData | {{MoveData | ||
|name = Taunt | |name = Taunt | ||
|input = A+B | |input = '''{{clr|2|A+B}}''' | ||
|image = | |image = SF1MR_Ken_Taunt.PNG | ||
|hitbox = | |hitbox = | ||
|data = | |data = | ||
| Line 315: | Line 320: | ||
|active = - | |active = - | ||
|recovery = 30 | |recovery = 30 | ||
|cancel = - | |||
|advHit = - | |advHit = - | ||
|advBlock = - | |advBlock = - | ||
|description = | |description = | ||
* Taunt builds 1 bar of meter instantly, regardless of if | * Taunt builds 1 bar of meter instantly, regardless of if Ken is hit out of it or not, hence the 1 frame startup. | ||
Ken's taunt is fairly fast, allowing him to use it relatively safely in neutral or after any knockdown without giving up much space. | Ken's taunt is fairly fast, allowing him to use it relatively safely in neutral or after any knockdown without giving up much space. | ||
}} | }} | ||
| Line 326: | Line 332: | ||
{{MoveData | {{MoveData | ||
|name = Neutral Jump Light Kick | |name = Neutral Jump Light Kick | ||
|input = nj.B | |input = '''{{clr|2|nj.B}}''' | ||
|image = | |image = SF1MR_Ken_njB.PNG | ||
|hitbox = | |hitbox = | ||
|hitbox2 = | |hitbox2 = | ||
| Line 337: | Line 343: | ||
|active = 10 | |active = 10 | ||
|recovery = 2 | |recovery = 2 | ||
|cancel = N/A | |||
|advHit = Varies | |advHit = Varies | ||
|advBlock = Varies | |advBlock = Varies | ||
|description = | |description = | ||
A great neutral jump air-to-air with very high damage. Outside of air-to-air however, it doesn't have much use, as '''{{clr|7|nj.D}}''' covers the high damage neutral jump starter role much better. However, in midscreen, it has less pushback than '''{{clr|7|nj.D}}''', allowing for higher damage followups. | |||
A great neutral jump air-to-air with very high damage. Outside of air-to-air however, it doesn't have much use, as nj.D covers the high damage neutral jump starter role much better. However, in midscreen, it has less pushback than nj.D, allowing for higher damage followups. | |||
}} | }} | ||
}} | }} | ||
| Line 348: | Line 354: | ||
{{MoveData | {{MoveData | ||
|name = Neutral Jump Heavy Kick | |name = Neutral Jump Heavy Kick | ||
|input = nj.D | |input = '''{{clr|7|nj.D}}''' | ||
|image = | |image = SF1MR_Ken_njD.PNG | ||
|hitbox = | |hitbox = | ||
|data = | |data = | ||
| Line 358: | Line 364: | ||
|active = 7 | |active = 7 | ||
|recovery = 2 | |recovery = 2 | ||
|cancel = N/A | |||
|advHit = Varies | |advHit = Varies | ||
|advBlock = Varies | |advBlock = Varies | ||
|description = | |description = | ||
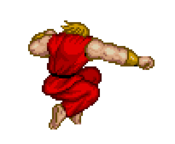
A spinning kick with massive hitstun and pushback. In the corner, this can connect and still allow for a '''{{clr|3|2C}}''', '''{{clr|3|2C}}''', '''{{clr|7|2D}}''', making for a massive damage starter. It can also be a good air-to-air, but '''{{clr|2|nj.B}}''' is a bit better thanks to the faster startup and higher active frames. In midscreen, pushback with this can be a bit too strong to get much more than a '''{{clr|7|2D}}''' after. | |||
A spinning kick with massive hitstun and pushback. In the corner, this can connect and still allow for a 2C, 2C, 2D, making for a massive damage starter. It can also be a good air-to-air, but nj.B is a bit better thanks to the faster startup and higher active frames. In midscreen, pushback with this can be a bit too strong to get much more than a 2D after. | |||
}} | }} | ||
}} | }} | ||
| Line 369: | Line 375: | ||
{{MoveData | {{MoveData | ||
|name = Hadouken | |name = Hadouken | ||
|input = 236A/C | |input = '''{{clr|1|236A/C}}''' | ||
|image = | |image = SF1MR_Ken_236P.PNG | ||
|hitbox = | |hitbox = | ||
|hitbox2 = | |hitbox2 = | ||
| Line 382: | Line 388: | ||
|active = Traveling | |active = Traveling | ||
|recovery = 33 | |recovery = 33 | ||
|cancel = N/A | |||
|advHit = 0 | |advHit = 0 | ||
|advBlock = -4 | |advBlock = -4 | ||
| Line 393: | Line 400: | ||
|active = Traveling | |active = Traveling | ||
|recovery = 33 | |recovery = 33 | ||
|cancel = N/A | |||
|advHit = 0 | |advHit = 0 | ||
|advBlock = -4 | |advBlock = -4 | ||
|description = | |description = | ||
* '''{{clr|1|A}}''' version is slower, '''{{clr|3|C}}''' version is much faster | |||
The classic fireballs shared by the shotos in every Street Fighter game. Generally, Ken has worse Hadoukens than Ryu. In SF1MR, Kens Hadoukens are less of a downgrade and more of a sidegrade. They have worse frame advantage, making Ken less consistent at chipping, but they're faster overall making them slightly safer zoning tools in neutral. These compliment Kens amazing '''Shoryuken''', making his zoning arguably close to Ryu, but the lack of Shinku Hadouken brings it back to worse. | |||
}} | }} | ||
}} | }} | ||
| Line 403: | Line 412: | ||
{{MoveData | {{MoveData | ||
|name = Shoryuken | |name = Shoryuken | ||
|input = 6236A/C | |input = '''{{clr|1|6236A/C}}''' | ||
|image = | |image = SF1MR_Ken_6236P.PNG | ||
|hitbox = | |hitbox = | ||
|data = | |data = | ||
| Line 415: | Line 424: | ||
|active = 19 | |active = 19 | ||
|recovery = 23 | |recovery = 23 | ||
|cancel = N/A | |||
|advHit = KD | |advHit = KD | ||
|advBlock = -17 | |advBlock = -17 | ||
| Line 426: | Line 436: | ||
|active = 25 | |active = 25 | ||
|recovery = 30 | |recovery = 30 | ||
|cancel = N/A | |||
|advHit = KD | |advHit = KD | ||
|advBlock = -27 | |advBlock = -27 | ||
|description = | |description = | ||
* Invincible on frames 1~12 | |||
Shoryukens are incredibly fast and damaging reversals and anti-airs, beating every other reversal in the game in terms of raw speed. The hitbox comes out on the first frame of the move, allowing it to blow through even 1 frame gaps and punish a ton of things within range. These are held back by a serious horizontal range issue. It's very easy to get a single hit and be unsafe, or even have it whiff entirely. | |||
}} | }} | ||
}} | }} | ||
| Line 436: | Line 448: | ||
{{MoveData | {{MoveData | ||
|name = Tatsumaki Senpukyaku | |name = Tatsumaki Senpukyaku | ||
|input = 214B/D | |input = '''{{clr|2|214B/D}}''' | ||
|image = | |image = SF1MR_Ken_njD.PNG | ||
|hitbox = | |hitbox = | ||
|data = | |data = | ||
| Line 448: | Line 460: | ||
|active = 4(7)4 | |active = 4(7)4 | ||
|recovery = 19 | |recovery = 19 | ||
|cancel = N/A | |||
|advHit = KD | |advHit = KD | ||
|advBlock = 0 | |advBlock = 0 | ||
| Line 459: | Line 472: | ||
|active = 4(7)4(7)4(7)4 | |active = 4(7)4(7)4(7)4 | ||
|recovery = 18 | |recovery = 18 | ||
|cancel = N/A | |||
|advHit = KD | |advHit = KD | ||
|advBlock = 0 | |advBlock = 0 | ||
|description = | |description = | ||
* Off the ground frame 4 | * Off the ground frame 4 | ||
Difficult to use but incredibly high reward combo tools. They only combo from a '''{{clr|3|2C}}''', and that can be range reliant as well, making it rare to use them. On top of that, they hit 'much' higher in this game than in other SF titles, to the point where they whiff some characters standing. This severely limits their use as combo tools, and while 0 on block can be attractive, they whiff often on block as well. In the corner, these can lead to Kens high damage '''Shinryuken''' loops, and can TOD anyone, making them incredibly niche but massive reward. | |||
}} | }} | ||
}} | }} | ||
| Line 470: | Line 484: | ||
{{MoveData | {{MoveData | ||
|name = Shoryureppa | |name = Shoryureppa | ||
|input = 236236P | |input = '''{{clr|1|236236P}}''' | ||
|image = | |image = SF1MR_Ken_236236P.PNG | ||
|hitbox = | |hitbox = | ||
|hitbox2 = | |hitbox2 = | ||
| Line 481: | Line 495: | ||
|active = 12(8)23 | |active = 12(8)23 | ||
|recovery = 29 | |recovery = 29 | ||
|cancel = N/A | |||
|advHit = KD | |advHit = KD | ||
|advBlock = -27 | |advBlock = -27 | ||
|description = | |description = | ||
* Invincible on frames 1~15 | |||
A simple to use combo super that works in a majority of combos as an alternate ender. Not the highest damage super in the game, but the reliability of it helps to make it worth. It can get every hit on an air connect, making it reliable in juggles, and can even combo from a '''{{clr|7|2D}}'''. | |||
}} | }} | ||
}} | }} | ||
| Line 491: | Line 507: | ||
{{MoveData | {{MoveData | ||
|name = Shinryuken | |name = Shinryuken | ||
|input = 236236K | |input = '''{{clr|2|236236K}}''' | ||
|image = | |image = SF1MR_Ken_236236K.PNG | ||
|hitbox = | |hitbox = | ||
|data = | |data = | ||
| Line 501: | Line 517: | ||
|active = 44 | |active = 44 | ||
|recovery = 37 | |recovery = 37 | ||
|cancel = N/A | |||
|advHit = KD | |advHit = KD | ||
|advBlock = -34 | |advBlock = -34 | ||
|description = | |description = | ||
* Invincible on frames 1~14 | |||
A massive damage anti-air and reversal super. The lightning fast startup and high damage can make this a very attractive metered alternative to '''Shoryuken''', but it shares the same issue with horizontal range, and works in only a few combos. When in range however, it makes for a massive damage alternative, and can be a very worthwhile way to spend a bar, especially since Ken can easily taunt to regain the meter after a successful connect. | |||
This is also an anywhere juggle, meaning it breaks normal juggle rules to allow for combos that aren't normally possible. The main application for this is Shinryuken loops: Ken can continuously loop Shinryuken in the corner as long as he has meter, racking up huge damage. This can be started from any '''Tatsu''' hit, allowing Ken to realistically TOD most of the cast in the right situation. | |||
}} | }} | ||
}} | }} | ||
== Arcade Ending == | |||
{{#ev:youtube|https://www.youtube.com/watch?v=UCYN_u9gWwI}} | |||
{{Navbox-SF1MR}} | {{Navbox-SF1MR}} | ||
{{Category:Street Fighter 1 Mugen Remake}} | {{Category:Street Fighter 1 Mugen Remake}} | ||
[[Category:Ken]] | [[Category:Ken]] | ||
Latest revision as of 16:56, 31 October 2022
Ken is Ryu's best friend and training partner. Heir to the Master's family, Ken comes from a lot of wealth and power. He was rowdy and energetic throughout his youth, and loved to get into fights. To ensure his son didn't become too much of a hassle, his father sent him to train with an old friend named Gouken. There, he met Ryu, and the two became rivals as they learned to master the arts of shotokan karate. Ken joins the Street Fighter tournament for the same reason as Ryu, hoping to fight highly skilled opponents from around the world.
Ken is the second in the duo that the community commonly calls "shotos". In the original Street Fighter 1, Ken was simply a player 2 alt with no differences to Ryu. SF1MR adds minor differences, usually just small frame data changes. While Ryu has more frame advantage to take care of his lack of mix with substantial pressure options, Ken trades that out for a faster fireball and DP game, giving him effectively better zoning than Ryu.
In comparison to Ryu, Ken is generally faster but lacks the same frame advantage. His Shoryuken (6236P) is incredible, being active on the first frame and going incredibly high. These make amazing reversals and defensive tools, but still maintain the same high risk. His Tatsumaki Senpukyaku (214K) is faster overall, and allows for some stronger corner combos, alongside only being 0 on block unlike Ryu's -3 version. Ken's Hadouken (236P) fireball is a frame faster, but unfortunately is also a frame slower on recovery, and lacks the same frame advantage that Ryu has from his.
The two have a large difference in their supers. Ken has Shoryureppa (236236P), an easy to confirm combo ending super, and Shinryuken (236236K), a stellar anti-air/reversal super with some amazing combo potential in the corner with Ken's Shinryuken loops. Overall, Ken has better anti-airs and more potential damage, plus better defense. However, he lacks Ryu's stable zoning, powerful super, and better frame advantage.
| Pros | Cons |
|
|
Stats and Vitals
- Attack Rating = 100
- Armor Rating = 100
- Forward Walk Speed = 2.5
- Backward Walk Speed = -2.3
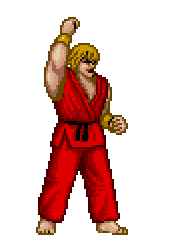
- Taunt = 30f
Movelist
- Special Moves
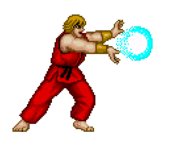
- 236A/C - Hadouken: Zoning/Blockstring Ender
- 214B/D - Tatsumaki Senpukyaku: Combo Ender/Extender
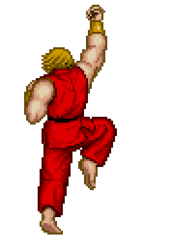
- 6236A/C - Shoryuken: Anti-air/Reversal
- Supers
- 236236P - Shoryureppa: Extremely high damage combo ender
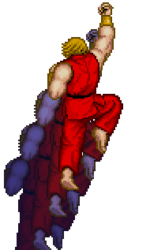
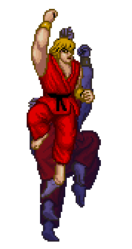
- 236236K - Shinryuken: Reversal, anti-air, and corner combo super
- Unique Attacks
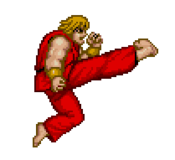
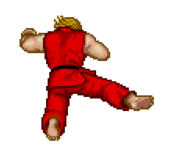
- nj.B, nj.D
Normals
Standing Normals
Stand Light Punch
5A |
|---|
Stand Light Kick
5B |
|---|
Stand Heavy Punch
5C |
|---|
Stand Heavy Kick
5D |
|---|
Crouching Normals
Crouch Light Punch
2A |
|---|
Crouch Light Kick
2B |
|---|
Crouch Heavy Punch
2C |
|---|
Crouch Heavy Kick
2D |
|---|
Jumping Normals
Jump Light Punch
j.A |
|---|
Jump Light Kick
j.B |
|---|
Jump Heavy Punch
j.C |
|---|
Jump Heavy Kick
j.D |
|---|
Taunt
Taunt
A+B |
|---|
Unique Attacks
Neutral Jump Light Kick
nj.B |
|---|
Neutral Jump Heavy Kick
nj.D |
|---|
Special Attacks
Hadouken
236A/C |
|---|
Shoryuken
6236A/C |
|---|
Tatsumaki Senpukyaku
214B/D |
|---|
Supers
Shoryureppa
236236P |
|---|
Shinryuken
236236K |
|---|
Arcade Ending
