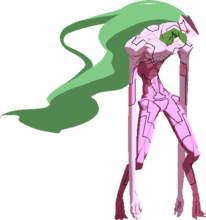
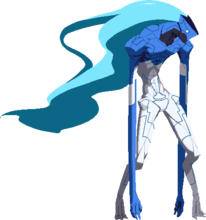
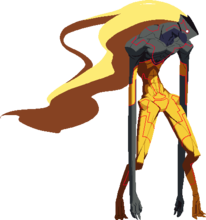
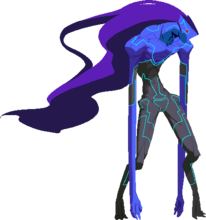
 |
Outdated Version
- This page is for an outdated version of the game (UNIEL). To see Merkava's character page for the latest version (UNICLR), click here.
|
Introduction
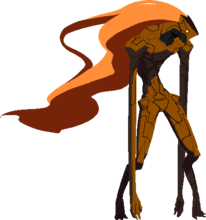
"BRAWK BRAWK BRAWK BRAWK"
Story
Unique Trait/Health
Health: 9,200
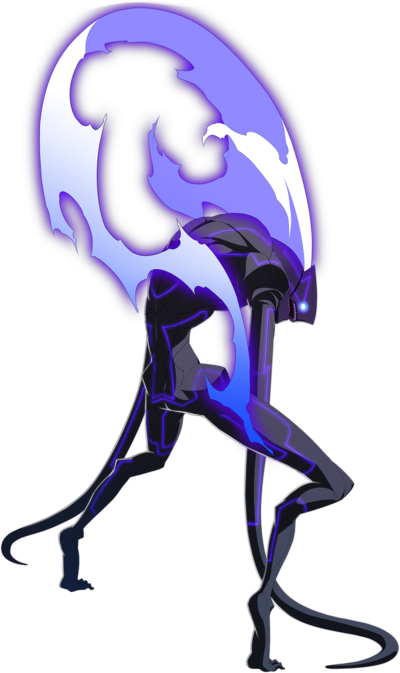
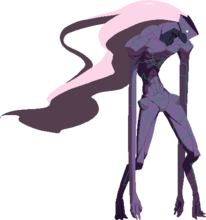
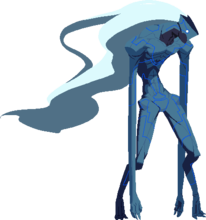
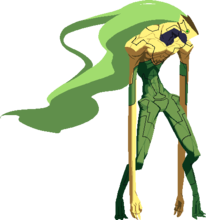
Merkava's unique trait is the ability to fly. By pressing up twice Merkava will begin to fly. From flight he can perform air normal/special moves. Flight is a very important tool to learn to use well. In neutral it gives him a lot of strong space control and when used for okizeme it can have very strong results. He also gains access to a glide attack that comes in very fast and can be hard to anti-air. He can cancel into normals from this attack on hit or block, even if your opponent shields it. Cancelling into j.B leads to a short combo on hit and frame advantage on block, so it's a good idea to do so most of the time. If he flies for too long without landing or performing a move, he will fall to the ground and be subjected to a large amount of recovery.
"Fast Flight" is a very important technique to master to get the most out of your flight. It's necessary in neutral to quickly and safely get spacing moves out, and you'll need it to get flight okizeme set up in time. It's very simple to perform. All you need to do is jump diagonally either forward or back, quickly input a seceond upwards motion, then quickly switch to holding down on the joystick. If performed correctly Merkava will quickly enter flight low to the ground. In neutral this allows him to get low to the ground air normals and keep himself safer when deciding to fly. Throwing out j.B low to the ground is very common, since it covers a large amount of space with a very small amount of recovery.
When used for okizeme, flight can become a very strong mix up. After 66C ender, immediately fast fly and you have a few different oki options. j.A hits high and can safejump certain reversals. If somebody respects your oki or lacks a reversal, you can attempt to set up something like j.C > j.B for multiple high hitting moves in one string. The low option is to whiff a button to get rid of flight recovery, then go low with 2B. The whiff can also be used to bait reversals or set up a throw. There's a very large amount of mind games past the high/low/throw game, so be creative with it.
Gameplay
fluff
Move List
L = Low, H = High, UNB = Unblockable, CS = Chain Shift
Startup includes the first active frame.
Normal Moves
| 2B
|
| Damage
|
Startup
|
Active
|
Recovery
|
Frame Adv
|
Cancels
|
Guard/Shield
|
Hitbox
|
| 445
|
7
|
2*2
|
22
|
-4
|
Sp,EX,CS
|
L
|
-
|
This thing is pretty awesome. 2 hit low with a lot of active frames. Great in pressure since it hits twice and can gatling into small gaps with things like 2C. Has deceptively long range as well, so can be used to get things started. Be careful though, on whiff this move leaves you really open.
|
|
| 5C
|
| Damage
|
Startup
|
Active
|
Recovery
|
Frame Adv
|
Cancels
|
Guard/Shield
|
Hitbox
|
| 710
|
14
|
5
|
23
|
-10
|
Sp,EX,CS
|
HL
|
-
|
Merkava just shoots his arms out at about 3/4 of the entire screen. Big silly poke, also makes its way into combos. Be careful, has quite a bit of recovery to compensate for its range.
|
|
| 2C
|
| Damage
|
Startup
|
Active
|
Recovery
|
Frame Adv
|
Cancels
|
Guard/Shield
|
Hitbox
|
| 570
|
12
|
7
|
24
|
-9
|
Sp,EX,CS
|
L
|
-
|
Merkava takes a second to lunge forward with a low hit that knocks the opponent airborne on hit. This thing is also pretty awesome. It's one of Merkava's main combo tools, since it leads to 2CC or 5C. It's also fairly useful in pressure since the delay on it creates a bit of a framtrap, and on block you can gatling out of it. The range on this thing is also great, which leads to some good punishes and call outs.
|
|
| j.B
|
| Damage
|
Startup
|
Active
|
Recovery
|
Frame Adv
|
Cancels
|
Guard/Shield
|
Hitbox
|
| 504
|
10
|
3*2
|
X+3
|
Varies
|
Sp,EX,CS
|
H/AS
|
-
|
j.B - 2 hit move where Merkava throws his arm out across the screen. Its primary use is to control space and it does a very good job of that. Combined with low flight, Merkava can throw this out very low to the ground to cover great space with very little recovery. Its 2 hits also make it good for extending air combos as Merkava lands.
|
|
Command Normals
| 4B
|
| Damage
|
Startup
|
Active
|
Recovery
|
Frame Adv
|
Cancels
|
Guard/Shield
|
Hitbox
|
| 666
|
10
|
5
|
19
|
-4
|
Sp,EX,CS
|
HL
|
-
|
Merkava gives them the elbow. This is a strong AA that leads to a full combo on hit and is a pretty good starter. On air hit it spikes the opponent down to the ground and causes a knockdown, so it also is a primary combo ender for a large amount of combos.
|
|
| 6C
|
| Damage
|
Startup
|
Active
|
Recovery
|
Frame Adv
|
Cancels
|
Guard/Shield
|
Hitbox
|
| 754
|
18
|
6
|
20
|
-8
|
Sp,EX,CS
|
HL
|
-
|
Anti-air version of 5C, looks the same just angled upwards. Good anti-air that covers a lot of space and can be followed up. It's also a good combo extender as well. As with 5C, be careful throwing it out as it has a large amount of recovery.
|
|
| 4C
|
| Damage
|
Startup
|
Active
|
Recovery
|
Frame Adv
|
Cancels
|
Guard/Shield
|
Hitbox
|
| 862
|
29
|
2
|
23
|
-7
|
Sp,EX,CS
|
H
|
-
|
Merkava tilts his arms back, then slams them down. Hits overhead. Has quite a bit of range, so you'll see this towards the end of pressure once Merk has been pushed out a little bit. The delay sometimes catches people trying to do something, and since it comes down it will catch people attempting to jump out. Pretty safe if blocked from far out, but don't try using it at close range. Can be followed up on hit but might be a little tricky.
|
|
| 3C
|
| Damage
|
Startup
|
Active
|
Recovery
|
Frame Adv
|
Cancels
|
Guard/Shield
|
Hitbox
|
| 488
|
~18
|
3
|
45
Landing: 14
|
-9
|
Sp,EX,CS
|
H
|
-
|
Merkava goes airborne and slams down with an overhead. This move is really good. Since Merkava is so high, he'll go over a lot of grounded moves and throws, catching opponents who like to mash. On hit it is easily confirmable into a combo. Has a hitbox on the way up that is a surprisingly good anti-air as well. On block it's unsafe, but can be special cancelled into air fireball to make it safer. It's also used as a combo extension in the corner.
|
|
| j.2C
|
| Damage
|
Startup
|
Active
|
Recovery
|
Frame Adv
|
Cancels
|
Guard/Shield
|
Hitbox
|
| 410
|
10
|
21 (max)
|
10
|
Stand: -6
Crouch: -3
|
Sp,EX,CS
|
HL
|
-
|
Divekick. Has quite a bit of recovery so it's hard to make safe. On hit, it causes a knockdown that can easily be followed up or used for okizeme. Mostly used in combos for the knockdown, but has gimmicky uses for oki and pressure.
|
|
Dash Normals
| 66C
|
| Damage
|
Startup
|
Active
|
Recovery
|
Frame Adv
|
Cancels
|
Guard/Shield
|
Hitbox
|
| 800
|
~18
|
2
|
43
Landing: 19
|
-7
|
Sp,EX,CS
|
H
|
-
|
Sped up version of 3C. Has all the same benefits except it is faster and goes a bit farther. Since it's faster you'll see it used as a combo extension for a lot of BnBs. This move really is the god sometimes.
|
|
Universal Mechanics
Throw
A+D
|
| Damage
|
Startup
|
Active
|
Recovery
|
Frame Adv
|
Cancels
|
Guard/Shield
|
Hitbox
|
| 1730 (max)
|
4
|
1
|
22
|
+29 (hit)
|
-
|
UNB
|
-
|
Merkava slams the opponent around. To get more hits(up to 8) and damage, spin the stick in 360 motions while mashing all your buttons. If you're not getting all hits, you're not mashing early/hard enough. No really, I'm serious.
|
|
Veil Off
A+B+C
|
| Damage
|
Startup
|
Active
|
Recovery
|
Frame Adv
|
Cancels
|
Guard/Shield
|
Hitbox
|
| 0
|
21 (min)
69 (max)
|
2
|
37
|
Blocked: -13
Hit: +36
|
-
|
HLA
|
-
|
Universal reversal. Invincible from start-up until the first active frame. Not throw invincible. You can delay the start-up until the 69th frame, but there's no real incentive to do so outside of thwarting meaty attacks.
|
|
Special Moves
Ware, Kyuuryuu o Tsuranuku
「我、 穹窿を貫く」
623X
|
|
Ware, Hokakushite Kurau
「我、捕獲して喰らう」
214X
|
| Version
|
Damage
|
Startup
|
Active
|
Recovery
|
Frame Adv
|
Cancels
|
Guard/Shield
|
Hitbox
|
| A
|
1476
|
26 (full screen)
|
12
|
12
|
-12 to -15
|
(CS)
|
HL
|
-
|
Merkava extends his arm horizontally across the screen, and on hit it grabs the opponent and brings Merkava to them where he then eats their face. This is completely blockable and whiffs entirely on airborne opponents. The arm will go through projectiles, making this a very good way to punish or discourage people from using them. If you press D while the arm is extending, the arm will stop and stay active for a few frames. On hit, this can be Chain Shifted which leads to really big damage from across the entire screen. On block this is very unsafe point blank, but most of the time you use it your opponent will be very far away and will have a tough time punishing depending on who they are.
|
| Version
|
Damage
|
Startup
|
Active
|
Recovery
|
Frame Adv
|
Cancels
|
Guard/Shield
|
Hitbox
|
| B
|
1476
|
26 (full screen)
|
12
|
12
|
+39 (combo stun)
|
(CS)
|
UNB
|
-
|
Functions the same as 214A, but goes at an upward angle. Can grab airborne opponents but whill whiff on standing ones. Aside from being used as an anti-air, is also commonly used to end air combos.
|
| Version
|
Damage
|
Startup
|
Active
|
Recovery
|
Frame Adv
|
Cancels
|
Guard/Shield
|
Hitbox
|
| EX
|
1980
|
15 (full screen)
|
23
|
9
|
-4 to -14
|
(CS)
|
HL
|
-
|
Is a very fast and more damaging version of 214A, with the exception that it can grab airborne opponents.
|
|
Ware, Shitsuyou ni Matsuwaritsuku
「我、執拗に纏わり付く」
22X
|
| Version
|
Damage
|
Startup
|
Active
|
Recovery
|
Frame Adv
|
Cancels
|
Guard/Shield
|
Hitbox
|
| A
|
427
|
168 (worm)
|
4
|
47 (Merkava)
|
+
|
-
|
HL
|
-
|
Merkava throws down his arm and spawns a little worm creature after a bit of time. If Merkava is hit, blocks, or techs a grab the worm disappears. The worm itself can also be hit before it becomes a threat. This takes way too long to come out and the worms are easy to deal with, so you rarely see it.
|
| Version
|
Damage
|
Startup
|
Active
|
Recovery
|
Frame Adv
|
Cancels
|
Guard/Shield
|
Hitbox
|
| B
|
427*2
|
169 (worm)
|
4
|
47 (Merkava)
|
+
|
-
|
HL
|
-
|
More or less same thing as 22A but the worm bites twice.
|
| Version
|
Damage
|
Startup
|
Active
|
Recovery
|
Frame Adv
|
Cancels
|
Guard/Shield
|
Hitbox
|
| EX
|
666 (Merkava)
1228, 836 (Worms)
|
18 (Merkava)
169 (Worms)
|
1 (Merkava)
~16 (Worms)
|
22 (Merkava)
|
-5 (Merkava)
+ (Worms)
|
-
|
H
|
-
|
With the super version, Merkava will actually hit the opponent with his arm and knock them down, giving him much more time to set up. Additionally, this versions spawns 3 worms that will attack twice. The same drawbacks as before still apply, but since this gives Merkava time to set something up they can be useful, especially versus characters with weak reversal options. Note: Merkava hits you with an overhead as hes setting down his worms.
|
|
Ware, Chouryou suru
「我、跳梁する」
41236C
|
| Damage
|
Startup
|
Active
|
Recovery
|
Frame Adv
|
Cancels
|
Guard/Shield
|
Hitbox
|
| 2109
|
14
|
18
|
15
|
-6
|
(CS)
|
HL
|
-
|
Merkava goes airborne then swoops at the opponent. On hit he slams them into the ground for a bit of damage and knockdown. Has a bit of invuln so can be used in reversal situations or to scoop somebody out of the air. Its invlun is up before it is active so you can't be too crazy with it. Doesn't see a whole lot of use since there are usually better options to go with.
|
|
Infinite Worth
Ware, Ikidouru
「我、憤る」
41236D
|
|
Infinite Words EXS
Ware, Juurinsen
「我、蹂躙せん」
A+B+C+D
|
| Damage
|
Startup
|
Active
|
Recovery
|
Frame Adv
|
Cancels
|
Guard/Shield
|
Hitbox
|
| 3665
|
16
|
3
|
49
|
-26
|
-
|
HLA
|
-
|
Same as other IWEXS moves. Starts with a pillar of light as the hitbox with some invuln. On hit, Merkava just eats the opponent in a pretty flashy animation. On block it's pretty unsafe.
|
|
Combos
Midscreen
- 2A(2) > 2CC > 6[C] > j.6D > j.A > j.B(2) > 66C > 66 > 2C > 5C > 4B [2396/42]
- This is THE midescreen BnB that works from just about any starter.
- 2A > 2B > 2CC > j.C > j.A > j.B(2) > 66C > 2C > 5C > 4B [2327/44]
- If your confirm scales too much for the IAD combo, you can keep it simple.
- 66C > 2CC > rest of BnB [2389/45]
- If you land a raw 66C you can pick up with 2C and do pretty much whatever you want. Again, this works from just about any starter as long as it isn't super scaled. 66C, Divekick, etc.
- 66C > 2C > 5C > 6C > j.6D > j.A > j.B(2) > 5B > 5C > 6C > 214B [2629/48]
- Sometimes your opponent will be too far away for 2CC to connect. This route allows you to continue the combo using 2C > 5C instead. Near the corner you may be able to link 66C after j.B but it's rather specific.
- 214A > CS > j.6D > j.C > j.2C > 2CC > rest of BnB [3482]
- If you have CS available you can really make 214A count.
- 214B > CS > j.6D > j.C > j.2C > 2CC > j.C > j.A > j.B(2) > 66C > 2C > 5C > 4B [3366]
- 214B scales a bit harder so you'll need to do a shorter combo.
- 5BB > 5C > 6C > 214B [2151/25]
- Max range 5B midscreen doesn't lead to a whole lot unfortunately. From close range, 5BB > 6C > j.6D etc works but you have to be practically point blank.
- AA 4B > 2CC > BnB [2627/44]
- 4B is a great AA and leads to a full combo too.
- 6C > 5[C] > j.6D > j.A > j.B(2) > 66C or 5B ender
- AA 6C can convert into an IAD combo depending on spacing and height.
- Glide > j.B(2) > 66C > 66 > 2C > 5C > 4B [2307]
- Oh hey, you can get a combo off glide.
Corner
A lot of the midscreen combos can be adjusted to work in the corner without the j.6D > j.A extension, where you simply do j.C > j.A > j.B(2) > etc instead.
- 2A(2) > 2C > 5C > 6C > j.C > j.A > >j.B > 66C > 2C > 5C > 4B [2570/47]
- Basic combo that works from just about anything.
- 2A(2) > 2C > 5C > 6C > j.C > j.A > >j.B > 66C > 2C > 5C > 4B > 236B > 236C [3386]
- If you want the damage you can tag on a super ender here.
- 2B(2) > 2C > 623A > 2B > 5C > 6C > j.C > j.A > j.B(2) > 66C > 2C > 5C > 4B [2922]
- Big void creature combo in the corner from better starters. You'll need to delay the 623A in order to get the 5C to connect after 2B. If this is too much trouble, you can just do no delay and do 5B instead for a bit less damage.
- 5C > 2C > 3C > j.236A > 2B > 5B > 6C > j.C > j.A > j.B(2) > 66C > 2C > 5C > 4B [3290]
- Big stupid confirm for big stupid damage.
- 66C > B+C > 4B > 2B > 5B > 6C > j.C > j.A > j.B(2) > 66C [2612]
- Alternate combo from 66C that lets you squeeze out some extra damage if you want 66C ender for flight oki.
Colors
| Hell's Viper
|
Scallop
|
Brown Lizard
|
Scream Hades
|
Green Iguana
|
|
|
|
|
|
|
| Bloody Basilisk
|
Violet Naja
|
Sea Snake
|
Dust Sand
|
Hephaistos
|
|
|
|
|
|
|
| Wise Marlin
|
Noble Turtle
|
Ladybug
|
Sauterelle Prince
|
Rose Crane
|
|
|
|
|
|
|
| Lark Dancer
|
Cruel Penguin
|
Killer Bee
|
Sombre Corbeau
|
Humble Falcon
|
|
|
|
|
|
|
