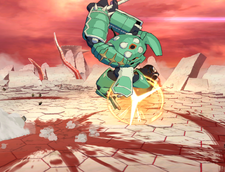
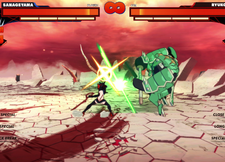
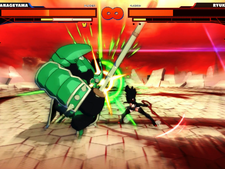
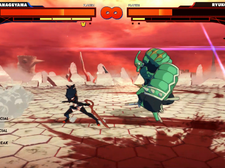
|
|
| Line 50: |
Line 50: |
|
| |
|
|
| |
|
| {{ProConTable | | {{StrengthsAndWeaknesses |
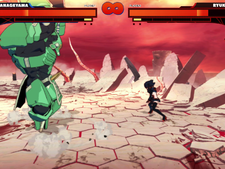
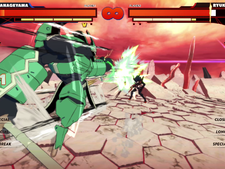
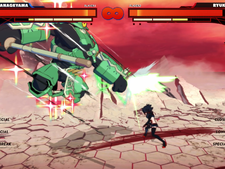
| |intro=<center>[[File:KLKIF_Sanageyama_Icon.png|50px]] '''Uzu''' is a massive armored rushdown gorilla who skips neutral like no other.</center> | | |intro = [[File:KLKIF_Sanageyama_Icon.png|50px]] '''Uzu''' is a massive armored rushdown gorilla who skips neutral like no other.</center> |
| |pros= | | |pros= |
| *'''Unstoppable Force''': With fast far reaching normals, a plethora of armored moves, and his infamous j.C cancels, Sanageyama's approach options are some of the best in the game as he can just teleport or truck through just about anything in neutral, forcing most characters to be defensive. | | *'''Unstoppable Force''': With fast far reaching normals, a plethora of armored moves, and his infamous j.C cancels, Sanageyama's approach options are some of the best in the game as he can just teleport or truck through just about anything in neutral, forcing most characters to be defensive. |
| *'''Defensive Options''': Shingan Step and Just Guard when used offer him amazing punish options and tons of meter, allowing him to easily steal his turn back if on the defensive. | | *'''Defensive Options''': Just Guard loads up a use of Fierce Strike and gives him a decent amount of meter, and his Valor Level 1 unlocks Shingan Step, a parry that gives him high damage punish options and tons of meter, allowing him to easily steal his turn back if on the defensive. |
| *'''Pressure Machine''': Sanageyama has built in frame traps, good stagger pressure, and 50/50 mix with sp.C due to it being dash cancelable, which gives him one of the scariest mix options in the game. | | *'''Pressure Machine''': Sanageyama has built in frame traps, good stagger pressure, unblockables with sp.B, and 50/50 mix with sp.C due to it being dash cancelable, which gives him one of the scariest mix options in the game. |
| |cons= | | |cons= |
| *'''Meter Gain''': Sanageyama has the worst meter gain in the game, letting most opponents burn through most of his health if not all of it when they hit him. Sanageyama also feeds the opponent massive amounts of meter on hit as well. Sanageyama's use of Valor, bursting, and his supers are restricted by this. This also impacts his mix greatly as sp.C is the only way he can get true 50/50 mix as the rest of his pressure is just bait outs. | | *'''Meter Gain''': Sanageyama has the worst meter gain in the game, letting most opponents burn through most of his health if not all of it when they hit him. Sanageyama also feeds the opponent massive amounts of meter on hit as well. Sanageyama's use of Valor, bursting, and his supers are restricted by this. This also impacts his mix greatly as sp.C is the only way he can get true 50/50 mix as the rest of his pressure is just bait outs. |
| *'''Predictability''': Sanageyama's low variety of moves and him being unsafe with most of his moves on block forces him to try and play unpredictably to get hits on defensive opponents. }} | | *'''Predictability''': Sanageyama's low variety of moves and him being unsafe with most of his moves on block forces him to try and play unpredictably and condition his opponents to get hits in. |
| | |
| | |tablewidth=80 |
| | }} |
| <br> | | <br> |
| '''Valor Level 1''' | | '''Valor Level 1''' |
Revision as of 00:31, 27 January 2024
|
| Health |
11,000
|
| Meter Multiplier |
0.5x
|
| Walkspeed |
13th
|
| Homing Dash Speed |
13th
|
| Homing Dash Duration |
90
|
| Height |
17.00
|
| Weight |
2
|
| Jump Height |
-
|
| Jump Duration |
-
|
| Side Step Dash Invul |
-
|
| Front Step Dash Total |
-
|
| Side Step Dash Total |
-
|
| Back Step Dash Total |
-
|
| Has Forced A Ender |
Yes
|
| Has Forced B Ender |
Yes
|
| Has Forced C Ender |
Yes
|
Introduction
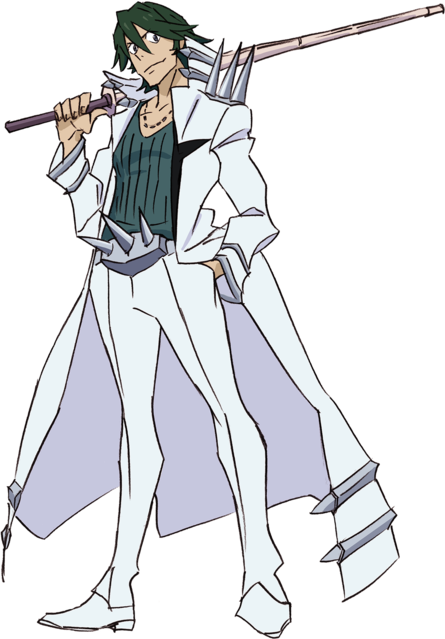
Uzu Sanageyama (猿投山 渦)
He is one of the student council's Elite Four. He regulates the athletic clubs at Honnōji Academy, including the boxing and tennis clubs. As a fighter, Sanageyama specializes in swordplay, using the kendō style. He is always seen carrying a shinai - a wooden katana used for kendō practice - which he uses with great skill.
Overview
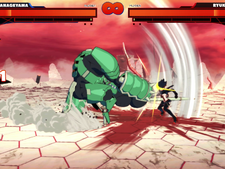
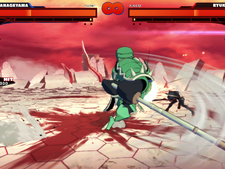
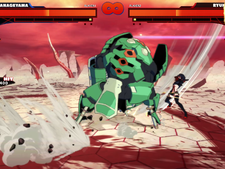
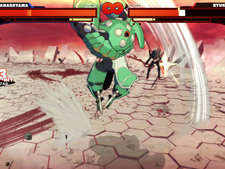
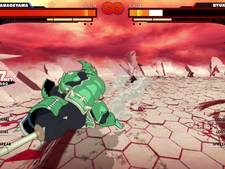
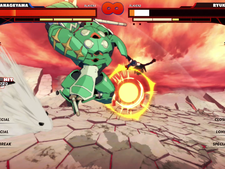
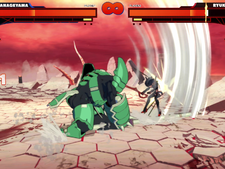
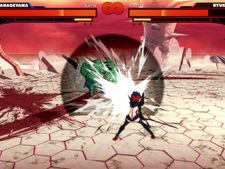
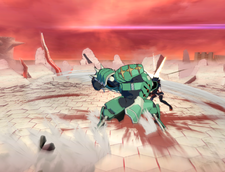
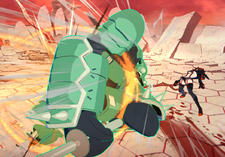
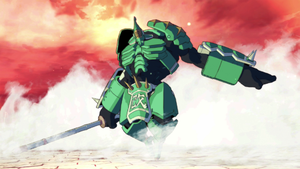
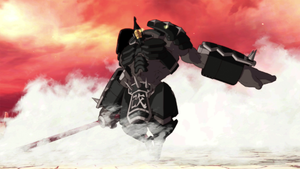
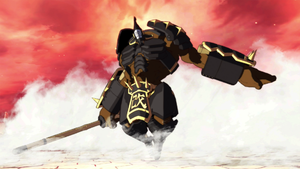
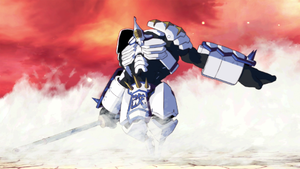
In his mighty Blade Regalia Mk.II, he attacks with relentless, strong, and fast sword strikes with his bamboo sword. As a character, he has insane combo potential, fairly big attacks, and strong specials. However, his gameplan is somewhat simple, so he can be somewhat predictable. Playing as Sanageyama you must learn to vary your assaults and trick your opponent so that you may catch them making a mistake, and punish them with an absurdly strong combo off of a counter hit. He can be overwhelmed with range and projectiles that can hit him from a distance, so you may have trouble getting in. If you can master Sanageyama's skills and moves, and efficiently read your opponent (maybe with your own Shingantsu), Uzu's overwhelming offense will efficiently and quickly finish off your opponent. Just be sure to keep track of your habits and not play into your opponent's hands.
Playstyle
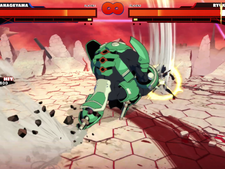
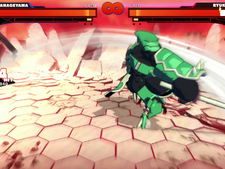
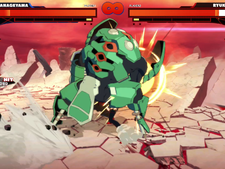
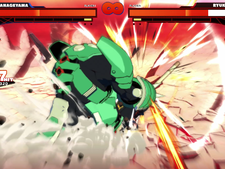
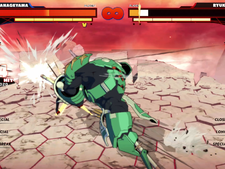
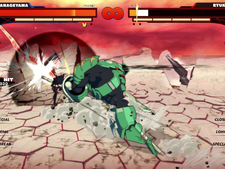
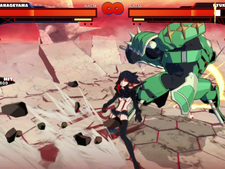
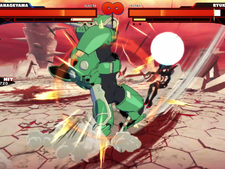
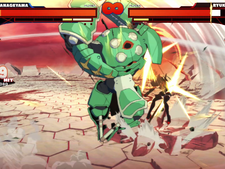
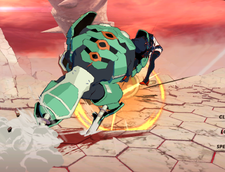
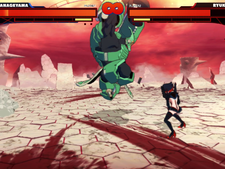
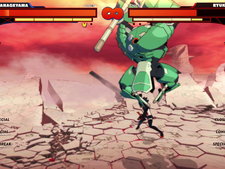
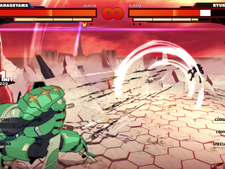
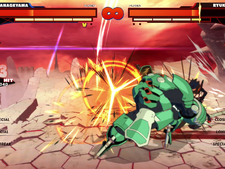
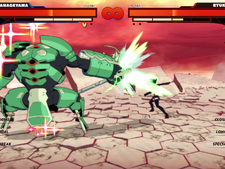
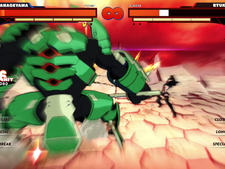
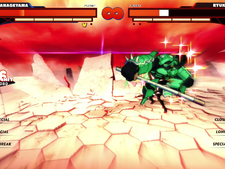
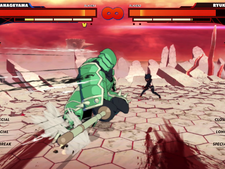
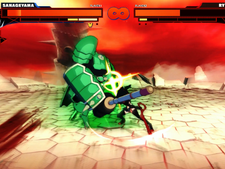
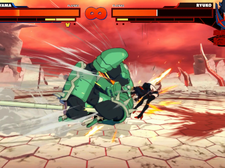
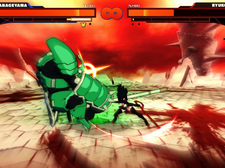
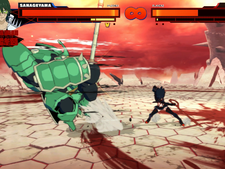
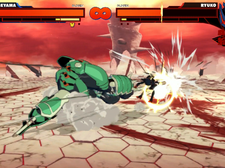
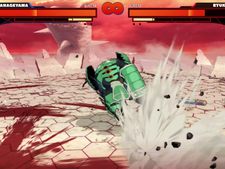
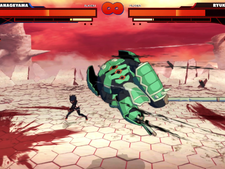
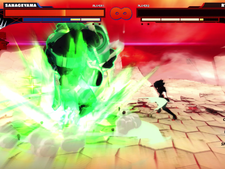
 Uzu is a massive armored rushdown gorilla who skips neutral like no other. Uzu is a massive armored rushdown gorilla who skips neutral like no other. |
| Pros |
Cons |
- Unstoppable Force: With fast far reaching normals, a plethora of armored moves, and his infamous j.C cancels, Sanageyama's approach options are some of the best in the game as he can just teleport or truck through just about anything in neutral, forcing most characters to be defensive.
- Defensive Options: Just Guard loads up a use of Fierce Strike and gives him a decent amount of meter, and his Valor Level 1 unlocks Shingan Step, a parry that gives him high damage punish options and tons of meter, allowing him to easily steal his turn back if on the defensive.
- Pressure Machine: Sanageyama has built in frame traps, good stagger pressure, unblockables with sp.B, and 50/50 mix with sp.C due to it being dash cancelable, which gives him one of the scariest mix options in the game.
|
- Meter Gain: Sanageyama has the worst meter gain in the game, letting most opponents burn through most of his health if not all of it when they hit him. Sanageyama also feeds the opponent massive amounts of meter on hit as well. Sanageyama's use of Valor, bursting, and his supers are restricted by this. This also impacts his mix greatly as sp.C is the only way he can get true 50/50 mix as the rest of his pressure is just bait outs.
- Predictability: Sanageyama's low variety of moves and him being unsafe with most of his moves on block forces him to try and play unpredictably and condition his opponents to get hits in.
|
Valor Level 1
- Gains the ability "Shingan Step." Allows him to dash cancel out of a successful block.
- Close Range Attack follow-up on d.AAA changes from 5AAAAAAA (Ender) to d.AAAA.
- Increased damage on d.B and gains Guard Point on startup.
- Counter hit window on d.C is removed and gains more Guard Point.
Valor Level 2
- Close Ranged Attack Special enhanced.
Notables
- Sanageyama's Just Guard and Shingan Step allows him to be the only character in the game with the ability to Parry.
- On Counter Hit or Guard Break, he will do a forced armored follow-up regardless of the normal that hit.
- Sanageyama's wallsplats are unique as they give him negative damage scaling instead of regular damage scaling.
Close Ranged Attacks
5A Men Men Dou: Frenzy Dou: Frenzy Kote: Frenzy Kote: Frenzy Men: Brave Blade Men: Brave Blade Dou: Brave Blade Dou: Brave Blade Kote: Brave Blade Kote: Brave Blade Men: Goku Blade Men: Goku Blade
|
| Version
|
Damage
|
Prorate
|
Priority
|
Startup
|
On Hit
|
On Block
|
Counter Hit
|
| 5A
|
200
|
-
|
-
|
19
|
-
|
-
|
+500 Damage, Knockdown
|
- A downwards swing to the head that can anti-air.
- Can cancel into 5B or d.C
|
| 5AA
|
100
|
-
|
-
|
-
|
-
|
-
|
+500 Damage, Crumple
|
- A followup horizontal swing to the body.
|
| 5AAA
|
100
|
-
|
-
|
-
|
-
|
-
|
+500 Damage, Knockdown
|
- Yet another downward swing, this time to the wrists.
|
| 5AAAA
|
300
|
-
|
-
|
-
|
-
|
-
|
+700 Damage
|
- A powerful head-smashing downward strike.
|
| 5AAAAA
|
140
|
-
|
-
|
-
|
-
|
N/A
|
N/A
|
- Only available if 5AAAA hits.
- A second, stronger downwards body strike.
|
| 5AAAAAA
|
140
|
-
|
-
|
-
|
-
|
N/A
|
N/A
|
- Only available if 5AAAAA hits.
- Yet another downwards swing, to the wrists.
|
| 5AAAAAAA (Ender)
|
1240
|
-
|
-
|
-
|
Sliding Knockdown
|
N/A
|
N/A
|
- Only available if 5AAAAAA hits.
- The final and mightiest downwards strike to the head.
- The most damaging close attack ender.
- Rest easy, you've made it to the end.
|
|
5AAAB Brave Blade: Pierce Brave Blade: Pierce Brave Blade: Pierce Brave Blade: Pierce
|
| Version
|
Damage
|
Prorate
|
Priority
|
Startup
|
On Hit
|
On Block
|
Counter Hit
|
| 5AAAB
|
200
|
-
|
-
|
-
|
Sliding Knockdown
|
-
|
N/A
|
- Sanageyama performs an attack similar to 5B, except it is a multihit attack.
- Can cancel into 5AAA > 4/6AA or 5C (Ender).
|
| 5AAABB
|
240
|
-
|
-
|
-
|
Sliding Knockdown
|
-
|
N/A
|
- A follow-up multihit thrust.
- Can cancel into 5AAA > 4/6AAA, 5B (Ender), or 5C (Ender).
|
|
5AAA > 4/6A Dou: Flash Dou: Flash Brave Blade: Pummel Brave Blade: Pummel Brave Blade: Pummel Brave Blade: Pummel
|
| Version
|
Damage
|
Prorate
|
Priority
|
Startup
|
On Hit
|
On Block
|
Counter Hit
|
| 5AAA > 4/6A
|
200
|
-
|
-
|
-
|
-
|
-
|
+700 Damage
|
- Lunging forward slash that makes Sanageyama move through the opponent on hit. Classic anime style.
- This move and the following attacks will yield the most meter out of all his combo strings.
|
| 5AAA > 4/6AA
|
180
|
-
|
-
|
-
|
Knockdown
|
-
|
-
|
- Only available if 5AAA > 4/6A hits/was blocked.
- A rapid three hit attack that knocks the opponent up.
|
| 5AAA > 4/6AAA
|
300
|
-
|
-
|
-
|
Knockdown
|
-
|
-
|
- Only available if 5AAA > 4/6AA hits/was blocked.
- Continuing three hit attack with Sanageyama doing a little hop forwards.
|
|
5AAA > 2/8A Brave Blade: Blade Uppercut Brave Blade: Blade Uppercut Men: Fierce Rising Men: Fierce Rising Dou: Brave Blade Dou: Brave Blade Kote: Brave Blade Kote: Brave Blade
|
| Version
|
Damage
|
Prorate
|
Priority
|
Startup
|
On Hit
|
On Block
|
Counter Hit
|
| 5AAA > 2/8A
|
300
|
-
|
-
|
-
|
Knockdown
|
-
|
+700 Damage
|
- Sanageyama does an underhand swing that launches both the opponent and Sanageyama into the air.
- On hit/block, can perform aerials afterwards.
- This move is important to Sanageyama's combo game, so go for it when you have the opportunity.
|
| 5AAA > 2/8AA
|
200
|
-
|
-
|
-
|
Knockdown
|
N/A
|
N/A
|
- Only available if 5AAA > 2/8A hits.
- Sanageyama leaps into the sky, falling down on the opponent with a sword slash.
|
| 5AAA > 2/8AAA
|
220
|
-
|
-
|
-
|
Knockdown
|
N/A
|
N/A
|
- Only available if 5AAA > 2/8AA or 2/8 Shingan Step A hits.
- Sanageyama does a follow-up swing while rushing forward.
|
| 5AAA > 2/8AAAA
|
220
|
-
|
-
|
-
|
Knockdown
|
N/A
|
N/A
|
- Only available if 5AAA > 2/8AAA hits.
- Sanageyama does another follow-up swing while rushing forward.
|
|
4/6A (Ender) Dou: Goku Flash Dou: Goku Flash
|
| Damage
|
Prorate
|
Priority
|
Startup
|
On Hit
|
On Block
|
Counter Hit
|
| 500
|
-
|
-
|
-
|
Crumple
|
N/A
|
N/A
|
- Only available if 5AAAAAA or 5AAA > 4/6AAA hits.
- A lunging forward strike similar to 5AAA > 4/6A, can be followed up off of.
|
|
2/8A (Ender) Brave Blade: Goku Blade Uppercut Brave Blade: Goku Blade Uppercut
|
| Damage
|
Prorate
|
Priority
|
Startup
|
On Hit
|
On Block
|
Counter Hit
|
| 640
|
-
|
-
|
-
|
Knockdown
|
N/A
|
N/A
|
- Only available if 5AAAAAA or 5AAA > 4/6AAA hits.
- An underhand swing ender similar to 5AAA > 2/8A, keeping the opponent close to Sanageyama.
- Can combo into 5B (Ender) afterwards.
|
|
4/6A Men: Hop Men: Hop
|
| Damage
|
Prorate
|
Priority
|
Startup
|
On Hit
|
On Block
|
Counter Hit
|
| 240
|
-
|
-
|
31
|
Knockdown
|
-
|
+800 Damage, Sliding Knockdown
|
- Sanageyama hops towards the opponent with an overhead strike.
- Great range due to the leap, however the noticeable wind up before the hit can make it avoidable.
- Expect game start 4/6A on smaller stages.
|
|
2/8A Men: Torrent Men: Torrent
|
| Damage
|
Prorate
|
Priority
|
Startup
|
On Hit
|
On Block
|
Counter Hit
|
| 240
|
-
|
-
|
41
|
Knockdown
|
-
|
+800 Damage, Stun
|
- After winding up, Sanageyama slams the ground with his weapon.
- Cannot cancel into anything on whiff.
- Incredible move due to to the priority it has. Can beat out many other melee hits, but don't overuse it or you will be read and punished as it is not overly fast.
|
|
d.A Brave Blade: Pummel Brave Blade: Pummel Brave Blade: Pummel Brave Blade: Pummel Brave Blade: Pummel Brave Blade: Pummel Brave Blade: Pummel Brave Blade: Pummel
|
| Version
|
Damage
|
Prorate
|
Priority
|
Startup
|
On Hit
|
On Block
|
Counter Hit
|
| d.A
|
160
|
-
|
-
|
19
|
Knockdown
|
-
|
+500 Damage
|
- Sliding forward body strike that can anti-air.
- Does not allow for very many follow up strikes, unless you are at Valor 1 or beyond.
- Can cancel into d.B or d.C.
|
| d.AA
|
160
|
-
|
-
|
-
|
Knockdown
|
-
|
-
|
- Can cancel into d.B or d.C.
|
| d.AAA
|
160
|
-
|
-
|
-
|
Knockdown
|
-
|
-
|
- Another follow-up strike.
- Can cancel into 5AAAAAAA (Ender), 5B (Ender), or 5C (Ender).
- At Valor Level 1, cancel options change to d.AAAA, 5B (Ender), or 5C (Ender).
|
| d.AAAA
|
200
|
-
|
-
|
-
|
Sliding Knockdown
|
-
|
-
|
- A follow-up strike that is only available in Valor Level 1 or above.
- Can cancel into 5AAA > 2/8AAA, 5AAAB, or 5C (Ender).
|
|
j.A Men: Rising Strike Men: Rising Strike
|
| Damage
|
Prorate
|
Priority
|
Startup
|
On Hit
|
On Block
|
Counter Hit
|
| 240
|
-
|
-
|
21
|
-
|
-
|
+500 Damage
|
- Sanageyama leaps forward in the air and slams down on the opponent with a strike to the head.
|
|
sp.A Hasso Ranbu Hasso Ranbu Hasso Ranbu: Brave Blade Hasso Ranbu: Brave Blade
|
| Version
|
Damage
|
Prorate
|
Priority
|
Startup
|
On Hit
|
On Block
|
Counter Hit
|
| Normal
|
1920 to 2540
|
-
|
-
|
14
|
Knockdown
|
-
|
+1000 Damage
|
| Valor Level 2
|
1920 to 3930
|
-
|
-
|
14
|
Knockdown
|
-
|
+1000 Damage
|
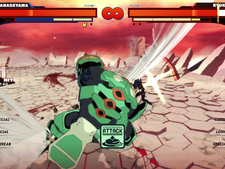
- Sanageyama swings down with a powerful strike to the head, stunning the opponent and allowing for additional strikes.
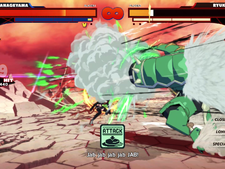
- An ATTACK prompt will appear which allows Sanageyama to perform additional swings with A, B, and C.
- Each attack represents a part of MEN DOU KOTE.
- The initial swing of the super will perform MEN.
- Performing MEN DOU KOTE in order will give you additional damage.
- At Valor Level 2, Sanageyama swings faster allowing for more reps.
- If enough reps have been done, a more damaging ender will be granted.
|
|
Long Ranged Attacks
5B Brave Blade: Thrust Brave Blade: Thrust Brave Blade: Multi-Thrust Brave Blade: Multi-Thrust Thrust: Full Body Thrust: Full Body
|
| Version
|
Damage
|
Prorate
|
Priority
|
Startup
|
On Hit
|
On Block
|
Counter Hit
|
| 5B
|
150
|
-
|
-
|
17
|
Knockdown
|
-
|
+500 Damage
|
- Uzu lunges forward with a long ranged poke, jabbing his sword into the opponent.
- It does what it looks like. It can connect from a long range, and can extend your combo and block strings by inserting it in between close range attacks.
- Can cancel into 5AA or d.C.
|
| 5BB
|
160
|
-
|
-
|
-
|
-
|
-
|
+500 Damage
|
- An additional poke to add on a little damage and keep the pressure going.
- Can cancel into 5AAA or d.C.
|
| 5BBB
|
300
|
-
|
-
|
-
|
Sliding Knockdown
|
N/A
|
N/A
|
- Only available if 5BB hits.
- Sanageyama performs an attack very similar to d.B, only difference is 5BBB does not get affected by Valor Level 1.
- Can cancel into 5AAAAA, 5B (Ender), or 5C (Ender).
|
|
5B (Ender) Thrust: Full Body Thrust: Full Body
|
| Damage
|
Prorate
|
Priority
|
Startup
|
On Hit
|
On Block
|
Counter Hit
|
| 560
|
-
|
-
|
-
|
Sliding Knockdown
|
Guard Crush
|
N/A
|
- Only available if 5AAAAAA, 5AAA > 4/6AAA, 2/8 (Ender), 5BBB, or d.B hits.
- Not his strongest ender, or most meter gaining, but it gets the opponent far away from you which can be useful if they want to rush you down.
|
|
5[B] Thrust: Gallop Thrust: Gallop
|
| Damage
|
Prorate
|
Priority
|
Startup
|
On Hit
|
On Block
|
Counter Hit
|
| 960 / 1200
|
-
|
-
|
56
|
Sliding Knockdown / Knockdown
|
Guard Crush
|
+660 Damage
|
- Once charged, Sanageyama lets out a straight blast from his weapon.
- Deals additional damage and can wallsplat when fully charged.
- While it has long range, the width of the hitbox is not nearly as massive as the clouds around it make it look like. Use it to call out sidesteps and bad movements at a range rather than to fight your opponent purely at range.
- Dash cancelable while charging. Remember this.
|
|
d.B Thrust: Full Body Thrust: Full Body
|
| Version
|
Damage
|
Prorate
|
Priority
|
Startup
|
On Hit
|
On Block
|
Counter Hit
|
| Normal
|
300
|
-
|
-
|
18
|
Sliding Knockdown
|
-
|
+500 Damage
|
| Valor Level 1
|
700
|
-
|
-
|
18
|
Sliding Knockdown
|
-
|
+500 Damage
|
- Lunging forward stab with further range than 5B.
- It hits significantly harder at Valor 1 and beyond.
- Can cancel into 5AAAAA, 5B (Ender), or 5C (Ender).
|
|
j.B Brave Blade: Thrust Brave Blade: Thrust
|
| Damage
|
Prorate
|
Priority
|
Startup
|
On Hit
|
On Block
|
Counter Hit
|
| 200
|
-
|
-
|
17
|
Launch
|
-
|
+500 Damage
|
- Sanageyama dives to the ground and lands with a thrust.
|
|
j.[B] Thrust: Multi-Hit Thrust: Multi-Hit
|
| Damage
|
Prorate
|
Priority
|
Startup
|
On Hit
|
On Block
|
Counter Hit
|
| 1160
|
-
|
-
|
54
|
Knockdown
|
Guard Crush
|
+900 Damage
|
- Once charged, Sanageyama lunges to the ground with a multi-hit stab.
- If fully charged, Sanageyama bops the opponent with high knockback, able to wallsplat from midscreen.
|
|
sp.B Godspeed Thrust Godspeed Thrust
|
| Damage
|
Prorate
|
Priority
|
Startup
|
On Hit
|
On Block
|
Counter Hit
|
| 1400
|
-
|
-
|
11
|
Knockdown
|
-
|
+1000 Damage
|
- Sanageyama lunges with high speed and fullscreen distance.
- Launches the opponent into the air with well enough time to convert into a combo.
- An excellent, incredibly fast punish. See your opponent sidestep? Thrust. Start to approach? Thrust. Need to end a combo but your opponent is too far away? I don't need to tell you what to do.
|
|
Break Attacks
5C Brave Blade: Lunge Brave Blade: Lunge
|
| Damage
|
Prorate
|
Priority
|
Startup
|
On Hit
|
Guard Break
|
Counter Hit
|
| 600
|
-
|
-
|
46
|
Sliding Knockdown
|
+900 Damage
|
+900 Damage
|
- Sanageyama strikes a pose and fires a point blank blast from his fist, pushing himself back a bit.
- Can cancel into Homing Dash on hit.
- Dash cancelable during the startup.
- A central move in Sanageyama's kit, more than other character's breaks due to his easily blockable pressure. It does not have an absurdly big hitbox, a dash forward, and isn't super fast, but it's certainly not too hard to hit due to its armor. Vary it up with sidestep canceling to break through your opponent's defense.
|
|
5C (Ender) Brave Blade: Blink Lunge Brave Blade: Blink Lunge
|
| Damage
|
Prorate
|
Priority
|
Startup
|
On Hit
|
Guard Break
|
Counter Hit
|
| 1100
|
-
|
-
|
-
|
Sliding Knockdown
|
+650 Damage, Stun
|
+650 Damage
|
- Sanageyama feints a 5C animation before vanishing in front of the opponent
- Afterwards he reappears behind the opponent with a guard breaking blast.
- Can be used to finish a blockstring to break a guard, or as a combo ender due to Uzu's breaks dealing high damage and gaining a good amount of meter.
- A way to continue pressure as the teleport makes any immediate attack from the opponent whiff.
- This is an excellent mindgame, use it sparingly so as to catch your opponent off guard. Or maybe on guard, since it breaks it.
|
|
d.C Lunge: Encircling Strike Lunge: Encircling Strike
|
| Damage
|
Prorate
|
Priority
|
Startup
|
On Hit
|
Guard Break
|
Counter Hit
|
| 600
|
-
|
-
|
36
|
Sliding Knockdown
|
+900 Damage
|
+900 Damage
|
- Sanageyama twirls around before firing a point blank blast, pushing himself back a bit.
- Can cancel into Homing Dash on hit.
- Dash cancelable during the startup.
- Is ground only, cannot hit airborne opponents.
- The longer startup compared to his other break attacks may be looked at as a detriment, but it can throw off your opponent since they may have expected an attack earlier on. It can be cancelled out of with a sidestep, which helps you further mindgame your opponent.
|
|
j.C Brave Blade: Lunge Brave Blade: Lunge
|
| Damage
|
Prorate
|
Priority
|
Startup
|
On Hit
|
Guard Break
|
Counter Hit
|
| 600
|
-
|
-
|
42
|
Sliding Knockdown
|
+900 Damage
|
+900 Damage
|
- Can cancel into Aerial Homing Dash on hit. This allows for a nasty combos.
- Air Dash cancelable during the startup.
- Very similar to his other break attacks, a bit slow, leaves Uzu hanging in the air for a while, but not a bad move at all.
|
|
sp.C Shingan Thousand Strikes Shingan Thousand Strikes
|
| Damage
|
Prorate
|
Priority
|
Startup
|
On Hit
|
Guard Break
|
Counter Hit
|
| 1160 to 2280
|
-
|
-
|
-
|
Sliding Knockdown
|
+600 Damage
|
+600 Damage
|
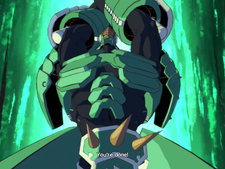
- "Oh, you're approaching me?" "I can't beat the crap out of you without getting closer."
- Sanageyama walks menacingly towards the opponent. If he is stuck, or walks directly into the opponent and touches them, they are stunned and locked in place as the beatdown begins.
- The special is canceled if Sanageyama cannot reach the opponent within five steps.
- Dash cancelable after the first step.
- Once close to the opponent, Sanageyama stuns the opponent and unleashes a flurry of 1000 punches.
- Mashing attack buttons during the special grants additional damage.
|
|
General Moves
Fierce Strike Dou: Fierce Strike Dou: Fierce Strike Kote: Fierce Strike Kote: Fierce Strike
|
| Version
|
Damage
|
Prorate
|
Priority
|
Startup
|
On Hit
|
On Block
|
Counter Hit
|
| Fierce Strike
|
400
|
-
|
-
|
-
|
Crumple
|
-
|
N/A
|
- On Counter Hit or Guard Break, Sanageyama will do a forced armored follow-up regardless of the normal that hit if A was pressed after said normal, can hit sidesteps.
- If done after a Guard Break, Fierce Strike will initiate after the Homing Dash.
- The only exceptions to this are specials, supers, raw Homing Dash, Valor Burst, Counter Burst, and Fiber Lost Secret Arts.
- Aerial Homing Dash does work however.
- Can cancel into 5B or 5C.
|
| Fierce Strike (2nd)
|
500
|
-
|
-
|
-
|
Knockdown
|
-
|
N/A
|
- Sanageyama continues the forced armored follow-up with an armored upward swing if A was pressed after the initial Fierce Strike, can hit sidesteps.
- Can cancel into 5AAAA, 5AAA > 4/6A, 5AAA > 2/8A, 5B, d.C, or a Step Dash.
- When canceled into 5AAA > 2/8A, gains Guard Point on startup and can now hit sidesteps.
|
|
Just Guard
|
| Damage
|
Prorate
|
Priority
|
Startup
|
On Hit
|
On Block
|
Counter Hit
|
| N/A
|
-
|
-
|
N/A
|
N/A
|
N/A
|
N/A
|
- If Sanageyama blocks an attack at the right moment he will gain more SP and reduce block stun, essentially making this a mini Shingen Step. This does not work against specials/supers or break attacks.
- Any Close Range or Long Range attack done after Just Guard can cancel into Fierce Strike.
|
|
Side Shingan Step
|
| Damage
|
Prorate
|
Priority
|
Startup
|
On Hit
|
On Block
|
Counter Hit
|
| N/A
|
-
|
-
|
N/A
|
N/A
|
N/A
|
N/A
|
- Only available at Valor Level 1.
- Upon dashing after blocking an attack, Sanageyama disappears then reappears to the side.
- Gives 1 bar of SP Gauge upon a successful Side Shingan Step.
- Double's the damage of any move done afterwards.
- Double damage lasts for 90 frames (1.30 seconds) after Side Shingan Step.
- Can cancel into 5A, 5B, or 5C.
- 5A and 5B will cancel into Fierce Strike if done from Side Shingan Step.
|
|
Forward Shingan Step
|
| Damage
|
Prorate
|
Priority
|
Startup
|
On Hit
|
On Block
|
Counter Hit
|
| 100
|
-
|
-
|
25
|
Knockdown
|
-
|
+300 Damage
|
- Only available at Valor Level 1.
- Upon forward dashing after blocking an attack, Sanageyama charges forward at the opponent, this attack can wallsplat.
- Any attacks done afterwards will not be affected by scaling.
- Threshold Armor on startup.
- Can cancel into d.AAAA, 5AAAB, or d.C.
|
|
Back Shingan Step
|
| Damage
|
Prorate
|
Priority
|
Startup
|
On Hit
|
On Block
|
Counter Hit
|
| 100
|
-
|
-
|
39
|
Knockdown
|
-
|
+300 Damage
|
- Only available at Valor Level 1.
- Upon backdashing after blocking an attack, Sanageyama dashes backwards, then lunges forward, this attack can wallsplat.
- Any attacks done afterwards will not be affected by scaling.
- Threshold Armor on startup.
- Can cancel into d.AAAA, 5AAAB, or d.C.
|
|
Homing Dash
|
| Damage
|
Prorate
|
Priority
|
Startup
|
On Hit
|
On Block
|
Counter Hit
|
| 50
|
-
|
-
|
23
|
Knockdown
|
-
|
+300 Damage
|
- Sanageyama homes in on the opponent and quickly attacks.
- Unique to Sanageyama, on counter hit his Homing Dash can now wallsplat.
- On hit, can perform d.A, d.B, or d.C afterwards.
- Homing Dash can be canceled into Dash attacks after the initial startup.
- Allows you to armor through low priority projectiles after the initial startup.
- Dash cancelable after the initial startup.
|
|
Aerial Homing Dash
|
| Damage
|
Prorate
|
Priority
|
Startup
|
On Hit
|
On Block
|
Counter Hit
|
| 50
|
-
|
-
|
23
|
Knockdown
|
-
|
+300 Damage
|
- Sanageyama homes in on the opponent and quickly attacks.
- Unique to Sanageyama, on counter hit his Aerial Homing Dash can now wallsplat.
- On hit, can perform j.A, j.B, or j.C afterwards.
- Allows you to armor through low priority projectiles after the initial startup.
- Air dash cancelable after the initial startup.
|
|
Valor Burst
|
| Damage
|
Prorate
|
Priority
|
Startup
|
On Hit
|
On Block
|
Counter Hit
|
| 1500
|
-
|
-
|
15
|
Bloody Valor / Sliding Knockdown
|
Guard Crush
|
+300 Damage
|
- A Burst that has been performed while your character is in a free state.
- Once activated, you become invincible and release a multi-hit shockwave.
- On hit, Bloody Valor will commence.
- At Valor Level 3, Valor Burst won't trigger Bloody Valor and will only cause a Sliding Knockdown.
|
|
Counter Burst
|
| Damage
|
Prorate
|
Priority
|
Startup
|
On Hit
|
On Block
|
Counter Hit
|
| 10
|
-
|
-
|
15
|
Sliding Knockdown
|
-
|
+590 Damage
|
- A Burst that has been performed under the effects of hitstun or blockstun.
- Once activated, you become invincible and knockback the opponent.
- Counter Burst can be performed in the air.
- You will not be able to perform any action until you land on the ground.
- Meter Cooldown for 7 seconds.
|
|
FIBER LOST SECRET ARTS Shingan Issen Shingan Issen
|
| Damage
|
Prorate
|
Priority
|
Startup
|
On Hit
|
On Block
|
Counter Hit
|
| SEN-I-SOSHITSU
|
-
|
-
|
62
|
SEN-I-SOSHITSU
|
-
|
SEN-I-SOSHITSU
|
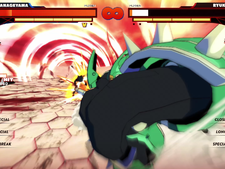
- Sanageyama teleports to the opponent's location and attacks, regardless of distance.
- Shares the same animation as Forward Shingan Step.
- At full meter Sanageyama can play a scary defense and wait for a whiff punish from fullscreen.
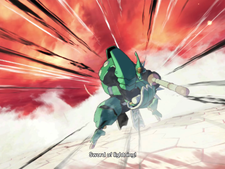
- "I can read the inner workings of your mind as clear as day."
- MEN! DOU! KOTE! MEN! DOU! KOTE! MEN DOU KOTE! MEN DOU KOTE! MEN-DOU-KOTE! MEN-DOU-KOTE!
- MENDOUKOTEMENDOUKOTEMENDOUKOTEMENDOUKOTEMENDOUKOTEMENDOUKOTEMENDOUKOTE!
|
|
Colors
Notable Players
Disclaimer: This list is derived from community input and is in no way comprehensive or a form of ranking of any kind. Our community criteria can be found here.
| Usual Color |
Handles/Links |
Region |
Status |
Notes
|
|
|
33phy33
@33phy33
|

United States
PA
|
Active
|
Plays on PS/Steam/Switch
Ignorance is bliss.
Example Play
|
|
|
FK_MarioJeegRobot
|

Peru
|
Retired
|
Plays on PS/Switch
An incredibly strong Sanageyama player only the fewest could defeat.
Example Play
|
External Links
