|
|
| (75 intermediate revisions by 3 users not shown) |
| Line 1: |
Line 1: |
| [[File:KLKIF_Inumuta.png|300px|thumb|right|]]
| | <center>{{Navigation-KLKIF}}</center> |
|
| |
|
| ==Introduction== | | {| class="wikitable" style="float:right; margin-left: 20px;" |
| <font size="3">'''Hōka Inumuta (犬牟田 宝火)'''</font> | | |- |
| | | align="center" colspan="2" |<div style="float:center; overflow:hidden; width:223px; height:639px; ><span style="margin-left:-15px">[[File:KLKIF_Inumuta.png|270px]] |
| | |- |
| | | '''Health''' || 8,500 |
| | |- |
| | | {{Tooltip|text= '''Meter Multiplier''' |hovertext=Multiplier to dictate how much meter the character gains when taking damage.}} || 1.5x |
| | |- |
| | | '''[http://wiki.gbl.gg/w/KILL_la_KILL_IF/Controls#Movement Walkspeed] || 3rd |
| | |- |
| | | '''[https://wiki.gbl.gg/w/KILL_la_KILL_IF/Controls#Homing_Dash Homing Dash Speed] || 10th |
| | |- |
| | | '''Homing Dash Duration''' || 90 |
| | |- |
| | | '''Height''' || 10.00 |
| | |- |
| | | '''Weight''' || 1 |
| | |- |
| | | '''Jump Height''' || - |
| | |- |
| | | '''Jump Duration''' || - |
| | |- |
| | | '''Side Step Dash Invul''' || 1-57 |
| | |- |
| | | '''Front Step Dash Total''' || - |
| | |- |
| | | '''Side Step Dash Total''' || - |
| | |- |
| | | '''Back Step Dash Total''' || - |
| | |- |
| | | '''Has Forced A Ender''' || - |
| | |- |
| | | '''Has Forced B Ender''' || - |
| | |- |
| | | '''Has Forced C Ender''' || - |
| | |- |
|
| |
|
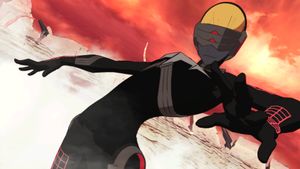
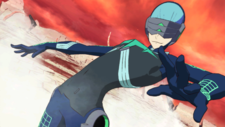
| '''''He is one of the student council's Elite Four. He is in charge of Honnōji Academy's information and strategy committee, aiding the student council by analyzing information via his laptop. He is also in charge of analysis of the Goku Uniforms research in the Sewing Club.'''''
| |
| ==Character Information==
| |
| {|
| |
| |-style="text-align:left;"
| |
| ! Strengths !! Weaknesses
| |
| |- style="vertical-align:top;text-align:left"
| |
| | style="width: 50%;"|
| |
| * Fastest base walk speed in the game
| |
| * Has one of the few remaining true infinites in the game
| |
| * Able to drain meter/health from opponent depending on the amount of AP he has
| |
| * Can mix between zoning and offense while also having access to strong setplay options
| |
| * Thermo Optic Camo (TOC) renders him invincible to majority of attacks in the game
| |
| * Excellent kit that works both defensive and offensive
| |
| * His Valor 1 allows an true unburstable combo that defeats EVERY (!) opponent
| |
| * Has the fastest meter gain in the game
| |
| * Has infinites and unburstable combos both for close and long range
| |
| * I-Frames between his attacks save him from possible punishment
| |
| | style="width: 50%;"|
| |
| * Lowest health in the game
| |
| * Resource heavy character with precise meter management
| |
| * Has no answer against opponents with good armor properties
| |
| * Requires good game and map knowledge to play optimal
| |
| * Low health leaves only minor room for mistakes
| |
| |-
| |
| |} | | |} |
|
| |
|
| | | ==Introduction== |
| '''Gameplay Style''': Setplay, Zoning, Rushdown | | <font size="3">'''Hōka Inumuta (犬牟田 宝火)'''</font> |
| <br> | | <br> |
| '''Ease of Use''': <span style="color:red"> '''Hard''' </span>
| |
| <br> | | <br> |
| | '''''He is one of the student council's Elite Four. He is in charge of Honnōji Academy's information and strategy committee, aiding the student council by analyzing information via his laptop. He is also in charge of analysis of the Goku Uniforms research in the Sewing Club.''''' |
| <br> | | <br> |
| '''Health:''' 8,500 | | |
| <br>
| | ==Overview== |
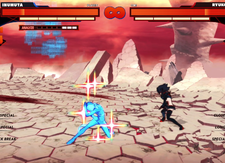
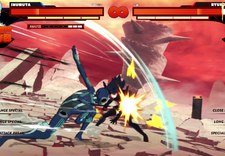
| | Inumuta is a pixie character who relies on his fast movement speed and normals, cubes, and infinites to delete his opponents. His normals are fairly safe on block or have enough cancel options to avoid direct punishment. He can reliably zone against most characters as his cubes are high priority projectiles (will clash against homing dashes). He can theoretically combo any character from full health to death and keep his combo unburstable by repeatedly stealing their meter before they can burst. Should they be able to burst he has multiple options to bait a burst attempt (sp.A, sp.C, Valor, some burst safe normals). He has many different unburstable infinites to pull from depending on the stage he is on, and him winning from these in Round 1 lets him start Round 2 in TOC, which will let him get near guaranteed hits at Round 2 start, letting him theoretically win the entire game off of roundstart. Should he feel the need to timer scam, TOC is very effective for keeping himself hidden (on top of being in permanent sidestep invul) until the game is over. Obtaining a significant life lead and entering TOC is an effective strategy for winning a game against an opponent who is difficult to approach or who has very few options to deal with TOC. |
| | |
| | |
| | {{StrengthsAndWeaknesses |
| | |intro = [[File:KLKIF_Inumuta_Icon.png|50px]] '''Inumuta''' is a flexible pixie character who will swiftly delete you for any mistake.</center> |
| | |pros= |
| | *'''To Infinity and Beyond:''' Inumuta is the only character in the game with fully unburstable infinites, he can start these infinites off of nearly any hit and if he ends them properly, they will put him in TOC which will let him get a near guaranteed hit at the start of Round 2, letting him potentially win the entire game off of one hit. |
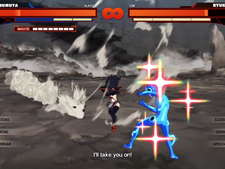
| | *'''Thermo Optical Camouflage''': Inumuta's infamous stance. In this state, Inumuta is invisible, gains permanent Sidestep Invulnerability, and gains additional moves. Many attacks, including his Step Dash, also make him "flicker" into it, making him a slippery target. |
| | *'''Speedster:''' Inumuta has the fastest base walkspeed in the game, has the fastest normals in the game, and has a Homing Dash with near instant acceleration. |
| | *'''Versatility:''' Can mix between zoning and rushdown styles with ease. Has access to strong defensive options, setplay, mix-ups, staggers, and meaty/okizeme options. Overall his kit is excellent for nearly any defensive or offensive situation. |
| | *'''Resource King:''' Inumuta has the best meter gain in the game, allowing him to use metered options often. He also has many moves that steal meter and or health from opponent such as sp.B and sp.C. |
| | *'''Swiss Army Valor:''' Inumuta has one of the strongest and most versatile Valors in the game, as it allows him to enter Thermo Optic Camouflage without the cost of meter, improves his infinites, improves his Analyze Gauge gains, and enhances his already powerful sp.C. |
| | |cons= |
| | *'''Fragile:''' Inumuta has the lowest health in the game, making mistakes with him when on meter cooldown is extremely punishing as most characters can one shot him if they get the chance. |
| | *'''Weak to Armor:''' Inumuta has rather weak answers to certain moves with Guard Point or Threshold Armor, forcing him to be on the defensive against certain characters. |
| | |
| | |tablewidth=80 |
| | }} |
| <br> | | <br> |
| '''Valor Level 1''' | | '''Valor Level 1''' |
| Line 44: |
Line 72: |
| *Thermo Optical Camouflage can be used from break attack startups or during a homing dash. | | *Thermo Optical Camouflage can be used from break attack startups or during a homing dash. |
| *Each cube that lands on your opponent will now build one AG instead of 1/2. | | *Each cube that lands on your opponent will now build one AG instead of 1/2. |
| | *True Invulnerability on wakeup is increased. |
| <br> | | <br> |
| '''Valor Level 2''' | | '''Valor Level 2''' |
| Line 49: |
Line 78: |
| *Break Attack Special enhanced | | *Break Attack Special enhanced |
| <br> | | <br> |
| '''[http://wiki.mizuumi.net/w/KILL_la_KILL_IF/Controls#Movement Walkspeed Ranking]:''' 3rd | | '''Notables''' |
| | |
| ==Gameplan==
| |
| Inumuta relies on his fast movement speed and normals to get in and out of his opponent’s range and bait a response. His normals are fairly safe on block or have enough cancel options to avoid direct punishment. He can reliably zone against most characters as his cubes are non-low priority projectiles (will clash against homing dashes). He can theoretically combo any character from full health to death and keep his combo unburstable by repeatedly stealing their meter before they can burst. Should they be able to burst he has multiple options to bait a burst attempt (sp.A, sp.C, burst back, some burst safe normals).
| |
| | |
| Should he feel the need to timer scam, TOC is very effective for keeping himself hidden (on top of being invincible) until the game is over. Obtaining a significant life lead and entering TOC is an effective strategy for winning a game against an opponent who is difficult to approach or who has very few options to deal with TOC.
| |
| | |
| Against more aggressive zoners he can make use of his tools in TOC to avoid getting hit by projectiles and also punish with his TOC.5C which is a fullscreen tracking guard break. With valor 1, 5CC is effective for transitioning into TOC.5C to punish a recovery.
| |
| | |
| Good execution/knowledge/reactions are important to have because any small mistake or bad burst will cost you the game due to his low health pool. Only burst on burst-safe points (typically during air strings or moves with few cancel options), a baited burst will kill you instantly.
| |
| <br>
| |
| | |
| <b>Comments on Recent Patch Changes (v1.03-1.05) by Rikir:</b>
| |
| | |
| Inumuta should focus on landing a valor burst to access valor level 1. The nerfed AG gain while at level 0 severely hinders his TOC game so it’s necessary to gain access as early as possible. The slight improvements to his guard break cancels while in valor 1 further emphasize gaining valor 1 or above. His grounded normals have all been hit with damage nerfs but his air strings have increased damage now. His normals in TOC state have also seen damage increases. The TOC.B variations also gained blockstun which they did not have before. Allowing for some nasty guard break setups. He is still capable of performing infinites which become more flexible in Valor 1.
| |
|
| |
|
| <b>Additional comments on Houka Inumuta by DanieD00:</b>
| | *Inumuta's invul frames share the same rules as TOC unless stated otherwise on specific moves. |
| | |
| Scoring Valor 1 increases Inumuta's chances of defeating the opponent drastically, as it allows him to perform a true unburstable infinite against every opponent if he can get a hit on them. It is however not necessary to win. Inumuta has answers to everything his opponents can do - even Dual Wield Ryuko's infamous Dash B can be defeated with blocking and sidestepping, or using a special attack.
| |
| | |
| His infinites can be used on all maps except Ragyo Stadium Grounds and Thread Palace. They work best on Polling Grounds + Naturals Election Stadium - Honno Town and Ragyo Stadium Runway require at least 1 SP Bar + 1 AP at the start.
| |
| | |
| TOC. BB can be spent multiple times to perform a combo since all BB's have blockstuns. He can deal up to 4-5k damage should he have 8 AP at combo start, allowing him to deal damage without fearing the opponent could hit him.
| |
|
| |
|
| ==Close Ranged Attacks== | | ==Close Ranged Attacks== |
| Line 241: |
Line 250: |
| |description= *FLASH KICK | | |description= *FLASH KICK |
|
| |
|
| *Invincible on startup. | | *True Invulnerability on startup, transitions into Sidestep Invulnerability afterwards. |
| }} | | }} |
| }} | | }} |
| Line 258: |
Line 267: |
| |attribute= +300 Damage | | |attribute= +300 Damage |
| |description= *Fullscreen slide. | | |description= *Fullscreen slide. |
| | |
| | *Uppercut Invulnerability on startup. |
| }} | | }} |
| }} | | }} |
| Line 365: |
Line 376: |
| *Gains 1 AG on hit. | | *Gains 1 AG on hit. |
|
| |
|
| *Invincible on startup. | | *True Invulnerability for the entire duration of the move. |
| }} | | }} |
| }} | | }} |
| Line 639: |
Line 650: |
| *+1 AG (per cube) on hit/block. | | *+1 AG (per cube) on hit/block. |
|
| |
|
| Note that the exact meter gain is dependent on what character you are fighting. Some characters have more of their meter drained than others. | | *Note that the exact meter gain is dependent on what character you are fighting. Some characters have more of their meter drained than others. |
| }} | | }} |
| }} | | }} |
| Line 804: |
Line 815: |
| |imageSize2= 225x200px | | |imageSize2= 225x200px |
| |imageSize3= 225x200px | | |imageSize3= 225x200px |
| | |imageSize4= 225x200px |
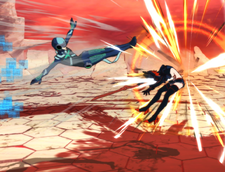
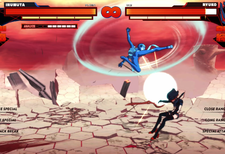
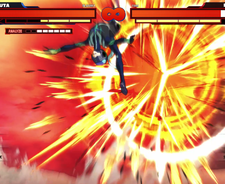
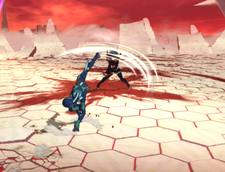
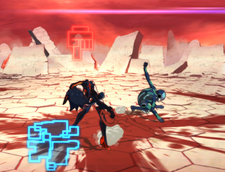
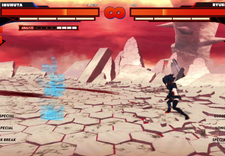
| |image=KLKIF_Inumuta_spC.png | | |image=KLKIF_Inumuta_spC.png |
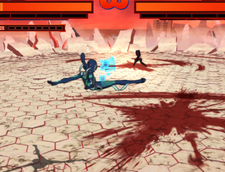
| |image2=KLKIF_Inumuta_spC2.png | | |image2=KLKIF_Inumuta_spC2.png |
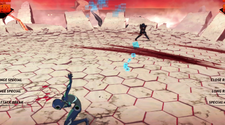
| |image3=KLKIF_Inumuta_spC3.png | | |image3=KLKIF_Inumuta_spC3.png |
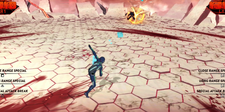
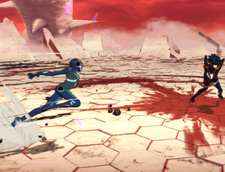
| | |image4=KLKIF_Inumuta_spC_Valor_2.png |
| |caption= | | |caption= |
| |name=sp.C | | |name=sp.C |
| Line 886: |
Line 899: |
| |attribute= N/A | | |attribute= N/A |
| |description= *At the end of Inumuta's specials, Inumuta goes into Thermo Optical Camouflage (TOC). | | |description= *At the end of Inumuta's specials, Inumuta goes into Thermo Optical Camouflage (TOC). |
| *In this state, Inumuta is invisible and '''"invincible"'''. | | *In this state, Inumuta is invisible and gains permanent Sidestep Invulnerability. |
| **Inumuta is still vulnerable to specific attacks (knocked out of TOC if hit.) | | **Inumuta is still vulnerable to attacks that hit sidesteps (knocked out of TOC if hit). |
| | ***Will always take Counter Hit damage when knocked out of TOC if hit. |
| *Can perform specific attacks only available in TOC. | | *Can perform specific attacks only available in TOC. |
| **Each attack consumes AG on use. | | **Each attack consumes AG on use. |
| Line 899: |
Line 913: |
| <td><p><b>Universal</b></p> | | <td><p><b>Universal</b></p> |
| </td> | | </td> |
| <td><p>4/6A, Homing Dash, Aerial Homing Dash, Valor Burst</p> | | <td><p>4/6A, Homing Dash, Aerial Homing Dash, Valor Burst, Counter Burst</p> |
| </td></tr> | | </td></tr> |
| <tr> | | <tr> |
| <td> <p><b>DTR</b></p> | | <td> <p><b>DTR</b></p> |
| </td> | | </td> |
| <td><p>Missiles (j.BB, 5[B]), d.C, sp.A, sp.C, Grenade Detonations (only the 5C > Guard + C version) | | <td><p>4/6A (Ender), sp.A, 5[B], j.BB, sp.B (Valor Level 1 Missiles), d.C, G+C, sp.C, Pursuit Dash</p> |
| </p> | |
| </td></tr> | | </td></tr> |
| <tr> | | <tr> |
| <td><p><b>Gamagoori</b></p> | | <td><p><b>Gamagoori</b></p> |
| </td> | | </td> |
| <td><p>5A (DC), sp.A, 5[B], j.B, sp.B, 5C, j.C, sp.C</p> | | <td><p>5A (DC), d.A, j.A (final hit), sp.A, 5[B], 5BC, d.B (Quake), j.B, j.BC, j.[B], sp.B, 5C (DC), d.C (DC), j.C (DC), sp.C</p> |
| </td></tr> | | </td></tr> |
| <tr> | | <tr> |
| <td><p><b>Inumuta<b></p> | | <td><p><b>Inumuta<b></p> |
| </td> | | </td> |
| <td><p>Any cube normal</p> | | <td><p>5AAA, 4/6AA, 4/6AAA, TOC 5AA, 5B, 5BB, 5BBB, TOC 5B, TOC 5BB, TOC 5BBB, 5[B], d.B, j.B, j.BB, j.[B], sp.B</p> |
| </td></tr> | | </td></tr> |
| <tr> | | <tr> |
| <td><p><b>Jakuzure</b></p> | | <td><p><b>Jakuzure</b></p> |
| </td> | | </td> |
| <td><p>sp.A, 5[B], d.B, sp.B, sp.C</p> | | <td><p>E4/6A, 4/6AA, Ej.A, sp.A, 5[B], 5B[B], 5BB[B], 5BBB[B], 5BBp[B], 5BBBp[B], d.B, d.[B], d.p[B], sp.B, sp.C, FIBER LOST SECRET ARTS</p> |
| </td></tr> | | </td></tr> |
| <tr> | | <tr> |
| <td><p><b>Mako</b></p> | | <td><p><b>Mako</b></p> |
| </td> | | </td> |
| <td><p>5AA, 4AA, j.AA, 5C, Sp.B, Rolling, Rolling Tackle | | <td><p>5AA, 4/6A (Ender), j.AA, sp.B, 5C (Valor Level 0), Rolling Movement, Rolling Tackle</p> |
| </p> | |
| </td></tr> | | </td></tr> |
| <td><p><b>Nui</b></p> | | <td><p><b>Nui</b></p> |
| </td> | | </td> |
| <td><p>j.A, j.AB, 5[B], j.[B], 5C, j.C, j.BC, sp.C</p> | | <td><p> j.A, j.A+B, 5[B], 5[B]A, j.[B], j.[B]A, sp.B (Valor Level 2), 5C, 5C (Clone), j.C, j.B+C, sp.C</p> |
| </td></tr> | | </td></tr> |
| <td><p><b>Ragyo</b></p> | | <td><p><b>Ragyo</b></p> |
| </td> | | </td> |
| <td><p>5A, 5BA</p> | | <td><p>5A, 4/6A (Ender), 5BA, 5BAA, j.BA, j.BAA</p> |
| </td></tr> | | </td></tr> |
| <td><p><b>Ryuko</b></p> | | <td><p><b>Ryuko</b></p> |
| </td> | | </td> |
| <td><p>5AA, j.A, 5[B], j.[B], sp.B</p> | | <td><p>5AA (2nd hit), d.A, j.A, d.B, sp.C (final hit)</p> |
| </td></tr> | | </td></tr> |
| <td><p><b>Ryuko Dual-Wield</b></p> | | <td><p><b>Ryuko Dual-Wield</b></p> |
| </td> | | </td> |
| <td><p>5AA, 5[B]B, sp.B, j.C, sp.C</p> | | <td><p>5AA, j.A, j.AA, j.AAB, 5BA, 5BAB, 5[B]B, sp.B, j.C (2nd hit), sp.C</p> |
| </td></tr> | | </td></tr> |
| <td><p><b>Sanageyama</b></p> | | <td><p><b>Sanageyama</b></p> |
| </td> | | </td> |
| <td><p>5AA, sp.C</p> | | <td><p>5AAAAA, 5AAA > 4/6A, 5AAA > 2/8A (post Fierce Strike only), 5AAA > 2/8AA, j.A, Fierce Strike, Fierce Strike (2nd)</p> |
| </td></tr> | | </td></tr> |
| <td><p><b>Satsuki</b></p> | | <td><p><b>Satsuki</b></p> |
| </td> | | </td> |
| <td><p>sp.A, 5[B], j.B, j.[B], sp.B, 5C, sp.C</p> | | <td><p>5AA, sp.A, j.B, j.BB, j.BBB, j.BA, j.[B], sp.B, 5C, sp.C</p> |
| </td></tr> | | </td></tr> |
| <td><p><b>Satsuki Dual-Wield</b></p> | | <td><p><b>Satsuki Dual-Wield</b></p> |
| </td> | | </td> |
| <td><p>sp.A, j.B, j.[B], sp.B, sp.C</p> | | <td><p>sp.A, 5BA, d.B, j.B, j.BB, j.BBB, j.BBBB, j.BA, j.[B], sp.B, d.C</p> |
| </td></tr></table> | | </td></tr></table> |
| }} | | }} |
| Line 973: |
Line 985: |
| |description= *Inumuta homes in on the opponent and quickly attacks. | | |description= *Inumuta homes in on the opponent and quickly attacks. |
|
| |
|
| *On hit, can perform Dash attacks afterwards. | | *On hit, can perform d.A, d.B, or d.C afterwards. |
|
| |
|
| *Can also be continued into 4/6A or 2/8A attacks after hit if timed correctly. | | *Can also be continued into 4/6A or 2/8A attacks after hit if timed correctly. |
| Line 1,001: |
Line 1,013: |
| |description= *Inumuta homes in on the opponent and quickly attacks. | | |description= *Inumuta homes in on the opponent and quickly attacks. |
|
| |
|
| *On hit, can perform aerials afterwards. | | *On hit, can perform j.A, j.B, or j.C afterwards. |
|
| |
|
| *Allows you to armor through low priority projectiles after the initial startup. | | *Allows you to armor through low priority projectiles after the initial startup. |
| Line 1,062: |
Line 1,074: |
| |imageSize= 225x200px | | |imageSize= 225x200px |
| |imageSize2= 225x200px | | |imageSize2= 225x200px |
| |imageSize3= 225x200px
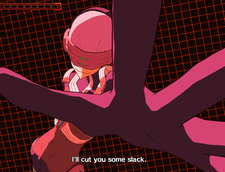
| | |image=KLKIF_Houka_IK.png |
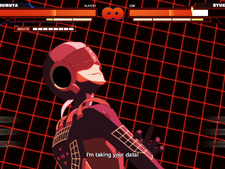
| |image=KLKIF_Inumuta_Fiber_Lost.png | | |image2=KLKIF_Inumuta_Fiber_Lost.png |
| |image2=KLKIF_Inumuta_Fiber_Lost2.png | |
| |image3=KLKIF_Inumuta_Fiber_Lost3.png
| |
| |caption= | | |caption= |
| |name=FIBER LOST SECRET ARTS | | |name=FIBER LOST SECRET ARTS |
| Line 1,082: |
Line 1,092: |
| }} | | }} |
| }} | | }} |
|
| |
| ==Combos==
| |
| '''Infinite-BnBs:'''
| |
|
| |
| Generally it is advised to always go for a BnB that grants you two SP bars - they allow you to enter TOC. state at the end of the combo, and on certain maps, they allow you to perform infinites. These combos grant two meter bars and work as followed:
| |
|
| |
| *4/6AAAB > 2/8AA > j. B > Land > 5ABAA > 4/6A Ender > sp. B (4080)
| |
| This combo can only be continued when you use j. C on the wallsplat. It's the easiest infinite setup and BnB Inumuta has, in exchange for that, it gives however the lowest amount of meter and deals the least amount of damage.
| |
|
| |
| {{#ev:youtube|qEsWVHhtR58}}
| |
|
| |
| *2/8AAAA > j. ABB > Land, Step Forward, Dash > 4/6AAAA > 4/6A Ender > sp. B (4330)
| |
| The third highest damage you can deal with his BnB. This combo deals more damage and ends briefly before the opponent is able to burst. Note that the j. ABB can be incosistent, this is probably due to timing issues or the given map circumstances, Honno Town requires you to perform an additional A when in a corner. But for that, Inu has the following BnB.
| |
| *2/8AAAA > j. ABAB > Land, Step Forward, Dash > 4/6AAAA > 4/6A Ender > sp. B (4620)
| |
| This combo is the most difficult to perform due to the slightly inconsistent j. ABAB. Timing seems to be important. The opponent will be granted 2 SP bars to burst out, but only once you arrived at the ender, making this combo a great burst bait opportunity that will reset your combo. This combo deals the second highest amount of damage possible.
| |
| *5ABAA > 2/8A > j. AAB > Land, Step Forward, Dash > 4/6AAAA > 4/6A Ender > sp. B (4820)
| |
| This combo deals the most damage and is easier to perform than it's fellow 8A combos, however, due to the combo requiring 5AB at the start, it is rather situational. If you can however catch an opponent with it, this is what you want to do.
| |
|
| |
| '''CTRL ALT Delete:'''
| |
|
| |
| A tech invented by DanieD00 and Bones that requires the use of 2 Meter for an sp. C + 1 AP. By hitting an opponent with any C while having 1 AP and frame perfectly (on frame 1) hitting sp. C once the guard break is commenced, the opponent will be stunned for approximately 2,5 seconds. Inumuta is able to either continue his combo with normal attacks or perform the so called CTRL ALT Delete:
| |
|
| |
| CTRL = Guard Break
| |
| ALT = sp. C
| |
| Delete = [B]
| |
|
| |
| By throwing [B] constantly after walking away from the opponent, Inumuta is able to lock them into a combo that will grant, if done nearly perfectly, an autowin, as it is absolutely impossible to burst it. If the combo is not done perfectly, it will reset and the opponent is able to block. This is an amazing way of taking down opponents on large maps - however, it's heavily disliked and should only be used if the situation absolutely requires it. Or if you want to be mean. But don't do that. It's really unfair.
| |
|
| |
| <br>
| |
| '''TOC (Thermal Optical Camo) Routes:'''
| |
| You can start Infinite-BnBs via TOC as well! These work as followed:
| |
|
| |
| Unburstable Infinite-Setups if the opponent has zero meter:
| |
| *TOC. C j. C > Homing > j. ABAB > Land, Step Forward, Dash > 4/6A > sp. B (3410, requires 2 AP)
| |
| *TOC. CAAC > Homing > j. ABAB > Land, Step Forward, Dash > 4/6A > sp. B (4010, requires 4 AP)
| |
| *TOC. AB > Dash > 2/8AAB> Land > 4/6AAAA > 4/6A Ender > sp. B (4650, requires 2 AP)
| |
|
| |
| Unburstable Non-Infinite setups if the opponent has zero meter:
| |
| *TOC. AA > Dash A. j. ABAB > Land, Step Forward, Dash > 2/8AAA > 4/6A Ender > sp. B (5140, requires 2 AP)
| |
| *TOC. ABAC > Homing > j. ABAB > Land, Step Forward, Dash > 4/6AAAA > 4/6A Ender > sp. B (6000, requires 4 AP)
| |
| <br>
| |
|
| |
| Setups specifically against certain characters:
| |
| *DTR: 2/8AAAA > j. A > j. [B] > Land > 2/8AAA > 4/6A Ender > sp. B (5320, only works on DTR)
| |
|
| |
| '''Unscale Loops:'''
| |
|
| |
| In v1.04 onwards the Inumuta infinite is based on unscaling the combo limit value. All of his non TOC guard breaks can subtract a value from the combo limit.
| |
|
| |
| *No Valor: -100 Combo Limit
| |
| *Valor 1: -200 Combo Limit (approximate)
| |
|
| |
| Here are some examples of combos that reset scaling:
| |
|
| |
| *No Valor:
| |
| {{#ev:youtube|G_lXiTvvJZc|}}
| |
| *Valor 1:
| |
| [https://twitter.com/Al_Rikir/status/1200470747942150144?s=20 Valor 1 Combo by Rikir]
| |
|
| |
| '''Infinites:'''
| |
|
| |
| Honno-Town:
| |
| [https://clips.twitch.tv/TemperedAnimatedYakFUNgineer-ehXEi-IrLEHvD0uC Honno-Town Infinite by DanieD00]
| |
|
| |
|
| ==Colors== | | ==Colors== |
| Line 1,155: |
Line 1,102: |
|
| |
|
| == Notable Players== | | == Notable Players== |
| {| class="wikitable" | | {{PlayerList|colorPrefix=KLKIF_Inumuta_Color|size=225x200px|data= |
| !width="95"|Name !! width="85"|Color
| | {{PlayerListEntry |
| !width="125"|Location !! Platform !! Contact !! Status !! Notes !! Example Play
| | |name = 33phy33<br>[https://twitter.com/33phy33 @33phy33] |
| |-
| | |color = 4 |
| | DanieD00 || style="text-align:center;"| [[File:KLKIF Inumuta Color1.jpg|enter|225px]] | | |region = us |
| | DE || PS/Steam/Switch || [https://twitter.com/DanieD000 @DanieD000] || Active || Known to many as the "Hackerman" or final boss of the game. DanieD00 is responsible for Inumuta's most devastating techs such as CTRL ALT Delete, consistently places Top 3 in online tournaments and in general an extremely difficult opponent. Hit him up if you need a teacher for the game. || [https://wiki.gbl.gg/w/KILL_la_KILL_IF/Inumuta Link]
| | |regionNote = PA |
| |-
| | |status = Active |
| | Rikir || style="text-align:center;"| [[File:KLKIF Inumuta Color1.jpg|enter|225px]] | | |notes = '''Plays on PS/Steam/Switch'''<br> 8a of the gods. <br>[https://youtu.be/2Wk3ksU5pK0?t=6553 Example Play] |
| | CA || PS || [https://twitter.com/Al_Rikir @Al_Rikir] || Retired || A very strong yet old school Houka player, discovered his standard infinite BnB along with other tech for Houka, has racked up many wins in offline tournaments such as FrostyFaustings and CEOTaku. || [https://wiki.gbl.gg/w/KILL_la_KILL_IF/Inumuta Link]
| | }} |
| |}
| | {{PlayerListEntry |
| | | |name = Rikir <br>[https://twitter.com/Al_Rikir @Al_Rikir] |
| NOTE: These tables can be subject to change in the future/Links are currently only in testing right now.
| | |color = 1 |
| | | |region = us |
| ==Matchup Information== | | |regionNote = CA |
| | | |status = Retired |
| [[File:Inu-MUChart061921.png|thumb|left|Inumuta's MU Chart, updated 06.19.21]]
| | |notes = '''Plays on PS/Steam'''<br> A very strong yet old school Houka player, discovered his standard infinite BnB along with other tech for Houka, has racked up many wins in offline tournaments such as FrostyFaustings and CEOTaku. <br>[https://youtu.be/aglUJTxnC3k?t=6385 Example Play] |
| | | }} |
| '''Inumuta MU Chart:''' | | {{PlayerListEntry |
| | | |name = Ryno <br>[https://twitter.com/_ryno4ever @_ryno4ever] |
| The following text provides information and strategies on all opponents Inumuta can face. Before I start: I can recommend gaining Valor 1 in all matchups, especially against Mako Mankanshoku, Ira Gamagoori, Dual Wield Ryuko and Nudist Beach. | | |color = 4 |
| | | |region = us |
| '''+2'''
| | |regionNote = |
| | | |status = Retired |
| '''Nui Harime:'''
| | |notes = '''Plays on PS'''<br> The Houka that started it all. <br>[https://youtu.be/uqE8Ku1P6xc?t=2635 Example Play] |
| | | }} |
| Houka Inumuta vs Nui Harime is an MU heavily favoured for Inumuta. As Inumuta, you are able to answer all of Nui Harime's moves. Her B's can be defeated by using d. B when timed correctly. Her A's can be countered with various counter moves, and even though she has the second highest meter gain and is therefore less vulnerable towards your infinites, she cannot properly start combos on you due to your ability to remove her meter. Be careful: if she does hit you, she will likely go to for a small unburstable combo, and her short combos can deal still up to 4k damage which is nearly half of your health bar. You will always have an advantage against her on all maps, infinites are not necessary to defeat her. Both defensive and offensive playstyles work well against her. TOC can effectively render Nui Harime useless against Inumuta, so if you feel like a meanie, get into TOC, obtain the Life lead and you will win automatically since she has no way of approaching you anymore. None of her attacks will hit you, and those that can will be punished or avoided.
| | }} |
| | |
| '''Ragyo Kiryuin:'''
| |
| | |
| Houka Inumuta vs Ragyo Kiryuin is an MU heavily favoured for Inumuta - possibly even better than against Nui Harime. As Inumuta, you are able to answer all of Ragyo Kiryuin's moves. Her B's are defeated with blocking, her C's with sidesteps OR steps forward (because Inu is the only char who can advance to her during her zoning game!) Due to Ragyo's lower meter gain, she cannot burst out of your infinite setups, meaning she is more vulnerable to them than other characters. Ragyo is able to perform an okizeme on you, but you won't let that happen since it requires her to do a wallsplat and that only works by using the B ender which is a large bullet. | |
| | |
| You can burst that bullet if it's about to hit you. It can be punished but it has to be nearly frame perfect, and even if you do get hit, go for the burst after the hit and instantly dash to her.
| |
| | |
| Take that, Director. TOC defeats all of her moves and forces her to attack you by standing still - and that's where your time has come and where you can perform an TOC. C on her which starts a combo and eventually grant you TOC again. I think you get the idea on how to fight her.
| |
| | |
| '''Uzu Sanageyama:'''
| |
| | |
| Now Sanageyama is an MU that works heavily in your favour as well. You need to know when you can attack and when you need to stay back. His j. C Cancels can be very scary, but if he happens to perform them, you can either run away and block briefly to see if he tries to poke you, or you punish him with a B barrage. Your main advantage is not the neutral game in this MU, this is pretty even between you and him - your main advantage is his worst disadvantage, the low meter gain. If you can catch Sanageyama and start an infinite setup, you will be able to defeat him without him being able to burst out. He will never be able to burst. '''Never'''. On Polling/Naturals/Honno/Runway, you can infinite him with the right amount of ressources, on Palace/Grounds you can't, but you don't have to. TOC, once again, is very helpful here and forces him to be very careful. His j. C can be punished by TOC. C - or you just run away, what should he do? He can't catch up with you unless he uses his dash, which you will punish. Last thing: thanks to your excellent meter gain, Sanageyama's combos give you more meter than others, and if you know the timings, you can deny his BnB briefly after he launched you into the air by simply bursting the j. C the moment you'd take the damage. We Inumuta players eat Sanageyama for breakfast.
| |
| | |
| '''Dual Wield Satsuki:'''
| |
| | |
| Once a -1 MU for Inumuta, now an +2 MU for him. Oh, how the mighty have fallen, and DW Satsuki has it the worst in this case. You are only truly vulnerable at the start of the match if DW Satsuki decides to go for her [B] attacks. [B] is her only real means of dealing proper damage to you - and you can defeat that by using Dash B since it will render you invisible. It will also most likely hit her and with that, you can start a combo. Other than that, keep distance between you and her, you are faster than DW Satsuki and if you can get her into a combo, she will fall just as fast as her SB variant. Other than her B and her good 5C (which can be punished by sidestepping, and sometimes your I-frames during 4/6A or 5AA save you too!), she has no real means of getting to you. Be careful though: if she does hit you and she is good, she can kill you in one combo you cannot burst out of most likely. You win the neutral here by default and the interactions, but be aware, one mistake and this might still be your end. Don't do anything stupid - oh, and TOC saves you too. ;)
| |
| | |
| '''Nonon Jakuzure:'''
| |
| | |
| We all like music but Nonon certainly takes it a bit too far, and you as Inumuta player just laugh about it with your electronical theme! Nonon can either zone you out with her sidestep 5B's or she can try to approach you with the sidestep 5A's. They will deal great damage and the B's push opponents away.
| |
| | |
| Haha, but why would you care? Fight fire with fire!
| |
| | |
| Nonon looks old when she, as the zoner, suddenly becomes the zoned one! Your B's may be slower than her B's, but they can track, and one hit on Nonon will remove ALL of her orbs. Your plan is to defeat Nonon by using her own weapons against her, and the cubes you throw out will help you greatly and win the neutral for you, and eventually the MU. Throwing B's to Nonon will force her to run away and sidestep them, and if she does that, you can either continue your barrage to jail her out - if that happens, you can perform a range infinite and even go invisible. If you choose to go into melee combat, dash at her once she is sidestepping and vulnerable or if she blocks, dash at her and do a guard break. Maintaining the neutral by constantly oppressing her is your way of winning this MU, and with 10k health, she doesn't want to be hit by you - your BnB deals 10,1k-10,8k damage. TOC can help you but it's not necessary to defeat her.
| |
| | |
| '''+1'''
| |
| | |
| '''Nudist Beach:'''
| |
| | |
| For most characters, Nudist Beach is an hopelessly boring matchup - but not for Inumuta. You mainly have two strategies to combat the DTR.
| |
| | |
| * Try to punish them when they go in and go for TOC
| |
| * Combat them in the air by using j. [B] at a safe distance
| |
| | |
| For the first strategy: DTR is extremely dangerous and once they hit you, it's most likely you will lose your first health bar entirely if you fight a skilled opponent. Their damage is incredible high and despite your excellent meter gain, you won't be able to burst out, and even if you can, they have several burst safe points, so knowing when to burst is incredibly important and not always easy. However, if you can take a hit on them, you can go for a DTR specific combo written in the combo section and go invisible. And once you are invisible, you have the advantage in neutral. DTR can do absolutely nothing to harm you - all they can do is dash at you (which you can just outrun, don't attack them) or they try to mine the battlefield with bombs. For the latter, use a TOC. C starter that will go into a air string combo - it will deal counter hit damage and you will go invisible. Invisibility is key against DTR, so always try to obtain it and don't do anything stupid. Once you are invisible, you win the battle - time them out if you want.
| |
| | |
| For the second strategy: this is something you can somehow apply into the first one too, but it's not necessary. DTR will most likely fight you in the air and their gun covers a large part of the area, but they will never have a distance as large as your j. [B]. On large maps, you can gain the advantage by simply running away and throwing j. [B] constantly at them. Always do a sidestep in the air to avoid their hits, a step back will let them hit you and you don't want that to happen. With this, you can always poke some damage out of them and get some meter.
| |
| | |
| DTR might seem like a difficult matchup but it is not - you need a ton of patience and one good hit, and you win the match. And like I said: once invisible, they are done. Either via time out, or by your TOC. moves.
| |
| | |
| '''SB Satsuki'''
| |
| | |
| '''SB Ryuko'''
| |
| | |
| '''Mako Mankanshoku'''
| |
| | |
| '''0'''
| |
| | |
| '''Dual Wield Ryuko:'''
| |
| | |
| Probably Dual Wield Ryuko's worst Matchup and a possible +1, but I kept it on 0 for now because of one reason: her damage.
| |
| | |
| You can answer absolutely everything she does and even her Dash B. Her Dash B itself needs to be blocked, the follow ups however can be punished or avoided by various moves - Dash A, 4/6A (yes), sp. A or sp. C. There are also points during her combo where you can burst out easily and some points that might seem dangerous to burst can actually be bursted and you can punish her from there on. I don't know why but it works, her dash B inside a combo for example can be bursted the moment she hits you from the looks of it - it definitely works, trust me.
| |
| | |
| Other than that, knowing when to attack and defend yourself is important. Don't spam cubes - throw one or two maybe to force her to respect them a bit but don't do them too much, she will be able to punish you. If you get a hit on her, she can fall just as fast as the rest of the cast since her meter gain is just like most other people - mediocre. When in doubt, go into TOC and wait for an reaction. DW Ryuko cannot properly punish you, she can go for a Dash B to save herself since it's invisible but if she does that and you have the life lead... why go in? Her other moves can be punished with TOC. A, B or C, whatever you need at the moment. The matchup works well - just keep in mind she can and will destroy you if you let her, she deals high damage in short time, especially when she has meter, so make use of that sp. B you got!
| |
| | |
| '''-2'''
| |
| | |
| '''Ira Gamagoori:'''
| |
| | |
| You really want to do this to you? I mean, try your luck! On a more serious note though: Gamagoori has 15k health, tons of armor, a large hitbox almost comparable to DTRs, his damage is rather high and he has a lot of burst safe points, meaning you'll have to take damage on certain points, and that damage is not to be underestimated.
| |
| | |
| You can fight Gamagoori with the following strategies:
| |
| | |
| * Retreat and spam range attacks to deal small amounts of damage
| |
| * Go into close combat and spam 8AAA in the attempt of catching him outside his regalia
| |
| * Go for j. C's that will deal guard break damage - with 1 AP and two meter you can go invisible
| |
| | |
| TOC. won't help you much here. Since he doesn't have any real range attacks, all of his attacks will hit you anyway. TOC. C might sound like a reasonable idea but since he dodges every time he jumps with the shackle regalia, you won't hit him. Choose for yourself what works best - everything will fail at one point. Yeah, all of this doesn't sound too optimistic but really, Gamagoori is Inumuta's hard counter and you will feel that. Valor 1 can and will help you so if you do happen to catch him for some reason, try to get it, and if you then can get another hit on him, he will fall just like the rest... but try to get that first. Good luck. You'll need it.
| |
|
| |
|
| ==External Links== | | ==External Links== |
