Ys vs. Sora no Kiseki: Alternative Saga/Geis: Difference between revisions
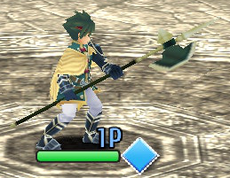
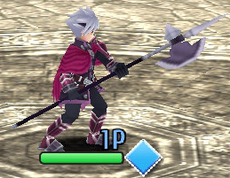
(Created page with "{{QuotationBox | margin = left | fontsize=0.8 | A mercenary who wields a black pole axe, utilizes Iskan sealing arts,<br/> and travels with three fairies: Sera, Jue and Xisa. He how focuses on<br/> his mercenary work, but he is still struggling to come to terms<br/> regarding the brother he lost on the Canaan Islands. }} {| class="wikitable" style="float:right; margin-left: 10px;" |- ! align="center" colspan="2" | Geis |- | align="center" colspan="2" |File:YvK_Geis_Pr...") |
|||
| (52 intermediate revisions by the same user not shown) | |||
| Line 12: | Line 12: | ||
| align="center" colspan="2" |[[File:YvK_Geis_Profile.png|center|frameless]] | | align="center" colspan="2" |[[File:YvK_Geis_Profile.png|center|frameless]] | ||
|- | |- | ||
| ''' | | '''Playstyle''' || All-rounder<br>Defensive | ||
|- | |- | ||
| '''Difficulty''' || | | '''Preferred Range''' || Close<br>Mid | ||
|- | |||
| '''Tankiness Rating''' || Above average (0.96%) | |||
|- | |||
| '''Learning Difficulty''' || Easy | |||
|- | |- | ||
! align="center" colspan="2" | Stats | ! align="center" colspan="2" | Stats | ||
| Line 38: | Line 42: | ||
{{TOClimit|3}} | {{TOClimit|3}} | ||
== Introduction == | == Introduction == | ||
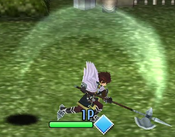
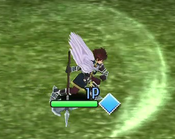
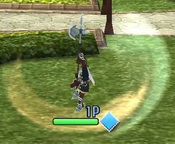
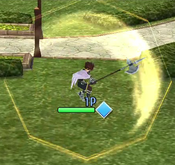
Geis is a well-rounded character with an emphasis on defensive play. Due to his slow movement speed, Geis relies on letting the opponent come to him in order to be effective. Thankfully for him, his pokes and anti-airs lets him easily punish reckless approaches. Paradoxically, Geis performs best once he gets to be on the offensive, thanks to his uniquely good okizeme. After a combo, he can use '''Antlion''' and force the opponent to deplete some of their stamina. This is especially effective if they choose to block, as Geis can easily stun them and potentially loop the situation. Despite that, Geis remains a great character on defense, thanks to his lunging reversal '''Wolf Fang'''. However, Geis' greatest tool is by far his EXTRA Skill, '''Fairy Annihilation'''. It's one of the best neutral skips in the entire game, due to creating a barrier of hitboxes around Geis, letting him win neutral for free. If it lands, he can start his okizeme game with Antlion and eventually snowball his way to victory. All of this makes Geis one of the best defensive characters in the game, although he still has some drawbacks. While he excels at playing a defensive neutral, he immediately starts to struggle a lot more once he's forced to chase his opponents, due to his slow movement speed and a lack of safe approach option. His '''Charge Attack''' is also quite poor due to its slow startup, short-ish range and low SP gain on hit. This makes generating SP quite hard for him during neutral. | |||
Geis is recommended for players who like no-nonsense characters. He is also the best fit for players who enjoy looping okizeme.<br> | |||
'''Similar to:''' | |||
{{ProConTable | {{ProConTable | ||
|intro='''Geis''' is a | |intro='''Geis''' is a well-rounded character with an emphasis on defensive play, while still keeping a good offense | ||
|pros= | |pros= | ||
* | * '''Well-Rounded:''' Geis' toolkit is very versatile and can deal with most situations. | ||
* '''Good Neutral:''' Geis has access to a lot of good pokes and anti-airs that lets him catch most approaches in neutral. | |||
* '''Looping Offense:''' Geis is surprisingly good in offense once he gets to deploy Antlion. | |||
* '''Outstanding X-Factor:''' Geis has one of the best comeback potentials in the game, thanks to his amazing EXTRA Skill. He is also one of the 3 characters with the ability to perform a Petrify glitch. | |||
|cons= | |cons= | ||
* | * '''Poor SP Gain:''' Geis has a hard time landing his Charge attack outside of combos. On top of that, it doesn't give that much SP on hit. | ||
* '''Slow Movement:''' Geis' movement stats are quite low, making him struggle if he ever finds himself forced to chase his opponents down. | |||
}} | }} | ||
''All damage values below were tested on Estelle (841 DEF). No stats-altering accessory was equipped. Also the values are averaged (see System page)'' | ''All damage values below were tested on Estelle (841 DEF). No stats-altering accessory was equipped. Also the values are averaged (see System page)'' | ||
| Line 68: | Line 75: | ||
|caption3=C | |caption3=C | ||
|caption4=D | |caption4=D | ||
|name=ABCD | |name=Ground Normal Link | ||
|input=ABCD | |||
|data= | |data= | ||
{{AttackData-YvK | {{AttackData-YvK | ||
| Line 81: | Line 89: | ||
|version=B | |version=B | ||
|damage=106 | |damage=106 | ||
|impact=5 | |impact=10+5 | ||
|spCost= | |spCost= | ||
|properties= | |properties= | ||
| Line 89: | Line 97: | ||
|version=C | |version=C | ||
|damage=106 | |damage=106 | ||
|impact= | |impact=21+4 | ||
|spCost= | |spCost= | ||
|properties= | |properties= | ||
| Line 97: | Line 105: | ||
|version=D | |version=D | ||
|damage=106 | |damage=106 | ||
|impact=6 | |impact=30+6 | ||
|spCost= | |spCost= | ||
|properties= | |properties= | ||
|description= | |description= | ||
{{#invoke:FrameChart-PKMNCC|drawFrameData | |||
|title='''A:''' | |||
|startup=4 | |||
|active=5 | |||
|recovery=8 | |||
|frcStart=10 | |||
|frcEnd=16 | |||
}} | |||
{{#invoke:FrameChart-PKMNCC|drawFrameData | |||
|title='''B:''' | |||
|startup=5 | |||
|active=6 | |||
|recovery=7 | |||
|frcStart=13 | |||
|frcEnd=17 | |||
}} | |||
{{#invoke:FrameChart-PKMNCC|drawFrameData | |||
|title='''C:''' | |||
|startup=4 | |||
|active=7 | |||
|recovery=9 | |||
|frcStart=11 | |||
|frcEnd=19 | |||
}} | |||
{{#invoke:FrameChart-PKMNCC|drawFrameData | |||
|title='''D:''' | |||
|startup=6 | |||
|active=7 | |||
|recovery=12 | |||
}} | |||
<hr> | |||
Somewhat average normal link. While it doesn't combo into itself, it still works great as a poke due to the enormous pushback on hit. However, said pushback is inconsistent since it also sometimes sends the opponent nowhere. | |||
}} | }} | ||
}} | }} | ||
| Line 112: | Line 151: | ||
|data= | |data= | ||
{{AttackData-YvK | {{AttackData-YvK | ||
|version=Ground | |||
|subtitle=[A] | |||
|damage=138 | |damage=138 | ||
|impact=10 | |impact=10 | ||
|spCost= | |spCost= | ||
|properties= | |properties=Soft Armor | ||
}} | |||
{{AttackData-YvK | |||
|header=no | |||
|version=Air | |||
|subtitle=j.[A] | |||
|damage=138 | |||
|impact=9 | |||
|spCost= | |||
|properties=Soft Armor | |||
}} | |||
{{AttackData-YvK | |||
|header=no | |||
|version=Dash | |||
|subtitle=d.[A] | |||
|damage=138 | |||
|impact=8 | |||
|spCost= | |||
|properties=Soft Armor | |||
|description= | |description= | ||
Geis | {{#invoke:FrameChart-PKMNCC|drawFrameData | ||
|title='''Ground:''' | |||
|startup=10 | |||
|active=8 | |||
|recovery=12 | |||
|frcStart=16 | |||
|frcEnd=29 | |||
}} | |||
{{#invoke:FrameChart-PKMNCC|drawFrameData | |||
|title='''Air:''' | |||
|startup=9 | |||
|active=8 | |||
|recovery=9 | |||
|specialRecovery=3 | |||
|frcStart=20 | |||
|frcEnd=28 | |||
}} | |||
{{#invoke:FrameChart-PKMNCC|drawFrameData | |||
|title='''Dash:''' | |||
|startup=8 | |||
|active=6 | |||
|recovery=7 | |||
|specialRecovery=2 | |||
|frcStart=18 | |||
|frcEnd=20 | |||
}} | |||
<hr> | |||
Not a great Charge Attack. Despite what the animation may imply, its hitbox is actually surprisingly thin, and will have trouble hitting opponents, especially at close range. That said, it remains an important move for Geis, due to its high SP gain on hit. It also works as a combo starter since, unlike everyone else, the air version will cancel into j.A instead of the character's Falling Attack. | |||
* Gives 23 SP on contact | * Gives 23 SP on contact | ||
}} | }} | ||
| Line 128: | Line 214: | ||
|caption=j.A | |caption=j.A | ||
|caption2=j.B | |caption2=j.B | ||
|name=j. | |name=Air Normal Link | ||
|input=j.AB | |||
|data= | |data= | ||
{{AttackData-YvK | {{AttackData-YvK | ||
| Line 141: | Line 228: | ||
|version=j.B | |version=j.B | ||
|damage=106 | |damage=106 | ||
|impact=5 | |impact=14+5 | ||
|spCost= | |spCost= | ||
|properties= | |properties= | ||
|description= | |description= | ||
{{#invoke:FrameChart-PKMNCC|drawFrameData | |||
|title='''j.A:''' | |||
|startup=5 | |||
|active=6 | |||
|recovery=6 | |||
|frcStart=15 | |||
|frcEnd=16 | |||
}} | |||
{{#invoke:FrameChart-PKMNCC|drawFrameData | |||
|title='''j.B:''' | |||
|startup=5 | |||
|active=12 | |||
|recovery=9 | |||
|frcStart=17 | |||
|frcEnd=25 | |||
}} | |||
<hr> | |||
Key combo moves. On top of connecting into each other pretty well, Geis can easily combo into j.A via his regular pokes. Its great range also makes it useful in neutral as a quick "anti-air", as well as a surprise option at range. | |||
}} | }} | ||
}} | }} | ||
| Line 160: | Line 264: | ||
|properties=Projectile | |properties=Projectile | ||
|description= | |description= | ||
A very unique Falling Attack that sends a projectile straight down. Once it touches the ground, it will stay around until an opponent steps on it (in which case they'll get launched) or after | {{#invoke:FrameChart-PKMNCC|drawFrameData | ||
* | |startup=6 | ||
|isProjectile=true | |||
|recovery=11 | |||
|frcStart=14 | |||
|frcEnd=16 | |||
}} | |||
<hr> | |||
A very unique Falling Attack that sends a projectile straight down. Once it touches the ground, it will stay around until an opponent steps on it (in which case they'll get launched) or after 3 seconds passes. | |||
* Frame data obtained while as low to the ground as possible | |||
}} | }} | ||
}} | }} | ||
| Line 169: | Line 281: | ||
|image=YvK_Geis_Rising.png | |image=YvK_Geis_Rising.png | ||
|name=Rising Attack | |name=Rising Attack | ||
|input=Attack while dodging | |||
|data= | |data= | ||
{{AttackData-YvK | {{AttackData-YvK | ||
|damage=106 | |damage=106 | ||
|impact= | |impact=8 | ||
|spCost=1 AP | |spCost=1 AP | ||
|properties= | |properties=Hard Armor 1-10 | ||
|description= | |description= | ||
"Universal" Rising Attack. | {{#invoke:FrameChart-PKMNCC|drawFrameData | ||
|startup=8 | |||
|active=8 | |||
|recovery=10 | |||
}} | |||
<hr> | |||
"Universal" Rising Attack. Basic, armored launcher that can be jump cancelled in order to start or continue a combo. Depending on the character, it can also be used as combo filler. | |||
}} | }} | ||
}} | }} | ||
| Line 185: | Line 304: | ||
{{MoveData | {{MoveData | ||
|image=YvK_Geis_S1.png | |image=YvK_Geis_S1.png | ||
|caption=Yes, it did hit | |||
|name=Reaper | |name=Reaper | ||
|input=S1 | |input=S1 | ||
| Line 191: | Line 311: | ||
|damage=280 | |damage=280 | ||
|impact=4 | |impact=4 | ||
|spCost=10 | |spCost=<abbr title="Base, Skill Earrings I to IV">10 / 9 / 9 / 8 / 8</abbr> | ||
|properties=Armor | |properties=Soft Armor | ||
|cooldown=31 | |||
|description= | |description= | ||
{{#invoke:FrameChart-PKMNCC|drawFrameData | |||
|title='''Ground:''' | |||
|startup=4 | |||
|active=16 | |||
|recovery=2 | |||
|specialRecovery=10 | |||
|frcStart=19 | |||
|frcEnd=31 | |||
}} | |||
{{#invoke:FrameChart-PKMNCC|drawFrameData | |||
|title='''Air:''' | |||
|startup=4 | |||
|active=16 | |||
|recovery=4 | |||
}} | |||
<hr> | |||
A simple forward-advancing sweep that knocks down on hit. Excellent defensive tool in neutral thanks to its quick startup and comically long active frames. Geis can also walk cancel it in order to make it almost impossible to punish. | |||
}} | }} | ||
}} | }} | ||
{{MoveData | {{MoveData | ||
|image= | |image=YvK_Geis_S2_Windup.png | ||
|caption=<small>Windup</small> | |||
|image2=YvK_Geis_S2_Shockwave.png | |||
|caption2=<small>Shockwave</small><br>More like Health Splitter | |||
|name=Helm Splitter | |name=Helm Splitter | ||
|input=S2 | |input=S2 | ||
|data= | |data= | ||
{{AttackData-YvK | {{AttackData-YvK | ||
|damage=70 | |version=Windup | ||
|damage=70 | |||
|impact=5 | |impact=5 | ||
|spCost=12 | |spCost=<abbr title="Base, Skill Earrings I to IV">12 / 11 / 11 / 10 / 9</abbr> | ||
|properties= | |properties=Soft Armor | ||
|cooldown=31 | |||
}} | |||
{{AttackData-YvK | |||
|header=no | |||
|version=Shockwave | |||
|damage=100 | |||
|impact=18 | |||
|spCost= | |||
|properties=Soft Armor, Stagger | |||
|cooldown=31 | |||
}} | |||
{{AttackData-YvK | |||
|header=no | |||
|version=Projectile | |||
|damage=80x2 | |||
|impact=19 | |||
|spCost= | |||
|properties=Soft Armor, Projectile | |||
|cooldown=31 | |||
|description= | |description= | ||
{{#invoke:FrameChart-PKMNCC|drawFrameData | |||
|title='''Strike:''' | |||
|startup=5 | |||
|active=9 | |||
|inactive2=1 | |||
|active3=4 | |||
|recovery=6 | |||
|specialRecovery=7 | |||
|total=31 | |||
|frcStart=23 | |||
|frcEnd=31 | |||
}} | |||
{{#invoke:FrameChart-PKMNCC|drawFrameData | |||
|title='''Projectile:''' | |||
|startup=5 | |||
|active=0 | |||
|inactive2=12 | |||
|active3=1 | |||
|recovery=7 | |||
|specialRecovery=7 | |||
|frcStart=23 | |||
|frcEnd=31 | |||
}} | |||
{{#invoke:FrameChart-PKMNCC|drawFrameData | |||
|title='''Shockwave:''' | |||
|startup=5 | |||
|active=0 | |||
|inactive2=13 | |||
|active3=1 | |||
|recovery=5 | |||
|specialRecovery=8 | |||
|frcStart=23 | |||
|frcEnd=31 | |||
}} | |||
<hr> | |||
Mostly useful as combo filler, although it also has its uses in neutral. While it can technically loop into itself, due to its stagger properties, this is very inconsistent since the projectile will knock opponents away on hit, allowing them to escape the loop. However, those same stagger properties allows Geis to perform Petrify glitches, for devastating damage. This technique is banned in tournament play, but it's still good to know for single player stuff. | |||
* Air version is only active upon landing | * Air version is only active upon landing | ||
* Frame data assumes point blank | * Frame data assumes point blank | ||
| Line 215: | Line 411: | ||
{{MoveData | {{MoveData | ||
|image= | |image=YvK_Geis_S3_Ground.png | ||
|image2=YvK_Geis_S3_Air.png | |||
|caption=Ground version | |||
|caption2=Air version | |||
|name=Wolf Fang | |name=Wolf Fang | ||
|input=S3 | |input=S3 | ||
| Line 222: | Line 421: | ||
|damage=715 | |damage=715 | ||
|impact=5 | |impact=5 | ||
|spCost=25 | |spCost=<abbr title="Base, Skill Earrings I to IV">25 / 23 / 22 / 20 / 19</abbr> | ||
|properties= | |properties=Hard Armor 1-4, Soft Armor | ||
|cooldown=33 | |||
|description= | |description= | ||
* | {{#invoke:FrameChart-PKMNCC|drawFrameData | ||
|title='''Ground:''' | |||
|startup=5 | |||
|active=15 | |||
|recovery=5 | |||
|specialRecovery=11 | |||
|frcStart=25 | |||
|frcEnd=35 | |||
}} | |||
{{#invoke:FrameChart-PKMNCC|drawFrameData | |||
|title='''Air:''' | |||
|startup=5 | |||
|active=15 | |||
|recovery=7 | |||
}} | |||
<hr> | |||
Very good reversal that puts Geis far away from his opponents, letting him reset neutral on hit or whiff. Also makes for a good combo ender. | |||
* Air version makes him travel upward | |||
}} | }} | ||
}} | }} | ||
| Line 231: | Line 448: | ||
{{MoveData | {{MoveData | ||
|image=YvK_Geis_S4.png | |image=YvK_Geis_S4.png | ||
|caption=Cast | |||
|image2=YvK_Geis_S4_Vortex.png | |||
|caption2=Lingering vortex | |||
|name=Sorcery: Antlion | |name=Sorcery: Antlion | ||
|input=S4 | |input=S4 | ||
| Line 236: | Line 456: | ||
{{AttackData-YvK | {{AttackData-YvK | ||
|damage=62x9 | |damage=62x9 | ||
|impact= | |impact=18 | ||
|spCost=20 | |spCost=<abbr title="Base, Skill Earrings I to IV">20 / 18 / 17 / 16 / 15</abbr> | ||
|properties=Projectile | |properties=Hard Armor 1-4, Soft Armor, Projectile | ||
|cooldown=84 | |||
|description= | |description= | ||
* | {{#invoke:FrameChart-PKMNCC|drawFrameData | ||
|startup=18 | |||
|isProjectile=true | |||
|recovery=14 | |||
}} | |||
* Vortex automatically appears on frame 22 | |||
<hr> | |||
Generally referred to as "Antlion". | |||
The backbone of Geis' offense. While slow to activate, it stays active for a very long time, allowing him to easily land otherwise hard to land moves, such as his Charge attack. This also makes it terrifying in pressure, as it can result in lots of guard damage. However, its strongest point is its sheer amount of hits. This makes it very easy for Geis to inflict status effects, such as Petrify for example. | |||
* Can't be walk cancelled since Geis recovers in the air | |||
}} | }} | ||
}} | }} | ||
| Line 252: | Line 483: | ||
|damage=370, 290, 550 | |damage=370, 290, 550 | ||
|impact=8+5 | |impact=8+5 | ||
|spCost=40 | |spCost=<abbr title="Base, Skill Earrings I to IV">40 / 36 / 34 / 32 / 30</abbr> | ||
|properties= | |properties=Hard Armor | ||
|cooldown=60 | |||
|description= | |description= | ||
{{#invoke:FrameChart-PKMNCC|drawFrameData | |||
|title='''Ground:''' | |||
|startup=5 | |||
|active=7 | |||
|inactive2=4 | |||
|active3=25 | |||
|recovery=5 | |||
}} | |||
{{#invoke:FrameChart-PKMNCC|drawFrameData | |||
|title='''Air:''' | |||
|startup=5 | |||
|active=7 | |||
|inactive2=4 | |||
|active3=25 | |||
|recovery=6 | |||
}} | |||
<hr> | |||
Expensive combo ender that does more damage than Wolf Fang. It also makes for a huge anti-air. | |||
* 8 frames of freeze upon use. The opponent can still cast Skills or use their assist during the freeze | * 8 frames of freeze upon use. The opponent can still cast Skills or use their assist during the freeze | ||
* Can't be walk cancelled since Geis recovers in the air | |||
}} | }} | ||
}} | }} | ||
{{MoveData | {{MoveData | ||
|image= | |image=YvK_Geis_S6_1.png | ||
|image2=YvK_Geis_S6_2.png | |||
|image3=YvK_Geis_S6_3.png | |||
|image4=YvK_Geis_S6_4.png | |||
|image5=YvK_Geis_S6_5.png | |||
|image6=YvK_Geis_S6_6.png | |||
|name=Axe Arts: Ravage | |name=Axe Arts: Ravage | ||
|input=S6 | |input=S6 | ||
| Line 266: | Line 522: | ||
{{AttackData-YvK | {{AttackData-YvK | ||
|damage=80x2, 120x5, 175x2, 300 | |damage=80x2, 120x5, 175x2, 300 | ||
|impact=8+ | |impact=8+2 | ||
|spCost=45 | |spCost=<abbr title="Base, Skill Earrings I to IV">45 / 41 / 39 / 36 / 34 | ||
|properties= | |properties=Hard Armor | ||
|cooldown=88 | |||
|description= | |description= | ||
{{#invoke:FrameChart-PKMNCC|drawFrameData | |||
|title='''Ground:''' | |||
|startup=2 | |||
|active=6 | |||
|inactive2=2 | |||
|active3=7 | |||
|inactive4=5 | |||
|active5=11 | |||
|inactive6=1 | |||
|active7=5 | |||
|inactive8=7 | |||
|active9=8 | |||
|recovery=22 | |||
}} | |||
{{#invoke:FrameChart-PKMNCC|drawFrameData | |||
|title='''Air:''' | |||
|startup=2 | |||
|active=52 | |||
|recovery=11 | |||
}} | |||
<hr> | |||
Pretty standard "barrage" Skill. Also works as a reversal due to its fast startup and long animation. | |||
* 8 frames of freeze upon use. The opponent can still cast Skills or use their assist during the freeze | * 8 frames of freeze upon use. The opponent can still cast Skills or use their assist during the freeze | ||
}} | }} | ||
| Line 276: | Line 555: | ||
{{MoveData | {{MoveData | ||
|image= | |image=YvK_Geis_EXTRA_1.png | ||
|caption=<small>First hit</small> | |||
|image2=YvK_Geis_EXTRA_2.png | |||
|caption2=<small>Lingering hits</small><br>When in doubt, press this | |||
|name=Fairy Annihilation | |name=Fairy Annihilation | ||
|input=EXTRA Skill | |input=EXTRA Skill | ||
| Line 286: | Line 568: | ||
|properties=Invincible | |properties=Invincible | ||
|description= | |description= | ||
{{#invoke:FrameChart-PKMNCC|drawFrameData | |||
|startup=7 | |||
|isProjectile=true | |||
|recovery=63 | |||
|total=69 | |||
}} | |||
<hr> | |||
The best EXTRA Skill in the game, thanks to its incredible versatility. It creates a huge hitbox around Geis that moves alongside him, letting him win neutral for free. Using it in combos is also an excellent idea, as it'll greatly increase his damage output. Similarly to Antlion, it can be used offensively to break the opponent's guard. As a bonus, its sheer number of hits makes it excellent at applying status effects, particularly Petrify. In most situations, it's usually an excellent idea to throw out an EXTRA Skill. However, its extremely short total duration makes it one of the worst EXTRA Skills in the game during EX trades (when two characters, casts their EXTRA Skill at roughly the same time). | |||
* The opponent can still cast Skills or use their assist during the freeze | * The opponent can still cast Skills or use their assist during the freeze | ||
}} | }} | ||
| Line 292: | Line 582: | ||
== Builds == | == Builds == | ||
'''Note:''' These builds are mostly here in order to guide new players into how to exploit Geis' potential to its fullest. Don't be afraid to experiment! | '''Note:''' These builds are mostly here in order to guide new players into how to exploit Geis's potential to its fullest. Don't be afraid to experiment! | ||
=== Recommended accessories === | === Recommended accessories === | ||
* Good accessories for Geis goes here. Explain why this build is good for him | * Good accessories for Geis goes here. Explain why this build is good for him | ||
| Line 303: | Line 593: | ||
=== Recommended Support === | === Recommended Support === | ||
* | * '''Jurio & Chris''' - Geis can easily confirm into Antlion, allowing him to easily stun his opponent from a BnB | ||
* '''Campanella''' - Gives Geis a chance of legally inflicting Petrify | |||
* '''Feena & Reah''' - Can't go wrong with a free EXTRA Skill, especially Geis's | |||
== General Strategy == | == General Strategy == | ||
=== Neutral === | === Neutral === | ||
* Explain how Geis | * Explain how Geis approaches neutral, ideally at close, mid and long range | ||
=== | === Offense === | ||
* Explain how Geis' | * Explain how Geis's offense works | ||
=== Defense === | === Defense === | ||
* | * Explain how Geis can defend himself from incoming attacks. Don't forget to mention how he can recover once he's on the back foot | ||
=== General Counterplay === | === General Counterplay === | ||
| Line 321: | Line 613: | ||
== Combos == | == Combos == | ||
=== Combo Terminology Table === | |||
{| class="wikitable sortable" border="1" style="min-width: 300px; text-align: left" | |||
|- | |||
! style="width: 3em;" | Symbol!! | Meaning | |||
|- | |||
| > || Cancel from the previous move to the following move. | |||
|- | |||
| , || Link from the previous move to the following move. | |||
|- | |||
| dl./delay || Delay before using the following move. | |||
|- | |||
| X(w)/whiff || Whiff the following move (do not hit). | |||
|- | |||
| jc || Jump Cancel. | |||
|- | |||
| wc || Walk Cancel. | |||
|- | |||
| d./dash || Dash air attacks. Done by pressing the dodge button while standing still. | |||
|- | |||
| (X) || Optional input. | |||
|- | |||
| {X}*N || Repeat (sequence) N number of times. | |||
|} | |||
=== Solo === | === Solo === | ||
* '''Combo''' (damage) | * '''A > d.AB > S2, S4, [A] > S1/S3''' (1.3k/1.6k damage) | ||
: | :Ground BnB. Any Skill can be used as combo finishers, but Reaper and Wolf Fang are the most SP-efficient ones. | ||
* '''A > d.AB > S2, S4, [A] > EX, [A] > S4, [A] > S1.S3''' (3.7k/4k damage) | |||
:Sample EX combo. | |||
=== With accessories === | |||
'''''Note:''' Geis + Medusa Blade is a banned combination in tournament play, due to Antlion being an outstanding tool for proccing status effects.'' | |||
* Combo (damage) | |||
:''Specify which accessories are required for this combo to work'' | |||
:Combo description | |||
=== With assists === | |||
* '''A > {S2 > S4, [A]}*2 > S3 > S6''' (1.9k/2.4k damage) | |||
:''Scherazard'' | |||
:Only works with Schera because S2 normally doesn't fully connect on ground hit. Requires almost full SP | |||
=== With | === With accessories and assists === | ||
* '' | * Combo (damage) | ||
:Combo | :''Specify which equippable items are required for this combo to work'' | ||
:Combo description | |||
| Line 334: | Line 665: | ||
{{ColorGallery/Color|1| text= Color 1<hr>{{Small|Default color}}}} | {{ColorGallery/Color|1| text= Color 1<hr>{{Small|Default color}}}} | ||
{{ColorGallery/Color|2| text= Color 2<hr>{{Small|Reference (if there's one)}}}} | {{ColorGallery/Color|2| text= Color 2<hr>{{Small|Reference (if there's one)}}}} | ||
{{ColorGallery/Color|3| text= Color 3<hr>{{Small| | {{ColorGallery/Color|3| text= Color 3<hr>{{Small|Elk (Ys SEVEN)}}}} | ||
{{ColorGallery/Color|4| text= Color 4<hr>{{Small|Reference (if there's one)}}}} | {{ColorGallery/Color|4| text= Color 4<hr>{{Small|Reference (if there's one)}}}} | ||
}} | }} | ||
Latest revision as of 02:31, 8 February 2024
| “ |
A mercenary who wields a black pole axe, utilizes Iskan sealing arts, |
” |
| Geis | |
|---|---|
| Playstyle | All-rounder Defensive |
| Preferred Range | Close Mid |
| Tankiness Rating | Above average (0.96%) |
| Learning Difficulty | Easy |
| Stats | |
| HP | 11423 |
| AP | 24 |
| STR | 972 |
| DEF | 891 |
| BRK | 587 |
| DUR | 2824 |
| SPD | 89 |
| AGL | 91 |
| SP Gain | 209 |
Introduction
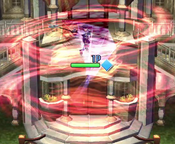
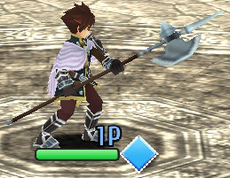
Geis is a well-rounded character with an emphasis on defensive play. Due to his slow movement speed, Geis relies on letting the opponent come to him in order to be effective. Thankfully for him, his pokes and anti-airs lets him easily punish reckless approaches. Paradoxically, Geis performs best once he gets to be on the offensive, thanks to his uniquely good okizeme. After a combo, he can use Antlion and force the opponent to deplete some of their stamina. This is especially effective if they choose to block, as Geis can easily stun them and potentially loop the situation. Despite that, Geis remains a great character on defense, thanks to his lunging reversal Wolf Fang. However, Geis' greatest tool is by far his EXTRA Skill, Fairy Annihilation. It's one of the best neutral skips in the entire game, due to creating a barrier of hitboxes around Geis, letting him win neutral for free. If it lands, he can start his okizeme game with Antlion and eventually snowball his way to victory. All of this makes Geis one of the best defensive characters in the game, although he still has some drawbacks. While he excels at playing a defensive neutral, he immediately starts to struggle a lot more once he's forced to chase his opponents, due to his slow movement speed and a lack of safe approach option. His Charge Attack is also quite poor due to its slow startup, short-ish range and low SP gain on hit. This makes generating SP quite hard for him during neutral.
Geis is recommended for players who like no-nonsense characters. He is also the best fit for players who enjoy looping okizeme.
Similar to:
| Geis is a well-rounded character with an emphasis on defensive play, while still keeping a good offense |
| Strengths | Weaknesses |
|---|---|
|
|
All damage values below were tested on Estelle (841 DEF). No stats-altering accessory was equipped. Also the values are averaged (see System page)
Movelist
Normal attacks
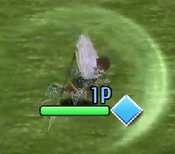
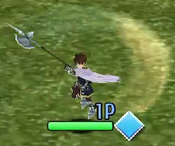
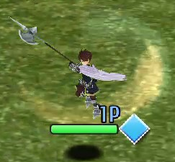
Ground Normal Link ABCD A A B B C C D D
|
|---|
Charge Attack
[A] |
|---|
Air Normal Link j.AB j.A j.A j.B j.B
|
|---|
Falling Attack
j.C |
|---|
Rising Attack
Attack while dodging |
|---|
Skills
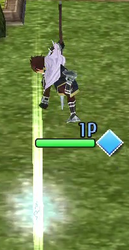
Reaper S1 Yes, it did hit Yes, it did hit
|
|---|
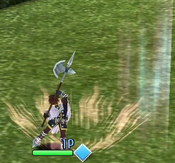
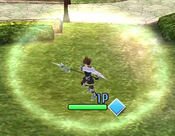
Helm Splitter S2 Windup Windup Shockwave More like Health Splitter Shockwave
More like Health Splitter |
|---|
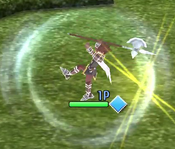
Wolf Fang S3 Ground version Ground version Air version Air version
|
|---|
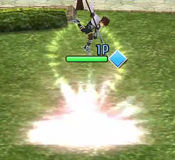
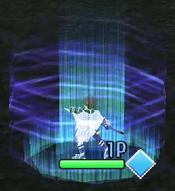
Sorcery: Antlion S4 Cast Cast Lingering vortex Lingering vortex
|
|---|
Spiral Slash
S5 |
|---|
Axe Arts: Ravage
S6 |
|---|
Fairy Annihilation EXTRA Skill First hit First hit Lingering hits When in doubt, press this Lingering hits
When in doubt, press this |
|---|
Builds
Note: These builds are mostly here in order to guide new players into how to exploit Geis's potential to its fullest. Don't be afraid to experiment!
Recommended accessories
- Good accessories for Geis goes here. Explain why this build is good for him
Recommended Skills
- S1
- S2
- S3
- S4
Recommended Support
- Jurio & Chris - Geis can easily confirm into Antlion, allowing him to easily stun his opponent from a BnB
- Campanella - Gives Geis a chance of legally inflicting Petrify
- Feena & Reah - Can't go wrong with a free EXTRA Skill, especially Geis's
General Strategy
Neutral
- Explain how Geis approaches neutral, ideally at close, mid and long range
Offense
- Explain how Geis's offense works
Defense
- Explain how Geis can defend himself from incoming attacks. Don't forget to mention how he can recover once he's on the back foot
General Counterplay
- List some general Geis counterplay. This includes, but isn't limited to, knowledge checks or gimmicks
Combos
Combo Terminology Table
| Symbol | Meaning |
|---|---|
| > | Cancel from the previous move to the following move. |
| , | Link from the previous move to the following move. |
| dl./delay | Delay before using the following move. |
| X(w)/whiff | Whiff the following move (do not hit). |
| jc | Jump Cancel. |
| wc | Walk Cancel. |
| d./dash | Dash air attacks. Done by pressing the dodge button while standing still. |
| (X) | Optional input. |
| {X}*N | Repeat (sequence) N number of times. |
Solo
- A > d.AB > S2, S4, [A] > S1/S3 (1.3k/1.6k damage)
- Ground BnB. Any Skill can be used as combo finishers, but Reaper and Wolf Fang are the most SP-efficient ones.
- A > d.AB > S2, S4, [A] > EX, [A] > S4, [A] > S1.S3 (3.7k/4k damage)
- Sample EX combo.
With accessories
Note: Geis + Medusa Blade is a banned combination in tournament play, due to Antlion being an outstanding tool for proccing status effects.
- Combo (damage)
- Specify which accessories are required for this combo to work
- Combo description
With assists
- A > {S2 > S4, [A]}*2 > S3 > S6 (1.9k/2.4k damage)
- Scherazard
- Only works with Schera because S2 normally doesn't fully connect on ground hit. Requires almost full SP
With accessories and assists
- Combo (damage)
- Specify which equippable items are required for this combo to work
- Combo description
Colors
Default color
Reference (if there's one)
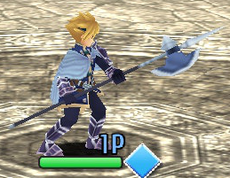
Elk (Ys SEVEN)
Reference (if there's one)

