KILL la KILL IF/Ragyo: Difference between revisions
AthenaDiva (talk | contribs) (Overview Overhaul, Continuation) |
|||
| Line 1,701: | Line 1,701: | ||
}} | }} | ||
{{PlayerListEntry | {{PlayerListEntry | ||
|name = | |name = Josh <br>[https://twitter.com/josh12465 @josh12465] | ||
|color = 1 | |color = 1 | ||
|region = gb | |region = gb | ||
Revision as of 11:02, 21 June 2022
| Health | 12,500 |
| Meter Multiplier | 0.75x |
| Walkspeed | 17th |
| Homing Dash Speed | 4th |
| Homing Dash Accel | - |
| Jump Height | - |
| Air Time | - |
| Front Step Dash Startup | - |
| Side Step Dash Startup | - |
| Back Step Dash Startup | - |
| Front Step Dash Invul | - |
| Side Step Dash Invul | - |
| Back Step Dash Invul | - |
Introduction
Ragyo Kiryuin (鬼龍院 羅暁)
Revocs Corporation's CEO, a chair of Honnōji Academy's board of directors and the true antagonist of Kill la Kill.
Overview
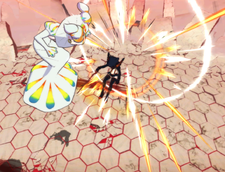
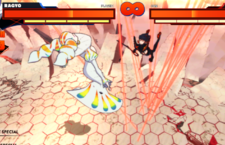
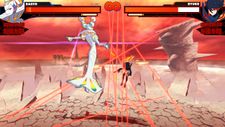
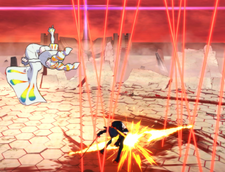
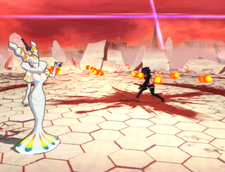
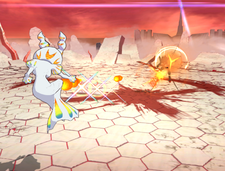
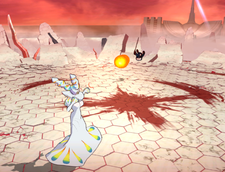
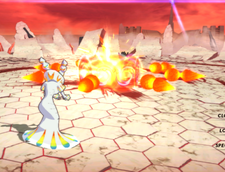
Ragyo is a zoner that specializes in capitalizing off the opponent's mistakes and using her attacks in tandem with setplay to create unblockable setups. She has massive normals, numerous setplay options, and many moves that can jail from fullscreen. Her damage output is phenomenal as well, being able to do massive unburstable damage off of a wallsplat or if the opponent is on meter cooldown. Her most important tool, j.C, when utilized properly Ragyo can keep the opponent in a vortex of set-ups making it very hard for the opponent to retaliate against her in neutral. However, due to how slow Ragyo's movement and attacks are, she must be patient and try to outplay the opponent if she is to reap any rewards and secure the activation of j.C. Ragyo can try to mitigate the fragility of her neutral by achieving Valor Level 1. Her Valor Level 1 is not easy to obtain due to her attacks giving the opponent a lot of meter on block and her low meter gain, however if she gets it she will gain the ability to combo off of a counter hit burst and winning Bloody Valor as the defender, making any attack on Ragyo from the opponent a grave risk and costly if she has meter. Overall, Ragyo requires patience, spatial awareness, and good decision making to do well, as one wrong decision might just cost her the match.
| Strengths | Weaknesses |
|---|---|
|
|
Valor Level 1
- Increase damage dealt when winning bloody valor as a defender.
- You can follow up with Life Fiber wire attack if your counter burst successfully counter hits.
Valor Level 2
- Break Attack Special enhanced
Notables
- Ragyo can perform Dash attacks from a vertical or horizontal Step Dash.
Close Ranged Attacks
5A Fiber: Baste Fiber: Baste Disciplinary Strike Disciplinary Strike Disciplinary Strike Disciplinary Strike Disciplinary Strike Disciplinary Strike Disciplinary Strike Disciplinary Strike Purge the Rebels Purge the Rebels
|
|---|
5AAAAA > 2/8A Fiber: Shear Fiber: Shear Crush the Resistance Crush the Resistance
|
|---|
5AAAAA > 2/8AAC Authority: Jetstream Authority: Jetstream
|
|---|
4/6A (Ender) Fiber: Whiplash Fiber: Whiplash
|
|---|
2/8A (Ender) Fiber: Shear Fiber: Shear
|
|---|
4/6A Fiber: Transect Fiber: Transect
|
|---|
2/8A Fiber: Vertical Section Fiber: Vertical Section
|
|---|
d.A Crooked Beatdown Crooked Beatdown
|
|---|
j.A Fiber: Tangling Yarn Fiber: Tangling Yarn Crush the Resistance Crush the Resistance Crush the Resistance Crush the Resistance
|
|---|
sp.A Annihilate the Rebellion Annihilate the Rebellion
|
|---|
Long Ranged Attacks
5B Fiber Bullet Fiber Bullet Fiber Bullet: Chasedown Fiber Bullet: Chasedown Fiber Bullet: Chasedown Fiber Bullet: Chasedown
|
|---|
5BA Fiber Bullet: Tacking Fiber Bullet: Tacking Fiber Bullet: Tacking Fiber Bullet: Tacking
|
|---|
5BAAC Authority: Crucifixion Authority: Crucifixion
|
|---|
5[B] Fiber Bullet: Homing Fiber Bullet: Homing
|
|---|
d.B Fiber Bullet: Moth to Flame Fiber Bullet: Moth to Flame
|
|---|
j.B Fiber Bullet: Obscurity Fiber Bullet: Obscurity Fiber Bullet: Constrict Fiber Bullet: Constrict
|
|---|
j.BA Fiber Bullet: Tacking Fiber Bullet: Tacking Fiber Bullet: Tacking Fiber Bullet: Tacking
|
|---|
j.BAC Authority: Crucifixion Authority: Crucifixion
|
|---|
j.BAAC Authority: Crucifixion Authority: Crucifixion
|
|---|
j.[B] Fiber Bullet: Pour Fiber Bullet: Pour
|
|---|
sp.B Fiber Bullet: Bind Fiber Bullet: Bind
|
|---|
Break Attacks
5C Authority Authority
|
|---|
d2/8.C Authority: Jetstream Authority: Jetstream
|
|---|
d4/6.C Authority: Jetstream Authority: Jetstream
|
|---|
j.d2/8.C Authority: Jetstream Authority: Jetstream
|
|---|
j.C Authority: Enclose Authority: Enclose
|
|---|
sp.C Authoritarian Burst Authoritarian Burst Authoritarian Overflow Authoritarian Overflow
|
|---|
General Moves
Life Fiber Wire Attack
|
|---|
Bloody Valor Defend Boost Mock Mock Taunt Taunt Provoke Provoke
|
|---|
Homing Dash
|
|---|
Aerial Homing Dash
|
|---|
Valor Burst
|
|---|
Counter Burst
|
|---|
FIBER LOST SECRET ARTS Multicolored Cruelty Multicolored Cruelty
|
|---|
Combos
Comment on Ragyo's 5B > d8 dl 8A and d.A AthenaDiva:
- When doing a wallsplat combo that involes doing 5B > d8 dl 8A, you want to delay the 8A enough so you don't accidentally d.A from d8.
- For any combo that has a Wallsplat follow-up into 5B > d8 dl 8A, if you are close enough to the opponent there is no need for the 5B and you can simply just 8A and continue the combo from there.
- If you are too far to reach 8A distance within only one d8, you can do two instead of one d8s before dl 8A in order to reach the opponent.
- This can also stop the opponent from bursting, as their burst will hit Ragyo if she does 5B or 8A too close to them during the combo.
- Most combos using 5A or 8A as a starter can use d.A as a substitute for both if needed.
Basic BnBs
- 5A/8A 5BB
- 5A Variant: 1.3K (1380 Dmg)
- 8A Variant: 1.9K (1900 Dmg)
- Ragyo's primary wallsplat route, this can be used to initiate zoning, extend combos, setup j.C okizeme, or setup 5[B].
- 5A/8A 5BB Wallsplat 5B > d8 dl 8AA sp.C
- 5A Variant: Varies from 4.3-6.1K
- 8A Variant: Varies from 4.8-6.2K
- Ragyo's most optimal metered wallsplat combo for having the least burst points possible with only 1 during 8AA.
- Can confirm sp.A from sp.C if you have have enough meter.
- 5A/8A 5BB Wallsplat 5B > d8 dl 8A 5BAC
- 5A Variant: 3.1K (3160 Dmg)
- 8A Variant: 3.4K (3430 Dmg)
- Ragyo's standard meterless wallsplat route, has no burst points due to not needing 8AA.
- Good for converting off of zoning as 5A/8A can be substituted with j.d.BB.
- Keeps Ragyo at a safe distance at the beginning and end of the combo.
- Can confirm sp.A after 5BAC if delayed.
- 5AAAAA > 2/8AAC j.AAA / 8AAA > 2/8AAC j.AAA
- 5A Variant: 5.3K (5360 Dmg)
- 8A Variant: 4.9K (4960 Dmg)
- Ragyo's standard long combo route.
- Can setup j.BB or d.B afterwards.
- Can confirm sp.C after 5AAAA, 8AA, or at any point during the aerial sections of the combo.
- Can confirm sp.A after 8AAA > 2/8AAC or sp.C if it is used.
- 5AAAAA 4/6A Ender / 8AAA 4/6A Ender
- 2.6K (2680 Dmg)
- 5A Variant: 2.8K (2800 Dmg)
- 8A Variant: 2.6K (2680 Dmg)
- Gives a good amount of meter, 1.25 bars.
- Best to use this when going for the kill, as it lets Ragyo carry over a significant amount of meter into the next round.
- j.AAC j.AAC j.AAA
- 3.3K (3300 Dmg)
- Ragyo's standard aerial combo route.
- Can setup j.BB or d.B afterwards.
- Can setup j.BB or d.B earlier by doing j.AAC j.AAA or simply doing just j.AAA, j.AA, or even just j.A incase if the opponent is going to burst.
- Can confirm either sp.A or sp.C at nearly any point in the combo with the exception of j.AAA.
Valor Burst Combos
- 5A Valor Burst
- 1.7K (1780 Dmg)
- 8AA Valor Burst
- 2.6K (2600 Dmg)
- 5BAA Valor Burst
- 2.4K (2440 Dmg)
- d.B d8 Valor Burst
- 2.2K (2200 Dmg)
- d.B d2/8.C 8AA Valor Burst
- 4.6K (4670 Dmg)
- 8A 5BB Wallsplat 5B > d8 dl 8AA Valor Burst
- 4.1K (4110 Dmg)
Valor 1 CH Burst Fiber Combos
Comments on Valor 1 CH Burst Fibers by AthenaDiva:
- Below these comments will list the most optimal combos with Ragyo's CH Burst Fibers, however to get the most optimal combos possible there are certain requirements due to how the Valor 1 CH Burst Fibers work.
- When on the ground upon CH Bursting, you can just go for 5AC, but for other combos you must wait until you regain full control of Ragyo on the ground before casting 8A. The timing for this is tight so be careful to not mistime it as you could get an accidental 5BAA out of it.
- When in the air upon CH Bursting, you can just go for 5AC, but for other combos she has to do d4/6 while falling and cancel into j.d.B.
- CH Burst Fibers 5AC
- Ground Variant: 2.5K (2500 Dmg)
- Air Variant: 2.2K (2250 Dmg)
- This combo while short and not that impressive for damage, is fully unburstable.
- If the Ground Variant's 5AC gets aimed at a nearby wall, you can get a wallsplat and confirm sp.A.
- Note trying to extend with this wallsplat will not work and will make any follow-ups drop.
- CH Burst Fibers dl 8A 5BB/d4/6 j.d.BB Wallsplat 5B > d8 dl 8A 5BAC
- Ground Variant: 5.7K (5780 Dmg)
- Air Variant: 4.3K (4370 Dmg)
- Most optimal meterless CH Burst Fiber combo.
- Can use sp.A after 5BAC if delayed to get 6.5K (6550 Dmg).
- CH Burst Fibers dl 8A 5BB/d4/6 j.d.BB Wallsplat 5B > d8 dl 8AA sp.C
- Ground Variant: Varies from 6.9-8K
- Air Variant: Varies from 5.0-6.4K
- Can get 10.0K if sp.A is used after sp.C with good Pillar RNG and being near the wall.
- CH Burst Fibers dl 8A 5BB/d4/6 j.d.BB Wallsplat 5B > d8 dl 8AAA > 2/8A sp.C sp.A
- Ground Variant: Varies from 10.0-10.2K
- Air Variant: Varies from 8.3-9.0K
- CH Burst Fibers dl 8AAA > 2/8AAC sp.C
- Varies from 6.7-8.2K
- CH Burst Fibers dl 8AA sp.C
- Varies from 5.4-6.9K
- CH Burst Fibers dl 8A5BAC/d4/6 j.d.BAC dl sp.A
- Ground Variant: 5.1K (5160 Dmg)
- Air Variant: 3.9K (3960 Dmg)
Valor 1 Defender Laser Combos
Comments on Valor 1 Defender Laser Combos by AthenaDiva:
- Below these comments will list the most optimal combos with Ragyo's Defender Lasers, and due to how Valor resets positions to round start, only specific combos such as the ones listed below are possible on larger maps such as Runway, Stadium, and Fiber Palace.
- Valor 1 Lasers 5C
- Valor 1 Lasers 8A 5BB j.C
- Valor 1 Lasers 8A 5BB Wallsplat 5C
- Valor 1 Lasers 8AAA 4/6A Ender
- Valor 1 Lasers d8 dl 8AA sp.C
- Valor 1 Lasers d8 dl 8A 5BAC dl sp.A
- On small stages such as Naturals, Town, and Polling Grounds, d8 dl 8A and 8A 5BB are the ideal starters for all Bloody Valor options.
- On large stages such as Runway, Stadium, and Fiber Palace, d8 dl 8A can be used for Mock and Taunt, but 8A 5BB is the ideal starter for Provoke as the knockback will be too great for you to d8 dl 8A in time unlike the other 2 Valor options. 8A will miss intentionally because doing 5BB afterwards will continue the combo as if Ragyo landed 8A due to the hitstun the Defender Lasers give and 5BB will hit the opponent.
- If the opponent tries to burst the Lasers (which they can't), but if they do then just don't do d8 dl 8A as then the burst will hit Ragyo. 8A 5BB is the better option here as it isn't burstable, you will get slightly less damage due to 8A not actually registering its damage (usually 1600 Dmg less), but it is worth it.
- Make sure to wait until Ragyo finishes her d8 before doing 8A as you might accidentally do d.A which will whiff.
- Valor 1 Defender Lasers can also be used to setup 5[B].
- Valor 1 Lasers 5C
- 3.3K (3300 Dmg)
- Valor 1 Lasers 8A 5BB Wallsplat 5C
- 3.7K (3780 Dmg)
- Valor 1 Lasers d8 dl 8A 5BB Wallsplat 5B > d8 dl 8AA sp.C
- Varies from 6.5-7.8K
- Valor 1 Lasers d8 dl 8A 5BB Wallsplat 5B > d8 dl 8AAA > 2/8A sp.C
- Varies from 8-8.9K
- Valor 1 Lasers d8 dl 8A 5BB Wallsplat 5B > d8 dl 8AAA 4/6A Ender dl sp.A
- 7.0K (7000 Dmg)
- Valor 1 Lasers d8 dl 8A 5BAC dl sp.A
- 4.7K (4760 Dmg)
- Valor 1 Lasers d8 dl 8A 5BB Wallsplat d8 dl 8A 5BAC dl sp.A
- 7.1K (7160 Dmg)
- Valor 1 Lasers d8 dl 8AAA 4/6A Ender
- 4.2K (4280 Dmg)
- Valor 1 Lasers d8 dl 8AA sp.C
- Varies from 4.7-6.0K
j.C/j.BB Okizeme Setups
Comments on 5A/8A 5BB being bursted by AthenaDiva:
- Ragyo's primary wallsplat method for confirming j.C okizeme, 5A/8A 5BB, can be bursted, most prominently by characters with high meter gain such as Houka. There is however a direct answer to stop the opponent from bursting it in the form of d2/8.C, if used with precise timing during the opponent bursting 5BB you can hit them with d2/8.C while they are still in burst recovery. Only do this if the opponent has 50 Meter though, as they can burst the d2/8.C itself if they burst the 5BB yet still have enough meter to burst again. If you land the d2/8.C you can convert into combos dealing over 7K damage. Combos such as 5A/8A 5BB (The opponent counter bursts here) CH d2/8.C 8AAA > 2/8A sp.C and combos similar to this are optimal to do from these burst punishes. These burst punishes can also be done from j.d.BB and can be done at any height due to how long burst recovery is.
- You can also try to make the opponent mess up their burst timing if they're expecting a 5BB. Instead of 5BB, do 5BC as this has different burst timing so this can potentially catch opponents at times that are keen on bursting your 5BB. However, use this with caution as if you do not land a wallsplat with this, the opponent will recover very quickly and you won't be able to get j.C out. Using this to wallsplat is more difficult due to the shorter launch distance that the opponent is hit with at when compared to 5BB. Note to wait for Ragyo to land after 5BC before doing j.C, or else you might accidentally do 5BAACC.
- 5A/8A 5BB j.C
- 5A Variant: 1.3K (1380 Dmg)
- 8A Variant: 1.9K (1900 Dmg)
- Ragyo's most simple way of confirming j.C, also being one of her most optimal when the opponent is not on Meter Cooldown due to how little meter this combo gives compared to her other setups.
- 5AAAA/8AA 5BB j.C
- 5AAAA Variant: 2.3K (2320 Dmg)
- 8AA Variant: 2.2K (2200 Dmg)
- 6AA 5BB j.C
- 2.0K (2040 Dmg)
- Ragyo can go for a reset if she goes from 6A right into 5BB.
- 5BAC (wait for Ragyo to land) j.C
- 1.0K (1040 Dmg)
- Only works at Long Range.
- 5B d4/6 d4/6.C (wait for Ragyo to land) j.C
- 0.8K (840 Dmg)
- Only works at Long Range.
- j.B j.d.BB j.C
- 1.3K (1340 Dmg)
- 5[B] d8 dl 8A 8A 8A 5BB Wallsplat j.C
- 6.0K (6050 Dmg)
- d.B d2/8.C 8A 5BB j.C
- Varies from 3.9-4.2K depending on how many hits d.B gets off.
- d.B 8A 5BB j.C
- Varies from 2.5-2.8K depending on how many hits d.B gets off.
- d.B j.d.BB j.C
- 2.0K (2080 Dmg)
- Will do 2.4K (2410 Dmg) if the wallsplat occurs late enough for the first j.C laser to hit.
- d.B d8 d.A 5BB j.C
- 1.9K (1950 Dmg)
- j.BB 8A 5BB j.C
- 2.2K (2240 Dmg)
- This combo is meant to be converted off of the opponent getting stunned by one of the j.BB fibers.
- You don't just have to do j.C, you can also convert into longer combos from it if you get a wallsplat such as 8A 5BB Wallsplat 5B > d8 dl 8AA sp.C or other similar combos.
- 5A/8A 5BB Wallsplat 5B > d8 dl 8A 5BB j.C
- 5A Variant: 3.2K (3230 Dmg)
- 8A Variant: 3.2K (3250 Dmg)
- While this combo does confirm j.C oki, it puts Ragyo at higher risk for higher reward as this is one of her most damaging j.C setups however the recovery from the second wallsplat is very fast, allowing for high risk for high reward so use this combo with caution, only commit to this combo if you know the opponent won't be able to punish you in time. However due to the faster recovery the opponent gains, they will be forced to deal with the first j.C laser unlike most j.C setups where the first laser is usually ignored completely due to recovery invul outlasting the duration of the first laser.
- CH Burst Fibers dl 8A 5BB/d4/6 j.d.BB j.C
- Ground Variant: 3.1K (3100 Dmg)
- Air Variant: 2.3K (2300 Dmg)
- Optimal route for getting j.C okizeme out off of CH Burst Fibers.
- Valor 1 Lasers d8 dl 8A 5BB j.C
- 2.7K (2700 Dmg)
- Optimal route for getting j.C okizeme out off of Defender Lasers.
- j.AAC j.AAC j.AAA j.BB
- 3.3K (3300 Dmg)
- Can setup d.B instead after j.AAA if needed.
- Can setup j.BB or d.B earlier by doing j.AAC j.AAA or simply doing just j.AAA, incase if the opponent is going to burst.
- 5AAAAA > 2/8AAC j.AAA j.BB / 8AAA > 2/8AAC j.AAA j.BB
- 5A Variant: 5.3K (5360 Dmg)
- 8A Variant: 4.9K (4960 Dmg)
- Can setup d.B instead after j.AAA if needed.
Zoning Patterns
Comments on Ragyo's Zoning Patterns by AthenaDiva:
- Ragyo's zoning is very reliant on j.C, as she needs it to create unavoidable setups for the opponent, essentially putting them into a vortex of guessing which patterns or setups Ragyo is going to throw at them. This vortex can happen from many different routes, but Ragyo's most consistent one is using 5BA as a j.C laser spawns, creating a setup where the opponent cannot sidestep or block to avoid it, and will always take the damage unless negated by a reversal that has enough invul frames such as SB Ryuko sp.A.
- If the Ragyo is confident enough in their zoning after learning how to utilize her patterns, she can freestyle without needing to follow a pattern at all.
- Ragyo can either decide to keep the vortex going or convert into a combo during her zoning.
- These patterns don't have to use a wallsplat if the map is large enough (Runway, Stadium, Palace). As an example, using 5A/8A 5BB on a large map will send the opponent very far away from Ragyo with no wallsplat, j.C is still safe to use here.
- Wallsplat j.C 5B d4/6 5B d4/6 j.B d4/6 5BAC Wallsplat j.C Repeat
- Ragyo's most basic meterless zoning pattern, as it will always have 5BA land when the second j.C laser spawns.
- Gives Ragyo multiple points to deviate from the pattern to punish homing dashes while still giving her time to use 5BA to get the setup.
- Wallsplat j.C 5BC 5BAC 5BAB j.d4/6.BB Wallsplat j.C Repeat
- A more complex zoning pattern, relies on the opponent to respect most of it.
- Uses the third j.C laser to make j.d4/6.BB unavoidable.
- Wallsplat j.C 5BAC sp.B 5BAB j.d4/6.BB Wallsplat j.C Repeat
- A basic sp.B setup pattern, using it's active frames and coverage to make the second j.C laser unavoidable.
- Also uses j.d4/6.BB to make the third j.C unavoidable as well.
- Wallsplat j.C d4/6.C 5B d4/6 j.d4/6.C sp.B 5BAC j.C Repeat
- An unorthodox pattern that uses sp.B's coverage and active frames to make 5BAC and the third j.C laser unavoidable.
- Grants even more points to deviate than the basic pattern due to the aerial section.
- There is no wallsplat before the second j.C, but it still puts the opponent in a sliding knockdown.
Advanced Combos
- 5AAAAA > 2/8AAC j.AAC / 8AAA > 2/8AAC j.AAC
- 5A Variant: 5.1K (5120 Dmg)
- 8A Variant: 4.7K (4720 Dmg)
- 5AAAAA > 2/8AAC j.AAB / 8AAA > 2/8AAC j.AAB
- 5A Variant: 4.4K (4420 Dmg)
- 8A Variant: 4.8K (4820 Dmg)
- Can use j.BB okizeme if you go for j.AAA.
- 5AAAA/8AA 5BB Wallsplat 5B > d8 dl 8AAA > 2/8A sp.C
- Both Variants: Varies from 6.3-8.6K
- 5A/8AA 5BB Wallsplat 5B > d8 dl 8AA sp.C
- Both Variants: Varies from 5.1-7.4K
- 5A/8AA 5BB Wallsplat 5B > d8 dl 8AAA > 2/8A sp.C sp.A
- 5A Variant: Varies from 7.1-8.2K
- 8A Variant: Varies from 9.1-9.8K
- 5AAAAA > 2/8AAC j.A sp.C / 8AAA > 2/8AAC j.A sp.C
- 5A Variant: Varies from 6.6-7.1K
- 8A Variant: Varies from 6.9-7.9K
- 5AAAAA > 2/8AAC j.A sp.C sp.A / 8AAA > 2/8AAC j.A sp.C sp.A
- 5A Variant: Varies from 8.6-9.3K
- 8A Variant: Varies from 8.9-9.4K
- 5A/8A 5BB Wallsplat 5B > d8 dl 8A5BAC dl sp.A
- 5A Variant: 4.7K (4790 Dmg)
- 8A Variant: 4.8K (4810 Dmg)
- 5A/8A 5BB Wallsplat 5B > d8 dl 8AAA 4/6A Ender dl sp.A
- 5A Variant: 5.2K (5280 Dmg)
- 8A Variant: 5.3K (5340 Dmg)
- 5AAAAAC 5C / 8AAAC 5C
- 5A Variant: 5.2K (5270 Dmg)
- 8A Variant: 5.1K (5150 Dmg)
- 8AA 5BB Wallsplat 8AA 5BB Wallsplat 8AA sp.C
- Varies from 8.5-9.0K
- Only works on Naturals and Polling Grounds.
- Mainly used against DTR.
- 5[B] d8 dl 8A 8A 8AAA > 2/8A sp.C
- Varies from 9.8-10K
- 5[B] d8 dl 8A 8A 8AAA > 2/8A sp.C sp.A
- Varies from 10.7-13.3K
- 5[B] d8 dl 8A 8A 8A 5BB Wallsplat 5BAC dl sp.A
- 8.6K (8610 Dmg)
- 5[B] d8 dl 8A 8A 8A 5BB Wallsplat 5B > d8 dl 8AA sp.C sp.A
- Varies from 10-17K
- Ragyo's most damaging combo.
- Ragyo's only universal ToD.
- With Valor 2 sp.C the combo will usually do 18.6K.
- Does a maximum of 20K with Valor 2 sp.C and near perfect Pillar RNG.
Unburstable Combos
Comments in regarding Ragyo's Unburstable Combos by AthenaDiva:
- This section will cover all of her unburstable combos including combos I have already listed in other sections.
- While in a previous comment I did talk about Ragyo's ability to punish 5BB bursts with d2/8.C, this won't be talked about here as that is not a combo, it is a punish/reset.
- 5A/8AA sp.C
- 5A Variant: Varies from 2.1-2.6K
- 8A Variant: Varies from 2.9-5.6K
- This can be done from nearly any of her combos to bait bursts.
- 5A/8AA sp.C sp.A
- 5A Variant: Varies from 3.6-4.1K
- 8A Variant: Varies from 4.4-7.1K
- This can be done from nearly any of her combos to bait bursts.
- 5A/8A 5BAC
- 5A Variant: 1.5K (1520 Dmg)
- 8A Variant: 2.0K (2040 Dmg)
- sp.A can be used after 5BAC if delayed.
- 5A/8A 5BAAC
- 5A Variant: 1.9K (1970 Dmg)
- 8A Variant: 2.4K (2490 Dmg)
- Only is unburstable if Ragyo is far away enough from the opponent when 5BAAC lands.
- sp.A can be used after 5BAAC if delayed.
- 5AA sp.C
- 2.4K (2400 Dmg)
- CH Burst Fibers 5AC
- 2.5K (2500 Dmg)
- If 5AC gets aimed at a nearby wall, you can get a wallsplat and confirm sp.A.
- Note trying to extend with this wallsplat will not work and will make any follow-ups drop.
Fiber Lost Confirms
Comments in regarding Ragyo's Fiber Lost by AthenaDiva:
- If Ragyo manages to reach Valor Level 3 in a match, she can gain access to her Fiber Lost (which is an insta-kill super). It can confirm off of nearly anything she has that is not an aerial. Below will list which moves can be confirmed Ragyo's Fiber Lost.
- Wallsplats can confirm Fiber Lost as well.
- Close Range Attacks
- 5A/6A/8A/d.A can all confirm into Fiber Lost.
- All A Variants: ∞ (SEN-I-SOSHITSU)
- 5A/6A/8A/d.A can all confirm into Fiber Lost.
- Long Range Attacks
- 5B/5BB/5BBB/j.d.BB/j.B/d.B can all confirm into Fiber Lost.
- All B Variants: ∞ (SEN-I-SOSHITSU)
- 5BB can only confirm if timed correctly, you must use Fiber Lost as soon as Ragyo lands.
- 5BBB needs to wallsplat for it to confirm into Fiber Lost.
- j.d.BB needs to wallsplat for it to confirm into Fiber Lost.
- 5B/5BB/5BBB/j.d.BB/j.B/d.B can all confirm into Fiber Lost.
- Break Attacks
- d2/8.C/d4/6.C/j.C can all confirm into Fiber Lost.
- All C Variants: ∞ (SEN-I-SOSHITSU)
- d4/6.C needs to wallsplat for it to confirm into Fiber Lost.
- j.C can only confirm into Fiber Lost if the opponent is pushed against the wall by one of the lasers.
- d2/8.C/d4/6.C/j.C can all confirm into Fiber Lost.
Fiber Lost Combos
Comments in regarding Ragyo's Fiber Lost Combos by AthenaDiva:
- Here will list all of the optimal combos that can confirm into Ragyo's Fiber Lost. These combos are seen as the most optimal to confirm the Fiber Lost with.
- The amount of meter gained from these combos will be shown here.
- The meter gain totals listed below are only for these specific combos as they do take into account the meter regeneration that Valor Level 3 provides and the SP Gauge started at 0.
- 5A/8A 5B Fiber Lost
- (5A Variant) Meter Gained: 0.50 Bars
- (8A Variant) Meter Gained: 0.60 Bars
- 5B can only confirm if timed correctly, you must use Fiber Lost as soon as Ragyo lands.
- Both Variants: ∞ (SEN-I-SOSHITSU)
- 5A/8A 5BB Wallsplat Fiber Lost
- (5A Variant) Meter Gained: 1 Bar
- (8A Variant) Meter Gained: 1.10 Bars
- Both Variants: ∞ (SEN-I-SOSHITSU)
- 8AAA 4/6A Ender dl Fiber Lost
- Meter Gained: 1.80 Bars
- ∞ (SEN-I-SOSHITSU)
- 5A/8A 5BB Wallsplat 5B > d8 dl 8A Fiber Lost
- (5A Variant) Meter Gained: 1.90 Bars
- (8A Variant) Meter Gained: 1.90 Bars
- Both Variants: ∞ (SEN-I-SOSHITSU)
- Valor 1 Lasers d8 dl 8A Fiber Lost
- Mock, Taunt, and Provoke all use the same starter (d8 8A)
- Provoke's starter changes from d8 8A to just 8A on large stages such as Runway, Stadium, and Fiber Palace.
- (Mock, Taunt, and Provoke Variant) Meter Gained: 0.80 Bars
- (Provoke Large Stage Variant) Meter Gained: 0.40 Bars
- Both Variants: ∞ (SEN-I-SOSHITSU)
Colors
Notable Players
Disclaimer: This list is derived from community input and is in no way comprehensive or a form of ranking of any kind. Our community criteria can be found here.
| Usual Color | Handles/Links | Region | Status | Notes |
|---|---|---|---|---|
| AthenaDiva @Athena_Diva_ |
United States NY |
Active | Plays on Steam Absolute j.C fanatic, j.C my beloved. Example Play | |
| AtomicOreo @AtomicOreo |
United States LA |
Active | Plays on PS/Steam Lab monster, helped discover a lot of Ragyo's current tech, consistently places in Top 8 for offline tournaments such as EVO, has been playing Ragyo since before the game released. Example Play | |
| Datpoodlenoodle @datpoodlenoodle |
Australia |
Active | Plays on Steam/Switch Average Ragyo mirror enjoyer. Example Play | |
| Josh @josh12465 |
United Kingdom |
Active | Plays on PS Really REALLY hates Nonon. Example Play | |
| PuellaSins @TwinTailTwist |
United States NV |
Retired | Plays on PS/Steam One of the first professional Ragyo players, has displayed amazing gameplay at local tournaments such as EVO, created her basics guide. Example Play |
External Links
- Twitter hashtag: #KLK_RGY
- Puella's Ragyo Basics Guide
