Asuka 120 LimitOver/Asuka Honda

From Mizuumi Wiki
Jump to navigation Jump to search
Asuka Honda
A120LO Asuka-Portrait.png
Colors
1 2 3 4
Color 1 for Asuka Honda Color 2 for Asuka Honda Color 3 for Asuka Honda Color 4 for Asuka Honda

Profile

Personal Details
Gender Birthday Zodiac Height Weight Blood Type Likes Dislikes Dream / Goal
Female April 15 Aries 151cm 44kg A Yakime-daifuku (cake) Sulfur & eggs To become a chemist.
Favorite Words

千里の道も一歩から
Even the longest road starts with one step.

School Details
Year Class Attendance # Favorite Subject Disliked Subject Love Status Charm Point
1st / Freshman C 26 Chemistry Japanese Language 3yrs w/o a boyfriend Her eyes

Overview

Stats

Stun

22

Playstyle

Shoto, Okizeme

Strength & Weakness

Playstyle
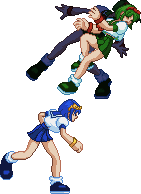
Asuka is the shoto of the game, with a big focus on okizeme with her Phenomenon Crash & tricky throw mixup/combos.
Pros Cons
  • Good projectile game overall ("rekka" Fireball + Phenomenon rash for Oki/Clash).
  • One of the best throws in the game:
    1. Combo after her ground & air throw.
    2. You can decide to side-switch or stay on the same side.
    3. OTG throw oki 👌.
  • 1 ground unblockable super.
  • Really brutal & useful jC:
    1. Spikes on the ground fast.
    2. jC(1) can turn your opponent around so you can throw them .
    3. jC allows a lot of OTG throw setups.
  • Some unblockable set-ups possible with jB or 214B (check this tweet)
  • OS Throw with Mashable
  • Her DP can miss on crouchers (hit once & whiff the rest).
  • Not the best GC 5C (doesn't launch nor bounce).
  • Lack of air unblockable moves.

Movelist

Standing Normals

5A
5A
A120LO Asuka 5A.png
Damage Stun Guard Air Guard Cancel Properties Startup Active Recovery Adv. (Hit / Block) Invincibility
2 1 All - - - - - - - -

Standard jab. Whiffs on crouchers.

6A
6A
A120LO Asuka 6A.png
6A
6A
A120LO Asuka 6AA.png
6AA
6AA
A120LO Asuka 6AAA.png
6AAA
6AAA
Version Damage Stun Guard Air Guard Cancel Properties Startup Active Recovery Adv. (Hit / Block) Invincibility
6A 8-12 1-3 All - - - - - - - -

Gut punch that moves you forward.
It can go into the auto-combo if you don't hold forward, otherwise it will continue the target combo.
Can be cancelled by any normals, specials or super.

6AA (total) 13-17 (total) 2-3 All - - - - - - - -

Cannot go into the auto-combo, but can still be cancelled by anything.
Good to extend ground combos when your opponent is in the corner.

6AAA (total) 18-23 (total) 3-5 All - - - - - - - -

Straight punch that pushes the opponent for a bit. If the foe is close to a corner it will wallbounce.
⚠ This last hit can only be cancelled by supers!

5B
5B
A120LO Asuka 5B.png
Damage Stun Guard Air Guard Cancel Properties Startup Active Recovery Adv. (Hit / Block) Invincibility
13-18 1-3 All - - - - - - - -

Straight uppercut, standard B launcher.
Its horizontal range is kinda lacking, it can miss some conversions if you're too far (eg: out of 2BB). It's recommended to jump cancel her 22X instead.

6B
6B
A120LO Asuka 6B.png
Damage Stun Guard Air Guard Cancel Properties Startup Active Recovery Adv. (Hit / Block) Invincibility
11-15 + 7-10 3-4 High - - - - - - - -

2 hits downward punch. First hit is overhead.
Standard 6B overhead, not as versatile as 6A overhead as it forces you to commit into a dash attack or special.

※ Asuka's 5C whiffs on crouchers, so it's not an option.

Can also be used as a kara cancel move to move your specials a bit forward.

5C
5C
A120LO Asuka 5C-1.png
A120LO Asuka 5C-2.png
Damage Stun Guard Air Guard Cancel Properties Startup Active Recovery Adv. (Hit / Block) Invincibility
8-12 + 5-9 (13-17) 2-4 All - - - - - - - -

In my opinion, one of the worst 5C's in the game:

  • Doesn't launch / blue launch,
  • Doesn't ground nor wall bounce,
  • Whiffs on crouchers,
  • Not a good anti-air option too...

You can jump cancel it on any of the 2 hits (on hit/clash) or go into a 214C / 22C supers for damage/confirm.
It's one the most limited GC 5C's, until we find some tech. At least, the first hit is somewhat fast.

Crouching Normals

2A
2A
A120LO Asuka 2A.png
Damage Stun Guard Air Guard Cancel Properties Startup Active Recovery Adv. (Hit / Block) Invincibility
2-3 1-2 Low - - - - - - - -

Low kick with good range, renda cancellable & can cancel into other As / anything.
Your main pressure starter/mixup tool.

3A
3A
A120LO Asuka 3A.png
Damage Stun Guard Air Guard Cancel Properties Startup Active Recovery Adv. (Hit / Block) Invincibility
8-12 1-3 Low - - - - - - - -

Has a tiny bit more range that 2A & deals more damage... but can only be cancelled into Bs, specials or supers.
Overall has less use than 2A imo.

2B
2B
A120LO Asuka 2B.png
Damage Stun Guard Air Guard Cancel Properties Startup Active Recovery Adv. (Hit / Block) Invincibility
13-18 3-5 Low - - - - - - - -

Sweep with a good range.
Sometimes too good: if you're trying to confirm into 2BB from the tip of 2B, your launcher will whiff.
In this case, try to confirm into 22A/B and jump cancel on the first hit. You can use the down + special button if you have trouble to do 2B 22X.

Jumping Normals

jA
jA
A120LO Asuka jA.png
Damage Stun Guard Air Guard Cancel Properties Startup Active Recovery Adv. (Hit / Block) Invincibility
4-7 1 high - - - - - - - -

Standard jA, really fast but will scale your combo so don't mash it too much.
Good out of hops.

j6A
j6A
A120LO Asuka j6A.png
Damage Stun Guard Air Guard Cancel Properties Startup Active Recovery Adv. (Hit / Block) Invincibility
8-12 2-4 high - - - - - - - -

Horizontal jumping kick.
Good air to air, but mainly good combo tool:
It moves them upward a bit & it stops foes momentum, which allow you to land more easily to continue combo.
Side note: if used on a grounded opponent, it will make them airborn.

j.B
jB
A120LO Asuka jB-1.png
A120LO Asuka jB-2.png
Damage Stun Guard Air Guard Cancel Properties Startup Active Recovery Adv. (Hit / Block) Invincibility
7-9 + 14-19 (21-28) 2-4 high - - - - - - - -

Her second best air normal!
As her kick start above her head, it's amazing anti-air & can be easily used as Throw OS.
It's also a crazy crossup move, and can sometimes guard break if you land the 2 hits or if you land on specific spot (vs Asuka at least).

⤷ check the 1st & 5th point of this tweet to know more about this unblockable tech.
j.C
jC
A120LO Asuka jC.png
Damage Stun Guard Air Guard Cancel Properties Startup Active Recovery Adv. (Hit / Block) Invincibility
8-11 + 9-15 (17-26) 2-4 high - - - - - - - -

While her 5C is one of the worst in the game, her jC is one of the best!
It's fast, an amazing jump in, can turn around on hit or groundbounce which combined with her amazing (OTG) combo throw make Asuka devastating.

If you get all hits:

  • It will send them on the ground, and thanks to Asuka amazing throw, you'll be able OTG throw & combo.
  • You can do this out of a hop, but also mid combo to extend or side switch.
  • On a grounded opponent in the corner, it will wallbounce instead of groundbounce, which can server as bounce mixup.

Check this tweet to see the reset/combo potential.

If you only hit with the 2nd hitbox:

  • It will turn around your opponent, which give you a free throw combo (untechable).
  • Doesn't turn around on block.

Throws

Throw
Throw
A120LO Asuka Throw-1.png
A120LO Asuka Throw-2.png
Damage Stun Guard Air Guard Cancel Properties Startup Active Recovery Adv. (Hit / Block) Invincibility
0 0 Throw - - - - - - - -

Grab & launch the opponent in a free juggle state.
The throw itself deals no damage/stun, but give you a combo opportunity. It doesn't feel like it scales the combo either; so if you start with a 2B, you'll deal good damage 👌.
Combine it with her mixup tools + jC, and it's one of most devastating throws in the game.

Again, check this tweet to see the reset/combo potential.

Air Throw
Air Throw
A120LO Asuka AirThrow.png
Damage Stun Guard Air Guard Cancel Properties Startup Active Recovery Adv. (Hit / Block) Invincibility
0 0 Throw - - - - - - - -

Same idea as her ground throw, but in the air.
It's an amazing anti-air: it can counter hops or double jump/high jump if your right under them (preventing you to get air to air).

Keep in mind some opponents can shrink their hurtbox while jumping making them harder to grab... Yes, Genichirou I'm looking at you (it's even worse with his jB/jC).

Special Moves

66A
66A
A120LO Asuka 66A-1.png
A120LO Asuka 66A-2.png
Damage Stun Guard Air Guard Cancel Properties Startup Active Recovery Adv. (Hit / Block) Invincibility
8-12 + 7-10 2-4 Mid - - - - - - - -

Dash forward and hit with 2 punches.
Frankly, I didn't find a lot of use for this move:

  • You can jump cancel (on hit only) both hits, but you can't really combo out of it. So it only lead into supers.
  • You could use it to extend corner combos, but:
    • Meterless: Mach punch will deal more damage & more stun,
    • With super: Mach punch deals a bit less damage but still more stun.
66B
66B
A120LO Asuka 66B.png
Damage Stun Guard Air Guard Cancel Properties Startup Active Recovery Adv. (Hit / Block) Invincibility
13-18 1-2 Mid > High - - - - - - - -

Charges and punch downwards with all her might.
This dash attack has 1 hit on hit but is divided in "2" on block; 2nd hit on block is overhead.
If you dash from afar to make the first part of the animation whiff, you'll hit with overhead directly.

The most interesting feature is it will send the opponent toward the wall, forcing them to tech or get comboed.
If you're fast enough, you can actually grab people once they wallbounce, which is really good with Asuka.

※If only the second hit touches, it won't send them into the wall, even if you're next to the corner

Mach Jabs
Mach Jabs
mash A or B
A120LO Asuka mash.png
A120LO Asuka mashB-1.png
B vers. 1rst hit
B vers. 1rst hit
Version Damage Stun Guard Air Guard Cancel Properties Startup Active Recovery Adv. (Hit / Block) Invincibility
A 7-18 2-5 All - - - - - - - -

In this version the multi-jabs come out instantly.
Not a big fan of this version, it doesn't deal a lot of damage nor stun.

B 25-32 4 All - - - - - - - -

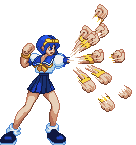
Asuka does a gut punch followed with the multi-jab.
It's the one I would recommend using in combo:

  • Easier to do execute thanks to the Special button (5Y),
  • Deals more damage & stun.
    • On hit, usually gains around 25-37.5% meter, reaching at max 56.25%.
    • On block, usually gains around 20-30% meter, reaching at max 45%.

The "usual meter gains" is calculated midscreen while "max meter gains" is as close as possible in the corner.

Midscreens, other finishers are generally better to use, yet mach punch has its niches:

  • When you can't land a full combo, you'll get a bit more meter.
Plus it is on the safe side (vs 22A/B if whiffed / in corner or 214B which can be hit up close).
  • If you're close to stun your opponent (it deals 4-7 midscreen, 4-10 corner).
  • Corner combos, for more stun & meter.

You can only jump/super cancel on the 3rd & 4th hit, if you extend it you won't be able to cancel at all.
Side note:
Like all mashable, it should win during a grab animation if the other person tech or try to grab back. ⚠️ Need more test.

Enshin Hasai Ken
Enshin Hasai Ken
236A/B
A120LO Asuka 236A.png
Version Damage Stun Guard Air Guard Cancel Properties Startup Active Recovery Adv. (Hit / Block) Invincibility
A 15-21 5 All - - - - - - - -

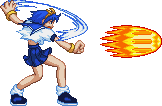
Asuka uses chemicals from her class to send a fireball!
Slow fireball with short recovery, you can run, jump right after it or just do another special right after.

B 15-21 5 All - - - - - - - -

The fireball moves faster but you have more recovery, so you can't run as fast after it then the A version.

Phenomenon Crash
Phenomenon Crash
214A/B
A120LO Asuka 214A.png
214A
214A
A120LO Asuka 214B.png
214B
214B
Version Damage Stun Guard Air Guard Cancel Properties Startup Active Recovery Adv. (Hit / Block) Invincibility
A 17-24 + 10-16 2-4 All - - - - - - - -

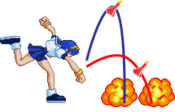
Asuka throws chemicals on the ground, creating a small explosion.
Good for clash battles / having a sudden multi-hits. You can't jump cancel it nor super cancel it limiting its overall usage.

B Each bottle: 17-24 + 10-16 - All - - - - - - - -

Instead of crashing the vials the ground, Asuka throw them in an arc.
Excellent oki tool as you can move really quickly after throwing them.

  • Will force your opponent to block due to multi-hit explosion
⤷ But can also help them to clash /GC and get away. That's why you should try to look/learn what your opponent likes to do.
  • Can create unblockable due to the multihit,
⤷ Check this tweet to know more about this unblockable tech.
  • Each bottle does the same damage as the A version.
Air Phenomenon Crash
j214A/B
A120LO Asuka j214X.png
Version Damage Stun Guard Air Guard Cancel Properties Startup Active Recovery Adv. (Hit / Block) Invincibility
A - - All - - - - - - - -

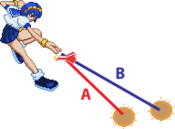
Asuka sends the vial in a downward angle, then slowly fall toward the ground.
These projectiles are a bit awkward to use.

You can't really use in blockstrings close to your opponent cause they'll be able to punish you...
Using them in combo is hard because they're slow and most jB send the opponent too far (if you want to combo try after j6A)...
Lastly they explode soon after you throw them, so you can't really use them from double jump or high jumps...

Right now, I can't recommend using them... even to build stun meterless as continuing your air chain will do the same amount.

B - - All - - - - - - - -

Same deal as the A version but different angle.

Chemical Impact
Chemical Impact
22A/B
A120LO Asuka 22A.png
A120LO Asuka jC.png
Version Damage Stun Guard Air Guard Cancel Properties Startup Active Recovery Adv. (Hit / Block) Invincibility
A 15-21 + 1 + 7-12 3-5 All - - - - - - - -

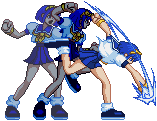
Asuka does a rising uppercut then punch the opponent toward the ground.
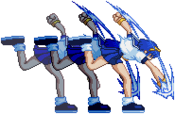
Both DPs are actually jump cancellable on the first hit! It is your go to launcher after a sweep as 5B can sometimes whiff if your too far.

The main difference between 2 versions is that A actually launch on the first hit (also send them a bit higher).
You can go into air combo from any ground normals & have an easier time to juggle after.

B 17-24 + 1 + 7-12 3-5 All - - - - - - - -

Moves further & goes higher than the A version.
Also jump cancellable, it doesn't launch the opponent off the ground like the A version. So you'll need to use it only after a sweep / when your opponent already in juggle.

Supers

Enshin Ren Satsu Ken
236C
A120LO Asuka 236A.png
Version Damage Stun Guard Air Guard Cancel Properties Startup Active Recovery Adv. (Hit / Block) Invincibility
Ground 40-48 89 All - - - - - - - -

Multi-hit version of her fireball. Air blockable.
Nothing special, good to had more damage or pressure / force your opponent to jump.

Chou Phenomenon Crash
214C
A120LO Asuka 214C.png
Ground Version
Ground Version
A120LO Asuka j214C.png
Air Version
Air Version
Version Damage Stun Guard Air Guard Cancel Properties Startup Active Recovery Adv. (Hit / Block) Invincibility
Ground 62-77 10-12 All - - - - - - - -

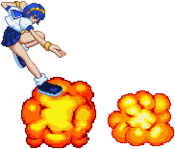
Asuka hops in the air while throwing even more chemicals on the ground, creating multiple explosions around her.
Damage shown was if the closest to Asuka, the further your are the less hit/damage/stun you'll do (but you might be able to combo).

It doesn't have iframes like Tetsuko's, you can still try to use it to win clash blattle, as it can avoids low/throw.
As you can still get hit, people can try jumping at you, but it will still force them to trade or block after.
They can generally block and GC high jump away though, so avoid it on block.

Version Damage Stun Guard Air Guard Cancel Properties Startup Active Recovery Adv. (Hit / Block) Invincibility
Air 50-60 6-8 All - - - - - - - -

Same as the air special one, except the vials explode immediatly.
Your main air finisher! You can use after most air normals (obviously not jC, best j6A/jB) & it adds damage & a lot of stun.
Making possible to do stun combo (for 20-22 stamina characters) if you start back to the wall..

Final Impact
Final Impact
22C
A120LO Asuka 22C.png
Ground unblockable but air blockable.
Version Damage Stun Guard Air Guard Cancel Properties Startup Active Recovery Adv. (Hit / Block) Invincibility
Ground 37-50 6-10 All - - - - - - - -

Similar to her 66B, Asuka dash & punch downward.
This super is pretty fast and ground unblockable! Making it hard if your opponent didn't evade beforehand.

Keep in mind it is air blockable though

It only has 2 clash hits, so you'll most likely lose clash battle if you're not super close.

Combos

Combo Notation Guide:
( ) = optional, typically the combo will be easier if omitted.
[ ] = Input is held.
~ = Delay the next hit.
/ = Option to choose between multiple actions.
+ = Multiple buttons are pressed simultaneously.
{}xN = That part can be repeated N number of times, range provided.
X(#) = Next action is taken after a certain number of hits from X move.
xx = Cancel A into B (A xx B), mainly written when it needs to be really fast.
CH = Counter Hit.

Combos

Easy univeral combo
  • 2A 2BB jAB jABC
  • 2A 2BB jA j6A [land] 5A 5B jAB jABC
Advanced combos
  • 2A 2B 22B(1) (jA) j6A [Land] 2B 22B jA j6A jB djA j6A (jB) j214C
Loops
  • {2BBxx2C}x4 jA j6A jB djA j6A j214C
2BB loop, maybe Max damage?


  • {2B 22B(1) jA j6A}x2 5B jA j6A jB djA(AA…) j6A j214C
Damage should be good but the stun is 👌, reached 27 max.


The Infinite
It's dumb and allowed in tournament, we need to see how broken it is ^^.
Possible from lows (2A) or overheads (6B).


Corner combos:

  • 2/5A(AA) 6AA (3A) 6B 5Y 236C/22C
To avoid corner teching & adding as much stun as you can.
236C should add stun but might allow them to tech → need 2P testing.

Missed tech punish

  • ... jC ※missed tech → OTG Throw 2B 22B [jump cancel] j6A 2B 22B → air series > j214C
Trying to be optimal after an immediate jC/OTG throw. Can be somewhat tight depending the weight of your opponent.
first part of this tweet https://twitter.com/TheSailorVick/status/1266393504730828804


  • 2A 2B 22B jA j6A ~ jC ※missed tech → OTG Throw 2B 22B → air series > j214C
To change which side you throw an OTG throw: try to be as close as possible, you'll generally need to dash, and once you're close to their body immediately 4B.
Check the second part of this tweet video https://twitter.com/TheSailorVick/status/1266393504730828804


Videos

General
FAQ
Controls
Systems
Training
Netplay
Links
Characters
Asuka Honda
Ryuko Yamazaki
Torami Houjyou
Megumi Suzuki
Kumi Ookubo
Tamaki Shindou
Karina Toyota
Nana Owada
Kiyoko Mitarai
Cathy Wild
Shinobu Kawasaki
Tetsuko Ougigaya
Genichirou Shindou