| Tamaki Shindou
|
|
|
| Colors
|
| 1 |
2 |
3 |
4
|
|
|
|
|
|
Profile
Personal Details
| Gender |
Birthday |
Zodiac |
Height |
Weight |
Blood Type |
Likes |
Dislikes |
Dream / Goal
|
| Female |
April 11 |
Aries |
167cm |
47kg |
O |
Music and tennis |
Dirty things & loud things |
To be a teacher.
|
| Favorite Words
|
| “
|
優しさと厳しさ
Kindness and harshness.
|
”
|
|
School Details
| Year |
Class |
Attendance # |
Favorite Subject |
Disliked Subject |
Love Status |
Charm Point
|
| 3rd / Senior |
A |
17 |
English (grammar) |
Nothing |
No comment |
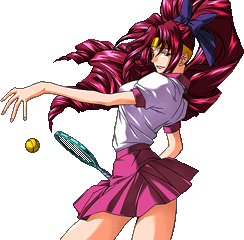
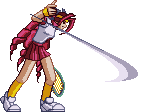
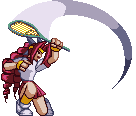
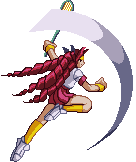
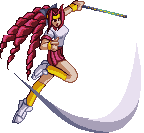
Her hair
|
Overview
Playstyle
- Info
- stun: 22
- Playstyle
-
Strength & Weakness
Playstyle
|
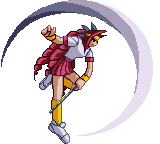
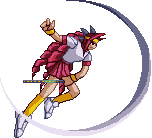
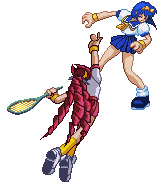
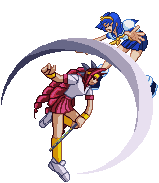
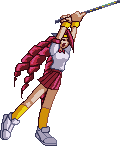
Tamaki is the resident zoner... but she actually does well in CQC too! Thanks to fast mixups & solid pressure. She also packs a punch, being able to stun easily while dealing tons of damage. |
| Pros |
Cons |
- Crazy zoning game due to her jump cancelable Fireball...
- ... But also, stupid mixup game with fastest grounded overhead in the game & crossover 214A/B specials.
- Guaranteed stun with her Fireball super.
- jC is a one move mixup: it can wall or ground slam depending how you're hitting with it.
|
- Her defensive options are lacking, she has trouble to get people off of her.
- The angle on her DPs make it easy to bait.
- Smaller hitboxes than her sprites suggest. You'll need to get used to them.
|
Move List
Standing Normals
5A
5A
|
| Damage
|
Stun
|
Guard
|
Air Guard
|
Cancel
|
Properties
|
Startup
|
Active
|
Recovery
|
Adv. (Hit / Block)
|
Invincibility
|
| 4-7
|
1-3
|
All
|
-
|
-
|
-
|
-
|
-
|
-
|
-
|
-
|
Normal jab, renda cancellable. Whiff on croucher.
|
|
6A
6A 6A 6A 6AA 6AA 6AAA 6AAA
|
| Version
|
Damage
|
Stun
|
Guard
|
Air Guard
|
Cancel
|
Properties
|
Startup
|
Active
|
Recovery
|
Adv. (Hit / Block)
|
Invincibility
|
| 6A
|
7-9
|
1-3
|
Overhead
|
-
|
-
|
-
|
-
|
-
|
-
|
-
|
-
|
One, if not, the fastest overhead in the game.
Also as it's a A button, you can cancel it into anything, so it's a really REALLY scaring move.
So you can do things like 2A 6A 2A ore other nasty mixups.
|
| 6AA
|
+ 7-10
|
1-2
|
All
|
-
|
-
|
-
|
-
|
-
|
-
|
-
|
-
|
Natural followup to 6A.
Can't go back into other As moves. Still is B/C, special or super cancellable.
|
| 6AAA
|
+ 5-8
|
1-2
|
All
|
-
|
-
|
-
|
-
|
-
|
-
|
-
|
-
|
Last hit of the 6AAA series, similar looking to 66B.
Launches, but isn't special/super cancellable anymore. Jump cancellable on hit.
|
|
5B
5B
|
| Damage
|
Stun
|
Guard
|
Air Guard
|
Cancel
|
Properties
|
Startup
|
Active
|
Recovery
|
Adv. (Hit / Block)
|
Invincibility
|
| 17-24
|
4-7
|
All
|
-
|
-
|
-
|
-
|
-
|
-
|
-
|
-
|
Tamaki draws a circle all around her with her racket.
Decent range / ok anti-air. It can hit above you, but not behind.
|
|
6B
6B
|
| Damage
|
Stun
|
Guard
|
Air Guard
|
Cancel
|
Properties
|
Startup
|
Active
|
Recovery
|
Adv. (Hit / Block)
|
Invincibility
|
| 17-24
|
2-4
|
All
|
-
|
-
|
-
|
-
|
-
|
-
|
-
|
-
|
Flat Forehand with deceptive hitbox.
It actually has a worth hitbox than you would think.
|
|
5C
5C
|
| Damage
|
Stun
|
Guard
|
Air Guard
|
Cancel
|
Properties
|
Startup
|
Active
|
Recovery
|
Adv. (Hit / Block)
|
Invincibility
|
| 11-15
|
1
|
All
|
-
|
-
|
-
|
-
|
-
|
-
|
-
|
-
|
Sliced backhand swipe.
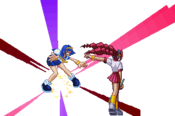
Ok-ish GC 5C, 3 hits on clashes.
Effect depends the state of your opponent:
- If you hit a grounded opponent, it will pushes them a set distance. While they're pushed, if they hit a wall, they'll get wallbounce.
- If you hit an aerial opponent, it will groundbounce them.
|
|
Crouching Normals
2A
2A
|
| Damage
|
Stun
|
Guard
|
Air Guard
|
Cancel
|
Properties
|
Startup
|
Active
|
Recovery
|
Adv. (Hit / Block)
|
Invincibility
|
| 2-3
|
1-2
|
Low
|
-
|
-
|
-
|
-
|
-
|
-
|
-
|
-
|
Good range low kick.
Renda cancellable, can go into any As or other moves.
|
|
3A
3A
|
| Damage
|
Stun
|
Guard
|
Air Guard
|
Cancel
|
Properties
|
Startup
|
Active
|
Recovery
|
Adv. (Hit / Block)
|
Invincibility
|
| 8-11
|
1-3
|
Low
|
-
|
-
|
-
|
-
|
-
|
-
|
-
|
-
|
Like 2A, but sliding forward.
Still fast & have a good momemtum forward, it allows to confirm from a bit further, but limit your mixup/cancel compared to 2A *(can't go into 6A)*.
|
|
2B
2B
|
| Damage
|
Stun
|
Guard
|
Air Guard
|
Cancel
|
Properties
|
Startup
|
Active
|
Recovery
|
Adv. (Hit / Block)
|
Invincibility
|
| 17-24
|
3-5
|
Low
|
-
|
-
|
-
|
-
|
-
|
-
|
-
|
-
|
Tamaki sweeps upward with her racket.
Fast & decent range sweep. 2BB whiff if hit with just the tip, so try to cancel into something instead.
Also, it seems to be air unblockable, making some chain like 5A 6A 2B deadly against people chicken blocking (or blocking while falling, trying to bait something).
|
|
Jumping Normals
j.A
jA
|
| Damage
|
Stun
|
Guard
|
Air Guard
|
Cancel
|
Properties
|
Startup
|
Active
|
Recovery
|
Adv. (Hit / Block)
|
Invincibility
|
| 7-9
|
1
|
high
|
-
|
-
|
-
|
-
|
-
|
-
|
-
|
-
|
Fast, pointing downard & is active until you reach the ground. Overall OK jump in, but her other moves are better.
You can do some weird crossup crouchers from a hop.
|
|
j.6A
j6A
|
| Damage
|
Stun
|
Guard
|
Air Guard
|
Cancel
|
Properties
|
Startup
|
Active
|
Recovery
|
Adv. (Hit / Block)
|
Invincibility
|
| 8-12 + 9-14 (17-26)
|
1-4
|
high
|
-
|
-
|
-
|
-
|
-
|
-
|
-
|
-
|
Same animation as your launcher but in the air.
Stop foe's momemtum/knockback during your combo, allow you to land & do longer combo.
It's not a good jump-in, but it can pop up a grounded opponent. So better use it after hitting with a jA.
Can't hit right above you or crossover.
|
|
j.B
jB
|
| Damage
|
Stun
|
Guard
|
Air Guard
|
Cancel
|
Properties
|
Startup
|
Active
|
Recovery
|
Adv. (Hit / Block)
|
Invincibility
|
| 13-17
|
1-2
|
high
|
-
|
-
|
-
|
-
|
-
|
-
|
-
|
-
|
One of your best aerial.
Extremely fast for a huge swipe downward. It can be used as instant overhead, but due to its low hitstun, you can't combo well like that.
But if you done low enough, you can chain a delayed jC to continue into a ground combo.
Outside that, it's good at stoping down approaches from under Tamaki, making some anti-air/air to air approaches a bit trickier to use.
|
|
j.C
jC
|
| Damage
|
Stun
|
Guard
|
Air Guard
|
Cancel
|
Properties
|
Startup
|
Active
|
Recovery
|
Adv. (Hit / Block)
|
Invincibility
|
| 13-18
|
1
|
high
|
-
|
-
|
-
|
-
|
-
|
-
|
-
|
-
|
The other best aerial normal.
This move can be a mixup by itself:
- if do early / from above the waist it will wallbounce (66 to tech).
- From under the waist, the move will instead groundbounce (88 to tech).
Aside that you can use as a jump-in from hops, either by itself or with jB ~ jC.
|
|
Throws
Neutral Throw
Throw
|
| Damage
|
Stun
|
Guard
|
Air Guard
|
Cancel
|
Properties
|
Startup
|
Active
|
Recovery
|
Adv. (Hit / Block)
|
Invincibility
|
| 11-15
|
1
|
Throw
|
-
|
-
|
-
|
-
|
-
|
-
|
-
|
-
|
Tamaki grab the opponent & smash serves them into the wall.
Not the best grab, as it doesn't lead into combos (except if they miss their tech). Althought it can be tricky to react in time if you're close to the wall.
Doesn't grab OTG.
|
|
Air Throw
Air Throw
|
| Damage
|
Stun
|
Guard
|
Air Guard
|
Cancel
|
Properties
|
Startup
|
Active
|
Recovery
|
Adv. (Hit / Block)
|
Invincibility
|
| 11-15
|
1
|
Throw
|
-
|
-
|
-
|
-
|
-
|
-
|
-
|
-
|
Same as the ground version but in the air.
It can be easier to surprise throw someone in the air, but it still has the same problem (walltech).
It seems to be the only air throw that can't grab grounded opponent if done really close to the ground.
|
|
Special Moves
66A
66A
|
| Damage
|
Stun
|
Guard
|
Air Guard
|
Cancel
|
Properties
|
Startup
|
Active
|
Recovery
|
Adv. (Hit / Block)
|
Invincibility
|
| 7-9 + 5-7 + 3-6
|
3-5
|
All
|
-
|
-
|
-
|
-
|
-
|
-
|
-
|
-
|
Dash & backhand swing downward.
Nothing specifically good about this dash:
- It's fast & starts around your head, but don't think it will be good enough as an anti-air
- You can jump cancel it, but it's a bit awkward to combo. Most often, you'll end up using 66B instead.
- Better as a GC option than 66B.
|
|
66B
66B
|
| Damage
|
Stun
|
Guard
|
Air Guard
|
Cancel
|
Properties
|
Startup
|
Active
|
Recovery
|
Adv. (Hit / Block)
|
Invincibility
|
| 7-9 + 7-10
|
2
|
All
|
-
|
-
|
-
|
-
|
-
|
-
|
-
|
-
|
Even though it's the better dash attack from the two, it's still not great.
Its main point is to launch from a tipper 2B, as the 2BB won't reach & the 2B 22B jc becomes a bit more hazardous.
Due to its first hitboxes being close to the ground, it's not a good anti-air or GC option.
|
|
Hyaku Retsu Serve
Hyaku Retsu Serve
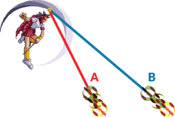
236A/B/C The different angles of the 236 The different angles of the 236
|
| Version
|
Damage
|
Stun
|
Guard
|
Air Guard
|
Cancel
|
Properties
|
Startup
|
Active
|
Recovery
|
Adv. (Hit / Block)
|
Invincibility
|
| A
|
17-25
|
5-7
|
All
|
-
|
-
|
-
|
-
|
-
|
-
|
-
|
-
|
Tamaki smash serves the tennis ball to its opponent.
Oh boy, her projectiles are dangerous. The tennis ball adds a LOT of stun, making meterless stun combo possible by just adding ONE fireball.
Check this meterless stun combo
A really important point: 236A/B are jump cancellable on whiff/hit (not block).
It makes her more mobile, harder to read/punish and add of course more more zoning/combo options.
As an added bonus, the racket can also hit. It can be a situational anti-air (mostly on accident on a bad fireball).
|
| B
|
15-34
|
5-7
|
All
|
-
|
-
|
-
|
-
|
-
|
-
|
-
|
-
|
Higher trajectory than the A version and deals more damages. Use this version in combo.
|
| EX
|
-
|
-
|
All
|
-
|
-
|
-
|
-
|
-
|
-
|
-
|
-
|
⚠ You CANNOT jump cancel this version! ⚠
It's use as a zoning tool or as a finisher to deals huge damages & add a LOT of stun.
When I say a lot, it's actually a TON of stun:
The ball bounces upward on the opponent, trying to continue its rise. So if you launch them and send the ball in/under them, the opponent will rise with the ball.
You can reach stupid amount of stun if done right (/being lucky with stun boost), more than ever needed.
As a zoning too, it's good to punish opponent's fireball or startup from afar.
It can sometimes work as a great anti-air or win some anti-air clash situation. Added bonus: it's air unblockable.
Be aware though that if done in neutral, it can be jumped or dodged easily.
|
|
Air - Hyaku Retsu Serve
Air - Hyaku Retsu Serve
j236A/B/C
|
| Version
|
Damage
|
Stun
|
Guard
|
Air Guard
|
Cancel
|
Properties
|
Startup
|
Active
|
Recovery
|
Adv. (Hit / Block)
|
Invincibility
|
| A
|
15-26
|
5
|
All
|
-
|
-
|
-
|
-
|
-
|
-
|
-
|
-
|
While in the air, Tamaki smash down the tennis ball.
The A version is close to you, most useful to stop ground approaches that try to punish your landing.
Racket doesn't have a hitbox
|
| B
|
13-18(racket) / 17-20 (ball)
|
-
|
All
|
-
|
-
|
-
|
-
|
-
|
-
|
-
|
-
|
Send the ball at a larger angle, more useful for zoning purpose.
This time, the racket has a hitbox! It's like jC but it reaches a bit further & can't groundbounce.
You can only bit hit either by the racket or the ball. You can't be hit both at the same time.
If you're close to them you most likely hit them with the racket.
|
|
Kougeki V
Kougeki V
214A/B Dash 1rst hit Dash 1rst hit V— V—
|
| Version
|
Damage
|
Stun
|
Guard
|
Air Guard
|
Cancel
|
Properties
|
Startup
|
Active
|
Recovery
|
Adv. (Hit / Block)
|
Invincibility
|
| A
|
34-44 (15-21 + 5 + -19 + 3)
|
5-9
|
All
|
-
|
-
|
-
|
-
|
-
|
-
|
-
|
-
|
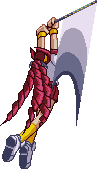
Tamaki dashes & does a lot of swing in V shapes, so fast you only se ethe afterimage... At least that what I think it is?
Outside the weird science behind it, the A version is pretty straightforward. It down the opponent and multi-hit them. It can be used to setup 236C for a stun or as a 214B feint as you stay in front.
Overall you'll often end using 214B instead for the crossover/unblockable "bonus".
|
| B
|
31-38
|
5-8
|
All > crossup
|
-
|
-
|
-
|
-
|
-
|
-
|
-
|
-
|
The B version, called Geigeki V, is similar to 214A but let the opponent grounded & crossover!
They'll need to auto-block or reverse your guard.
Althought it's better for them to GC offensively or away than to block it.
Due to how the (auto)guard is done in LO, if two hitboxes hit on each side in a really short time, it will be unblockable.
It's easy to trigger with this special, you just need to do 214B some steps away from close range (on block, 2A 2B xx 214B), and you most likely be unblockable.
If done too close, it will be blockable (need to crossup).
⚠ Reminder:
It's not because it's unblockable that it is "unavoidable".
As you have to block the first hit first, you can GC high jump, GC 5C or GC dodge by example to avoid the whole "unblockable" situation.
|
|
Lob Otoshi
Lob Otoshi
22A/B
|
| Version
|
Damage
|
Stun
|
Guard
|
Air Guard
|
Cancel
|
Properties
|
Startup
|
Active
|
Recovery
|
Adv. (Hit / Block)
|
Invincibility
|
| A
|
24-33 (BL) / 13-31(full)
|
2-3
|
All
|
-
|
-
|
-
|
-
|
-
|
-
|
-
|
-
|
The Blue launcher happens if you're close / early hits. Can be use to side-switch throw.
It's actually somewhat hard to miss it,n but it happens. By example if you 2A 2B 22A, and it hits only with the tip of the racket.
Use the 214B if you want the full animation, it will be easier.
As an anti-air, it's decent, first hit is actually air-unblockable, but it is really low to the ground, so you most likely won't guard break.
Also as it's moving a bit forward & doesn't hit behind, it easier to bait than a straight DP.
|
| B
|
31-36
|
6
|
All
|
-
|
-
|
-
|
-
|
-
|
-
|
-
|
-
|
22B is the version you use for combo, either as launcher of ender.
You can jump cancel it on the first hit to send the opponent fly above the life bars or on second hit to them at high jump height.
As an anti-air air unblockable, it's still only on the first hit but it has a bit bigger hitbox.
But it's close to the ground, and as you move even further forward, you can slide behind your jumping opponent.
|
|
Supers
Shori no V
Shori no V
214C
|
| Damage
|
Stun
|
Guard
|
Air Guard
|
Cancel
|
Properties
|
Startup
|
Active
|
Recovery
|
Adv. (Hit / Block)
|
Invincibility
|
| 43-49
|
8
|
All
|
-
|
-
|
-
|
-
|
-
|
-
|
-
|
-
|
Like a Tennis Samurai, Tamaki dashes in, hits once then a lot of iado racket slashes connect.
Outside being a decent finisher —as it adds damage, stun & blue launch— it can also be used in some gimmicky ways.
It hits only once or it can even go through blocking opponent, so you can use it as some sort of command dash. Useful after projectiles imo.
By example:
Doing 2A 2B 236A x 214C, you can go through the opponent while he's blocking the tennis ball.
At best you can get an unblockable (multi-hit + side switch = hit both side), but you might not be able to combo after or it's really tight. In most case you get a mixups.
You can try 236A xx 214C on whiff to go under jumps or other thing, be creative & try with other normals/specials too.
|
|
Shin Lob Otoshi
Shin Lob Otoshi
22C
|
| Damage
|
Stun
|
Guard
|
Air Guard
|
Cancel
|
Properties
|
Startup
|
Active
|
Recovery
|
Adv. (Hit / Block)
|
Invincibility
|
| 53-66
|
3
|
All
|
-
|
-
|
-
|
-
|
-
|
-
|
-
|
-
|
Tamaki's super with the less utility. Overall:
- As an ender, it's bad compared to her 2 other supers: either less damage/stun or utility.
- As a GC, it doesn't have as many hit as you're thinking or might not fully connect.
- It doesn't hit as high or as behind than you're thinking.
Its main good point is to be air unblocklable & first hitbox is better than your DPs.
Which, isn't bad, it means any people that you catch chicken blocking or GC hop can be punished easily & a lot of damages.
It isn't better than air guard-breaking them with 2B, as it leads into full combo (+damage/+stun).
But at least it's more "compact", meaning you can do it even if they're close to the corner.
|
|
Combos
| Combo Notation Guide:
|
- ( ) = optional, typically the combo will be easier if omitted.
- 5[X] = Input is held.
- ~ = Delay the next hit.
- / = Option to choose between multiple actions.
- + = Multiple buttons are pressed simultaneously.
- {}xN = That part can be repeated N number of times, range provided.
- X(#) = Next action is taken after a certain number of hits from X move.
- xx = Cancel A into B (A xx B), mainly written when it needs to be really fast.
- CH = Counter Hit.
|
True combo
- 2A 2BB jA j6A [Land] 2B xx 236B jA j6A jB djA j6A jB jC/j236B
Meterless Stun combo, try to drop as soon as you see the stun to have more time to reposition yourself.
Check this tweet to see it in video.
- (2A) {2BB [micro dash]}x4 214B ~ 236C
- (2A) {2BB [micro dash]}x4 jA j6A jB djA j6A jB jC/j236B
- (2A) {2BB [micro dash]}x4 xx 236B jA j6A jB djA j6A jB jC/j236B
Highest damage combo & most "compact" thanks to the 2BB loops.
You need to stop your loops after 8hits, as if you try another one it will whiff.
Tight at first but once you have it in hand.
Missed tech punish
Basic missed wall tech punish. 214B will put you in between the opponent and the wall to avoid corner tech.
Videos
