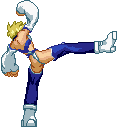
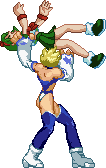
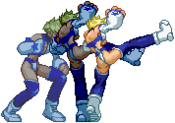
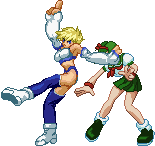
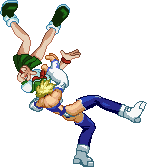
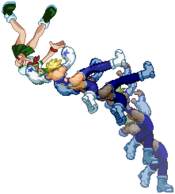
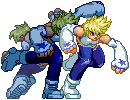
Asuka 120 LimitOver/Cathy Wild

From Mizuumi Wiki
Jump to navigation Jump to search
Cathy Wild
A120LO Cathy-Portrait.png
Colors
1 2 3 4
Color 1 for Cathy Wild
Color 2 for Cathy Wild
Color 3 for Cathy Wild
Color 4 for Cathy Wild

Profile

Personal Details
Gender Birthday Zodiac Height Weight Blood Type Likes Dislikes Dream / Goal
Female February 20 Pisces 176cm 56kg O Karaoke Sitting Japanese style To be "ruler champion" of the WWWA (Women's World Wrestling Association)
Favorite Words

イッチバーン!
Number one!

School Details
Year Class Attendance # Favorite Subject Disliked Subject Love Status Charm Point
3rd / Senior C 8 Japanese language History Has a fiancee Her large bust

Overview

Playstyle

Info
stun: 26
Playstyle
  • Grappler, Aggressive

Strength & Weakness

Playstyle
Cathy is THE grappler of the game! She has a range problem & trouble to approach due to her stubby normals & slow run speed... But once in, Cathy pressure/mixups can be one of the scariest in the game!
Pros Cons
  • Good pressure / mixups.
  • Extremely scary with Meter.
  • Unbreakable throw combos.
  • Hard to stun, tied with Ryuko for 3rd best stamina (26).
  • Can backdash cancel all her normals (outside 5C), even on block!
  • Possible restun (tight execution)
  • Catch mindless corner tech with 214A
  • Command grab that open for full combo
  • Great GC options with her grabs
  • Take some time to get used to, her flow is different form the rest of the cast
  • Below-average walk/run speed.
  • Have a hard time to approach / Struggles vs zoners.
  • Damage can be lacking without supers.
  • Stunning can be hard without resets (or good execution).

Move List

Standing Normals

5A
5A
A120LO Cathy 5A.png
Damage Stun Guard Air Guard Cancel Properties Startup Active Recovery Adv. (Hit / Block) Invincibility
4-7 1 All - - - - - - - -

Elbow jab. Hit crouchers!
You can't tick throw if you cancel immediatly into 214B, you need to delay or kara cancel another move in between (6B xx 214B).

6A
6A
A120LO Cathy 6A-0.png
A120LO Cathy 6A-1.png
Version Damage Stun Guard Air Guard Cancel Properties Startup Active Recovery Adv. (Hit / Block) Invincibility
6A 11-15 1-3 All - - - - - - - -

Long reaching uppercut, whiff on crouchers. Only one hitbox that follows the arm/fist.
Great anti-air to prevent GC hop/high jump, though due to how it move forward, you might accidentally hit behind them (whiff) if you're too close.

If you made them block & they're around your elbow/forearm height, cancel into 214A to anti-air throw them into combo.

5B
5B
A120LO Cathy 5B.png
Damage Stun Guard Air Guard Cancel Properties Startup Active Recovery Adv. (Hit / Block) Invincibility
20-24 3-5 All - - - - - - - -

Multi-hit Knee. Only launches on the second hit.
Don't mash B or you'll get the target/followup 6B.

You have enough time to backdash cancel the 2nd hit and then dash attack after. More stylish than useful, it might help to get only one hit of 66A.

6B
6B
A120LO Cathy 6B-1.png
6B
6B
A120LO Cathy 6B-2.png
6BB
6BB
Version Damage Stun Guard Air Guard Cancel Properties Startup Active Recovery Adv. (Hit / Block) Invincibility
6B 20-27 - All - - - - - - - -

Spinning Lariat.
I think it could become a crucial move for Cathy's pressure.

Here's some ideas:

  • Cancel into backdash to be safe (2A/3A to stop punish attemps?).
  • 6BB is the overhead, give you a full combo after.
  • 6BB recovers faster than you think, 3A for.
  • 6B kara cancel into throw (high risk/high reward)
    • sometimes you can still get the 214B if you hit 6B(1) on block?
    • sometimes you can get an instant backthrow after 6B(1) on block...?
  • If they block 2A 6B then GC high jump:
    • GC during 2A, 6B will normally stop their jump, 214A on reaction.
    • GC during 6B, you should be able to react to their jump direction & threaten with 214A or jump jB/airthrow (be aware they can double jump away).
Version Damage Stun Guard Air Guard Cancel Properties Startup Active Recovery Adv. (Hit / Block) Invincibility
6BB (total) 29-34 - High - - - - - - - -

Overhead elbow. You need to hit 6B to do this followup.
On hit, it forces crouchers to stand & groundslam standing or airborn opponents.

If you hit a crouching foe, you can combo 3A/2B into 66A for a full combo. If you hit them standing or airborn & they miss their tech:

  1. You could 214C to catch them on the first bounce (seems somewhat safe? might give them more time to react though).
  2. If they missed every tech and lie on the ground, you can actually run & grab them (214B = 236C > 623X >= 6B).
5C
5C
A120LO Cathy 5C.png
Damage Stun Guard Air Guard Cancel Properties Startup Active Recovery Adv. (Hit / Block) Invincibility
8-12 1 All - - - - - - - -

Decent GC option with 3 clash hits & a good range. Its recovery is quite long if not jump cancelled.
Sadly, it doesn't launch nor wallslam —at least fullscreen— & only groundslam airborn opponents (it sends them so far it's not worth it).

Let's come back to this wallslam property:
When Cathy's 5C hit, it pushes the opponent for some distances. If they touch the wall while being pushed they'll get wallslamed.
It can lead to some funky combos.

Reminder:
The wallslam should be used as a "mixup/gimmick", just sneak it here & there in the middle of your corner combos.

Crouching Normals

2A
2A
A120LO Cathy 2A.png
Damage Stun Guard Air Guard Cancel Properties Startup Active Recovery Adv. (Hit / Block) Invincibility
- - Low - - - - - - - -

Shorter than it seems, it's still a decent ranged & mashable 2A.
When close, it's your main mixup tool.

3A
3A
A120LO Cathy 3A.png
Damage Stun Guard Air Guard Cancel Properties Startup Active Recovery Adv. (Hit / Block) Invincibility
8-12 1-3 Low - - - - - - - -

Cathy gets low on the ground & hit with her leg fully extended.
Can actually go under some fireballs.

A really amazing poking tool, to mixup with 2B. Short comparison between the 2:

  • Similar startup if not identical.
  • Both can be backdash cancelled, even on block.
  • Doesn't knockdown like 2B (good for corner combos).
  • Moves further but has a smaller hitbox (still has a better reach).
2B
2B
A120LO Cathy 3A.png
Damage Stun Guard Air Guard Cancel Properties Startup Active Recovery Adv. (Hit / Block) Invincibility
20-27 3-5 Low - - - - - - - -

Your best poking moves & combo starter.
As all good point of 3A but with some added bonuses:

  • Shorter hurtbox, even easier to go under fireballs / make jumpins whiff.
  • Knockdown, easier to combo off & has more untech time.
  • huge damage & good stun get even better at low health.

Definitely use it as your starter on stunned opponent.

3B
3B
A120LO Cathy 3B.png
Damage Stun Guard Air Guard Cancel Properties Startup Active Recovery Adv. (Hit / Block) Invincibility
7-9 1-3 All - - - - - - - -

Super slow slide. Hits Mid, punishable on hit, safe-ish on block (can block earlier than you can act). You NEED to cancel it into something else.

This looks like an awful move at first... And it somewhat is... BUT it has it's uses! here's some:

  • Due to being 0 or negative on block, you can cancel immediately into 214B for a powerful "Tick throw" option.
  • It lets the opponent grounded (no knockdown/launch) which help for corner combos. It gets you closer & has enough hitstun tocombo into 66B or 623X.
  • In combos, it's easier to catch your opponent close to the ground with 3B than 3A/2B.

Jumping Normals

j.A
jA
A120LO Cathy jA.png
Damage Stun Guard Air Guard Cancel Properties Startup Active Recovery Adv. (Hit / Block) Invincibility
7-9 1 high - - - - - - - -

Fast knee move, mashable & active until landing. Can be used as crossup.
From a hop, it won't hit crouchers immediatly, but it's one of your fatest overhead from up close.

j.6A
j6A
A120LO Cathy j6A.png
Damage Stun Guard Air Guard Cancel Properties Startup Active Recovery Adv. (Hit / Block) Invincibility
11-15 3-5 high - - - - - - - -

One of the rare j6A that stay active until landing! Though like most of them it nullifies foe's air momemtum(/knockback) during combo.
It doesn't launch grounded opponents.

The hitbox continues under her arm, hitting sooner than expected. Might be a bit faster than jA? (need testing)

j.B
jB
A120LO Cathy jB-0.png
A120LO Cathy jB-1.png
A120LO Cathy jB-2.png
Damage Stun Guard Air Guard Cancel Properties Startup Active Recovery Adv. (Hit / Block) Invincibility
27-37 3-5 high - - - - - - - -

Similar to Asuka's jB, but doesn't start as fast or as high as hers.
It's still a good air to air option. Using it while rising + holding direction is a sort of OS: you'll get jB if you're too far (hit or for a block) or will trow them if you're close enough.
If you clash you can double jump cancel, away to be safe, in to try to attack/throw them again.
During Air series, jB can be awkward to combo, here's some tips:

  • Combo it from a j6A, t sets it up perfectly while jA>jB can whiff or only the 2nd hit will connect (it sends them further away).
  • If you have trouble to double jump cancel it, cancel it on the first hit. 2nd hit can make djA whiff or send them too higher for jC to combo.
  • Early in your combos, it's often more optimal to go for jB(2) jC land & 214A/214B to continue or 236C for a lot of damage.
    • For meterless air finisher, you can go for the full jA j6A jB(1) djA j6A jB jC (if you can grab after, it's even better 👌).
j.C
jC
A120LO Cathy jC.png
Damage Stun Guard Air Guard Cancel Properties Startup Active Recovery Adv. (Hit / Block) Invincibility
7-12 1-3 high - - - - - - - -

jC is your furthest reaching jumping move & has a great blue launcher property! Allowing her to combo her command throws.

It will be your main air series finisher, to try to land a grab followup right after.
It can be used as a starter too, you'll need to space it correctly though as there's no hitbox close to her.

You need to remember that as any C moves, it uses meter. You can still use with no meter, but it can get you out of 100% (120% will stay active).

Throws

Throw
Throw
A120LO Cathy Throw-1.png
A120LO Cathy Throw-2.png
Damage Stun Guard Air Guard Cancel Properties Startup Active Recovery Adv. (Hit / Block) Invincibility
19-26 0 Throw - - - - - - - -

One of the few throw that doesn't deal any stun. Decent damage but doesn't lead into a combo.
Nothing special about it.

Air Throw
Air Throw
A120LO Cathy 214A-2.png
Damage Stun Guard Air Guard Cancel Properties Startup Active Recovery Adv. (Hit / Block) Invincibility
20-27 4-7 Throw - - - - - - - -

Fast air throw with a big hitbox.
Good as a anti-air tool if you're sharking under them, though the reward is somewhat limited as people can ground tech.

The hitbox extends enough downward that you can tick > air throw grounded opponents: check this tweet for more information.

Lastly if they miss the ground tech, then micro dash > 2B(B) xx 623X. It will add a good chunk of damage & stun.
If they somehow keep missing the tech, just repeat it. From my testing, the optimal loop would be:

  • air throw > micro dash > 2BB 623X > 2B 623X > 2BB 623X.

The micro dash helps to connect all hits of 2BB & 623X.

Special Moves

66A
66A
A120LO Cathy 66A.png
Damage Stun Guard Air Guard Cancel Properties Startup Active Recovery Adv. (Hit / Block) Invincibility
18-22 2-3 All - - - - - - - -

Cathy dash & give them the boot.
One of your primary launcher, it helps to combo from far 3A/2B or convert from random hits.

It's also good to clash with projectiles due to its big hitbox forward & dash momentum.
Be aware of its somehwat slow startup, so it works better fullscreen/midscreen. Closer is more a read, though you're safe on block if they don't GC.

66B
66B
A120LO Cathy 66B.png
A120LO Cathy 66B-2.png
*Weeeeeee*
*Weeeeeee*
Damage Stun Guard Air Guard Cancel Properties Startup Active Recovery Adv. (Hit / Block) Invincibility
23-34 2 All - - - - - - - -

Cathy runs in, extend her arm toward her opponent & do a clothesline.
Decent combo ender, switch side.

It's a hitgrab, meaning you can combo it but you can't grab Blue Launcher with it.
You can actually jump or super cancel right after the first hit. The former is only useful in the corner to do fancy ±1fr link into jC while the latter is used to add +1 stun to your combo before a super.
Otherwise 66B is used when you can't reach with a 623. Due to the dash momentum, it can combo from most random hits.
It's useful to prevent corner techs, but it deals less damage/stun & sends them further back than 623.

Dash Knee
Dash Knee
236A/B
A120LO Cathy 236A.png
A120LO Cathy 236B-2.png
Version Damage Stun Guard Air Guard Cancel Properties Startup Active Recovery Adv. (Hit / Block) Invincibility
A 11-15 1 All - - - - - - - -

I had a hard time to find a good use of these moves:

  • 236A launches but isn't jump cancellable while 236B doesn't but is jump cancellable...
  • if 236B hit an airborn opponent, it sends them away making it awkward to combo off.
  • overall deals meh to decent damage but no stun.
  • Not super cancellable until its recovery frames.

But if you look to their animation you realize: they're jumping, could they avoid lows?
Bingo! Finally found a use for them! Although it is quite niche:
It seems to avoid lows as soon as possible, so where all your dash attacks or specials lose to 2A mash (clashes or oki), you can now go over them & confirm into a super! (on block 236C is tick throw, on hit either 22C or 214C)
If 236A hits an airbone opponent might give you enough time to combo with a 6A/5B depending at what height you hti them.

And that's kinda it... 236A, has a shorter hop/dash but seems to avoid even lows that hit a bit higher than usual (eg. Asuka 2B) because it hits a bit later than 236B.

B 24-29 3 All - - - - - - - -

Same ideas as 236A, use it to avoid & punish lows.

236B main differences are:

  • Dash/hop further than 236A
  • Has 3 hits, but if you're too close, you won't be able to connect the first hit to the rest.
  • Has a bigger first hitbox & hits a bit earlier. It indirectly makes it harder to avoid some lows because it will clash with them.
  • Jump cancellable (only on hit), during last the 2 knee hits.
    • Doesn't launch, so can't combo into any air moves.
    • Let you in a jump height/air controllable state: allow to retreat or do left/right mixup if you don't have meter to confirm.
Shoulder Crash
Shoulder Crash
214A
A120LO Cathy 214A-1.png
A120LO Cathy 214A-2.png
Damage Stun Guard Air Guard Cancel Properties Startup Active Recovery Adv. (Hit / Block) Invincibility
15-21 2-4 All - - - - - - - -

Cathy jumps grab the opponent in the air to do a back breaker.
Anti-air throw with a finicky range, you need to be closer than you think to grab them.

It's an important tool to abuse of Cathy's jC for untechable blue launcher combos.
Easily comboable into almost anything before 8hits (eg. 66A, 2B 623X, hop jC), you'll be forced to use 6A in a 3fr window if you want to extend your combos post 8 hits. See this tweet for use case & timing
This link is pretty tight & unintuitive but is really powerful! Allowing Cathy to do restun combo!

Fun Fact:
In limited, Cathy could grab grounded people if she was close enough.
In LO, it was fixed… but not completely.
Though it's really not worth the effort in midscreen due to how tight it is, it might have some situational uses in the corner after they corner tech.

Triple Headbutt
Triple Headbutt
214B
A120LO Cathy 214B-1.png
214B whiff
214B whiff
A120LO Cathy 214B-2.png
A120LO Cathy 214B-3.png
A120LO Cathy 214B-4.png
Mash B 2-3 times to get more headbutts
Damage Stun Guard Air Guard Cancel Properties Startup Active Recovery Adv. (Hit / Block) Invincibility
11-15 > +9-14 > +7-11 (27-35) 3-5 All - - - - - - - -

Cathy grab the oppponent and as the name suggest, heabutts the opponent up to 3 times. Stun for them a bit.
Your second command throw & important toolset.
Even if you're sliding during animation (recovery), you only grab at the start of the move.

This grab gives you a free combo & after a jC, this grab will restand the opponent. Some ideas on how it can be used:

  • Restand to restart combo / ground super them.
  • Avoid corner reset & go into corner combo. Here's some examples.
  • Force them into mixup (command throw, low, crossover low or hop overhead),
    • ⚠: Remember that past 8 hits, 214B's hitstun will be shorter. It means hard/impossible to combo, but faster resets.
Northern Light Bomb
Northern Light Bomb
623A/B
A120LO Cathy 623A-1.png
A120LO Cathy 623A-2.png
A120LO Cathy 623A-3.png
Damage Stun Guard Air Guard Cancel Properties Startup Active Recovery Adv. (Hit / Block) Invincibility
28-35 3-5 All - - - - - - - -


Cathy execute a perfect Northen Ligh Bomb on her poor opponent.
⚠ It is a hitgrab, though a weird one: It can be blocked, but if done close enough it has a second hitbox that is an actual throw (can be avoided GC high jump/backdash). Due to this, it can also catch blue launcher.

One of your best meterless ground ender for damage/stun. It also let them close to you with a good advantage.
Remember it side switches, you could end trapping yourself in the corner. To avoid that, try to end with a 22X (if on they're grounded), 214B (if jC) or 66B (send them further midscreen).

As far as I can tell, there's no visible difference between the 2 versions (same speed, damage or stun). So I recommend using the shortcut 5Y (=623B) as it's easier & faster to input.

Cathy Lariat
Cathy Lariat
22A/B
A120LO Cathy 22A.png
Version Damage Stun Guard Air Guard Cancel Properties Startup Active Recovery Adv. (Hit / Block) Invincibility
A 26-31 2 High > All - - - - - - - -

Cathy's special version of Lariat.
First hit on both (meterless) versions is overhead, the rest are all mids.

22A is a bit slower than 22b & deals less damage/stun.
On block it CANNOT be super cancelled.

B 34-39 3 High > All - - - - - - - -

22B seems to be faster & to deal more damage/stun than 22A, it's the recommended version in most cases.
It's still an overhead on the first hit. On block it CANNOT be super cancelled.

Great multiple purposes move:

  • Good move to throw during pressure. It is surprisingly safe (-3~5fr) if the opponent doesn't GC and if it hits, you can confirm into supers.
  • It works wonders as an anti-air when they're right above you or trying to crossup. If you don't win you'll at least clash with them.
  • One of your best clash move due to how fast & close the hits are. Be cautious as it will lose to low hitboxes.

Supers

Cathy Bomb
Cathy Bomb
236C
A120LO Cathy 236C-1.png
A120LO Cathy 236C-2.png
Version Damage Stun Guard Air Guard Cancel Properties Startup Active Recovery Adv. (Hit / Block) Invincibility
Ground 59-69 9 Throw - - - - - - - -

Cathy grabs the opponent, jumps doing a Northern Light Bomb to finish with smashing their head into the corner.

It's her most damaging super! It also scales well during combo.
Reminder: it is a real grab. It won't combo from a hit, but it will from a blue launcher (jC, 5C WB).

If you cancel certain moves on block (eg. 5B, 6B, 3B, 66A/B, 236A/B recovery) it can lead to some tricky tick throw setup.

Itekomashi Special
Itekomashi Special
214C
A120LO Cathy 214C.png
Version Damage Stun Guard Air Guard Cancel Properties Startup Active Recovery Adv. (Hit / Block) Invincibility
Ground 48-61 reset > 2 Throw - - - - - - - -

Cathy heabutts the opponent 10 times before doing a backbreaker variant into a powerbomb.
The opponent is invincible during the powerbomb bounce, you cannot combo after it.

Great finisher to add damages from any random hits, but until it kills you want to avoid doing at the end of a combo...

The reason is simple: it will reset your stun.
Cathy won't gain any stun during the headbutts, but the stun timer is still ticking!
Meaning it will reset & you'll only have the +2 stuns from last 2 hits.

Buchikamashi Lariat
Buchikamashi Lariat
22C
A120LO Cathy 22C.png
Damage Stun Guard Air Guard Cancel Properties Startup Active Recovery Adv. (Hit / Block) Invincibility
50-67 8 All - - - - - - - -

Cathy chains multiple lariats in a row & send them flying with the last one.
Unlike the meterless version, none of the hits are overhead.

Raw, the damage is correct but it scales badly the more hits there is in the combo.
But more hits means more stun! As a finisher move, +8 stuns is nothing scoff at! It can be enough to stun.

While it can still be used as an anti-air or clash move like 22B, it is NOT safe on block (around -15fr).
Be cautious doing it too close of the corner too: if your opponent corner tech, they might recover before you do.

Combos

Combo Notation Guide:
( ) = optional, typically the combo will be easier if omitted.
[ ] = Input is held.
~ = Delay the next hit.
/ = Option to choose between multiple actions.
+ = Multiple buttons are pressed simultaneously.
{}xN = That part can be repeated N number of times, range provided.
X(#) = Next action is taken after a certain number of hits from X move. (Use # many hits of X move)
xx = Cancel A into B (A xx B), mainly written when it needs to be really fast.
CH = Counter Hit.

True combo

  • 2A 2B 66A jB(2) jC (dash) 214B (micro-dash) 2AAA 6A (6B 3B) 66B 22C
Use meter. This stun combo is "compact" enbough that you can start from a bit further than midscreen and still works if you end in the corner (from the 214B).
See it in action here

Corner combo

  • (...) 2A{x2~4} 6A 3A (6B) 3B > 623B / 22C or 214C
Corner BnB, keep them grounded & can work from a 214B at ≤8hits adding a good amount of stun.
Omit the 6B if you're too far from them. Even though it's moving forward, it can be somewhat unreliable. if you're close, you can 6BB to ground slam them.


Meterless: 623B will deal more damage & let you closer to them than 66B, who send them closer to midscreen.
With meter: 214C will do more damage, but will ruin your stun. While 22C is the opposite.
Check more corner combos & resets in this tweet.

Missed tech punish

  • (micro dash) 2BB 623X > 2B 623X > 2BB 623X
Work anytime they stay on the ground (≤ 8hits), by example after an air throw.

Videos

General
FAQ
Controls
Systems
Training
Netplay
Links
Characters
Asuka Honda
Ryuko Yamazaki
Torami Houjyou
Megumi Suzuki
Kumi Ookubo
Tamaki Shindou
Karina Toyota
Nana Owada
Kiyoko Mitarai
Cathy Wild
Shinobu Kawasaki
Tetsuko Ougigaya
Genichirou Shindou