Asuka 120 LimitOver/Karina Toyota

From Mizuumi Wiki
Jump to navigation Jump to search
Karina Toyota
A120LO Karina-Portrait.png
Colors
1 2 3 4
Color 1 for Karina Toyota
Color 2 for Karina Toyota
Color 3 for Karina Toyota
Color 4 for Karina Toyota

Profile

Personal Details
Gender Birthday Zodiac Height Weight Blood Type Likes Dislikes Dream / Goal
Female May 9 Taurus 151cm 45kg B Frogs Snakes To becomes a Biologist
Favorite Words

一寸の虫にも五分の魂
There is greatness found in even the smallest of living things.

School Details
Year Class Attendance # Favorite Subject Disliked Subject Love Status Charm Point
1st / Freshman B 22 Life Science / Biology Chemistry Never had a boyfriend "Hold" of her hair

Overview

Stats

Strength & Weakness

Playstyle
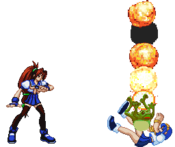
Karina is a pseudo-puppet character, mainly focused on mixup & crazy damage conversion with her frog super, 236C.
Pros Cons
  • Good ranges on her lows & jump normals
  • Crazy meter build thanks to Kero-pyon
  • Incredible jC: multi-hit clash, easy crossup, spike down, allow OTG throw reset.
  • Solid Pressure thanks to the Frog, either during the sparkles or specials.
  • At 120% meter, easy 50% combo thanks to the izuna frog super.
  • Safe-ish DP, that can sometimes crossup.
  • Long reach with dem legs
  • Even though if she has a great, safe-ish DP, she can struggle to get people off of her.
  • Frog can get kicked out / clashed, so with time there will be more counter measure.

Move List

Standing Normals

5A
5A
A120LO Karina 5A.png
Damage Stun Guard Air Guard Cancel Properties Startup Active Recovery Adv. (Hit / Block) Invincibility
2-3 1 All - - - - - - - -

Standard jab. Hit most crouchers, but can whiff on characters with small crouched hurtbox (whiff on Karina).

6A
6A
A120LO Karina 6A.png
6A
6A
A120LO Karina 6AA.png
6AA
6AA
A120LO Karina 6AAA-1.png
A120LO Karina 6AAA-2.png
A120LO Karina 6AAA-3.png
6AAA
6AAA
Version Damage Stun Guard Air Guard Cancel Properties Startup Active Recovery Adv. (Hit / Block) Invincibility
6A 8-12 1-3 All - - - - - - - -

Good mid-range poke that moves you in.
Useful to clear procteciles & not suffer from too much pushback, it also shines in corner combo or corner pressures.

If you try to do 2A after this move, you'll get a 3A no matter what.

6AA 13-18 (+5-7) 2-4 (+1) All - - - - - - - -

A follow up kick. Help to confirm into combo.
You can't go back to another A moves after this. You'll force have the choice to go into:

  • Next 6A follow up
  • Any B (you can't cancel into C for some reason)
  • Jump cancel (only on hit)
  • Special
  • Super
6AAA 20-26 5-8 (+3) All - - - - - - - -

Another follow up kick.
Though be aware this kick is ONLY super cancellable. So generally your combo is done after this move.

For most cases, it's better to use 66B:
It has same animation & hitboxes but deals a bit more damage and you can also jump cancel it (on hit).

4A
4A
A120LO Karina 4A.png
Damage Stun Guard Air Guard Cancel Properties Startup Active Recovery Adv. (Hit / Block) Invincibility
2-3 1 low - - - - - - - -

Standing low. Renda cancellable & cancellable into any A.

5B
5B
A120LO Karina 5B.png
Damage Stun Guard Air Guard Cancel Properties Startup Active Recovery Adv. (Hit / Block) Invincibility
13-18 1-3 All - - - - - - - -

You can hit with only one of the hits:

  • 1st hit with the knee (similar to 5A), will be your regular launcher / 2BB.
  • 2nd hit is upward kick can hit sometimes after a long-range 2BB.
  • 3rd hit is ... an anti-air? not sure how you'd use this one.


Overall a good launcher, be aware you'll whiff from a tippert 2BB most of the time.

6B
6B
A120LO Karina 6B-1.png
A120LO Karina 6B-2.png
A120LO Karina 6B-3.png
Damage Stun Guard Air Guard Cancel Properties Startup Active Recovery Adv. (Hit / Block) Invincibility
27-35 3-6 High - - - - - - - -

3 steps hammer kick. All hits are overhead!
The last hit is NOT special cancellable, only jump (on hit) & super cancellable,

5C
5C
A120LO Karina 5C.png
Damage Stun Guard Air Guard Cancel Properties Startup Active Recovery Adv. (Hit / Block) Invincibility
11-15 1 All - - - - - - - -

Slow high kick. Wallslam.
It has some iframes at the start & keeps its hurtbox behind the sprites until the active frame, making it a good-ish option to stuff some move in neutral.
The problem is it has a really long recovery, so use it only to punish, combo or if you can cancel in super to frame trap.
You can jump cancel it on hit, which I recommend doing if you don't plan using meter. You'll be able to move faster than waiting for the recovery, and in the corner you could try to air throw them if they miss the wall-tech.

Crouching Normals

2A
2A
A120LO Karina 2A.png
Damage Stun Guard Air Guard Cancel Properties Startup Active Recovery Adv. (Hit / Block) Invincibility
2-3 1 Low - - - - - - - -

Fast low kick. It's your main starter with 4A.

3A
3A
A120LO Karina 3A.png
Damage Stun Guard Air Guard Cancel Properties Startup Active Recovery Adv. (Hit / Block) Invincibility
8-12 1-3 Low - - - - - - - -

Crouching anti-air kick.
The leg has no hurtbox until behind the knee, has a load of clashbox before that and is air unblockable!
So it has all the features necessary for a good anti-air... but its angle will make it awkward to use.

Raw, you'll mainly use it to anti-air far hops or some high jump.
Otherwise, you'll use it after forcing them to block with a 6A (works wonder vs Hops).

2B
2B
A120LO Karina 2B.png
Damage Stun Guard Air Guard Cancel Properties Startup Active Recovery Adv. (Hit / Block) Invincibility
15-21 3-5 Low - - - - - - - -

Big sweep. Good range & hit higher than most sweep, which is nice cause it's air unbloackble!.

Now for anti-air, it has less range than 3A but you can force them to block with 5A & delay your sweep (5A can't chain into 3A).

Jumping Normals

j.A
jA
A120LO Karina jA.png
Damage Stun Guard Air Guard Cancel Properties Startup Active Recovery Adv. (Hit / Block) Invincibility
7-9 1 high - - - - - - - -

Standard jA. Fast, renda cancellable & active until landing or being cancelled

j6A
j6A
A120LO Karina j6A.png
Damage Stun Guard Air Guard Cancel Properties Startup Active Recovery Adv. (Hit / Block) Invincibility
16-23 (7-9 + 9-14) 2-4 high - - - - - - - -

Your 3A but in the air.
Similarly to most j6A:

  • it stops momentum of your opponent during combo,
  • it launches grounded opponent,
    • Raw, it doesn't Hard Knockdown. So you can't land > relaunch. You need to do an air series.


Like your 3A you could use it to anti-air/air-to-air to go into air series, otherwise it can be used after a hard knockdown to land & relaunch.

j.B
jB
A120LO Karina jB.png
Damage Stun Guard Air Guard Cancel Properties Startup Active Recovery Adv. (Hit / Block) Invincibility
15-21 2-4 high - - - - - - - -

Good jump in & crossup button, but has really short hitstun.
You need to hit it real deep or cancel it into something to combo.

j.C
jC
A120LO Karina jC-1.png
A120LO Karina jC-2.png
A120LO Karina jC-3.png
Damage Stun Guard Air Guard Cancel Properties Startup Active Recovery Adv. (Hit / Block) Invincibility
8-22 3-7 high - - - - - - - -

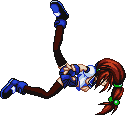
Karina flip in air, letting her legs hittting the opponent.
Even though it's not an overhead, this move is still amazing:

  • Great crossup button.
  • Ground slams for devastating OTG Throw combos if they miss their tech.
  • On block, it creates instant throw setups.
  • On hit (grounded), it can turn them around for untechable throw setups.
  • Although very specific, it can unblockable/ break auto-guard.

Throws

Neutral Throw
Throw
A120LO Karina Throw.png
Damage Stun Guard Air Guard Cancel Properties Startup Active Recovery Adv. (Hit / Block) Invincibility
19-23 3-6 Throw - - - - - - - -

Launches them in the air for free air series.
You can also cancel the first hit (the knee) into a jump, special or super!

Meterless, it's generally better to let the 2nd hit rock. I can only see 2 exceptions:

  • You know they're really close to be stunned, you could use 236A (5-7 stun) but your combo is done after it.
  • You grabbed them in the corner, then 66A/236A will keep them grounded (preventing corner techs).

⚠️ Be aware that because of this cancel point, you need to time your jump cancel or you'll get the risk to NOT get the second hit launcher.

If you have meter:

  • 236C is a great option after a OTG throw past 8hits,; if you want to switch side or if you just want to get big damage.
  • 236A xx 22C will deal a LOT of stun (around 17). Never as much as a full 236C combo, but it's way easier & drop proof.


You can watch here a showcase of Throw Combos, jC to OTG Throw & a funky reset

Air Throw
Air Throw
A120LO Karina AirThrow.png
Damage Stun Guard Air Guard Cancel Properties Startup Active Recovery Adv. (Hit / Block) Invincibility
11-15 1-2 Throw - - - - - - - -

What looks like a mild air throw, can be situationally good if they miss their ground-tech.

In this case you can micro dash & OTG throw them! Opening all ground throw possibilities!
See it in action at the end of this video.

Special Moves

66A
66A
A120LO Karina 66A-1.png
A120LO Karina 66A-2.png
Damage Stun Guard Air Guard Cancel Properties Startup Active Recovery Adv. (Hit / Block) Invincibility
22-27 (11-15 + 11-16) 2-4 Mid - - - - - - - -

Karina dashes in witha knee to the stomatch & ending with a big forward launcher kick.

The first hit is Air Unblockable, which making it terryfying!
It also stops any momentum, which allow jump cancel combo or event to combo into 236C.
Be sure to cancel before the 2nd kick, because it will send them flying preventing any combo.

The 2 hits keep them grounded, making it a good choise for corner combo.

66B
66B
A120LO Karina 66B-1.png
A120LO Karina 66B-2.png
A120LO Karina 66B-3.png
Damage Stun Guard Air Guard Cancel Properties Startup Active Recovery Adv. (Hit / Block) Invincibility
19-22 3-5 High - - - - - - - -

Your "Go to move" after a far 2B.
The timing to jump cancel it can be a bit weird, it's generally on the first or last hit, but be sure to experiment.

KeroKero Attack
KeroKero Attack
236A/B
A120LO Karina 236A.png
A120LO Karina 236B.png
KeroKero Heat Press
KeroKero Heat Press
Version Damage Stun Guard Air Guard Cancel Properties Startup Active Recovery Adv. (Hit / Block) Invincibility
A 17-24 4-7 All - - - - - - - -

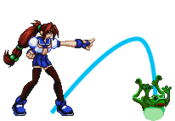
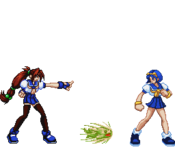
Kero-pyon use Flame Charge. It's not very effective...

Surpringly it's the projectile that deal the most stun, even more in its enhanced version.
It's somewhat slow & is easily jumped, so it's not a great zoning tool, but it has its niche as a combo fodder to add stun or keep them grounded.

A (Enhanced) 32-39 (17-24 + 14-15) 7-10 All - - - - - - - -

Kero-pyon dashes twices, doubling its range & dealing more damage/stun.

B 17-23 1-2 All - - - - - - - -

Kero-pyon used Heat Crash! It's pretty effective!

It doesn't do as much damage or stun as 236A, but has way more utility!
It's great for pressure, forcing them to use a GC option or take the mixup.
You can also use to prevent them to jumpout /anti-air in some situation.

B (Enhanced) 17-23 1-2 All - - - - - - - -

Kero-pyon jumps a bit higher & further than the regular 236B.
Same use as before, but it goes further. Be cautious about not overshooting your opponent when they're too close & crouched.

Air - KeroKero Attack
j236A/B
A120LO Karina j236A.png
j236A
j236A
Version Damage Stun Guard Air Guard Cancel Properties Startup Active Recovery Adv. (Hit / Block) Invincibility
A 17-24 4-7 All - - - - - - - -

Same as the ground version, but allows more flexible uses or can help making a jump safe-ish.

Small notes:

  • Crossing up with 236A/236B can be tricky as they seem to have a small cooldown after switching? (even if you reverse the inputs, they don't always come out).
  • If you try to do them too low to the ground, you'll land and do the ground version. Experiment in training mode to understand the minimal height.
A (Enhanced) 32-39 (17-24 + 14-15) 7-10 All - - - - - - - -

Similar uses as the enhanced ground version.

B 17-23 1-2 All - - - - - - - -

Best projectile to make your jump in safer/get more distances.

Small notes:

  • Crossing up with 236A/236B can be tricky as they seem to have a small cooldown after switching? (even if you reverse the inputs, they don't always come out).
  • If you try to do them too low to the ground, you'll land and do the ground version. Experiment in training mode to understand the minimal height.
B (Enhanced) 17-23 1-2 All - - - - - - - -

Similar uses as the enhanced ground version.

Kero-pyon setup
Kero-pyon setup
214A/B
A120LO Karina 214A.png
*sparkles*
*sparkles*
A120LO Karina 214A-cancel.png
setup cancel
setup cancel
Version Damage Stun Guard Air Guard Cancel Properties Startup Active Recovery Adv. (Hit / Block) Invincibility
A 0 0 All - - - - - - - -

Kero-pyon focuses & sparkles.
While it's in this stance, it earns meter for Karina.

The A version is shorter & doesn't have hitbox.
It could be used to setup throw mixup if your opponent is used to 214B or respect the frog too much.

As an added bonus, if you get hit on block, Kero-pyon will try to counter attack for you (it works in both versions).

If you block, it will counter no matter the distance between you or what hit you.

  • Standing block: Kero-pyon will do 236A, regular 236A not the enhanced version.
  • Crouching block: it'll do a regular 236B (not enhanced).
  • Air block: it doesn't seem to react.


If you get hit, it will only counter if the move get in its range, otherwise it'll sit there & continue to charge meter.
This time, no matter how you get hit, Kero-pyon will do a 236B (not enhanced).

B 15-18 1 All - - - - - - - -

Kero-pyon focuses & sparkles.
While it's in this stance, it earns meter for Karina.

214B lasts longer & a hitbox appears everytime its head goes down.

  • On block, it can hit
  • On hit, Kero-pyon will do a 236B toward where it's facing.
  • It can't hit you in the air due to its small hitbox. I don't know if there's a behaviour there or not.

Fun fact:
This hit can be used as a tick into instant throw setup!

Bio Impact
Bio Impact
22X
A120LO Karina 22A-1.png
A120LO Karina 22A-2.png
Version Damage Stun Guard Air Guard Cancel Properties Startup Active Recovery Adv. (Hit / Block) Invincibility
A 18-23 2-3 All - - - - - - - -

Karina jumps with her knee first before doing a backflip, kicking her opponent behind her. Groundslam.

Amazing DP, that can be used as an air-unblockable anti-air or as a launcher for more damage.

The A version has 10fr of invincibility and hits before she gets back her hurtbox! Making this version the reversal option.

B 29-34 3-5 All - - - - - - - -

Very similar to the A version, it deals a good chunk of damage, 1-2 more stun and has 1 more hit at the start making it easier to use as launcher.
The obvious trade off is it has less iframes on startup (6fr only vs 10fr for 22A) & its hitbox & hurtbox appear at the same time. Meaning you could trade or get beaten by a far low.

Supers

Kerokero Mega Heat
Kerokero Mega Heat
236C
A120LO Karina 236C-1.png
dash
dash
A120LO Karina 236C-2.png
hitgrab
hitgrab
A120LO Karina 236C-3.png
izuna drop!
izuna drop!
Version Damage Stun Guard Air Guard Cancel Properties Startup Active Recovery Adv. (Hit / Block) Invincibility
Ground 53-65~72? 3-6 All - - - - - - - -

Kero-pyon rushes toward the opponent, hitgrab them, jump & do an izuna drop!
They cannot tech when they hit the ground with Kero-pyon, they're forced to bounce first. They bounce to the opposite side where you triggered the super.

Your go to super for damaging combo or read/punish!
It has 11fr of invincibility before the flash, so you could read any big commitment from your opponent & punish them with the super.

Once it hits, it deal a crazy amount of damage, and you can combo after it.
I recommend side-switching before they fall down, like that they will be sent in your direction, which make combos more consitent & easier.

Kerokero Angler
Kerokero Angler
214C
A120LO Karina 214C.png
Version Damage Stun Guard Air Guard Cancel Properties Startup Active Recovery Adv. (Hit / Block) Invincibility
Ground 32-46 4-8 All - - - - - - - -

Kero-pyon flips toward the back & runs through the stage with all his friends & family.

While it looks like it'd be a great okizeme super, it's really slow& Karina has to go through a huge recovery, making it awkward to use.
Add to that there's not real hard knockdown in the game, and you get a somewhat useless super imo.

One thing to note though, it has a "Squiggly Effect", where it creates a corner with the side of the screen during the flash.
It could be used to force a wallslam sooner to surprise the opponent and get a knockdown chance...

...But even then it's not that great:

  • TECH the wall:
    they recover before you, depending the distance between you and the corner, they might be able to punish you or guaranteed pressure you.
  • NO wall-tech + TECH on the ground:
    they can hop, highjump or reversal.
    You can try to "tech-chase" / anti-air, but you might be somewhat far & if they see you running they could still reversal instead.
  • NO wall-tech + NO ground tech:
    they'll get hit once by the frog. The frogs will be out before they wake up...


Anyway, the best use is kinda far as you coudl run with them, but it also mean your opponent can see and react easily.
If anyone find any good use, just DM/ping me.

???
???
22C
A120LO Karina 22C.png
Version Damage Stun Guard Air Guard Cancel Properties Startup Active Recovery Adv. (Hit / Block) Invincibility
Ground 40-49 7 All - - - - - - - -

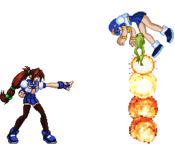
Karina unleashes a flurry of kicks on the opponent.

Nothing special to say about it, outside 2 details:

  • It's a good reversal, it's invincible before the flash until its first hitbox appear.
  • if it whiff, it'll do only 2 hits & a really short recovery.


Combos

Combo Notation Guide:
( ) = optional, typically the combo will be easier if omitted.
[ ] = Input is held.
~ = Delay the next hit.
/ = Option to choose between multiple actions.
+ = Multiple buttons are pressed simultaneously.
{}xN = That part can be repeated N number of times, range provided.
X(#) = Next action is taken after a certain number of hits from X move.
xx = Cancel A into B (A xx B), mainly written when it needs to be really fast.
CH = Counter Hit.

True combo

  • 2A 6A 3A 6B 66A 236C (68 dmg - ±7-8 stun)
Corner combo to maximize damage.
Don't use 66B(2) instead of 66A, it deals less damage & will launch on third hit.
  • 2A 4A(AAA...) 6A(A) 6B 66A 236C (31 dmg - ±10-11 stun)
Corner combo to maximize stun.
Only use it if you feel you're close to the stun: it's somewhat strict & for only +2 stun compared to the previous combo...

Missed tech punish

  • (≤8 hits) ... jC ※ OTG grab > (jA) j6A [land] 5A 5B jA j6A jB djA j6A jB jC
  • (past 8 hits) ... jC ※ OTG grab > jA j6A jB djA j6A jB jC
After any jC you can air series.
If you started the combo with a jC>OTG grab you can add a j6A > land or get more creative.
  • ... jC ※ OTG grab 236C [crossover] → jA j6A jB djA j6A jB jC
  • ... jC ※ OTG grab 236C [crossover] → 66Bxx236C
You can cancel your grab on the first hit to combo into 236C. Toolate and they'll be able to block immediately.
After the 236C, you can go into your air series, or try to time a 66B into another 236C. Timing is somewhat strict but it'll give you more damage.

Videos

General
FAQ
Controls
Systems
Training
Netplay
Links
Characters
Asuka Honda
Ryuko Yamazaki
Torami Houjyou
Megumi Suzuki
Kumi Ookubo
Tamaki Shindou
Karina Toyota
Nana Owada
Kiyoko Mitarai
Cathy Wild
Shinobu Kawasaki
Tetsuko Ougigaya
Genichirou Shindou