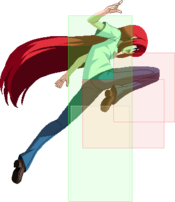
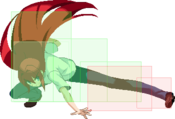
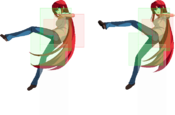
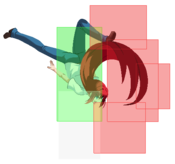
Melty Blood/MBTL/Aoko Aozaki
Gameplay
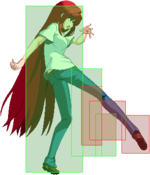
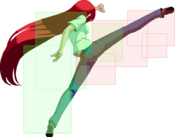
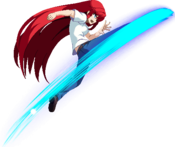
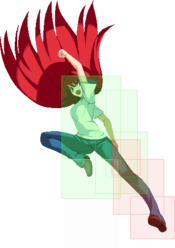
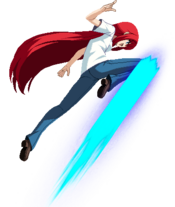
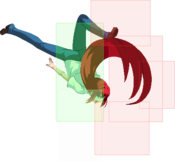
Aoko Aozaki is a returning character to Melty Blood, released as free DLC alongside Dead Apostle Noel on January 13, 2022. Aoko is a versatile all-rounder capable of close-range pressure, zoning, and space control via screen hazards and far-reaching normal and special attacks.
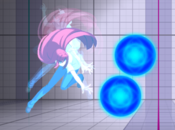
Aoko excels at creating difficult situations for the opponent to navigate using moves that cover a broad variety of ranges and angles, such as her charged 5C and j.C, Browning Starmine (236X), Raining Starmine (j.236X) and her trademark Floating Starmine setplay orbs (214X, j.214X, and 421X). However, she also has tools to get in and mix it up directly: her 6C rekka series, plus use of I'll trip you up!/I'll send you flying! (623A/B), allows her to run effective gamuts of pressure and high/low mixups at close-range. Combined with her unique trait of 2 air jumps and 2 air dashes, Aoko can relentlessly pressure the opponent in various ways when she's given momentum.
In exchange for all of this, Aoko has no meterless reversal, making it difficult for her to fight back as freely from a defensive position as most other characters can. Orbs and other ranged moves can also allow the opponent greater opportunities to shield and interrupt her offensive pressure, so they have to be used carefully for maximum effectiveness--this is especially true of her longer-range moves with longer startup and recovery times.
| Pick if you like | Avoid if you dislike |
|---|---|
|
|
Successor to the Fifth Magician, The Magic Gunner
One of only five magicians who exist in the world.
Successor to the Fifth Magician. Overall, she is not considered a skilled magician. However, when it comes to "Destructive" power, she is unrivaled in her talents. The sight of her raining down bullets like hot geysers has also given her the direct, yet rather tasteless nickname, "Magic Gunner".
Who she learned it from is unknown, but she is also familiar with martial arts, and has a battle style that could be considered a hybrid of those martial arts and magic.
She encountered Shiki on her travels. She gives him glasses that suppress his Mystic Eyes, and teaches him the value of living things and how to handle things. For that reason, Shiki respects her and calls her his teacher.
She's a difficult person to pin down. She believes in justice, is unreliable, and a vagabond.
In this story, she has been hired to look into what Roa is researching and experimenting on by a certain person in a position of power, and is trying to seek out and infiltrate the research facilities...
Main Weapon/Skill
High Speed Incantation, Magic Blue, Martial Arts
Basic Info
Height: 160cm
Weight: 50kg
Blood Type: A
Birthday: July 7
Voiced by: Haruka Tomatsu
Negative Edge Orbs
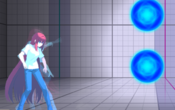
Aoko's 421X and 1BC spawn orbs that only detonate when Aoko lets go of an attack button (A, B, or C), or gets hit. This semi-permanent screen pollution is key to her offense and zoning, allowing her to create interactions that no other character can, "Breaking the rules." so to speak.
High Freedom of Movement
Aoko has two airdashes and two double jumps. There's some nuance to it however, triple jump consumes one of your airdashes, but double airdash does not consume your triple jump.
Running with the theme of "Breaking the rules.", in addition to the universal extra jump, Aoko gains a 3rd airdash that can be used in the same direction as the first two when she is in MD, unlike the rest of the cast.
Character Summary
- Moon Skills
- 6B+C - Browning Starmine
- 3B+C - I'll send you flying!
- 4B+C or 1B+C - Floating Starmine
- 2B+C - Blazing Starmine
- Air 6B+C - Raining Starmine
- Special Attacks
- 236A/B/C - Browning Starmine
- >A/B/C - Addiitional Input 1 (236A only)
- >A/B/C - Additional Input 2 (236A~X only)
- >A/B/C - Addiitional Input 1 (236A only)
- 623A - I'll trip you up!
- 623B/C - I'll send you flying!
- >A/B/C - Additional Input (623B only)
- 214A/B/C or 421X - Floating Starmine
- 22A/B/C - Blazing Starmine
- j.236A/B/C - Raining Starmine
- j.214A/B/C - Floating Starmine (air)
- Arc Drives
- 236B+C - Severe Break Slider
- Last Arc
- A+B+C+D - Retrograde - Genesis Light Year
- Unique Attacks
- 6C > C > C - Good morning cardio routine
- >C - Additional input 1
- >4C - Additional input 2
- 3C
- 4C
- 2C > 2C
- Blowback Edge Moves
- 5C, 6C, j.C, 236A~X~X, j.214A/B
HP Value: 11,700 (Average)
Backdash:
  - 1-10 Full Invul
  - 1-13 Strike Invul
  - 14-18 Projectile/Air Invul
  - 6-19 Airborne
  - 28 Total
Dash startup: 4
Dash actionable: 5
Jump startup: 4
Jump airtime: 37
}}
Move Analysis
Normal Moves
Standing Normals
5A
| Damage | Guard | Cancel | Property | Cost | Attribute |
|---|---|---|---|---|---|
| 180 | L | -SE-, -N-, -SP-, -CH-, -EX-, -MD-, (J) | - | - | - |
| First Active | Active | Recovery | Overall | Advantage | Invul |
| 5 | 2 | 11 | 17 | -1 | - |
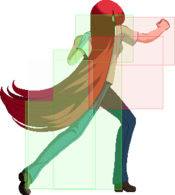
- A quick kick to the ankles.
While 2A is generally better to use for pressure, 5A's low-hitting properties in spite of its short reach makes it an excellent reverse beat option, both to catch opponents shielding mid or to whiff it and lessen recovery as a rebeat from C normals. Not ideal for anti air but still a serviceable move to fuzzy mash with.
5B
| Damage | Guard | Cancel | Property | Cost | Attribute |
|---|---|---|---|---|---|
| 480 | LH | N, SP, CH, EX, MD, (J) | - | - | - |
| First Active | Active | Recovery | Overall | Advantage | Invul |
| 8 | 4 | 16 | 27 | -5 | - |
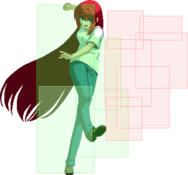
- A straight kick forward.
Good reach and surprisingly safe without reverse beat. Solid normal overall.
5C
| Damage | Guard | Cancel | Property | Cost | Attribute |
|---|---|---|---|---|---|
| 610 | LH | N, SP, CH, EX, MD, (J) | - | - | - |
| First Active | Active | Recovery | Overall | Advantage | Invul |
| 10 | 4 | 23 | 36 | -10 | - |
- A rear-leg roundhouse.
Aoko moves forward slightly as she swings her leg.
5[C]
| Damage | Guard | Cancel | Property | Cost | Attribute |
|---|---|---|---|---|---|
| 680, 560 (1167) | LH | N, SP, CH, EX, MD, (J) | L (Laser Hit) | - | - |
| First Active | Active | Recovery | Overall | Advantage | Invul |
| 19 | 6 | 24 | 48 | -12 [-13] | 14-18 Clash |
- Cancel properties are for leg connect only.
- Crushes low shield for a fatal counter.
- Laser launches on hit.
- Laser whiffs on crouchers, drastically changing confirms based on the situation.
Charged version of 5C where Aoko shoots a laser from her foot. Excellent damage as combo filler that can also provide the height necessary to enable 5[C] > 623B sideswaps in addition to crushing low shield for a fatal counter.
The main issue is the laser hitbox whiffs on crouchers but launches on hit, so the optimal hitconfirm could vary wildly depending on whether or not they got fatal'd for low shielding or had their 5A/Jump caught from the natural 3F gap between 2C > 5[C]. Should you confirm perfectly however, you can easily reach 4.3 - 4.4k without the help of the corner.
Crouching Normals
2A
| Damage | Guard | Cancel | Property | Cost | Attribute |
|---|---|---|---|---|---|
| 150 | L | -SE-, -N-, -SP-, CH, -EX-, -MD-, (J) | - | - | - |
| First Active | Active | Recovery | Overall | Advantage | Invul |
| 5 | 2 | 11 | 17 | -1 | - |
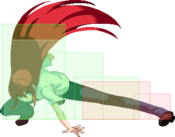
- Fast low with good reach.
A quick low kick with the front leg. Excellent close-range pressure normal.
2B
| Damage | Guard | Cancel | Property | Cost | Attribute |
|---|---|---|---|---|---|
| 420 | L | N, SP, CH, EX, MD, (J) | - | - | - |
| First Active | Active | Recovery | Overall | Advantage | Invul |
| 7 | 4 | 18 | 28 | -7 | - |
- Faster than average startup.
- Startup increases to 10f at max distance.
A slightly slower kick from the back leg that slides forward a little bit. Very good abare normal when they're out of 2A range.
2C
2C~C
| Damage | Guard | Cancel | Property | Cost | Attribute |
|---|---|---|---|---|---|
| 740 | LH | N, SP, EX, MD, J | L, WB | - | - |
| First Active | Active | Recovery | Overall | Advantage | Invul |
| 12 | 3 | 25 | 39 | -11 | - |
- Aoko blasts the opponent away with a small burst.
- Wallbounces in the corner.
- Use this as early as possible in pretty much every corner confirm because wallbouncing increases the damage you do for the rest of the combo.
Aoko advances very far when doing this move. While the pushback necessitates reverse beating to 2B midscreen, in the corner this becomes a fairly important stagger tool in strings such as 2A > 2CC > 5A, especially with the looming threat of an orb making the opponent think twice about disrespecting her strings.
Jumping Normals
j.A
| Damage | Guard | Cancel | Property | Cost | Attribute |
|---|---|---|---|---|---|
| 140 | HA | N, SP, CH, EX, MD, J | - | - | - |
| First Active | Active | Recovery | Overall | Advantage | Invul |
| 5 | 4 | 11 | 19 | - | - |
- Hits standing opponents while rising.
- Whiff-cancelable into other air buttons, moves, or double-jump/forward airdash after frame 19.
A quick knee attack. Aoko's most horizontal air normal. Also useful as a frame kill for certain AT setups.
j.B
| Damage | Guard | Cancel | Property | Cost | Attribute |
|---|---|---|---|---|---|
| 380 | HA | N, SP, CH, EX, MD, J | - | - | - |
| First Active | Active | Recovery | Overall | Advantage | Invul |
| 7 | 4 | - | - | - | - |
- An upward roundhouse kick.
- Incredible air-to-air.
Hits the farthest above Aoko out of any of her air normals, making it a good long distance rising anti-air. Also possesses a crossup hitbox that makes it a powerful option for landing on the opponent in scrambles.
j.C
| Damage | Guard | Cancel | Property | Cost | Attribute |
|---|---|---|---|---|---|
| 560 | HA | N, SP, CH, EX, MD, J | - | - | - |
| First Active | Active | Recovery | Overall | Advantage | Invul |
| 10 | 4 | - | - | - | - |
- Hits standing opponents while rising.
A downward kick from the front leg.
| Damage | Guard | Cancel | Property | Cost | Attribute |
|---|---|---|---|---|---|
| 560*2 (1058) | HA | N, SP, CH, EX, MD, J | L, GB | - | - |
| First Active | Active | Recovery | Overall | Advantage | Invul |
| 20 | 6 | - | - | - | 16-19 Clash |
- Has infinite range, laser travels until it hits the ground.
- Kick is still an overhead, laser is not.
- Cancel properties are for leg connect only, on laser connect it's just Special/EX Cancellable.
Aoko shoots a laser from her foot that does the same damage as the leg hit & has its own independent hitbox, in combos you typically only want to hit with the laser since hitting with both prorates pretty hard. Compared to other charged air normals in this game, Aoko j.[C] sees much more specialized use due to the change in air momentum on use combined with a surprisingly low untech time on the groundbounce.
It's typically seen as combo filler in sequences like 22A > SJ > j.[C](1) > j.236A > Land > Followup, but can also be used as a unique pressure tool in the corner to stall out your momentum and fit more overheads into a string. It's also got very niche use in neutral as a hail mary if you've burned all your air options and want one last chance to mixup your landing, but even this might be less preferable to using j.236B or j.214X, because you can MD cancel those on whiff at least. Whatever you do, don't whiff it - you'll die.
Command Normals
6C
| Damage | Guard | Cancel | Property | Cost | Attribute |
|---|---|---|---|---|---|
| 440 | LH | SP, CH, EX, MD | - | - | - |
| First Active | Active | Recovery | Overall | Advantage | Invul |
| 10 | 4 | 18 | 31 | -5 | - |
- The starting input for Aoko's classic rekka series.
- You can only continue the rekka on contact, not whiff.
- In spite of being -5, it's safe due to pushback leaving you outside of jab range.
Aoko's Rekka series is incredibly versatile. Its main purposes are to stabilize your combos and give corner carry while adding damage. Often done after air hit 5B in combos, but the hitbox is slightly lower & than 5B, so it's necessary to delay it slightly. On aerial hit it drops the opponent fairly quickly after hitstop which allows you to aim for the sweet-spot height where 6CCC~C hits slightly meaty to enable a 5A link.
| Damage | Guard | Cancel | Property | Cost | Attribute |
|---|---|---|---|---|---|
| 680 | H | SP, CH, EX, MD | - | - | - |
| First Active | Active | Recovery | Overall | Advantage | Invul |
| 30 | 4 | 18 | 51 | -5 | - |
- Charging 6C makes it an overhead.
Much slower overhead than 4C but can be cancelled and thus gives a full combo even without orb in addition to having better damage proration. While its slow speed makes it fairly reactable, having an orb set can often create enough visual fuzz to hide the startup, so it still has some merit as a mixup tool. It's also sometimes seen as combo filler after a 2CC in the corner, particularly to squeeze damage out of her corner throw route.
6C~C
| Damage | Guard | Cancel | Property | Cost | Attribute |
|---|---|---|---|---|---|
| 440 (774) | LH | SP, CH, EX, MD | - | - | - |
| First Active | Active | Recovery | Overall | Advantage | Invul |
| 10 | 5 | 18 | 32 | -6 | - |
- The second hit of Aoko's rekka series.
- Also safe in spite of the framedata, due to pushback.
- After this step, the rekka loses special cancel properties.
If you are ever uncertain about your opponent's height or you have an exceedingly bad starter like IAD j.B > j.A, just special cancel this into 623BB > j.236C or j.214C.
6C~C~C
| Damage | Guard | Cancel | Property | Cost | Attribute |
|---|---|---|---|---|---|
| 440 (1073) | LH | CH, EX, MD | - | - | - |
| First Active | Active | Recovery | Overall | Advantage | Invul |
| 10 | 4 | 21 | 34 | -8 | - |
- The third hit of Aoko's rekka series.
- Can cancel into an EX Edge or Arc Drive.
- Spaces you around jabs but unsafe on block.
6C~C~C~C
| Damage | Guard | Cancel | Property | Cost | Attribute |
|---|---|---|---|---|---|
| 800 | L | EX, MD | L, SK | - | - |
| First Active | Active | Recovery | Overall | Advantage | Invul |
| 13 | 7 | 14 | 33 | -4 | - |
- The low ender to Aoko's rekka series.
- Punishable with throw on block.
- Can cancel into an EX Edge or Arc Drive.
- OTGable if they hit the ground during untech.
- Can be linked off of in certain cases.
Basically her 623A. It's very important to get a good feel for linking 5A after this move, especially on air hit, and a part of that is micromanaging the opponent's height during the rekka. If they're too high, you'll slide under them and they'll tech before it hits. If they're too low, it won't hit meaty and you can't link 5A anymore. Usually this is autotimed but its good to be cognizant of why it does and does not work sometimes.
6C~C~C~4C
| Damage | Guard | Cancel | Property | Cost | Attribute |
|---|---|---|---|---|---|
| 836 | HA | EX, MD, J | GB | - | - |
| First Active | Active | Recovery | Overall | Advantage | Invul |
| 23 | 3 | 17 | 42 | -3 | - |
- The overhead ender to Aoko's rekka series. Jump cancellable on hit and block.
- Can cancel into an EX Edge, typically j.214C, to get a combo going.
- +1 on crouch hit, -1 on standing hit.
- It's possible to link a 2A on a Counter hit to convert without spending meter, but only when the opponent is hit while crouching. On a Fatal Counter hit you can link 2B instead for a slightly more damaging combo.
4C
| Damage | Guard | Cancel | Property | Cost | Attribute |
|---|---|---|---|---|---|
| 850 | H | - | - | - | - |
| First Active | Active | Recovery | Overall | Advantage | Invul |
| 22 | 2 | 16 | 39 | 0 | - |
- Aoko does an outward crescent kick with her back leg.
- Fast overhead with 0 cancel properties.
- +2 on standing hit, +3 on crouching hit.
- Links into any normal with a held orb, 2B on counterhit, and 2C on fatal counter.
At a glance this move isn't that great. It can't be cancelled and does less damage than a throw. However, it's the fastest standing overhead in the game on a character who can partially obscure the screen with orbs while also being advantageous on hit and 0 on block with a character with a fairly large 7F 2B so her turn isn't even necessarily over once it's blocked. On top of that, it's yet another low shield crushing option for a character who has an easy time encouraging people to gamble on shield. All of this is to say it's really one of her best moves - and if you've got good confirms, this move can take you very far even without an orb pop.
Additionally, due to its high base damage, this normal sees use as combo filler in the corner.
Universal Mechanics
Rapid Beat 1
| Damage | Guard | Cancel | Property | Cost | Attribute |
|---|---|---|---|---|---|
| 400 | LH | SP, CH, EX, MD | - | - | - |
| First Active | Active | Recovery | Overall | Advantage | Invul |
| 9 | 8 | 18 | 34 | -10 | - |
- Rushing knee attack. Auto-attack filler.
3C / Rapid Beat 2
| Damage | Guard | Cancel | Property | Cost | Attribute |
|---|---|---|---|---|---|
| 700 | LH | SP, EX, MD, (J) | LR | - | - |
| First Active | Active | Recovery | Overall | Advantage | Invul |
| 10 | 3 | 25 | 37 | -11 | 5-12 Air |
- Universal launcher. Has a decent amount of vertical range but is still tricky to use as an AA due to its relatively shorter horizontal range.
- As a rapid beat, is often cancelled into 22X for advantage & the distance to pester with 236A.
Ground Throw
| Damage | Guard | Cancel | Property | Cost | Attribute |
|---|---|---|---|---|---|
| 1300 | - | - | HK, AB | - | - |
| First Active | Active | Recovery | Overall | Advantage | Invul |
| 4 | 3 | 19 | 25 | +64 | - |
- Does 200 less damage then then average throw (1300 vs 1500).
- If a 214X or j.214X orb is set, you can throw the opponent into the orb, which will detonate it and allow you to get a scaled combo.
- The above orb trick works with 421X orbs as well, but requires you to detonate them manually.
While doing less damage than most other throws, Aoko's throw boasts the most amount of plus frames off throw in the game, letting Aoko get safejumps, left/rights or set up orb okizeme. It's Aoko's ability to combo from throw with a set orb that makes it so strong though, as the average throw combo does far more than 1500 damage (offsetting the throw's one disadvantage) while having more freedom in enders.
Air Throw
| Damage | Guard | Cancel | Property | Cost | Attribute |
|---|---|---|---|---|---|
| 1200 | - | - | HK, AB | - | - |
| First Active | Active | Recovery | Overall | Advantage | Invul |
| 1 | 3 | Until Landing+12 | Until Landing+12 | - | - |
- Universal air combo ender.
- If you still have your jump and air dash, you can jump cancel the recovery and air dash towards your opponent to meaty them with a falling air normal.
Pretty tough getting a safejump that beats 5F DPs midscreen, but possible with 3C > AT > j.IAD > dj.8~[6] > j.C. It's an absolute partystarter in the corner with j.9A > j.8~[6] > j.C though.
Special Moves
Browning Starmine
| Damage | Guard | Cancel | Property | Cost | Attribute |
|---|---|---|---|---|---|
| 950 | LHA | -CH-, -EX-, -MD- | - | - | - |
| First Active | Active | Recovery | Overall | Advantage | Invul |
| 12 | 3 | 26 | 40 | -4 | - |
- Aoko fires a short-ranged finger laser.
- Can be followed up by tapping any attack button, on contact or on whiff.
Excellent poke & stagger tool, especially after 22X. 236A is the easiest way to truestring into 236C
| Damage | Guard | Cancel | Property | Cost | Attribute |
|---|---|---|---|---|---|
| 700 | LHA | -CH-, -EX-, -MD- | L | - | - |
| First Active | Active | Recovery | Overall | Advantage | Invul |
| 14 | 3 | 28 | 44 | -6 | - |
- Aoko steps forward slightly and fires a laser similar to the first shot from 236A.
- Can be followed up by tapping any attack button, on contact or on whiff.
Hits lower than the first strike of 236A, you may have to delay this followup in some routes for it to fully connect.
| Damage | Guard | Cancel | Property | Cost | Attribute |
|---|---|---|---|---|---|
| 1100 | LHA | -EX-, -MD- | L, WB | - | - |
| First Active | Active | Recovery | Overall | Advantage | Invul |
| 21 | 9 | 29 | 58 | -11 | - |
- Full-screen laser shot.
- Causes wallbounce in the corner.
Has merit in specific max damage corner routes over 236A~X~[X]. Can link 5A if there isn't too much HSD and you delay long enough for them to be in position for it.
| Damage | Guard | Cancel | Property | Cost | Attribute |
|---|---|---|---|---|---|
| 380*5 (1446) | LHA | -EX-, -MD- | L, WB+ | - | - |
| First Active | Active | Recovery | Overall | Advantage | Invul |
| 36 | 15 | 24 | 74 | 0 | - |
- Charged version of 236A~X~X. Hits multiple times.
- Causes wallbounce in the corner.
A primary source of corner damage that connects seamlessly at low hitstun decay and prorates a ton. Try not to delay this at all after 236A~X.
| Damage | Guard | Cancel | Property | Cost | Attribute |
|---|---|---|---|---|---|
| 500*3 (1220) | LHA | -EX-, -MD- | L | - | - |
| First Active | Active | Recovery | Overall | Advantage | Invul |
| 26 | 9 | 15 | 49 | +9 | - |
- A slower laser shot that reaches full screen.
- Launches the opponent.
- Can be low profiled.
Zoning tool that sees occasional use as a pressure reset due to being +9.
| Damage | Guard | Cancel | Property | Cost | Attribute |
|---|---|---|---|---|---|
| 500*5 (1795) | LHA | -EX-, -MD- | L, WB+ | - | - |
| First Active | Active | Recovery | Overall | Advantage | Invul |
| 43 | 18 | 12 | 72 | +21 | - |
- Charged version of 236B.
- Causes wallbounce at the corner.
| Damage | Guard | Cancel | Property | Cost | Attribute |
|---|---|---|---|---|---|
| 630*5 (2203) | LHA | MD | L, HK, AB | - | - |
| First Active | Active | Recovery | Overall | Advantage | Invul |
| 4+14 | 36 | 0 | 53 | +23 | - |
- Aoko sets up an array of magic circles to fire multiple lasers.
- Aoko's most damaging EX move in isolation.
- Can truestring using 236A > 236C to maintain pressure.
Versatile EX move for converting awkward 22A/2BC hits, making 6BC advantageous so you don't die if it's blocked, as the 2nd EX in 2-bar round enders, and for maximizing chip damage during heat/blood heat. Also sees use as one of the two primary knockdowns she uses for her crossup break setups.
| Damage | Guard | Cancel | Property | Cost | Attribute |
|---|---|---|---|---|---|
| 1300 | LHA | EX, MD | L, WB | - | - |
| First Active | Active | Recovery | Overall | Advantage | Invul |
| 17 | 9 | 36 | 61 | -18 | Clash 1-11 (MD) |
- Basically a standalone version of 236A~A~X.
Good news, this is unreactable, even from fullscreen! Bad news, if they block this at all the frame advantage is so bad some characters can punish you from fullscreen. Worse news, if they shield this from fullscreen the entire cast except for Shiki, Akiha, Mario, Neco-Arc, and ironically enough Aoko herself, get a combo of some kind /w resource.
That said, this is mainly a hail mary in neutral and occasional fullscreen frametrap tool. You should always EX cancel it into 236C for frame advantage on block and a combo extension on hit, otherwise your turn is over from anywhere on the screen. Since this starts up in 20f from fullscreen and 236C is +23, you can choose to loop 6BC > 236C when in Heat/Blood heat for fairly good chip damage. 6BC > 236C is also a high damage starter you can choose to cash out on with MD to close out a round.
I'll trip you up!/I'll send you flying!
| Damage | Guard | Cancel | Property | Cost | Attribute |
|---|---|---|---|---|---|
| 1200 | L | -EX-, -MD- | L, SK | - | - |
| First Active | Active | Recovery | Overall | Advantage | Invul |
| 17 | 9 | 12 | 37 | -4 | 5-15 Low Crush, 16 Throw |
- Aoko does a low hop into a sweeping kick.
- Travels quite far with a lot of active frames but jumps up before the kick which means it's not a very good low profile.
Without a doubt Aoko's most important & versatile special for combos. You should always be able to fit at least one in a combo. It's VERY active and a vast majority of her routes require it to hit a little bit meaty if you want to convert.
| Damage | Guard | Cancel | Property | Cost | Attribute |
|---|---|---|---|---|---|
| 440, 836 (1200) | H | -CH-, -EX-, -MD- | GB | - | - |
| First Active | Active | Recovery | Overall | Advantage | Invul |
| 18 | 3 (7) 7 | 14 | 48 | -4 | 6-35 Low Crush |
- Aoko does a jumping overhead axe kick.
- Hits grounded opponents on frame 29.
- Hits jumping opponents on frame 19.
- Will groundbounce an opponent in the air.
Versatile in its own right, it's often used as combo filler for routes such as Shield-A, sideswap routes, or the 2A crossup protection break route. Can also see some use as a hail mary overhead to check the opponent, which can then be cancelled into j.214C for plus frames if blocked. Sometimes used as a combo ender going straight into j.214C if the hitstun decay is low enough to enable her best crossup breaks.
Additionally it makes for an okay anti-air thanks to its fast startup and air unblockable properties. This also makes it an excellent reset tool after 6CCC~C and 623A if you know you're going to drop but are unwilling to give up the combo.
| Damage | Guard | Cancel | Property | Cost | Attribute |
|---|---|---|---|---|---|
| 800 | LHA | -EX-, -MD-, (J) | L | - | - |
| First Active | Active | Recovery | Overall | Advantage | Invul |
| 12 | 4 | X + 8L | - | -11~-12 | - |
- A somersault followup to 623B.
- If this input is delayed it's possible to pick up and get meterless conversions for further corner carry.
- With meter, can get conversions by using 236C or j.214C.
623B~B is primarily used as a combo ender going into j.236C for a hard knockdown, but if you hit a raw 623B you can use it to score a full conversion by linking 2B afterward.
| Damage | Guard | Cancel | Property | Cost | Attribute |
|---|---|---|---|---|---|
| 160 * 3, 836, 800 (1936) | LH | (MD) | L, HK, AB | - | - |
| First Active | Active | Recovery | Overall | Advantage | Invul |
| 4+2 | 12 (6) 3 | 24 | 50 | -10 | 1-17 All |
- A supercharged, invulnerable version of 623B that travels farther and automatically does the followup on hit.
- Gives a long knockdown on hit, which can buy time to set up orbs.
- Listed frame advantage is on block (punishable).
Her dp. Fast up close, travels really far horizontally, and AUB to boot. The crazy horizontal movement happens somewhere around frame 20 - frame 24 so not actually that good as an AUB tool.
Floating Starmine
| Damage | Guard | Cancel | Property | Cost | Attribute |
|---|---|---|---|---|---|
| 900 | LHA | -EX-, -MD- | - | - | - |
| First Active | Active | Recovery | Overall | Advantage | Invul |
| 26 (30) | 5 | - | 38 | +16 | - |
| Damage | Guard | Cancel | Property | Cost | Attribute |
|---|---|---|---|---|---|
| 900 | LHA | -EX-, -MD- | - | - | - |
| First Active | Active | Recovery | Overall | Advantage | Invul |
| 26 (30) | 5 | - | 38 | +16 | - |
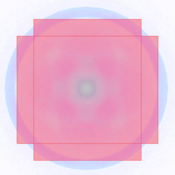
- Startup data refers to the time it takes the orb's trigger box to come out, orb spawns on f11, trigger box activates on f26, orb's actual explosion has 5f startup once triggered.
- Orb fizzles out on f348.
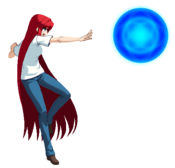
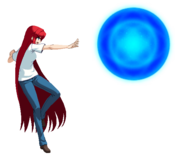
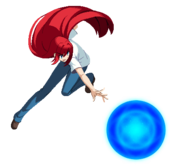
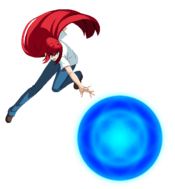
- Aoko puts her hand forward and an orb floats out. After its initial startup, it will detonate automatically when an opponent gets too close to it.
- Up to 2 orbs from 214A/B are allowed on screen at the same time; repeating the command for an orb you've already set will destroy it and replace it with an orb at your current position.
- Any orbs made by 214A will be replaced if you use j.214A. Similarly, any orbs made by 214B will be replaced by j.214B.
- Holding the attack button during the initial input will move the orb forward until you stop holding the button.
- If Aoko is hit, then any deployed orbs disappear. They also disappear on their own after a period of time or if they are hit by attacks.
- One of her main oki and space control tools.
| Damage | Guard | Cancel | Property | Cost | Attribute |
|---|---|---|---|---|---|
| 550*4 (1886) | LHA | (MD/AD) | L, HK, AB | - | - |
| First Active | Active | Recovery | Overall | Advantage | Invul |
| 4+4 (4+9) | 5 | - | 31 | +14 | - |
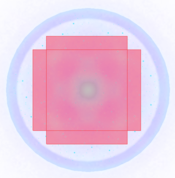
- Aoko sets out a large orb that does multiple hits when it detonates. Unlike 214A/B, it will detonate near instantly if the opponent is close enough during startup.
- This move is pretty similar to the A and B orbs; C can be held to move it forward, it disappears when Aoko is hit or after it's been deployed for a while, and using 214C or j.214C when a 214C or j.214C orb is already out will delete the old 214C/j.214C orb and replace it with a new one.
- However, 214C's orb counts as a separate orb from 214A/B and j.214A/B orbs, so it can be used even if you have one or both of those orbs out already.
It has its niche as a pressure rebuy when you aren't airborne or can't get out a 236A for 236A > 236C, but by most metrics this move is an inferior version of j214C. Seen in niche setups and occasionally whiff cancelled out of 421C in neutral.
| Damage | Guard | Cancel | Property | Cost | Attribute |
|---|---|---|---|---|---|
| 900*2 (1602) | LHA | MD, AD | - | - | - |
| First Active | Active | Recovery | Overall | Advantage | Invul |
| 14 (18) | 5 | - | 41 | +1 (min) | Clash 1-10 (MD) |
- Sends a 214A and a 214B orb forward in opposing sine wave motions. Will replace any existing A/B proximity orbs on the screen.
- The bottom orb counts as an A orb and the top orb counts as a B orb. Using any version of 214A or 214B will replace the corresponding 4BC orb.
Floating Starmine (NE)
| Damage | Guard | Cancel | Property | Cost | Attribute |
|---|---|---|---|---|---|
| 900 | LHA | -EX-, -MD- | - | - | - |
| First Active | Active | Recovery | Overall | Advantage | Invul |
| 18 (23) [24] + 8 | 4 | - | 50 (47) [44] | 0 (+8) [+12] {+24} | - |
- Data listed is for A (B) [C] orb respectively. Frame advantage is for the fastest pop of A (B) and [C], followed by the {+24} you get from any stray orb pop. Startup listed refers to the time it takes to put the orb on the screen; the earliest detonation is 8 frames afterwards.
- Aoko points and sets out an orb that will move to a fixed position and then automatically detonate.
- The strength of the button used determines how far away from Aoko the orb appears. A doesn't move and is right at her fingertip, while B travels a bit farther than an unheld 214A/B and C is almost halfscreen at max range.
- When any attack button is being held before a 421X orb detonates, the orb's detonation is paused until no attack buttons are being held down. You can, for example, do 421[A], then 421B without holding B, and keep both orbs from detonating as long as you hold A the whole time. You can also switch which button you're holding as long as you don't release all of them in-between switching.
- 214X/j.214X orbs DO NOT OVERLAP WITH 421X orbs. This means you can set orbs with 214X or j.214X and then set 421X orbs as you see fit. However, only 2 orbs from 421X are allowed on screen at the same time. If you try to set a third 421X orb, you will get the 214X version of whatever 421X orb you're trying to set.
- Another critical part of Aoko's oki and space control kit.
| Damage | Guard | Cancel | Property | Cost | Attribute |
|---|---|---|---|---|---|
| 900*2 (1602) | LHA | - | - | - | - |
| First Active | Active | Recovery | Overall | Advantage | Invul |
| 24, 28 + 8 (32, 36) | 4 | - | 34 | +22/+26 (min) | Clash 1-11 (MD) |
- Data in () represents total startup of the orbs including detonation.
- Sets two 421X orbs out at once.
- Much like regular 421X, you can hold any attacking button to keep these orbs from detonating.
- Although these are negative edge orbs, these can be broken if hit by the opponent's attacks.
Floating Starmine (air)
| Damage | Guard | Cancel | Property | Cost | Attribute |
|---|---|---|---|---|---|
| 900 | LHA | -EX-, -MD- | - | - | - |
| First Active | Active | Recovery | Overall | Advantage | Invul |
| 25 + 5 | 5 | 6L | - | - | - |
| Damage | Guard | Cancel | Property | Cost | Attribute |
|---|---|---|---|---|---|
| 900 | LHA | -EX-, -MD- | - | - | - |
| First Active | Active | Recovery | Overall | Advantage | Invul |
| 25 + 5 | 5 | 6L | - | - | - |
- An aerial version of 214A/B, where Aoko sets an orb in midair and then falls to the ground.
- Very loose height restriction, so when the input is tiger kneed, Aoko will set the orb extremely close to the ground.
- After the orb is set, Aoko will fall forward if she was moving forward before setting the orb. Otherwise, she'll fall backward.
- Pretty much all the same rules and restrictions from 214A/B apply here, except held inputs will instead give a charged version (listed below).
- Any orbs made by j.214A will be replaced if you use 214A and vice versa. Similarly, Aoko may only have one orb from either 214B or j214B out at a time.
| Damage | Guard | Cancel | Property | Cost | Attribute |
|---|---|---|---|---|---|
| 900 | LHA | -J-, -EX-, -MD- | - | - | - |
| First Active | Active | Recovery | Overall | Advantage | Invul |
| 31 + 5 | 5 | 6L | 36 | - | - |
| Damage | Guard | Cancel | Property | Cost | Attribute |
|---|---|---|---|---|---|
| 900 | LHA | -J-, -EX-, -MD- | - | - | - |
| First Active | Active | Recovery | Overall | Advantage | Invul |
| 31 + 5 | 5 | 6L | 36 | - | - |
- Charged versions of j.214A/B. Unlike the normal versions, Aoko will always move backward after setting a charged orb.
- If Aoko has air actions remaining, she can jump-cancel after charged j.214A/B, though this doesn't work with TK'd versions as she lands too quickly for the jump cancel point.
| Damage | Guard | Cancel | Property | Cost | Attribute |
|---|---|---|---|---|---|
| 550*4 (1886) | LHA | (MD) | L, HK, AB | - | - |
| First Active | Active | Recovery | Overall | Advantage | Invul |
| 4+3 (4+8) | 5 | 6L | - | - | - |
- Aoko sets out a big orb that hits multiple times, just like 214C.
- Pretty much all the same rules and restrictions as 214C apply, minus being able to charge it with a held input (faster detonation, the orb is destroyed & replaced by using j.214C or 214C when an orb is out, etc.)
This move is the partystarter. Provided the combo is not too scaled, this is the move you are going to end your combos with to set up her layered Crossup Protection Break setups. In pressure, it can be made plus enough that you can truestring an IAD jC, and to top it off, it only goes away when Aoko is hit or techs a throw. Thanks to the low landing recovery and the effect the move has on your momentum in the air, EX Cancelling into this move after 22B in the corner can severely limit the opponent's options due to it auto punishing reckless abare if Aoko blocks. From there, she can truestring into 2C, 5[C] to fatal shield attempts, dash up and reset pressure, etc. Coupled with a negative edge orb, the opponent has no choice but to gamble their way out. The sky is the limit if you have the meter to spend on this move.
| Damage | Guard | Cancel | Property | Cost | Attribute |
|---|---|---|---|---|---|
| 900*2 (1602) | LHA | -J-, MD | - | - | - |
| First Active | Active | Recovery | Overall | Advantage | Invul |
| 28 (32) | 5 | - | 30 | - | - |
- Sets two j.214X orbs out at the same time, one slightly below and in front of the other.
- Using 214A or j.214A will replace the top orb, while using 214B or j.214B will replace the bottom orb.
- Great setplay tool. After a 214C knockdown, it can be used to setup a "wall" of plus frames to sandwich the opponent between.
- If buffered after rising j.A, it will stop your momentum allowing you to continue the combo on hit or sideswitch on block.
Blazing Starmine
| Damage | Guard | Cancel | Property | Cost | Attribute |
|---|---|---|---|---|---|
| 800 | LHA | J, -EX-, -MD- | L | - | - |
| First Active | Active | Recovery | Overall | Advantage | Invul |
| 10 | 6 | 19 | 34 | -2 | - |
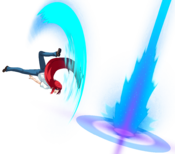
- Aoko does a backward flipkick and shoots an upward laser from her initial position.
- Jump-cancelable on hit only.
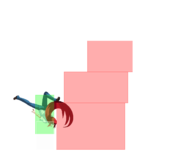
22A is gigantic, the hitbox pretty much matches what the visuals would imply, it's fairly active, and it covers a very important angle for melty so you should get familiar with confirming off it. Typically you convert off it in combos & off stray hits with SJ j.[C](1) > j.236A > ground normal, if you're super close just j.9 instead of SJ. Since you can't jump cancel on block, learning the SJ timing and always inputting it without hitconfirming is also a good strat. If you aren't confident in the SJ timing or otherwise got a really really high non-fatal hit, wait until you land and do 236C, you should be able to dash up and convert with 623A or 5B afterward.
| Damage | Guard | Cancel | Property | Cost | Attribute |
|---|---|---|---|---|---|
| (300*3 [846])x2 (1425) | LHA | J, -EX-, -MD- | L | - | - |
| First Active | Active | Recovery | Overall | Advantage | Invul |
| 15 | 3,3 | 23 | 43 | +2~+5 | - |
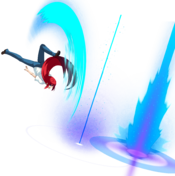
- The B version fires multiple lasers from her initial position instead, each traveling a little farther forward.
- Is +2 point blank but when cancelled from any normal it's +5.
- Truestrings from C normals and rapid beat 2, while it leaves a 1F gap when cancelled from B normals, and a 4F gap when cancelled from A normals.
- Jump-cancelable on hit only.
This sees much less use as an anti air due to the smaller hitbox and longer startup when compared to 2BC and 22A. It's instead used to end pressure in the corner at a safe distance to pester with 236A, 2BC, 6BC etc without getting hit by quick pokes like Tohno 2C or Roa 214A. Since it truestrings from Rapid Beat you can use this to correct any mistakes in pressure while maintaining some form of advantage.
| Damage | Guard | Cancel | Property | Cost | Attribute |
|---|---|---|---|---|---|
| (170*3)x6 [2006] | LHA | J, MD | L, HK, AB | - | - |
| First Active | Active | Recovery | Overall | Advantage | Invul |
| 4+3 | 3,3,3,3,3,3 | 10 | 34 | +9 ~ +18 | - |
- Similar to the B version, but there are more lasers that cover more horizontal ground.
- Jump-cancelable on hit only.
Probably Aoko's strangest EX move damage-wise. While it looks like it fires 7 pillars forward, it actually fires off 1 big hit that expands outwards for 6 frames, and then travels forward for 9 frames, with a new hit every 3 frames. Every instance of the hitbox hits 3 times... What all of this means is damage wise this move pretty much has a "sweet spot" where you will get all 6 hits and it becomes her 2nd most damaging EX move (With the highest minimum damage at 540 total, though the instances where this optimzation is possible are few to none), otherwise it's her least damaging one.
It's insanely fast so you'll see it used to net punishes at ranges where 2B won't hit (Blocked Shield-A when outside of 2B range, for example.) In combos, it's used when no other EX move will hit and you need emergency damage/hitstun at the end of a wack confirm, or to put out a hitbox when trying to make a whiffed special move safe, since it only has 3 frames less recovery than 214C but comes out in 6 frames to punish any commitments made before superflash. It also has some utility in corner routes, enabling you to place a 421X orb mid combo and still convert into 3C, enabling a 421X orb safejump which has some merit over the standard 1BC orb safejump.
| Damage | Guard | Cancel | Property | Cost | Attribute |
|---|---|---|---|---|---|
| 180*9 (1273) | LHA | EX, MD, (J) | L | - | - |
| First Active | Active | Recovery | Overall | Advantage | Invul |
| 10 | 3,3,3 | 30 | 48 | -2 | Clash 1-7 (MD) |
- A faster version of 22B with the 3 initial hits of 22C for its hitboxes.
- Jump cancellable only on hit.
The panic button. Massive, super fast without a motion input, comes out in 10 frames (9 in MD), has clash frames in MD, gives a bunch of meter on hit, is easy to confirm with sj j.[C]... Super versatile move, but don't be reckless with it. If it's shielded, you're super dead. If the opponent clashes with it and has MD, you're super dead. If you use it too much... Well, you'll run out of moon and are likely super dead.
Raining Starmine
| Damage | Guard | Cancel | Property | Cost | Attribute |
|---|---|---|---|---|---|
| 1000 | LHA | -EX-, -MD- | - | - | - |
| First Active | Active | Recovery | Overall | Advantage | Invul |
| 17 | 6 | Until Landing+16 | - | ~-11(tk) ~+16(falling) | - |
- Aoko fires a laser downward at a narrow angle while retaining momentum.
This is your main tool for converting air hits into a ground combo for damage, also adds fairly good damage in optimized punishes in combination with j.C or j.[C](1).
| Damage | Guard | Cancel | Property | Cost | Attribute |
|---|---|---|---|---|---|
| 500*3 (1220) | LHA | -EX-, -MD- | L | - | - |
| First Active | Active | Recovery | Overall | Advantage | Invul |
| 21 | 9 | Until landing+12 | - | +9(tk) | - |
- Aoko fires a beam diagonally downward while halting all momentum before recoiling back slightly.
A more specialized air version of 236B, this can be seen in some high damage corner routes as a tk. This move is really punishable on whiff without much reward on hit unless you have moon drive, but having negative edge orbs on the ground to cover your landing can make this move a real nuisance for some characters who lack a good answer to it. It can also be used to stall your air momentum when the opponent expects a landing j.B/C and you don't have air options left to bait with, but don't do this without MD to cover your whiff.
| Damage | Guard | Cancel | Property | Cost | Attribute |
|---|---|---|---|---|---|
| 850*3 (1938) | LHA | MD | L, GB, HK, AB | - | - |
| First Active | Active | Recovery | Overall | Advantage | Invul |
| 4+8 | 9 | Until Landing+12 | - | +9(tk) | - |
- A supercharged version of j.236B that causes a hard knockdown. Very useful as a combo ender from 623B~B, can also combo into it from any air normal.
Super Moves
Arc Drives
Severe Break Slider
| Damage | Guard | Cancel | Property | Cost | Attribute |
|---|---|---|---|---|---|
| 50*40, 75*20 (3500) | LHA | - | L, HK, AB | - | - |
| First Active | Active | Recovery | Overall | Advantage | Invul |
| 1+8 | 60 (21) 60 | 58 | 207 | -34 | All 1-158 |
- Aoko punches out two fullscreen lasers. If they hit, she adds on a third jump-kicked laser for maximum damage.
- Aoko continues the attack if the opponent blocks it. Opponents can shield into B followup with time after to set up for a damaging combo while Aoko finishes the attack.
Last Arc
Retrograde - Genesis Light Year
| Damage | Guard | Cancel | Property | Cost | Attribute |
|---|---|---|---|---|---|
| 4800 [4800 ~ 6960 in BH] | LH | - | L, HK, AB | - | - |
| First Active | Active | Recovery | Overall | Advantage | Invul |
| 1+21 | 4 | 27 | 52 | -14 | All 1-25 |
- Aoko does a short punch forward. If it hits, she traps the opponent in the Marvel 2 character select screen and catches them in the detonation of a new universe.
- Animation identical to the second hit of her arc drive.
- Longest Last Arc in the game.
As with most Last Arcs, comboing into this is rarely (if ever) optimal over just ending with an EX > Arc Drive outside of Blood Heat. Meterlessly, you're looking at any wallbounce > MD > LA, or ending any corner combo with orb pop > LA. During Blood Heat, you're looking at 214C/j.214C > 66 > LA midscreen and 236C > LA in the corner.
Rebeats and Gaps
| Attack | Chain | Advantage |
|---|---|---|
| 5B/2B | 5A/2A | -3 |
| 5C/2C/2CC | 5A/2A | -1 |
| 5[C] (Laser Hits) | 5A | +0 |
| Attack | Chain | Frame Gap |
|---|---|---|
| 2A/5A | 5[C] | 8F(3-7 Clash) |
| 2B/5B | 5[C] | 5F(1-4 Clash) |
| 2C/2CC | 5[C] | 3F(1-2 Clash) |
| 2A/5A | 4C | 11F |
| 2B/5B | 4C | 8F |
| 2C/5C | 4C | 6F |
| 5[C] (Laser Hits) | 4C | 5F |
| 5C/2C/2CC/6C/6CC/3C | 421A | 10F |
| 5C/2C/2CC/6C/6CC/3C | 236B | 10F |
| 5C/2C/2CC/6C/6CC/3C | 421A > 22C | 6F |
| 5C/2C/2CC/6C/6CC/3C | 421B > 22C | 3F |
| 5C/2C/2CC/6C/6CC/3C | 421C > 22C | 0F |
Customization
Palette options
Aoko Wiki Roadmap
| 40% complete | ||
|
|
| Page | Completed | To-do | Score |
|---|---|---|---|
|
Various framedata mistakes fixed. Some descriptions added, fixed some bad images/missing hitboxes. |
Clean up messy move descriptions & detail the more barren ones. Add the missing hitboxes. |
15/25 | |
| Strategy |
Functional Neutral, Pressure & Oki sections. |
Go over more Neutral strategies & add more offensive setups. Complete defense section. |
15/25 |
| Combos |
Combos listed for various starters. |
Pending update to 1.31 routing + needs better sorting. |
10/25 |
| Matchups |
Fill in every MU. |
0/25 |


